| Field | Details |
| Document Title | ThinkPad Z13 Gen 1 and Z16 Gen 1 User Guide |
| Document Type | User Guide |
| Brand Name | Lenovo |
| Product Name | ThinkPad Z13 Gen 1, ThinkPad Z16 Gen 1 |
| Model Number(s) | 21D2, 21D3, 21D4, 21D5 |
| PDF File Size | 21 MB |
| Number of Pages | 76 |
| Languages | English |
Lenovo ThinkPad Z13 Gen 1
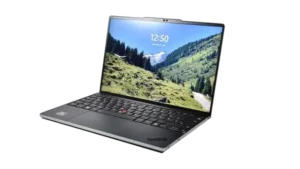
The Lenovo ThinkPad Z13 Gen 1 is a notebook computer featuring an AMD-based platform, a 16:10 display, TrackPoint pointing stick, haptic touchpad, fingerprint reader, infrared camera, and USB4 Type-C connectivity. It supports Windows 10 and Windows 11, with selected configurations offering touchscreen input, cellular connectivity, and additional security features.
The laptop includes soldered LPDDR5 memory, M.2 solid-state storage, Dolby Atmos speaker technology, and Dolby Voice. It also offers intelligent cooling modes, biometric authentication, Lenovo Commercial Vantage, and UEFI BIOS configuration.
The ThinkPad Z13 Gen 1 supports wireless networking, Bluetooth accessories, external displays, USB-C charging, and optional 4G cellular connectivity. Its built-in security functions include fingerprint authentication, Windows Hello facial recognition, camera privacy control, and configurable firmware passwords.
Product Overview
The ThinkPad Z13 Gen 1 combines notebook computing functions with built-in pointing controls, biometric security, and power management settings.
The keyboard includes dedicated shortcuts for changing volume, adjusting display brightness, controlling the camera and microphone, and managing external displays.
The TrackPoint pointing device and haptic touchpad provide alternative ways to control the pointer. Selected configurations also support touchscreen gestures and compatible Lenovo digital pens.
Main Features
- 16:10 display with IPS or OLED technology, depending on configuration.
- Integrated infrared camera with privacy control.
- Fingerprint reader integrated into a keyboard key.
- TrackPoint pointing stick.
- Haptic touchpad.
- Optional multi-touch display.
- Dolby Atmos Speaker System.
- Dolby Voice.
- LPDDR5 onboard memory.
- M.2 solid-state storage.
- Two USB-C connections supporting USB4.
- Integrated wireless LAN and Bluetooth.
- Optional wireless WAN and nano-SIM support.
- Optional GPS on wireless WAN configurations.
- Windows Hello facial recognition.
- Lenovo Commercial Vantage.
- TrackPoint Quick Menu.
- Intelligent Cooling and Intelligent Cooling Boost.
- USB-C charging and rapid-charge support.
- UEFI BIOS security configuration.
- Optional Lenovo Mod Pen and Lenovo Precision Pen 2 support.
- User-replaceable M.2 SSD and selected other components.
Technical Specifications
Hardware Specifications
| Specification | Details |
| Brand | Lenovo |
| Product Series | ThinkPad Z |
| Model | Z13 Gen 1 |
| Machine Types | 21D2, 21D3 |
| Product Type | Notebook Computer |
| Display Aspect Ratio | 16:10 |
| Display Technologies | IPS LCD, OLED on selected configurations |
| Touchscreen | Multi-Touch on selected models |
| Memory Type | LPDDR5 |
| Maximum Memory | Up to 32 GB |
| Memory Installation | Soldered on System Board |
| Storage Type | M.2 Solid-State Drive |
| SSD Form Factor | M.2 2242 |
| Maximum SSD Capacity | Up to 1 TB |
| Audio | Dolby Atmos Speaker System, Dolby Voice |
| Camera | Integrated Infrared Camera |
| Fingerprint Reader | Integrated into Keyboard |
| Pointing Devices | TrackPoint, Haptic Touchpad |
| Wireless Networking | Wireless LAN |
| Bluetooth | Supported |
| Cellular Connectivity | Wireless WAN on selected models |
| Cellular Network | 4G, where supported |
| GPS | Selected Wireless WAN Models |
| USB Ports | 2 USB-C (USB4) |
| Audio Connector | Combination Audio Connector |
| Operating Systems Covered | Windows 10, Windows 11 |
| Power Adapter | 65 W USB-C |
| Firmware | UEFI BIOS |
| Security | Fingerprint, Face Authentication, Firmware Passwords |
Display Specifications
The Z13 Gen 1 and Z16 Gen 1 product family includes IPS and selected OLED display configurations.
The combined guide identifies the following display resolutions across the two models:
| Display Specification | Details |
| Aspect Ratio | 16:10 |
| Display Technologies | IPS LCD, OLED |
| Resolutions Listed Across Both Models | 1920 × 1200, 2880 × 1800, 3840 × 2400 |
| Multi-Touch | Selected Configurations |
| Eye-Care Certifications | TÜV Eye Safe or Eye Comfort on selected models |
Display resolution and available technologies depend on the specific model and configuration.
Storage Specifications
| Specification | ThinkPad Z13 Gen 1 |
| Storage Interface | M.2 Solid-State Drive |
| SSD Size | 2242 |
| Storage Slots | 1 |
| Maximum Capacity | Up to 1 TB |
| Customer Replacement | Supported |
Power Specifications
| Specification | Details |
| Power Adapter Rating | 65 W |
| AC Input Voltage | 100–240 V |
| AC Input Frequency | 50–60 Hz |
| Adapter Output | 20 V DC, 3.25 A |
| Charging Connector | USB-C |
| Rapid Charge | Up to 80% in approximately 1 hour with computer off |
| Recommended Charging Temperature | 10–35°C (50–95°F) |
USB Specifications
The ThinkPad Z13 Gen 1 has two USB-C connectors supporting USB4.
| USB Feature | Details |
| Connector Type | USB-C |
| USB Standard | USB4 |
| Number of USB-C Ports | 2 |
| USB-C Accessory Charging Output | 5 V, 1.5 A |
| USB-C to VGA Display | Up to 1920 × 1200 at 60 Hz |
| USB-C to DisplayPort | Up to 5120 × 3200 at 60 Hz |
| External Display Through USB4 | Up to 8K at 30 Hz |
Higher refresh rates may limit maximum external display resolution.
Actual USB transfer performance varies with connected devices, system configuration, and operating conditions.
Operating Environment
| Condition | Specification |
| Operating Temperature | 5–35°C (41–95°F) |
| Storage Temperature Without Packaging | 5–43°C (41–109°F) |
| Storage and Transportation in Original Packaging | -20–60°C (-4–140°F) |
| Maximum Altitude Without Pressurization | 3048 m (10,000 ft) |
| Operating Relative Humidity | 8–95% at 23°C wet-bulb temperature |
| Storage Relative Humidity | 5–95% at 27°C wet-bulb temperature |
| Minimum Battery Temperature for Charging | 10°C (50°F) |
Parts and Components
Front Components
| Component | Function |
| Infrared Camera | Supports facial recognition and camera functions |
| Microphones | Capture voice and other audio |
| Display | Shows the operating system and applications |
| Touchscreen | Accepts touch gestures on supported configurations |
| TrackPoint Pointing Stick | Moves the pointer and supports mouse controls |
| Fingerprint Reader | Provides fingerprint authentication |
| Haptic Touchpad | Controls pointer movement, clicking, and scrolling |
| Camera Privacy Control | Disables camera operation |
Infrared Camera
The infrared camera supports Windows Hello facial recognition.
Press F9 to enable or disable the camera privacy function.
When the F9 privacy indicator is illuminated, the camera is disabled.
Fingerprint Reader
The fingerprint reader is built into a keyboard key.
It can be used for Windows sign-in and supported firmware authentication functions.
TrackPoint Pointing Stick
The TrackPoint is located between the keyboard keys.
It supports pointer movement, clicking, scrolling, and zooming.
Haptic Touchpad
The haptic touchpad provides conventional mouse controls through a pressure-sensitive surface.
Its lower areas support left- and right-click actions.
Microphones
The built-in microphones support voice input, communication, and audio recording.
Microphone settings can be adjusted through supported Lenovo software.
Side Ports and Connectors
The ThinkPad Z13 Gen 1 includes USB4, audio, power, and optional nano-SIM connections.
| Component | Function |
| USB-C USB4 Power Connector | Connects the power adapter and supported USB-C accessories |
| USB-C USB4 Connector | Connects compatible USB devices and displays |
| Power Button | Turns the computer on or activates configured power functions |
| Audio Connector | Connects compatible headphones or headsets |
| Nano-SIM Card Tray | Accepts a nano-SIM card on selected cellular models |
USB-C Power Connector
The USB-C power connector supports the computer’s compatible power adapter.
It can also connect supported USB-C accessories.
USB4 Connector
The USB4 connector supports compatible external devices and display adapters.
Audio Connector
The audio connector accepts a compatible headset or audio accessory.
Nano-SIM Card Tray
Selected configurations include a nano-SIM tray for cellular network access.
A compatible wireless WAN module and active carrier service are required.
Bottom Components
Stereo Speakers
The ThinkPad Z13 Gen 1 has speakers positioned along the underside of the computer.
The speakers are part of the Dolby Atmos audio system.
Emergency-Reset Hole
The emergency-reset hole is located on the underside of the laptop.
It allows the power supply to be temporarily disconnected when the computer becomes unresponsive.
Using the Emergency-Reset Hole
- Disconnect the laptop from AC power.
- Insert a straightened paper clip into the emergency-reset hole.
- This temporarily disconnects the power supply.
- Reconnect the AC adapter.
- Press the Power button to start the computer.
Use this procedure when normal shutdown is unsuccessful.
Safety Instructions
Heat and Ventilation Safety
Place the computer on a hard, flat surface during operation.
Warning: Avoid prolonged direct skin contact with the bottom of the laptop.
The underside can become warm enough to cause discomfort or injury when held against bare skin for more than one minute.
Keep ventilation openings unobstructed.
Electrical Safety
- Use appropriate Lenovo-certified power adapters and power cords.
- Connect the computer to a compatible electrical supply.
- Disconnect power before supported internal component replacement.
- Follow the Lenovo Safety and Warranty Guide and Generic Safety and Compliance Notices.
Battery Safety
The ThinkPad Z13 Gen 1 contains a built-in rechargeable battery.
Important: Battery replacement must be performed by a Lenovo-authorized repair facility or technician.
Do not attempt to replace the built-in battery as a customer-replaceable component.
Liquid Spill Safety
If liquid is spilled on the laptop:
- Disconnect the AC power adapter immediately.
- Turn off the computer.
- Do not attempt to drain the liquid by turning the laptop upside down.
- Allow the computer to dry completely before turning it on.
Turning the computer off promptly helps reduce the risk of electrical damage.
Touchscreen Safety
For touchscreen configurations:
- Avoid applying excessive pressure.
- Do not use metallic objects on the display.
- Do not use fingernails, gloved fingers, or objects not intended for touchscreen input.
- Do not apply solvents when cleaning.
- Turn off the computer before cleaning the screen.
Internal Hardware Safety
Before replacing supported internal components:
- Disable Windows Fast Startup.
- Disable the built-in battery through UEFI BIOS.
- Shut down and disconnect the computer from external power.
- Allow the computer to cool.
- Follow the relevant replacement procedure.
Before First Use
Connecting the Power Adapter
- Locate the USB-C power connector.
- Connect the compatible power adapter.
- Connect the power cord to an appropriate electrical outlet.
- Allow the battery to charge if necessary.
- Press the Power button.
The computer supports rapid charging through the specified 65 W power adapter.
Starting Windows
Follow the Windows setup instructions displayed when the computer starts.
The computer supports Windows 10 or Windows 11 configurations covered by this guide.
Keyboard Shortcuts and Function Keys
The ThinkPad Z13 Gen 1 includes dedicated function keys and Fn key combinations for frequently used controls.
Function Key Guide
| Key | Function |
| F1 | Mutes or unmutes the speakers |
| F2 | Decreases volume |
| F3 | Increases volume |
| F4 | Mutes or unmutes the microphones |
| F5 | Decreases screen brightness |
| F6 | Increases screen brightness |
| F7 | Manages external display output |
| F8 | Enables or disables Airplane Mode |
| F9 | Enables or disables the camera |
| F10 | Answers incoming Microsoft Teams calls |
| F11 | Declines incoming Microsoft Teams calls |
| F12 | Performs the function assigned in Lenovo Vantage |
Additional Keyboard Shortcuts
| Shortcut | Function |
| Fn + Esc | Toggles Fn Lock |
| Fn + Tab | Opens Magnifier |
| Fn + Keyboard Backlight Key | Changes keyboard backlight on supported configurations |
| Fn + G | Enables or disables TrackPoint Quick Menu |
| Fn + B | Break |
| Fn + K | Scroll Lock |
| Fn + P | Pause |
| Fn + S | System Request |
| Fn + 4 | Enters Sleep Mode |
| Fn + Left Arrow | Home |
| Fn + Right Arrow | End |
| Fn + T | Enables or disables Intelligent Cooling Auto Mode |
Using Fn Lock
Press Fn + Esc to change the Fn Lock setting.
- Fn Lock indicator on: The F1–F12 keys perform their standard function-key actions.
- Fn Lock indicator off: The F1–F12 keys perform the special functions shown on the keys.
Adjusting Display Brightness
Use the F5 and F6 special functions to decrease or increase screen brightness.
Muting the Microphone
Use the F4 special function to mute or unmute the built-in microphones.
Controlling Camera Privacy
Press F9 to disable or enable the camera.
The illuminated privacy indicator shows that the camera is disabled.
Entering Sleep Mode
Press Fn + 4.
To wake the laptop, press Fn or the Power button.
Using the TrackPoint
The TrackPoint pointing device allows pointer movement, mouse clicks, scrolling, and zooming without using the touchpad.
Moving the Pointer
- Place a finger on the TrackPoint’s nonslip cap.
- Apply gentle pressure in the desired direction.
- The pointer moves accordingly.
Increasing pressure makes the pointer move faster.
Left-Click and Right-Click
The TrackPoint button areas provide the same functions as conventional mouse buttons.
Scrolling
- Press and hold the dotted middle button.
- Apply pressure to the TrackPoint in the vertical or horizontal direction.
- Move through the document, website, or application.
Zooming
Press and hold Ctrl + Middle Button while moving the TrackPoint pointing stick.
Disabling TrackPoint
- Open the Start menu.
- Select Settings > Devices > Mouse.
- Follow the on-screen instructions to disable the TrackPoint.
Using the Haptic Touchpad
The haptic touchpad provides pointer movement, clicking, scrolling, and supported gestures.
Touchpad Controls
| Control | Function |
| Single-Finger Tap | Selects or opens an item |
| Double Tap | Opens a shortcut menu in the documented gesture layout |
| Two-Finger Movement | Scrolls through content |
| Two-Finger Pinch or Spread | Zooms out or in |
| Task View Gesture | Displays open windows |
| Desktop Gesture | Shows the desktop |
Some gestures depend on the application and the previous pointing-device action.
Disabling the Haptic Touchpad
- Open the Start menu.
- Select Settings > Devices > Touchpad.
- Turn off the Touchpad setting.
Cleaning the Haptic Touchpad
If the touchpad becomes stained with oil:
- Turn off the computer.
- Use a soft, lint-free cloth.
- Lightly moisten the cloth with lukewarm water or suitable computer cleaner.
- Gently clean the surface.
Touchscreen Instructions
Selected ThinkPad Z13 Gen 1 configurations include multi-touch support.
Touchscreen Gestures
| Gesture | Function |
| Tap Once | Selects an item |
| Double Tap | Double-clicks an item |
| Tap and Hold | Opens a context menu |
| Slide | Scrolls through content |
| Pinch In | Zooms out |
| Spread Fingers | Zooms in |
| Swipe from Left in Windows 10 | Displays open windows |
| Swipe from Right in Windows 10 | Opens Action Center |
| Swipe from Left in Windows 11 | Opens Widgets |
| Swipe from Right in Windows 11 | Opens Notification Center |
| Short Downward Swipe | Shows a title bar |
| Downward Swipe | Closes the current application |
Cleaning the Touchscreen
- Turn off the computer.
- Use a dry, soft, lint-free cloth or absorbent cotton.
- Gently remove dust and fingerprints.
- Avoid solvents and excessive pressure.
Calibrate touch input periodically if necessary to maintain accuracy.
Connecting to Wi-Fi
The ThinkPad Z13 Gen 1 supports wireless LAN connections.
Wi-Fi Setup
- Click the network icon in the Windows notification area.
- Select the required wireless network.
- Click Connect.
- Enter the network credentials when requested.
- Complete the connection.
The connection interface depends on whether Windows 10 or Windows 11 is installed.
Connecting to Wired Ethernet
A wired Ethernet connection requires a compatible Lenovo USB-C to Ethernet Adapter.
Ethernet Setup
- Connect the USB-C Ethernet adapter to the laptop.
- Connect the Ethernet cable to the adapter.
- Connect the other end to the network.
- Complete any required network configuration.
The adapter is included with selected configurations or available as an accessory.
Connecting to a Cellular Network
Selected ThinkPad Z13 Gen 1 models support 4G cellular connections.
Cellular connectivity requires:
- A compatible wireless WAN card.
- A nano-SIM card.
- An active cellular data plan.
- Supported carrier service.
Installing a Nano-SIM Card
- Turn off the computer.
- Locate the nano-SIM tray.
- Insert a straightened paper clip into the tray release hole.
- Remove the tray.
- Insert the nano-SIM card in the correct orientation.
- Reinsert the tray.
- Turn on the computer.
- Open the Windows network menu.
- Select the cellular network.
- Enter the required connection details.
Network availability and data speeds depend on the carrier, location, and signal conditions.
Using Airplane Mode
Airplane Mode disables the computer’s wireless communication functions.
Enabling Airplane Mode
- Type Airplane mode in Windows Search.
- Press Enter.
- Turn on Airplane Mode.
The F8 special function can also be used to control Airplane Mode.
Connecting Bluetooth Devices
The ThinkPad Z13 Gen 1 supports Bluetooth communication with compatible accessories.
Bluetooth Setup
- Open Windows Search.
- Type Bluetooth.
- Press Enter.
- Turn on Bluetooth.
- Select the device to connect.
- Follow the pairing instructions.
For connection, place Bluetooth devices within approximately 10 meters (33 feet) of the computer.
Supported accessories include keyboards, mice, smartphones, and speakers.
Connecting an External Display
The USB-C connectors support compatible external display adapters and display devices.
Wired Display Connection
- Connect the appropriate USB-C display adapter or cable.
- Connect the external monitor or projector.
- Turn on the display.
- Use the external display keyboard shortcut to select the required display mode.
If Windows does not detect the monitor:
- Right-click an empty area of the desktop.
- Select Display Settings.
- Follow the instructions to detect the display.
External Display Resolution
| Connection | Maximum Listed Resolution |
| USB-C USB4 | Up to 8K at 30 Hz |
| USB-C to VGA | Up to 1920 × 1200 at 60 Hz |
| USB-C to DisplayPort | Up to 5120 × 3200 at 60 Hz |
Higher refresh rates may require lower display resolutions.
Wireless Display Connection
A wireless display must support Miracast.
- Press Windows + K.
- Select the required wireless display.
- Complete the connection.
Changing Display Settings
- Right-click an empty area of the desktop.
- Select Display Settings.
- Choose the required display.
- Adjust resolution, orientation, or main display settings.
Using the Lenovo Mod Pen
Selected configurations support the Lenovo Mod Pen for writing and drawing.
The Mod Pen is rechargeable and includes two barrel buttons.
Pen Controls
| Component | Function |
| Bottom Barrel Button | Erases supported digital content |
| Top Barrel Button | Performs right-click actions in compatible applications |
| LED Indicator | Displays battery status |
Charging the Lenovo Mod Pen
- Remove the pen cap.
- Connect the pen to the appropriate charging connection using the computer’s AC power adapter.
- Allow the pen to charge.
- Replace the cap, aligning it correctly.
Pen Battery Indicators
| Indicator | Meaning |
| Blinking Amber | Low battery |
| Solid Amber | Charging |
| Solid White | Fully charged |
Charging takes approximately two hours.
A fully charged pen supports up to 14 days of battery standby time under the stated conditions.
Pen Maintenance
- Keep the pen away from water.
- Avoid moisture exposure.
- Do not subject the pen to shocks.
- Avoid excessive writing pressure.
- Store the pen in a dry, ventilated location.
- Avoid direct sunlight and major temperature changes.
Using the Lenovo Precision Pen 2
Selected configurations also support the Lenovo Precision Pen 2.
Pen Controls
| Component | Function |
| Bottom Barrel Button | Erases supported digital ink |
| Top Barrel Button | Performs right-click actions |
| LED Indicator | Displays battery status |
| USB-C Connector | Charges the pen |
Charging the Precision Pen 2
- Remove the pen cap.
- Connect the pen to a charger using a USB-C cable.
- Allow the pen to charge.
- Reinstall the pen cap.
The LED shows blinking amber for low battery, solid amber while charging, and solid white when fully charged.
A full charge takes approximately two hours.
Barrel button functions can be customized through Lenovo Pen Settings.
Lenovo Commercial Vantage
Lenovo Commercial Vantage provides settings, maintenance functions, diagnostics, and support information.
Opening Lenovo Vantage
- Open Windows Search.
- Type Lenovo Commercial Vantage.
- Open the application.
Available Functions
- View device information and status.
- Configure hardware settings.
- Download BIOS and firmware updates.
- Install device drivers.
- Monitor computer health.
- Run hardware diagnostics.
- Check warranty status.
- Access product documentation.
- Temporarily disable input devices for cleaning.
Available functions depend on the installed software version and computer configuration.
TrackPoint Quick Menu
The TrackPoint Quick Menu provides convenient access to camera, microphone, dictation, and pointing-device settings.
Opening the Quick Menu
Double-tap the TrackPoint pointing stick.
The menu is enabled by default.
Press Fn + G to enable or disable the double-tap shortcut.
Quick Menu Functions
| Function | Description |
| Camera | Adjusts camera brightness and contrast |
| Mute Detection | Provides mute controls and warnings |
| Microsoft Dictation | Opens a speech-to-text notepad |
| Microphone | Changes microphone sound settings |
| TrackPoint Buttons | Configures TrackPoint button behavior |
Microphone Modes
| Mode | Function |
| Privacy Mode | Captures the speaker’s voice |
| Collaboration Mode | Captures the speaker and surrounding sound |
Selecting either mode automatically enables AI noise suppression when supported.
Smart Privacy and Productivity Features
Selected configurations include Glance by Mirametrix.
Glance uses camera-based detection to provide privacy, productivity, and wellness features.
Opening Glance
- Open Windows Search.
- Type Glance.
- Press Enter.
Privacy Features
| Feature | Function |
| Presence Detection | Keeps the computer awake during use and locks it when the user moves out of camera range |
| Privacy Alert | Displays an alert when another person is detected looking at the screen |
| Privacy Guard | Blurs the screen when another viewer is detected |
| Smart Display | Blurs displays that the user is not viewing |
Press Alt + F2 to cancel supported blur effects.
Productivity Features
| Feature | Function |
| Snap Window | Moves selected windows toward the display being viewed |
| Smart Pointer | Moves the pointer toward the display being viewed |
These features operate when compatible external displays are connected.
Digital Wellness Features
- Posture Check: Reminds users to correct a hunched posture.
- 20/20/20 Alert: Reminds users to look away from the screen for 20 seconds every 20 minutes.
Intelligent Cooling
Intelligent Cooling controls power consumption, cooling fan behavior, operating temperature, and performance.
The ThinkPad Z13 Gen 1 supports automatic and manually selected cooling modes.
Cooling Modes
| Mode | Function |
| Eco | Reduces power use, performance, and fan speed |
| Balanced | Balances performance, power consumption, and fan operation |
| Performance | Gives priority to performance with higher allowable fan speed and temperature |
| Auto | Automatically adjusts cooling and power behavior according to system activity |
Intelligent Cooling in Windows 10
- Click the battery icon in the Windows notification area.
- Use the power slider to select a mode.
- Press Fn + T to enable or disable Auto Mode.
Intelligent Cooling in Windows 11
- Right-click the battery icon in the taskbar.
- Open the power and sleep settings.
- Locate the Power section.
- Select the required power mode.
Windows 11 includes:
- Best Power Efficiency.
- Balanced.
- Best Performance.
Press Fn + T to change Auto Mode.
When Auto Mode is active, Balanced is the recommended Windows 11 power setting.
Intelligent Cooling Boost
Intelligent Cooling Boost dynamically adjusts performance according to the applications being used.
It can be useful for communication applications such as Microsoft Teams.
The function requires Auto Mode and Balanced Mode.
Enabling Intelligent Cooling Boost
- Restart the computer.
- Press F1 at the Lenovo logo to enter UEFI BIOS.
- Select Config > Power.
- Find Intelligent Cooling Boost.
- Enable the function.
- Press F10 to save changes and exit.
Battery Charging and Power Management
Checking Battery Status
- Open Windows Settings.
- Select System.
- View battery information.
Additional battery details are available in Lenovo Vantage.
Charging the Computer
Connect the specified USB-C power adapter when the battery charge becomes low.
The ThinkPad Z13 Gen 1 uses a 65 W power adapter.
The rapid-charge function can charge the battery to approximately 80% in one hour while the computer is turned off.
Charging time varies with operating conditions, battery temperature, and computer activity.
Charging Temperature
The recommended charging temperature is between 10°C and 35°C (50–95°F).
Battery Charging Behavior
The battery may not begin recharging immediately after a small decrease from a full charge.
Once fully charged, the battery must fall to approximately 94% or below before charging resumes.
Battery capacity behavior may also change after extended periods of limited use.
For battery maintenance, Lenovo provides additional guidance through the power section of Vantage.
USB-C Peer-to-Peer Charging
The Z13 Gen 1 supports Lenovo P-to-P 2.0 charging through its USB-C ports.
This feature allows supported computers to exchange power through compatible USB-C connections.
Enabling Charging in Battery Mode
- Restart the computer.
- Press F1 to enter UEFI BIOS.
- Select Config > USB.
- Enable Charge in Battery Mode.
- Save the settings.
Charging can then operate in supported configurations even when the computer is turned off or hibernating.
Charging speed depends on battery levels, adapter power, and whether the computers are operating.
Power Settings
Default ENERGY STAR Power Plan
On applicable ENERGY STAR configurations:
| Setting | Default |
| Turn Off Display | After 10 minutes |
| Enter Sleep Mode | After 10 minutes |
Changing the Power Plan
- Open Control Panel.
- Select Large icons or Small icons.
- Open Power Options.
- Select or customize a power plan.
Changing Power Button Behavior
- Open Control Panel.
- Select Power Options.
- Click Choose what the power buttons do.
- Adjust the required settings.
Security Features
The ThinkPad Z13 Gen 1 provides biometric authentication, firmware protection, and supported storage security.
Security Features
| Feature | Purpose |
| Fingerprint Reader | Biometric sign-in |
| Infrared Camera | Windows Hello face recognition |
| Camera Privacy Control | Disables camera operation |
| TPM 2.0 | Hardware-backed security functions |
| UEFI BIOS Passwords | Restricts system and firmware access |
| NVMe Password | Restricts storage-drive access |
| FIDO Authentication | Supports registered passwordless startup devices |
| Power Loss Protection | Helps protect supported SSD data during power interruption |
Setting Up Fingerprint Authentication
- Open Windows Search.
- Type Sign-in options.
- Press Enter.
- Select Fingerprint Recognition.
- Follow the instructions to register a fingerprint.
- Use the fingerprint reader to sign in.
For more reliable recognition, place the finger near the center of the reader during registration.
Registering more than one fingerprint is recommended.
Fingerprint Reader Care
- Do not scratch the sensor.
- Avoid using dirty or wet fingers.
- Do not use an injured finger on the reader.
Setting Up Windows Hello Face Recognition
- Confirm that the F9 camera privacy indicator is off.
- Open Windows Search.
- Type Sign-in options.
- Select the face recognition setting.
- Follow the instructions to register the face.
The infrared camera can then be used for Windows Hello sign-in.
UEFI BIOS Passwords
The ThinkPad Z13 Gen 1 supports several firmware password types.
| Password | Purpose |
| Power-On Password | Restricts computer startup |
| Supervisor Password | Protects UEFI BIOS configuration |
| System Management Password | Provides configurable firmware management authority |
| NVMe Password | Restricts access to storage data |
Setting a BIOS Password
- Restart the computer.
- Press F1 at the Lenovo logo.
- Select Security > Password.
- Choose the password type.
- Follow the on-screen instructions.
Store passwords securely.
Forgotten Power-On Password
If a supervisor password is known, the Power-On Password can be removed through UEFI BIOS.
Otherwise, contact a Lenovo-authorized service provider.
Forgotten Supervisor Password
A forgotten supervisor password cannot be removed through the normal service procedure.
System board replacement may be required.
Forgotten NVMe Password
If the required NVMe password cannot be recovered, Lenovo cannot reset the password or retrieve the protected data.
Storage replacement may be necessary.
Entering UEFI BIOS
UEFI BIOS performs the initial hardware checks and controls firmware-level settings.
Opening BIOS
- Restart the computer.
- Press F1 when the Lenovo logo appears.
BIOS Navigation Keys
| Key | Function |
| F1 | General Help |
| F5/F6 | Changes startup priority |
| F9 | Loads setup defaults |
| F10 | Saves and exits |
| Arrow Keys | Moves between options |
| Enter | Selects an option |
| Esc | Returns to the previous menu |
Changing System Date and Time
- Enter UEFI BIOS.
- Select Date/Time.
- Set the correct values.
- Press F10 to save.
Changing the Boot Order
Permanent Startup Sequence
- Enter UEFI BIOS using F1.
- Select Startup > Boot.
- Press Enter.
- Arrange the startup devices in the required order.
- Press F10 to save and exit.
Temporary Boot Menu
- Restart the computer.
- Press F12 when the logo appears.
- Select the required startup device.
- Press Enter.
Viewing BIOS Event Logs
The BIOS Event Log records firmware events and system startup information.
Opening BIOS Event Logs
- Enter UEFI BIOS.
- Select Main > BIOS Event Log.
- Press Enter.
- Select an event to view its details.
Logged Events
Events can include:
- Computer power-on.
- Firmware password changes.
- Boot device changes.
- BIOS configuration changes.
- POST errors.
- Firmware updates.
- System restarts.
- Security-related events.
Security Chip Configuration
Selected configurations include Discrete TPM 2.0 or Microsoft Pluton TPM 2.0.
The Pluton TPM option is intended for Windows 11.
Changing the Security Chip
Warning: Changing the security chip clears stored security-chip information, potentially including BitLocker encryption keys.
Before making a change:
- Disable BitLocker Drive Encryption if active.
- Restart the computer.
- Press F1 to enter UEFI BIOS.
- Select Security > Security Chip.
- Choose the required supported security-chip configuration.
- Confirm the appropriate TPM 2.0 chip is Active.
- Press F10 to save and exit.
Resetting UEFI BIOS to Factory Defaults
The UEFI BIOS includes a Reset System to Factory Defaults function.
This function resets firmware settings and related internal data.
Reset Procedure
- Restart the computer.
- Press F1 to enter UEFI BIOS.
- Select Security > Reset System to Factory Defaults.
- Follow the warning prompts.
- Complete the required security preparations.
- Confirm the reset.
- Enter the applicable firmware password if requested.
The laptop restarts and performs initialization.
Important: The screen may remain blank during the process. Do not interrupt initialization.
UEFI BIOS Self-Recovery
The computer can recover UEFI BIOS from a previously stored secure firmware backup when applicable.
During recovery, the screen may be blank.
Progress is shown through keyboard indicator lights.
BIOS Recovery Indicators
| Blinking LEDs | Recovery Progress |
| Esc | 0–32% |
| Esc + F1 | 33–65% |
| Esc + F1 + F4 | 66–100% |
Do not press the Power button during firmware self-recovery.
Wait until the Lenovo logo appears.
Updating UEFI BIOS
BIOS updates may be needed when installing new hardware, drivers, or software.
Updating Through Lenovo Vantage
- Open Lenovo Commercial Vantage.
- Check for updates.
- Select the available UEFI BIOS update package.
- Follow the installation instructions.
Updating Through Lenovo Support
- Visit https://pcsupport.lenovo.com.
- Select the ThinkPad Z13 Gen 1.
- Find the applicable BIOS update.
- Follow the installation instructions.
Memory Retraining During BIOS Updates
Some BIOS updates trigger memory retraining.
During this process, the screen may remain blank while the Esc, F1, and F4 LEDs blink.
Do not interrupt the computer.
Wait until the Lenovo logo appears.
FIDO Passwordless Authentication
The ThinkPad Z13 Gen 1 supports FIDO authentication using a compatible registered FIDO2 USB device.
This function requires a power-on password and a registered device.
Registering a FIDO2 USB Device
- Turn on the computer.
- Press F12 during startup.
- Enter the power-on password if prompted.
- Select App Menu > ThinkShield Passwordless Power-On Device Manager.
- Connect the compatible FIDO2 USB device.
- Select the device from Discovered Devices.
- Confirm the selection.
- Enter the power-on password when requested.
- Press the button on the FIDO2 device when prompted.
- Complete registration.
- Press Esc and restart.
Using FIDO2 at Startup
- Restart the computer.
- Wait for the passwordless authentication screen.
- Connect the registered FIDO2 device.
- Follow the prompt to confirm authentication.
- Allow startup to continue.
The device or password must be supplied within 60 seconds, or the computer shuts down.
Installing Windows
The ThinkPad Z13 Gen 1 supports Windows installation using compatible installation media.
Warning: Reinstalling an operating system can erase data from the internal storage drive.
Back up important files before proceeding.
Windows Installation Procedure
- Check operating system compatibility.
- Disable BitLocker encryption when required.
- Confirm that the correct TPM is Active.
- Connect the Windows installation drive.
- Restart the computer.
- Press F1 to enter UEFI BIOS.
- Open Startup > Boot.
- Select the installation device.
- Confirm the required startup settings.
- Save the changes.
- Follow the Windows installation instructions.
- Install required hardware drivers.
- Apply Windows updates.
Installing Drivers
Drivers can be installed through Lenovo Vantage or Lenovo Support.
Through Vantage
- Open Lenovo Commercial Vantage.
- Check available updates.
- Select the required driver packages.
- Follow the installation instructions.
Through Lenovo Support
- Visit https://pcsupport.lenovo.com.
- Select the appropriate laptop model.
- Find the required drivers.
- Download and install the compatible packages.
Cleaning and Maintenance
Cleaning the Touchpad
Turn off the laptop and gently wipe the haptic touchpad with a soft, lint-free cloth lightly moistened with lukewarm water or appropriate computer cleaner.
Cleaning the Touchscreen
- Turn off the computer.
- Use a soft, dry, lint-free cloth.
- Gently remove fingerprints and dust.
- Avoid solvents and excessive pressure.
Cleaning Through Lenovo Vantage
Supported Vantage functions allow temporary disabling of the keyboard, display, touchpad, and TrackPoint for cleaning.
Maintenance Tasks
| Task | Guidance |
| Battery Care | Follow Vantage battery recommendations |
| Driver Updates | Check Lenovo Vantage or Support |
| BIOS Updates | Install applicable Lenovo firmware packages |
| Touchpad Cleaning | Use a soft, lint-free cloth |
| Touchscreen Cleaning | Use a dry, lint-free cloth |
| Hardware Diagnostics | Use Lenovo diagnostic tools |
| Security Maintenance | Keep firmware and passwords protected |
| Component Replacement | Follow supported CRU procedures |
Customer-Replaceable Components
Lenovo identifies certain parts as customer-replaceable units (CRUs).
CRU List
| Component | Replacement Category |
| AC Power Adapter | Self-Service, Selected Models |
| Power Cord | Self-Service, Selected Models |
| Base Cover Assembly | Self-Service |
| M.2 SSD | Self-Service |
| M.2 SSD Bracket | Self-Service |
| Nano-SIM Tray | Self-Service, Selected Models |
| Wireless WAN Card | Optional-Service, Selected Models |
The built-in rechargeable battery is not a customer-replaceable part.
Disabling Fast Startup
Before replacing an internal CRU, disable Windows Fast Startup.
Procedure
- Open Control Panel.
- Select Power Options.
- Click Choose what the power buttons do.
- Select Change settings that are currently unavailable.
- Approve the prompt if requested.
- Clear Turn on fast startup.
- Save the changes.
Disabling the Built-In Battery
Procedure
- Restart the computer.
- Press F1 when the Lenovo logo appears.
- Select Config > Power.
- Select Disable Built-in Battery.
- Press Enter.
- Confirm Yes.
- The computer turns off automatically.
- Allow three to five minutes for cooling.
Removing the Base Cover Assembly
The base cover must be removed to access certain internal components.
Procedure
- Disable Fast Startup and the built-in battery.
- Shut down the computer.
- Disconnect AC power and all cables.
- Close the display.
- Turn the laptop over.
- Remove the base cover retaining screws.
- Carefully release the cover as shown in the hardware removal diagram.
- Lift off the base cover.
Reinstalling the Base Cover
- Align the cover with the computer.
- Reattach it using the documented installation sequence.
- Tighten the retaining screws.
- Reconnect AC power.
If the computer does not start after reinstallation, disconnect and reconnect the AC adapter.
Replacing the M.2 SSD
The Z13 Gen 1 uses an M.2 2242 solid-state drive.
Attention: The SSD contains sensitive electronic components. Incorrect handling can result in permanent data loss.
SSD Replacement Instructions
- Back up important data.
- Disable Fast Startup.
- Disable the built-in battery.
- Shut down the laptop and disconnect cables.
- Remove the base cover.
- Locate the M.2 SSD.
- Carefully move any protective Mylar film without damaging it.
- Remove the SSD retaining hardware.
- Slide the SSD horizontally from its connector.
- Install the compatible replacement SSD horizontally.
- Reinstall the retaining hardware.
- Reposition any protective film.
- Reinstall the base cover.
SSD Handling Precautions
- Do not touch the electrical contacts.
- Do not apply pressure to the circuit board.
- Avoid shocks and vibration.
- Keep thermal pads in their original positions.
- Do not insert the SSD at an incorrect angle.
Replacing the Wireless WAN Card
Selected configurations support a user-installable wireless WAN module.
Use only a compatible Lenovo-authorized module.
Replacement Instructions
- Disable Fast Startup and the built-in battery.
- Turn off the computer.
- Disconnect power and cables.
- Remove the base cover.
- Locate the wireless WAN card.
- Carefully move the protective Mylar film if present.
- Disconnect the antenna cables.
- Remove the retaining screw and card.
- Install the replacement module.
- Reconnect the antenna cables.
- Reinstall the retaining screw.
- Reinstall the protective film and base cover.
Wireless WAN Antenna Connections
| Cable Color | Connector |
| Orange | ORANGE |
| Blue | BLUE |
Only Lenovo-authorized wireless modules specifically tested for the model should be installed.
An unsupported module can trigger startup error beeps.
Troubleshooting Guide
Common Problems and Solutions
| Problem | Recommended Action |
| Laptop does not respond | Hold Power to shut down, then restart |
| Computer remains unresponsive | Use the emergency-reset hole |
| Black screen during startup | Run the LCD Self-Test |
| Battery is low | Connect the AC adapter |
| Laptop does not charge | Check adapter connection and battery temperature |
| Wi-Fi cannot connect | Check network selection and credentials |
| External display is not detected | Open Display Settings and detect the monitor |
| Fingerprint login fails | Check finger placement and cleanliness |
| Camera does not work | Check the F9 camera privacy indicator |
| SSD detection error | Reinstall or replace the affected drive |
| BIOS settings cause problems | Check UEFI BIOS configuration |
| Unexpected firmware recovery screen | Allow BIOS self-recovery to finish |
| Hardware problem persists | Run Lenovo diagnostics or contact Lenovo Support |
Computer Does Not Respond
Restart Procedure
- Press and hold the Power button until the computer turns off.
- Restart the laptop.
If the computer remains unresponsive:
- Disconnect AC power.
- Insert a straightened paper clip into the emergency-reset hole.
- Reconnect the AC adapter.
- Start the computer.
Black Screen During Startup
The ThinkPad Z13 Gen 1 includes an LCD Self-Test function.
Running the LCD Self-Test
- Connect the AC adapter.
- Press and hold Power for approximately seven seconds to shut down the computer.
- Press Fn + Left Ctrl + Power simultaneously.
- Observe the screen.
If the screen displays five solid colors in sequence, the LCD is operating normally.
The test runs for approximately 20 seconds and exits automatically.
Press Power to exit manually.
Error Messages
Error Code Guide
| Error Code | Meaning | Recommended Action |
| 0190 | Critical low-battery error | Connect AC power and charge the battery |
| 0191 | Invalid remote security change | Confirm the configuration change and retry |
| 0199 | Supervisor password retry limit exceeded | Confirm the password |
| 0271 | Date or time not configured | Set the date and time in UEFI BIOS |
| 210x/211x | Storage detection or read error | Reinstall the storage drive or replace it if necessary |
UEFI Variable Storage Nearly Full
This message indicates insufficient available space in the non-volatile UEFI variable storage.
Recovery Procedure
- Press F1 when the error appears.
- Open the UEFI BIOS prompt.
- Review the storage cleanup confirmation.
- Select the appropriate option.
Selecting Yes removes operating-system or application-created UEFI variable data except the protected global variables specified by UEFI.
Selecting No preserves existing data but may prevent applications from modifying that storage.
Beep Error Troubleshooting
The ThinkPad Z13 Gen 1 supports Lenovo SmartBeep diagnostic technology.
SmartBeep uses a compatible smartphone application to decode startup beep errors.
Using Lenovo SmartBeep
- Visit https://support.lenovo.com/smartbeep.
- Install the supported diagnostic application on a smartphone.
- Run the application.
- Hold the smartphone near the laptop.
- Press Fn on the computer to repeat the beep sequence.
- Review the decoded diagnostic information.
Do not attempt unsupported internal repairs.
Warranty Information
The ThinkPad Z13 Gen 1 is covered by the applicable Lenovo Limited Warranty.
Warranty coverage and service conditions depend on the individual product and its applicable service terms.
Warranty Resources
| Resource | Link |
| Lenovo Limited Warranty | https://www.lenovo.com/warranty/llw_02 |
| Warranty Status | https://pcsupport.lenovo.com/warrantylookup |
| Warranty Upgrade | https://pcsupport.lenovo.com/warrantyupgrade |
Warranty Services
Applicable warranty services can include:
- Problem diagnosis.
- Covered hardware repair.
- Authorized engineering changes.
Additional services may be purchased where available.
Customer Support Information
Lenovo Support Resources
| Resource | Details |
| Manufacturer | Lenovo |
| Product Support | https://pcsupport.lenovo.com |
| Support Phone Directory | https://pcsupport.lenovo.com/supportphonelist |
| Authorized Service Providers | https://support.lenovo.com/partnerlocator |
| Accessories | https://www.lenovo.com/accessories |
| Recovery Assistance | https://support.lenovo.com/HowToCreateLenovoRecovery |
| Troubleshooting Information | https://www.lenovo.com/tips |
Before Contacting Lenovo
Prepare the following:
- Product name.
- Machine type and serial number.
- Installed operating system.
- Exact error codes or messages.
- Description of the problem.
- Whether the problem is continuous or intermittent.
- Applications running when the issue occurred.
- Steps needed to reproduce the problem.
The machine type and serial number are printed on the computer’s identification label.
Frequently Asked Questions
1. How do I enter BIOS on the Lenovo ThinkPad Z13 Gen 1?
Restart the laptop and press F1 when the Lenovo logo appears. This opens the UEFI BIOS menu, where startup devices, passwords, security settings, and firmware configuration can be managed.
2. How do I charge the ThinkPad Z13 Gen 1?
Connect the compatible 65 W USB-C power adapter. The laptop supports rapid charging to approximately 80% in one hour when turned off, depending on the battery and operating conditions.
3. Can I upgrade the RAM on the ThinkPad Z13 Gen 1?
The laptop uses soldered LPDDR5 memory with configurations supporting up to 32 GB. The onboard memory is not a customer-replaceable upgrade component.
4. How do I replace the SSD in the ThinkPad Z13 Gen 1?
Disable Windows Fast Startup and the built-in battery, disconnect power, remove the base cover, and follow the M.2 SSD replacement procedure. The Z13 Gen 1 uses an M.2 2242 SSD.
5. How do I turn off the camera on the ThinkPad Z13 Gen 1?
Press F9 to activate the camera privacy function. When the F9 indicator is illuminated, the camera is disabled.
6. How do I reset an unresponsive ThinkPad Z13 Gen 1?
Press and hold Power to turn off the computer. If it remains unresponsive, disconnect AC power, use a straightened paper clip in the emergency-reset hole, reconnect power, and restart.
7. How do I connect an external monitor to the ThinkPad Z13 Gen 1?
Use a compatible USB-C display connection or adapter. The USB4 ports support external displays, and a compatible wireless monitor can be connected using Windows + K when Miracast is supported.