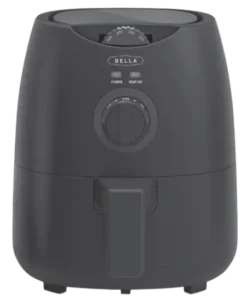
| Document Detail | Information |
| Document Title | 2 QT Air Fryer Instruction Manual and Recipe Guide |
| Document Type | Instruction Manual and Recipe Guide |
| Brand Name | BELLA |
| Product Name | 2 QT Air Fryer |
| Model Number(s) | 17160 |
| PDF File Size | 4 MB |
| Number of Pages | 36 |
| Languages | English, Spanish |
BELLA 2 QT Air Fryer 17160
The BELLA 17160 2 QT Air Fryer is an electric countertop cooking appliance designed to cook, brown, crisp, and reheat food using circulating hot air. It features a removable 2-quart frying basket, a crisping tray, a manual temperature control dial, and a 30-minute countdown timer.
The temperature can be adjusted between 175°F and 400°F, while the timer controls the cooking duration. Two orange indicator lights display power and heating activity. The air fryer automatically stops heating when the basket is opened and resumes when the basket is correctly reinserted.
Before cooking, the frying basket and crisping tray must be cleaned, the four rubber tips on the crisping tray must be checked, and the appliance must be placed on a flat, heat-resistant surface with adequate ventilation.
Product Overview
The BELLA 2 QT Air Fryer uses heated air circulation to cook a variety of foods, including vegetables, French fries, chicken, fish, and baked snacks.
The removable frying basket holds the food, while the crisping tray supports the ingredients and allows hot air to circulate during cooking. The manual control dials allow cooking temperature and time to be adjusted according to the food being prepared.
Main Features
- 2-quart capacity: Designed for cooking smaller food portions.
- Adjustable temperature: Selects temperatures from 175°F to 400°F.
- 30-minute countdown timer: Controls cooking duration and automatically switches the air fryer off when time expires.
- Removable frying basket: Includes a cool-touch handle for opening and closing the basket.
- Removable crisping tray: Supports food during air frying.
- Orange POWER indicator: Displays power status.
- Orange HEAT ON indicator: Shows when the heating element is operating.
- Automatic heating interruption: Stops heating when the frying basket is opened.
- Automatic shutoff: Turns the appliance off when the timer reaches zero.
- Dishwasher-safe components: The frying basket and crisping tray can be cleaned in a dishwasher.
- Reheating function: Allows cooked food to be reheated using a suitable temperature and time.
Technical Specifications
| Specification | Details |
| Brand | BELLA |
| Product Name | 2 QT Air Fryer |
| Model Number | 17160 |
| Product Type | Electric Air Fryer |
| Capacity | 2 Quarts |
| Power Supply | 120V AC |
| Temperature Range | 175°F–400°F |
| Timer | 30-Minute Countdown Timer |
| Temperature Control | Manual Dial |
| Timer Control | Manual Dial |
| Power Indicator | Orange POWER Light |
| Heating Indicator | Orange HEAT ON Light |
| Frying Basket | Removable |
| Basket Handle | Cool-Touch Handle |
| Crisping Tray | Removable with 4 Rubber Tips |
| Plug Type | Polarized Plug |
| Recommended Preheating Allowance | 3 Minutes |
| Maximum Recommended Basket Fill | Two-Thirds Full |
| Recommended Fresh Vegetable Quantity | Up to 1½ Cups |
| Frying Basket Cleaning | Hand Wash or Dishwasher |
| Crisping Tray Cleaning | Hand Wash or Dishwasher |
| Intended Use | Household Use Only |
| Warranty | 2 Years for Mechanical Defects; 90 Days for Non-Mechanical Parts |
Parts and Components
The BELLA 17160 Air Fryer contains a heating body, removable frying basket, crisping tray, temperature and timer controls, and ventilation openings.
| Part | Function |
| Air Fryer Body | Houses the heating system and cooking chamber. |
| Temperature Control Dial | Adjusts the cooking temperature from 175°F to 400°F. |
| 30-Minute Timer Dial | Sets cooking time and provides the OFF position. |
| Orange POWER Light | Indicates power status during operation. |
| Orange HEAT ON Light | Indicates heating activity. |
| Air Inlets | Allow air to enter the appliance. |
| Air Outlet | Releases hot air and steam during operation. |
| Removable Frying Basket | Holds food and the crisping tray during cooking. |
| Cool-Touch Basket Handle | Allows the basket to be pulled out and reinserted. |
| Crisping Tray | Supports food inside the frying basket. |
| Four Rubber Tips | Help the crisping tray fit securely inside the basket. |
| Frying Basket Drawer | Slides into the front of the air fryer body. |
| Power Cord | Connects the appliance to electrical power. |
| Polarized Plug | Fits a compatible polarized electrical outlet. |
Removable Frying Basket
The frying basket is inserted into the front of the air fryer and must be fully closed for heating to begin.
The basket includes a handle for removing it during cooking.
Important: The appliance will not operate unless the frying basket is fully closed.
Crisping Tray
The crisping tray is positioned inside the frying basket before food is added.
It has four rubber tips around its edges that help it fit securely inside the basket.
All four rubber tips must be properly attached before use.
Air Inlets and Outlet
The air fryer includes air inlets on the back and sides and an air outlet for releasing hot air and steam.
These openings must remain unobstructed during operation.
Control Dials and Indicator Lights
The BELLA 2 QT Air Fryer has two manual control dials and two orange indicator lights.
Temperature Control Dial
The temperature dial allows cooking temperatures to be selected between 175°F and 400°F.
| Control | Function |
| Temperature Dial | Selects cooking temperature. |
| Minimum Temperature | 175°F |
| Maximum Temperature | 400°F |
| Temperature Adjustment | Can be changed during cooking. |
Once the selected temperature is reached, the orange HEAT ON light turns off.
The heating element and HEAT ON light cycle on and off during operation to maintain the selected temperature.
30-Minute Countdown Timer
The timer dial controls the cooking duration.
| Timer Function | Operation |
| Set Cooking Time | Rotate the timer dial to the desired duration. |
| Start Heating | Heating begins when the timer is set and the basket is closed. |
| End of Cooking | One beep sounds when the timer reaches zero. |
| Automatic Shutoff | The air fryer switches off when the timer reaches zero. |
| Manual Shutoff | Turn the timer dial to 0 (OFF). |
For cooking times longer than the timer’s 30-minute range, additional timed operation is needed.
Indicator Light Guide
| Indicator | Meaning |
| Orange POWER Light | Indicates power status. |
| Orange HEAT ON Light Illuminated | The heating element is operating. |
| Orange HEAT ON Light Turns Off | The selected temperature has been reached or heating has stopped. |
| HEAT ON Light Cycles On and Off | Normal temperature regulation. |
| Both Lights Off After Timer Expires | The air fryer has automatically switched off. |
What Happens When the Basket Is Opened?
When the frying basket is pulled out during cooking:
- Heating stops.
- The orange HEAT ON light turns off.
- The timer continues counting down.
- Heating resumes when the basket is correctly reinserted.
Because the timer continues running while the basket is open, additional cooking time may be required.
Important Safety Instructions
The BELLA Air Fryer generates high temperatures and releases hot air and steam during operation. Improper handling may cause burns, electrical shock, fire, or property damage.
General Safety Precautions
- Read all instructions before operating the appliance.
- Use the air fryer only for its intended household purpose.
- Do not touch hot surfaces during or immediately after cooking.
- Use handles, knobs, oven mitts, or potholders.
- Do not leave the appliance unattended while operating.
- Keep children away from the hot appliance.
- Do not use the air fryer outdoors.
- Do not place the appliance near hot gas burners, electric burners, or heated ovens.
- Do not place objects on top of the appliance while operating or while hot.
- Do not block the ventilation openings.
- Never move the air fryer while it is hot or contains hot food.
- Allow the appliance to cool before moving or cleaning it.
- Use only accessories recommended by the manufacturer.
Electrical Safety
- Connect the appliance only to a 120V AC electrical outlet.
- Do not immerse the air fryer body, power cord, or plug in water.
- Do not handle a damaged appliance or power cord.
- Do not operate the appliance if it malfunctions.
- Keep the cord away from hot surfaces.
- Do not allow the cord to hang over the edge of a table or countertop.
- Unplug the appliance when not in use.
- Unplug before cleaning or removing components.
- Turn the timer dial to OFF before disconnecting the plug.
- Do not attempt unauthorized repairs.
If the power cord is damaged, contact Consumer Service for replacement assistance.
Child Safety
The appliance is not intended for use by individuals, including children, with reduced physical, sensory, or mental capabilities or insufficient experience and knowledge unless appropriate supervision or instruction is provided.
Children must be supervised to prevent them from playing with the appliance.
Keep the power cord out of reach of children and infants.
Hot Surface and Steam Safety
Warning: The air fryer remains hot for some time after being switched off.
- Use oven mitts when handling the hot frying basket or crisping tray.
- Avoid escaping steam when opening the basket.
- Place the hot basket only on a flat, heat-resistant surface.
- Allow metal parts to cool before cleaning.
- Use appropriate utensils when removing hot food.
Basket Filling Precautions
Never fill the frying basket more than two-thirds full.
For fresh vegetables, the recommended quantity is no more than 1½ cups.
Underfilling or overfilling the basket improperly may damage the appliance or cause injury.
The crisping tray must be installed before food is added.
Hot Oil Warning
Hot oil may collect in the bottom of the frying basket.
Warning: Never turn the frying basket upside down while it contains cooked food.
Use tongs, a long fork, or a long wooden spoon to remove food. This helps prevent hot oil from spilling onto the food or causing burns.
Ventilation Requirements
Place the air fryer on a flat, heat-resistant surface.
Maintain at least 4 inches of clearance from walls and other objects during operation.
The air inlets and outlet must not be blocked.
Avoid placing hands or other objects near escaping steam.
Cooking Restrictions
The BELLA 17160 Air Fryer must never be used to boil water or heat oil.
It is designed for hot-air cooking, not conventional deep frying.
Polarized Plug Safety
The air fryer has a polarized plug with one blade wider than the other.
If the plug does not fit the outlet:
- Remove the plug.
- Reverse its direction.
- Try inserting it again.
- If it still does not fit, contact a qualified electrician.
Do not modify the plug.
Power Cord and Extension Cord Precautions
The appliance uses a short power cord to reduce entanglement and tripping risks.
If a longer cord or extension cord is used:
- Its marked electrical rating must be at least equal to the appliance rating.
- A grounding-type appliance requires an appropriate three-wire grounding extension cord.
- The cord must not hang over a countertop where children could pull it.
- Arrange the cord to prevent tripping.
The air fryer should operate on a separate electrical circuit from other appliances to avoid overloading.
Countertop Protection
Place non-plastic coasters or placemats between the air fryer and countertops or furniture surfaces when necessary.
This precaution helps prevent marks, staining, or discoloration caused by plasticizer migration.
Before First Use
The frying basket and crisping tray must be cleaned and inspected before the air fryer is used for cooking.
Step 1: Remove the Frying Basket
- Place the air fryer on a flat, clean work surface.
- Grasp the frying basket handle firmly.
- Pull the basket out of the front of the appliance.
- Place the basket on the work surface.
Step 2: Remove Packaging Materials
- Remove all packing materials.
- Remove labels from the inside and outside of the appliance.
- Check beneath and around the frying basket for remaining packaging.
Step 3: Wash the Removable Parts
- Remove the crisping tray from the basket.
- Wash the frying basket in hot, soapy water.
- Wash the crisping tray in hot, soapy water.
- Rinse the components.
- Dry all parts thoroughly.
Step 4: Clean the Air Fryer Body
- Use a damp cloth to wipe the exterior and accessible surfaces.
- Remove packaging dust or residue.
- Dry the appliance.
Warning: Do not immerse the air fryer body in water.
Step 5: Check the Crisping Tray Rubber Tips
The crisping tray has four rubber tips that help it fit securely inside the basket.
- Locate the four rubber tips.
- Make sure each tip is attached to its corresponding tab.
- If a tip has become detached, slide it back onto the tab.
- Check that all four tips are securely positioned.
The tray is now ready to be placed inside the frying basket.
Setup Instructions
How to Install the Crisping Tray
- Remove the frying basket from the air fryer.
- Check that the crisping tray is clean and dry.
- Confirm that all four rubber tips are attached.
- Place the crisping tray into the base of the frying basket.
- Check that the tray sits securely.
How to Position the Air Fryer
- Select a flat, heat-resistant work surface.
- Position the appliance near a suitable electrical outlet.
- Keep at least 4 inches of space between the appliance and nearby walls or objects.
- Check that the air inlets and outlet are unobstructed.
- Keep the appliance away from other heat sources.
How to Prepare the Basket for Cooking
- Make sure the crisping tray is installed.
- Arrange food on the tray.
- Do not fill the basket more than two-thirds full.
- Keep enough space for hot air to circulate.
- Slide the frying basket fully into the air fryer.
Operating Instructions
How to Use the BELLA 17160 Air Fryer
- Place the air fryer on a flat, heat-resistant surface.
- Pull out the frying basket using its handle.
- Install the crisping tray.
- Arrange the food on top of the tray.
- Slide the basket completely into the appliance.
- Plug the power cord into a 120V AC outlet.
- Turn the temperature dial to the desired setting between 175°F and 400°F.
- Turn the timer dial to the required cooking time.
- Add 3 minutes to the selected cooking time if the air fryer is cold and preheating is required.
- The orange HEAT ON light will illuminate as heating begins.
- Open the basket halfway through cooking when the food requires shaking or turning.
- Check the food and adjust the temperature or cooking time if necessary.
- Reinsert the basket to resume heating.
- When the timer reaches zero, one beep will sound and the air fryer will switch off.
- Check the food for doneness.
- If more cooking is required, set the timer for additional 3-minute intervals.
- Allow the cooked food to rest for 5–10 seconds.
- Remove the basket and place it on a flat, heat-resistant surface.
- Use tongs or a long fork to transfer the food to a serving plate.
- Turn the timer dial to OFF and unplug the appliance when cooking is complete.
How to Preheat the Air Fryer
The operating instructions specify adding 3 minutes to the cooking time when starting with a cold air fryer.
For example, if food requires 12 minutes of air frying, the timer may be set for 15 minutes to allow for the initial heating period.
How to Shake Food During Cooking
Some foods require shaking or turning for more even cooking.
- Grasp the basket handle.
- Pull the basket out halfway through the cooking time.
- Check the food.
- Shake the basket carefully or turn the food using suitable utensils.
- Reinsert the basket completely.
Important: Heating stops when the basket is removed, but the timer continues counting down.
How to Stop Cooking Early
The air fryer can be turned off at any time.
- Turn the timer dial to 0 (OFF).
- The heating function will stop.
- Unplug the appliance when it is no longer needed.
How to Remove Cooked Food Safely
- Allow the food to rest for 5–10 seconds.
- Pull out the basket by its handle.
- Place the basket on a heat-resistant surface.
- Use tongs, a long fork, or another suitable utensil to remove food.
- Avoid contact with hot oil collected at the bottom of the basket.
Never turn the basket upside down while it contains cooked food.
Air Frying Tips
Use a Small Amount of Oil
Olive oil spray or vegetable oil may be applied to food before cooking.
For foods that are not already oiled or coated, a light application of oil can improve browning and crispness.
Do Not Overfill the Basket
Never fill the frying basket more than two-thirds full.
For fresh vegetables, do not add more than approximately 1½ cups.
Cooking smaller batches allows hot air to circulate around the food.
Shake or Turn Food When Required
French fries, vegetables, chicken, and other foods may require shaking or turning during cooking.
Follow the recommended action and time in the air frying chart.
Dry Food Before Cooking
Pat food dry before air frying.
Removing excess surface moisture helps improve browning and reduces smoke.
Reduce Smoke When Cooking Fatty Foods
Naturally fatty foods, such as chicken wings and sausages, may release grease during cooking.
It may be necessary to empty accumulated fat from the basket between batches.
Allow safe handling of the hot basket and use appropriate heat protection.
Cooking Freshly Breaded Food
- Press the breading firmly onto the food.
- Place the breaded items on a cooling rack.
- Refrigerate briefly to help the coating adhere.
- Arrange the pieces in the frying basket without touching.
- Leave space for air circulation.
Adjusting Conventional Oven Recipes
When adapting suitable conventional oven recipes, the manual recommends:
- Reducing the baking temperature by approximately 20°F–50°F.
- Reducing cooking time by approximately 30%–50%.
Actual adjustments depend on the food and quantity being cooked.
Reheating Cooked Food
The air fryer can be used to reheat food.
The manual recommends a temperature of 300°F for up to 10 minutes.
Food should be checked during reheating and heated thoroughly before serving.
Air Frying Temperature and Cooking Time Chart
The following temperatures and times are provided for common foods.
Actual cooking times depend on food quantity, thickness, density, and whether the food is fresh, thawed, or frozen.
| Food | Temperature | Cooking Time | When to Check / Action |
| Mixed Vegetables, Roasted | 400°F | 15–20 min | Shake after 8 min |
| Broccoli, Roasted | 400°F | 15–20 min | Shake after 8 min |
| Frozen Onion Rings | 400°F | 12–18 min | Shake after 8 min |
| Frozen Cheese Sticks | 350°F | 8–12 min | — |
| Fresh Sweet Potato Chips, First Stage | 325°F | 15 min | Shake after 8 min |
| Fresh Sweet Potato Chips, Second Stage | 350°F | 5 min | Shake after 3 min |
| Fresh French Fries, First Stage | 325°F | 15 min | Shake after 8 min |
| Fresh French Fries, Second Stage | 350°F | 10–15 min | Shake after 5 min |
| Thin Frozen French Fries, 1½ Cups | 400°F | 12–16 min | Check after 8 min |
| Thick Frozen French Fries, 1½ Cups | 400°F | 17–21 min | Shake after 10 min |
| Meatloaf, 1 lb | 350°F | 35–40 min | Check doneness |
| Hamburgers, ¼ lb, Up to 2 | 350°F | 10–14 min | Check doneness |
| Hot Dogs / Sausages | 350°F | 10–15 min | Turn after 6 min |
| Fresh or Thawed Chicken Wings, First Stage | 325°F | 15 min | Shake after 8 min |
| Chicken Wings, Second Stage | 350°F | 9–12 min | Shake after 5 min |
| Chicken Tenders / Fingers, First Stage | 360°F | 10 min | Turn after 5 min |
| Chicken Tenders / Fingers, Second Stage | 400°F | 5 min | Shake after 3 min |
| Chicken Pieces | 350°F | 20–30 min | Turn after 10 min |
| Frozen Chicken Nuggets | 350°F | 10–15 min | Shake after 5 min |
| Battered Catfish Fingers, Thawed | 400°F | 7–8 min | Turn after 3 min |
| Frozen Fish Sticks | 400°F | 10–15 min | Turn after 5 min |
| Apple Turnovers | 400°F | 5 min | — |
| Donuts | 350°F | 5 min | Turn after 3 min |
| Fried Cookies | 350°F | 8 min | Turn after 4 min |
Preheating: Add 3 minutes to the air frying time when starting with a cold appliance.
Important Cooking Notes
- Use the chart as a general cooking guide.
- Adjust cooking time according to food quantity and thickness.
- Cooking smaller batches may reduce cooking time.
- Shake or turn foods when indicated.
- Use a meat thermometer to verify that meat, poultry, and fish are properly cooked.
Internal Cooking Temperatures
The manual provides the following internal temperature recommendations:
| Food | Internal Temperature |
| Beef and Lamb | 145°F (63°C) |
| Pork | 160°F (71°C) |
| Poultry | 170°F–175°F (77°C–82°C) |
| Reheated Meat and Poultry | 165°F (74°C) |
Always check the internal temperature of meat, poultry, and fish before serving rather than relying only on the timer.
Cleaning Instructions
The BELLA 17160 Air Fryer should be cleaned after use.
Always allow the appliance and removable components to cool completely before cleaning.
How to Clean the Frying Basket
- Turn the timer dial to OFF.
- Unplug the air fryer.
- Allow the appliance to cool completely.
- Pull out the frying basket.
- Remove the crisping tray.
- Wash the basket in hot, soapy water.
- Rinse thoroughly.
- Dry the basket before reassembly.
Do not use metal utensils, abrasive cleansers, or harsh cleaning products that may damage the nonstick coating.
How to Clean the Crisping Tray
- Make sure the crisping tray is completely cool.
- Lift the tray using its center hole.
- Remove it from the frying basket.
- Wash it in hot, soapy water.
- Rinse thoroughly.
- Dry the tray.
- Inspect the four rubber tips.
- Reattach any tip that has become separated from its tab.
All four rubber tips must be securely attached before the air fryer is used again.
Dishwasher Cleaning
The frying basket and crisping tray are dishwasher-safe.
For best results, place both components on the upper rack of the dishwasher.
The electrical air fryer body must never be immersed in water or placed in a dishwasher.
Cleaning the Air Fryer Body
- Unplug the appliance.
- Allow it to cool completely.
- Wipe the body using a damp cloth.
- Remove any surface residue.
- Keep water away from the electrical components.
Warning: Do not immerse the air fryer body, power cord, or plug in water or any other liquid.
Maintenance Instructions
The BELLA Air Fryer requires little routine maintenance.
It contains no user-serviceable internal parts.
Any repairs or maintenance requiring disassembly beyond normal cleaning must be performed by a qualified appliance repair technician.
Regular Maintenance
| Maintenance Task | When to Perform |
| Clean Frying Basket | After Use |
| Clean Crisping Tray | After Use |
| Check Four Rubber Tips | Before Use and After Cleaning |
| Wipe Air Fryer Body | When Needed, After Cooling |
| Inspect Power Cord and Plug | Before Use |
| Check Air Inlets and Outlet | Before Operation |
| Allow Appliance to Cool | Before Cleaning or Storage |
Important Maintenance Precautions
- Do not attempt to disassemble the air fryer.
- Do not use damaged electrical components.
- Keep the power cord and plug dry.
- Do not use abrasive cleaning products on the nonstick components.
- Make sure the crisping tray is correctly installed.
- Keep ventilation openings clear.
Common Operating Problems and Checks
The following checks address operating conditions described in the instructions.
| Problem or Condition | Possible Cause | Recommended Action |
| Air fryer does not heat | Timer dial has not been set. | Set the timer to the desired cooking time. |
| Air fryer does not heat | Frying basket is not fully closed. | Push the basket completely into the appliance. |
| Heating stops when basket is opened | Basket-open safety function has interrupted heating. | Reinsert the basket to resume heating. |
| Timer continues while basket is open | Normal timer operation. | Allow additional cooking time if needed. |
| HEAT ON light switches off during cooking | Selected temperature has been reached. | Normal temperature regulation. |
| Slight odor during first use | Normal initial heating condition. | The odor should disappear during initial use. |
| Food cooks unevenly | Food may need shaking or turning. | Check and shake or turn halfway through cooking. |
| Food is not browned sufficiently | Surface moisture or insufficient oil. | Dry food and apply a light coating of oil when appropriate. |
| Excess smoke while cooking fatty foods | Fat may accumulate in the basket. | Carefully empty accumulated fat between batches. |
| Appliance does not operate properly | Electrical circuit may be overloaded. | Operate the air fryer on a separate electrical circuit. |
| Appliance is damaged or malfunctions | Electrical or mechanical fault. | Stop use and arrange qualified servicing. |
BELLA Air Fryer Not Heating
The air fryer will not heat unless the timer is set and the frying basket is fully closed.
- Check that the basket is inserted completely.
- Confirm that the timer is set to a cooking duration.
- Check the electrical connection.
- Make sure the circuit is not overloaded.
If the appliance is damaged or continues to malfunction, unplug it and arrange qualified service.
BELLA Air Fryer Stops Heating When Opened
Heating stops automatically when the frying basket is removed.
This is normal operation.
Reinsert the basket to resume heating.
The timer continues counting down while the basket remains open.
BELLA Air Fryer HEAT ON Light Keeps Turning Off
The orange HEAT ON light turns off when the selected temperature has been reached.
The light and heating element cycle on and off to maintain the cooking temperature.
This behavior is normal.
BELLA Air Fryer Food Not Cooking Evenly
Some foods need to be shaken or turned during air frying.
To improve cooking results:
- Avoid overfilling the frying basket.
- Keep food below the two-thirds capacity limit.
- Shake or turn food halfway through cooking.
- Follow the recommended cooking chart.
- Adjust the cooking time if needed.
BELLA Air Fryer Produces a Slight Odor
A slight odor may occur during the first use.
The instructions describe this as normal and state that it does not affect the cooked food.
If the appliance malfunctions, it must be unplugged immediately and referred for qualified servicing.
Storage Instructions
The air fryer must be clean, dry, and completely cool before storage.
How to Store the BELLA Air Fryer
- Turn the timer dial to OFF.
- Unplug the power cord.
- Allow the appliance to cool completely.
- Clean the frying basket.
- Clean the crisping tray.
- Check that all components are dry.
- Reassemble the removable components.
- Store the air fryer in its original box or another clean, dry location.
Important:
- Never store the air fryer while it is hot.
- Do not store the appliance while wet.
- Keep the electrical components dry during storage.
BELLA 2 QT Air Fryer Recipes
The BELLA 2 QT Air Fryer Instruction Manual includes recipes for vegetables, potatoes, eggs, fish, chicken, baked foods, and desserts.
The following recipes use the temperatures and cooking times provided for this appliance.
Air Fried Sweet Potato Chips
Servings: 1–2
Ingredients
| Ingredient | Quantity |
| Large Sweet Potato | 1, approximately 2 cups |
| Vegetable Oil | 2 teaspoons |
| Cinnamon Sugar or Brown Sugar | Optional |
Cooking Instructions
- Wash the sweet potato and peel it if desired.
- Slice the potato into thin, even chips.
- Place the vegetable oil in a large bowl.
- Add the sweet potato slices and coat them evenly with oil.
- Transfer the slices to the frying basket.
- Set the temperature to 325°F.
- Air fry for 15 minutes, shaking halfway through.
- Increase the temperature to 350°F.
- Cook for another 5 minutes, shaking halfway through.
- Remove the chips and add cinnamon sugar or brown sugar if desired.
Hard-Cooked Eggs
Ingredients
| Ingredient | Quantity |
| Eggs | 6 |
Cooking Instructions
- Place the eggs in the air fryer.
- Set the temperature to 260°F.
- Cook for 13 minutes.
- Allow the eggs to cool until they can be handled.
Stuffed Rainbow Baby Bell Peppers
Ingredients
| Ingredient | Quantity |
| Poblano Pepper | 1 |
| Baby Bell Peppers | 8 |
| Vegetable Cream Cheese | ¼ cup |
| Fresh Parmesan Cheese, Grated or Shredded | ¼ cup |
| Milk | 2 tablespoons |
| Mixed Greens | 1 handful |
| Zaatar Seasoning | 1 teaspoon |
| Kosher Salt | 1 teaspoon |
A poblano pepper may be replaced with 1–2 jalapeños or one Cubanelle pepper.
Cooking Instructions
- Lightly spray the poblano pepper with oil.
- Air fry at 370°F for 13 minutes.
- Turn the pepper halfway through cooking.
- Allow it to cool.
- Remove its top, skin, and seeds, then chop it.
- Remove the tops and seeds from the baby bell peppers.
- Combine the chopped pepper, cream cheese, Parmesan, milk, mixed greens, seasoning, and salt.
- Fill each baby bell pepper with the mixture.
- Arrange the stuffed peppers inside the frying basket.
- Lightly spray with olive oil if desired.
- Air fry at 370°F for 8–10 minutes.
- Turn halfway through cooking and serve at room temperature.
Hasselback Potatoes
Ingredients
| Ingredient | Quantity |
| Medium Red or White Potatoes | 1–2 |
| Olive Oil | As Needed |
| Kosher or Sea Salt | To Taste |
| Shredded Cheese | Optional |
| Bacon Bits | Optional |
Cooking Instructions
- Wash the potatoes thoroughly.
- Peel them if desired.
- Cut narrow slits approximately ¼ inch apart.
- Keep the cuts approximately ¼ inch above the bottom of the potatoes.
- Brush the potatoes with olive oil.
- Set the air fryer to 370°F.
- Cook for 30 minutes.
- Brush with additional olive oil halfway through.
- Continue until the potatoes are fully cooked.
- Serve plain or with the preferred toppings.
Suggested toppings include cheese, bacon bits, butter, sour cream, chives, pesto, salsa, or olive tapenade.
Family Cornbread
Ingredients
| Ingredient | Quantity |
| Corn Muffin or Cornbread Mix | 1 box, 8 oz |
| Creamed Corn | Half of an 8 oz can |
| Shredded Pepper Jack or Cheddar Cheese | ½ cup |
| Egg | 1 |
| Salted Butter, Melted | 1 tablespoon |
| Sour Cream | 2 tablespoons |
Cooking Instructions
- Remove the crisping tray from the frying basket drawer.
- Whisk the egg in a medium mixing bowl.
- Add the cornbread mix, creamed corn, cheese, melted butter, and sour cream.
- Mix the ingredients thoroughly.
- Bake at 400°F for approximately 18–20 minutes.
- Check that the cornbread is golden brown and that a toothpick inserted into it comes out clean.
Fried Catfish Nuggets
Yield: Approximately 12 nuggets
Servings: 3–4
Ingredients
| Ingredient | Quantity |
| Catfish Fillet | ⅓–½ lb |
| Flour | ⅛ cup |
| Old Bay Seasoning | 1 tablespoon |
| Egg | 1 |
| Egg White | 1 |
| Seasoned Panko Breadcrumbs | ¾ cup |
| Olive Oil Spray | Optional |
Cooking Instructions
- Cut the catfish into approximately 10–12 nuggets.
- Season both sides with Old Bay seasoning.
- Set up three bowls containing flour, beaten egg and egg white, and breadcrumbs.
- Coat each fish piece with flour.
- Dip it into the egg mixture.
- Press breadcrumbs onto both sides.
- Place 4–5 nuggets in the frying basket, leaving space between them.
- Spray with olive oil if desired.
- Air fry at 400°F for 7–8 minutes.
- Turn the fish after approximately 3 minutes.
- Repeat with the remaining nuggets.
Fresh Hand-Cut French Fries
Servings: 1–2
Ingredients
| Ingredient | Quantity |
| Russet Potato | 1 |
| Vegetable Oil | 2 teaspoons |
| Kosher Salt | To Taste |
| Water for Brine | 6–8 cups |
| Salt for Brine | 4 tablespoons |
Cooking Instructions
- Cut the potato into fries approximately ¼ inch thick.
- Prepare a brine using the water and salt.
- Soak the cut potatoes for 1 hour or overnight.
- Remove the potatoes and dry them using a clean kitchen towel.
- Place vegetable oil in a large bowl.
- Add the potato pieces and coat them evenly.
- Transfer a portion of the potatoes to the frying basket.
- Set the air fryer to 325°F.
- Cook for 15 minutes, shaking halfway through.
- Increase the temperature to 350°F.
- Cook for another 10 minutes, shaking halfway through.
- Remove the fries and season with salt.
- Repeat with the remaining potatoes.
The recipe recommends cooking the fries in two batches.
Crisp and Juicy Chicken Tenders
Ingredients
| Ingredient | Quantity |
| Egg Whites | 2 |
| Water | ¼ cup |
| Seasoned Panko Breadcrumbs | ¾ cup |
| Chicken Tenders | 4, approximately 1¼ lb |
| Olive Oil Spray | Optional |
Cooking Instructions
- Lightly beat the egg whites with the water.
- Place the breadcrumbs on a plate.
- Dip each chicken tender into the egg mixture.
- Coat both sides with the breadcrumbs.
- Arrange the tenders in the frying basket with space between them.
- Spray with olive oil if desired.
- Set the air fryer to 350°F.
- Cook for 12 minutes, turning halfway through.
- Increase the temperature to 400°F.
- Cook for another 6 minutes, turning halfway through.
- Repeat with the remaining chicken tenders.
Check that the chicken is thoroughly cooked before serving.
Apple Turnovers with Vanilla Drizzle
Yield: 8 small turnovers
Ingredients
| Ingredient | Quantity |
| Prepared Puff Pastry Sheets, Thawed | 2 sheets, 5 × 5 inches each |
| Apple Pie Filling | ½ cup |
| Golden Raisins | 3 teaspoons, optional |
Vanilla Drizzle
| Ingredient | Quantity |
| Confectioners’ Sugar | ½ cup |
| Milk | 1 tablespoon |
| Vanilla Extract | ¼ teaspoon |
Cooking Instructions
- Mix the vanilla drizzle ingredients in a small bowl.
- Unfold the thawed pastry on a lightly floured surface.
- Place approximately 1 tablespoon of apple filling in the center of each pastry square.
- Add raisins if desired.
- Fold the pastry into triangles.
- Seal the edges using a fork.
- Place four turnovers in the frying basket.
- Set the air fryer to 400°F.
- Cook for 5 minutes.
- Remove the turnovers and allow them to cool.
- Repeat with the remaining turnovers.
- Drizzle the vanilla icing over the turnovers.
Cherry Turnover Variation
Cherry pie filling may be substituted for apple filling.
The turnovers can also be topped with chocolate drizzle prepared from confectioners’ sugar, unsweetened cocoa powder, milk, and vanilla extract.
Warranty Information
The BELLA 17160 Air Fryer is covered by a limited warranty provided by SENSIO Inc.
The warranty applies to qualifying defects in materials and workmanship from the original date of purchase.
Warranty Coverage
| Warranty Detail | Information |
| Warranty Provider | SENSIO Inc. |
| Mechanical Defects | 2 Years |
| Non-Mechanical Parts | 90 Days |
| Warranty Holder | Original Retail Purchaser |
| Transferable | No |
| Proof of Purchase | Original Sales Receipt Required |
For an eligible claim, SENSIO Inc. may repair the product, replace it, or provide a refund at its discretion.
Warranty Exclusions
The warranty does not cover:
- Normal wear of parts.
- Negligent use.
- Incorrect electrical voltage or current.
- Improper routine maintenance.
- Use contrary to the operating instructions.
- Unauthorized disassembly.
- Repairs or alterations by unqualified personnel.
- Damage caused by events such as fires, floods, hurricanes, or tornadoes.
The warranty is not transferable.
Additional legal rights and limitations may vary by state, province, or jurisdiction.
How to Request Warranty Service
- Contact Customer Service at 1-866-832-4843.
- Explain the product problem.
- Follow the representative’s troubleshooting instructions.
- If the problem cannot be resolved by telephone, obtain a case number.
- Follow the product return instructions provided by Customer Service.
- Attach a tag containing the required customer and product information.
- Include a copy of the original sales receipt.
- Package the product carefully.
- Send the product according to the supplied instructions, with shipping and insurance prepaid.
The return tag must include:
- Customer name.
- Address.
- Daytime telephone number.
- Case number.
- Description of the problem.
SENSIO Inc. does not accept responsibility for returned products while they are in transit to its Customer Service Center.
Customer Support Information
For questions about operating the air fryer, damaged components, product malfunctions, or warranty claims, contact BELLA Customer Service.
| Contact Detail | Information |
| Brand | BELLA |
| Website | https://www.bellahousewares.com |
| Customer Support Email | help@bellahousewares.com |
| Customer Support Phone | 1-866-832-4843 |
| Warranty Provider | SENSIO Inc. |
| Company Location | New York, NY 10016, USA |
Product registration and customer feedback are available through the BELLA website.
Frequently Asked Questions
How do I use the BELLA 17160 2 QT Air Fryer?
Place the crisping tray inside the frying basket, add food without filling the basket more than two-thirds full, and close the basket completely. Plug the appliance into a 120V AC outlet, select a temperature between 175°F and 400°F, and set the timer. Add 3 minutes for preheating when the air fryer is cold. The appliance automatically turns off when the timer reaches zero.
How do I preheat the BELLA 2 QT Air Fryer?
The operating instructions recommend adding 3 minutes to the selected cooking time when starting with a cold air fryer. For example, food requiring 12 minutes may be cooked using a 15-minute timer setting to account for preheating.
Why is my BELLA 17160 air fryer not heating?
The air fryer will not heat if the timer has not been set or the frying basket is not fully closed. Check that the basket is correctly inserted and the timer has been turned to the desired cooking duration. If the appliance is damaged or malfunctions, stop using it and arrange qualified service.
Why does the HEAT ON light turn off during cooking?
The orange HEAT ON light turns off when the selected temperature is reached. The heating element and indicator light cycle on and off to maintain the chosen temperature. Heating also stops when the frying basket is opened, although the timer continues counting down.
What temperature should I use for French fries in the BELLA air fryer?
For fresh, hand-cut French fries, the cooking chart recommends 325°F for 15 minutes, followed by 350°F for 10–15 minutes. For thin frozen French fries, the recommended setting is 400°F for 12–16 minutes. Thick frozen fries are listed at 400°F for 17–21 minutes.
Can the BELLA 17160 frying basket and crisping tray go in the dishwasher?
Yes. The frying basket and crisping tray are dishwasher-safe. For best results, place them on the upper dishwasher rack. The components must be completely cool before cleaning, and all four rubber tips on the crisping tray must be securely attached before reuse.
How do I turn off the BELLA 17160 air fryer?
Turn the timer dial to 0 (OFF) to stop operation at any time. The appliance also switches off automatically when the countdown timer reaches zero and sounds one beep. Unplug the power cord when the air fryer is not in use.