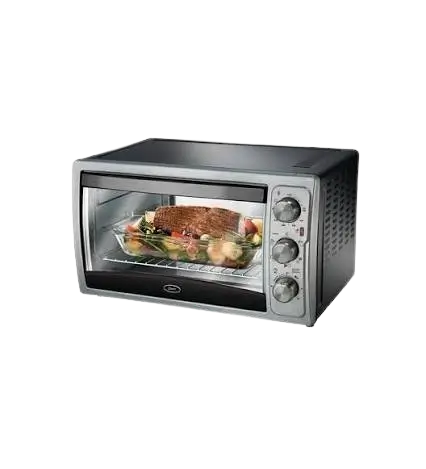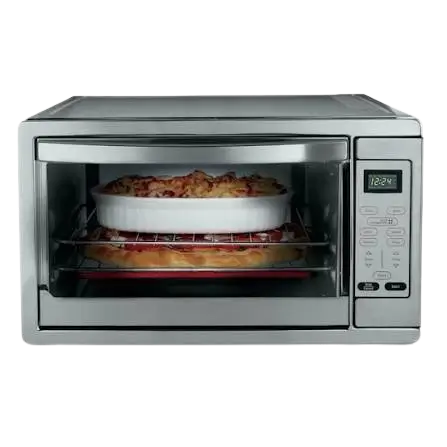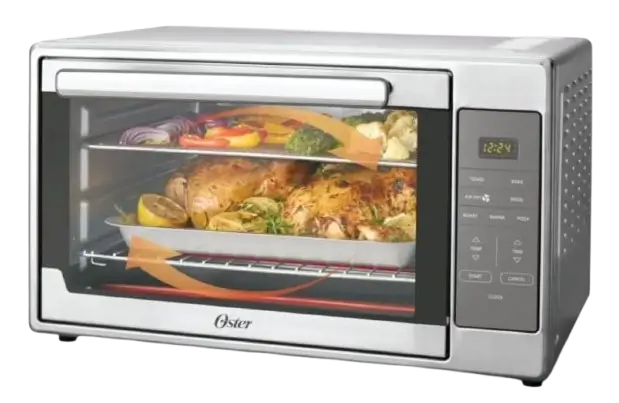
Oster Extra Large Digital Air Fry Oven TSSTTV-ELXLDAF3
The Oster Extra Large Digital Air Fry Oven TSSTTV-ELXLDAF3 is a household countertop oven with a digital time display and seven preset functions: Bake, Toast, Broil, Warm, Air Fry, Roast and Pizza. It has three rack positions and comes with an air fry rack, baking pan, wire rack (also used as a broil rack) and removable crumb tray. Accessories included depend on the model purchased.
Bake, Air Fry, Roast and Pizza preheat before cooking. Toast, Broil and Warm do not. It runs on a 120 Volt AC outlet and is intended for household countertop use only.
Parts and Controls
Oven Parts
| No. | Part |
|---|---|
| 1 | Air Fry Rack |
| 2 | Baking Pan |
| 3 | Wire Rack / Broil Rack |
| 4 | Crumb Tray / Cookie Sheet |
| 5 | Three Rack Positions |
| 6 | Glass Door |
| 7 | Control Buttons |
| 8 | Time Display |
| 9 | Handle |
Controls Named in the Instructions
The instructions refer to these controls by name:
- Clock button: sets the time of day.
- Arrow keys: set the hour and minutes when setting the clock.
- Temp arrow keys: select the cooking temperature.
- Timer (time) arrow keys: select the cooking time. In Toast, they select the toast shade.
- Function buttons: Bake, Toast, Broil, Warm, Air Fry, Roast and Pizza.
- Start button: begins heating or cooking.
- Cancel button: cancels the current function.
The time display shows PrE while the oven preheats.
Important Safety Information
Read all instructions before using the oven. Key precautions from the safeguards:
- The appliance gets hot during use. Do not touch hot surfaces. Use handles or knobs, and protect your hands with non-slip oven mitts or similar.
- Do not place or immerse the cord, plug or appliance in water or other liquid.
- The appliance is not intended for use by children or by persons with reduced physical, sensory or mental capabilities, or lack of experience and knowledge. Close supervision is necessary when it is used near children. Keep the appliance and its cord out of reach of children.
- Unplug the oven when it is not in use, before putting on or taking off parts, and before cleaning. Let it cool first. To disconnect, turn any control to OFF, then unplug by grasping the plug. Do not pull on the cord.
- Do not operate the oven with a damaged cord or plug, or after it malfunctions or is damaged in any way. Do not replace or splice a damaged cord.
- Use only manufacturer-recommended accessories. Do not use outdoors or for commercial purposes.
- Keep 6 inches (152 mm) clear from the wall and on all sides. Use the oven on a dry, stable, level surface, away from wet surfaces and heat sources such as a hot gas or electric burner or a heated oven.
- Do not let the cord hang over the edge of a table or counter or touch hot surfaces.
- Use extreme caution when moving the appliance or removing a pan containing hot oil or other hot liquids.
- Do not insert oversize foods or metal utensils.
- Do not cover the oven or let it touch or sit near flammable materials such as curtains, draperies, towels or walls while it operates. Do not store any item on top of it while it operates.
- Do not clean with metal scouring pads.
- Use extreme caution with containers made of materials other than metal or glass.
- Do not place paper, cardboard, plastic or any material that may catch fire or melt in the oven. Do not store materials other than manufacturer-recommended accessories in the oven when it is not in use.
- Do not cover the crumb tray or any part of the oven with metal foil. This causes overheating.
- Empty the crumb tray after each use.
- The glass door is tempered glass. Inspect it for chips, cracks or other damage. Do not use the oven if the glass door is damaged, because the glass may shatter during use.
- If your oven has a STAY-ON feature, it stays on if the knob is turned counterclockwise past zero. Use caution and do not operate it unattended for long periods.
- Do not use the oven with a programmer, timer, wireless plug adapter or outlet that allows remote control. Do not connect it to a circuit that is regularly switched on and off by the utility.
Power Cord and Plug
A short power-supply cord is provided to reduce the risk of tangling or tripping. If you use a longer detachable cord or an extension cord:
- Its marked electrical rating must be at least as great as the appliance’s rating.
- Arrange it so it does not drape over the countertop or tabletop, where it could be pulled on by children or tripped over.
- If the appliance is the grounded type, use a grounding-type 3-wire cord.
Do not pull, twist or otherwise abuse the cord.
North American models have a polarized plug, with one blade wider than the other. It fits a polarized outlet only one way. If it does not fit fully, reverse the plug. If it still does not fit, contact a qualified electrician. Do not defeat this safety feature or modify the plug. If the plug fits loosely or the outlet feels warm, do not use that outlet.
Product Notices
- Some countertop and table surfaces cannot withstand prolonged heat. Do not set the heated unit on a finished wood table. A hot pad or trivet under the oven is recommended.
- Slight smoke or odor during initial use is normal with many heating appliances and will not recur after a few uses.
Getting Started
Preparing the Oven for First Use
- Remove any stickers from the surface of the oven.
- Open the oven door and remove all printed documents and paper from inside.
- Clean the air fry rack, wire rack, baking pan and removable crumb tray with hot water, a small amount of dishwashing liquid and a non-abrasive sponge or cleaning pad. CAUTION: DO NOT IMMERSE THE BODY OF THE UNIT IN WATER.
- Dry the unit thoroughly before using.
- Choose a spot in an open area on a flat counter where the plug will reach an outlet.
- Plug the oven into a 120 Volt AC electrical outlet.
Note: Heating the oven at 450° for approximately 15 minutes is recommended to eliminate any manufacturing residue that may remain after shipping.
Setting the Clock
- Push the Clock button. The clock flashes.
- Use the arrow keys to set the hour. Push the Clock button again.
- Use the arrow keys to set the minutes.
- Push the Clock button once more. The time is set.
Oven Functions Overview
| Preset | Preheat | Rack Position |
|---|---|---|
| Bake | Yes | Middle |
| Toast | No | Middle |
| Broil | No | Top |
| Warm | No | Bottom |
| Air Fry | Yes | Middle |
| Roast | Yes | Bottom |
| Pizza | Yes | Middle |
The Air Fry row shows the air fry rack. Toast and Pizza show the wire rack. Roast shows the baking pan over the wire rack.
Using Your Oven
Opening the Oven Door
- Grab the center of the handle underhanded with your fingertips.
- Pull the oven door down carefully.
CAUTION: The appliance generates heat during use. Do not touch hot surfaces. Always use the handle or knobs.
Preheating the Oven
- Place the oven rack into the desired position before heating the oven.
- Select the desired cooking function.
- Use the temp arrow keys to select the desired temperature.
- Use the timer arrow keys to select the desired time.
- Select the Start button.
While preheating, the display shows PrE. When the oven reaches the desired temperature, it beeps. Press the Start button to begin cooking.
The preheat feature is available in Bake, Air Fry, Pizza and Roast. To bypass preheating, press the Start button a second time.
Using Bake, Air Fry, Broil, Roast, Pizza or Warm
- Select the desired oven rack position (see Oven Functions Overview).
- Arrange food on the wire rack, air fry rack or baking pan, or in the cookie sheet.
- Select the desired cooking function.
- Use the temperature arrow keys to select the temperature and the time arrow keys to select the time.
- Select the Start button.
When cooking is complete, open the door fully and remove food carefully.
Note: When air frying foods with high amounts of fat or grease, place the wire rack with the baking pan on top in the bottom rack position to catch drippings during the cooking cycle.
WARNING: Cooked food can be very hot. Handle with care. Do not leave the oven unattended.
Using the Toast Function
- Place the wire rack into the middle rack position before heating the oven.
- Select the Toast button.
- Use the time arrows to select the toast shade.
- Press the Start button.
When toasting is complete, open the door fully and remove food carefully.
Note: Different types of bread need different settings. Lighter breads and waffles need a lighter setting. Darker breads, muffins and English muffins need a darker setting.
WARNING: Cooked food can be very hot. Handle with care. Do not leave the oven unattended.
Baking Pan Position
The baking pan can sit on top of the rack or slide into the guide rails below the rack. Let the unit cool before removing the pan.
- Baking: Place the baking pan on top of one of the racks.
- Broiling: Insert the baking pan into the guide rails below the rack and place the food on top of the rack.
Please note: Do not use the baking pan under the wire rack in the lower position.
Air Fry Chart
| Food | Weight | Function | Temperature (°F) | Time | Oil? |
|---|---|---|---|---|---|
| Potatoes | |||||
| Hand-Cut Fries | 2 lbs | Air Fry | 425 | 20–22 min | Yes |
| Hand-Cut Sweet Potato Fries | 2 lbs | Air Fry | 425 | 19–21 min | Yes |
| Frozen Fries (Thick Cut) | 1.5 lbs | Air Fry | 450 | 10–13 min | No |
| Frozen Fries (Thin Cut) | 1.5 lbs | Air Fry | 450 | 10–12 min | No |
| Meat/Poultry/Seafood | |||||
| Chicken Wings | 2 lbs | Air Fry | 400 | 35 min | No |
| Chicken Breast Cutlet | 2.5 lbs | Air Fry | 450 | 27–30 min | Yes |
| Chicken Tenderloin | 1.5 lbs | Air Fry | 400 | 25–30 min | Yes |
| Hamburger | 1.5 lbs | Air Fry | 450 | 18–22 min | No |
| Pork Chops | 4 lbs | Air Fry | 450 | 20–25 min | Yes |
| Breaded Fish | 1 lb | Air Fry | 425 | 18–22 min | Yes |
| Frozen Snacks | |||||
| Frozen Chicken Nuggets | 1.5 lbs | Air Fry | 450 | 15–18 min | No |
| Frozen Chicken Fingers | 1.5 lbs | Air Fry | 425 | 18–20 min | No |
| Frozen Mozzarella Sticks | 1.5 lbs | Air Fry | 425 | 8–10 min | No |
| Frozen Onion Rings | 1 lb | Air Fry | 425 | 7–8 min | No |
| Frozen Mixed Vegetables | 1.5 lbs | Air Fry | 450 | 35–40 min | Yes |
| Fresh Vegetables | |||||
| Broccoli | 2 lbs | Air Fry | 425 | 18–24 min | Yes |
| Asparagus | 2 lbs | Air Fry | 425 | 18–24 min | Yes |
| Brussels Sprouts | 2 lbs | Air Fry | 425 | 20–25 min | Yes |
| Carrots | 1 lb | Air Fry | 400 | 20–25 min | Yes |
Cook times are estimates and may vary based on food type and preparation. Not all foods benefit from being tossed in oil before air frying. Frozen foods and high-fat foods such as chicken wings or bacon do not need oil. To get crispy, browned results on foods such as hand-cut fries or vegetables, coat the food evenly with about one tablespoon of oil.
Care and Cleaning
Cleaning the Oven
- Unplug the oven and let it cool.
- Wipe the oven with a damp cloth, using only mild, soapy water. CAUTION: DO NOT IMMERSE IN WATER!
- Clean the air fry rack, baking pan, wire rack and removable crumb tray with hot water, a small amount of dishwashing liquid and a non-abrasive sponge or cleaning pad.
- Empty the crumb tray frequently so crumbs do not accumulate.
Abrasive cleaners, scrubbing brushes and chemical cleaners damage the coating on the unit. The appliance has no user-serviceable parts. Any servicing beyond the cleaning described should be done only by an Authorized Service Representative.
Storing the Oven
Let the oven cool completely before storing it. If you will store it for a long period, make sure it is clean and free of food particles. Store it in a dry location such as a table, countertop or cupboard shelf. No user maintenance is needed beyond the recommended cleaning.
Troubleshooting
| Problem | Potential Cause | Solution |
|---|---|---|
| Overcooked / undercooked foods | Incorrect temperature or time setting | Adjust the time and temperature to your preferred taste. The countertop oven is smaller than a regular oven, so it heats faster and generally cooks in shorter periods of time. |
| Overcooked / undercooked foods | Rack placement | See Oven Functions Overview. The rack may need adjusting for the food type. |
| Burnt smell | Food build-up inside the oven, on the heating elements or in the crumb tray | See the Cleaning section. |
| Oven does not turn on | Unit is unplugged | Plug the oven into a 120-volt AC electrical outlet. Set the timer and temperature to the desired setting. Both must be set for the oven to operate. |
| Oven does not turn on | Start was not pressed | Press Start. |
| Only one heating element is heating up | The function setting determines which heating element operates | When toasting, make sure the oven is not set to the Broil setting. |
| Heating elements do not stay on | Heating elements cycle on and off to maintain proper heat | Be certain the function is as desired. Heating elements may not glow. |
| Cannot change function button | The current function needs to be canceled | Press Cancel. |
Warranty and Support
Sunbeam Products, Inc. provides a 1 Year Satisfaction Guaranteed warranty. For one year from the date of purchase, the product is guaranteed to be free from defects in material and workmanship. Sunbeam, at its option, will repair or replace the product or any defective component. The guarantee covers the original retail purchaser only and is not transferable. Keep the original sales receipt, because proof of purchase is required.
Do not attempt to repair or adjust any electrical or mechanical function, because doing so voids the guarantee.
For guarantee service in the U.S.A., call 1-800-334-0759, and a convenient service center address will be provided. Do not return the product to the place of purchase. Product questions can also go to Sunbeam Consumer Service at 1.800.334.0759 or www.oster.com.
Frequently Asked Questions
How do I set the clock on the Oster TSSTTV-ELXLDAF3?
Push the Clock button, and the clock starts flashing. Use the arrow keys to set the hour, then push the Clock button again. Use the arrow keys to set the minutes, then push the Clock button one more time to lock in the time.
What should I do before using the oven for the first time?
Remove any stickers from the outside and take all printed documents and paper out of the oven. Wash the air fry rack, wire rack, baking pan and crumb tray with hot water, a little dishwashing liquid and a non-abrasive sponge. Never immerse the oven body in water. Dry everything thoroughly, then place the oven on a flat counter near an outlet and plug it into a 120 Volt AC outlet. Heating the empty oven at 450° for about 15 minutes is recommended to burn off manufacturing residue left from shipping. A little smoke or odor during first use is normal and should not return after a few uses.
How do I open the oven door safely?
Grab the center of the handle from underneath with your fingertips, then pull the door down carefully. Use only the handle or knobs, because the oven’s surfaces are hot during use. Protecting your hands with non-slip oven mitts is also advised.
What does PrE mean on the display, and can I skip preheating?
PrE means the oven is preheating. When it reaches your selected temperature, it beeps. Press Start again to begin cooking. Preheating applies to Bake, Air Fry, Pizza and Roast. If you would rather not wait, press Start a second time to bypass preheating. Toast, Broil and Warm do not preheat.
Which rack and accessory should I use for air frying?
Use the middle rack position with the Air Fry function. The Oven Functions table shows the air fry rack for this setting. For foods with a lot of fat or grease, place the wire rack with the baking pan on top in the bottom rack position to catch drippings during cooking. Air fry the food, then open the door fully and remove it carefully, since cooked food can be very hot.
How do I toast bread, and how do I choose the shade?
Put the wire rack in the middle rack position, press the Toast button, use the time arrows to choose the toast shade, then press Start. Lighter breads and waffles need a lighter setting. Darker breads, muffins and English muffins need a darker setting. Toast does not preheat.
Where does the baking pan go for baking and broiling?
For baking, set the baking pan on top of one of the racks. For broiling, slide the baking pan into the guide rails below the rack and put the food on top of the rack. Let the oven cool before removing the pan. Do not use the baking pan under the wire rack in the lower position.
Do I need to use oil when air frying?
Not always. Frozen foods and high-fat foods such as chicken wings or bacon do not need oil. For crispy, browned hand-cut fries or vegetables, evenly coat the food with about one tablespoon of oil. The Air Fry Chart marks each food with a Yes or No for oil. Chart cook times are estimates and may vary with the food type and how it is prepared.
Why won’t my oven turn on?
First confirm the oven is plugged into a 120-volt AC outlet. Then set both the timer and the temperature, because both must be set for the oven to operate. Finally, press Start, since the oven will not begin heating until you do.
Why is only one heating element heating up, or why do the elements turn off?
The selected function decides which heating element operates, so it is normal for only one element to heat. If you are toasting, make sure the oven is not set to Broil. The heating elements also cycle on and off to hold the right temperature, and they may not glow even while the oven is working. If the function is not what you wanted, press Cancel to change it.
How do I clean the oven, and can I use foil in it?
Unplug the oven and let it cool, then wipe it with a damp cloth and mild soapy water. Wash the air fry rack, baking pan, wire rack and crumb tray with hot water, dishwashing liquid and a non-abrasive sponge. Never immerse the oven in water. Abrasive cleaners, scrubbing brushes and chemical cleaners damage the coating, and metal scouring pads are not allowed. Do not cover the crumb tray or any part of the oven with metal foil, because this causes overheating. Empty the crumb tray after each use.
What should I do if the oven gives off a burnt smell?
A burnt smell usually points to food build-up inside the oven, on the heating elements or in the crumb tray. Unplug the oven, let it cool completely, and clean it as described in the care instructions, emptying the crumb tray too. A slight smoke or odor during the first few uses of a new oven is separate and is considered normal.