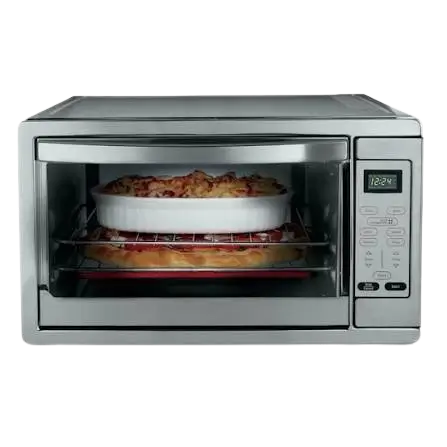
Oster Digital Countertop Oven TSSTTVDFL1
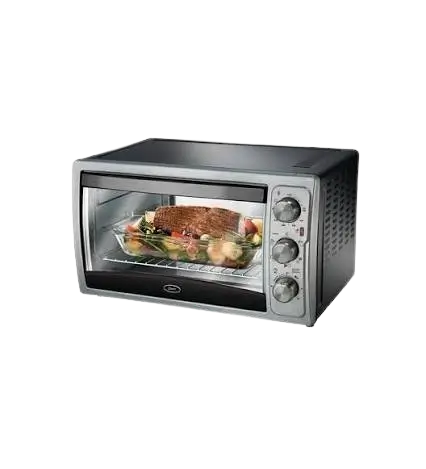
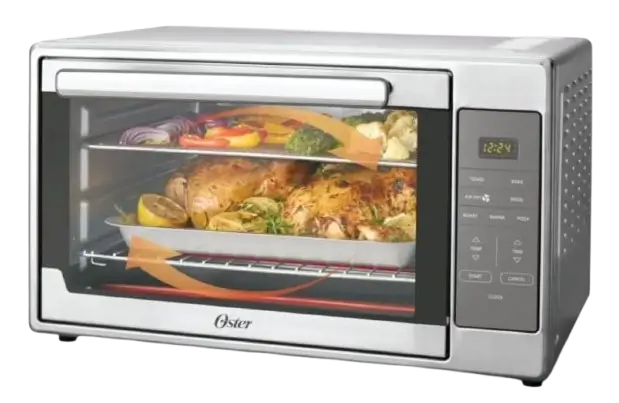
The Oster Digital Countertop Oven TSSTTVDFL1 is a household countertop oven with an LCD display and three knobs: one for function, one for time and one for temperature. It has ten cooking functions: Toast, Bagel, Pizza, Bake, Broil, Cookies, Roast, Warm, Defrost and Reheat. Toast and Bagel use a 1–7 color shade setting. The other functions use a set time and temperature. A Turbo Convection Heat button turns on a built-in fan that circulates hot air in the oven chamber. The oven has two rack positions, a removable crumb tray, a tempered glass door and a combined baking pan/cookie sheet with a broil rack. It is for household use only.
Important Safeguards
Read all instructions, product labels and warnings before using the oven, and save the instructions.
Handling and Hot Surfaces
- Do not touch hot surfaces. Use oven mitts when handling hot materials, and let metal parts cool before cleaning.
- Use the oven handles when moving the unit.
- When the unit is not in use and before cleaning, press the “Start/Cancel” button and unplug the oven. Let it cool thoroughly before putting in or taking off parts.
- Use extreme caution when removing the pan or disposing of hot grease or other hot liquids.
Placement and Fire Prevention
- Pull the oven out a minimum of 6 inches from the wall or other cords while it is in use.
- A fire may occur if the oven is covered or touches flammable materials such as curtains, draperies or walls while operating. Do not store items on top of the appliance while it is operating.
- Do not place the appliance near a hot gas or electric burner, or in a heated oven.
- Do not place flammable materials such as paper, cardboard or plastic, or anything that may catch fire or melt, in the oven.
- Do not store anything other than the manufacturer’s recommended accessories in the oven when it is not in use.
- Do not use outdoors or for commercial purposes.
Cookware, Foil and Utensils
- Use extreme caution with containers made of material other than metal or glass.
- Do not cover the oven tray or rack with metal foil. This will cause the appliance to overheat.
- Do not insert oversized foods or metal utensils. They may create a fire or risk of electrical shock.
- Do not use attachments the manufacturer does not recommend. They may cause fire, electric shock or personal injury.
- Do not clean with metal scouring pads. Pieces can break off and touch electrical parts, which risks electrical shock.
Cord, Plug and Electrical Safety
- Do not immerse the cord, plug or appliance in water or any other liquid.
- Do not operate the oven with a frayed or damaged cord or plug, after it malfunctions, or after it has been dropped or damaged in any way. Return it to the nearest Authorized Sunbeam Appliance Service Center for examination, repair or electrical or mechanical adjustment.
- Do not let the cord dangle over the edge of a tabletop or countertop, or touch hot surfaces.
- A short power-supply cord is provided to reduce the risk of entanglement or tripping. If you use an extension cord, its electrical rating must be at least as great as the oven’s. Arrange it so it does not drape over the countertop or tabletop where children could pull it or someone could trip on it.
- For products purchased in the United States and Canada only: the plug is polarized, with one blade wider than the other. It fits a polarized outlet only one way. If it does not fit fully, reverse the plug. If it still does not fit, contact a qualified electrician. Do not try to defeat this safety feature.
Children
Close supervision is necessary whenever any appliance is used near children. This appliance is not for use by children.
Parts and Controls
Product Diagram
| No. | Part | Function |
|---|---|---|
| 1 | LCD Display | Shows function, shade, time, Turbo icon and temperature |
| 2 | Function Selector Knob | Turn to select the cooking function |
| 3 | Start/Cancel Button | Press to turn the appliance off |
| 4 | Turbo Convection Heat Button | Activates or cancels turbo convection heat |
| 5 | Time Control Knob | Adjusts the time |
| 6 | Temperature Control Knob | Adjusts the thermostat to the desired temperature |
| 7 | Removable Wire Rack | See the rack positioning section below |
| 8 | Tempered Glass Door | Front viewing of food |
| 9 | Two Rack Positions | Upper and lower rack guides |
| 10 | Removable Crumb Tray | Collects crumbs and fallen food particles; pulls out for cleaning |
| 11 | Baking Pan/Cookie Sheet in One and Broil Rack | For baking, broiling and grilling |
| 12 | Easy Clean Interior Walls | Allow fast cleanup |
LCD Display
The LCD has these areas:
- Functions indicator: Toast, Bagel, Pizza, Bake, Broil, Cookies, Roast, Warm, Defrost, Reheat
- Function indicator arrow: moves from function to function as you turn the Function Selector Knob
- Color shade setting indicator: 1–7
- Time indicator
- Turbo Convection Heat icon
- Temperature indicator
Before First Use
- Remove any stickers from the surface of the oven.
- Open the oven door and remove all printed documents and paper from inside.
- Clean the rack and pan with hot water, a small amount of dishwashing liquid and a nonabrasive sponge or cleaning pad. Do not immerse the cord, plug or body of the unit in water.
- Dry the unit thoroughly.
- Choose a location in an open area on a flat counter where the plug will reach an outlet.
- Plug the oven into an electrical outlet.
Basic Operation
Powering On and Display Wake-Up
When you plug the oven in, it emits two long beeps and the LCD lights up. The indicator is on the preset Toast function. The LCD and the Start/Cancel button light stay lit for 30 seconds, then go out if you do not press or turn anything. After the blue display goes out, press any button or move any knob to wake it and operate as normal.
Setting a Cooking Cycle
- Select the function. Turn the Function Knob to one of the 10 options: Toast, Bagel, Pizza, Bake, Broil, Cookies, Roast, Warm, Defrost or Reheat.
- Set the time. Turn the Time Knob to increase or decrease the cooking time. The maximum time setting is 60 minutes.
- Set the temperature. Turn the Temperature Knob to raise or lower the setting.
- Start. Press Start/Cancel. The red Start/Cancel light comes on, the LCD shows the function, countdown time and selected temperature, and the timer starts counting down.
If you do not start the cooking process or touch a control within 30 seconds, the blue backlight and the Start/Cancel button light turn off. When a cycle finishes, the oven emits 3 beeps, and the LCD and Start/Cancel light turn off after 30 seconds. To cancel a cycle at any time, press Start/Cancel once. The red light turns off whenever a function finishes or is manually canceled. The Start/Cancel button also turns the appliance off.
Turbo Convection Heat
Turbo Convection Heat turns on a built-in fan that circulates hot air in the oven chamber, cooking food faster and more evenly. Press the Turbo button to turn it on or off. The button’s blue light shows when it is on.
- On automatically: Pizza, Bake, Cookies and Roast. Press the Turbo button once to switch to the regular function.
- Off by default: Warm, Defrost and Reheat. Press the Turbo button once to turn it on manually.
Cooking Functions
Function Settings at a Glance
| Function | Default temperature | Default time | Temperature range | Turbo Convection Heat |
|---|---|---|---|---|
| Toast | Not adjustable | Set by shade | Not adjustable | Not stated |
| Bagel | Not adjustable | Set by shade | Not adjustable | Not stated |
| Pizza | 400ºF | 16 minutes | 350 to 450ºF, 25-degree increments | On automatically |
| Bake | 325ºF | 30 minutes | 150 to 450ºF, 5-degree increments | On automatically |
| Broil | 450ºF | 10 minutes | 400 to 450ºF, 25-degree increments | Not stated |
| Cookies | 350ºF | 11 minutes | 150 to 450ºF, 5-degree increments | On automatically |
| Roast | 350ºF | 60 minutes | 150 to 450ºF, 5-degree increments | On automatically |
| Warm | 150ºF | 60 minutes | 150 to 200ºF, 25-degree increments | Manual |
| Defrost | 450ºF | 16 minutes | 150 to 450ºF, 5-degree increments | Manual |
| Reheat | 325ºF | 15 minutes | 150 to 450ºF, 5-degree increments | Manual |
The maximum time setting for every function with adjustable time is 60 minutes (1 hour).
Toast and Bagel
- Turn the Function Knob to Toast or Bagel. The 1–7 color shade indicator appears on the LCD. Both the upper and lower heating elements heat.
- Turn the Time Knob to adjust the shade. The indicator shows your selection as you turn the knob.
- Press Start/Cancel. The LCD shows the function, shade and countdown time. The oven beeps 3 times when finished.
The default shade is 4. It returns to 4 each time you unplug the oven and plug it back in. If the oven stays plugged in, it remembers the last shade you selected for that function, even if you did not run it. Temperature is not adjustable for Toast or Bagel. Time adjusts automatically with the shade setting, and neither temperature nor time can be adjusted during these functions.
The top rack position is recommended for toasting and bagel toasting. For best results with bagels, toast with the cut side up.
Pizza, Bake, Cookies and Roast
These four functions work the same way.
- Turn the Function Knob to the function. Turbo Convection Heat activates automatically.
- To use the regular function instead, press the Turbo button once. The blue light turns off.
- Turn the Temperature Knob and Time Knob if you want to change the defaults in the table above.
- Press Start/Cancel. The LCD shows the function, countdown time and temperature.
Broil
Broil heats with the upper heating elements. The default is 450ºF for 10 minutes. Set the temperature from 400 to 450ºF in 25-degree increments. Set the time with the Time Knob, up to 60 minutes, then press Start/Cancel.
Warm, Defrost and Reheat
Warm heats with the lower heating element. Turbo Convection Heat is off by default for Warm, Defrost and Reheat. Press the Turbo button once to turn it on. Then set temperature and time using the table above and press Start/Cancel.
Positioning the Rack
The oven has two rack positions, the upper and lower rack guides. The rack fits into either one.
- Let the unit cool before removing the rack.
- Open the oven door and pull the rack toward the front. It slides on the rack guides inside the oven.
- Use caution. The rack may tilt downward when pulled out, causing food to shift.
Rack position depends on the food’s size and the browning you want. Use the lower position to prevent top browning and the upper position to prevent bottom burning. For best toasting results, use the upper rack guide.
Cleaning and Storage
Cleaning
Do not immerse the oven in liquids.
- Press Start/Cancel to turn the oven off, unplug it and let it cool.
- Wipe the unit with a damp cloth. Use only mild, soapy water. Abrasive cleaners, scrubbing brushes and chemical cleaners will damage the coating.
- Pull the crumb tray out of the oven.
- Shake crumbs off the tray. Cleaning it often avoids buildup.
- Remove the wire rack and clean it with a damp cloth or place it on the top rack of a dishwasher.
Storage
Let the oven cool completely before storing it. If you will store it for a long time, make sure it is clean and free of food particles. Store it in a dry location such as a table, countertop or cupboard shelf. Other than the recommended cleaning, no further user maintenance should be necessary.
Warranty and Support
The oven carries a 5 Year Satisfaction Guarantee. For five years from the date of purchase, Sunbeam Products, Inc. doing business as Jarden Consumer Solutions (or Sunbeam Corporation (Canada) Limited in Canada) warrants the product to be free from defects in material and workmanship. The company will repair or replace the product or any defective component, at its option. Do not try to repair or adjust any electrical or mechanical functions, as doing so voids the guarantee. The guarantee is valid for the original retail purchaser and is not transferable. Keep the original sales receipt, because proof of purchase is required.
- U.S.A.: 1-800-334-0759
- Canada: 1-800-667-8623
- Website: www.oster.com
Callers are given a convenient service center address. The manual says not to return the product to the company’s addresses or the place of purchase.
Frequently Asked Questions
What should I expect when I first plug in the oven?
The oven emits two long beeps and the LCD lights up with the indicator on the preset Toast function. The LCD and the Start/Cancel button light stay on for 30 seconds, then go out if you do not touch any control. Pressing any button or turning any knob wakes the display again.
Why did the display and Start/Cancel light go dark?
Nothing is wrong. If you do not start a cooking cycle or touch a button or knob within 30 seconds, the blue backlight and the Start/Cancel light turn off. Press any button or move any knob to wake the display, then continue setting up your cycle.
How do I change the temperature for Toast or Bagel?
You can’t. Temperature is not adjustable for either function, and time adjusts automatically with the shade setting. Turn the Time Knob to pick a shade from 1 to 7. The default is 4, and it resets to 4 whenever the oven is unplugged and plugged back in. If it stays plugged in, it remembers your last shade for that function.
Which functions use Turbo Convection Heat by default?
Pizza, Bake, Cookies and Roast turn Turbo Convection Heat on automatically. Press the Turbo button once if you want the regular version. Warm, Defrost and Reheat start with it off, and you can press the Turbo button once to turn it on. The button’s blue light shows when the fan function is active.
Which heating elements does each function use?
The manual states this for four functions. Toast and Bagel heat with both the upper and lower elements, Broil uses the upper elements, and Warm uses the lower element. It does not say which elements the other functions use.
Which rack position should I use?
Use the upper rack guide for toasting and for bagels. More generally, move the rack to the lower position to prevent top browning, and to the upper position to prevent bottom burning. The best choice depends on the food’s size and how much browning you want.
Can I cover the rack or pan with foil?
No. Covering the oven tray or rack with metal foil causes the appliance to overheat. Do not put paper, cardboard, plastic or other flammable or meltable materials in the oven, and use extreme caution with containers made of anything other than metal or glass.
How much space does the oven need around it?
Pull the oven out at least 6 inches from the wall or other cords while it is in use. Do not cover it, let it touch flammable materials such as curtains or draperies, or store items on top while it is operating. Keep it away from hot gas or electric burners and do not place it inside a heated oven.
How do I stop a cooking cycle or turn the oven off?
Press Start/Cancel once to cancel a cycle at any time. The red Start/Cancel light turns off when a function is canceled or completes. To turn the appliance off completely, press Start/Cancel and unplug the cord. Always do this before cleaning.
How do I clean the oven and crumb tray?
Unplug the oven and let it cool. Wipe the exterior with a damp cloth and mild, soapy water only. Abrasive cleaners, scrubbing brushes and chemical cleaners damage the coating. Pull out the crumb tray and shake off the crumbs, and do this often to avoid buildup. The wire rack can be wiped with a damp cloth or washed on the top rack of a dishwasher. Never immerse the oven in liquid or use metal scouring pads.
Can I use an extension cord with this oven?
Yes, with care. The cord’s electrical rating must be at least as great as the oven’s. Arrange it so it does not drape over the countertop or tabletop, where it could be pulled on by children or tripped over. Do not let any cord dangle over the edge of the counter or touch hot surfaces.