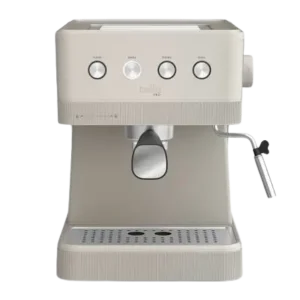
| Document Detail | Information |
| Document Title | Barista Elite Espresso Drink Station+ Instruction Manual |
| Document Type | Instruction Manual |
| Brand Name | bella |
| Product Name | Barista Elite Espresso Drink Station+ |
| Model Number(s) | 90277, 90278 |
| PDF File Size | 4 MB |
| Number of Pages | 12 |
| Languages | English |
bella PRO Barista Elite Espresso 90277
The bella PRO Barista Elite Espresso Drink Station+ is an automatic espresso and milk-based coffee machine designed to prepare single and double espresso shots, lattes, cappuccinos, and frothed milk. It features a touch-activated control panel, dual-spout portafilter, removable water tank, and integrated milk frothing system.
The machine includes a 54-ounce (1.6-liter) water tank and a removable 20-ounce (0.6-liter) milk frothing container. Its preset drink buttons automatically dispense measured quantities of espresso and milk according to the selected beverage.
The espresso maker also allows users to program the volume of single and double espresso shots. A dedicated Clean function supports descaling, while removable components and the supplied cleaning pin allow the brewing and milk frothing systems to be maintained.
These instructions cover initial setup, espresso preparation, latte and cappuccino brewing, milk frothing, programmable shot sizes, cleaning, descaling, troubleshooting, and warranty service.
Product Overview
The bella PRO Barista Elite Espresso Drink Station+ combines espresso brewing and automatic milk frothing in one household appliance.
Its touch-activated display includes dedicated controls for single and double espresso, latte, and cappuccino, along with separate Clean and Froth buttons.
The removable milk container connects to a dispensing tube that delivers frothed milk directly into a cup. The machine also includes a heated top plate, removable drip tray with a full indicator, and an accessory storage container.
Main Features
- 54-ounce water tank: Removable 1.6-liter reservoir for espresso brewing.
- 20-ounce milk container: Removable 0.6-liter container with lid.
- Touch-activated control panel: Dedicated drink and cleaning buttons.
- Single and double espresso: Automatic espresso shot selections.
- Single and double latte: Preset espresso and milk quantities.
- Single and double cappuccino: Automatic milk frothing and espresso brewing.
- Milk-only frothing: Separate Froth button for preparing frothed milk.
- Programmable espresso volume: Allows single and double shot quantities to be adjusted.
- Dual-spout portafilter: Supports brewing into one or two cups.
- Stainless steel filter baskets: Separate single and double espresso filters.
- Integrated milk dispensing tube: Directs frothed milk into a cup.
- Heated top plate: Located on top of the machine.
- Removable drip tray: Includes a full indicator.
- Accessory storage container: Holds coffee preparation accessories.
- Automatic sleep mode: Activates after 30 minutes of inactivity.
- Descaling function: Dedicated Clean button for maintenance.
- Cleaning pin: Supplied for clearing blocked filters and milk frothing channels.
What’s Included
The espresso station includes removable brewing components, milk frothing accessories, and coffee preparation tools.
| Component | Description |
| Espresso Drink Station+ | Main espresso machine |
| 54 oz Water Tank | Removable water reservoir |
| 20 oz Milk Frothing Container | Removable milk container with lid |
| Dual-Spout Portafilter | Holds the espresso filter basket |
| Single Espresso Filter Basket | Used for a single espresso shot |
| Double Espresso Filter Basket | Used for double espresso or two single shots |
| Measuring Scoop | Measures ground espresso |
| Tamper | Compresses ground coffee inside the filter |
| Cleaning Pin | Clears blockages in filters and frothing channels |
| Accessory Storage Container | Two-piece storage accessory requiring assembly |
| Removable Drip Tray | Collects drips and includes a full indicator |
Parts and Components
The espresso machine contains a brewing system, milk frothing system, digital controls, and removable maintenance components.
| Part | Function |
| Water Tank | Holds fresh water for brewing |
| Milk Frothing Container | Holds milk for lattes, cappuccinos, and frothing |
| Milk Container Lid | Covers the milk container |
| Frothing Spout | Dispenses frothed milk |
| Milk Dispensing Tube | Carries milk through the frothing system |
| Portafilter | Holds ground espresso for brewing |
| Filter Retainer Clip | Secures the filter basket when emptying coffee grounds |
| Brew Head | Connects to the portafilter during brewing |
| Control Panel | Provides touch-activated drink and cleaning controls |
| Drip Tray | Collects liquid beneath the brewing area |
| Drip Tray Full Indicator | Indicates when the tray is full |
| Power Button | Turns the machine on or off |
| Heated Top Plate | Heated surface on top of the espresso machine |
| Single Filter Basket | Holds approximately 7 g of ground espresso |
| Double Filter Basket | Holds approximately 14 g of ground espresso |
| Measuring Scoop | Measures ground coffee |
| Tamper | Compresses espresso grounds |
| Cleaning Pin | Removes blockages from designated openings |
| Accessory Storage Container | Stores accessories |
Removable Water Tank
The water tank holds 54 ounces (1.6 liters) of water.
It must be filled with fresh, cool water before brewing.
The tank includes a MAX fill line.
Milk Frothing Container
The removable milk container holds 20 ounces (0.6 liters).
It connects to the machine’s automatic frothing system and should be filled with cold milk when preparing lattes, cappuccinos, or frothed milk.
The milk container can be stored in the refrigerator with leftover milk until the next use.
Dual-Spout Portafilter
The portafilter holds either the single or double stainless steel filter basket.
Its dual spouts allow brewed espresso to be dispensed into one or two cups.
Filter Retainer Clip
The portafilter includes a sliding retainer clip.
The clip holds the filter basket in place while used coffee grounds are emptied.
Warning: Keep the retainer clip away from the filter during brewing.
Removable Drip Tray
The drip tray is positioned beneath the brewing area.
It includes a full indicator to help identify when the tray needs attention.
Accessory Storage Container
The supplied accessory storage container consists of two pieces that must be assembled before use.
Technical Specifications
| Specification | Details |
| Brand | bella PRO |
| Product Name | Barista Elite Espresso Drink Station+ |
| Model Number(s) | 90277, 90278 |
| Product Type | Automatic Espresso and Milk Frothing Machine |
| Water Tank Capacity | 54 oz (1.6 L) |
| Milk Container Capacity | 20 oz (0.6 L) |
| Electrical Supply | 120V AC |
| Power Plug | Polarized |
| Control Panel | Touch-Activated |
| Espresso Options | Single, Double |
| Latte Options | Single, Double |
| Cappuccino Options | Single, Double |
| Milk Frothing | Automatic |
| Single Espresso Volume | 0.8–1.3 oz |
| Double Espresso Volume | 1.7–2.3 oz |
| Single Espresso Coffee Quantity | Approximately 7 g |
| Double Espresso Coffee Quantity | Approximately 14 g |
| Single Espresso Filter | Included |
| Double Espresso Filter | Included |
| Shot Volume Programming | Supported |
| Shot Programming Button Hold | 3 Seconds |
| Single Shot Programming Limit | 30 Seconds |
| Coffee Volume Factory Reset | Supported |
| Automatic Sleep Mode | After 30 Minutes of Inactivity |
| Milk Frother Cleaning | Weekly or As Needed |
| Descaling Interval | Every 2–3 Months |
| Descaling Mixture | 1 Part White Vinegar to 3 Parts Water |
| Mechanical Warranty | 2 Years |
| Non-Mechanical Parts Warranty | 90 Days |
| Intended Use | Household |
Touch-Activated Control Panel
The espresso machine uses dedicated touch controls to prepare drinks and operate its cleaning functions.
Control Panel Functions
| Button | Function |
| Clean | Starts the descaling cleaning cycle |
| Single Espresso | Brews one espresso shot |
| Double Espresso | Brews a double espresso shot |
| Single Latte | Prepares a single latte |
| Double Latte | Prepares a double latte |
| Single Cappuccino | Prepares a single cappuccino |
| Double Cappuccino | Prepares a double cappuccino |
| Froth | Dispenses frothed milk without brewing espresso |
Single Espresso Button
Press Single Espresso to prepare a shot measuring approximately 0.8–1.3 ounces.
The button flashes while brewing.
Pressing and holding the button for three seconds activates espresso volume programming.
Double Espresso Button
Press Double Espresso to prepare approximately 1.7–2.3 ounces of espresso.
The button flashes during brewing.
Its output volume can also be reprogrammed.
Latte Buttons
The latte buttons prepare espresso followed by steamed and frothed milk.
Separate buttons are provided for single and double lattes.
Cappuccino Buttons
The cappuccino buttons froth milk into the cup first, then brew espresso over the milk.
Separate buttons control single and double cappuccinos.
Froth Button
Press Froth to dispense frothed milk without preparing an espresso shot.
Press the button again to stop frothing.
Clean Button
The Clean button starts the machine’s descaling cycle.
When selected, the machine should be allowed to complete the full cleaning process.
Preset Drink Volumes
The control panel uses preset quantities for espresso and milk.
| Drink | Espresso Volume | Frothed Milk Volume |
| Single Espresso | 0.8–1.3 oz | — |
| Double Espresso | 1.7–2.3 oz | — |
| Single Latte | 0.8–1.3 oz | 5.4–6.7 oz |
| Double Latte | 1.7–2.3 oz | 6.7–8.4 oz |
| Single Cappuccino | 0.8–1.3 oz | 2.7–4 oz |
| Double Cappuccino | 1.7–2.3 oz | 3.7–5 oz |
| Froth Only | — | 6.7–8.4 oz |
The latte and cappuccino functions use different milk quantities and dispensing sequences.
Important Safety Instructions
The bella PRO Espresso Drink Station+ operates using heat, pressurized brewing, and hot liquids. Follow these safety precautions to reduce the risk of burns, fire, electric shock, and injury.
Electrical Safety
- Read all instructions before using the espresso machine.
- Connect the appliance only to a 120V AC electrical outlet.
- Never immerse the machine, power cord, or plug in water or another liquid.
- Do not use the appliance with a damaged cord or plug.
- Stop using the machine if it malfunctions or becomes damaged.
- Unplug the espresso maker when it is not in use and before cleaning.
- Allow the machine to cool before installing or removing parts.
- Use only accessories approved for this appliance.
- Keep the cord away from hot surfaces.
- Do not allow the power cord to hang over a counter or table.
- Do not place the machine near a hot burner or heated oven.
- Do not use the appliance outdoors.
Warning: Do not attempt to repair the espresso machine yourself. Unauthorized repairs may void the warranty.
Pressure and Brewing Safety
The machine operates under pressure during brewing.
- Do not leave the machine unattended while it is operating.
- Never open the brew chamber during brewing.
- Make sure lids are securely positioned before operation.
- Do not remove lids during the brewing cycle.
- Use the designated handles and controls instead of touching hot surfaces.
- Allow the appliance to cool sufficiently before adding more water.
Warning: Opening the brew chamber during brewing can cause injury from pressure, hot water, or steam.
Water Tank Safety
- Never operate the machine without water.
- Use fresh, cool water.
- Do not use warm water.
- Do not add food or other liquids to the water tank.
- Do not mix anything with the water except as directed for descaling.
- Allow the machine to cool before refilling to prevent splattering.
Placement and Heat Safety
- Place the espresso maker on a heat-resistant surface.
- Keep it at least 4 inches away from walls or other objects during operation.
- Do not move the appliance while it contains hot liquids.
- Allow the machine to cool completely before moving it.
- Use a heat-resistant trivet or cutting board underneath the appliance when needed to protect the countertop.
Child Safety
Close supervision is required when the espresso maker is used by or near children.
The appliance is not intended for use by people with reduced physical, sensory, or mental capabilities, or limited experience, unless supervised or instructed by a person responsible for their safety.
If the Machine Malfunctions
- Press the Power button.
- Unplug the espresso maker immediately.
- Stop using the appliance.
- Contact Consumer Service for examination or repair.
If the machine falls into water or another liquid, unplug it immediately without reaching into the water. Do not operate it afterward.
Polarized Plug and Power Cord Instructions
Polarized Plug
The espresso machine has a polarized plug with one blade wider than the other.
It is designed to fit into a polarized outlet in only one direction.
If the plug does not fit:
- Remove the plug.
- Reverse its orientation.
- Try inserting it again.
- If it still does not fit, contact a qualified electrician.
Do not modify the plug.
Extension Cord Precautions
The appliance includes a short power cord to reduce entanglement and tripping hazards.
If a longer detachable cord or extension cord is used:
- Its electrical rating must be at least equal to the rating of the espresso maker.
- If the appliance is grounded, use a grounding-type three-wire cord.
- Position the cord so it cannot be pulled by children or accidentally tripped over.
Electrical Circuit Requirements
An overloaded electrical circuit may prevent the espresso maker from operating correctly.
The manufacturer recommends using a circuit separate from other appliances.
Before First Use
The removable brewing and milk components must be cleaned before the espresso machine is used.
Initial Cleaning
- Remove all packaging materials and stickers.
- Remove the portafilter and filter baskets.
- Remove the milk container.
- Remove the water tank and drip tray.
- Wash these components in warm, soapy water.
- Rinse thoroughly.
- Dry all cleaned parts.
Assemble the Accessory Storage Container
The accessory storage container consists of two pieces.
- Identify the tabs and slots on both pieces.
- Align the pieces so that the tabs match the slots.
- Press the pieces together firmly.
- Continue until a clicking sound indicates that they are securely connected.
Fill the Water Tank
- Remove the water tank.
- Fill it with fresh, cold water.
- Do not exceed the MAX line.
- Return the tank to its operating position.
Turn On the Espresso Machine
- Plug the espresso maker into a suitable outlet.
- Press the Power button on the side of the appliance.
- The machine begins preheating.
- All drink buttons flash during preheating, except Clean.
- When the machine is ready, the drink buttons remain steadily illuminated.
Install the Milk Container
Fill the milk container when preparing a latte, cappuccino, or frothed milk.
Attach it securely to the espresso maker.
Note: If the milk container is not correctly installed, only the espresso buttons will appear on the control panel.
How to Brew Espresso
The bella PRO Espresso Drink Station+ can prepare single or double espresso shots.
Espresso Coffee Quantities
| Espresso Type | Ground Coffee | Filter Basket |
| Single Espresso | Approximately 1 Tablespoon (7 g) | Single Basket |
| Double Espresso | Approximately 2 Tablespoons (14 g) | Double Basket |
The double basket can be used to prepare one double espresso or two single espresso shots at the same time.
Step 1: Install the Filter Basket
Select the single or double stainless steel filter basket.
Place it inside the portafilter.
Step 2: Add Ground Espresso
Add the appropriate quantity of ground coffee.
For a single espresso, use approximately 7 grams.
For a double espresso, use approximately 14 grams.
Step 3: Tamp the Coffee
- Use the supplied tamper.
- Press the ground coffee down firmly.
- Wipe loose coffee from the rim of the portafilter.
The rim should be clear before the portafilter is attached to the brew head.
Step 4: Attach the Portafilter
- Position the portafilter beneath the brew head.
- Insert it into the brew head.
- Rotate the handle toward the front locking position.
- Make sure the handle is aligned with the lock.
- Check that the portafilter is sealed and securely locked.
Step 5: Position the Cup
Place a coffee cup or shot glass beneath the portafilter spouts.
For two single shots using the double basket, position the cups beneath the two outlets.
Step 6: Start Brewing
Press Single Espresso or Double Espresso.
The selected button flashes while the machine brews.
Step 7: Finish Brewing
Allow the selected brewing process to finish.
After the machine has cooled sufficiently, the portafilter can be removed.
To unlock it, turn the handle toward the left until it releases from the brew head, then lower it carefully.
How to Program Espresso Shot Volume
The espresso machine allows the brewed quantity of single and double shots to be changed.
How to Adjust Single Espresso Volume
- Prepare the portafilter and position a cup.
- Press and hold Single Espresso for 3 seconds.
- Water begins flowing through the brewing system.
- Continue holding the button while the desired quantity is dispensed.
- Release the button to stop the flow.
- The new shot volume is saved.
Important: The Single Espresso button must not be held for longer than 30 seconds during programming.
How to Adjust Double Espresso Volume
- Prepare the machine for double espresso.
- Press and hold Double Espresso for three seconds.
- Allow the desired quantity to dispense.
- Release the button to save the new volume.
The programmed shot quantities can be adjusted again whenever needed.
How to Reset Espresso Volume to Factory Settings
The programmed espresso quantities can be restored to their original settings.
Factory Reset Instructions
- Make sure the machine is in standby mode.
- Press and hold the Single Espresso and Double Espresso buttons simultaneously.
- Continue holding for 3 seconds.
- The Single and Double Espresso buttons flash five times.
- The machine returns to standby mode.
The espresso shot volumes are restored to their factory settings.
How to Make a Latte
The automatic latte function combines espresso with steamed and frothed milk.
For latte preparation, the machine brews espresso first and then adds milk.
Single and Double Latte Quantities
| Latte Type | Espresso | Frothed Milk |
| Single Latte | 0.8–1.3 oz | 5.4–6.7 oz |
| Double Latte | 1.7–2.3 oz | 6.7–8.4 oz |
Latte Preparation Instructions
- Insert the required filter basket into the portafilter.
- Add the appropriate quantity of ground espresso.
- Tamp the coffee firmly.
- Attach and lock the portafilter into the brew head.
- Fill the milk container with cold milk, up to the MAX line.
- Attach the milk container securely.
- Position the frothing spout over the center of the cup or mug.
- Select Single Latte or Double Latte.
- Allow the machine to complete the automatic drink cycle.
The machine first brews the espresso and then dispenses the corresponding quantity of steamed and frothed milk.
How to Make a Cappuccino
The cappuccino function uses a different preparation sequence from the latte function.
For cappuccino, the machine froths milk into the cup first and then brews espresso over it.
Cappuccino Quantities
| Cappuccino Type | Espresso | Frothed Milk |
| Single Cappuccino | 0.8–1.3 oz | 2.7–4 oz |
| Double Cappuccino | 1.7–2.3 oz | 3.7–5 oz |
Cappuccino Preparation Instructions
- Install the appropriate filter basket.
- Add ground espresso.
- Tamp the coffee firmly.
- Attach and lock the portafilter.
- Fill the milk container with cold milk.
- Secure the milk container to the machine.
- Position the frothing spout above the cup.
- Select Single Cappuccino or Double Cappuccino.
- Allow the machine to complete the drink cycle.
The milk is frothed and dispensed first, followed by the espresso.
How to Froth Milk Without Espresso
The Froth function allows the machine to dispense frothed milk without brewing coffee.
Milk Frothing Quantity
| Function | Frothed Milk Volume |
| Froth Only | 6.7–8.4 oz |
Milk Frothing Instructions
- Fill the milk container.
- Attach it securely to the espresso machine.
- Position a mug beneath the frothing spout.
- Press Froth.
- Allow the milk to dispense.
- Press Froth again whenever the dispensing process needs to be stopped.
Milk Frothing Tips
The instruction manual provides several recommendations for obtaining good frothing results.
Use Cold Milk
Use milk directly from the refrigerator.
Cold milk is recommended for the frothing system.
Whole Milk
Whole milk produces the richest foam.
Plant-Based Milk
Plant-based milk can also be used.
Frothing results may vary depending on the milk.
Clean After Use
Clean the milk container after every use.
The removable milk container can be stored in the refrigerator with leftover milk until its next use.
Preheating and Display Indicators
The espresso machine uses illuminated controls to show when it is preparing for operation or brewing a drink.
Display and Indicator Guide
| Indicator | Meaning |
| Drink Buttons Flashing After Power On | Machine Is Preheating |
| Drink Buttons Solid | Machine Is Ready |
| Selected Drink Button Flashing | Drink Is Being Prepared |
| Only Espresso Buttons Visible | Milk Container Is Not Installed Correctly |
| All Double Drink Buttons Flashing During Brewing | Water Tank Is Empty |
| Single and Double Espresso Buttons Flash Five Times | Espresso Volume Factory Reset Completed |
| No Operation for 30 Minutes | Machine Enters Sleep Mode |
Water Tank Empty Indicator
If all double drink buttons begin flashing during brewing, the water tank is empty.
- Refill the water tank.
- Press any button to return the machine to standby mode.
Automatic Sleep Mode
The espresso maker enters sleep mode after 30 minutes of inactivity.
To reactivate it, touch the display.
Cleaning and Maintenance
The espresso machine requires regular cleaning of the portafilter, filter baskets, brew head, and milk frothing system.
The machine should be unplugged when not in use and before cleaning. Allow it to cool sufficiently before removing parts or performing maintenance.
How to Clean the Portafilter and Brew Head
Step 1: Allow the Machine to Cool
After brewing, allow the machine to cool for at least one minute before removing the portafilter for cleaning.
Step 2: Remove the Portafilter
Unlock the portafilter from the brew head and remove it.
Step 3: Empty Used Coffee Grounds
- Hold the portafilter handle.
- Slide the filter retainer clip forward until it reaches the end.
- The clip secures the filter basket.
- Tap out the used coffee grounds.
- Slide the clip back to its original position.
Warning: The retainer clip must remain away from the filter during brewing.
Step 4: Rinse the Components
Rinse the portafilter and filter basket thoroughly.
Wipe the brew head with a damp cloth.
Step 5: Clear a Blocked Espresso Filter
If the espresso filter becomes blocked:
- Use the supplied cleaning pin.
- Carefully clear the obstructed opening.
- Rinse the filter thoroughly.
Caution: The cleaning pin is sharp. Handle it carefully.
How to Clean the Milk Frother
The milk frothing system should be cleaned weekly or as needed, in addition to cleaning the milk container after each use.
Weekly Milk Frother Cleaning
- Remove the milk container from the espresso maker.
- Take apart the container lid, milk tube, and frothing spout.
- Wash all removable parts by hand using warm, soapy water.
- Reassemble the milk container.
- Fill the container with fresh, cool water.
- Attach it to the machine.
- Place a large empty cup beneath the frothing spout.
- Press Froth to run water through the system.
- Allow the cycle to finish.
- Dispose of the water collected in the cup.
- Empty the remaining water from the milk container.
- Repeat the cycle if necessary.
Caution: Hot water and steam come out of the frothing spout during the cleaning cycle.
Deep Cleaning the Milk Frother
The milk frothing system can be disassembled further to remove blockages from the dispensing tube, steam channel, and air inlet.
Step 1: Remove the Milk Tube
Detach the milk tube from the frothing assembly.
Step 2: Remove the Frothing Tube
Push the frothing tube upward to release it from the frothing assembly.
Step 3: Remove the Milk Frother Lid
Push the lid upward to release it from the frother housing.
Remove the lid to access the internal passages.
Step 4: Clear Milk Container Blockages
Use the supplied cleaning pin to remove any blockage from the designated milk container opening.
Step 5: Clear the Steam Channel
With the milk container disassembled, carefully use the cleaning pin to clear an obstruction from the steam channel.
Step 6: Clear the Air Inlet Channel
Use the cleaning pin to remove any blockage in the air inlet channel.
Step 7: Reassemble the Frother
- Position the lid back onto the milk frother.
- Press the lid down firmly.
- A clicking sound indicates that the lid is correctly attached.
- Reinstall the milk tube.
- Reinstall the frothing tube.
Make sure the frothing components are properly assembled before using the machine again.
How to Descale the Espresso Machine
The espresso maker should be descaled every 2–3 months.
Descaling removes mineral deposits from the brewing system using the machine’s dedicated cleaning function.
Descaling Schedule
| Maintenance Task | Frequency |
| Descale Espresso Machine | Every 2–3 Months |
| Clean Milk Container | After Every Use |
| Clean Milk Frother | Weekly or As Needed |
| Clean Portafilter and Filter Basket | After Use |
| Deep Clean Frother | When Blockages Require Removal |
Descaling Solution
Prepare a mixture using:
| Ingredient | Ratio |
| White Vinegar | 1 Part |
| Water | 3 Parts |
Descaling Instructions
- Fill the water tank with a mixture of one part white vinegar and three parts water.
- Insert the empty portafilter into the brew head.
- Place a large mug beneath the espresso spouts and frothing spout.
- Press Clean.
- Allow the machine to complete the full cleaning cycle.
- Empty the collected liquid.
- Repeat the process twice using fresh water to rinse the system.
The complete rinsing procedure requires two fresh-water cleaning cycles after descaling.
Troubleshooting Guide
The following troubleshooting table covers the problems, causes, and corrective actions provided in the instruction manual.
| Problem | Possible Cause | Recommended Solution |
| No Coffee Flows | Water Tank Is Empty | Fill the Water Tank |
| Coffee Leaks Around the Edge | Portafilter Is Not Locked Tightly | Reattach the Portafilter Firmly and Evenly |
| Froth Is Not Dispensing | Frothing Spout Is Clogged | Clean the Spout and Frother Parts |
| Espresso Is Weak | Coffee Grind Is Too Coarse or Too Little Coffee Is Used | Use a Finer Grind and More Ground Coffee |
| Coffee Brews Too Fast | Coffee Grind Is Too Coarse | Use a Finer Grind |
No Coffee Coming Out
If espresso does not flow, the water tank may be empty.
- Check the water tank.
- Refill it with fresh, cool water.
- Return the tank to its operating position.
If all double drink buttons flash during brewing, refill the tank and press any button to return to standby.
Coffee Leaking Around the Portafilter
A portafilter that is not securely locked may allow coffee to leak around the edge.
Remove and reattach the portafilter firmly and evenly.
Make sure it is aligned with the locking position.
Milk Frother Not Dispensing Milk
The frothing spout may be clogged.
Clean the frothing spout and removable milk frother components.
If necessary, perform the deep-cleaning procedure using the supplied cleaning pin to clear the milk, steam, and air channels.
Espresso Tastes Weak
Weak espresso can occur when the coffee grind is too coarse or too little ground coffee is used.
Use a finer grind and an appropriate quantity of ground espresso.
The manual specifies approximately 7 grams for a single shot and 14 grams for a double shot.
Espresso Brews Too Quickly
If espresso flows too quickly, the coffee grind may be too coarse.
Use a finer grind.
Storage Instructions
Store the espresso machine only after it has been unplugged and completely cooled.
How to Store the Espresso Machine
- Turn off the machine using Power.
- Unplug the power cord.
- Allow the appliance to cool fully.
- Store it in its original box or another clean, dry area.
Power Cord Storage
Do not place stress on the power cord where it enters the appliance.
Excessive bending or pulling at this point may cause the cord to fray or break.
Warning: Never store the espresso machine while it is hot or connected to electrical power.
Warranty Information
The bella PRO Barista Elite Espresso Drink Station+ includes a limited warranty provided by Sensio Inc., doing business as Made by Gather.
The warranty covers qualifying mechanical defects in materials and workmanship for two years from the initial delivery date.
Non-mechanical parts have a separate 90-day warranty period.
Warranty Coverage
| Warranty Detail | Information |
| Warranty Provider | Sensio Inc. dba Made by Gather |
| Mechanical Warranty | 2 Years |
| Non-Mechanical Parts Coverage | 90 Days |
| Warranty Start | Date of Initial Delivery |
| Eligible Purchaser | Original Retail Purchaser |
| Transferability | Non-Transferable |
| Proof of Purchase | Original Sales Receipt |
| Warranty Remedy | Repair, Replacement, or Refund at Provider’s Discretion |
| Customer Service | 1-866-832-4843 |
What the Warranty Covers
During the applicable warranty period, Sensio may repair or replace a qualifying defective product or issue a refund.
The remedy is determined by Sensio.
Warranty Exclusions
The warranty does not cover normal wear or damage caused by:
- Negligent use.
- Incorrect voltage or electrical current.
- Improper routine maintenance.
- Use contrary to the operating instructions.
- Unauthorized disassembly.
- Repairs or alterations performed by unauthorized personnel.
- Natural events such as fires, floods, hurricanes, or tornadoes.
The warranty also contains limitations on incidental and consequential damages. Applicable consumer rights and restrictions may vary by jurisdiction.
How to Request Warranty Service
- Contact Customer Service at 1-866-832-4843.
- Explain the problem to the service representative.
- Follow the troubleshooting instructions provided by telephone.
- If the problem cannot be resolved, obtain a case number.
- Follow the instructions for returning the product.
Returning the Product for Warranty Service
If a return is required, attach a tag containing:
- Customer name.
- Customer address.
- Daytime telephone number.
- Case number.
- Description of the problem.
Include a copy of the original sales receipt.
Carefully package the product and send it to the address provided by Sensio with shipping and insurance prepaid.
Sensio does not accept responsibility for the returned product while it is in transit to its Customer Service Center.
Customer Support Information
Customer support for the bella PRO Barista Elite Espresso Drink Station+ is provided by Sensio Inc. dba Made by Gather.
| Contact Detail | Information |
| Brand | bella PRO |
| Company | Sensio Inc. dba Made by Gather |
| Customer Service Phone | 1-866-832-4843 |
| Customer Service Email | help@bellahousewares.com |
| Brand Website | https://bellakitchenware.com |
| Company Location | New York, NY 10016, USA |
Product Registration
The product registration information directs users to https://bellakitchenware.com.
When to Contact Customer Service
Contact Consumer Service if the machine has a damaged power cord or plug, develops a malfunction, requires repair, or needs warranty assistance.
Frequently Asked Questions
How do I use the bella PRO Barista Elite Espresso Drink Station+?
Fill the water tank with fresh, cool water and turn on the machine. Wait until the drink buttons stop flashing and remain illuminated. Install the appropriate filter basket, add ground espresso, tamp it, and lock the portafilter into the brew head. Place a cup beneath the spouts and select Single or Double Espresso. For lattes and cappuccinos, attach the filled milk container before selecting the desired drink.
How much ground coffee should I use for a single or double espresso?
Use approximately 7 grams (one tablespoon) of ground espresso for a single shot and 14 grams (two tablespoons) for a double shot. The single and double stainless steel filter baskets are designed for their respective quantities.
How do I change the espresso shot volume on the bella PRO machine?
Press and hold Single Espresso or Double Espresso for three seconds to begin programming. Allow the desired quantity to dispense, then release the button to save the new volume. Do not hold the Single Espresso button longer than 30 seconds.
How do I reset the espresso shot volume to factory settings?
With the machine in standby mode, press and hold Single Espresso and Double Espresso simultaneously for three seconds. The buttons flash five times to confirm that the original espresso volumes have been restored.
Why are only the espresso buttons showing on my bella PRO machine?
If the milk container is not fitted correctly, only the espresso buttons appear. Install the milk container securely to make the milk-based drink functions available.
Why is my bella PRO espresso machine not dispensing milk froth?
The frothing spout may be clogged. Remove and clean the milk container, lid, milk tube, and frothing spout. If necessary, perform deep cleaning and use the supplied cleaning pin to clear the designated milk, steam, and air channels.
How do I descale the bella PRO Barista Elite Espresso Drink Station+?
Fill the water tank with one part white vinegar and three parts water. Install the empty portafilter and place a large mug beneath the espresso and frothing spouts. Press Clean and let the full cycle finish. Repeat the cleaning cycle twice with fresh water to rinse the machine. Descaling is recommended every two to three months.
What is the warranty on the bella PRO Barista Elite Espresso Drink Station+?
The machine includes a two-year limited warranty for qualifying mechanical defects and 90-day coverage for non-mechanical parts. Coverage applies to the original retail purchaser from the initial delivery date and requires proof of purchase. For warranty assistance, contact 1-866-832-4843 or help@bellahousewares.com.