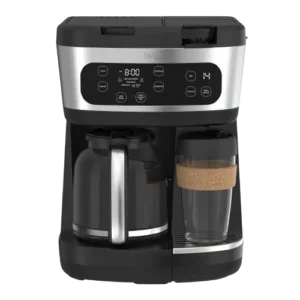
| Field | Details |
| Document Title | MultiBrew Coffee Maker Instruction Manual |
| Document Type | Instruction Manual |
| Brand Name | BELLA |
| Product Name | MultiBrew Coffee Maker |
| Model Number(s) | 90228, 90283, 90284 |
| PDF File Size | 2 MB |
| Number of Pages | 16 |
| Languages | English |
BELLA Pro MultiBrew Coffee Maker 90228
The BELLA Pro MultiBrew Coffee Maker is a dual-brewing coffee machine designed for preparing full carafes, single-serve coffee, and iced coffee. It combines a 12-cup drip coffee system with a single-serve brewing station that accepts compatible coffee capsules or ground coffee through a reusable basket.
The coffee maker features a touch-activated digital control panel, programmable Brew Later function, adjustable brew strength, automatic Keep Warm settings, and five single-serve cup sizes ranging from 6 to 14 ounces.
A separate water reservoir supplies each brewing system, allowing drip coffee and single-serve beverages to be prepared using their respective controls. The machine can also dispense hot water for tea, instant soups, oatmeal, and other hot beverages.
These instructions cover the MultiBrew Coffee Maker’s components, control panel, first-time preparation, carafe brewing, single-serve operation, iced coffee, programmable brewing, cleaning, descaling, troubleshooting, and warranty service.
Product Overview and Technical Specifications
The BELLA Pro MultiBrew Coffee Maker is intended for indoor household use and operates from a 120 V AC electrical outlet. It features a glass coffee carafe, reusable coffee filters, an adjustable-height single-serve drip tray, and a digital clock with programmable brewing controls.
| Specification | Details |
| Brand | BELLA Pro |
| Product Name | MultiBrew Coffee Maker |
| Product Type | Drip and single-serve coffee maker |
| Electrical Supply | 120 V AC |
| Power Plug | Polarized 2-prong plug |
| Carafe Capacity | 12 cups |
| Carafe Cup Measurement | 5 fl oz. per cup |
| Single-Serve Cup Sizes | 6, 8, 10, 12, and 14 oz. |
| Default Single-Serve Size | 8 oz. |
| Single-Serve Beverage Options | Hot coffee, coffee over ice, hot water |
| Coffee Brewing Options | Ground coffee and compatible capsules |
| Carafe Brew Strengths | Regular, Gourmet, Bold |
| Small-Batch Setting | 1–4 CUPS |
| Programmable Brewing | Up to 24 hours in advance |
| Keep Warm Default | 2 hours |
| Adjustable Keep Warm Duration | 0–4 hours |
| Pause & Serve | Up to 30 seconds |
| Digital Clock | LED clock with AM/PM indicator |
| Control Panel | Touch-activated display |
| Cleaning Reminder | Every 150 brews |
| Cleaning Cycle Duration | Approximately 30–40 minutes |
| Water Reservoirs | Separate drip and single-serve reservoirs |
| Intended Use | Household use only |
Main Features
The MultiBrew Coffee Maker includes the following features:
- 12-cup drip coffee system: Prepares a carafe of coffee using the reusable filter basket.
- Single-serve coffee brewing: Prepares individual cups using compatible capsules or ground coffee.
- Over Ice brewing: Brews a reduced amount of coffee directly over ice.
- Programmable Brew Later: Allows carafe brewing to begin automatically at a selected time within the next 24 hours.
- Three carafe brew strengths: Regular, Gourmet, and Bold.
- 1–4 CUPS option: Adjusts the brewing process for smaller carafe batches.
- Adjustable single-serve sizes: Select from 6, 8, 10, 12, or 14 ounces.
- Pause & Serve: Allows a cup of coffee to be poured before the carafe brewing cycle finishes.
- Keep Warm: Keeps brewed carafe coffee warm for an adjustable duration.
- Hot water dispensing: Supplies hot water through the single-serve brewing system.
- Cleaning reminder: Indicates when the coffee maker requires descaling.
- Touch-activated display: Provides access to brewing, scheduling, clock, sound, and cleaning functions.
Parts and Components
The MultiBrew Coffee Maker contains separate components for drip coffee and single-serve brewing. The two brewing systems share the main appliance body and digital control panel.
| Part | Description and Function |
| Touch-Activated Display Control Panel | Controls brewing functions, cup size, strength, clock, and programming. |
| Carafe Lid | Covers the glass carafe during brewing and serving. |
| Carafe Handle | Provides a grip for pouring coffee. |
| Glass Carafe | Collects brewed drip coffee. |
| Coffee Scoop | Measures ground coffee. |
| Reusable Filter Basket With Handle | Holds ground coffee for carafe brewing. |
| Removable Filter Basket Holder | Supports the reusable filter basket. |
| Warming Plate | Keeps brewed carafe coffee warm. |
| Shower Head | Distributes water over the coffee grounds during drip brewing. |
| Drip Coffee Water Reservoir | Holds water for carafe brewing. |
| Pause & Serve Flow Valve | Temporarily interrupts dripping when the carafe is removed. |
| Removable Single-Serve Water Tank | Supplies water for individual drinks. |
| Locking Adaptor Compartment Lid | Secures the single-serve brewing adaptor. |
| Top Capsule Punch | Pierces the upper portion of a coffee capsule. |
| Adaptor Compartment | Holds the capsule adaptor or reusable ground coffee basket. |
| Single-Serve Coffee Spout | Dispenses single-serve beverages and hot water. |
| Single-Serve Drip Tray Cover | Supports cups and collects minor drips. |
| Capsule Adaptor | Holds compatible coffee capsules during brewing. |
| Reusable Ground Coffee Basket | Holds ground coffee for individual brewing. |
| Adjustable-Height Drip Tray | Accommodates different cup and mug heights. |
| Power Cord and Plug | Connects the appliance to a 120 V AC electrical outlet. |
Glass Coffee Carafe
The glass carafe collects coffee prepared by the drip brewing system.
It has a handle and removable lid.
The carafe must be placed correctly on the warming plate during brewing.
The lid should be securely attached and aligned with the pouring spout before serving hot coffee.
Important: Do not use the glass carafe on a stovetop or in a microwave oven.
Reusable Drip Coffee Filter Basket
The reusable filter basket holds ground coffee for carafe brewing.
Its flat bottom allows it to rest on a clean, level surface while being filled.
The basket fits inside the removable filter basket holder and includes a handle for removal.
After brewing, the used coffee grounds can be discarded and the basket cleaned and reused.
Single-Serve Capsule Adaptor
The capsule adaptor holds compatible single-serve coffee capsules.
The adaptor fits into the single-serve compartment beneath the locking lid.
During brewing, the capsule is punctured at the top and bottom.
Warning: Two sharp needles are located in the capsule brewing assembly. Never insert fingers into the capsule adaptor or the upper adaptor compartment.
Reusable Single-Serve Ground Coffee Basket
The reusable ground coffee basket allows individual cups to be brewed without disposable coffee capsules.
For best results, use medium-ground coffee.
The basket is installed in the single-serve adaptor compartment before the locking lid is closed.
Adjustable Single-Serve Drip Tray
The single-serve station includes an adjustable-height drip tray.
Its position can accommodate cups or taller mugs.
Travel mugs and tumblers up to 15 ounces can be placed under the single-serve coffee spout.
Touch-Activated Control Panel and Button Functions
The digital control panel provides separate controls for carafe brewing and single-serve operation.
It also includes a clock, strength selector, future brewing controls, and cleaning functions.
Control Panel Guide
| Control | Function |
| Digital Clock | Displays the current time with AM/PM indication. |
| HOUR | Adjusts the hour when setting the clock or programmed brewing time. |
| MINUTE | Adjusts minutes when setting the clock or programmed brewing time. |
| CLOCK | Indicates clock-setting mode. |
| PROGRAM | Sets and activates future carafe brewing. |
| STRENGTH | Selects Regular, Gourmet, Bold, or 1–4 CUPS. |
| BREW CARAFE/OFF | Starts or stops drip coffee brewing. |
| KEEP WARM | Adjusts the carafe warming duration. |
| 1–4 CUPS | Optimizes the brewing process for smaller carafe batches. |
| CLEAN | Indicates and activates the cleaning process. |
| SIZE | Selects the single-serve brewing volume. |
| Cup Size Display | Shows the selected single-serve volume in ounces. |
| BREW SINGLE | Starts single-serve brewing. |
| OVER ICE | Starts the iced coffee brewing function. |
| SOUND OFF | Indicates that audible notifications have been disabled. |
BREW CARAFE/OFF Button
The BREW CARAFE/OFF button controls drip coffee brewing.
Press the button to begin a carafe brewing cycle.
Press it again during brewing to stop operation and return the drip coffee system to standby.
The button is also used to start or interrupt the drip coffee cleaning cycle.
BREW SINGLE Button
The BREW SINGLE button starts individual hot coffee brewing.
Before pressing this button, select the required cup size and prepare the single-serve compartment with a compatible capsule or the reusable ground coffee basket.
Pressing the active BREW SINGLE button during operation interrupts the brewing cycle.
OVER ICE Button
The OVER ICE button starts the single-serve iced coffee function.
Ice should be placed in the receiving cup before brewing begins.
The appliance dispenses approximately half the selected cup volume when OVER ICE is used.
SIZE Button
The SIZE button selects the desired single-serve coffee volume.
The available sizes are:
| Cup Size | Selection |
| 6 oz. | Small |
| 8 oz. | Default |
| 10 oz. | Medium |
| 12 oz. | Large |
| 14 oz. | Extra-large |
Press SIZE repeatedly until the required volume appears on the display.
The appliance remembers the previously selected size while it remains connected to electricity. Unplugging the machine clears that retained selection.
STRENGTH Button
The STRENGTH button controls the carafe brewing setting.
The available selections are Regular, Gourmet, Bold, and 1–4 CUPS.
The last selected Regular, Gourmet, or Bold strength is retained for the next carafe brewing cycle.
The 1–4 CUPS setting must be selected immediately before brewing.
Setting the Digital Clock
The coffee maker includes an LED clock with an AM/PM indicator.
The clock must show the correct time for scheduled brewing to start at the intended hour.
How to Set the Clock
- Connect the coffee maker to a suitable electrical outlet.
- Press and hold HOUR or MINUTE until the CLOCK indicator flashes.
- Press HOUR to adjust the hour.
- Press MINUTE to adjust the minutes.
- Check the AM/PM indication.
- Complete the adjustment when the correct time is displayed.
Holding HOUR or MINUTE allows the displayed time to change more quickly.
How to Turn the Sound On or Off
The coffee maker allows audible notifications to be disabled.
Turning the Sound Off
- Press and hold MINUTE and PROGRAM simultaneously.
- Continue holding until the sound-off icon illuminates.
- The icon appears near the clock.
Turning the Sound Back On
- Press and hold MINUTE and PROGRAM simultaneously.
- Wait for the sound-off icon to disappear.
- One audible tone confirms that sound has been restored.
Important Safety Instructions
The BELLA Pro MultiBrew Coffee Maker heats water and produces hot coffee and steam. Incorrect use can cause burns, electrical shock, fire, or damage to the appliance.
Electrical Safety
- Connect the coffee maker only to a 120 V AC electrical wall outlet.
- Never immerse the appliance, power cord, or plug in water or another liquid.
- Do not operate the coffee maker with a damaged cord or plug.
- Do not use the appliance after a malfunction or other damage.
- Unplug the coffee maker before cleaning or removing components.
- Allow the appliance to cool before handling removable parts.
- Keep the power cord away from hot surfaces.
- Do not allow the cord to hang over the edge of a table or countertop.
- Do not pull the power cord to move the appliance.
- Do not place the coffee maker near a hot burner or inside a heated oven.
- Do not operate the appliance outdoors.
- Do not use an extension cord.
The coffee maker should be operated on a separate electrical circuit when possible because an overloaded circuit may affect operation.
Hot Coffee and Steam Safety
Warning: The appliance produces hot water and escaping steam during brewing.
- Never open the water tank lids or coffee compartments during operation.
- Do not lift the brewing compartment lids while coffee is brewing.
- Avoid touching heated surfaces.
- Use the designated handles when handling hot components.
- Keep hands away from hot coffee outlets.
- Do not attempt to move the appliance while it contains hot liquids.
- Allow the coffee maker to cool completely before moving it.
- Never open the single-serve brewing chamber during brewing.
- Allow at least 15 minutes of cooling before adding water to a hot coffee maker.
Capsule Needle Safety
The single-serve capsule system contains two sharp puncturing needles.
One is located inside the capsule adaptor, and the other is located on the upper underside of the adaptor compartment.
Warning: Never place fingers inside the capsule adaptor or adaptor compartment. The needles can cause puncture injuries.
Use caution when removing or cleaning the single-serve brewing accessories.
Safe Placement and Ventilation
Place the coffee maker on a flat, stable, heat-resistant surface.
Maintain at least 4 inches of clearance from walls and surrounding objects.
Do not operate the coffee maker beneath cabinets. Keep several feet of open space above the appliance, away from furniture or cabinetry.
Do not place the appliance inside a cabinet during operation.
Do not put objects on top of the coffee maker while it is operating.
A heat-resistant trivet or cutting board is recommended underneath the appliance to help protect the countertop.
Glass Carafe Safety
The glass carafe must be handled carefully.
- Do not use a cracked carafe.
- Do not use a carafe with a loose or weakened handle.
- Never place the carafe on a stovetop.
- Do not place the carafe in a microwave oven.
- Do not set a hot carafe on a wet or cold surface.
- Avoid impact that could break the glass.
- Secure the carafe lid before pouring.
- Do not leave an empty carafe on the warming plate while the coffee maker is on.
- Do not clean the glass carafe with abrasive materials or steel wool.
Caution: The warming plate can retain heat after use. Avoid touching it until it has cooled.
Water Reservoir Safety
Only fresh, cool water should be used in the coffee maker during normal operation.
Do not add milk, food products, or other beverages to the water reservoirs.
The vinegar-and-water solutions described in the cleaning instructions are permitted for descaling.
Never operate either brewing system with an empty water reservoir.
Child Safety
Close supervision is required when the appliance is used by or near children.
Children must not clean or maintain the coffee maker without supervision.
Persons with reduced physical, sensory, or mental abilities, or insufficient experience using electrical appliances, require appropriate supervision or instruction.
Polarized Plug
The appliance has a polarized plug with one blade wider than the other.
If the plug does not fit completely into the outlet:
- Remove the plug.
- Reverse its orientation.
- Try inserting it again.
- If it still does not fit, contact a qualified electrician.
Never modify the plug.
Emergency Shutdown
If the coffee maker malfunctions during carafe brewing:
- Press BREW CARAFE/OFF.
- Immediately unplug the appliance.
- Stop using the coffee maker.
- Contact Consumer Service.
If a malfunction occurs during single-serve brewing:
- Press the active BREW SINGLE or OVER ICE button to stop brewing.
- Immediately disconnect the power cord.
- Discontinue use.
- Contact Consumer Service.
Do not attempt to repair internal electrical components.
Before Brewing Drip Coffee for the First Time
The carafe brewing system must be cleaned before preparing the first pot of coffee.
Initial Cleaning
- Remove all packaging materials and labels.
- Place the coffee maker on a clean, flat, heat-resistant surface.
- Remove the glass carafe, lid, filter basket holder, reusable filter basket, and coffee scoop.
- Wash the removable components in hot, soapy water.
- Rinse thoroughly.
- Dry all parts.
- Reassemble the coffee maker.
The glass carafe, carafe lid, removable filter basket holder, and reusable filter basket are top-rack dishwasher-safe.
The coffee scoop may be washed in the dishwasher with the cutlery.
Flush the Drip Coffee System
Before brewing coffee, run two full carafes of clean tap water through the machine.
Do not add ground coffee or the reusable filter basket during this initial flushing process.
- Fill the drip coffee reservoir with water.
- Place the empty glass carafe on the warming plate.
- Start a carafe brewing cycle.
- Allow the water to pass through the machine.
- Discard the brewed water.
- Repeat the process for a second full carafe.
After flushing, prepare the filter basket and add ground coffee for normal brewing.
How to Brew a Full Carafe of Coffee
The drip coffee system prepares up to 12 standard coffee-maker cups.
Each cup represents approximately 5 fluid ounces.
Carafe Brewing Instructions
- Fill the glass carafe with fresh, cold tap or distilled water.
- Carefully pour the water into the drip coffee reservoir.
- Add water above the 4-cup marking, without exceeding the 12-cup marking.
- Install the removable filter basket holder.
- Add the desired amount of ground coffee to the reusable filter basket.
- Place the reusable basket into its holder.
- Close the coffee maker lid securely.
- Position the empty glass carafe on the warming plate.
- Press BREW CARAFE/OFF to activate the drip brewing system.
- Select the desired brew strength if different from the current selection.
- Press BREW CARAFE/OFF to begin brewing.
- Allow the brewing cycle to finish.
When brewing is complete, three audible tones sound.
The display changes to 0:00, and the coffee maker enters Keep Warm mode.
Water Fill Requirements
The drip coffee reservoir should contain water above the 4-cup marking before normal brewing.
Do not fill beyond the 12-cup marking.
The coffee maker measures carafe cups using a 5-ounce industry-standard serving.
For larger mugs, the reservoir can be filled according to the desired amount of brewed coffee.
Some water is absorbed by the coffee grounds and filter, so the finished beverage volume may be lower than the amount of water added.
How Much Coffee Does the Carafe Make?
| Measurement | Capacity |
| Standard Coffee-Maker Cup | 5 fl oz. |
| Maximum Carafe Brewing Capacity | 12 cups |
| Water for a Larger Mug | Approximately 3–4 coffee-maker cups, or 15–20 oz. |
| Water Absorbed During Brewing | Up to approximately 10% may remain in the grounds and filter |
Stopping Carafe Brewing
Press BREW CARAFE/OFF during a brewing cycle to stop the appliance.
The drip brewing system returns to standby.
Carafe Brew Strength Settings
The carafe brewing system offers three brew strengths and a separate small-batch option.
| Setting | Function |
| Regular | Standard carafe brewing strength. |
| Gourmet | Alternative brew strength setting. |
| Bold | Stronger brew selection. |
| 1–4 CUPS | Adjusts the brewing process for smaller amounts of coffee. |
How to Select Brew Strength
- Prepare the drip coffee reservoir and filter basket.
- Press STRENGTH.
- Continue pressing until the preferred option appears.
- Check that the selected strength is illuminated.
- Press BREW CARAFE/OFF to begin brewing.
The coffee maker remembers the last Regular, Gourmet, or Bold strength selected for the next carafe brewing cycle.
How to Use 1–4 CUPS Mode
The 1–4 CUPS option changes the brewing process when preparing smaller carafe batches.
- Fill the drip coffee reservoir with 4 cups of water.
- Add ground coffee to the reusable filter basket.
- Place the carafe on the warming plate.
- Press STRENGTH until the 1–4 CUPS indicator illuminates.
- Press BREW CARAFE/OFF to begin brewing.
Important: The 1–4 CUPS option must be selected immediately before brewing.
The coffee maker does not measure the amount of water in the reservoir. It will brew all the water present even when 1–4 CUPS is selected.
Pause & Serve Function
Pause & Serve allows a cup of coffee to be poured before the full carafe brewing cycle has finished.
The flow valve under the removable filter basket holder temporarily interrupts dripping when the carafe is removed.
How to Use Pause & Serve
- Carefully remove the glass carafe from the warming plate during brewing.
- Pour the desired amount of coffee.
- Return the carafe to its proper position under the filter basket.
- Brewing will resume when the carafe is replaced.
Caution: Return the carafe within 30 seconds to prevent the filter basket from overflowing.
Brew Later: Programmable Coffee Brewing
The Brew Later function allows the coffee maker to begin a carafe brewing cycle automatically at a selected time within the next 24 hours.
The current clock must be set correctly before scheduling a brew.
How to Program Brew Later
- Fill the drip coffee water reservoir with the required amount of water.
- Add fresh ground coffee to the reusable filter basket.
- Install the filter basket correctly.
- Close the coffee maker lid.
- Place the empty glass carafe with its lid on the warming plate.
- Press and hold PROGRAM for approximately 1.5 seconds.
- The previously programmed future brewing time will begin flashing.
- Press HOUR to set the desired hour.
- Press MINUTE to adjust the minutes.
- Check the AM/PM indicator.
- Press PROGRAM to confirm the scheduled time, or wait approximately 5 seconds.
The PROGRAM indicator remains illuminated when scheduled brewing has been activated.
At the selected time, the coffee maker begins brewing automatically.
What Happens After Scheduled Brewing?
When the programmed brewing cycle finishes:
- Three audible tones sound.
- The coffee maker switches to Keep Warm.
- The warming cycle continues for the selected duration.
How to Use the Same Brew Time the Next Day
The previously programmed future brewing time can be activated again.
After preparing the water reservoir, ground coffee, and carafe, press PROGRAM to reactivate the saved brewing time.
The relevant control buttons illuminate to indicate the programmed state.
Keep Warm Function
The drip coffee system includes an automatic warming function.
After carafe brewing is complete, the coffee maker switches to Keep Warm.
Default Keep Warm Duration
The default Keep Warm time is 2 hours.
The display begins counting upward from 0:00.
At the end of the warming period, two audible tones sound. The coffee maker turns itself off within approximately five minutes if no further operation occurs.
How to Adjust Keep Warm Time
The warming duration can be adjusted from 0 minutes to 4 hours.
- Press and hold KEEP WARM until the displayed time flashes.
- Use HOUR or MINUTE to adjust the duration.
- Select the preferred warming time.
The default duration is 2 hours.
Important: Do not leave an empty glass carafe on the warming plate while the coffee maker is operating.
Before Brewing Single-Serve Coffee for the First Time
The single-serve brewing system must be flushed and its pump primed before the first drink is prepared.
Prime the Single-Serve Pump
- Fill the removable single-serve water tank with up to 15 ounces of fresh, cold water.
- Place an empty tall mug or cup directly beneath the single-serve coffee spout.
- Press BREW CARAFE/OFF as directed in the initial pump-priming procedure.
- Press BREW SINGLE to begin the water-only cycle.
- Allow the pump to move water through the brewing system.
- Wait until dispensing finishes and the indicator lights illuminate.
The single-serve brewing system is ready for normal operation after the initial priming cycle.
Single-Serve Coffee Brewing Instructions
The MultiBrew single-serve system can prepare individual hot coffee servings using compatible prepackaged capsules or the reusable ground coffee basket.
Preparing the Single-Serve Water Tank
- Remove or open the single-serve water reservoir as appropriate.
- Add fresh, cold filtered water.
- Keep the water level between the MIN and MAX markings.
- Reinstall the reservoir securely.
Warning: Never operate the single-serve system with an empty water tank.
Selecting a Cup or Mug
Place a suitable cup directly beneath the single-serve spout.
The adjustable drip tray accommodates different cup heights.
Taller travel mugs and tumblers up to 15 ounces can be placed on the single-serve base beneath the spout.
How to Brew Coffee Using a Capsule
- Fill the single-serve water tank with fresh, cold water.
- Position a cup beneath the coffee spout.
- Use the front tab to unlock and open the adaptor compartment lid.
- Insert the capsule adaptor into the compartment.
- Align the front tube of the adaptor with the outlet opening at the front of the housing.
- Turn the adaptor until it fits flush in the compartment.
- Place a compatible K-Cup capsule into the adaptor.
- Press the adaptor compartment lid down firmly until it clicks into the locked position.
- Press SIZE until the desired cup volume appears.
- Press BREW SINGLE to start brewing.
- Allow the selected brewing cycle to finish.
Warning: The capsule system has sharp upper and lower puncturing needles. Never place fingers inside the adaptor or brewing compartment.
Use only capsules intended for the appliance. Do not force a capsule that does not fit.
How to Brew Using Ground Coffee
The reusable single-serve ground coffee basket allows coffee to be prepared without a disposable capsule.
- Fill the single-serve water reservoir.
- Place a suitable cup beneath the coffee spout.
- Unlock and open the adaptor compartment lid.
- Add medium-ground coffee to the reusable ground coffee basket.
- Place the filled basket into the adaptor compartment.
- Close the compartment lid until it locks.
- Select the desired volume using SIZE.
- Press BREW SINGLE.
- Allow the brewing cycle to finish.
For best results, use a medium coffee grind when filling the reusable single-serve basket.
Single-Serve Coffee Size Settings
The single-serve system provides five selectable drink sizes.
| Selected Size | Brew Volume |
| 6 oz. | 6 oz. |
| 8 oz. | 8 oz. |
| 10 oz. | 10 oz. |
| 12 oz. | 12 oz. |
| 14 oz. | 14 oz. |
The default setting is 8 ounces.
Press SIZE repeatedly to cycle through the available settings.
The coffee maker remembers the last selected cup size while plugged in.
How to Cancel Single-Serve Brewing
Press the active BREW SINGLE button during brewing.
The brewing cycle stops, the control buttons illuminate, and the appliance returns to standby.
How to Brew Iced Coffee
The OVER ICE function prepares coffee directly over ice using the single-serve brewing system.
The coffee maker dispenses approximately half the selected cup volume when OVER ICE is used.
Iced Coffee Instructions
- Fill the single-serve water tank with fresh, cold water.
- Prepare the capsule adaptor or reusable ground coffee basket.
- Place ice cubes inside the receiving cup, mug, or travel mug.
- Position the cup beneath the single-serve coffee spout.
- Close and lock the adaptor compartment lid.
- Press SIZE to select the preferred brewing volume.
- Press OVER ICE to begin brewing.
- Allow coffee to dispense directly over the ice.
OVER ICE Brewing Volume Chart
| Selected Size | Approximate Coffee Dispensed |
| 6 oz. | 3 oz. |
| 8 oz. | 4 oz. |
| 10 oz. | 5 oz. |
| 12 oz. | 6 oz. |
| 14 oz. | 7 oz. |
The coffee maker reduces the brewed coffee volume to approximately half the selected size.
The cup should contain ice before the brewing cycle begins.
How to Stop Iced Coffee Brewing
Press the active OVER ICE button to interrupt the cycle.
The appliance returns to standby.
Single-Serve Water Tank Empty Warning
During capsule brewing, the coffee maker can indicate when the single-serve water supply runs out.
The BREW SINGLE, OVER ICE, and SIZE buttons flash together.
How to Resume Brewing After the Water Runs Out
- Check the single-serve water tank.
- Add fresh, cool water without exceeding the MAX marking.
- If water is added within three minutes, press any button to continue the remaining brewing cycle.
- If more than three minutes have passed, the coffee maker returns to standby.
Press BREW CARAFE/OFF to return to standby at any time while the buttons are flashing.
Single-Serve Hot Water Instructions
The MultiBrew Coffee Maker can dispense hot water through its single-serve system.
Hot water can be used for preparing bagged tea, instant soup, quick-cooking oatmeal, packaged hot chocolate, hot apple cider, and other foods or drinks requiring hot water.
How to Dispense Hot Water
- Add fresh, cold water to the single-serve water tank.
- Keep the level between the MIN and MAX markings.
- Position a suitable cup beneath the single-serve coffee spout.
- Open the adaptor compartment.
- Install the capsule adaptor without any coffee capsule or ground coffee.
- Close and lock the adaptor compartment lid.
- Press SIZE to select the desired volume.
- Press BREW SINGLE to begin dispensing hot water.
- Allow the water to heat and flow into the cup.
- Wait for the indicator to illuminate when dispensing finishes.
Stir any added beverage or food ingredients thoroughly before serving.
Preventing Unwanted Flavors
When changing between different hot beverages, remove any residue from the adaptor compartment.
The appliance must be turned off and cool before cleaning.
Use a damp paper towel to wipe away residue from the adaptor compartment.
Important: Never operate the system without water or fill beyond the MAX line.
Tips for Better-Tasting Coffee
The MultiBrew Coffee Maker’s brewing instructions include several practices for preparing coffee.
Use Fresh, Cold Water
Always fill the reservoirs with fresh, cold water.
Warm water and other liquids should not be used during normal brewing.
Choose the Preferred Brew Strength
For carafe coffee, select Regular, Gourmet, or Bold according to the desired strength.
The coffee maker retains the last selected strength for future carafe cycles.
Use Suitable Coffee Grounds
For single-serve brewing with the reusable ground coffee basket, use medium-ground coffee.
For carafe brewing, drip-style coffee grounds are suitable for fuller extraction.
Grind Coffee Beans Before Brewing
For better flavor, whole coffee beans can be ground shortly before brewing.
Do Not Reuse Coffee Grounds
Previously used coffee grounds should be discarded after brewing.
Reusing coffee grounds reduces flavor quality.
Avoid Reheating Coffee
Coffee has its best flavor immediately after brewing.
Reheating is not recommended in the instruction manual.
Keep the Coffee Maker Clean
Regular cleaning helps maintain brewing performance and coffee flavor.
Oil droplets may occasionally appear on the surface of black coffee, particularly when using heavily roasted beans.
Excessive extraction may also contribute to oiliness and indicate that the coffee maker needs cleaning.
Cleaning and Maintenance Instructions
The coffee maker must be cleaned regularly to remove used grounds, coffee residue, and mineral buildup.
Always disconnect the power cord and allow the warming plate and appliance to cool before cleaning.
How to Clean the Drip Coffee Filter Basket
- Open the drip coffee lid after the appliance has cooled.
- Lift the handle of the reusable filter basket.
- Remove the basket from its holder.
- Discard the used coffee grounds.
- Wash the basket in hot, soapy water.
- Rinse thoroughly.
- Dry and reinstall the filter basket.
The reusable filter basket should be cleaned after every use.
How to Clean the Glass Carafe
- Allow the glass carafe to cool.
- Remove the carafe lid.
- Wash the carafe in hot, soapy water.
- Clean the lid using a soapy kitchen brush.
- Rinse thoroughly.
- Dry the components before reassembly.
Avoid striking the glass against sinks, faucets, or other hard surfaces.
Dishwasher-Safe Components
| Component | Cleaning Method |
| Glass Carafe | Top-rack dishwasher or hand washing |
| Carafe Lid | Top-rack dishwasher or hand washing |
| Removable Filter Basket Holder | Top-rack dishwasher or hand washing |
| Reusable Drip Coffee Filter Basket | Top-rack dishwasher or hand washing |
| Coffee Scoop | Dishwasher with cutlery or hand washing |
| Coffee Maker Exterior | Damp cloth only |
Cleaning the Exterior
Wipe the exterior with a soft, damp cloth.
For stubborn stains, use a nylon or plastic cleaning pad with a nonabrasive cleanser.
Do not use metal scouring pads or abrasive cleaning products.
After cleaning, dry the removable parts and install them correctly.
Make sure the filter basket holder is properly seated in its housing before closing the lid.
CLEAN Indicator and Descaling Reminder
The MultiBrew Coffee Maker has a cleaning reminder that activates after approximately 150 brewing cycles.
When cleaning is required, CLEAN flashes on the display.
The drip coffee and single-serve systems have separate water tanks and must be descaled separately.
The drip coffee CLEAN cycle takes approximately 30–40 minutes.
How to Descale the Drip Coffee System
The drip brewing system is cleaned using white vinegar and cold water.
Drip Coffee Descaling Solution
| Ingredient | Quantity |
| White Vinegar | 6 cups |
| Cold Water | 4 cups |
Descaling Instructions
- Mix 6 cups of white vinegar with 4 cups of cold water in the glass carafe.
- Pour the mixture into the drip coffee water reservoir.
- Position the empty carafe on the warming plate.
- Close the coffee maker lid.
- Press and hold HOUR and MINUTE together until CLEAN illuminates.
- Press BREW CARAFE/OFF to start cleaning.
- An audible tone sounds as the CLEAN cycle begins.
- The CLEAN and BREW CARAFE/OFF indicators remain illuminated.
- The appliance slowly dispenses part of the cleaning solution during an initial three-minute sequence.
- The remaining solution is held and periodically dispensed during the cleaning process.
- Allow the cycle to finish.
At completion, three audible tones sound, CLEAN disappears from the display, and the coffee maker turns off automatically.
Rinsing After Descaling
- Discard the used cleaning solution.
- Wash the glass carafe and removable filter components with hot, soapy water.
- Brew two or three carafes of fresh water through the drip coffee system to rinse it.
- Discard the rinse water.
- Dry the components thoroughly.
- Reinstall the removable filter basket holder and reusable filter basket.
- Close the lid.
How to Stop the CLEAN Cycle
Press BREW CARAFE/OFF to interrupt or exit the cleaning function.
How to Descale the Single-Serve Brewing System
The single-serve system has its own descaling procedure and water reservoir.
Single-Serve Descaling Solution
| Ingredient | Quantity |
| White Vinegar | 4 oz. |
| Cold Water | 10 oz. |
Single-Serve Descaling Instructions
- Mix 4 ounces of white vinegar with 10 ounces of cold water.
- Pour the solution into the single-serve water tank.
- Position a 15-ounce cup or container directly beneath the single-serve coffee spout.
- Press BREW SINGLE.
- Allow the cleaning solution to flow through the brewing system.
- Wait for the dispensing cycle to finish.
Rinsing the Single-Serve System
- Refill the single-serve reservoir with fresh, cold water.
- Run two or three water-only rinsing cycles, using a suitable 15-ounce receiving container.
- Discard the rinse water after each cycle.
- Allow the coffee maker to cool for at least 15 minutes before its next use.
The drip coffee and single-serve water tanks should be cleaned separately.
Routine Maintenance
The MultiBrew Coffee Maker requires regular cleaning and careful handling of its removable components.
| Maintenance Task | Instructions |
| Reusable Carafe Filter | Discard used grounds and rinse after each use. |
| Glass Carafe | Wash after use and handle carefully. |
| Carafe Lid | Clean with hot, soapy water and a suitable kitchen brush. |
| Single-Serve Adaptor Compartment | Remove residue when changing beverages, with the appliance off and cool. |
| Drip Coffee Descaling | Run CLEAN when indicated, normally after 150 brews. |
| Single-Serve Descaling | Clean its separate water system as needed. |
| Exterior Cleaning | Wipe with a damp cloth. |
| Warming Plate | Allow to cool before cleaning. |
| Electrical Repairs | Refer to a qualified appliance repair technician. |
The coffee maker contains no user-serviceable internal components.
Any repair requiring disassembly beyond routine cleaning must be performed by a qualified technician.
Troubleshooting Guide
The following table covers operating conditions and corrective actions supported by the MultiBrew instruction manual.
| Problem or Situation | Possible Cause or Condition | Recommended Action |
| Single-serve system is not ready for first use | The pump requires initial priming. | Complete the water-only pump-priming procedure. |
| BREW SINGLE, OVER ICE, and SIZE flash together | The single-serve water tank has run out of water. | Add water. Within three minutes, press any button to continue brewing. |
| Single-serve brewing returns to standby | More than three minutes passed after the water ran out. | Prepare and start a new brewing cycle. |
| Coffee maker displays CLEAN | The cleaning reminder has activated. | Follow the descaling instructions. |
| Coffee maker produces less coffee than the amount of water added | Grounds and filters absorb some water. | Allow for up to approximately 10% water absorption. |
| Drip coffee continues to collect in the filter area when the carafe is removed | Pause & Serve temporarily blocks the flow. | Replace the carafe within 30 seconds to prevent overflow. |
| 1–4 CUPS mode brews more water than intended | The setting does not measure reservoir water volume. | Fill the reservoir with 4 cups of water before selecting this mode. |
| Over Ice dispenses less coffee than the selected cup size | The iced coffee function uses approximately half the selected volume. | This is normal operation. |
| Coffee has an unwanted flavor | Residue or accumulated deposits may affect flavor. | Clean the applicable brewing components and descale as directed. |
| Coffee maker does not operate properly on a shared circuit | The electrical circuit may be overloaded. | Use a separate electrical circuit. |
| Coffee maker malfunctions during brewing | An appliance malfunction has occurred. | Stop the active brewing function, unplug the machine, and contact Consumer Service. |
Single-Serve Coffee Maker Not Brewing
If the single-serve system has not been used before, complete the pump-priming procedure.
Fill the single-serve water tank with fresh, cold water and run the initial water-only cycle through the single-serve spout.
During normal brewing, confirm that the tank contains water and the adaptor compartment is properly closed.
If the system malfunctions, stop operation and contact Consumer Service.
Single-Serve Buttons Flashing
When BREW SINGLE, OVER ICE, and SIZE flash together, the water tank has run out during brewing.
Add fresh, cold water.
If the tank is refilled within three minutes, press any button to resume the remaining brewing cycle.
After three minutes, the appliance returns to standby.
Coffee Maker Showing CLEAN
The CLEAN indicator flashes after approximately 150 brews.
Run the recommended cleaning cycle.
The drip coffee and single-serve systems must be descaled separately using their specified cleaning solutions.
Coffee Maker Brewing Less Coffee Than Expected
The amount of brewed coffee may be lower than the amount of water placed in the reservoir.
Coffee grounds and filters can absorb up to approximately 10% of the water.
The carafe’s cup markings also use 5-ounce servings rather than larger household mugs.
Water Overflows During Pause & Serve
The Pause & Serve valve temporarily stops coffee from dripping when the carafe is removed.
However, the glass carafe must be returned to the warming plate within 30 seconds.
Leaving it removed for longer can cause overflow.
Over Ice Coffee Volume Is Lower Than Selected
The OVER ICE function intentionally dispenses approximately half the selected cup volume.
For example, choosing 6 ounces produces approximately 3 ounces of brewed coffee.
Ice must be placed in the receiving cup before brewing.
Coffee Maker Has an Unusual or Off Flavor
Coffee residue and mineral buildup may affect beverage flavor.
Clean the applicable brewing components and perform the recommended descaling procedure.
When switching hot beverages, clean residue from the single-serve adaptor compartment after the machine has been switched off and cooled.
When to Contact Consumer Service
If the coffee maker malfunctions:
- Stop the active brewing cycle using its corresponding button.
- Unplug the appliance.
- Allow it to cool.
- Do not attempt internal repairs.
- Contact Consumer Service.
Do not remove the bottom cover or disassemble electrical components.
Storage Instructions
The coffee maker should be cleaned, cooled, and completely dried before storage.
How to Store the Coffee Maker
- Make sure all brewing operations have stopped.
- Disconnect the appliance from the electrical outlet.
- Allow the coffee maker and warming plate to cool.
- Clean the removable components.
- Reinstall the reusable filter basket and filter basket holder.
- Place the glass carafe on the warming plate.
- Close the coffee maker lid.
- Store the appliance fully assembled in its original box or a cool, dry location.
Never store the coffee maker while it is connected to electricity.
Warranty Information
The BELLA Pro MultiBrew Coffee Maker includes a limited two-year warranty provided by SENSIO Inc., doing business as Made by Gather.
The warranty begins on the date of delivery and applies only to the original retail purchaser.
Warranty Coverage
| Warranty Detail | Coverage |
| Warranty Provider | SENSIO Inc. dba Made by Gather |
| Mechanical Defects | 2 years from delivery |
| Non-Mechanical Parts | 90 days |
| Warranty Start Date | Original delivery date |
| Eligible Purchaser | Original retail purchaser |
| Transferability | Non-transferable |
| Proof of Purchase | Original sales receipt required |
| Warranty Remedies | Repair, replacement, or refund at the provider’s discretion |
The two-year warranty covers mechanical defects in materials and workmanship.
Non-mechanical parts are covered for 90 days.
During the warranty period, SENSIO Inc. may repair or replace a defective product or provide a refund.
Warranty Exclusions
The limited warranty does not cover normal wear or damage resulting from:
- Negligent use.
- Incorrect electrical voltage or current.
- Improper routine maintenance.
- Operation contrary to the instructions.
- Unauthorized disassembly.
- Repairs or modifications performed by anyone other than qualified SENSIO Inc. personnel.
- Natural disasters, including fires, floods, hurricanes, and tornadoes.
The warranty also includes limitations on incidental and consequential damages and implied warranties.
Some limitations may not apply in every state, province, or jurisdiction. Specific legal rights may vary.
How to Request Warranty Service
- Contact Customer Service at 1-866-832-4843.
- Explain the product problem.
- Follow the troubleshooting assistance provided.
- If the issue cannot be resolved by telephone, obtain a case number and return instructions.
- Attach a tag containing the purchaser’s name, address, daytime telephone number, case number, and description of the problem.
- Include a copy of the original sales receipt.
- Package the appliance carefully with the required documentation.
- Return the product according to the supplied instructions, with shipping and insurance prepaid.
SENSIO Inc. does not accept responsibility or liability for the product while it is in transit to its customer service center.
Customer Support and Contact Information
BELLA Pro provides customer service for product questions, operating issues, and warranty assistance.
| Contact Type | Details |
| Brand | BELLA Pro |
| Company | SENSIO Inc. dba Made by Gather |
| Customer Service Phone | 1-866-832-4843 |
| Customer Service Email | help@bellahousewares.com |
| Website | https://bellakitchenware.com |
| Company Location | New York, NY 10016, USA |
Product Registration
The instruction manual provides a product registration option through the BELLA website.
Registration can be accessed at https://bellakitchenware.com.
Retain the original sales receipt because proof of purchase is required for warranty validation.
Frequently Asked Questions
How do you use the BELLA Pro MultiBrew Coffee Maker?
For carafe brewing, fill the drip water reservoir, add ground coffee to the reusable filter basket, place the glass carafe on the warming plate, and press BREW CARAFE/OFF.
For single-serve brewing, fill the separate water tank, install a compatible capsule or the reusable ground coffee basket, choose a cup size, and press BREW SINGLE. The OVER ICE button prepares coffee directly over ice.
What are the single-serve cup sizes on the BELLA Pro MultiBrew?
The single-serve system offers five sizes: 6, 8, 10, 12, and 14 ounces. The default setting is 8 ounces. Press SIZE repeatedly to select a different volume. The appliance remembers the last selected size while it remains plugged in.
How do you program Brew Later on the BELLA Pro MultiBrew Coffee Maker?
Prepare the drip water reservoir, ground coffee, and glass carafe. Press and hold PROGRAM for approximately 1.5 seconds, then use HOUR and MINUTE to select the future brewing time. Check AM/PM and press PROGRAM to confirm, or wait five seconds. The machine can be programmed to begin brewing up to 24 hours in advance.
How do you make iced coffee with the BELLA Pro MultiBrew?
Place ice in the receiving cup, prepare a compatible capsule or the reusable ground coffee basket, and select a cup size. Press OVER ICE to begin brewing. The machine dispenses approximately half the selected volume. For example, an 8-ounce selection produces approximately 4 ounces of coffee over ice.
Why are BREW SINGLE, OVER ICE, and SIZE flashing?
These three buttons flash when the single-serve water tank runs out during brewing. Add fresh water within three minutes and press any button to continue the remaining cycle. If more than three minutes pass, the coffee maker returns to standby.
How do you clean the BELLA Pro MultiBrew Coffee Maker?
After use, discard coffee grounds, wash the reusable filters and glass carafe, and wipe the exterior with a damp cloth. The drip coffee system should be descaled using 6 cups of white vinegar and 4 cups of cold water. The single-serve system uses 4 ounces of vinegar and 10 ounces of cold water. Both systems require separate rinsing.
What does CLEAN mean on the BELLA Pro MultiBrew Coffee Maker?
The CLEAN indicator flashes when the machine reaches approximately 150 brewing cycles. It indicates that descaling is required. The drip coffee CLEAN program takes approximately 30–40 minutes. The two water systems should be descaled separately.
What is the warranty on the BELLA Pro MultiBrew Coffee Maker?
The coffee maker includes a limited two-year warranty covering mechanical defects in materials and workmanship and 90 days of coverage for non-mechanical parts. Coverage begins on the original delivery date and requires proof of purchase. For assistance, contact Customer Service at 1-866-832-4843 or help@bellahousewares.com.