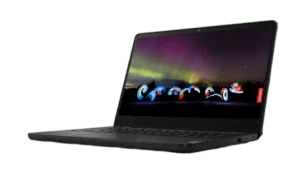
| Field | Details |
| Document Title | Lenovo 14w Gen 2 |
| Document Type | Setup Guide |
| Brand Name | Lenovo |
| Product Name | 14w Gen 2 Laptop |
| Model Number(s) | 14w Gen 2; individual machine-type numbers are not specified |
| PDF File Size | 0.50 MB |
| Number of Pages | 7 |
| Languages Covered | English |
Lenovo 14w Gen 2
The Lenovo 14w Gen 2 is a laptop computer designed for everyday computing, internet access, communication, and other computer-based activities. It features a built-in display, keyboard, touchpad, integrated camera, microphones, speakers, and several ports for connecting external devices.
The laptop includes a USB-C power connector, two USB 3.2 ports, an HDMI connector, a headset jack, a microSD card slot, and a security-lock slot. Selected configurations also support touchscreen input.
The Lenovo 14w Gen 2 provides wireless LAN and Bluetooth connectivity. Its wireless hardware supports multiple radio-frequency bands, including 2.4 GHz and 5 GHz WLAN connections.
Selected models include Lenovo Commercial Vantage, a device-management application that provides access to settings, Smart Assist, updates, WiFi security, support, and warranty information.
Initial setup involves connecting the supplied power adapter to the computer, plugging it into an electrical outlet, and pressing the Power button.
Technical Specifications
| Specification | Details |
| Brand | Lenovo |
| Product Name | 14w Gen 2 |
| Product Type | Laptop Computer |
| Input Devices | Keyboard and Touchpad |
| Touchscreen | Available on Selected Models |
| Camera | Integrated |
| Camera Privacy Control | Identified in Hardware Diagram |
| Microphones | Integrated |
| Speakers | Integrated |
| Power Connection | USB-C |
| USB-A Connections | 2 × USB 3.2 |
| External Display Connection | HDMI |
| Audio Connection | Headset Jack |
| Memory Card Slot | microSD |
| Security Connection | Security-Lock Slot |
| Wireless LAN | 802.11b/g/n/ax and 802.11a/n/ac/ax |
| Bluetooth | BR/EDR/LE |
| Device Management | Lenovo Commercial Vantage, Selected Models |
| Maximum Reported Body-Worn SAR | 0.434 W/kg |
| Maximum Reported Limb SAR | 1.971 W/kg |
| Wireless Regulatory Compliance | EU Directive 2014/53/EU and UK SI 2017 No. 1206 |
Package Contents
The initial setup illustration identifies the laptop, power adapter assembly, and documentation used during installation.
| Component | Description |
| Lenovo 14w Gen 2 Laptop | Main computer |
| AC Power Adapter | Supplies electrical power through the USB-C charging connection |
| Power Cable | Connects the power adapter to an electrical outlet |
| Printed Documentation | Setup and safety information |
The setup illustration identifies selected-model variations with an asterisk.
Parts and Components
The Lenovo 14w Gen 2 includes hardware components positioned around the display, keyboard, palm-rest area, and sides of the computer.
Front and Interior Components
| Component | Function |
| Integrated Camera | Provides camera input for supported applications. |
| Camera Privacy Control | Provides the camera-related privacy function shown in the diagram. |
| Built-In Microphones | Capture sound for recording and communication. |
| Display | Displays computer applications and visual information. |
| Touchscreen | Supports direct touch input on selected models. |
| Speakers | Provide audio output. |
| Power Button | Turns on the computer. |
| Keyboard | Provides text input and computer controls. |
| Touchpad | Controls pointer movement and input. |
Integrated Camera and Microphones
The hardware diagram identifies a camera at the upper center of the display.
Microphones are positioned on either side of the camera area.
The diagram also identifies a camera privacy control with a crossed-out camera symbol.
Built-In Speakers
The computer includes an integrated speaker system for audio playback.
The speaker location is identified near the hinge area in the front-view illustration.
Keyboard and Touchpad
The built-in keyboard provides standard computer input.
The touchpad is positioned below the keyboard and provides pointer control without requiring an external mouse.
Optional Touchscreen
Selected Lenovo 14w Gen 2 configurations support touchscreen input.
The touchscreen option is identified by an asterisk in the hardware diagram.
Side Ports and Connections
The laptop provides several connections for USB devices, external displays, headphones, memory cards, and security accessories.
USB-C Power Connector
The USB-C connector is positioned on the side of the computer and is identified with a power symbol.
It is used to connect the power adapter during initial setup.
USB 3.2 Ports
The laptop includes two USB 3.2 connections.
These ports provide connections for compatible USB peripheral devices.
HDMI Connector
The HDMI connector is identified on the same side as the USB-C power connection.
It provides a digital audio/video connection for compatible HDMI equipment.
Headset Jack
The headset jack is identified by the headphone symbol.
It provides an audio connection for compatible headsets.
microSD Card Slot
The microSD slot is positioned on the opposite side of the laptop from the USB-C power connector.
It provides a connection for compatible microSD memory cards.
Security-Lock Slot
The security-lock slot is identified by a padlock symbol.
It provides a connection point for a compatible physical security device.
Port Identification Table
| Port or Connector | Location in Diagram | Purpose |
| USB-C | Side with HDMI | Power adapter connection |
| USB 3.2 | Side with USB-C | USB peripheral connection |
| HDMI | Side with USB-C | External digital display connection |
| Headset Jack | Side with HDMI | Headset/audio connection |
| USB 3.2 | Opposite Side | USB peripheral connection |
| microSD | Opposite Side | Memory card connection |
| Security-Lock Slot | Opposite Side | Physical security accessory |
Before First Use
The laptop must be connected to the appropriate power source before initial startup.
The setup diagram illustrates the complete connection sequence using four numbered steps.
Initial Preparation
- Unpack the computer and power accessories.
- Locate the USB-C charging connector.
- Prepare the power adapter and power cable.
- Position the laptop where it can be connected to an electrical outlet.
- Complete the power connection sequence.
How to Set Up the Lenovo 14w Gen 2
The initial setup illustration identifies the sequence for connecting the computer to electrical power and starting it.
Step 1: Connect the Power Cable to the Adapter
Connect the power cable to the AC power adapter as shown in the setup diagram.
The connection must be secure before continuing.
Step 2: Connect the USB-C Power Cable to the Laptop
Locate the USB-C port marked with the power symbol.
Insert the USB-C power connector into this port.
Step 3: Connect the Power Adapter to an Electrical Outlet
Insert the power plug into a suitable electrical outlet.
The computer is now connected to external power.
Step 4: Turn On the Computer
Locate the Power button near the upper-right area of the keyboard.
Press the Power button to start the laptop.
The computer begins its startup process.
Power Button and Startup Controls
The Power button is shown in the front-view illustration near the upper-right edge of the keyboard area.
Turning On the Computer
- Connect the laptop to its power adapter.
- Connect the adapter to an electrical outlet.
- Press the Power button.
The laptop starts after the Power button is pressed.
Using the Touchscreen
Selected Lenovo 14w Gen 2 models include a touch-sensitive display.
The touchscreen allows supported computer functions to be controlled through direct contact with the display.
Identifying Touchscreen Support
The hardware diagram uses a finger-touch symbol marked with an asterisk.
The asterisk indicates that touchscreen functionality applies to selected models.
The available touch functions depend on the computer configuration and installed software.
Lenovo Commercial Vantage
Lenovo Commercial Vantage is available on selected Lenovo 14w Gen 2 models.
The application provides access to device-management functions and support resources.
Commercial Vantage Features
| Feature | Purpose |
| Settings | Accesses available device settings. |
| Smart Assist | Provides supported smart-assistance functions. |
| Updates | Provides access to system update functions. |
| WiFi Security | Provides wireless-security-related features. |
| Support & Warranty | Provides product support and warranty resources. |
Device Settings
The Settings section provides access to the computer settings supported by Lenovo Commercial Vantage.
Smart Assist
Smart Assist provides the assistance functions available for the computer configuration.
System Updates
The Updates section provides access to available system update features.
WiFi Security
The WiFi Security section provides access to wireless security-related functions within Commercial Vantage.
Support and Warranty
The Support & Warranty section provides product assistance and warranty resources.
The available application features may depend on the specific laptop model.
Wireless LAN and Bluetooth Specifications
The Lenovo 14w Gen 2 includes radio equipment supporting wireless LAN and Bluetooth technologies.
Wireless communication operates within the frequency ranges identified in the regulatory information.
Wireless Frequency Bands
| Wireless Technology | Frequency Range | Maximum Transmit Power |
| WLAN 802.11b/g/n/ax | 2400–2483.5 MHz | Below 20 dBm |
| WLAN 802.11a/n/ac/ax | 5150–5725 MHz | Below 23 dBm |
| WLAN 802.11a/n/ac/ax | 5725–5875 MHz | Below 13.98 dBm |
| Bluetooth BR/EDR/LE | 2400–2483.5 MHz | Below 20 dBm |
WiFi Frequency Bands
The wireless LAN hardware supports operation in the 2.4 GHz and 5 GHz frequency ranges specified in the table.
Bluetooth Connectivity
Bluetooth BR/EDR/LE operates within the 2400–2483.5 MHz frequency range.
Indoor Wireless Restrictions
Operation in the WLAN frequency range from 5150 MHz to 5350 MHz is restricted to indoor use.
The restriction applies under the European Union and United Kingdom radio-equipment compliance requirements.
Local restrictions must also be followed when wireless equipment is used in public areas, including hospitals, airplanes, and schools.
Radio Frequency Exposure and SAR Information
The Lenovo 14w Gen 2 contains radio transmitters and receivers.
The radio equipment is designed to comply with international guidelines for exposure to radio-frequency electromagnetic fields.
The exposure guidelines were developed by the International Commission on Non-Ionizing Radiation Protection (ICNIRP).
What Is Specific Absorption Rate (SAR)?
Specific Absorption Rate measures the amount of radio-frequency energy absorbed by body tissue.
SAR values are expressed in watts per kilogram (W/kg).
SAR Limits and Reported Values
| Measurement | 10g SAR Limit | Maximum Reported SAR |
| Body-Worn SAR | 2 W/kg | 0.434 W/kg |
| Limb SAR | 4 W/kg | 1.971 W/kg |
The reported maximum SAR measurements are based on a separation distance of 0 mm.
The stated values are within the applicable international exposure limits.
Radio Frequency Safety Instructions
The laptop must be used in accordance with the radio-frequency exposure guidelines and local wireless regulations.
Recommended Placement
Where practical, place the laptop on a:
- Table
- Desk
- Tray
These surfaces also help maintain ventilation around the computer.
Reducing Radio Frequency Exposure
The following precautions are identified in the guide:
- Use the wireless equipment under good radio signal conditions.
- Keep the wireless antennas as far from the body as practical.
- Keep the antennas away from other people where practical.
- Follow the antenna-location information in the Lenovo User Guide.
- Observe local wireless restrictions.
Precautions for Pregnant Women and Adolescents
Pregnant women should keep the wireless antennas away from the stomach.
Adolescents should keep the antennas away from the lower abdomen.
Electronic Medical Implant Precautions
Users with electronic medical implant devices, including pacemakers, insulin pumps, and neurostimulators, must maintain a distance greater than 15 cm between the radio device and the implanted medical device.
European Union and United Kingdom Regulatory Compliance
Lenovo (Singapore) Pte. Ltd. declares that the Lenovo 14w Gen 2 radio equipment complies with the applicable European Union and United Kingdom radio regulations.
Regulatory Standards
| Region | Regulation |
| European Union | Directive 2014/53/EU |
| United Kingdom | Radio Equipment Regulations SI 2017 No. 1206 |
EU Declaration of Conformity
The European Union declaration of conformity is available at:
https://www.lenovo.com/us/en/compliance/eu-doc
UK Declaration of Conformity
The United Kingdom declaration of conformity is available at:
https://www.lenovo.com/us/en/compliance/uk-doc
USB Transfer Rate Information
The laptop includes USB 3.2 connections for compatible USB devices.
Detailed information about USB transfer rates is provided through the Lenovo User Guide.
The User Guide can be accessed through:
Lenovo User Guide and Product Documentation
The Lenovo 14w Gen 2 provides access to additional product documentation through Lenovo’s support resources.
Accessing the User Guide
- Open https://pcsupport.lenovo.com.
- Locate the Lenovo 14w Gen 2 product documentation.
- Open the available User Guide.
The printed setup documentation also includes a QR code for accessing the product’s digital documentation.
Documentation Resources
| Resource | Details |
| Product | Lenovo 14w Gen 2 |
| Official Support | https://pcsupport.lenovo.com |
| EU Regulatory Documents | https://www.lenovo.com/us/en/compliance/eu-doc |
| UK Regulatory Documents | https://www.lenovo.com/us/en/compliance/uk-doc |
Frequently Asked Questions
1. How do I set up the Lenovo 14w Gen 2 for the first time?
Connect the power cable to the AC adapter, insert the USB-C charging connector into the laptop, and connect the adapter to an electrical outlet. Press the Power button near the upper-right area of the keyboard to turn on the computer.
2. Where is the charging port on the Lenovo 14w Gen 2?
The USB-C charging connector is positioned on the side of the laptop alongside the USB 3.2, HDMI, and headset connections. It is identified by a power symbol in the hardware diagram.
3. What ports are available on the Lenovo 14w Gen 2?
The laptop includes one USB-C power connector, two USB 3.2 ports, an HDMI connector, a headset jack, a microSD card slot, and a security-lock slot.
4. Does the Lenovo 14w Gen 2 have a touchscreen?
Touchscreen functionality is available on selected configurations. The setup guide identifies the touchscreen option with an asterisk in the laptop diagram.
5. What is Lenovo Commercial Vantage used for?
On supported models, Lenovo Commercial Vantage provides access to Settings, Smart Assist, Updates, WiFi Security, and Support & Warranty functions.
6. What wireless technologies does the Lenovo 14w Gen 2 support?
The laptop supports WLAN 802.11b/g/n/ax, WLAN 802.11a/n/ac/ax, and Bluetooth BR/EDR/LE. The listed wireless LAN frequency ranges cover 2.4 GHz and 5 GHz operation.
7. Can the Lenovo 14w Gen 2 use the 5 GHz WiFi band outdoors?
Operation within the 5150–5350 MHz WLAN frequency range is restricted to indoor use under the stated EU and UK requirements. Other local wireless regulations must also be followed.
8. Where can I find the full Lenovo 14w Gen 2 User Guide?
The product User Guide is available through Lenovo’s support website at https://pcsupport.lenovo.com. The setup document also provides a QR code for accessing digital documentation.