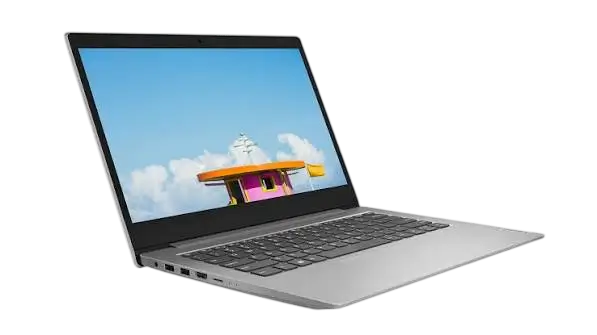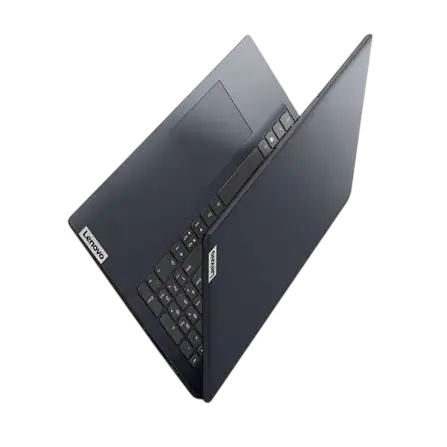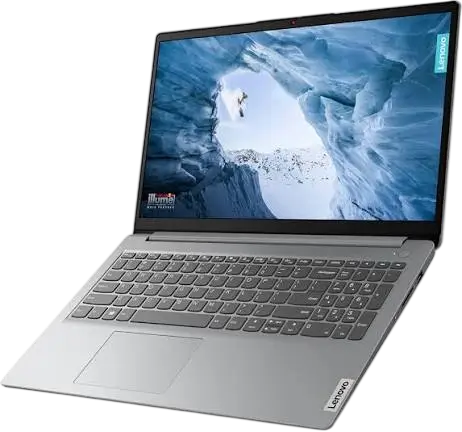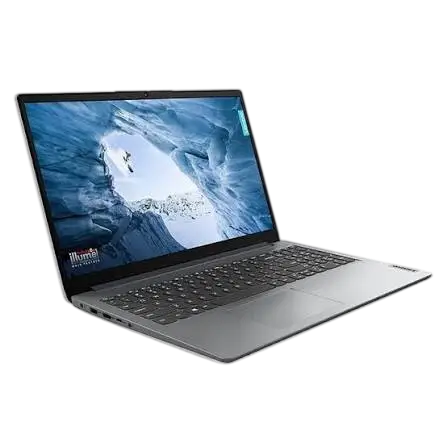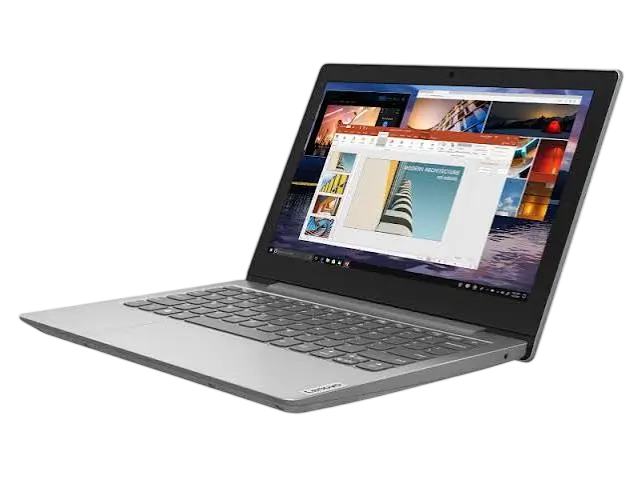
Lenovo IdeaPad 1 11ADA05
The Lenovo IdeaPad 1 11ADA05 (machine type 82GV) is an 11.6-inch Windows laptop with a 1366 × 768 display, on-board DDR4 memory, a 35 Wh built-in battery and a 45 W ac adapter. Its left side holds the power connector, charging light, two USB 3.2 Gen 1 Type-A ports, an HDMI connector, a microSD card slot, the Novo button hole and the power light, and a combo audio jack sits on the right side. Everyday controls include keyboard hotkeys with a UEFI/BIOS-selectable hotkey mode, a multi-touch touch pad and a Novo Button menu for reaching setup, boot selection and Windows recovery options. This guide also covers the 11IGL05, 14IGL05 and 14ADA05 models, and calls out where specifications differ between them.
Covered Models and Machine Types
The same User Guide applies to the four models below. Illustrations may look slightly different from your model, and some accessories, features and software are not available on every model.
| Model name | Machine type (MT) |
| Lenovo IdeaPad 1 11IGL05 | 81VT |
| Lenovo IdeaPad 1 14IGL05 | 81VU |
| Lenovo IdeaPad 1 11ADA05 | 82GV |
| Lenovo IdeaPad 1 14ADA05 | 82GW |
The instructions assume the Windows operating system and do not apply if you install and use another operating system. Windows feature updates can make Windows-related steps outdated over time. Lenovo notes that the guide is subject to change without notice and that the latest version is available at https://support.lenovo.com.
Ports, Lights and Controls
Front
- Wireless antennas: send and receive radio waves for the built-in wireless LAN and Bluetooth module. They are not visible from the outside. If the antennas are close to your body (less than 20 cm), you can find the Specific Absorption Rate (SAR) values in the Setup Guide that comes with the computer.
- Microphones: capture or record sound and voice.
- Camera: captures still and moving images for photos, video recording and video chat.
- Camera light: when it is on, the camera is in use.
- Screen: displays text, graphics and video.
Keyboard and Touch Pad
The keyboard is used to enter characters and interact with programs, and it includes hotkeys and function keys for changing settings and performing tasks quickly. The touch pad performs finger touch and all the functions of a traditional mouse, and it also supports multi-touch.
Left Side
| Item | Function |
| Power connector | Connects to power with the included power cord and ac power adapter. |
| Charging light | Solid white: connected to ac power, battery capacity 91%–100%. Solid amber: connected to ac power, battery capacity 1%–90%. Off: not connected to ac power. |
| USB 3.2 Gen 1 Type-A connectors (two) | Connect a USB-compatible device such as a USB keyboard, mouse, storage device or printer. |
| HDMI connector | Connects to a compatible digital audio device or video monitor, such as an HDTV. |
| microSD card slot | Accepts a microSD card for data transfer or storage. |
| Novo button hole | Press the Novo button to open the Novo Button menu, where you can open the UEFI/BIOS setup utility, the Boot menu or the Windows startup options screen. |
| Power light | On: the computer is turned on. Off: the computer is turned off or in hibernation mode. Blinking: the computer is in sleep mode. |
Right Side
The combo audio jack connects headphones or headsets with a 3.5 mm (0.14 inch), 4-pole plug. It does not support standalone external microphones, so if you use a headset, choose one with a single plug.
Bottom
The speakers are on the bottom of the computer and produce sound. The product name and serial number can usually be found on the bottom of the computer, either printed on a label or etched on the cover. The FCC ID and IC ID label information for factory-installed wireless modules, for computers bought in the United States or Canada, is also visible on the bottom cover.
Specifications
Dimensions
| Screen size | Width | Depth | Thickness |
| 11-inch models | 288 mm (11.33 inches) | 200 mm (7.87 inches) | Thinnest 17.7 mm (0.69 inches); thickest 17.9 mm (0.70 inches) |
| 14-inch models | 327.1 mm (12.87 inches) | 235 mm (9.25 inches) | Thinnest 17.7 mm (0.69 inches); thickest 17.9 mm (0.70 inches) |
Power Adapter and Battery
- ac power adapter input: 100 V ac–240 V ac, 50 Hz–60 Hz.
- ac power adapter output: 20 V dc, 2.25 A.
- ac power adapter power: 45 W.
- Battery pack, IdeaPad 1 11IGL05 and 14IGL05: 32 Wh, 2 cells.
- Battery pack, IdeaPad 1 11ADA05 and 14ADA05: 35 Wh, 2 cells.
The battery capacity is the typical or average capacity measured in a specific test environment. Capacities measured in other environments may differ but are no lower than the rated capacity shown on the product label.
Processor, Memory, Storage and Screen
- Microprocessor: to view it, type system information in the Windows search box and press Enter.
- Memory: on-board DDR4 SDRAM with 0 memory slots.
- Secondary storage: M.2 solid-state drive (SSD) or eMMC. Capacity varies by model. To see more detail, right-click the Start button and select Device Manager.
- Screen size: 294.6 mm (11.6 inches) or 355.6 mm (14 inches).
- Display resolution: 11-inch models are 1366 × 768 pixels (HD). 14-inch models are 1366 × 768 pixels (HD) or 1920 × 1080 pixels (FHD).
Connectors, Security and Wireless
- Connectors and slots: combo audio jack, two USB 3.2 Gen 1 Type-A connectors, HDMI connector and microSD card slot.
- Keyboard: function keys and hotkeys.
- Security features: UEFI/BIOS administrator, user, master hard disk and user hard disk passwords, plus a trusted platform module (TPM).
- Wireless features: Bluetooth and wireless LAN.
USB Transfer Rate
Actual transfer rates through the USB connectors vary with the processing capability of the host and peripheral devices, file attributes and system configuration, and they will be slower than the listed data rate: USB 3.2 Gen 1 is 5 Gbit/s and USB 3.2 Gen 2 is 10 Gbit/s.
Operating Environment
- Maximum altitude without pressurization: 3048 m (10 000 ft).
- Up to 2438 m (8000 ft): operating temperature 5°C to 35°C (41°F to 95°F); storage temperature 5°C to 43°C (41°F to 109°F).
- Above 2438 m (8000 ft): maximum operating temperature under unpressurized conditions is 31.3°C (88°F).
- When you charge the battery, its temperature must be no lower than 10°C (50°F).
- Relative humidity: operating 8% to 95% at wet-bulb temperature 23°C (73°F); storage 5% to 95% at wet-bulb temperature 27°C (81°F).
Getting Started With Windows
Basic Windows Settings
To configure a setting, type the keyword in the Windows search box, select the best match and follow the on-screen instructions.
| Function | What it does | Search keyword |
| Control Panel | View or change Windows settings, including hardware and software setup and configuration. | Control Panel |
| Connect to Wi-Fi networks | On models with a wireless LAN module, click the network icon in the Windows notification area and select a network. The wireless LAN module may support different standards, and in some countries or regions use of 802.11ax may be disabled by local regulations. | Wi-Fi |
| Airplane mode | Turns all wireless communications on and off, for example when boarding an airplane. | Airplane mode |
| Night light mode | Shows warmer colors and reduces emitted blue light, which can reduce the chance of eye fatigue or eye strain. | Night light |
| Adjust color temperature | With night light on, you can adjust the screen color temperature. Selected Lenovo computers are low blue light certified and are tested with night light on and color temperature at the default value of 48. | Night light |
| Windows Updates | Applicable updates download automatically when the computer is online, and you are prompted to restart to install them. You can also check for updates manually. | Windows Updates |
Use only Windows Update to download and install Windows updates. Updates from other sources may include security risks.
Lenovo Vantage and Lenovo PC Manager
Lenovo Vantage and Lenovo PC Manager are Lenovo software that may be pre-installed. With them you can view product information, view warranty and support information, run a hardware scan and diagnose problems, change hardware settings, and update Windows, drivers and UEFI/BIOS. To open the software, enter its name in Windows Search and select the match. If Lenovo Vantage is not pre-installed, you can download it from Microsoft Store.
Windows Help
If on-screen instructions do not solve a problem, type Get Help or Tips in the Windows search box and press Enter, then describe the problem in the app. You can also visit https://support.microsoft.com.
The Novo Button Menu
The Novo Button menu can be displayed before the operating system starts. From it you can open the UEFI/BIOS setup utility, open the boot device selection menu, or open the Windows startup options screen. From the Windows startup options screen you can then start the computer from a recovery drive, reset the computer or open the advanced options screen.
Open the Novo Button Menu
- Turn off the computer.
- Open the LCD screen and press the Novo button.
Alternatively, turn off the computer and press Fn and the power button together to open the Novo Button menu.
Keyboard Hotkeys and Hotkey Mode
Hotkey Functions
Some keys are printed with icons. These hotkeys can be pressed alone or together with the Fn key to reach certain Windows functions or settings quickly, and the icon printed on each key shows its function.
| Hotkey function | What it does |
| Mute icon | Mutes or unmutes sound. |
| Volume down and volume up icons | Decreases or increases system volume. |
| Microphone icon | Mutes or unmutes the microphone. |
| Refresh icon | Reloads Web pages or refreshes the screen. |
| Touch pad icon | Enables or disables the touch pad. |
| Airplane icon | Turns airplane mode on and off. |
| Camera icon | Enables or disables the integrated camera. |
| Lock icon | Locks the screen. |
| Display icon | Switches display devices. |
| Brightness icons | Increases or decreases screen brightness. |
Hotkey Mode
Some hotkeys share keys with the function keys F1 to F12. Hotkey mode is a UEFI/BIOS setting that changes how they are used.
| Hotkey mode setting | How to use hotkeys | How to use function keys |
| Disabled | Hold down Fn and press the hotkey. | Press the function keys directly. |
| Enabled | Press the hotkeys directly. | Hold down Fn and press the function key. |
Hotkeys that do not share keys with function keys are not affected by this setting and should always be used with the Fn key.
Change Hotkey Mode
- Open the UEFI/BIOS setup utility.
- Select Configuration ➙ Hotkey Mode and press Enter.
- Change the setting to Disabled or Enabled.
- Select Exit ➙ Exit Saving Changes.
Power and Battery
Check the Battery Status
The battery status icon is in the Windows notification area. Click it to see the percentage of battery power remaining, view the current power plan, change the power mode and open battery settings. A warning message appears when the battery is low.
Charge the Battery
When the remaining power is low, connect the computer to ac power. The battery is fully charged in about two to four hours, depending on battery capacity, the physical environment and whether you are using the computer. The recommended charging temperature range is 10°C (50°F) to 35°C (95°F). To maximize battery life, the computer does not start recharging if the remaining power is greater than 95%.
Check the Battery Temperature
- Open Lenovo Vantage.
- Click Hardware Settings ➙ Power.
- In the Power Status section, click Show Details to view the battery temperature.
If you use Lenovo PC Manager, select System hardware ➙ Battery instead.
Set the Power Button Behavior
By default, pressing the power button puts the computer to sleep. To change this:
- Type Control Panel in the Windows search box, press Enter, and view by large or small icons.
- Select the power options and click Choose what the power button does.
Change or Customize a Power Plan
This applies to computers with pre-installed Windows. Type power plan in the Windows search box, press Enter, and customize a power plan to your preference.
UEFI/BIOS Setup Utility
UEFI/BIOS is the first program that runs when the computer starts. It initializes hardware components and loads the operating system and other programs, and the setup utility lets you change certain settings.
Open the UEFI/BIOS Setup Utility
- Turn on or restart the computer.
- When the Lenovo logo appears, press F2 repeatedly. On computers with hotkey mode enabled, press Fn + F2.
Change the Startup Sequence
Change the startup sequence if you need the computer to start from another device or a network location.
- Open the UEFI/BIOS setup utility.
- Go to the Boot menu.
- Follow the on-screen instructions to change the order of devices under Boot Priority Order.
To change the startup sequence only temporarily, start the computer and press F12 (or Fn + F12) repeatedly when the Lenovo logo appears.
UEFI/BIOS Passwords
Password Types
| Password type | Prerequisite | Usage |
| Administrator password | None | Required to start the setup utility. |
| User password | Administrator password must be set | Can be used to start the setup utility. |
| Master hard disk password | None | Required to start the operating system. |
| User hard disk password | Master hard disk password must be set | Can be used to start the operating system. |
All passwords set in the setup utility use alphanumeric characters only. If you start the setup utility with the user password, you can change only a few settings.
Set an Administrator Password
Attention: If you forget the administrator password, Lenovo authorized service personnel cannot reset it. You must take the computer to Lenovo authorized service personnel to have the system board replaced. Proof of purchase is required and a fee is charged for parts and service.
- Open the UEFI/BIOS setup utility.
- Select Security ➙ Set Administrator Password and press Enter.
- Enter a password containing only letters and numbers, then press Enter.
- Enter the password again and press Enter.
- Select Exit ➙ Exit Saving Changes.
The next time you start the computer, you must enter the administrator password to open the setup utility. If Power on Password is enabled, you must enter the administrator or user password to start the computer.
Change or Remove the Administrator Password
Only the administrator can do this.
- Open the UEFI/BIOS setup utility using the administrator password.
- Select Security ➙ Set Administrator Password and press Enter.
- Enter the current password.
- In the Enter New Password box, enter the new password.
- In the Confirm New Password box, enter the new password again. To remove the password, press Enter in both boxes without entering any character.
- Select Exit ➙ Exit Saving Changes.
If you remove the administrator password, the user password is also removed.
Set a User Password
The administrator password must be set first, and the user password must differ from it.
- Open the UEFI/BIOS setup utility using the administrator password.
- Select Security ➙ Set User Password and press Enter.
- Enter a password containing only letters and numbers, then press Enter.
- Enter the password again and press Enter.
- Select Exit ➙ Exit Saving Changes.
Enable the Power-On Password
The administrator password must be set in advance.
- Open the UEFI/BIOS setup utility.
- Select Security ➙ Power on Password and press Enter.
- Change the setting to Enabled.
- Select Exit ➙ Exit Saving Changes.
When it is enabled, a prompt appears every time you turn on the computer, and you must enter the administrator or user password to start it.
Set a Hard Disk Password
Attention: Be extremely careful. If you forget the hard disk password, Lenovo authorized service personnel cannot reset it or recover data from the hard disk. You must take the computer to Lenovo authorized service personnel to have the hard disk drive replaced. Proof of purchase is required and a fee is charged for parts and service.
- Open the UEFI/BIOS setup utility. If you start it with the user password, you cannot set a hard disk password.
- Select Security ➙ Set Hard Disk Password and press Enter.
- Follow the on-screen instructions to set both the master and user passwords, which must be set at the same time.
- Select Exit ➙ Exit Saving Changes.
Once set, you must provide the correct password to start the operating system.
Change or Remove a Hard Disk Password
- Open the UEFI/BIOS setup utility.
- Select Security.
- To change or remove the master password, select Change Master Password and press Enter. To change the user password, select Change User Password and press Enter.
- Select Exit ➙ Exit Saving Changes.
If you remove the master hard disk password, the user hard disk password is also removed. The user hard disk password cannot be removed separately.
Safety and Care
Heat
When the computer is on or the battery is charging, the base, the palm rest and some other parts may become hot, depending on system activity and battery charge. Extended contact with your body, even through clothing, could cause discomfort or a skin burn. Avoid keeping your hands, lap or any other part of your body in contact with a hot section for an extended time, and periodically lift your hands from the palm rest.
Ventilation
- Never block, cover or disable ventilation slots, fans or heat sinks, for example by placing the computer on a bed, sofa, carpet or other flexible surface.
- Keep the cover closed whenever the computer is plugged in.
- Regularly inspect the outside of the computer for dust and remove dust from vents and perforations in the bezel. Dusty or high-traffic areas may need more frequent cleaning.
- Do not operate the computer inside furniture, and do not operate it or charge the battery near flammable materials or in explosive environments.
- Airflow temperatures into the computer should not exceed 35°C (95°F).
ac Power Adapter and Power Cord
- Use only the power cords and power adapters supplied by the product manufacturer. Power cords must be safety approved.
- The adapter generates heat when connected to an outlet and the computer. Do not place it in contact with any part of your body while in use, never use it to warm your body, and do not cover it with clothing or other objects.
- Never wrap a power cord around the adapter or another object, and route cords so they cannot be walked on, tripped over or pinched.
- Keep cords and adapters away from liquids, and do not use an adapter or cord that shows corrosion, overheating (such as deformed plastic) or any damage.
- Make sure all power cord connectors are fully and securely plugged into receptacles, and do not share an outlet with other appliances that draw large amounts of electricity.
- Make sure any extension cord, surge protector or power strip is rated for the product’s electrical requirements and never overload it.
Liquids, Handling and Carrying
- Keep liquids away from the computer to avoid spills and electrical shock.
- Do not drop, bump, scratch, twist, hit, vibrate, push or place heavy objects on the computer, display or external devices.
- Before putting the computer in a carrying case, make sure it is off, in sleep mode or in hibernation mode. Use a quality case with adequate cushioning and do not pack it in a tightly packed suitcase or bag.
- The screen is made of glass. If an LCD breaks and the internal fluid gets in your eyes or on your hands, wash the affected areas with water for at least 15 minutes and get medical care if symptoms are present. If other glass parts break, do not touch or remove the glass and stop using the product until trained service personnel replace it.
External Devices and Headphones
- Do not connect or disconnect external device cables other than USB and 1394 cables while the computer is on. After shutting down, wait at least five seconds before disconnecting external devices.
- Excessive sound pressure from earphones and headphones can cause hearing loss. Keep the volume at an appropriate level, and use headphones that comply with EN 50332-2 (Clause 7 limits) for a wide band characteristic voltage of 75 mV. The computer’s headphone output complies with EN 50332-2 Sub clause 7 and limits maximum wide band true RMS output voltage to 150 mV.
Battery
- The IdeaPad 1 has a built-in rechargeable battery. Do not attempt to remove or replace it; replacement must be done by a Lenovo-authorized repair facility or technician.
- Do not open, disassemble, crush, puncture, short-circuit or expose any battery to water or other liquids, and keep batteries away from children and fire.
- Stop using a battery that is damaged or shows discharge or a buildup of foreign material on its leads.
- For storage, keep rechargeable batteries or products containing them at room temperature with the battery charged to approximately 30%–50% of full capacity, and charge the battery at least once per year to prevent over-discharging.
- Dispose of batteries according to local ordinances or regulations, not in landfill trash.
When to Stop Using the Computer
If you notice an odor, smoke, sparks, or popping, cracking or hissing sounds, do not diagnose the problem yourself. Stop using the product, unplug it from the power source and contact Lenovo Customer Support. The same applies if you see any of the following:
- Cracked, broken or damaged power cords, plugs or power adapters.
- Signs of overheating, smoke, sparks or fire.
- A damaged battery, battery discharge, or a buildup of foreign substances on the battery.
- Signs that liquid has spilled or an object has fallen onto the computer, power cord or adapter, or that any of them was exposed to water.
- The product was dropped or damaged in any way.
- The product does not operate normally when you follow the operating instructions.
Service and Upgrades
Do not service the product yourself unless Customer Support or the documentation tells you to, and use only a service provider approved for your product. Before removing covers from a product with a power cord, turn it off and unplug it. Before opening the computer cover, turn it off, disconnect power and wait approximately 10 minutes for internal components to cool. After replacing a customer replaceable unit (CRU), reinstall all protective covers before connecting power and operating the computer.
Troubleshooting and Support
If the Computer Stops Responding
Press and hold the power button until the computer turns off, then restart it.
If You Spill Liquid on the Computer
- Carefully unplug the ac power adapter and turn off the computer immediately. Stopping the current quickly lowers the chance of damage from short circuits. You might lose some data or work, but leaving the computer on might make it unusable.
- Wait until you are certain all the liquid is dry before turning the computer on.
Caution: Do not try to drain the liquid by turning the computer over. If your computer has keyboard drainage holes on the bottom, the liquid drains through them.
Drivers, UEFI/BIOS, Recovery and Self-Help
- Latest drivers and UEFI/BIOS: use Lenovo Vantage or Lenovo PC Manager, or the Lenovo Support Web site at https://support.lenovo.com.
- Partitioning the storage drive: refer to https://support.lenovo.com/solutions/ht503851.
- Reset or restore Windows: use Lenovo recovery options at https://support.lenovo.com/HowToCreateLenovoRecovery, or go to https://pcsupport.lenovo.com, detect or select your model, and click Diagnostics ➙ Operating System Diagnostics.
- Troubleshooting tips and forums: https://www.lenovo.com/tips and https://forums.lenovo.com.
- Product documentation (Safety and Warranty Guide, Setup Guide, User Guide, Regulatory Notice): https://support.lenovo.com, then select Documentation.
Customer Replaceable Units
For this product, the power cord and the ac power adapter are the parts defined as self-service CRUs. Replacement of any other part, including the built-in rechargeable battery, must be done by a Lenovo-authorized repair facility or technician (https://support.lenovo.com/partnerlocation). If you install a CRU, Lenovo ships it to you and you might have to return the defective part. In that case, you might be charged for the replacement if Lenovo does not receive the defective part within thirty (30) days of your receipt of the replacement.
Contacting Lenovo
Before calling, record the product name, machine type and serial number, and the problem details: whether it is continuous or intermittent, any error message or code, the operating system and version, which applications were running, and whether you can reproduce it. During the warranty period, Customer Support offers problem determination, Lenovo hardware repair for problems caused by Lenovo hardware under warranty, and engineering change management. Not covered are parts not made for or by Lenovo, identification of software problem sources, UEFI/BIOS configuration as part of an installation or upgrade, device driver changes, network operating system maintenance and program installation and maintenance. Support phone numbers by country or region are at https://pcsupport.lenovo.com/supportphonelist, and additional paid services are at https://www.lenovo.com/services. Warranty terms are in the Safety and Warranty Guide that comes with the computer.
Frequently Asked Questions
How do I open the UEFI/BIOS setup utility on the IdeaPad 1 11ADA05?
Turn the computer on or restart it, and as soon as the Lenovo logo appears, press F2 repeatedly. If hotkey mode is enabled on your computer, press Fn + F2 instead. If you have set an administrator password, you will need to enter it to get in, and starting with the user password lets you change only a few settings.
What is the Novo button and how do I use it?
The Novo button is reached through the Novo button hole on the left side of the computer. With the computer turned off, open the screen and press it to display the Novo Button menu, which lets you open the UEFI/BIOS setup utility, the boot device selection menu or the Windows startup options screen. If you prefer, turn the computer off and press Fn and the power button together to reach the same menu.
What do the charging light colors mean?
The charging light is on the left side. Solid white means the computer is connected to ac power and the battery is at 91%–100%. Solid amber means it is connected to ac power and the battery is at 1%–90%. If the light is off, the computer is not connected to ac power.
How long does the battery take to charge, and why isn’t it charging at a high level?
A full charge takes about two to four hours, though the actual time depends on battery capacity, the environment and whether you are using the computer while it charges. The recommended charging temperature is between 10°C (50°F) and 35°C (95°F), and the battery temperature must be no lower than 10°C (50°F) when you charge. To maximize battery life, the computer also will not start recharging when the remaining power is above 95%.
How do I start the computer from a USB drive or another device?
For a one-time change, start the computer and press F12 (or Fn + F12) repeatedly when the Lenovo logo appears. To change the order permanently, open the UEFI/BIOS setup utility, go to the Boot menu and follow the on-screen instructions to change the order of devices under Boot Priority Order, then choose Exit ➙ Exit Saving Changes if you made changes in setup.
How do I use the F1–F12 keys without holding Fn?
Hotkeys and function keys share keys, and a UEFI/BIOS setting called Hotkey Mode decides which one needs Fn. With Hotkey Mode set to Enabled, you press hotkeys directly and hold Fn for the function keys. With it set to Disabled, you hold Fn for hotkeys and press function keys directly. To change it, open the setup utility, select Configuration ➙ Hotkey Mode, change the setting, then select Exit ➙ Exit Saving Changes. Hotkeys that do not share keys with function keys always need Fn.
What should I do if the computer stops responding?
Press and hold the power button until the computer turns off, then restart it. Any unsaved work in open programs may be lost, so save your work regularly.
What should I do if I spill liquid on the computer?
Unplug the ac power adapter and turn the computer off right away. Wait until you are certain all the liquid is dry before turning it on again. Do not turn the computer over to drain the liquid; if your computer has keyboard drainage holes on the bottom, the liquid will drain through them.
Can I add memory or replace the battery on the IdeaPad 1?
No memory upgrade is provided for in this guide: the memory is on-board DDR4 and the computer has 0 memory slots. The battery is a built-in rechargeable battery that you should not remove or replace yourself, and replacement must be done by a Lenovo-authorized repair facility or technician. The only parts listed as customer replaceable units for this product are the power cord and the ac power adapter.
What happens if I forget the administrator or hard disk password?
Lenovo authorized service personnel cannot reset either password. For a forgotten administrator password, you must take the computer to Lenovo authorized service personnel to have the system board replaced. For a forgotten hard disk password, they also cannot recover data from the drive, and you must have the hard disk drive replaced. In both cases proof of purchase is required and a fee is charged for parts and service, so choose passwords you will remember.
Can I use a standalone external microphone with the headphone jack?
No. The combo audio jack accepts headphones or headsets with a 3.5 mm (0.14 inch), 4-pole plug, but it does not support standalone external microphones. If you want to use a microphone through the jack, choose a headset with a single plug.
What power adapter does the IdeaPad 1 use?
The included ac power adapter accepts 100 V ac–240 V ac at 50 Hz–60 Hz and outputs 20 V dc at 2.25 A, which is 45 W. Use only the power cords and adapters supplied by the product manufacturer, never wrap the cord around the adapter, and do not use an adapter or cord that is damaged, corroded or showing signs of overheating.