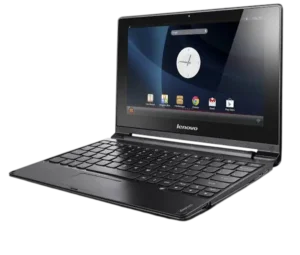
| Field | Details |
| Document Title | Lenovo IdeaPad A10 User Guide |
| Document Type | User Guide |
| Brand Name | Lenovo |
| Product Name | IdeaPad A10 |
| Model Number(s) | A10 |
| PDF File Size | 839.9 KiB |
| Number of Pages | 14 |
| Languages Covered | English |
Lenovo IdeaPad A10
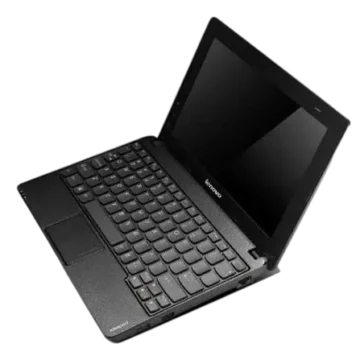
The Lenovo IdeaPad A10 is an Android-based notebook computer with a physical keyboard, multi-touch display, and adjustable screen hinge. It combines conventional laptop controls with touchscreen navigation, allowing users to operate Android applications using keyboard shortcuts, the touchpad, and touch gestures.
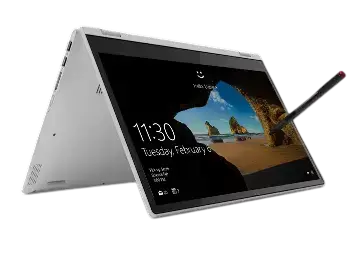
The IdeaPad A10 features a display that can open up to 300 degrees, supporting two main operating positions: Notebook Mode and Stand Mode, also called Theater Mode. Notebook Mode is intended for typing, writing emails, and creating documents, while Stand Mode is designed for activities such as watching videos and viewing photographs.
The computer provides wireless networking, USB connectivity, a micro HDMI connection, a microSD card reader, and a combined headset audio jack. Select configurations also include an integrated camera and a SIM card slot.
The Lenovo IdeaPad A10 uses a Micro USB connection for charging and data transfer. Its built-in battery status indicator shows charging conditions, low-battery warnings, and unread notifications.
The Android interface includes a Home screen, Apps screen, status drop-down menu, and touchscreen gestures. Users can change wireless settings, screen brightness, sound volume, and display rotation through keyboard hotkeys or on-screen controls.
The following instructions explain the computer’s components, initial setup, everyday operation, connectivity, battery indicators, and troubleshooting procedures.
Product Overview and Features
| Feature | Description |
| Product Type | Convertible notebook computer |
| Operating System Referenced | Android |
| Display | Multi-touch screen |
| Maximum Display Opening Angle | 300 degrees |
| Operating Positions | Notebook Mode and Stand Mode |
| Keyboard | Integrated physical keyboard with hotkeys |
| Pointing Device | Integrated touchpad |
| Camera | Available on select models |
| Wireless Connectivity | Wireless LAN |
| Bluetooth Controls | Available through the status drop-down menu |
| USB Connections | Two USB ports |
| Charging Connection | Micro USB port |
| External Display Connection | Micro HDMI |
| Audio Connection | Combo audio jack |
| Microphones | Built-in microphones |
| Memory Card Support | microSD cards up to 64 GB |
| SIM Card Support | Standard SIM cards on select models |
| Audio Output | Built-in speakers |
| Battery Indicator | Orange and blue LED states |
| Reset Function | Dedicated reset hole |
| Navigation | Touchscreen gestures, keyboard, and touchpad |
Supported Operating Positions
The IdeaPad A10 uses its adjustable display to support different activities.
| Mode | Intended Use |
| Notebook Mode | Typing, creating documents, and writing emails |
| Stand Mode (Theater Mode) | Viewing photographs, playing videos, and other activities requiring little or no keyboard input |
The keyboard and touchpad automatically lock when the keyboard panel faces downward.
Technical Specifications
The following specifications and capabilities apply to the functions identified in the IdeaPad A10 User Guide.
| Specification | Details |
| Brand | Lenovo |
| Model | IdeaPad A10 |
| Device Type | Android notebook computer |
| Input Methods | Touchscreen, keyboard, touchpad |
| Display Hinge Opening | Up to 300 degrees |
| USB Ports | 2 |
| Power and Data Connection | Micro USB |
| Video Output | Micro HDMI |
| Audio Port | Combo audio jack |
| External Storage | microSD |
| Maximum Supported microSD Capacity | 64 GB |
| SIM Format | Standard SIM, supported on select models |
| Wireless Network | Wireless LAN |
| Camera | Integrated camera on select models |
| Microphone | Built-in |
| Audio Output | Integrated speakers |
| Battery Power | Built-in rechargeable battery |
| Charging Method | USB cable connected to AC power adapter |
| Reset Control | Reset hole on the bottom |
| Documented Software Interface | Android Home screen and Apps screen |
Features may vary between product configurations.
Important Safety Instructions
Before operating the IdeaPad A10, the Lenovo Safety and General Information Guide supplied with the computer should be read.
Display Panel Safety
- Do not close the display while pens or other objects remain between the screen and keyboard.
- Do not force the display beyond its intended range of movement.
- Excessive force can damage the display panel or its hinges.
The display can open up to 300 degrees.
Wireless Device Safety
The Lenovo Regulatory Notice contains information about radio-frequency requirements and wireless-device safety.
The applicable regulatory documents are available through Lenovo Support.
External Device Safety
Avoid connecting or disconnecting external device cables other than USB while the computer is powered on.
Doing so may damage the computer or connected equipment.
USB Storage Data Protection
Before disconnecting a USB storage device, confirm that all file transfers have finished.
Use the system’s Remove Storage Device function before removing the device to reduce the risk of data corruption.
External USB Power
If a USB device has its own power cord, connect the device to its power source before connecting it to the IdeaPad A10.
Otherwise, the computer may not recognize the device.
System Reset Precaution
If the computer becomes unresponsive, the reset hole can be used to reset it.
Unsaved data may be lost when the computer is reset.
Parts and Components
The IdeaPad A10 includes components on its top, left, right, and bottom surfaces.
Top View – Display, Camera, Keyboard, and Touchpad
The top of the computer contains the touchscreen, keyboard, touchpad, wireless antennas, and other integrated components.
Top Components
| Component | Function |
| Integrated Camera | Provides video communication on select models |
| Wireless LAN Antennas | Send and receive wireless signals |
| Multi-Touch Screen | Displays content and accepts touch input |
| Caps Lock Indicator | Indicates uppercase typing mode |
| Touchpad | Controls the on-screen pointer |
| Touchpad Buttons | Provide left-click and right-click functions |
Integrated Camera
Select IdeaPad A10 configurations include an integrated camera.
The camera can be used for video communication.
Wireless LAN Antennas
The wireless antennas work with the computer’s wireless adapter to transmit and receive wireless network signals.
Multi-Touch Display
The touchscreen serves as both a visual display and an input method.
It supports touch, long press, swipe, drag, double touch, and pinch gestures.
Caps Lock Indicator
When the Caps Lock indicator is on, typed letters appear in uppercase by default.
Touchpad
The touchpad operates similarly to a conventional mouse.
Moving a fingertip across its surface moves the pointer on the screen.
The left and right areas perform the corresponding mouse-button functions.
Left-Side Ports and Controls
The left side of the IdeaPad A10 contains the Power button, a USB port, and a combo audio jack.
| Component | Function |
| Power Button | Turns the computer on and provides shutdown control |
| USB Port | Connects compatible USB devices |
| Combo Audio Jack | Connects compatible headsets |
Power Button
The Power button starts the computer.
It can also be used when shutting down or recovering the computer from sleep mode.
USB Port
The USB port allows supported peripheral devices to connect to the computer.
Combo Audio Jack
The combo audio jack connects a compatible headset.
Conventional microphones are not supported through this jack.
Some third-party headsets may not support recording because of differences between connector standards.
Right-Side Ports and Indicators
The right side contains additional USB connectivity, removable storage, charging, video output, and microphone components.
| Component | Function |
| USB Port | Connects compatible USB devices |
| Memory Card Slot | Accepts supported microSD cards |
| Micro USB Port | Charges the battery or transfers data |
| System Status Indicators | Show charging and notification states |
| Micro HDMI Port | Connects a compatible external display |
| Built-in Microphones | Capture sound for recording and communication |
Micro USB Port
The Micro USB port connects the USB cable supplied for AC charging.
It also supports data transfer.
Micro HDMI Port
The Micro HDMI port connects to devices with HDMI input, including compatible televisions and external displays.
Built-in Microphones
The microphones capture audio for:
- Video conferencing
- Voice narration
- Audio recording
Bottom View – Reset Hole, SIM Slot, and Speakers
The bottom surface contains the system reset opening, optional SIM card slot, and speakers.
| Component | Function |
| Reset Hole | Resets the computer |
| SIM Card Slot | Accepts a standard SIM card on select models |
| Speakers | Provide audio output |
Reset Hole
The reset hole is used when the computer must be reset.
This function is intended for situations where the system stops responding and cannot be shut down normally.
SIM Card Slot
Select IdeaPad A10 models include a standard SIM card slot.
SIM card compatibility can depend on the local service provider.
Speakers
The built-in speakers provide audio playback.
Using the Keyboard and Hotkeys
The keyboard provides direct shortcuts to frequently used Android functions.
These shortcuts allow the user to operate the device without opening the corresponding settings screen.
Keyboard Hotkey Functions
| Hotkey | Function |
| Back | Returns to the previous screen |
| Home | Opens the Home screen |
| Apps | Opens the Apps screen |
| Settings | Opens the settings screen |
| Mute | Mutes or unmutes sound |
| Volume Down | Decreases audio volume |
| Volume Up | Increases audio volume |
| Brightness Down | Decreases display brightness |
| Brightness Up | Increases display brightness |
| Airplane Mode | Enables or disables Airplane Mode |
| Screen Lock | Locks the screen |
| Touchpad Toggle | Enables or disables the touchpad |
| Landscape Mode | Forces landscape display orientation |
| Browser | Opens the browser screen |
| Print Screen (PrtSc) | Captures a screenshot |
| Search | Opens the search screen |
| App Switching | Switches between different applications |
| Shortcut Menu | Opens a shortcut menu |
Returning to the Previous Screen
Press the Back hotkey to return to the previous screen.
Opening the Home Screen
Press the Home hotkey to display the Android Home screen.
Opening Installed Applications
Press the Apps hotkey to open the Apps screen.
Opening Settings
Press the Settings hotkey to access system settings.
Adjusting Sound
Use the volume hotkeys to increase or decrease sound.
Press the Mute hotkey to turn sound off or on.
Adjusting Screen Brightness
Use the brightness hotkeys to increase or decrease display brightness.
Taking a Screenshot
Press PrtSc to capture the current screen.
Locking the Screen
Press the Screen Lock hotkey to lock the display.
Changing Screen Orientation
Press the landscape hotkey to force landscape orientation.
Switching Applications
Use the app-switching hotkey to toggle between different applications.
Using the Touchpad
The integrated touchpad allows pointer control using a fingertip.
Moving the Pointer
- Place a fingertip on the touchpad.
- Move the finger in the desired direction.
- The on-screen pointer moves accordingly.
Left and Right Mouse Functions
The left and right portions of the touchpad provide conventional mouse-button functions.
Enabling or Disabling the Touchpad
Press the dedicated touchpad hotkey.
The hotkey switches the touchpad between enabled and disabled states.
The keyboard and touchpad also lock automatically when the keyboard panel faces downward.
Positioning the Display Panel
The IdeaPad A10 display can be opened up to 300 degrees.
This allows the computer to be used in Notebook Mode or Stand Mode.
Notebook Mode
Notebook Mode is intended for activities that require the keyboard and touchpad.
Typical activities include:
- Creating documents
- Writing emails
- Typing text
- Using applications that require keyboard input
To use Notebook Mode, position the display at a comfortable viewing angle with the keyboard facing upward.
Stand Mode (Theater Mode)
Stand Mode is designed for activities that require little or no keyboard input.
Examples include:
- Viewing photographs
- Watching videos
- Playing multimedia content
The display can be moved backward into the supported stand position.
When the keyboard panel faces downward, the keyboard and touchpad are automatically locked.
Display Positioning Precaution
Do not apply excessive force while opening or repositioning the display.
Forcing the display can damage the panel or hinges.
Before First Use
Before starting the IdeaPad A10, read the included safety documentation.
Initial Setup Procedure
- Check the computer and its controls.
- Connect the USB cable to the AC power adapter.
- Connect the cable to the computer’s Micro USB port.
- Connect the power adapter to an electrical socket.
- Turn on the computer.
- Use the Android Home screen or Apps screen to begin operating the device.
- Configure wireless networking when internet access is required.
Connecting the IdeaPad A10 to Power
The computer is charged through its Micro USB port.
Charging Instructions
- Connect the USB cable to the AC power adapter.
- Insert the Micro USB connector securely into the Micro USB port on the right side of the computer.
- Insert the adapter’s power plug into an electrical socket.
The system status indicator shows the charging condition.
Low-Battery Warning
When the computer is disconnected from the AC power adapter, an on-screen warning appears if the battery reaches low or critical power levels.
Connect the AC power adapter when a low-battery warning appears.
Turning On the Lenovo IdeaPad A10
To start the computer:
- Locate the Power button on the left side.
- Press and hold the Power button for five seconds or longer.
- Release the button when the computer begins starting.
The Lenovo logo and startup screen appear.
Shutting Down the Computer
The IdeaPad A10 provides two shutdown methods.
Method 1: Using the Status Drop-Down Menu
- Open the status drop-down list.
- Select Shut Down.
- Select OK to confirm.
Method 2: Using the Power Button
- Press and hold the Power button for five seconds or longer.
- Select Shut Down.
If the Computer Does Not Shut Down
If the operating system becomes unresponsive or the computer cannot shut down normally, use the reset hole to reset the computer.
Unsaved data may be lost.
Understanding the Android Interface
The IdeaPad A10 uses an Android graphical user interface with a Home screen, Apps screen, and system status controls.
Home Screen
The Home screen provides access to application shortcuts and system information.
Home Screen Components
| Component | Function |
| Status Bar | Shows wireless connection, power supply, battery state, and time |
| Apps Launcher | Opens the Apps screen |
| Custom App Icons | Provides shortcuts to selected applications |
| Show/Hide App Icons | Shows or hides application icons on the taskbar |
Status Bar
The status bar displays system information, including:
- Wireless connection status
- Power supply information
- Battery state
- Clock
Apps Launcher
The Apps Launcher opens the Apps screen.
Custom Application Icons
Application icons provide direct access to selected applications.
Showing and Hiding Application Icons
The show/hide control changes whether application icons are displayed on the taskbar.
Apps Screen
The Apps screen provides access to installed applications.
Apps Screen Navigation
| Control | Function |
| Home | Returns to the Home screen |
| Back | Returns to the previous screen |
Applications can be opened from the Apps screen using the touchscreen or other available input controls.
Using the Status Drop-Down Menu
The status drop-down menu provides quick access to frequently used settings.
How to Open the Status Menu
- Locate the status bar in the upper-right corner of the screen.
- Use the touchscreen or touchpad.
- Drag the status bar downward.
The status drop-down list opens.
Available Quick Settings
| Setting | Function |
| Wi-Fi | Enables or disables wireless networking |
| Bluetooth | Enables or disables Bluetooth |
| Airplane Mode | Controls wireless connections |
| Screen Rotation | Enables or disables display rotation |
| Volume | Adjusts sound level |
| Brightness | Adjusts display brightness |
| Restart | Restarts the computer |
| Sleep | Places the computer into sleep mode |
| Shut Down | Turns off the computer |
Changing Screen Brightness
Open the status menu and adjust the brightness control.
The keyboard brightness hotkeys can also be used.
Changing Audio Volume
Use the volume setting in the status menu or the keyboard volume hotkeys.
Restarting the Computer
Open the status menu and select Restart.
Entering Sleep Mode
Open the status menu and select Sleep.
Using Touchscreen Gestures
The IdeaPad A10 supports several touchscreen gestures for navigation and interaction.
Touch Gesture Guide
| Gesture | How to Perform | Function |
| Touch | Press the screen and lift the finger | Activates the selected item |
| Long Press | Press, hold briefly, then lift | Selects items or opens additional item actions |
| Swipe | Press, move the finger, then lift | Scrolls content or changes views |
| Drag | Long press, move the item, then lift | Moves or rearranges items |
| Double Touch | Touch twice quickly | Zooms into content or supports text selection |
| Pinch | Move two fingers inward or outward | Zooms out or in |
Touch
Touch an item once to activate its normal function.
For example, touch an application icon to open it.
Long Press
Press an item and hold before lifting the finger.
This gesture allows items to be selected or manipulated.
Swipe
Press the touchscreen, move a finger across the display, and lift.
Swiping is used to scroll through content or move between related views.
Drag
Press and hold an item, move the finger while maintaining contact, and release it in the desired location.
Dragging can be used to rearrange items or move them into a container.
Double Touch
Touch the display twice in quick succession.
This gesture can zoom into content or serve as a secondary text-selection gesture.
Pinch
Place two fingers on the touchscreen.
Move the fingers apart to zoom in or toward each other to zoom out.
Connecting to a Wireless Network
The IdeaPad A10 includes a wireless network card for connecting to wireless LAN networks.
How to Enable Wi-Fi
- Open the Apps screen.
- Select Settings.
- Select Wi-Fi.
- Move the Wi-Fi switch to ON.
The computer automatically searches for available wireless networks.
How to Connect to Wi-Fi
- Enable Wi-Fi.
- Wait for the available networks to appear.
- Select the required wireless network.
- Select Connect.
- Enter the network password if required.
The network can be used after a successful connection.
Open and Secured Wi-Fi Networks
The wireless network list displays status icons.
| Network Type | Connection Requirement |
| Open Network | Can be connected without entering a password |
| Encrypted Network | Requires the correct network password |
Advanced Wi-Fi Settings
The wireless settings menu also provides advanced options.
To access them:
- Open Settings.
- Select Wi-Fi.
- Open the menu.
- Select Advanced.
The Wi-Fi interface also allows networks to be scanned for manually or added.
How to Disable Wi-Fi
Wi-Fi can be disabled through its dedicated setting or by enabling Airplane Mode.
Method 1: Wi-Fi Settings
- Open Settings.
- Select Wi-Fi.
- Move the Wi-Fi switch to OFF.
Method 2: Airplane Mode
- Open Settings.
- Select More.
- Enable Airplane Mode.
When Airplane Mode is enabled, the computer’s wireless connections are disabled.
The keyboard also includes an Airplane Mode hotkey.
Connecting USB Devices
The IdeaPad A10 has two USB ports for compatible devices.
How to Connect a USB Device
- Locate a USB port on the left or right side.
- Insert the compatible USB connector into the port.
- Use the connected device according to its operating instructions.
Connecting USB Devices With External Power
If a USB device has its own power cord:
- Connect the device to its power supply.
- Connect the USB device to the computer.
Without the external power connection, the device may not be recognized.
Safely Removing USB Storage
USB storage devices should be removed through the Android storage settings.
USB Storage Removal Procedure
- Wait until the device has finished transferring data.
- Open the Apps screen.
- Select Settings.
- Select Storage.
- Select Remove Storage Device.
- Select OK.
- Disconnect the USB storage device after it has been safely removed.
Removing storage during an active transfer may damage the stored data.
Using a microSD Memory Card
The IdeaPad A10 supports microSD cards with capacities up to 64 GB.
Memory cards are inserted into the card slot on the right side.
How to Insert a microSD Card
- Locate the memory card slot.
- Align the microSD card with the slot.
- Slide the card in until it clicks into place.
How to Remove a microSD Card
- Push the card inward until a click is heard.
- Gently pull the card out of the slot.
Memory Card Specifications
| Specification | Details |
| Supported Card Type | microSD |
| Maximum Capacity | 64 GB |
| Card Location | Right side |
| Insertion Mechanism | Push until it clicks |
| Removal Mechanism | Push to release, then pull out |
Using a SIM Card
Select IdeaPad A10 configurations include a SIM card slot.
The slot supports standard SIM cards.
How to Insert a SIM Card
- Locate the SIM card slot on the bottom of the computer.
- Align the SIM card with the slot.
- Slide the SIM card inward until it clicks into place.
How to Remove a SIM Card
- Push the installed SIM card inward until a click is heard.
- Gently pull the SIM card out of the slot.
SIM Card Compatibility
Some SIM cards may not be supported.
Consult the local service provider for compatibility information.
Connecting an External Display
The IdeaPad A10 has a Micro HDMI port for connecting an external display.
The port supports connections to devices with HDMI input, including:
- Compatible televisions
- External monitors
- Other supported HDMI display devices
Connect the external display using a compatible connection for the Micro HDMI port and the external device’s HDMI input.
Using Audio and Headsets
The IdeaPad A10 has built-in speakers, microphones, and a combo audio jack.
Built-in Speakers
The speakers provide sound output for applications and multimedia.
Built-in Microphones
The microphones capture sound for communication and recording.
Connecting a Headset
Connect a compatible headset to the combo audio jack on the left side.
Conventional standalone microphones are not supported through this jack.
Some third-party headsets may not support recording because of connector-standard differences.
Battery and System Status Indicators
The right-side status indicators show battery charging conditions and unread notification activity.
Battery Indicator Meanings
| Indicator | Condition | Meaning |
| Solid Orange | Charging | Battery charge is below 10% |
| Solid Orange | Low battery | Battery needs charging |
| Solid Blue | Charging | Battery charge is above 10% |
| Blinking Orange Every 2 Seconds | Notification | New unread messages are present |
| Blinking Blue Every 2 Seconds | Notification | New unread messages are present |
| Off | Charging cable disconnected | Computer is off or battery charge is above 10% |
Solid Orange Indicator
An orange indicator can mean the battery is charging below 10% or that the battery requires charging.
Solid Blue Indicator
A solid blue indicator while charging means the battery charge is above 10%.
Blinking Orange or Blue Indicator
A light blinking approximately every two seconds indicates unread messages.
Low-Battery Screen Warning
When the computer is disconnected from the AC adapter, the system displays warnings when the battery reaches low or critical levels.
Connect the power adapter when these warnings appear.
Resetting an Unresponsive IdeaPad A10
The IdeaPad A10 has a dedicated reset hole on the bottom.
The reset function is used when the computer stops responding and normal shutdown is unsuccessful.
When to Use the Reset Function
The reset hole may be needed when:
- The computer becomes unresponsive.
- The system cannot be shut down normally.
- The computer does not recover from sleep mode.
Reset Procedure
- Try the normal shutdown procedure first.
- If the system does not respond, use the reset hole on the bottom of the computer.
- Start the computer again after the reset.
Warning: Unsaved data may be lost when the computer is reset.
Troubleshooting Guide
The following procedures address the operating problems described for the Lenovo IdeaPad A10.
Common Problems and Solutions
| Problem | Possible Cause or Condition | Recommended Solution |
| Screen remains blank at startup | Power connection or startup problem | Check USB charging cable, AC adapter, electrical outlet, and Power button |
| Screen turns blank while running | Computer may be in sleep mode | Press a keyboard key in Notebook Mode or press Power |
| Critical low-battery warning | Battery charge is low | Connect the USB cable and AC adapter |
| Computer sleeps immediately after startup | Battery or operating temperature condition | Check charge and operating temperature |
| Computer does not wake from sleep | Power or system response problem | Connect AC power and press Power |
| Display is blank | Display brightness or sleep condition | Increase brightness or wake the system |
| Incorrect characters appear | Operating system or application problem | Check software installation and configuration |
| No sound from speakers | Mute, audio jack, or playback settings | Check mute and speaker selection |
| Battery indicator behaves unexpectedly | Battery charge indication | Recharge the battery |
| Computer stops responding | System has become unresponsive | Attempt shutdown, then use reset hole if necessary |
| External device does not work | Connection or device compatibility issue | Follow supported device connection precautions |
Computer Does Not Turn On or Display Anything
If nothing appears on the screen when the computer is started:
- Confirm that the USB cable is connected to the computer.
- Check that the AC power adapter is plugged into a working electrical outlet.
- Confirm that the computer power is on.
- Press the Power button again to verify.
If these conditions are correct and the display remains blank, the computer requires service.
Screen Goes Blank While the Computer Is On
The computer may have entered sleep mode.
To resume operation:
- Press any keyboard key while in Notebook Mode.
- Alternatively, press the Power button.
Critical Low-Battery Error Appears
If a critical low-battery message appears and the computer immediately shuts down, the battery charge is insufficient.
Connect the USB charging cable and AC power adapter.
Computer Enters Sleep Immediately After Power-On
If the computer enters sleep mode immediately after being turned on, check the following:
- The battery is charged.
- The operating temperature is within the acceptable range.
The acceptable operating conditions are described in the Lenovo Safety and General Information Guide.
If the battery is charged and the operating temperature is within range, the computer requires service.
Computer Does Not Return From Sleep Mode
If the computer does not resume normal operation:
- Connect the USB cable and AC power adapter.
- Press the Power button.
If the computer is powered off:
- Connect the USB cable and AC power adapter.
- Press the Power button to start it.
If the system remains unresponsive and cannot be shut down, use the reset hole.
Unsaved data may be lost.
Display Is Blank or Too Dark
If the display is blank but the battery status indicator is on:
- Press the brightness-increase hotkey.
- Check whether the display becomes visible.
If the computer is in sleep mode, press a keyboard key in Notebook Mode to wake it.
Incorrect Characters Appear on the Screen
If characters appear incorrectly, check whether the operating system and applications are installed and configured correctly.
If the software is installed and configured correctly but the problem continues, the computer requires service.
No Sound From the Speakers
If no sound is heard even when the volume is increased, check the following:
- Confirm that the Mute function is off.
- Check whether the combo audio jack is being used.
- Confirm that Speakers are selected as the playback device.
Battery Indicator Does Not Match Actual Battery Operation
If the computer shuts down before the battery indicator shows empty, or continues operating after the indicator shows empty, recharge the battery.
Computer Does Not Respond
If the computer becomes unresponsive:
- Press and hold the Power button for five seconds or longer.
- Select Shut Down if the shutdown option appears.
- If the system still does not respond, use the reset hole.
Unsaved data may be lost when the system is reset.
Connected External Device Does Not Work
Do not connect or disconnect external device cables other than USB while the computer is powered on.
This precaution helps prevent damage to the computer.
For USB devices that require external power, connect the device’s power supply before connecting it to the IdeaPad A10.
Maintenance and Care
Display and Hinge Care
- Do not force the display beyond its supported opening range.
- Keep objects away from the keyboard before closing the screen.
- Reposition the display carefully when switching between Notebook Mode and Stand Mode.
Battery Care
- Connect the AC power adapter when the battery warning appears.
- Check the battery status indicator for charging information.
- Avoid allowing a critical low-battery condition to interrupt active work.
Removable Storage Care
Wait until file transfers finish before removing USB storage.
Use the system’s Remove Storage Device function for USB storage devices.
External Device Care
Follow the connection instructions for USB peripherals and powered accessories.
Avoid disconnecting non-USB external device cables while the computer is powered on.
Warranty Information
The IdeaPad A10 is supplied with Lenovo warranty documentation.
The Lenovo limited warranty flyer included with the computer provides the applicable:
- Warranty period
- Warranty type
- Warranty service information
The warranty terms should be checked in the document supplied with the computer.
Customer Support Information
Lenovo provides product support, regulatory information, and additional documentation through its support website.
| Support Information | Details |
| Brand | Lenovo |
| Product | IdeaPad A10 |
| Official Support Website | http://support.lenovo.com |
| Documentation Location | SUPPORT → GUIDES & MANUALS |
| Warranty Documentation | Lenovo Limited Warranty flyer supplied with the product |
| Safety Documentation | Lenovo Safety and General Information Guide |
| Regulatory Documentation | Lenovo Regulatory Notice |
Finding Additional Documentation
- Visit http://support.lenovo.com.
- Select SUPPORT.
- Open GUIDES & MANUALS.
- Locate the required IdeaPad A10 documentation.
Lenovo Customer Support
Instructions for contacting Lenovo customer support are provided in Chapter 3, Getting Help and Service, of the Lenovo Safety and General Information Guide supplied with the computer.
Frequently Asked Questions
1. How do I turn on the Lenovo IdeaPad A10?
Press and hold the Power button on the left side for five seconds or longer. The Lenovo logo and startup screen appear when the computer begins starting.
2. How do I connect the Lenovo IdeaPad A10 to Wi-Fi?
Open Settings, select Wi-Fi, and switch Wi-Fi to ON. The computer scans for available networks. Select the desired network, choose Connect, and enter its password if required.
3. How do I charge the Lenovo IdeaPad A10?
Connect the USB cable to the AC power adapter, plug the Micro USB connector into the port on the right side of the computer, and connect the power adapter to an electrical socket. The battery indicator shows the charging condition.
4. How do I reset a frozen Lenovo IdeaPad A10?
Press and hold the Power button for five seconds or longer and select Shut Down if the option appears. If the system remains unresponsive, use the reset hole on the bottom of the computer. Unsaved data may be lost.
5. How do I switch between Notebook Mode and Stand Mode?
Adjust the display position using the hinge, which supports opening up to 300 degrees. Notebook Mode is suitable for keyboard-based work, while Stand Mode is designed for viewing photos and videos. When the keyboard panel faces downward, the keyboard and touchpad lock automatically.
6. What memory cards does the Lenovo IdeaPad A10 support?
The IdeaPad A10 supports microSD memory cards with capacities up to 64 GB. Insert the card into the memory card slot until it clicks. To remove it, push the card inward until it clicks, then gently pull it out.
7. What does the orange or blue light on the Lenovo IdeaPad A10 mean?
A solid orange indicator can mean the battery is charging below 10% or needs charging. A solid blue indicator while charging means the charge is above 10%. An orange or blue indicator blinking every two seconds means there are unread messages.
8. Why does my Lenovo IdeaPad A10 screen stay black?
Check that the USB charging cable and AC adapter are connected correctly and the electrical outlet is working. Confirm that the computer is powered on. If the computer was in sleep mode, press a keyboard key in Notebook Mode or press the Power button. If the battery indicator is on but the screen remains dark, use the brightness-increase hotkey. If the display still remains blank, the computer requires service.