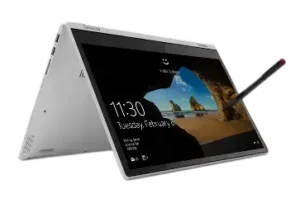
| Field | Details |
| Document Title | User Guide — Lenovo ideapad D330 |
| Document Type | User Guide |
| Brand Name | Lenovo |
| Product Name | ideapad D330 |
| Model Number(s) | D330; 10IGL is indicated by the supplied PDF filename, although the cover identifies the product as D330 |
| PDF File Size | 6.97 MB |
| Number of Pages | 33 |
| Languages Covered | English |
Lenovo ideapad D330-10IGL
The Lenovo ideapad D330 is a detachable tablet computer designed for touchscreen operation and notebook-style use with an optional keyboard dock. It runs Windows 10 and supports everyday activities such as internet access, document editing, communication, and multimedia applications.
The computer features a multi-touch display, front and rear cameras, wireless LAN antennas, a built-in speaker, USB-C connectivity, an audio jack, and a microSD card slot. Selected configurations also support wireless WAN connectivity through a nano-SIM card and include GPS antenna functionality.
When connected to its optional keyboard dock, the ideapad D330 can be used like a notebook computer, with a physical keyboard, touchpad, and additional USB 2.0 connections. Some models also support the Lenovo Digital Pen for handwriting, drawing, and touchscreen interaction.
The following instructions cover the computer’s hardware, tablet and keyboard connections, digital pen operation, function keys, Windows 10 setup, wireless networking, touchscreen gestures, system recovery, maintenance precautions, and troubleshooting.
Product Overview and Technical Specifications
The ideapad D330 combines a portable touchscreen tablet with optional notebook-style accessories. Hardware and accessory availability depend on the purchased configuration.
| Specification | Details |
| Brand | Lenovo |
| Product | ideapad D330 |
| Model Identifier | D330-10IGL |
| Product Type | Detachable Tablet Computer |
| Operating System Covered | Windows 10 |
| Display Input | Multi-Touch Screen |
| Display Orientation | Automatic Portrait and Landscape Rotation |
| Front Camera | Yes |
| Rear Camera | Yes |
| Wireless LAN | Yes |
| Wireless WAN | Selected Models |
| GPS Antenna | Included with the Wireless WAN Antenna Arrangement |
| Audio Output | Built-In Speaker |
| Audio Connection | Combo Audio Jack |
| USB-C Connection | USB 3.1 and DisplayPort (DP) |
| Power Connection | Dedicated AC Power Adapter Jack |
| Memory Card Support | microSD |
| Cellular SIM Support | Nano-SIM on Selected Models |
| Keyboard Dock | Optional |
| Keyboard Dock USB Ports | Two USB 2.0 Ports |
| Touchpad | Included with Optional Keyboard Dock |
| Digital Pen | Optional |
| Digital Pen Battery | AAAA Alkaline |
| Maximum Display Opening Angle with Dock | 135 Degrees |
| Windows Recovery | Reset This PC and Novo Menu |
Parts and Components
Top and Front Components
The front of the tablet includes the touchscreen, front-facing camera, wireless antennas, and speaker.
| Component | Function |
| Front Camera | Supports video communication |
| Wireless LAN Antennas | Transmit and receive WiFi signals |
| Wireless WAN Antennas | Support cellular network communication on selected models |
| GPS Antenna | Included in the wireless WAN antenna arrangement |
| Multi-Touch Screen | Displays information and accepts touch input |
| Speaker | Provides sound output |
The wireless antennas are installed inside the device and are not externally visible.
Rear Camera
The rear camera is located on the back of the tablet.
It supports taking photographs and video communication through compatible applications.
Left-Side Components
The left side contains the combo audio jack.
Combo Audio Jack: Used to connect compatible headsets.
The jack does not support conventional standalone microphones. Some third-party headset recording functions may not work because of differences in connector standards.
Right-Side Components
| Component | Function |
| Power Button | Turns the computer on or off |
| Volume Up/Down Button | Adjusts speaker volume |
| USB Type-C Port | Supports USB 3.1 and DisplayPort |
| AC Power Adapter Jack | Connects the AC power adapter |
Bottom Components
| Component | Function |
| Tablet-Keyboard Dock Latch | Secures the tablet to the optional keyboard dock |
| Keyboard Dock Connector | Establishes the connection between the tablet and keyboard dock |
| Nano-SIM and microSD Card Tray | Accepts supported cards |
The nano-SIM slot is available only on selected models.
Display Orientation
The multi-touch display can be used in portrait or landscape orientation.
The screen automatically changes its orientation according to how the tablet is held.
This allows the computer to switch between vertical and horizontal viewing without manually changing the display orientation.
Optional Keyboard Dock
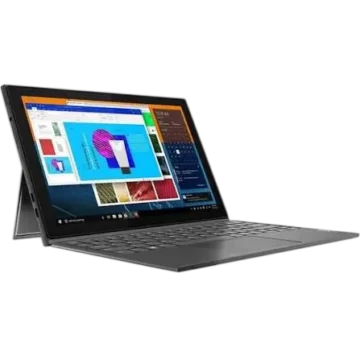
The optional keyboard dock converts the ideapad D330 from a touchscreen tablet into a notebook-style computer.
It includes a physical keyboard, touchpad, docking connectors, latches, and two USB 2.0 ports.
Keyboard Dock Components
| Component | Function |
| Tablet-Keyboard Dock Latches | Hold the tablet securely in place |
| Keyboard Dock Connector | Connects the tablet to the keyboard |
| Physical Keyboard | Provides typing and keyboard shortcuts |
| Touchpad | Provides mouse-style pointer control |
| Left USB 2.0 Port | Connects USB-compatible devices |
| Right USB 2.0 Port | Connects USB-compatible devices |
How to Attach the Tablet to the Keyboard Dock
- Position the keyboard dock on a stable surface.
- Align the tablet’s docking connector with the connector on the keyboard dock.
- Carefully lower the tablet into the dock, following the connector alignment.
- Allow the docking latches to secure the tablet in position.
The tablet can then be used with the keyboard and touchpad.
Important: Do not force the connectors during attachment. Incorrect alignment can damage the docking connection.
How to Detach the Tablet from the Keyboard Dock
- Hold the tablet securely.
- Carefully lift the tablet upward from the keyboard dock.
- Separate the tablet without twisting or forcing the connector.
The tablet can then be used independently with touchscreen controls.
Keyboard Dock Display Safety
Do not open the display panel beyond 135 degrees while using the keyboard dock.
Before closing the display, remove pens and any other objects positioned between the screen and keyboard.
Objects trapped between the two surfaces may damage the display.
Using the Keyboard Dock Touchpad
The touchpad functions in a similar way to a conventional computer mouse.
Touchpad Controls
| Action | Function |
| Slide a Finger | Moves the pointer |
| Press Left Touchpad Area | Performs a left mouse click |
| Press Right Touchpad Area | Performs a right mouse click |
| Fn + Delete | Enables or disables the touchpad |
The touchpad can be disabled when touch input is preferred or when accidental pointer movement needs to be avoided.
Keyboard Function Keys and Shortcuts
The optional keyboard dock includes Fn key combinations for controlling common functions.
To use a shortcut, hold Fn and press the required key.
Function Key Combinations
| Keyboard Shortcut | Function |
| Fn + Esc | Mutes or unmutes sound |
| Fn + ` | Closes the currently active window |
| Fn + Delete | Enables or disables the touchpad |
| Fn + Backspace | Enables or disables Airplane Mode |
| Fn + PgUp | Performs the Home key function |
| Fn + PgDn | Performs the End key function |
| Fn + Up Arrow | Increases display brightness |
| Fn + Down Arrow | Decreases display brightness |
| Fn + Left Arrow | Decreases volume |
| Fn + Right Arrow | Increases volume |
| Fn + B | Break |
| Fn + P | Pause |
| Fn + S | System Request |
| Fn + K | Enables or disables Scroll Lock |
| Fn + I | Insert |
| Fn + T | Print Screen |
| Fn + 4 | Activates Sleep mode |
| Fn + Tab | Opens Windows Magnifier |
Some hidden keyboard functions apply only to systems where the feature is supported.
Lenovo Digital Pen
Selected ideapad D330 configurations support the optional Lenovo Digital Pen.
The pen allows handwriting, drawing, and touchscreen interaction in compatible applications.
Digital Pen Parts
| Component | Function |
| Pen Cap | Opens to install or replace the battery |
| Top Barrel Button | Provides right-click functionality in compatible applications |
| Bottom Barrel Button | Erases text or drawings in supported applications |
| Pen Tip | Provides handwriting and drawing input |
Using the Pen Buttons
Top Barrel Button: Hold the top button and tap the touchscreen to perform a right-click action in supported applications.
Bottom Barrel Button: Hold the bottom button while using the pen to erase supported text or drawings.
The behavior of the buttons may vary between applications.
How to Install the Digital Pen Battery
The Lenovo Digital Pen uses an AAAA alkaline battery.
- Unscrew the pen cap.
- Insert an AAAA alkaline battery into the pen, with the positive (+) end toward the pen tip, as shown in the battery installation illustration.
- Reinstall the cap and screw it into place.
The AAAA battery may not be included in some countries or regions.
Lenovo Pen Settings
The functions assigned to the pen buttons can be viewed or changed using Lenovo Pen Settings.
To open the software:
- Open Windows Search.
- Search for Lenovo Pen Settings.
- Select the matching application.
- Change the supported button settings as required.
If the software is not installed, the appropriate drivers can be obtained from:
Digital Pen Care
- The pen is not waterproof.
- Do not immerse or drop it in water.
- Avoid exposing it to shocks or strong vibration.
- Do not hold the pen tip under pressure for an extended time.
The pen contains pressure sensors that may be damaged by improper handling.
Using the Nano-SIM and microSD Card Tray
The tablet includes a tray for supported removable cards.
Supported Card Types
| Card Type | Support |
| microSD Card | Yes |
| Nano-SIM Card | Selected Models |
| SDIO Device | No |
The tray may contain two slots for different card types. Only one card should be inserted into each slot at a time.
How to Insert a microSD or Nano-SIM Card
- Turn off the tablet.
- Disconnect the AC power adapter and all connected cables.
- Locate the card tray opening.
- Insert a suitable prying pin into the small release hole.
- Press the pin straight inward until the tray pops out.
- Carefully pull the tray out.
- Position the microSD or nano-SIM card in its corresponding slot.
- Reinsert the tray into the tablet.
The prying pin is not supplied with the computer.
How to Remove a microSD or Nano-SIM Card
When removing a microSD card, first use Windows Safely Remove Hardware and Eject Media to disable the card and reduce the risk of data corruption.
Then:
- Shut down the tablet.
- Disconnect the AC adapter and external cables.
- Insert the prying pin into the tray release hole.
- Pull out the card tray.
- Remove the required card.
- Reinsert the empty or remaining-card tray.
Important: Do not insert or remove cards while the computer is turned on. Doing so may damage the card reader.
Connecting USB Devices
The optional keyboard dock includes USB Type-A ports for compatible external devices.
How to Connect a USB Device
- Locate a USB port on the keyboard dock.
- Insert the USB Type-A connector.
- Wait for Windows to recognize the device.
- Allow Windows to install the required driver if prompted.
Windows usually detects a newly connected device and installs its driver automatically.
Some external devices require drivers to be installed before connection. The instructions supplied with the external device should be followed.
Safely Removing a USB Storage Device
- Wait until all file transfers have finished.
- Select Safely Remove Hardware and Eject Media in the Windows notification area.
- Choose the connected storage device.
- Disconnect the device after Windows permits removal.
For USB devices that require an external power supply, connect the device to its power source before connecting it to the computer.
Before First Use
Initial Preparation
- Position the tablet on a stable surface.
- Connect the AC power adapter to the tablet’s power jack.
- Connect the adapter to an appropriate electrical outlet.
- Press the Power button.
- Follow the Windows 10 setup instructions.
If the keyboard dock is being used, attach the tablet according to the docking instructions before operating it as a notebook.
Configuring Windows 10 for the First Time
Windows 10 may require several configuration steps during its first startup.
These can include:
- Accepting the end-user license agreement
- Setting up an internet connection
- Registering the operating system
- Creating a Windows user account
Complete the displayed instructions to finish the operating system setup.
Windows 10 Start Menu
The Start menu provides access to installed applications, frequently used programs, and system power controls.
Opening the Start Menu
Use either method:
- Select the Start button in the lower-left corner.
- Press the Windows key on the optional keyboard.
The Start menu can be used to open applications, search for installed software, and access Windows power options.
Windows 10 Action Center
Action Center displays system notifications and quick settings.
Opening Action Center
Select the Action Center icon on the Windows taskbar.
The panel displays important notifications from Windows and installed applications.
It also provides quick access to common system settings.
Windows 10 Task View and Virtual Desktops
Task View allows multiple desktop workspaces to be managed.
Creating a New Desktop
- Select the Task View icon on the taskbar.
- Select New desktop.
Switching Between Desktops
- Open Task View.
- Select the required desktop.
Touchscreen Controls and Gestures
The multi-touch display accepts input using one or more fingertips.
Touchscreen Gesture Guide
| Gesture | Action | Function |
| Tap | Touch an item once | Selects an item, opens a link, or performs a command |
| Press and Hold | Keep a finger pressed briefly | Opens additional information or a shortcut menu |
| Pinch | Move two fingers together | Zooms out |
| Spread | Move two fingers apart | Zooms in |
| Rotate | Place two or more fingers on an object and rotate | Rotates supported content |
| Slide | Drag a finger across the screen | Scrolls, moves objects, or draws in supported apps |
| Swipe from Left Edge | Move inward from the left side | Brings an application running in the background into view |
| Swipe from Right Edge | Move inward from the right side | Opens Action Center |
Not every application supports all gestures.
Touchscreen and Keyboard Input
When the optional keyboard dock is connected, Windows can be controlled using the keyboard and touchpad.
When the tablet is detached, the touchscreen provides the primary input method.
Connecting to a Wireless Network
The ideapad D330 supports wireless networking through its built-in wireless LAN hardware.
Enabling Wireless Connections
Wireless functions must be enabled before connecting to a WiFi network.
Airplane Mode can be disabled using one of these methods:
Method 1: Action Center
- Open Action Center.
- Deselect Airplane Mode.
Method 2: Keyboard Shortcut
Press Fn + Backspace on the optional keyboard dock.
Method 3: Windows Settings
- Open Windows Settings.
- Select Network & Internet > Airplane mode.
- Change Airplane Mode to Off.
Connecting to WiFi
- Enable wireless communication.
- Open the available wireless network list.
- Select the required network.
- Select Connect.
- Enter the network security key or passphrase when requested.
For password-protected networks, the required security key can be obtained from the network administrator or internet service provider.
Sleep Mode and Shutdown
Windows 10 provides Sleep and Shutdown functions for different periods of inactivity.
Putting the Computer into Sleep Mode
Sleep mode allows the computer to resume its session without completing a full startup.
Use one of the following methods:
- Close the display lid when using the keyboard dock.
- Select Start > Power > Sleep.
- Press Fn + 4 on the optional keyboard.
Waking the Computer from Sleep
Press any key on the keyboard.
Shutting Down the Computer
When the computer will not be used for an extended period, shut it down.
Method 1
- Open Start.
- Select Power > Shut down.
Method 2
- Right-click the Start button.
- Select Shut down or sign out > Shut down.
Windows 10 Recovery System
The Lenovo ideapad D330 includes the Windows 10 Reset This PC recovery function.
This recovery feature reinstalls Windows and returns system settings to the selected recovery state.
Recovery Options
| Recovery Option | Function |
| Keep My Files | Reinstalls Windows while preserving personal files, but removes applications and settings |
| Remove Everything | Removes user data and applications and returns Windows to its original setup state |
Important: The Remove Everything option deletes personal data and installed applications. Important files should be backed up before using this recovery option.
Opening Recovery Through the Novo Menu
The ideapad D330 uses a combination of the Volume Up and Power buttons to open the Novo Menu.
- Shut down the computer.
- Wait at least five seconds.
- Press and hold the Volume Up button.
- While holding Volume Up, press the Power button.
- Continue until the Novo Menu appears.
- Select System Recovery.
- Select Troubleshoot > Reset this PC.
- Choose the required recovery option.
- Follow the on-screen instructions.
Opening Recovery Through Windows Settings
When Windows is operating normally, Reset This PC can be started through Windows Settings.
- Open Windows Settings.
- Select Update & Security > Recovery.
- Locate Reset this PC.
- Select Start.
- Choose Keep My Files or Remove Everything.
- Complete the on-screen recovery steps.
Windows Recovery Partition
The Windows 10 installation includes a recovery partition containing the system recovery image.
This partition is used to restore Windows to its factory configuration.
Recovery Partition Functions
The recovery partition contains files required by Windows recovery functions.
It normally does not have a drive letter and cannot be opened through Windows File Explorer.
Recovery Partition Precautions
Do not delete or modify the recovery partition.
Removing or changing the partition can prevent Windows from being restored to its original factory condition.
On computers using Windows Compact technology, deleting the recovery partition may also prevent Windows from starting.
Checking Windows Compact Technology
- Right-click the Windows Start button.
- Select Disk Management.
- Check the Windows partition information.
If Wim Boot appears on the Windows partition, Compact technology is enabled.
Troubleshooting Guide
The following troubleshooting steps cover common display, power, Sleep, battery, audio, and external-device problems.
Common Problems and Solutions
| Problem | Recommended Action |
| Computer turns on but the screen is blank | Confirm the AC adapter is connected and the computer is powered on |
| White cursor appears on a blank screen | Use Windows recovery to restore the operating system |
| Screen goes blank during operation | Press a keyboard key to resume from Sleep |
| Display is too dim | Use the brightness-increase shortcut |
| Screen is distorted or unreadable | Check display resolution, color quality, and monitor settings |
| Incorrect characters appear | Check Windows and application installation |
| No sound comes from the speakers | Check Mute, audio jack usage, and playback device |
| Critical low-battery message appears | Connect the AC adapter |
| Computer enters Sleep immediately after startup | Check battery charge and operating temperature |
| Computer does not resume from Sleep | Reconnect AC power and attempt to wake or reset the computer |
| Battery indicator appears inaccurate | Recharge the battery |
| External device is not recognized | Check device connection and external power requirements |
Computer Screen Remains Blank
If nothing appears when the computer is turned on:
- Confirm that the AC adapter is connected.
- Check that the power cord is plugged into a working electrical outlet.
- Press the Power button again to confirm the computer is turned on.
If the screen remains blank after these checks, the computer requires service.
Only a White Cursor Appears
If the computer starts with a blank screen and only a white cursor:
- Use Windows recovery to restore backed-up files or reset Windows to its factory configuration.
- Restart the computer after recovery.
If the cursor-only display remains, the computer requires service.
Screen Is Too Dim or Distorted
If the screen is blank or difficult to read:
- Press the keyboard brightness-increase shortcut.
- If the power indicator is blinking, press the Power button to resume from Sleep.
- Check the screen resolution, color quality, and monitor configuration.
If incorrect characters continue appearing despite Windows and applications being correctly installed, the computer requires service.
No Sound from the Speakers
If the speakers produce no sound even when the volume is increased, check the following:
- The Mute function is disabled.
- The combo audio jack is not being used.
- The built-in speakers are selected as the playback device.
Sleep and Power Troubleshooting
Critical Low-Battery Error
If a critical low-battery message appears and the computer shuts down, connect the AC power adapter.
Computer Enters Sleep Immediately After Startup
Check that:
- The battery is charged.
- The computer is operating within the acceptable temperature range.
If both conditions are normal and the computer continues entering Sleep immediately after startup, authorized service is required.
Computer Does Not Wake from Sleep
- Connect the AC power adapter.
- Press the Windows button or Power button.
- Check whether the computer resumes.
If the computer remains unresponsive, use the forced shutdown procedure below.
Computer Stops Responding
To reset an unresponsive ideapad D330:
- Press and hold the Power button for eight seconds or longer.
- If the computer still does not respond, disconnect the AC power adapter.
Important: A forced shutdown may cause unsaved data to be lost.
The computer may become unresponsive if it enters Sleep during a communication operation. Disable the Sleep timer while carrying out network activities that should not be interrupted.
Battery Troubleshooting
If the computer shuts down before the battery indicator reaches empty, or continues operating after the indicator shows empty, recharge the battery.
External Device Troubleshooting
External USB devices with high power requirements may need their own power adapters.
If such a device does not operate correctly:
- Check that the device is connected properly.
- Use its external power adapter where required.
- Check that Windows recognizes the device.
Do not connect or disconnect non-USB external-device cables while the computer is turned on. Doing so may damage the computer.
Maintenance and Handling Instructions
Tablet and Keyboard Dock Care
- Do not force the tablet into the keyboard dock.
- Avoid twisting or damaging the docking connectors.
- Keep objects away from the space between the tablet and keyboard when closing the device.
- Do not exceed the specified 135-degree display opening angle.
Card Reader Care
Shut down the computer before inserting or removing cards.
Use Windows Safely Remove Hardware and Eject Media before removing a microSD card.
Avoid forcing the card tray or release pin.
Digital Pen Maintenance
Keep the digital pen away from water, impacts, and excessive pressure on the tip.
Replace its AAAA alkaline battery according to the battery installation procedure when needed.
Moving the Computer
Put the computer into Sleep mode before moving it while in use, as recommended in the guide for protecting storage data.
For longer periods of inactivity, use Windows Shutdown.
Warranty Information
Warranty coverage depends on the Lenovo Limited Warranty applicable to the purchased ideapad D330.
The warranty period and service conditions are identified in the Lenovo Limited Warranty flyer supplied with the computer.
Customer Support Information
Lenovo provides documentation, drivers, troubleshooting resources, and support services for the ideapad D330.
Support Resources
| Resource | Details |
| Manufacturer | Lenovo |
| Product | ideapad D330 |
| Product Support and Drivers | https://pcsupport.lenovo.com |
| Lenovo Support Website | https://support.lenovo.com |
| Compliance Information | https://www.lenovo.com/compliance |
| Safety Information | Lenovo Safety and General Information Guide |
| Warranty Conditions | Lenovo Limited Warranty Flyer |
Downloading Drivers
The latest applicable device drivers can be obtained through Lenovo’s support website.
Contacting Customer Support
Customer support contact instructions are provided in the Lenovo Safety and General Information Guide under Getting Help and Service.
Frequently Asked Questions
1. How do I connect the keyboard dock to the Lenovo ideapad D330?
Align the tablet’s docking connector with the keyboard dock and lower the tablet into position until it is secured by the docking latches. Avoid forcing the connector and do not open the display beyond 135 degrees.
2. How do I reset the Lenovo ideapad D330 to factory settings?
Turn off the tablet and wait at least five seconds. Hold Volume Up and press Power until the Novo Menu appears. Select System Recovery, then Troubleshoot and Reset this PC. Choose the required reset option and follow the instructions.
3. What battery does the Lenovo Digital Pen use?
The Lenovo Digital Pen uses an AAAA alkaline battery. Unscrew the pen cap, insert the battery with its positive end toward the pen tip, and reinstall the cap. The battery may be sold separately in some regions.
4. How do I turn off Airplane Mode on the ideapad D330?
Press Fn + Backspace on the optional keyboard dock, or open Windows Settings > Network & Internet > Airplane mode and turn the setting off. Wireless networks can then be selected from the available network list.
5. Does the Lenovo ideapad D330 support a SIM card?
Selected models support a nano-SIM card through the card tray. The tray also accepts a microSD card. SIM-card functionality depends on the specific computer configuration.
6. How do I fix a Lenovo ideapad D330 that is frozen?
Press and hold the Power button for at least eight seconds. If the tablet remains unresponsive, disconnect the AC power adapter. Unsaved data may be lost during the reset.
7. How do I enable or disable the keyboard dock touchpad?
Press Fn + Delete on the optional keyboard dock. This shortcut switches the touchpad between enabled and disabled states.
8. Where can I download drivers for the Lenovo ideapad D330?
Drivers can be downloaded from Lenovo Support at https://pcsupport.lenovo.com. Select the appropriate computer model and the required drivers for the installed operating system.