| Field | Details |
| Document Title | IdeaPad Duet 3i (10″, 5) User Guide |
| Document Type | User Guide |
| Brand Name | Lenovo |
| Product Name | IdeaPad Duet 3i |
| Model Number(s) | IdeaPad Duet 3 10IGL5 (82AT), IdeaPad Duet 3 10IGL5-LTE (82HK) |
| PDF File Size | 10.70 MB |
| Number of Pages | 60 |
| Languages Covered | English |
Lenovo IdeaPad Duet 3i 10IGL5
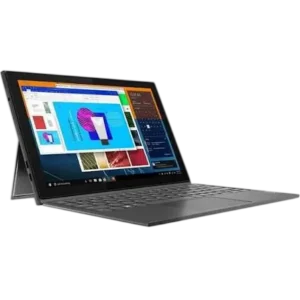
The Lenovo IdeaPad Duet 3i is a detachable 2-in-1 Windows computer featuring a 10.3-inch multi-touch display, an integrated kickstand, and support for a Bluetooth folio keyboard. The computer can be used as a touchscreen tablet or combined with the keyboard for typing and everyday computing tasks.
This guide covers the IdeaPad Duet 3 10IGL5 (machine type 82AT) and the IdeaPad Duet 3 10IGL5-LTE (machine type 82HK). The LTE version includes wireless WAN functionality and a nano SIM card slot for compatible mobile broadband connections.
The IdeaPad Duet 3i has front and rear cameras, built-in microphones, stereo speakers, two USB-C ports, a microSD card slot, and wireless LAN and Bluetooth connectivity. The USB-C ports are used to connect the AC power adapter, charge the internal battery, and connect compatible external devices.
The Bluetooth folio keyboard attaches magnetically using a pogo-pin connector and supports both direct attachment and Bluetooth pairing. It includes a touchpad, function keys, battery, power switch, and connection status indicator.
Select configurations also support the Lenovo Digital Pen, allowing handwriting, drawing, selection, and erasing in compatible applications.
The integrated kickstand supports multiple viewing positions, including Stand Mode with or without the keyboard and a low-angle Stylus Mode. The recommended kickstand angle is between 45 and 150 degrees.
The computer uses Windows, with access to power management settings, device configuration, firmware settings, and password protection. Lenovo Vantage or Lenovo PC Manager can be used to check system information, diagnose hardware problems, manage supported settings, and obtain software updates.
Supported Models
| Model Name | Machine Type | Main Distinction |
| IdeaPad Duet 3 10IGL5 | 82AT | Wireless LAN and Bluetooth configuration |
| IdeaPad Duet 3 10IGL5-LTE | 82HK | Includes wireless WAN and nano SIM support |
The product may be identified as IdeaPad Duet 3i in Lenovo product documentation.
Product Features and Specifications
| Feature | Description |
| Product Type | Detachable 2-in-1 computer |
| Display | 10.3-inch multi-touch screen |
| Screen Resolution | 1920 × 1200 pixels |
| Operating System Instructions | Windows |
| Storage Technology | eMMC 5.1 |
| Memory | Onboard |
| Tablet Battery Capacity | 30 Wh |
| Keyboard Battery | Separate one-cell battery |
| Detachable Keyboard | Bluetooth folio keyboard |
| Keyboard Connection | Bluetooth and magnetic pogo-pin connector |
| Pointing Device | Integrated keyboard touchpad |
| Kickstand | Built-in, adjustable |
| Cameras | Front and rear |
| Microphones | Built-in |
| Audio Output | Stereo speakers |
| Audio Connector | 3.5 mm combo audio jack |
| USB Ports | Two USB-C ports |
| Memory Card | microSD |
| Mobile Broadband | Supported on LTE models |
| SIM Format | Nano SIM |
| Wireless Networking | Wi-Fi and Bluetooth |
| Digital Pen | Available on select models |
| Firmware | UEFI/BIOS |
| Security | Firmware passwords |
Technical Specifications
Physical Dimensions
| Specification | Measurement |
| Width | 253 mm (9.96 inches) |
| Depth | 167.5 mm (6.59 inches) |
| Thickness | 10 mm (0.39 inches) |
| Display Size | 261.62 mm (10.3 inches) |
| Display Resolution | 1920 × 1200 pixels |
Power Specifications
| Specification | Value |
| AC Adapter Input | 100–240 V AC |
| Input Frequency | 50–60 Hz |
| AC Adapter Output | 20 V DC, 2.25 A |
| Adapter Power | 45 W |
| Computer Battery Capacity | 30 Wh |
| Computer Battery Cells | 2 |
| Bluetooth Folio Keyboard Battery Cells | 1 |
| Approximate Full Charging Time | 2–4 hours |
| Recommended Battery Charging Temperature | 10–35°C (50–95°F) |
The 30 Wh capacity refers to the computer battery. The Bluetooth folio keyboard has a separate battery.
Memory and Storage
| Component | Specification |
| Memory Type | Onboard memory |
| Memory Slots | 0 |
| Storage Type | eMMC 5.1 |
To view the installed processor information, enter System Information in Windows Search and open the matching result.
Connections and Wireless Features
| Feature | Details |
| USB-C | Two connectors |
| USB-C Power Input | Supported |
| USB-C External Devices | Display, storage, and data devices |
| Combo Audio Jack | 3.5 mm, four-pole |
| Memory Card Slot | microSD |
| SIM Card Slot | Nano SIM on supported LTE models |
| Wi-Fi | Supported |
| Bluetooth | Supported |
| Wireless WAN | Supported on selected models |
USB Transfer Speeds
The guide provides the following nominal USB standard data rates.
| USB Standard | Nominal Data Rate |
| USB 3.1 Gen 1 | 5 Gbit/s |
| USB 3.1 Gen 2 | 10 Gbit/s |
| USB 3.1 Gen 2 × 2 | 20 Gbit/s |
Actual transfer speeds depend on connected devices, file characteristics, system configuration, and operating conditions. These figures describe USB standards and do not identify every listed standard as a supported mode of the computer’s USB-C ports.
Parts and Components
The IdeaPad Duet 3i has controls and connections on the front, left, right, rear, and bottom surfaces.
Front Components
| Component | Function |
| Front Camera | Captures photographs and video |
| Camera Indicator | Illuminates when the camera is active |
| Wireless WAN Antennas | Support cellular connectivity on LTE models |
| Wi-Fi Antennas | Support wireless LAN and Bluetooth |
| Multi-Touch Screen | Displays content and accepts touch input |
| Microphones | Capture speech and audio |
Front Camera
The front camera can be used for taking photographs, recording videos, and video communication.
Camera Indicator Light
The indicator illuminates when the camera is being used.
Wireless Antennas
The internal antennas provide wireless communication.
The wireless WAN antennas are available on supported LTE configurations.
The antennas are not visible from outside the computer.
Multi-Touch Display
The touchscreen displays text, images, applications, and video.
It supports touch gestures, including tapping, dragging, scrolling, and pinch-to-zoom operations.
Left-Side Ports
The left side contains the speaker, combo audio jack, card slot, and two USB-C connectors.
| Component | Function |
| Speaker | Produces audio |
| Combo Audio Jack | Connects headphones or a headset |
| Nano SIM/microSD Slot | Accepts supported removable cards |
| USB-C Connectors (2) | Charge the computer and connect external devices |
Combo Audio Jack
The audio jack supports headphones or headsets with a 3.5 mm, four-pole connector.
A compatible headset must have a single plug.
Standalone external microphones are not supported through this jack.
Nano SIM and microSD Card Slot
The card slot supports microSD storage.
On LTE models, it also supports a nano SIM card for mobile broadband service.
USB-C Connectors
The two USB-C connectors can be used to:
- Connect the AC power adapter.
- Charge the internal computer battery.
- Connect compatible external displays.
- Connect external storage devices.
- Transfer data through supported accessories.
An appropriate adapter may be required for certain external devices.
Right-Side Controls
| Component | Function |
| Volume Buttons | Increase or decrease system volume |
| Power Button | Turns on the computer or enters sleep mode |
| Power Indicator | Shows the computer’s power state |
| Speaker | Provides sound output |
Volume Buttons
Press the corresponding volume button to increase or decrease sound.
Power Button
Press the Power button to turn on the computer.
By default, pressing the Power button while the computer is operating puts it into sleep mode.
Power Button Indicator
| Indicator | Computer State |
| On | Computer powered on |
| Off | Computer off or hibernating |
| Blinking | Computer in sleep mode |
Rear Components
| Component | Function |
| Rear Camera | Captures photos and videos |
| Kickstand Hinges | Allow kickstand movement |
| Kickstand | Supports the tablet on a surface |
Rear Camera
The rear camera supports still photography, video recording, and compatible video applications.
Integrated Kickstand
The kickstand allows the computer to stand on a flat surface without an additional support accessory.
It can be adjusted to different positions for typing, viewing, or pen input.
Bottom Connector
The bottom of the computer has a pogo-pin connection with guide pins.
This connector allows the Bluetooth folio keyboard to attach magnetically to the computer.
Bluetooth Folio Keyboard Parts
The Bluetooth folio keyboard provides physical typing and pointer controls.
| Component | Function |
| Pogo-Pin Connector | Attaches the keyboard magnetically |
| Keyboard | Enters text and supports function keys |
| Bluetooth Status Light | Shows charging, pairing, and battery states |
| Keyboard Switch | Controls power and Bluetooth pairing |
| Touchpad | Provides pointer and mouse functions |
Bluetooth Folio Keyboard Indicator Lights
The keyboard indicator communicates its operating and charging condition.
| Indicator State | Meaning |
| Solid Amber | Keyboard charging through the pogo-pin connection |
| Continuously Blinking White (up to 1 minute) | Bluetooth pairing in progress |
| Solid White for 3 Seconds, Then Off | Bluetooth pairing successful |
| Slowly Blinking White | Keyboard operating and connected through pogo pins |
| Blinking Amber | Keyboard battery low |
| Off | Keyboard fully charged while connected through pogo pins, or keyboard battery has no power |
Bluetooth Folio Keyboard Switch Positions
| Switch Position | Function |
| Off | Turns the keyboard off |
| Middle | Turns the keyboard on and reconnects to the last connected device |
| Bluetooth Symbol | Activates Bluetooth pairing when held for three seconds |
The Bluetooth pairing position is spring-loaded. When released, the switch automatically returns to the middle position.
Important Safety Instructions
Electrical Safety
Use only power cords and adapters supplied or approved by the product manufacturer.
- Do not use damaged power cords or adapters.
- Do not wrap power cords around an operating adapter.
- Keep electrical connections away from liquids.
- Do not overload electrical outlets or power strips.
- Use correctly wired electrical outlets.
- Disconnect power before accessing internal parts.
- Avoid connecting or disconnecting cables during electrical storms.
Battery Safety
The computer contains a built-in rechargeable battery.
Do not attempt to remove or replace the built-in computer battery. Battery replacement must be performed by a Lenovo-authorized technician or repair facility.
Do not puncture, crush, short-circuit, disassemble, or expose batteries to fire or water.
Heat and Ventilation
The computer and AC adapter may become hot during use or charging.
- Avoid prolonged contact with hot surfaces.
- Keep ventilation openings clear.
- Do not operate the computer on soft surfaces that block airflow.
- Do not cover the power adapter while it is connected.
- Do not charge the computer near flammable materials.
Liquid Protection
Keep liquids away from the computer and keyboard.
If liquid enters the computer:
- Disconnect the AC power adapter.
- Turn off the computer immediately.
- Do not turn the device upside down to drain the liquid.
- Wait until all liquid is completely dry before turning it on.
Display Safety
The display includes glass components.
If glass breaks, stop using the computer until the damaged component is replaced by trained service personnel.
If liquid from a damaged LCD enters the eyes or contacts the hands, wash the affected area with water for at least 15 minutes and seek medical attention if symptoms remain.
Digital Pen Safety
The Lenovo Digital Pen is not waterproof.
Do not immerse it in water, apply continuous pressure to the tip, or expose it to excessive shock or vibration.
Before First Use
Before operating the IdeaPad Duet 3i:
- Read the Safety and Warranty Guide.
- Connect the approved AC power adapter to a USB-C power connector.
- Turn on the computer using the Power button.
- Complete the Windows setup instructions.
- Connect to a Wi-Fi network if required.
- Attach the Bluetooth folio keyboard if available.
- Pair the keyboard with the computer before its first Bluetooth use.
- Configure the preferred Windows settings.
Connecting the Bluetooth Folio Keyboard
The keyboard can be magnetically attached to the computer using the pogo-pin connector.
How to Attach the Keyboard
- Place the computer and keyboard on a stable surface.
- Align the keyboard connector with the connector on the bottom of the computer.
- Position the keyboard so that the guide pins align.
- Bring the keyboard toward the computer in the direction shown by the connector arrangement.
- Allow the magnetic connection to secure the keyboard.
The connector alignment helps hold the keyboard in place and provides the pogo-pin connection.
Pairing the Bluetooth Folio Keyboard
Bluetooth pairing is required the first time the keyboard is used wirelessly.
The keyboard supports Windows Swift Pair on compatible systems.
Step 1: Turn On the Keyboard
Move the Bluetooth folio keyboard switch to the middle position.
Step 2: Activate Pairing Mode
Press and hold the switch toward the Bluetooth symbol for three seconds.
Release the switch after pairing begins.
The switch returns to the middle position automatically.
Step 3: Check the Pairing Indicator
The keyboard indicator blinks white continuously for up to one minute while pairing.
Step 4: Complete Bluetooth Pairing
Use the Windows Bluetooth pairing interface or the Swift Pair notification when displayed.
Follow the on-screen instructions to connect the keyboard.
Step 5: Confirm the Connection
When pairing succeeds, the keyboard light turns solid white for approximately three seconds and then turns off.
The keyboard can subsequently reconnect to its most recently connected device when powered on and within Bluetooth range.
Charging the Bluetooth Folio Keyboard
The Bluetooth folio keyboard has its own rechargeable battery.
The pogo-pin connection is used for keyboard charging.
Charging Indicator
When the keyboard is charging through the pogo-pin connector, the Bluetooth indicator displays solid amber.
When fully charged and connected through pogo pins, the indicator may be off.
A blinking amber indicator means the keyboard battery is low.
Using the Keyboard Touchpad
The keyboard has an integrated touchpad for controlling the Windows pointer.
The touchpad performs the functions of a conventional mouse and supports multi-touch gestures.
Use the touchpad to move the pointer, select items, and interact with applications.
Using the Kickstand
The IdeaPad Duet 3i has an integrated adjustable kickstand.
How to Open the Kickstand
- Place the computer on a stable surface.
- Locate the recessed grips on both sides of the rear kickstand.
- Pivot the kickstand outward.
- Adjust it to the required position.
Recommended Kickstand Angle
The appropriate kickstand angle is 45–150 degrees.
Do not force the kickstand outside this range because improper positioning may damage the computer.
Kickstand Operating Positions
| Mode | Description |
| Stand Mode Without Keyboard | Computer supported by kickstand for touch operation |
| Stand Mode With Keyboard | Computer supported by kickstand with attached keyboard |
| Stylus Mode | Lower-angle positioning for pen input |
The kickstand is adjustable within its supported range, allowing the display position to be changed for different activities.
Installing a Nano SIM Card
The IdeaPad Duet 3 10IGL5-LTE supports nano SIM cards for mobile broadband connectivity.
Nano SIM Installation
- Locate the card tray on the left side.
- Insert the ejection tool into the tray release opening.
- Remove the card tray.
- Place the nano SIM card into the tray in the correct orientation.
- Reinsert the tray into the computer.
The nano SIM card is purchased separately.
Wireless WAN operation requires a compatible mobile broadband service.
Installing a microSD Card
The computer includes a microSD card slot for removable storage.
Precautions Before Installation
Before handling the card, touch a grounded metal object to reduce static electricity.
Do not put the computer into sleep mode while transferring data to or from the card.
microSD Installation
- Locate the card tray on the left side.
- Use the ejection tool to release the tray.
- Slide the tray out.
- Place the microSD card into the tray.
- Check that the card is correctly oriented.
- Reinsert the tray.
The microSD card is purchased separately.
Connecting to Wi-Fi
The IdeaPad Duet 3i supports wireless LAN connections.
How to Connect to a Wireless Network
- Open Windows.
- Click the network icon in the notification area.
- Review the available Wi-Fi networks.
- Select the desired network.
- Follow the displayed connection instructions.
- Enter network credentials if required.
Wireless LAN features and available standards depend on the computer configuration and regional regulations.
Connecting Bluetooth Devices
Bluetooth allows the computer to communicate with compatible devices over short distances.
Supported device types may include:
- Keyboards
- Mice
- Speakers
- Smartphones
- Other compatible Bluetooth accessories
The typical supported operating distance is approximately 10 meters (32.8 feet).
How to Pair a Bluetooth Device
- Open Windows Search.
- Search for Bluetooth settings.
- Open the matching Windows settings page.
- Enable Bluetooth.
- Start the pairing process.
- Select the required device.
- Follow the on-screen instructions.
If a nearby Bluetooth device supports Swift Pair, Windows may display a pairing notification.
Using Airplane Mode
Airplane Mode disables the computer’s wireless communication functions.
How to Enable Airplane Mode
- Open Windows Search.
- Search for Airplane Mode.
- Open the matching setting.
- Turn Airplane Mode on.
Turn the setting off when wireless connectivity is required again.
Windows Settings and Controls
Windows provides search-based access to common system settings.
| Function | Windows Search Term |
| Control Panel | Control Panel |
| Wireless Networking | Wi-Fi |
| Bluetooth Connections | Bluetooth |
| Airplane Mode | Airplane mode |
| Night Light | Night light |
| Windows Updates | Windows Updates |
Control Panel
Control Panel provides access to hardware, software, and configuration settings.
Night Light
Night Light changes screen colors to warmer tones and reduces blue-light output.
This setting can help reduce eye discomfort during extended screen use.
Windows Updates
Windows Update downloads supported security and feature updates.
Use Windows Update as the source for Windows operating system updates rather than downloading unofficial update packages.
Using Lenovo Vantage or Lenovo PC Manager
Lenovo Vantage and Lenovo PC Manager provide computer management and support tools.
Available Functions
- View product information.
- Check warranty and support details.
- Run hardware scans.
- Diagnose hardware problems.
- Change supported hardware settings.
- Update drivers.
- Obtain firmware and UEFI/BIOS updates.
- Manage supported Windows updates.
How to Open Lenovo Vantage
- Open Windows Search.
- Enter Lenovo Vantage.
- Select the matching application.
Lenovo PC Manager can be opened through Windows Search in the same way.
Lenovo Vantage can be downloaded from Microsoft Store if it is not preinstalled.
Using the Lenovo Digital Pen
Select configurations include the Lenovo Digital Pen.
The pen supports handwriting, drawing, and control functions in compatible applications.
Digital Pen Components
| Component | Function |
| Pen Cap | Opens for battery installation or replacement |
| Top Barrel Button | Performs right-click actions in supported applications |
| Bottom Barrel Button | Erases text or drawings in supported applications |
| Pen Tip | Writes or draws on the touchscreen |
Installing the Digital Pen Battery
The Lenovo Digital Pen uses an AAAA alkaline battery.
- Unscrew the pen cap.
- Install the AAAA battery in the orientation shown by the pen’s battery diagram.
- Reattach the cap.
The battery may not be included in every country or region.
Writing and Drawing
Use the pen tip directly on the touchscreen in a compatible application.
Right-Clicking
Hold the top barrel button and tap the touchscreen.
Erasing
Hold the bottom barrel button and use the pen on the text or drawing to be erased.
Changing Pen Button Functions
The behavior of the pen buttons may differ between applications.
Use Lenovo Pen Settings to view or change supported button functions.
The software can be located through Windows Search.
Compatible pen drivers are available through Lenovo Support.
Keyboard Hotkeys
The Bluetooth folio keyboard includes shortcut keys for common functions.
Hotkey Functions
| Hotkey Function | Description |
| Mute/Unmute | Turns audio output off or on |
| Volume Down | Decreases sound volume |
| Volume Up | Increases sound volume |
| Brightness Up | Increases screen brightness |
| Brightness Down | Decreases screen brightness |
| Airplane Mode | Enables or disables Airplane Mode |
FnLock
FnLock changes the default behavior of the function keys.
Press Fn + Esc to toggle FnLock.
| FnLock Setting | Default F1 Behavior |
| Off | Mute or unmute sound |
| On | Standard F1 function |
The function of F1 depends on the active application when FnLock is enabled.
Using the Multi-Touch Screen
The touchscreen supports common Windows touch gestures.
| Gesture | Function |
| Single Tap | Selects an item or activates an action |
| Double Tap | Opens an application or desktop item |
| Tap and Hold | Opens a shortcut menu |
| Slide | Scrolls through lists, pages, or photos |
| Drag | Moves an item |
| Pinch In | Zooms out |
| Spread Two Fingers | Zooms in |
| Swipe From Right | Opens Action Center |
| Swipe From Left | Opens Task View |
| Short Swipe From Top | Reveals a hidden title bar in supported modes |
| Swipe From Top to Bottom | Closes an application in Tablet Mode |
Touch gesture availability varies by application.
Battery and Power Management
The IdeaPad Duet 3i contains a rechargeable 30 Wh computer battery.
The Bluetooth folio keyboard has its own separate battery.
Checking Computer Battery Status
- Locate the battery indicator in the Windows notification area.
- Click the indicator.
- Review the remaining battery percentage.
- Adjust the available power mode if needed.
Windows displays a warning when battery charge becomes low.
Charging the Computer
Connect the AC power adapter to one of the computer’s USB-C power connectors.
The battery normally reaches full charge in approximately two to four hours.
Charging time depends on the battery condition, environment, and whether the computer is being used.
Charging Temperature
The recommended battery charging temperature is:
10–35°C (50–95°F)
The computer does not begin recharging when the remaining battery charge exceeds 95%.
Checking Battery Temperature
With Lenovo Vantage:
- Open Lenovo Vantage.
- Select Hardware Settings → Power.
- Locate Power Status.
- Select Show Details.
With Lenovo PC Manager, select System Hardware → Battery.
Configuring Power Button Behavior
By default, pressing the Power button places the computer into sleep mode.
This behavior can be changed through Windows.
How to Change the Power Button Setting
- Open Windows Search.
- Search for Control Panel.
- Open Control Panel.
- Change the view to large or small icons.
- Select Power Options.
- Open Choose what the power button does.
- Change the settings as required.
Creating or Changing a Power Plan
A Windows power plan controls power-saving behavior.
How to Change the Power Plan
- Open Windows Search.
- Enter power plan.
- Open the matching settings page.
- Select or customize the preferred power plan.
Default Energy-Saving Settings
For the documented ENERGY STAR Balanced configuration when connected to AC power:
| Function | Default Idle Period |
| Turn Off Display | 10 minutes |
| Put Computer to Sleep | 30 minutes |
Performance Modes
The computer supports different performance settings.
These modes affect the balance between system performance and power consumption.
The selected mode can be adjusted through the available Windows or Lenovo system controls, depending on the installed configuration.
Entering UEFI/BIOS Setup
UEFI/BIOS initializes computer hardware before Windows starts.
The setup utility allows configuration of supported firmware settings.
How to Open UEFI/BIOS
- Turn on or restart the computer.
- Wait for the Lenovo logo.
- Press Fn + F2 repeatedly.
The UEFI/BIOS setup utility opens.
Changing the Boot Order
The boot order determines which device the computer attempts to start from.
How to Change the Startup Sequence
- Open UEFI/BIOS.
- Navigate to the Boot menu.
- Locate Boot Priority Order.
- Follow the on-screen instructions to rearrange the startup devices.
Temporarily Selecting a Boot Device
- Start or restart the computer.
- When the Lenovo logo appears, press F12 or Fn + F12 repeatedly.
- Select the required boot device.
Enabling or Disabling Always On USB
On configurations that support Always On USB, the feature can be configured through BIOS.
Procedure
- Open UEFI/BIOS Setup.
- Select Configuration → Always On USB.
- Press Enter.
- Select Enabled or Disabled.
- Open Exit.
- Select Exit Saving Changes.
UEFI/BIOS Password Security
The computer supports several firmware password types.
Password Types
| Password | Purpose |
| Administrator Password | Restricts access to BIOS Setup |
| User Password | Allows authorized BIOS access |
| Master Hard Disk Password | Protects access to the storage device |
| User Hard Disk Password | Provides authorized access to protected storage |
| Power-On Password | Requires a password when starting the computer |
BIOS passwords consist of letters and numbers.
Setting an Administrator Password
- Enter BIOS Setup.
- Select Security → Set Administrator Password.
- Press Enter.
- Enter an alphanumeric password.
- Press Enter.
- Re-enter the password.
- Save the changes using Exit → Exit Saving Changes.
Important: A forgotten administrator password cannot be reset by Lenovo service personnel through the documented procedure. System board replacement may be required, with proof of purchase and service charges.
Changing or Removing an Administrator Password
- Open BIOS Setup using the administrator password.
- Select Security → Set Administrator Password.
- Enter the current password.
- Enter and confirm a new password.
To remove the password, leave both new-password fields empty and press Enter.
Save the changes.
Removing the administrator password also removes the user password.
Setting a User Password
An administrator password must already be configured.
- Open BIOS Setup using the administrator password.
- Select Security → Set User Password.
- Enter a new password.
- Confirm the password.
- Save the changes.
The user password must differ from the administrator password.
Enabling the Power-On Password
- Open BIOS Setup.
- Select Security → Power on Password.
- Change the setting to Enabled.
- Save the changes.
When enabled, the computer requires an administrator or user password during startup.
Setting a Hard Disk Password
- Open BIOS Setup.
- Select Security → Set Hard Disk Password.
- Follow the on-screen instructions to create the master and user passwords.
- Save the changes.
The master and user hard disk passwords are configured together.
Changing or Removing Hard Disk Passwords
- Open BIOS Setup.
- Select Security.
- Select Change Master Password or Change User Password.
- Follow the instructions.
- Save the changes.
Removing the master hard disk password also removes the user password. The user hard disk password cannot be removed separately.
Warning: Lenovo service personnel cannot recover data or reset a forgotten hard disk password through the documented service process. Replacement of the protected storage device may be required.
Troubleshooting Guide
The following troubleshooting procedures cover situations addressed in the Lenovo IdeaPad Duet 3i User Guide.
Common Problems and Solutions
| Problem | Recommended Action |
| Computer stops responding | Hold the Power button until it turns off, then restart |
| Liquid is spilled on the computer | Disconnect AC power immediately and turn off the computer |
| Bluetooth keyboard will not pair | Activate pairing mode using the keyboard switch and complete Windows Bluetooth pairing |
| Keyboard indicator blinks amber | Keyboard battery is low |
| Keyboard blinks white continuously | Bluetooth pairing is in progress |
| Keyboard does not reconnect wirelessly | Check that the keyboard is on and Bluetooth is enabled |
| Computer battery is low | Connect the AC power adapter |
| Computer does not begin charging above 95% | Normal battery-management behavior |
| microSD data may be corrupted | Avoid sleep mode during file transfer and handle the card carefully |
| Windows problem requires recovery | Use Windows or Lenovo recovery options |
| UEFI/BIOS password is forgotten | Contact Lenovo-authorized service |
| Drivers or firmware need updating | Use Lenovo Vantage, Lenovo PC Manager, or Lenovo Support |
Computer Stops Responding
If the computer becomes unresponsive:
- Press and hold the Power button until the computer turns off.
- Restart the computer.
Bluetooth Keyboard Does Not Connect
Check that the keyboard is turned on.
To restart Bluetooth pairing:
- Move the keyboard switch to the middle position.
- Hold the switch toward the Bluetooth symbol for three seconds.
- Release the switch.
- Wait for the indicator to blink white.
- Complete pairing in Windows.
The keyboard must be paired with the computer before its first wireless use.
Keyboard Battery Is Low
A blinking amber keyboard indicator means the keyboard battery is low.
Attach the keyboard through the pogo-pin connector to charge it.
A solid amber indicator means charging is in progress.
Keyboard Indicator Is Off
An unlit indicator can mean:
- The keyboard is fully charged and connected through the pogo-pin connector.
- The keyboard battery has no power.
Computer Battery Does Not Recharge Above 95%
The computer is designed not to begin charging again when battery capacity exceeds 95%.
This behavior is part of its battery-management function.
microSD Card Data Problems
To reduce the risk of data corruption:
- Touch a grounded metal surface before handling the card.
- Do not put the computer into sleep mode while transferring files.
- Keep the card correctly oriented in its tray.
Liquid Is Spilled on the Computer
- Disconnect the AC power adapter immediately.
- Turn off the computer.
- Do not turn the computer over to drain liquid.
- Allow the computer to dry completely before turning it on.
If there are signs of damage, contact Lenovo Support.
Windows Recovery Problems
The guide directs users to Lenovo and Windows recovery resources.
Lenovo recovery information is available through:
https://support.lenovo.com/HowToCreateLenovoRecovery
Windows operating system diagnostics and recovery resources are also available through Lenovo PC Support.
Maintenance and Care
General Care
Keep the computer and keyboard in a clean, dry, well-ventilated environment.
Avoid exposure to:
- Excessive moisture
- Dust and dirt
- Extreme heat
- Extreme cold
- Direct sunlight
Caring for the Kickstand
Use the kickstand only within its supported angle range of 45–150 degrees.
Avoid excessive pressure or forcing the hinges.
Caring for the Bluetooth Keyboard
Handle the keyboard carefully.
Avoid dusty, dirty, humid, or excessively hot or cold environments.
Caring for the Digital Pen
Keep the pen dry and protect the tip from sustained pressure, shock, and vibration.
Battery Storage
For extended storage of rechargeable batteries or products containing them:
- Store at room temperature.
- Keep the battery at approximately 30–50% charge.
- Recharge at least once per year to prevent excessive discharge.
Operating and Storage Conditions
| Environmental Condition | Specification |
| Maximum Unpressurized Altitude | 3048 m (10,000 ft) |
| Operating Temperature Up to 2438 m Altitude | 5–35°C (41–95°F) |
| Storage Temperature | 5–43°C (41–109°F) |
| Maximum Operating Temperature Above 2438 m | 31.3°C (88°F) |
| Operating Relative Humidity | 8–95% at 23°C wet-bulb temperature |
| Storage Relative Humidity | 5–95% at 27°C wet-bulb temperature |
| Minimum Battery Temperature for Charging | 10°C (50°F) |
Ergonomic and Accessibility Information
Recommended Viewing Distance
Lenovo recommends positioning the display approximately 510–760 mm (20–30 inches) from the eyes.
Ergonomic Positioning
For comfortable use:
- Keep the head and neck in a natural position.
- Use seating with suitable back support.
- Maintain relaxed wrist and arm positions.
- Keep feet supported.
- Adjust display brightness to suit surrounding light.
- Take frequent short breaks.
Accessibility Features
Windows provides accessibility options for users with visual, hearing, or mobility requirements.
Additional Lenovo accessibility information is available at:
https://www.lenovo.com/accessibility
Replacement Parts and Accessories
The guide identifies several Customer Replaceable Units (CRUs).
Customer Replaceable Units
| Part | CRU Type |
| Power Cord | Self-service |
| AC Power Adapter | Self-service |
| Bluetooth Folio Keyboard | Self-service, on supported configurations |
| Lenovo Digital Pen | Self-service, on supported configurations |
Customer Replaceable Unit Types
Self-Service CRU: A part that can be replaced by the customer or by a trained service technician, potentially at additional cost.
Optional-Service CRU: A part requiring greater technical skill, which may also be replaced by qualified service personnel under applicable warranty terms.
Returning Defective Parts
When Lenovo requires a defective CRU to be returned, the replacement is supplied with return instructions, a prepaid shipping label, and suitable packaging.
The defective part must be returned within 30 days of receiving the replacement when a return is required.
Failure to return it may result in a charge for the replacement part.
Warranty Information
The IdeaPad Duet 3i is covered by the applicable Lenovo Limited Warranty.
Warranty coverage, duration, and service arrangements depend on the product and purchase region.
Warranty Services
During the applicable warranty period, services may include:
- Hardware problem determination
- Authorized Lenovo hardware repair
- Applicable engineering changes
Services Outside Standard Warranty Coverage
Examples listed in the guide include:
- Replacement or use of nonwarranted parts
- Identifying software problem sources
- BIOS configuration during installation or upgrades
- Driver changes and upgrades
- Network operating system installation or maintenance
- Application installation and maintenance
Lenovo Limited Warranty
https://www.lenovo.com/warranty/llw_02
Additional Services
Additional Lenovo service options may be available through:
https://pcsupport.lenovo.com/warrantyupgrade
Customer Support Information
| Support Information | Details |
| Brand | Lenovo |
| Product | IdeaPad Duet 3i |
| Models | 10IGL5, 10IGL5-LTE |
| Machine Types | 82AT, 82HK |
| Lenovo Support | https://support.lenovo.com |
| Regional Phone Directory | https://pcsupport.lenovo.com/supportphonelist |
| Lenovo Community | https://forums.lenovo.com |
| Lenovo Tips | https://www.lenovo.com/tips |
| Warranty Upgrades | https://pcsupport.lenovo.com/warrantyupgrade |
| Accessories | https://www.lenovo.com/accessories |
Preparing to Contact Lenovo Support
Before contacting Lenovo, prepare:
- Product name
- Machine type
- Serial number
- Operating system and version
- Problem description
- Error messages or error codes
- Software running when the problem occurred
- Information about whether the problem can be reproduced
The machine type and serial number are usually printed on a label or etched into the bottom cover.
Lenovo Self-Help Resources
Lenovo Support provides:
- Product documentation
- Drivers and software
- Hardware diagnostics
- Warranty information
- Product and parts details
- Frequently asked questions
- Recovery resources
Environmental and Recycling Information
Lenovo provides regional recycling and electronic waste information.
Recycling the Computer
Electronic products should be disposed of through appropriate recycling or collection systems.
Products carrying the crossed-out wheeled-bin symbol must not be discarded as unsorted municipal waste in regions where the applicable rules require separate collection.
Battery Recycling
Batteries should be recycled according to applicable local regulations.
Built-in rechargeable battery replacement must be handled by Lenovo-authorized technicians.
Lenovo Recycling Resources
https://www.lenovo.com/recycling
Frequently Asked Questions
1. How do I connect the Lenovo IdeaPad Duet 3i Bluetooth keyboard?
Align the keyboard’s pogo-pin connector with the connector on the bottom of the computer and attach it magnetically. For first-time Bluetooth use, turn the keyboard on and hold its switch toward the Bluetooth symbol for three seconds. Complete the pairing process in Windows or through a Swift Pair notification.
2. What do the Bluetooth folio keyboard indicator lights mean?
Solid amber means the keyboard is charging. Continuously blinking white indicates Bluetooth pairing. Solid white for three seconds followed by off means pairing succeeded. Slowly blinking white indicates operation through the pogo-pin connection. Blinking amber means the battery is low.
3. How do I charge the Lenovo IdeaPad Duet 3i?
Connect the supplied compatible AC power adapter to either USB-C power connector on the computer. The 30 Wh battery normally reaches full charge in approximately two to four hours, depending on usage and environmental conditions.
4. How do I insert a SIM card into the Lenovo Duet 3 10IGL5-LTE?
Use the ejection tool to remove the card tray from the left side of the computer. Place a nano SIM card into the tray in the correct orientation, then reinsert it. The SIM card is sold separately and requires compatible mobile broadband service.
5. How do I install a microSD card in the IdeaPad Duet 3i?
Use the card ejection tool to remove the tray from the left side. Place the microSD card into the tray in the correct orientation and reinsert it. Avoid placing the computer into sleep mode while transferring files.
6. How do I enter BIOS on the Lenovo IdeaPad Duet 3i?
Turn on or restart the computer. When the Lenovo logo appears, press Fn + F2 repeatedly to open UEFI/BIOS Setup. To select a temporary boot device, press F12 or Fn + F12 repeatedly during startup.
7. How do I use the Lenovo Digital Pen with the Duet 3i?
On supported models, install an AAAA alkaline battery in the pen, following the orientation shown in the pen battery compartment diagram. Use the pen tip to write or draw, hold the top barrel button to right-click, or hold the bottom barrel button to erase content in compatible applications.
8. What should I do if my Lenovo IdeaPad Duet 3i stops responding?
Press and hold the Power button until the computer turns off, then restart it. If Windows or hardware problems continue, use Lenovo Vantage, Lenovo PC Manager, or Lenovo Support to run diagnostics and check available recovery options.