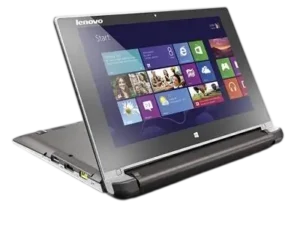
| Field | Details |
| Document Title | Lenovo IdeaPad Flex 10 User Guide |
| Document Type | User Guide |
| Brand Name | Lenovo |
| Product Name | IdeaPad Flex 10 |
| Model Number(s) | Flex 10 |
| PDF File Size | 4 MB |
| Number of Pages | 30 |
| Languages | English |
| Edition | First Edition, July 2013 |
Lenovo IdeaPad Flex 10
The Lenovo IdeaPad Flex 10 is a convertible notebook computer with a multi-touch display that can open up to 300 degrees. It supports two operating positions: Notebook Mode for keyboard-based tasks and Stand Mode (Theater Mode) for viewing photos, videos, and other touchscreen content.
The IdeaPad Flex 10 includes a keyboard, touchpad, built-in speakers, wireless LAN connectivity, HDMI output, and two USB ports. Selected configurations also include an integrated camera and wireless WAN antennas.
This Lenovo IdeaPad Flex 10 user manual covers the computer’s components, keyboard functions, display positions, Windows 8 setup, touchscreen gestures, wireless networking, battery indicators, BIOS setup, and troubleshooting procedures.
Product Overview
The IdeaPad Flex 10 combines traditional notebook controls with touchscreen input. Users can operate the computer with its keyboard and touchpad or interact directly with the multi-touch screen.
The display hinge allows the computer to switch between a standard notebook position and a backward-folded stand position. When the screen opens beyond approximately 180 degrees, the keyboard and touchpad automatically lock to prevent unintended input.
The computer supports USB devices, external HDMI displays, compatible headsets, and wireless network connections.
Main Features
- Multi-touch display.
- Display hinge that opens up to 300 degrees.
- Notebook Mode and Stand Mode.
- Automatic keyboard and touchpad locking beyond approximately 180 degrees.
- Keyboard with dedicated function shortcuts.
- Integrated touchpad.
- Physical volume buttons.
- Windows button for Start screen access and waking the computer.
- Built-in microphone.
- Integrated camera on selected models.
- Wireless LAN antennas.
- Wireless WAN antennas on selected models.
- HDMI connector.
- USB 3.0 and USB 2.0 ports.
- Combo audio jack.
- Built-in speakers.
- Battery charging and status indicator.
- Windows 8 operating instructions.
- BIOS setup and troubleshooting functions.
Technical Specifications
The following table summarizes the hardware and functions identified for the Lenovo IdeaPad Flex 10.
| Specification | Details |
| Brand | Lenovo |
| Product | IdeaPad Flex 10 |
| Product Type | Convertible Notebook Computer |
| Display | Multi-Touch Screen |
| Maximum Display Opening Angle | 300 degrees |
| Operating Positions | Notebook Mode, Stand Mode (Theater Mode) |
| Keyboard | Built-in Keyboard with Function Keys |
| Pointing Device | Touchpad |
| Wireless Connectivity | Wireless LAN |
| Wireless WAN Antennas | Selected Models |
| Integrated Camera | Selected Models |
| Microphone | Built-in |
| Speakers | Built-in |
| External Display Connection | HDMI |
| USB 3.0 Port | 1 |
| USB 2.0 Port | 1 |
| Audio Connection | Combo Audio Jack |
| Battery | Built-in Rechargeable Battery |
| AC Power Connection | AC Power Adapter Jack |
| Operating System Covered | Windows 8 |
| Firmware Configuration | BIOS Setup Utility |
Operating system compatibility: The guide’s instructions are based on Windows 8. If another Windows operating system is installed, some procedures may differ. A computer preinstalled with a 32-bit operating system cannot install 64-bit operating system applications in that environment.
Parts and Components
The Lenovo IdeaPad Flex 10 includes components on the display assembly, keyboard area, left side, right side, and bottom.
Top and Front Components
| Component | Function |
| Integrated Camera | Supports video communication on selected models. |
| Wireless LAN Antennas | Send and receive wireless LAN signals. |
| Wireless WAN Antennas | Support wireless WAN communication on selected models equipped with the corresponding hardware. |
| Multi-Touch Screen | Displays information and accepts touch input. |
| Windows Button | Switches between the Start screen and current view or wakes the computer from sleep. |
| Touchpad | Controls the pointer and provides left-click and right-click functions. |
The wireless antennas are integrated into the display area and are not externally visible.
Integrated Camera
Selected configurations include an integrated camera for video communication.
The camera works with compatible applications that support video input.
Multi-Touch Display
The touchscreen serves as both the computer’s display and an input device.
Users can tap, press and hold, swipe, slide, rotate, or move two fingers together and apart to perform supported actions.
Windows Button
The Windows button is located below the display.
Pressing it can:
- Switch between the current view and the Windows Start screen.
- Wake the computer from sleep mode.
Touchpad
The touchpad works similarly to a conventional mouse.
To move the pointer, slide a fingertip across the touchpad in the desired direction.
The left and right sections of the touchpad provide the same functions as standard mouse buttons.
Press F6 to enable or disable the touchpad.
Left-Side Components
| Component | Function |
| Built-in Microphone | Captures sound for video conferencing, voice narration, and audio recording. |
| AC Power Adapter Jack | Connects the AC power adapter. |
| HDMI Port | Connects a compatible television or external display. |
| USB 3.0 Port | Connects compatible USB devices. |
| Combo Audio Jack | Connects compatible headphones or headsets. |
Combo Audio Jack
The combo audio jack supports compatible headsets.
Important:
- The connector does not support conventional standalone microphones.
- Recording may not work with certain third-party headphones or headsets because of differences in audio connector standards.
Right-Side Components
| Component | Function |
| Volume Up Button | Increases the system volume. |
| Volume Down Button | Decreases the system volume. |
| Power Button | Turns on the computer and provides power-related controls. |
| Battery Status Indicator | Displays battery charging and remaining-charge conditions. |
| USB 2.0 Port | Connects compatible USB devices. |
Bottom Components
The speakers are located on the underside of the computer.
They provide audio output for Windows, media playback, and other applications.
Keyboard Function Keys
The Lenovo IdeaPad Flex 10 includes twelve function keys for quickly controlling common system settings.
Function Key Guide
| Key | Function |
| F1 | Mutes or unmutes sound. |
| F2 | Decreases the volume. |
| F3 | Increases the volume. |
| F4 | Closes the active window. |
| F5 | Refreshes the desktop or active window. |
| F6 | Enables or disables the touchpad. |
| F7 | Enables or disables Airplane Mode. |
| F8 | Displays currently active applications. |
| F9 | Turns the LCD backlight on or off. |
| F10 | Switches display output between the computer and an external device. |
| F11 | Decreases display brightness. |
| F12 | Increases display brightness. |
Adjusting the Volume
The volume can be changed using the keyboard or the physical buttons on the right side.
- Press F1 to mute or unmute audio.
- Press F2 to decrease volume.
- Press F3 to increase volume.
The physical Volume Up and Volume Down buttons provide additional volume controls.
Changing Screen Brightness
- Press F11 to reduce brightness.
- Press F12 to increase brightness.
Press F9 to turn the LCD backlight on or off.
Enabling or Disabling the Touchpad
Press F6 to switch the touchpad on or off.
Switching Display Output
Press F10 to switch the display between the computer and a connected external device.
Notebook Mode and Stand Mode
The Lenovo IdeaPad Flex 10 display can open up to 300 degrees.
The hinge supports two operating positions.
Notebook Mode
Notebook Mode is the standard laptop position.
It is suitable for tasks that require the keyboard and touchpad, including:
- Creating and editing documents.
- Writing emails.
- Typing and other keyboard-based activities.
To use Notebook Mode, position the display at a comfortable angle for normal keyboard operation.
Stand Mode (Theater Mode)
Stand Mode places the display farther backward so the screen faces the user while the keyboard section supports the computer.
It is suitable for activities requiring little or no keyboard input, such as:
- Viewing photographs.
- Watching videos.
- Using supported touchscreen applications.
Automatic Keyboard and Touchpad Locking
When the screen opens beyond approximately 180 degrees, the keyboard and touchpad automatically lock.
This prevents unintended keyboard or touchpad input while the computer is positioned in Stand Mode.
Display Hinge Precautions
Attention:
- Do not force the screen beyond its maximum opening angle.
- Do not open the display with excessive force.
- Excessive pressure may damage the display panel or hinges.
- Keep pens and other objects away from the space between the keyboard and display when closing the notebook.
Objects left between the keyboard and display can damage the screen.
Battery Status Indicator Guide
The battery indicator is located on the computer’s right side.
Its color and blinking pattern indicate the charging condition and remaining battery level.
| Indicator Status | Charging Condition | Battery Level or Meaning |
| Solid White | Charging | Greater than 80%. |
| Solid White | Discharging | Greater than 20%. |
| Solid Amber | Discharging | Less than 20%, but greater than 5%. |
| Blinking White | Charging | Greater than 20%, but less than 80%. |
| Slowly Blinking Amber | Charging | Less than 20%, but greater than 5%. |
| Quickly Blinking Amber | Charging or Discharging | Less than 5%. |
| Off | Discharging | Computer is turned off. |
Low-Battery Warning
When the battery level drops below 20% during discharge, the indicator illuminates amber.
A rapidly blinking amber indicator means the battery charge has fallen below 5%.
Connect the AC power adapter when the battery becomes low.
Safety Instructions
The Lenovo IdeaPad Flex 10 must be operated according to the supplied Lenovo safety documentation.
Read the Lenovo Safety and General Information Guide before using the computer.
Display and Hinge Safety
- Do not force the display beyond its intended opening angle.
- Avoid applying excessive pressure to the display hinges.
- Do not leave objects between the display and keyboard before closing the computer.
External Device Safety
The guide provides the following precautions for connecting external equipment:
- Do not connect or disconnect external device cables other than USB cables while the computer is powered on.
- High-power USB devices, such as an external USB optical drive, may require their own power adapter.
- Before disconnecting a USB storage device, allow data transfers to finish.
- Use the Windows Safely Remove Hardware function before removing USB storage.
Moving the Computer
Put the computer into sleep mode before moving it when the hard disk may still be operating.
Moving the notebook while the hard disk is spinning can damage the drive and cause data loss.
Initial Setup Instructions
The Lenovo IdeaPad Flex 10 guide provides initial operating system setup instructions for Windows 8.
Configuring Windows 8 for the First Time
The first-time setup process may include:
- Accepting the operating system’s end-user license agreement.
- Configuring the Internet connection.
- Registering the operating system.
- Creating a Windows user account.
Follow the on-screen instructions during the initial setup process.
Using Windows 8
Windows 8 provides two main user interfaces:
- Start Screen.
- Desktop.
Switching from the Start Screen to the Desktop
Use any of the following methods:
- Select the Desktop tile on the Start screen.
- Press the Windows button.
- Press Windows + D.
Switching from the Desktop to the Start Screen
Use either method:
- Open the Charms bar and select Start.
- Move the pointer to the lower-left corner and select the Start screen thumbnail when it appears.
Windows 8 Charms
The Charms bar provides access to common Windows functions from different applications.
Windows 8 includes five charms:
| Charm | Function |
| Search | Finds applications, settings, and files. |
| Share | Shares supported links, photographs, and other content. |
| Start | Opens the Windows Start screen. |
| Devices | Connects to or sends files to compatible external devices. |
| Settings | Provides access to system settings, volume, power controls, and Control Panel. |
Opening the Charms Bar
Use any of these methods:
- Move the pointer to the upper-right or lower-right corner of the display.
- Swipe inward from the right edge of the touchscreen.
- Press Windows + C.
Search Charm
The Search charm locates applications, Windows settings, and files.
Share Charm
The Share charm allows supported applications to share links, photographs, and other content without leaving the current application.
Start Charm
The Start charm returns the computer to the Start screen.
Devices Charm
The Devices charm provides access to compatible external devices, including cameras, televisions, and printers.
Settings Charm
The Settings charm provides access to commonly used system controls.
It can be used to:
- Change the volume.
- Access power options.
- Open Control Panel from the desktop.
- Change supported Windows settings.
Touchscreen Operating Instructions
The IdeaPad Flex 10 supports multi-touch gestures.
The touchscreen responds to one or more fingertips and can perform actions normally completed using a mouse.
Touchscreen Gesture Guide
| Gesture | How to Perform It | Function |
| Tap | Touch an item once. | Selects an item, opens a link, or performs a command. |
| Press and Hold | Keep a finger pressed on an item briefly. | Displays details or opens additional options, similar to right-clicking. |
| Zoom | Move two fingers together or apart. | Zooms in or out on supported content. |
| Rotate | Place two or more fingers on an item and rotate them. | Rotates supported objects. |
| Slide | Move a finger across the screen. | Scrolls, pans, moves items, or draws in supported applications. |
| Swipe | Move a finger inward from a screen edge. | Opens application or Windows navigation functions. |
Tapping the Screen
Tap an item once to perform an action.
Examples include opening an application, selecting a command, or following a link.
Pressing and Holding
Press and hold a finger on an item.
This can display additional information or open a menu with more options.
The function is similar to right-clicking with a mouse.
Zooming
Use two fingers on the touchscreen.
- Move the fingers apart to zoom in.
- Move them together to zoom out.
This gesture can be used with supported pictures, maps, and other visual applications.
It may also move directly to the beginning or end of a list in certain applications.
Rotating Items
Place two or more fingers on an object and turn them.
The object rotates when the current application supports rotation.
Not every application or object supports this gesture.
Sliding and Scrolling
Drag a finger across the screen to:
- Scroll through lists.
- Move across pages.
- Pan displayed content.
- Move supported objects.
- Draw or write in compatible applications.
Windows 8 Edge-Swipe Gestures
Swiping inward from a screen edge performs different Windows navigation actions.
Swipe from the Top or Bottom Edge
Swiping downward from the top edge or upward from the bottom edge can display an application command bar.
Depending on the application, this bar provides options such as:
- Save.
- Edit.
- Delete.
Docking an Application
To display two supported applications side by side:
- Open an application.
- Swipe downward from the top edge.
- Stop approximately halfway down the screen without lifting the finger.
- Move the application toward the left or right edge.
The application can then be displayed alongside another supported application.
Closing an Application with a Gesture
- Swipe downward from the top edge.
- Continue moving the finger to the bottom edge without lifting it.
This closes the active application.
Swipe from the Left Edge
Swiping inward from the left edge switches to an application running in the background.
To display a list of running applications:
- Swipe inward from the left edge.
- Without lifting the finger, quickly move the application back toward the left edge.
Windows displays the background application list.
Swipe from the Right Edge
Swipe inward from the right edge to display the Charms bar.
Putting the Computer to Sleep
Sleep mode allows the computer to pause operation and resume more quickly than a full startup.
Use sleep mode when leaving the computer temporarily.
Entering Sleep Mode
Use any of these methods:
- Close the display panel.
- Press the Power button.
- Open the Charms bar and select Settings > Power > Sleep.
Waking the Computer
Use one of the following methods:
- Press any keyboard key while the computer is in Notebook Mode.
- Press the Power button.
- Press the Windows button.
Shutting Down the Computer
Shut down the computer when it will not be used for an extended period.
Shutting Down Through Windows 8
- Open the Charms bar.
- Select Settings.
- Select Power > Shut down.
Connecting USB Devices
The Lenovo IdeaPad Flex 10 includes two USB ports:
- USB 3.0 on the left side.
- USB 2.0 on the right side.
These ports support compatible USB devices.
Connecting a USB Device
- Identify the appropriate USB port.
- Connect the compatible device.
- Allow Windows to detect the device.
When a USB device is connected to a port for the first time, Windows normally installs the appropriate driver automatically.
After installation, the device can generally be disconnected and reconnected without repeating the driver installation process.
Note: Some devices require a driver to be installed before the device is connected. Follow the accessory manufacturer’s instructions.
Safely Removing USB Storage
Before disconnecting a USB storage device:
- Wait for file transfers to finish.
- Click Safely Remove Hardware and Eject Media in the Windows notification area.
- Select the USB storage device.
- Disconnect it after Windows completes the removal procedure.
If a USB accessory uses a separate power cord, connect its power supply before connecting it to the computer.
Connecting an External Monitor or Television
The Lenovo IdeaPad Flex 10 includes an HDMI connector on its left side.
The HDMI connector allows the computer to connect to devices with compatible HDMI input, including televisions and external monitors.
Switching Between Displays
- Connect the compatible external display through HDMI.
- Press F10 to switch display output between the computer and external device.
Connecting to a Wireless Network
The IdeaPad Flex 10 supports wireless LAN connectivity.
Before connecting, confirm that Airplane Mode is turned off.
Enabling Wireless LAN
Airplane Mode is disabled by default.
If the Airplane Mode icon appears in the Windows notification area, wireless communication is disabled.
To enable wireless networking:
Method 1: Keyboard
Press F7 to disable Airplane Mode.
Method 2: Windows Settings
- Open the Charms bar.
- Select Settings.
- Open the Network configuration page.
- Set Airplane Mode to Off.
Connecting to Wi-Fi
When wireless networking is enabled, Windows scans for available wireless networks.
- Open the available wireless network list.
- Select the network to connect to.
- Click Connect.
- Enter the network security key or passphrase if requested.
For a protected network, obtain the required security key from the network administrator or Internet service provider.
BIOS Setup Instructions
The BIOS Setup Utility is firmware-based software that provides access to basic computer information and configuration settings.
It includes options for:
- Boot device configuration.
- Security settings.
- Hardware settings.
- Other system preferences.
How to Enter BIOS on the Lenovo IdeaPad Flex 10
- Shut down the computer.
- Start the computer.
- Press and hold Fn + F2 while the computer is starting.
The BIOS Setup Utility opens.
Drivers and Preinstalled Software
The Lenovo IdeaPad Flex 10 documentation identifies where supported preinstalled applications and hardware drivers can be found.
Reinstalling Preinstalled Lenovo Software
The computer does not come with installation discs for Lenovo preinstalled desktop software.
To reinstall an application:
- Open the D: partition of the hard disk.
- Locate the applicable installation program.
- Run the installer according to its instructions.
If the required installation program is unavailable on the D: partition, Lenovo provides software downloads through its consumer support website.
Finding Hardware Drivers
For computers preinstalled with Windows, Lenovo provides the required hardware drivers on the D: partition of the hard disk.
Updated drivers can also be downloaded from Lenovo Support.
Windows Help and Support
Windows 8 includes a Help and Support function for operating system questions.
To open it:
Method 1
- Open the Charms bar.
- Select Settings.
- Click Help.
Method 2
Press Windows + Fn + F1.
Windows Help and Support provides information stored on the computer and links to additional online assistance.
Troubleshooting Guide
The following troubleshooting table covers the specific problems and corrective actions documented for the Lenovo IdeaPad Flex 10.
| Problem | Possible Cause or Condition | Recommended Action |
| Screen stays blank when the computer starts | Power connection or startup problem. | Check the AC adapter, electrical outlet, and computer power state. If the screen remains blank, arrange service. |
| Only a white cursor appears on a blank screen | Windows or stored system contents may need recovery. | Restore backed-up files or recover factory contents using the recovery system. Arrange service if the problem remains. |
| Screen becomes blank while the computer is on | Computer may be asleep, hibernating, or have its LCD backlight disabled. | Wake the computer or check the LCD backlight using F9. |
| Critical low-battery error appears | Battery charge is too low. | Connect the AC power adapter. |
| Computer enters sleep immediately after startup | Battery charge or operating temperature may be outside the required condition. | Check battery charge and operating temperature. Arrange service if both are normal. |
| Computer does not wake from sleep | Battery may have depleted and caused hibernation. | Connect AC power and press the Windows or Power button as appropriate. |
| Display appears blank | Brightness, power state, or LCD backlight. | Increase brightness using F12, wake the computer, or check F9. |
| Display is unreadable or distorted | Display configuration may be incorrect. | Check screen resolution, color quality, and monitor type. |
| Incorrect characters appear on screen | Operating system or application installation may be incorrect. | Check software installation and configuration; arrange service if these are correct. |
| Speakers produce no sound | Audio muted, headset connected, or incorrect playback device. | Check mute, disconnect the headset if applicable, and select the speakers as the playback device. |
| Battery indicator shows an unexpected remaining charge | Battery requires recharging. | Recharge the battery. |
| Computer does not respond | System has stopped responding. | Hold the Power button for at least five seconds. |
| Connected external device does not work | Connection procedure or external power requirements. | Follow the external-device cable and power precautions. |
Screen Is Blank at Startup
If nothing appears when the computer is turned on:
- Confirm that the AC power adapter is connected to the computer.
- Confirm that the power cord is connected to a working electrical outlet.
- Confirm that the computer is powered on.
- Press the Power button again to check the power state.
If the screen remains blank after these checks, have the computer serviced.
White Cursor on a Blank Screen
If only a white cursor appears during startup, the guide recommends restoring backed-up Windows files or restoring the hard disk to its original factory contents using the recovery system.
Attention: A factory restoration can affect stored data. Preserve important information before performing recovery when possible.
If the white cursor remains after recovery, have the computer serviced.
Screen Goes Blank During Use
The computer may have entered sleep or hibernation mode.
To resume operation:
- Press a keyboard key while in Notebook Mode.
- Press the Power button.
- Press the Windows button.
If the display remains blank, press F9 to check whether the LCD backlight has been disabled.
Critical Low-Battery Error
If a critical low-battery warning appears and the computer immediately turns off, battery power is too low.
Connect the AC power adapter and recharge the battery.
Computer Immediately Enters Sleep After Startup
Check the following:
- Battery charge is sufficient.
- The computer is operating within the acceptable temperature range.
If the battery is charged and the operating temperature is within the allowed range, have the computer serviced.
Computer Does Not Wake from Sleep
If the battery becomes depleted while the computer sleeps, the system may automatically enter hibernation.
If the computer is in sleep mode:
- Connect the AC power adapter.
- Press the Windows button or Power button.
If the computer is hibernating or powered off:
- Connect the AC power adapter.
- Press the Power button.
If the computer still does not respond:
- Press and hold the Power button for at least five seconds.
- If the computer does not reset, disconnect the AC power adapter.
Note: A forced reset may cause unsaved data to be lost.
Screen Is Blank but the Computer Is Powered On
- If the battery status indicator is illuminated, press F12 to increase screen brightness.
- If the power indicator is blinking, press the Power button to resume operation.
- Press F9 to check whether the LCD backlight is disabled.
If the problem continues, check the screen settings.
Screen Is Unreadable or Distorted
Confirm that:
- Screen resolution is configured correctly.
- Color quality is configured correctly.
- The correct monitor type is selected.
Incorrect Characters Appear on the Screen
Check whether the operating system and installed applications are configured correctly.
If software installation and configuration are correct but the problem remains, have the computer serviced.
No Sound from Built-In Speakers
If no sound is heard even when volume is increased:
- Confirm that the sound is not muted.
- Check whether the combo audio jack is being used.
- Confirm that the built-in speakers are selected as the playback device.
Battery Indicator Shows Unexpected Charge Behavior
If the computer shuts down before the battery indicator shows empty, or continues running after the indicator shows empty, recharge the battery.
Computer Is Not Responding
- Press and hold the Power button for at least five seconds.
- If the computer still does not respond, disconnect the AC power adapter.
The computer may also become unresponsive if it enters sleep mode during a communication operation.
When working on the network, Lenovo recommends disabling the sleep timer if this issue occurs.
External USB Device Does Not Work
For high-power USB accessories such as an external optical drive, use the external device’s own power adapter.
Otherwise, the accessory may not be recognized or the computer may shut down.
Do not connect or disconnect non-USB external device cables while the computer is powered on.
Warranty Information
Warranty coverage for the Lenovo IdeaPad Flex 10 is provided under the applicable Lenovo Limited Warranty.
The warranty period and type of service are described in the Lenovo Limited Warranty flyer supplied with the computer.
Customer Support Information
Lenovo provides support information for hardware questions, software installation, drivers, and service requests.
Lenovo Support Website
The Lenovo consumer support website provides access to supported software downloads, device drivers, and product documentation.
Contacting the Customer Support Center
For instructions on contacting Lenovo Customer Support, refer to the Getting Help and Service chapter in the Lenovo Safety and General Information Guide supplied with the computer.
Frequently Asked Questions
1. How do I enter BIOS on the Lenovo IdeaPad Flex 10?
Shut down the computer, then start it while pressing and holding Fn + F2. The BIOS Setup Utility provides access to boot devices, security settings, and other hardware configuration options.
2. How far can the Lenovo IdeaPad Flex 10 screen open?
The IdeaPad Flex 10 screen can open up to 300 degrees. It supports Notebook Mode and Stand Mode. When the screen opens beyond approximately 180 degrees, the keyboard and touchpad automatically lock.
3. How do I enable or disable the touchpad on the IdeaPad Flex 10?
Press F6 to turn the touchpad on or off. The touchpad also locks automatically when the display opens beyond approximately 180 degrees.
4. How do I connect the Lenovo IdeaPad Flex 10 to Wi-Fi?
Press F7 if necessary to turn off Airplane Mode. Open the available wireless network list, select the preferred network, click Connect, and enter its security key when prompted.
5. What does a blinking amber battery light mean on the Lenovo Flex 10?
A slowly blinking amber light during charging means the battery level is below 20% but above 5%. A quickly blinking amber light during charging or discharging means the battery level is below 5%.
6. What should I do if my Lenovo IdeaPad Flex 10 screen is black?
Check the AC power connection and confirm the computer is turned on. Press F12 to increase brightness and F9 to check the LCD backlight. If the computer is sleeping, press the Power or Windows button. Arrange service if the display remains blank after the documented checks.
7. How do I reset a frozen Lenovo IdeaPad Flex 10?
Press and hold the Power button for five seconds or longer. If the computer still does not respond, disconnect the AC power adapter. A forced reset can cause unsaved work to be lost.
8. Where can I download Lenovo IdeaPad Flex 10 drivers?
Drivers for the preinstalled Windows configuration are provided on the computer’s D: partition. Updated drivers can also be obtained from Lenovo Support.