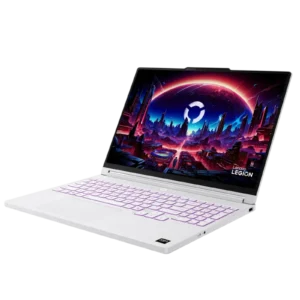
| Field | Details |
| Document Title | Lenovo Legion 5a (15″, 11) and Lenovo Legion 5i (15″, 11) User Guide |
| Document Type | User Guide |
| Brand Name | Lenovo |
| Product Name | Legion 5a (15″, 11), Legion 5i (15″, 11) |
| Model Number(s) | Legion 5 15AGP11, Legion 5 15AGP11 D1, Legion 5 15AHP11, Legion 5 15AHP11 D1, Legion 5 15IAX11, Legion 5 15IAX11 D1, Legion 5 15IPH11, Legion 5 15IPH11 D1 |
| Machine Types | 83Q6, 83Q7, 83QE, 83VK, 83RW |
| PDF File Size | 14 MB |
| Number of Pages | 72 |
| Languages | English, French, Korean |
Lenovo Legion 5 15AGP11
The Lenovo Legion 5 is a notebook computer designed for gaming, everyday computing, multimedia, and other demanding applications. It features a 15.3-inch display with a resolution of 2560 × 1600 pixels, a supported refresh rate of 165 Hz, DDR5 memory, solid-state storage, and an RGB-backlit keyboard.
The Lenovo Legion 5 user guide covers the 15AGP11, 15AHP11, 15IAX11, and 15IPH11 models, including their applicable D1 variants. These models share several operating features but have different USB connectivity capabilities, storage interface options, and hardware configurations.
The Lenovo Legion 5 15AGP11 user manual provides instructions for setting up Windows 11, identifying ports and controls, connecting accessories, managing performance and battery settings, using Legion Space and supported Lenovo applications, configuring UEFI/BIOS, and troubleshooting common hardware and software problems.
Selected configurations also support Lenovo Qira, biometric authentication, Super Resolution, and other intelligent features. Available options depend on the specific computer model, installed software, and applicable updates.
Supported Models and Machine Types
| Model | Machine Type |
| Legion 5 15AGP11 | 83Q6 |
| Legion 5 15AGP11 D1 | 83Q6 |
| Legion 5 15AHP11 | 83Q7 |
| Legion 5 15AHP11 D1 | 83Q7 |
| Legion 5 15IAX11 | 83QE, 83VK |
| Legion 5 15IAX11 D1 | 83VK |
| Legion 5 15IPH11 | 83RW |
| Legion 5 15IPH11 D1 | 83RW |
Product Overview
The Lenovo Legion 5 provides several hardware and software functions for controlling performance, connecting external devices, and managing everyday computer use.
Its display supports a 2560 × 1600 resolution and a refresh rate of 165 Hz. The computer includes two DDR5 memory slots, M.2 solid-state storage, wired Ethernet, Wi-Fi, Bluetooth, and multiple USB connections.
The keyboard provides a numeric keypad, RGB lighting, hotkeys, and function-key shortcuts. The built-in touchpad supports Windows multi-finger gestures.
The computer also provides different operating modes to balance performance, power consumption, and fan noise.
Main Product Features
- 15.3-inch display with 2560 × 1600 resolution.
- Supported 165 Hz display refresh rate.
- DDR5 memory with two physical slots.
- M.2 PCIe solid-state storage.
- RGB keyboard backlighting.
- USB Type-C, USB Standard-A, HDMI, and Ethernet connections.
- USB4 connectivity on Legion 5 15AGP11 and 15AHP11.
- Thunderbolt 4 connectivity on supported connectors of Legion 5 15IAX11 and 15IPH11.
- Wi-Fi and Bluetooth connectivity.
- Built-in microphones, camera, and speakers.
- Physical camera privacy switch.
- Quiet, Balance, Performance, and supported Custom operating modes.
- Legion Space application for performance, device, and lighting settings.
- Windows 11 operating system.
- Lenovo Qira AI features on selected models.
- Smart Connect support for compatible Motorola smartphones and Lenovo tablets.
Technical Specifications
The following specifications apply to the Lenovo Legion 5 models covered by this guide. Some values differ by configuration.
General Specifications
| Specification | Details |
| Brand | Lenovo |
| Product Series | Legion 5 |
| Product Models | 15AGP11, 15AHP11, 15IAX11, 15IPH11 |
| Product Type | Notebook Computer |
| Operating System | Windows 11 |
| Display Size | 15.3 inches (388.6 mm) |
| Display Resolution | 2560 × 1600 pixels |
| Supported Display Refresh Rate | 165 Hz |
| Memory Type | DDR5 |
| Physical Memory Slots | 2 |
| Storage Type | Solid-State Drive |
| SSD Form Factor | M.2 2242 or M.2 2280 |
| Storage Interface | PCIe 4.0; PCIe 5.0 on 15IAX11 and 15IPH11 |
| Keyboard Lighting | RGB |
| Numeric Keypad | Included |
| Built-in Camera | Yes |
| Infrared Camera Support | Selected models |
| Audio | Built-in Speakers, Microphones, 3.5 mm Combo Audio Jack |
| Wired Network | Gigabit Ethernet |
| Wireless Network | Wi-Fi |
| Bluetooth | Bluetooth 5.3 or 5.4 |
| USB Standard-A Connectors | 3 |
| USB Type-C Connectors | 2 |
| HDMI Connector | Yes |
| Battery | Built-in Rechargeable Battery |
| Battery Capacity | 60 Wh or 80 Wh |
| Battery Cells | 4 |
Dimensions
| Measurement | Value |
| Width | 344 mm (13.5 inches) |
| Depth | 244.5 mm (9.6 inches) |
| Minimum Thickness | 18.95 mm (0.7 inches) |
| Maximum Thickness | 19.95 mm (0.8 inches) |
AC Power Adapter Specifications
| Specification | Details |
| Input Voltage | 100–240 V AC |
| Input Frequency | 50–60 Hz |
| Output Voltage | 20 V DC |
| Output Current | 8.5 A or 12.25 A |
| Adapter Power | 170 W or 245 W |
The 170 W adapter is available on selected models.
Some configurations are sold without an included AC power adapter. When selecting a separate adapter, its connector, voltage, current, and power rating must meet the computer’s requirements.
USB Type-C Power Specifications
| Function | Supported Value |
| USB-C Power Output | 5 V, up to 3 A |
| Minimum USB Power Delivery Input | 65 W (20 V, 3.25 A) |
| Maximum USB Power Delivery Input | 100 W (20 V, 5 A) |
| Lenovo Proprietary USB-C Input | Up to 140 W (20 V, 7 A) |
The minimum supported USB Power Delivery input allows the computer to remain operational and begin charging its internal battery.
The maximum supported input provides faster charging under the applicable power delivery protocol.
Important: A USB-C charger should be safety-approved or certified. An uncertified charger may damage the computer or create an electrical hazard.
USB Connectivity Differences Between Models
| Model | Supported USB-C Technology |
| Legion 5 15AGP11 | USB4, up to 40 Gbps |
| Legion 5 15AHP11 | USB4, up to 40 Gbps |
| Legion 5 15IAX11 | Thunderbolt 4, up to 40 Gbps on the marked connector |
| Legion 5 15IPH11 | Thunderbolt 4, up to 40 Gbps on the marked connector |
The multi-purpose USB-C connectors also support USB data transfer, compatible display output, and USB Power Delivery.
External Display Specifications
| Connection | Maximum Output Resolution |
| HDMI | 7680 × 4320 at 60 Hz |
| DisplayPort 1.4 through USB-C (15AGP11, 15AHP11) | 7680 × 4320 at 30 Hz |
| DisplayPort 2.1 through USB-C (15IAX11, 15IPH11) | 7680 × 4320 at 60 Hz |
The supported display resolution depends on the connector, cable, display, and relevant interface specifications.
Wireless Connectivity
| Specification | Supported Options |
| Ethernet | 1 Gbps |
| Wi-Fi Standards | 802.11a/b/g/n/ac/ax/be |
| Wi-Fi 6 | Supported configurations |
| Wi-Fi 6E | Legion 5 15IAX11 and 15IPH11 |
| Wi-Fi 7 | Supported configurations |
| Bluetooth | 5.3 or 5.4 |
Wi-Fi 6E and Wi-Fi 7 availability can be restricted by regional wireless regulations.
Parts and Components
The Lenovo Legion 5 includes hardware components on the front, keyboard deck, left and right sides, rear, and bottom.
Front Components
| Component | Function |
| Microphones | Capture voice and surrounding sound for recording and communication. |
| Infrared LED | Provides infrared illumination for facial recognition on selected models. |
| Camera | Captures photographs and video. |
| Camera Light | Indicates when the camera is activated. |
| Display | Shows Windows, applications, images, and video content. |
Camera Indicator
| Camera Light | Meaning |
| On | Camera is activated. |
| Off | Camera is not activated. |
Base Components
| Component | Function |
| Power Button | Turns on the computer or performs the configured power action. |
| Power Light | Shows the current power state and active operation mode. |
| Keyboard | Provides typing, numeric entry, and shortcut controls. |
| Touchpad | Controls the pointer and supports gestures. |
| Antennas | Support Wi-Fi and Bluetooth communication. |
The wireless antennas are located inside the computer.
Left-Side Connectors
| Connector | Function |
| Ethernet Connector | Connects to a router or network through an Ethernet cable. |
| Multi-Purpose USB Type-C Connectors | Support USB devices, external displays, charging, and model-specific USB4 or Thunderbolt functions. |
The Legion 5 15AGP11 and 15AHP11 support USB4-enabled docks and devices.
The Legion 5 15IAX11 and 15IPH11 support Thunderbolt-enabled docks and devices through the connector marked with the Thunderbolt symbol.
Right-Side Components
| Component | Function |
| Camera Switch | Enables or disables the built-in camera. |
| Combo Audio Jack | Connects headphones, headsets, or external speakers. |
| USB Standard-A Connector | Connects compatible USB storage and peripheral devices. |
The 3.5 mm audio connector supports three-pole TRS plugs and four-pole TRRS plugs, including CTIA and OMTP types.
Rear Connectors
| Component | Function |
| Air Vents | Release heat from the computer. |
| USB Standard-A Connector | Connects compatible USB peripherals. |
| HDMI Connector | Connects external monitors, televisions, and projectors. |
| Always-On USB Standard-A Connector | Supplies power to compatible USB devices when the computer is off, asleep, or hibernating. |
| Power Connector | Connects the compatible AC power adapter. |
| Charging Light | Shows AC power connection and battery charging status. |
Always-On USB Connector
The rear USB Standard-A connector marked with a battery symbol supports charging compatible devices even when the computer is:
- Powered off.
- In sleep mode.
- In hibernation mode.
The function can be enabled or disabled through UEFI/BIOS.
The always-on connector supports a maximum output of 5 V, 2 A.
Bottom Components
| Component | Function |
| Air Intake Vents | Draw cooling air into the computer. |
| Speakers | Provide built-in audio output. |
Important: The ventilation openings must remain clear during operation. Blocked airflow can cause overheating, reduced performance, unresponsiveness, or automatic shutdown.
Indicator Lights and Their Meanings
The Legion 5 power and charging indicators provide information about the computer’s operating condition.
Power Light Status
| Light Status | Computer State |
| Solid On | Computer is powered on. |
| Slowly Blinking | Computer is in sleep mode. |
| Off | Computer is powered off or hibernating. |
Power Light Colors
| Light Color | Operating Mode |
| White | Balance |
| Blue | Quiet |
| Red | Performance |
| Purple | Custom |
On configurations with a fingerprint reader integrated into the power button, the power light may turn solid green when fingerprint enrollment or scanning is required.
Battery Charging Indicator
| Light Status | AC Power Connected | Battery Level |
| Off | No | — |
| Amber | Yes | 1%–90% |
| White | Yes | 91%–100% |
Safety Instructions
Read the Generic Safety and Compliance Notices, Safety and Warranty Guide, and Setup Guide before operating the computer.
Heat and Ventilation Safety
The computer generates heat during operation, particularly when running demanding applications.
- Place the computer on a hard, flat surface.
- Keep ventilation openings clear.
- Do not operate the computer on a bed, sofa, carpet, or other flexible surface that may block airflow.
- Avoid placing the bottom of the computer directly against bare skin.
- Avoid prolonged direct contact with hot sections of the computer.
Caution: The underside of the computer can become warm enough to cause discomfort or harm when directly touched for more than 10 seconds, even during normal operation.
Battery Charging Safety
- Use a compatible power adapter or supported USB Power Delivery charger.
- Select safety-approved or certified charging equipment.
- Do not use damaged charging equipment.
- Charge the battery only within the recommended temperature range.
- Keep charging connections away from liquids.
The recommended battery charging temperature is 10°C to 35°C (50°F to 95°F).
USB-C Charger Safety
When using a third-party USB-C charger, select a charger carrying the applicable electrical safety certification for its region.
Examples include CCC certification in mainland China, CE marking in applicable European markets, and recognized testing laboratory certification in the United States and Canada.
Using an uncertified charger can damage the computer or create an electrical hazard.
Liquid Exposure
If liquid is spilled on the computer:
- Carefully disconnect the AC power adapter.
- Turn off the computer immediately.
- Do not turn the computer upside down to drain the liquid.
- Wait until the computer is completely dry before attempting to turn it on.
Attention: Leaving the computer powered on after a liquid spill can increase damage from electrical short circuits.
Before First Use
Initial Windows Setup
The Legion 5 comes with Windows 11 preinstalled.
When the computer is turned on for the first time, Windows guides the user through initial setup.
The setup includes:
- Creating a Windows user account.
- Connecting to a wireless network with Internet access.
- Selecting language and regional settings.
- Completing the remaining on-screen instructions.
For personal-use Windows setup, a Microsoft account is required during the initial setup process described in the guide. A local account can be used after initial setup.
Setting Up Facial Recognition
Selected Legion 5 models include infrared hardware that supports facial recognition.
To configure Windows facial recognition:
- Open Start > Settings > Accounts > Sign-in options.
- Select Facial recognition.
- Click Set up > Get started.
- Follow the instructions to register a face.
When using a local Windows account, a password must be configured before enabling facial recognition.
Basic Operating Instructions
Turning the Computer On
Press the power button to turn on the computer.
The power light illuminates when the computer is running.
Shutting Down Windows
- Open the Start menu.
- Select Power.
- Click Shut down.
Entering Sleep Mode
- Open Start > Power.
- Select Sleep.
The computer can resume from sleep more quickly than from a complete shutdown.
To wake the computer, press the power button or any key on the keyboard.
Changing Sleep and Screen Timeouts
- Open Start > Settings.
- Select System > Power & battery.
- Open Screen, sleep, & hibernation timeouts.
- Change the available settings.
Separate timeout values can be configured for AC power and battery operation.
Default Power-Saving Timeouts
| Action | Power Source | Default Timeout |
| Turn Off Display | AC Power | 5 minutes |
| Turn Off Display | Battery | 3 minutes |
| Enter Sleep Mode | AC Power | 5 minutes |
| Enter Sleep Mode | Battery | 3 minutes |
Connecting to Networks
Connecting to Wi-Fi
- Select the network icon in the Windows taskbar.
- Choose an available Wi-Fi network.
- Select Connect.
- Enter the network credentials if required.
- Follow the remaining instructions.
Select Connect automatically before connecting if the computer should reconnect to the network when available.
Connecting to Wired Ethernet
- Connect an Ethernet cable to the computer’s Ethernet connector.
- Connect the other end to a router or network wall connection.
The integrated Ethernet connection supports speeds up to 1 Gbps.
Keyboard Controls and Hotkeys
The Lenovo Legion 5 includes hotkeys for controlling audio, brightness, wireless settings, display output, and installed applications.
Keyboard Hotkey Functions
| Hotkey Function | Description |
| Sound Mute | Mutes or unmutes system audio. |
| Volume Down | Reduces speaker volume. |
| Volume Up | Increases speaker volume. |
| Microphone | Enables or disables the microphone. |
| Brightness Down | Reduces screen brightness. |
| Brightness Up | Increases screen brightness. |
| Display Selection | Opens display connection and configuration options. |
| Airplane Mode | Turns airplane mode on or off. |
| Lenovo Application / AI | Opens a supported AI experience, application launch panel, or PC management application. |
| Touchpad | Enables or disables the touchpad. |
| Smart Connect | Opens the Smart Connect application. |
| Calculator | Opens Calculator. |
| Screenshot | Captures a screenshot. |
The exact key icons identify the corresponding shortcuts.
Using FnLock
FnLock changes the behavior of keys that provide both standard function-key actions and hotkey actions.
Press Fn + Esc to enable or disable FnLock.
| FnLock | Pressing Function Key Alone | Pressing Fn + Function Key |
| Disabled | Primary hotkey function | Secondary function |
| Enabled | Secondary function | Primary hotkey function |
The Esc key contains an indicator that shows FnLock status.
Fn Key Combinations
| Shortcut | Function |
| Fn + Q | Switches the operating mode. |
| Fn + R | Switches the built-in display refresh rate on supported configurations. |
| Fn + N | Shows important device information. |
| Fn + Space | Adjusts keyboard backlighting. |
| Fn + B | Break |
| Fn + P | Pause |
| Fn + S | SysRq |
| Fn + K | Scroll Lock |
| Fn + I | Insert |
| Fn + T | Print Screen |
| Fn + Left Arrow | Home |
| Fn + Right Arrow | End |
| Fn + Up Arrow | Increases keyboard brightness. |
| Fn + Down Arrow | Decreases keyboard brightness. |
Windows Keyboard Shortcuts
| Shortcut | Function |
| Windows Key | Opens or closes Start. |
| Windows + A | Opens Quick Settings. |
| Windows + D | Shows the desktop. |
| Windows + E | Opens File Explorer. |
| Windows + I | Opens Settings. |
| Windows + L | Locks the screen. |
| Windows + M | Minimizes open windows. |
| Windows + N | Opens notifications. |
| Windows + P | Opens display mode selection. |
| Windows + W | Opens Widgets. |
| Windows + Semicolon | Opens the emoji panel. |
| Windows + Tab | Opens Task View. |
| Windows + Print Screen | Captures and saves a full-screen screenshot. |
Copilot Key
The Copilot key opens Copilot in Windows when the feature is available and enabled.
Otherwise, it opens Windows Search.
Copilot availability depends on the operating system version and region. Windows 11 version 23H2 or later may be required for the functionality described.
Numeric Keypad
The keyboard includes a numeric keypad for entering numbers and mathematical operators.
Press Num Lock to enable or disable the numeric keypad.
Touchpad Operating Instructions
The touchpad supports standard pointer functions and Windows multi-finger gestures.
Touchpad Gestures
| Gesture | Function |
| One-Finger Movement | Moves the pointer. |
| Tap | Selects an item. |
| Double Tap | Opens or activates an item. |
| Two-Finger Vertical Swipe | Scrolls pages. |
| Two-Finger Pinch | Zooms out. |
| Two-Finger Stretch | Zooms in. |
| Two-Finger Tap | Opens the right-click menu. |
| Three-Finger Swipe Up | Shows open windows. |
| Three-Finger Swipe Down | Returns to the desktop. |
| Three-Finger Swipe Left or Right | Switches between open applications. |
| Three-Finger Tap | Opens Windows Search. |
Changing Touchpad Gestures
- Open Settings > Bluetooth & devices > Touchpad.
- Find Three-finger gestures.
- Change the available swipe or tap functions.
Enabling or Disabling the Touchpad
The touchpad can be enabled or disabled with its dedicated keyboard hotkey or Fn + M.
It can also be controlled through Settings > Bluetooth & devices > Touchpad.
Connecting External Displays
The Lenovo Legion 5 supports external monitors, televisions, and projectors through HDMI or compatible USB Type-C display connections.
Connecting a Wired Display
- Connect a compatible display cable to the HDMI or multi-purpose USB Type-C connector.
- Connect the other end to the external display.
- Configure the display settings in Windows.
A suitable adapter may be required depending on the display’s available ports.
Connecting a Wireless Display
Wireless display connection requires Miracast support.
Both devices must support Miracast, and the external display must be discoverable on the same Wi-Fi network.
- Press Windows + K.
- Select the required wireless display.
- Follow the on-screen instructions.
Changing Display Settings
- Right-click an empty area on the Windows desktop.
- Select Display settings.
- Choose the display to configure.
- Change the available settings.
Changing the Display Mode
Press the display-switching hotkey or its Fn combination.
Select the preferred display mode from the available list.
Camera Privacy Controls
The Lenovo Legion 5 includes a physical camera switch on the right side.
The switch controls whether applications can access the integrated camera.
Disabling the Camera
Slide the camera switch toward the disabled-camera symbol.
When the camera is disabled, applications cannot capture images through the integrated camera.
Enabling the Camera
Slide the camera switch to the opposite position.
The camera can then be used by supported applications with the appropriate permissions.
Windows displays an on-screen indication when the camera switch state changes.
Display Settings
Turning On Night Light
Night Light changes the display to warmer color tones.
- Open Quick Settings by selecting the network, sound, or battery area of the taskbar.
- Select Night light.
The Windows + A shortcut can also open Quick Settings.
Changing Color Temperature
- Open Start > Settings.
- Select System > Display.
- Open Night light settings.
- Move the color temperature slider.
Selected Lenovo computers have low-blue-light certification based on testing with Night Light enabled and the color temperature set to 48 or higher.
Changing the Refresh Rate
The display supports a 165 Hz refresh rate.
On configurations supporting adjustable refresh rates, the user can switch between available refresh-rate settings.
Press Fn + R to change the refresh rate when the feature is supported.
A higher refresh rate can provide smoother motion during gaming and video playback, while a lower refresh rate can reduce power consumption.
Refresh-rate options can also be accessed through Windows display settings.
Legion Space Application
Legion Space provides software controls for the computer’s gaming and hardware functions.
Opening Legion Space
- Open Windows Search.
- Type Legion Space.
- Select the matching application.
The application may also be accessible through the taskbar.
Legion Space Functions
Depending on the computer configuration and application version, Legion Space provides access to:
- Game resources.
- Performance settings.
- Operating mode controls.
- Keyboard and lighting effects.
- Device and peripheral management.
- Hardware settings.
- Supported intelligent features.
- Driver and firmware updates.
Legion Space receives updates that may add or modify available functions.
Some features may become available only after an online software update.
Lenovo Qira
Lenovo Qira is an AI assistant available on selected Lenovo Legion 5 configurations.
It supports voice and text interaction and can generate responses, summaries, transcriptions, and other content based on user instructions.
Lenovo Qira supports both on-device processing and hybrid processing that may use cloud-based services.
Its available capabilities depend on the computer, application version, enabled features, permissions, and processing mode.
Opening Lenovo Qira
- Open Windows Search.
- Type Qira.
- Select the matching application.
Alternatively, press the dedicated Lenovo AI hotkey.
A prompt bar appears on the desktop.
Signing In to Lenovo Qira
- Launch Lenovo Qira.
- Follow the displayed sign-in instructions.
- Sign in using a Lenovo ID.
- Configure the preferred interaction settings.
The account settings can also be accessed through Settings > Account in the Lenovo Qira application.
Lenovo Qira Settings
| Setting | Function |
| Language | Selects the response language. |
| Launch Options | Controls wake-word activation. |
| Voice | Configures voice recognition and response options. |
| Sync Data | Enables or disables synchronization. |
| Processing Mode | Selects Local or Hybrid processing. |
| Personalized Answers | Controls permitted access to stored personal information. |
| Connectors | Manages connected applications and services. |
| Close Behavior | Controls background operation. |
| Catch Me Up | Selects applications whose notifications can be summarized. |
Local and Hybrid Processing Modes
| Mode | Description |
| Local Mode | Uses on-device AI processing. Some features may be unavailable or limited. |
| Hybrid Mode | Combines on-device processing with supported cloud services. |
Using the Wake Word
Lenovo Qira can be opened through the voice command “Hey, Qira” when the wake-word feature is enabled.
Microphone permission must also be enabled.
To check permission:
- Open Start > Settings > Privacy & security.
- Select Microphone.
- Confirm that Lenovo Qira has permission to access the microphone.
Lenovo Qira Features
| Feature | Function |
| Question Answering | Responds to user questions. |
| Next Move | Provides context-based suggestions. |
| Content Creation and Editing | Assists with drafting and editing content. |
| Live Mode | Supports real-time voice and camera-enabled interaction. |
| Catch Me Up | Summarizes selected application notifications. |
| Pay Attention | Supports meeting transcription, translation, and summaries. |
| Creator Zone | Creates AI-generated images. |
| Knowledge | Stores and retrieves selected personal knowledge and documents. |
Functions operate according to the user’s settings and permissions.
Important: Lenovo Qira can produce inaccurate, incomplete, or biased information. Generated content should be reviewed and verified before use or sharing.
Closing Lenovo Qira
When the prompt bar is visible:
- Minimize it using the minus control.
- Right-click the minimized Lenovo Qira icon.
- Select Close.
To exit the application fully, right-click the Lenovo Qira system tray icon and select Exit.
Lenovo Qira can also be closed through Task Manager.
Upgrading Lenovo AI Now
Some eligible computers may include Lenovo AI Now instead of Lenovo Qira.
When an upgrade is available:
- Review the upgrade notification.
- Select Learn More.
- Select Update.
- Follow the instructions.
Connect the computer to AC power and a stable Internet connection before beginning the upgrade.
Smart Connect
Smart Connect allows supported Lenovo PCs, Motorola smartphones, and Lenovo tablets to communicate and share functions.
Smart Connect Features
- Access supported mobile applications from the PC.
- Share content between devices.
- Mirror a phone display.
- Create a virtual phone screen.
- Copy and paste between devices.
- Use a phone or tablet camera as the PC webcam.
- Control a connected device using the computer’s keyboard and mouse.
- Extend or mirror the computer display on a Lenovo tablet.
Opening Smart Connect
- Open Windows Search.
- Type Smart Connect.
- Select the matching result.
The F11 Smart Connect hotkey can also open the application, depending on the keyboard’s current function-key setting.
Intelligent Features
Super Resolution
Selected models support Super Resolution.
This feature uses supported Intel processor capabilities to display video at a higher resolution than the original source.
Super Resolution can be enabled or disabled through Legion Space or Lenovo PC Manager on supported configurations.
Some video players may require the feature to be activated separately.
Smart Noise Cancelling
Smart Noise Cancelling helps reduce unwanted sounds during supported audio activities.
Available functions depend on hardware and application settings.
| Function | Description |
| Voice Recognition | Captures multiple voices while preserving their relative spatial positions. |
| Only My Voice | Prioritizes a registered voice and attempts to suppress other voices. |
| Normal | Focuses on the person facing the computer. |
| Multiple Voices | Captures voices from a wider area. |
| Speaker Noise Cancelling | Filters output to emphasize human speech. |
| Meeting Noise Cancelling | Reduces unwanted sounds during conferencing applications. |
Microphone noise cancellation functions apply to supported built-in microphones or 3.5 mm wired microphone input.
Speaker and meeting noise cancellation functions are not intended for music or video playback.
Settings can be reviewed through the device settings in Legion Space or Lenovo PC Manager.
Battery Charging and Power Management
The Lenovo Legion 5 contains a built-in rechargeable battery.
The computer can operate on battery power or AC power. The battery charges when the computer is connected to a suitable power source.
Battery Capacity
The available configurations use a four-cell battery with either:
- 60 Wh capacity.
- 80 Wh capacity.
Charging Temperature
The recommended battery charging temperature is:
10°C to 35°C (50°F to 95°F)
Battery Recharge Behavior
To manage battery lifespan, charging does not restart immediately after the battery becomes fully charged.
The battery must discharge to 94% or lower before charging can resume.
Normal Charging Mode
Normal mode provides standard battery charging.
Charging from 0% to 100% typically takes approximately 2–4 hours.
Conservation Mode
Conservation mode is designed for users who keep the computer connected to AC power for extended periods.
In this mode, the battery charge is maintained at approximately 75%–80% rather than reaching a full charge.
This can support long-term battery health.
To charge the battery fully before portable use, switch to Normal or Rapid Charge mode.
Overnight Charge Optimization
Selected models support overnight charge optimization.
This function learns the user’s regular nighttime charging and morning unplugging pattern.
The computer temporarily maintains the battery within a selected charge range before charging it to 100% closer to the expected unplugging time.
If the computer is disconnected earlier than usual, the battery may not yet be fully charged.
Recovering Full Charging Capacity
If the computer is continuously connected to AC power and the battery rarely discharges, its available full-charge capacity may decrease.
Lenovo provides the following procedure:
- Disconnect the computer from AC power.
- Use the computer until the battery charge falls below 20%.
- Reconnect AC power.
- Charge the battery to 100%.
Changing the Power Button Function
By default, pressing the power button while the computer is on places it into sleep mode.
To change this:
- Search for Control Panel in Windows.
- Open Power Options.
- Select Choose what the power button does.
- Change the available settings.
System Operating Modes
The Lenovo Legion 5 supports different operating modes that affect performance, power consumption, and cooling fan behavior.
Available Modes
| Mode | Recommended Use |
| Performance | Demanding tasks while connected to AC power. |
| Balance | General use involving different applications and workloads. |
| Quiet | Battery operation or situations where lower fan noise is preferred. |
| Custom | Configuration-dependent personalized settings. |
Performance Mode
Performance mode provides the computer’s highest available performance.
Use this mode when:
- The computer is connected to AC power.
- Maximum performance is required.
- Increased fan noise is acceptable.
Balance Mode
Balance mode adjusts performance dynamically based on the workload.
It can switch between higher-performance and quieter operation as system activity changes.
Quiet Mode
Quiet mode prioritizes lower fan noise and reduced power consumption.
It is suitable when operating on battery power or when quieter operation is preferred.
Changing Operating Modes
Press Fn + Q to cycle through the available operating modes.
Operating modes can also be changed through supported Lenovo software.
Note: Performance mode may be unavailable when the computer is running on battery power or connected to an adapter that does not supply sufficient power.
UEFI/BIOS Setup Instructions
UEFI/BIOS initializes the hardware and starts the operating system.
The setup utility provides access to startup settings, hardware options, and security controls.
Entering BIOS on Lenovo Legion 5
- Turn on or restart the computer.
- Press F2 repeatedly when the Lenovo logo appears.
- The UEFI/BIOS setup utility opens.
BIOS can also be opened through the Novo Button menu.
Opening the Novo Button Menu
- Turn off the computer.
- Press the power button.
- Press F9 repeatedly.
The Novo Button menu provides access to:
- UEFI/BIOS Setup.
- Boot Menu.
- Windows startup options.
Selecting a Temporary Boot Device
- Turn on or restart the computer.
- Press F12.
- Select the required boot device.
- Continue startup.
Changing the Boot Order
- Open the UEFI/BIOS setup utility.
- Select the Boot menu.
- Locate UEFI Boot Order.
- Move the preferred boot device to the top of the list.
- Save the changes and exit.
Enabling or Disabling Always-On USB
- Open UEFI/BIOS.
- Select Configuration > Always On USB.
- Press Enter.
- Select Enabled or Disabled.
- Choose Exit > Exit Saving Changes.
Fool Proof Fn Ctrl Setting
The Fool Proof Fn Ctrl setting allows the Fn key and Ctrl key to be used interchangeably for certain Ctrl-based shortcuts.
To change the setting:
- Open UEFI/BIOS.
- Select Configuration > General Settings.
- Find Fool Proof Fn Ctrl.
- Select Enabled or Disabled.
- Save and exit.
When enabled, shortcuts such as Ctrl + A can also be performed using Fn + A.
UEFI/BIOS Passwords
The Lenovo Legion 5 provides firmware password options for protecting computer configuration and storage access.
BIOS Password Types
| Password Type | Purpose |
| Administrator Password | Protects access to BIOS setup. |
| User Password | Provides restricted BIOS setup access. |
| Master Hard Disk Password | Protects operating system and storage access. |
| User Hard Disk Password | Allows authorized access using a user-level drive password. |
Passwords contain alphanumeric characters only.
Setting an Administrator Password
- Enter BIOS.
- Select Security > Set Administrator Password.
- Press Enter.
- Enter the desired password.
- Confirm the password.
- Select Exit > Exit Saving Changes.
Important: A forgotten administrator password cannot be reset by Lenovo-authorized service personnel. System board replacement is required, with proof of purchase and applicable charges.
Changing or Removing the Administrator Password
- Open BIOS using the administrator password.
- Select Security > Set Administrator Password.
- Enter the current password.
- Enter and confirm the new password.
- Save the changes.
To remove the password, leave the new password fields empty.
Removing the administrator password also removes the user password.
Setting a User Password
An administrator password must be configured first.
- Open BIOS using the administrator password.
- Select Security > Set User Password.
- Enter a password different from the administrator password.
- Confirm the password.
- Save and exit.
Enabling a Power-On Password
- Open BIOS.
- Select Security > Power on Password.
- Change the setting to Enabled.
- Save and exit.
The administrator password must already be configured.
Once enabled, the computer requests the administrator or user password during startup.
Setting a Hard Disk Password
- Open BIOS using the administrator password.
- Select Security > Set Hard Disk Password.
- Follow the instructions to create both master and user hard disk passwords.
- Save and exit.
The master and user hard disk passwords must be configured together.
Forgotten Hard Disk Password
Attention: Lenovo cannot reset a forgotten hard disk password or recover data protected by that password.
The storage drive must be replaced by Lenovo-authorized service personnel. Proof of purchase and applicable service charges are required.
Windows Recovery Instructions
Windows 11 provides recovery options for system problems, startup failures, and operating system restoration.
Available Recovery Methods
| Situation | Recovery Option |
| Windows becomes slow after installing an application | System Restore |
| Windows has not been functioning correctly | Reset Windows |
| Computer cannot start | Windows Startup Repair |
| Computer cannot start and Startup Repair fails | Recovery USB Drive |
Resetting Windows
- Open Settings > System > Recovery.
- Under Recovery options, select Reset PC.
- Choose Keep my files or Remove everything.
- Follow the on-screen instructions.
Important: Back up important files before performing a reset, especially when choosing Remove everything.
Creating a Recovery USB Drive
A recovery USB drive can be used to reinstall or repair Windows if the computer cannot start.
Use an empty USB drive with at least 32 GB of storage.
- Search for Create a recovery drive in Windows.
- Open the matching application.
- Select Back up system files to the recovery drive.
- Click Next.
- Connect the USB drive.
- Select the drive.
- Click Next > Create.
Recovering Windows from USB
- Shut down the computer.
- Connect the recovery USB drive.
- Turn on the computer and repeatedly press F9.
- Open the Novo Button menu.
- Select Boot Menu.
- Choose the USB recovery drive.
- Follow the Windows Recovery Environment instructions.
Troubleshooting Guide
The Lenovo Legion 5 includes troubleshooting procedures for power, charging, display, audio, connectivity, and operating system problems.
| Problem | Recommended Action |
| Computer does not start | Disconnect external devices, check the power adapter, and use Windows Startup Repair if possible. |
| Computer is stuck in sleep mode | Reset the graphics driver, restart, and review wake settings. |
| Battery is plugged in but not charging | Check the adapter, charging mode, driver, and firmware. |
| Battery drains quickly | Reduce background activity, change power settings, and lower display brightness. |
| Blue screen error | Restart and use the Windows Get Help troubleshooting instructions. |
| Screen flickers | Reset the graphics driver, check display drivers, and review incompatible applications. |
| Display brightness cannot be changed | Disable adaptive brightness or update the display driver. |
| Computer runs slowly | Remove temporary files, review startup programs, and update Windows. |
| Camera cannot be detected | Check the camera switch, permissions, drivers, and troubleshooter. |
| Audio does not work | Check audio devices, volume settings, and Windows audio troubleshooting. |
| Keyboard types incorrect characters | Check keyboard language, autocorrect settings, and drivers. |
| Touchpad does not respond | Enable the touchpad and check its driver. |
| Touchpad responds slowly | Clean the surface, adjust pointer settings, and update the driver. |
| Fan makes unusual noise | Close demanding applications, change operation mode, and check updates. |
| Wi-Fi connection fails | Check Wi-Fi, airplane mode, saved network settings, and the router. |
| Bluetooth connection fails | Check Bluetooth settings, restart the device, and update drivers. |
| Computer stops responding | Hold the power button until the computer shuts down, then restart. |
| Liquid is spilled | Disconnect AC power, shut down, and allow the computer to dry fully. |
Computer Will Not Start
- Disconnect unnecessary external devices.
- Confirm that the power adapter is connected correctly.
- Try a compatible adapter and a working electrical outlet.
- If the Windows logo appears, use Startup Repair.
To open Startup Repair using the documented procedure:
- Start the computer.
- When the Windows logo appears, hold the power button until shutdown.
- Repeat the process once.
- Start the computer again.
- When Automatic Repair appears, select Advanced options > Startup Repair.
Computer Stuck in Sleep or Hibernate Mode
Try resetting the graphics driver using:
Windows + Ctrl + Shift + B
If the computer remains unresponsive:
- Hold the power button until the computer turns off.
- Wait approximately 15 seconds.
- Press the power button to restart.
The user can also check Windows wake settings, disable Fast Startup, or disable wake timers if those functions are causing problems.
Battery Plugged In but Not Charging
- Confirm that the adapter is connected securely.
- Check the outlet and power connector for damage.
- Confirm that the adapter supplies the required wattage.
- Restart the computer.
- Review battery charging mode in Legion Space or Lenovo Vantage.
- Check for firmware updates.
If a battery driver problem is suspected, open Device Manager and locate the Microsoft AC Adapter or Microsoft ACPI-Compliant Control Method Battery driver.
The previous driver can be restored through Properties > Driver > Roll Back Driver when that option is available.
Battery Drains Too Quickly
To reduce battery power consumption:
- Disconnect unnecessary peripherals.
- Close applications that use excessive power.
- Open Settings > System > Power & battery > Battery usage.
- Review applications consuming battery power.
- Restrict unnecessary background activities.
- Disable unnecessary startup applications.
- Reduce screen brightness.
- Reduce or disable RGB keyboard lighting.
- Select Best Power Efficiency when appropriate.
Extreme hot or cold environments can also affect battery performance.
Blue Screen Errors
- Restart the computer.
- Search Windows for Get Help.
- Open the application.
- Search for troubleshoot BSOD error.
- Follow the guided troubleshooting procedure.
Screen Flickering
- Press Windows + Ctrl + Shift + B to reset the graphics driver.
- Restart the computer.
- Open Task Manager and check whether it also flickers.
If Task Manager flickers, review the display driver in Device Manager and roll it back when a previous driver is available.
If Task Manager does not flicker, review recently installed or incompatible applications.
Display Brightness Cannot Be Changed
- Open Start > Settings > System > Display.
- Disable automatic brightness adjustment if enabled.
- Turn off brightness changes based on displayed content.
- If necessary, update the display adapter driver through Device Manager.
Computer Runs Slowly
The following maintenance actions may help resolve slow performance:
- Restart Windows.
- Delete unnecessary temporary files.
- Remove unused applications.
- Disable unnecessary startup programs.
- Scan for malware.
- Install Windows updates.
- Use the System File Checker tool when system files are corrupted.
- Use Windows recovery options if other procedures do not resolve the issue.
Camera Not Working
- Confirm that the physical camera switch is enabled.
- Open Settings > Bluetooth & devices > Camera.
- Confirm that the camera is enabled.
- Open Settings > Privacy & security > Camera.
- Enable camera access and application permissions.
- Check whether antivirus software blocks camera use.
- Update the camera driver if necessary.
Windows also provides a camera troubleshooter through the Get Help application.
Audio Not Working
- Open Start > Settings > System > Sound.
- Check the selected input and output devices.
- Confirm the volume level.
- Under Advanced settings, open the audio troubleshooter.
- Follow the instructions.
Keyboard Types Wrong Characters
- Open Settings > Time & language > Language & region.
- Review the installed keyboard layout.
- Select the appropriate keyboard.
- Check autocorrect settings under Time & language > Typing.
- Review the keyboard driver in Device Manager if the problem continues.
Touchpad Not Responding
- Open Settings > Bluetooth & devices > Touchpad.
- Enable the touchpad.
- Try the dedicated touchpad hotkey or Fn + M.
- If necessary, update the touchpad driver through Device Manager.
A previous touchpad driver can also be restored when the issue started after a driver update.
Touchpad Responds Slowly
- Keep the touchpad surface clean and dry.
- Disconnect unnecessary external pointing devices.
- Adjust touchpad cursor speed in Windows.
- Update the touchpad driver.
Fan Makes Unusual Noise
- Close demanding applications that are not needed.
- Open Task Manager and check active processes.
- Change the computer’s operation mode through Legion Space or Fn + Q.
- Check Windows and driver updates.
Wi-Fi Not Connecting
- Confirm that Wi-Fi is enabled.
- Confirm that airplane mode is off.
- Check the network connection status.
- Run Windows network diagnostics.
- Forget the saved Wi-Fi network and reconnect.
- Restart the modem or wireless router if required.
Bluetooth Not Connecting
- Confirm Bluetooth is enabled on both devices.
- Turn off airplane mode.
- Restart the Bluetooth accessory.
- Check the accessory’s battery charge.
- Move the accessory within its required connection range.
- Remove and pair the device again.
- Run the Bluetooth troubleshooter.
- Update or reinstall the Bluetooth driver if necessary.
Computer Stops Responding
Press and hold the power button until the computer turns off.
Restart the computer after shutdown.
Liquid Is Spilled on the Computer
- Disconnect the AC adapter immediately.
- Turn off the computer.
- Do not turn the computer upside down to drain liquid.
- Allow the computer to dry completely before attempting to restart.
Maintenance Instructions
The Lenovo Legion 5 includes software tools and operating practices that help maintain performance and system functionality.
Software Maintenance
| Maintenance Task | Procedure |
| Windows Updates | Open Settings > Windows Update. |
| Device Driver Updates | Use Lenovo Support or supported Lenovo management software. |
| UEFI/BIOS Updates | Check supported Lenovo update tools. |
| Hardware Diagnostics | Use Legion Space or Lenovo PC Manager. |
| Battery Management | Review battery charging modes and power settings. |
| Storage Maintenance | Remove unnecessary files and applications. |
| Cooling Management | Avoid blocking ventilation openings and review operating mode settings. |
Cleaning the Touchpad
When the touchpad becomes dirty or responds slowly:
- Use a soft, lint-free cloth.
- Gently clean the touchpad surface.
- Remove visible dirt and oil.
- Keep the surface dry.
Ventilation Maintenance
Keep the computer on a hard, flat surface while operating.
Do not place objects against the rear exhaust vents or bottom intake vents.
Blocked cooling airflow can cause higher temperatures, reduced performance, or unexpected shutdown.
Operating and Storage Conditions
The Lenovo Legion 5 must be used within the specified environmental conditions.
| Environmental Specification | Supported Range |
| Maximum Altitude Without Pressurization | 3048 m (10,000 ft) |
| Operating Temperature Up to 2438 m | 5°C to 35°C (41°F to 95°F) |
| Storage Temperature | 5°C to 43°C (41°F to 109°F) |
| Maximum Operating Temperature Above 2438 m | 31.3°C (88°F) |
| Minimum Battery Charging Temperature | 10°C (50°F) |
| Operating Relative Humidity | 8%–95% at 23°C wet-bulb temperature |
| Storage Relative Humidity | 5%–95% at 27°C wet-bulb temperature |
Customer Replaceable Units and Accessories
Customer Replaceable Units are components designated by Lenovo for replacement under supported service procedures.
Customer Replaceable Units
| Component | CRU Classification |
| Power Cord | Self-Service CRU |
| AC Power Adapter | Self-Service CRU |
These parts apply to selected configurations.
Some computers use a wall-mounted AC adapter and do not include a separate power cord.
Other component replacements, including the internal rechargeable battery, require qualified repair service or the applicable Lenovo replacement instructions.
Compatible Accessories
The Legion 5 supports compatible accessories through its existing connections.
These include:
- USB storage devices.
- USB keyboards and mice.
- Compatible USB-C docking stations.
- USB4 docks on supported models.
- Thunderbolt-enabled docks on supported models.
- External monitors and projectors.
- Compatible headsets and speakers.
- Ethernet network equipment.
Accessory information is available through https://www.lenovo.com/accessories.
Warranty Information
The Lenovo Legion 5 is covered by the applicable Lenovo Limited Warranty.
Warranty service depends on the computer model, geographic location, and applicable warranty conditions.
Warranty Service Types
Depending on eligibility, Lenovo may provide:
- Customer Replaceable Unit Service.
- On-site Service.
- Courier or Depot Service.
- Customer Carry-in Service.
- Mail-in Service.
- Customer Two-Way Mail-in Service.
Customer Replaceable Unit Service
If a part designated as a CRU fails during the applicable warranty period, Lenovo may provide a replacement part.
If the defective part must be returned, Lenovo supplies return instructions and shipping materials.
The defective component must be returned within 30 days of receiving the replacement when a return is required. Charges may apply if it is not returned within that period.
Warranty Support Services
Warranty support can include:
- Hardware problem determination.
- Repair of eligible Lenovo hardware.
- Applicable engineering changes.
Services Not Covered
Examples of excluded services include:
- Replacement or use of nonwarranted or non-Lenovo parts.
- Software problem identification.
- BIOS configuration during installation or upgrades.
- Driver modifications or upgrades.
- Network operating system installation and maintenance.
- Application installation and maintenance.
The applicable warranty terms are provided in the Safety and Warranty Guide.
Customer Support Information
Lenovo provides technical assistance, documentation, diagnostic tools, and warranty support.
Lenovo Support Resources
| Resource | Link |
| Lenovo Product Support | https://support.lenovo.com |
| Lenovo Support Phone Directory | https://pcsupport.lenovo.com/supportphonelist |
| Lenovo Authorized Service Locations | https://support.lenovo.com/partnerlocation |
| Lenovo Recovery Resources | https://support.lenovo.com/HowToCreateLenovoRecovery |
| Lenovo Additional Services | https://pcsupport.lenovo.com/warrantyupgrade |
| Lenovo Accessibility Support | https://www.lenovo.com/accessibility |
| Lenovo Community Forums | https://forums.lenovo.com |
| Microsoft Support | https://support.microsoft.com |
Before Contacting Lenovo
Prepare the following product information:
- Product name.
- Machine type.
- Serial number.
- Operating system and version.
- Description of the problem.
- Error messages or codes.
- Applications running when the problem occurred.
- Steps that reproduce the problem.
The product name and serial number are normally printed or etched on the underside of the computer.
Accessibility Features
The Lenovo Legion 5 supports Windows 11 accessibility functions and compatible assistive devices.
Windows Accessibility Settings
Open Start > Settings > Accessibility or press Windows + U.
Accessibility Tools
| Feature | Purpose |
| Narrator | Reads on-screen content aloud. |
| Magnifier | Enlarges text and screen content. |
| Text Size | Adjusts displayed text size. |
| Contrast Themes | Improves visibility through high-contrast color schemes. |
| Sticky Keys | Allows modifier-key shortcuts without holding multiple keys simultaneously. |
| On-Screen and Assistive Input | Supports compatible accessibility tools and USB devices. |
Accessibility Shortcuts
| Shortcut | Function |
| Windows + U | Open Accessibility Settings. |
| Windows + Ctrl + Enter | Start or stop Narrator. |
| Windows + Ctrl + N | Open Narrator settings. |
| Windows + Plus (+) | Enable Magnifier or zoom in. |
| Windows + Esc | Exit Magnifier. |
| Shift Five Times | Enable or disable Sticky Keys. |
Frequently Asked Questions
1. How do I enter BIOS on the Lenovo Legion 5?
Turn on or restart the Lenovo Legion 5 and press F2 repeatedly when the Lenovo logo appears. The BIOS setup utility can also be opened through the Novo Button menu by pressing F9 during startup.
2. How do I change performance modes on the Lenovo Legion 5?
Press Fn + Q to switch between the available operating modes. The computer supports Performance, Balance, and Quiet modes, with Custom settings available on supported configurations. The power light changes color to indicate the active mode.
3. How long does the Lenovo Legion 5 battery take to charge?
In Normal charging mode, the battery typically takes 2–4 hours to charge from 0% to 100%. Charging time depends on battery capacity, the connected power adapter, and operating conditions.
4. Does the Lenovo Legion 5 support USB-C charging?
Yes. The supported USB-C connection accepts USB Power Delivery input from 65 W to 100 W and supports Lenovo proprietary charging up to 140 W. The charger must be compatible with the computer’s power requirements.
5. How do I change the Lenovo Legion 5 screen refresh rate?
Press Fn + R to change the display refresh rate when the feature is supported. The built-in display supports a 165 Hz refresh rate. Available adjustment options depend on the installed display configuration.
6. What should I do if the Lenovo Legion 5 is plugged in but not charging?
Check the adapter connection, confirm that the charger supplies sufficient power, and review the battery charging mode in Legion Space or Lenovo Vantage. Conservation mode can stop charging at a selected battery level. Restarting the computer, checking drivers, and installing firmware updates are additional documented troubleshooting steps.
7. How do I reset Windows on the Lenovo Legion 5?
Open Settings > System > Recovery and select Reset PC. Choose whether to keep personal files or remove everything, then follow the on-screen instructions. A previously created recovery USB drive can also be used if Windows cannot start.