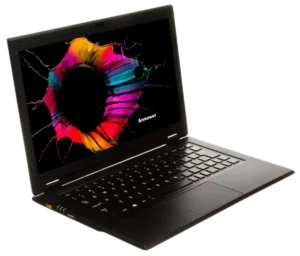
| Field | Details |
| Document Title | Lenovo LaVie Z User Guide |
| Document Type | User Guide |
| Brand Name | Lenovo |
| Product Name | LaVie Z |
| Model Number(s) | 20FF0012US, 20FG0013US |
| Machine Types | 20FF, 20FG |
| PDF File Size | 864 KB |
| Number of Pages | 52 |
| Languages | English |
Lenovo LaVie Z 20FF0012US
The Lenovo LaVie Z is a lightweight notebook computer designed for portable computing, Internet access, document work, and multimedia use. It features an Intel Core i7 processor, 8 GB LPDDR3 memory, 256 GB solid-state storage, built-in wireless networking, and an HDMI connection for external displays.
This user guide covers Lenovo LaVie Z models 20FF0012US and 20FG0013US, including the clamshell and convertible configurations described in the product documentation. The convertible configuration also includes dedicated Windows and volume controls.
The Lenovo LaVie Z user manual provides instructions for initial setup, battery charging, keyboard shortcuts, touchpad controls, network configuration, external displays, BIOS settings, system security, Windows 8.1 recovery, and safe operation.
The operating system procedures follow Windows 8.1 as supplied with the computer. Some menu names and procedures may differ when another operating system is installed.
Product Overview
The Lenovo LaVie Z combines notebook computing features with a compact, lightweight design. It includes an LCD screen, integrated stereo speakers, camera, microphones, touchpad, USB 3.0 ports, wireless LAN, and a built-in rechargeable battery.
The computer uses an Intel Core i7 processor with Hyper-Threading technology and an 8 GB LPDDR3 memory configuration. Files, applications, and the operating system are stored on a 256 GB SATA solid-state drive.
The computer can operate using its internal battery or a compatible AC power adapter. When connected to AC power, the battery charges automatically.
Product Features
- Intel Core i7 processor.
- 8 GB onboard LPDDR3 memory.
- 256 GB SATA solid-state drive.
- Built-in lithium-polymer battery.
- LCD display.
- Integrated stereo speakers.
- Built-in camera and microphones.
- USB 3.0 connectivity.
- HDMI external display output.
- SD, SDHC, and SDXC memory card support.
- Wireless LAN connectivity.
- Intel Wireless Display (WiDi) support with a compatible adapter.
- USB Power Charge function.
- BIOS setup and security chip controls.
- Windows 8.1 recovery options.
The convertible configuration includes additional Windows and volume buttons.
What’s Included in the Box
The Lenovo LaVie Z shipping package contains the computer and the accessories required for power connection and safe operation.
| Included Item | Description |
| Lenovo LaVie Z Computer | Main notebook computer. |
| AC Power Adapter | Converts AC electricity into the power required by the computer. |
| Power Cord | Connects the AC adapter to an electrical outlet. |
| Instructions for Safe Use | Product safety and handling documentation. |
After opening the shipping box, check the computer and included accessories for visible damage.
If an item is missing or damaged, contact the place of purchase.
Technical Specifications
The Lenovo LaVie Z models 20FF0012US and 20FG0013US share the main technical specifications listed below.
| Specification | Details |
| Brand | Lenovo |
| Product | LaVie Z |
| Model Numbers | 20FF0012US, 20FG0013US |
| Product Type | Notebook Computer |
| Processor | Intel Core i7 |
| Processor Technology | Hyper-Threading, Enhanced Intel SpeedStep |
| Memory | 8 GB LPDDR3 |
| Memory Type | Onboard Low-Power DDR3 SDRAM |
| Internal Storage | 256 GB SATA SSD |
| Battery Type | Lithium-Polymer |
| Battery Voltage | DC 14.8 V |
| Typical Battery Capacity | 2000 mAh |
| AC Adapter Input | 100–240 V AC, 50–60 Hz |
| Maximum Power Consumption | Approximately 45 W |
| Graphics/Video Connection | HDMI |
| USB Connections | USB 3.0 |
| Memory Card Support | SD, SDHC, SDXC |
| Wireless Connectivity | Wireless LAN |
| Wireless Module | Intel Dual Band Wireless-AC 7265 |
| Wireless Standards | IEEE 802.11a/b/g/n/ac, as applicable |
| Audio | Integrated Stereo Speakers |
| Camera | Integrated Camera |
| Microphones | Integrated Microphones |
| Operating System Covered | Windows 8.1 |
| Security | Security Chip, BIOS Password Controls, Security-Lock Slot |
Dimensions and Weight
The physical measurements differ between the convertible and clamshell configurations.
| Measurement | Convertible Model | Clamshell Model |
| Width | 319 mm (12.6 inches) | 319 mm (12.6 inches) |
| Depth | 217 mm (8.5 inches) | 212 mm (8.3 inches) |
| Height | 16.9 mm (0.7 inch) | 16.9 mm (0.7 inch) |
| Weight Including Battery | 926 g (2.0 lb) | 850 g (1.9 lb) |
Measurements exclude protruding components.
Parts and Components
The Lenovo LaVie Z includes built-in hardware controls, connection ports, cooling vents, and indicators.
Main Computer Components
| Component | Function |
| LCD Screen | Displays Windows, applications, images, and other visual information. |
| Keyboard | Provides text input and keyboard shortcut controls. |
| Touchpad | Moves the pointer and supports clicking, scrolling, and gestures. |
| Power Button | Turns the computer on or changes its power state. |
| Status LEDs | Indicate power, charging, and keyboard status. |
| Stereo Speakers | Provide built-in audio playback. |
| Camera | Captures photographs and supports video communication. |
| Microphones | Capture voice and audio for compatible applications. |
| Air Vents | Allow airflow for internal component cooling. |
Ports and External Connections
| Connector | Purpose |
| DC Power-Input Connector | Connects the supplied AC power adapter. |
| HDMI Connector | Connects a compatible external display or television. |
| USB 3.0 Connector | Connects compatible USB peripherals. |
| USB 3.0 Power Charge Connector | Connects USB devices and supports charging certain devices while the computer sleeps or hibernates. |
| SD Memory Card Slot | Accepts SD, SDHC, and SDXC memory cards. |
| Audio Connector | Connects compatible headphones or headsets. |
| Security-Lock Slot | Accepts a compatible security cable lock. |
USB 3.0 Connectors
The USB 3.0 connectors support peripherals such as printers, digital cameras, and other USB-compatible equipment.
Attention: When inserting a USB cable, position the USB mark upward. Incorrect insertion may damage the connector.
USB Power Charge Function
One USB connector supports the Power off USB Power Charge function.
This connector can charge certain mobile digital devices and smartphones while the computer is in sleep or hibernation mode.
Charging depends on the connected device and its compatibility with the USB charging function.
Audio Connector
The audio connector supports headphones and headsets equipped with a four-pole CTIA mini-plug.
It can be used for audio playback through compatible accessories.
Important: The connector does not support a conventional standalone microphone.
Camera and Microphones
The built-in camera supports photography and video conferencing through compatible applications.
The camera indicator illuminates while the camera is being used.
The microphones capture sound and speech. During microphone recording, simultaneous playback of the recorded sound through the speakers is not available.
Convertible Model Controls
The convertible configuration includes additional controls.
| Control | Function |
| Windows Icon | Performs the same function as the Windows key. |
| Volume Button | Adjusts system volume. |
On the convertible model, pressing and holding the Windows icon and then pressing the power button opens a menu containing:
- Lock
- Switch user
- Sign out
- Change a password
- Task Manager
Status LED Guide
The Lenovo LaVie Z uses power, battery recharge, and Caps Lock indicators to show operating conditions.
Power LED
| LED State | Computer Status |
| Solid Blue | Computer is powered on. |
| Blinking Blue | Computer is entering sleep mode. |
| Solid Orange | Battery power is low. |
| Slowly Blinking Orange | Battery is low while the computer is in sleep mode. |
| Rapidly Blinking Orange | Battery power is extremely low. |
| Off | Computer is turned off or in hibernation mode. |
Battery Recharge LED
| LED State | Meaning |
| Solid Orange | Battery is charging. |
| Blinking Orange | Battery charging error or battery deterioration error. |
| Off | AC adapter is disconnected or the battery is fully charged. |
The battery recharge indicator may turn off when the battery is fully or nearly fully charged.
Caps Lock Indicator
| LED State | Meaning |
| Green | Caps Lock is enabled and letters are entered in uppercase. |
| Off | Caps Lock is disabled. |
Important Safety Instructions
The Lenovo LaVie Z contains electrical components and a rechargeable battery. Incorrect handling can cause electric shock, burns, equipment damage, or other injuries.
Read the supplied Instructions for Safe Use before operating or servicing the computer.
Electrical Safety
Danger: Electrical current from power and communication cables can cause serious injury.
- Use only manufacturer-supplied power cords and adapters.
- Connect the computer to a properly wired electrical outlet.
- Do not use damaged or corroded power cords.
- Keep electrical connections away from liquids.
- Do not modify electrical plugs.
- Never overload outlets, power strips, or extension cords.
- Do not connect or disconnect electrical cables during a thunderstorm.
- Disconnect power before opening any permitted access cover.
- Do not operate the computer with exposed internal components.
Never remove the cover of a power supply or another component carrying a hazardous-voltage warning.
AC Power Adapter Safety
The AC adapter generates heat during operation.
- Do not place the adapter against the body while it is operating.
- Do not use the adapter to warm the body.
- Never wrap the power cord tightly around the adapter.
- Do not cover the operating adapter with clothing or other materials.
- Stop using an adapter that shows overheating, corrosion, or physical damage.
Battery Safety
Danger: Incorrect battery handling may cause overheating, leakage, or explosion.
- Do not disassemble or modify the battery.
- Do not crush or puncture it.
- Do not short-circuit the battery terminals.
- Keep batteries away from water and fire.
- Keep batteries away from children.
- Stop using the battery if it is damaged or leaking.
- Use only Lenovo-approved replacement batteries.
Important: The built-in rechargeable battery must not be replaced by the user. Replacement must be performed by a Lenovo-authorized repair facility or technician.
Coin-Cell Battery Safety
The internal non-rechargeable coin-cell battery must not be replaced by the user.
A Lenovo-authorized service facility or technician must perform any required replacement.
Heat and Ventilation Safety
The computer and AC adapter can become hot during operation or charging.
- Avoid prolonged contact with the warm computer base or palm rest.
- Take breaks when using the keyboard for extended periods.
- Keep all ventilation openings clear.
- Do not use the computer on a bed, carpet, sofa, or other surface that can block airflow.
- Do not operate the computer inside enclosed furniture that restricts cooling.
- Do not charge the computer near flammable materials.
- Keep incoming airflow temperatures at or below 35°C (95°F).
Liquid and Moisture Safety
Keep liquids away from the computer, adapter, and power cord.
Liquid exposure may cause short circuits and electrical hazards.
Stop using the computer if water or another liquid enters the unit. Disconnect the power source and contact Lenovo Support when required.
Screen Safety
The LCD contains glass that can break if the computer is dropped or handled roughly.
If the LCD breaks and internal liquid contacts the skin or eyes, immediately wash the affected area with water for at least 15 minutes.
Seek medical care if symptoms remain.
Do not touch or remove broken glass components. Damaged glass must be replaced by trained service personnel.
Headphone Safety
Excessively high headphone volume can damage hearing.
Use an appropriate volume setting and compatible headphones or earphones.
The computer’s headphone output is designed to meet the applicable EN 50332-2 requirements.
Conditions Requiring Immediate Attention
Stop using the computer, disconnect it from electrical and communication connections, and contact Lenovo Support if any of the following occurs:
- Smoke, sparks, or fire.
- Unusual cracking, popping, or hissing sounds.
- A strong or unusual odor.
- Damaged power cords or adapters.
- Battery leakage or physical damage.
- Water or other liquid exposure.
- Severe impact damage.
- Abnormal operation despite following the instructions.
Do not attempt unauthorized internal repairs.
Before First Use
Before starting the Lenovo LaVie Z for the first time:
- Remove the computer and accessories from the shipping box.
- Check that the computer, power adapter, power cord, and safety documentation are present.
- Inspect the equipment for visible damage.
- Read the product safety instructions.
- Connect the AC power adapter.
- Turn on the computer.
- Complete the Windows setup procedure.
Important: Do not touch connector terminals while attaching accessories. Doing so may damage the connectors.
Lenovo instructs users to complete Windows setup and firewall configuration before connecting a LAN cable.
Initial Setup Instructions
Connecting the AC Power Adapter
The computer can operate using its internal battery or the supplied AC power adapter.
When AC power is connected, the battery charges automatically.
Follow the connection order:
- Connect the power cord to the AC power adapter.
- Connect the AC adapter to the computer’s DC power-input connector.
- Plug the power cord into a suitable electrical outlet.
Attention: An unsuitable power cord can seriously damage the computer.
Battery Charging Precautions
- Battery temperature must be at least 10°C (50°F) before charging.
- Disconnect the AC adapter from the electrical outlet when it is not being used.
- Do not wind the power cord tightly around the adapter.
- Charge the battery when Windows reports a low battery level.
- Recharge the battery after an extended period without use.
The supplied power cord is intended for the electrical specifications of its original region. A suitable regional power cord is required when using the computer in another region.
Completing Windows 8.1 Setup
- Connect the computer to AC power.
- Press the power button.
- Wait for the initial Windows setup screen.
- Follow the on-screen instructions.
- Configure the required account and system settings.
For computers managed by an organization, obtain the appropriate configuration information from the system administrator.
Fast Startup Settings
The Lenovo LaVie Z includes the Windows Fast Startup function, which is enabled by default.
Fast Startup allows the computer to start more quickly after shutdown.
Before installing or removing a peripheral device, Lenovo instructs users to disable Fast Startup and shut down the computer. Otherwise, the device may not be detected correctly.
Disabling or Enabling Fast Startup
- Open the Windows desktop.
- Display the Charms bar.
- Select Settings > Control Panel.
- Open System and Security.
- Under Power Options, select Change what the power buttons do.
- Click Change settings that are currently unavailable.
- Find Turn on fast startup (recommended).
- Clear the checkbox to disable Fast Startup, or select it to enable the function.
- Click Save changes.
Keyboard Shortcuts and Functions
The Lenovo LaVie Z keyboard includes an Fn key that activates system functions when combined with specific keys.
Keyboard Shortcut Table
| Shortcut | Function |
| Fn + F1 | Mute or unmute audio. |
| Fn + F2 | Turn wireless functions on or off. |
| Fn + F3 | Switch between the computer display and an external display. |
| Fn + F7 | Decrease screen brightness. |
| Fn + F8 | Increase screen brightness. |
| Fn + F9 | Decrease audio volume. |
| Fn + F10 | Increase audio volume. |
| Fn + Up Arrow | Page Up |
| Fn + Down Arrow | Page Down |
| Fn + Left Arrow | Home |
| Fn + Right Arrow | End |
| Fn + Spacebar | Enable or disable the touchpad. |
Keyboard Function Notes
- Fn + F3: The display-switching function requires the appropriate driver.
- Fn + Spacebar: Touchpad switching is unavailable if the touchpad driver has been changed to the Standard PS/2 port mouse driver.
Touchpad Operating Instructions
The touchpad provides pointer movement, selection, right-clicking, scrolling, zooming, and rotation functions.
Touchpad Gesture Guide
| Function | Touchpad Operation |
| Move Pointer | Slide a finger across the touchpad. |
| Left-Click | Press the touchpad outside the lower-right area or tap once. |
| Right-Click | Press the lower-right part of the touchpad. |
| Double-Click | Press twice quickly or tap twice. |
| Drag | Press and hold an item while moving a finger, or use the documented double-touch dragging gesture. |
| Scroll | Move two slightly separated fingers in the desired direction. |
| Zoom In | Move two fingers farther apart. |
| Zoom Out | Move two fingers closer together. |
| Rotate | Twist two fingers across the touchpad. |
Some applications do not support every gesture.
Changing Touchpad Settings
Touchpad behavior can be adjusted through the Windows Mouse Properties window.
- Open Control Panel.
- Select Hardware and Sound.
- Under Devices and Printers, click Mouse.
- Open the appropriate tab in Mouse Properties.
- Change the required pointer, button, or gesture settings.
Turning the Touchpad On or Off
Press Fn + Spacebar to enable or disable the touchpad when the supported touchpad driver is installed.
Connecting an External Display
The Lenovo LaVie Z can connect to compatible external displays and televisions through HDMI.
Switching Display Output
- Connect a compatible external monitor or television to the HDMI connector.
- Press Fn + F3.
- Use the Up or Down Arrow key to select the desired display mode.
- Press Enter.
Display Output Modes
| Display Mode | Function |
| Computer Screen Only | Displays content on the computer screen. |
| Duplicate | Displays the same content on both screens. |
| Extend | Extends the desktop onto the external display. |
| Second Screen Only | Displays content on the external display. |
Intel Wireless Display (WiDi)
The Lenovo LaVie Z supports Intel Wireless Display technology for compatible external displays and televisions.
Intel WiDi uses wireless LAN to send the computer’s display output to an external device through an optional WiDi adapter.
Requirements for Intel WiDi
- A compatible Intel WiDi adapter.
- A suitable external display or television.
- A compatible HDMI or composite audio/video input connection for the adapter.
- A stable wireless LAN connection.
The display or television must have a connection suitable for the chosen Intel WiDi adapter.
Connecting Through Intel WiDi
- Connect the Intel WiDi adapter to the external display or television.
- Prepare the display until the Intel WiDi standby screen appears.
- Open the Windows Charms bar.
- Select Devices.
- Click Project > Add a wireless display.
- Select the detected wireless display.
- Follow the instructions.
If a WPS PIN is requested, enter the eight-digit security code shown on the external display.
Disconnecting Intel WiDi
- Open the Charms bar.
- Select Devices.
- Click Project > Disconnect.
Intel WiDi Operating Notes
- A fast and stable wireless connection is important for high-resolution video.
- Audio and video playback may experience delays or interruptions.
- Output on the external display may be delayed by approximately 0.3 seconds.
- Video playback may show dropped frames or uneven motion.
- Certain protected content may not play because of copyright-protection requirements.
- Duplicate display mode may limit available resolutions.
- Changing certain sound settings may disconnect the wireless display.
- Disconnect WiDi before entering Sleep, Hybrid Sleep, or Hibernate mode, or changing Windows users.
Network Setup Instructions
The Lenovo LaVie Z supports wireless LAN connections and wired Ethernet through an optional adapter.
Configuring Network Settings
- Open Control Panel.
- Select Network and Internet.
- Click View network status and tasks.
- Select Change adapter settings.
- Follow the on-screen instructions.
Changing the Computer Name
- Open Control Panel.
- Select System and Security > System.
- Under computer name, domain, and workgroup settings, click Change settings.
- Follow the Windows instructions.
Connecting to Wired Ethernet
The computer supports wired Ethernet through the optional ThinkPad USB 3.0 Ethernet Adapter.
- Connect the supported Ethernet adapter to the computer.
- Connect an Ethernet cable to the adapter.
- Complete the network configuration through Windows.
Danger: Do not connect a telephone cable to the Ethernet adapter’s Ethernet connector. This can create an electrical shock hazard.
Connecting to Wi-Fi
- Confirm that the wireless function is enabled.
- Confirm that airplane mode is turned off.
- Click the wireless network icon in the Windows notification area.
- Select the required network.
- Enter the network credentials if requested.
- Complete the connection.
Windows can automatically reconnect to available saved wireless networks.
Improving Wireless Connection Quality
Lenovo provides the following operating guidance:
- Reduce obstacles between the computer and wireless access point.
- Open the computer lid slightly beyond 90 degrees.
- Be aware that simultaneous Bluetooth and Wi-Fi use may reduce wireless network performance.
Enabling 5 GHz Wi-Fi
Under the factory-default configuration described in the guide, wireless LAN operates using the 2.4 GHz band.
To configure the Intel Dual Band Wireless-AC 7265 adapter for the documented 5 GHz-capable wireless mode:
- Open Control Panel.
- Change the Control Panel view to Large icons.
- Select Device Manager.
- Double-click Network adapters.
- Open Intel(R) Dual Band Wireless-AC 7265.
- Select the Advanced tab.
- Under Property, select Wireless Mode.
- In the Value menu, select 6. 802.11a/b/g.
- Click OK.
- Restart the computer if required.
The wireless hardware supports compatible IEEE 802.11 standards, including 802.11ac.
BIOS Setup Instructions
The BIOS Setup Utility provides access to hardware configuration and system settings.
How to Enter BIOS on the Lenovo LaVie Z
- Turn on the computer.
- Immediately press F2 several times.
- Wait for the BIOS Setup Utility to appear.
BIOS Navigation Controls
| Key | Function |
| Left / Right Arrow | Select BIOS menu tabs. |
| Up / Down Arrow | Select configuration items or listed values. |
| Enter | Open a menu, select a setting, or confirm a value. |
| Esc | Return to a previous screen or exit without saving. |
| F9 | Restore factory-default BIOS settings. |
| F10 | Save changes and restart. |
| Tab | Move between digits when configuring system date or time. |
BIOS Operating Precautions
Do not turn off the computer using the power switch while working in BIOS.
To change settings under the Advanced menu, start the computer through a normal Windows restart rather than from hibernation or a shutdown performed with Fast Startup enabled.
Restoring Default BIOS Settings
- Enter the BIOS Setup Utility.
- Press F9.
- Select Yes.
- Press Enter to load factory-default settings.
- Press F10.
- Confirm the save operation.
- Allow the computer to restart or power off.
Security Chip and TPM Settings
The Lenovo LaVie Z includes a security chip function for compatible system security features.
The security chip does not provide complete protection against every data or hardware security risk.
Lenovo also recommends configuring supervisor and user passwords in BIOS.
Preparing the Security Chip Before Recovery or Repair
The security chip should be initialized before computer recovery, operating system reinstallation, or certain reset operations.
When Windows BitLocker drive encryption is enabled, it must first be disabled according to the documented procedure before initializing the security chip.
Attention: Clearing TPM information can affect access to data protected by the security chip. Do not perform this operation without completing the required encryption and recovery preparations.
Initializing the Security Chip
- Start the computer and repeatedly press F2 to enter BIOS.
- Open the Security menu.
- Select Security Chip Configuration.
- Confirm that Current TPM State is Enabled&Activated.
- If necessary, enable the security chip first.
- Set Change TPM State to Clear.
- Press F10.
- Select Yes and press Enter.
- If another confirmation appears after restart, press Shift + F10.
The security chip initialization process is then completed.
Enabling the Security Chip
- Enter BIOS using F2.
- Open Security > Security Chip Configuration.
- Set TPM Support to Enabled.
- Set Change TPM State to Enable&Activate.
- Press F10.
- Confirm the change.
- Restart the computer after Windows starts.
Before Sending the Computer for Repair
Before sending the computer for repair, Lenovo instructs users to remove supervisor and user password settings and initialize the security chip to help protect information.
Complete any necessary backups and encryption preparations before changing these security settings.
Protecting Data on the Solid-State Drive
The Lenovo LaVie Z stores data on an internal SSD.
Files may contain private information, account details, and other sensitive data.
Deleting Data Before Selling or Disposing of the Computer
Moving files to the Recycle Bin, deleting files, formatting the SSD, or restoring the factory software does not necessarily make the previous data unrecoverable.
These operations may change how the data is referenced without physically erasing every stored record.
For disposal, resale, or transfer, Lenovo recommends using a suitable data-erasure service or dedicated software.
Lenovo identifies the Drive Erase Utility for Resetting the Cryptographic Key and Erasing the Solid State Drive as a tool for supported storage devices.
The software is available through Lenovo Support.
When a supported encrypted SSD is installed, cryptographic-key erasure can make data encrypted under the old key unreadable without that key.
Windows 8.1 Recovery Instructions
The Lenovo LaVie Z includes Windows 8.1 recovery functions that can refresh Windows, restore factory settings, or repair startup problems.
A recovery image is stored in the computer’s recovery partition.
Attention: Some recovery operations delete personal files, applications, and system settings. Back up important information before starting recovery.
Preparing for Recovery
Before starting:
- Back up important personal files.
- Record settings that may need to be restored.
- Restore the required BIOS defaults.
- Complete the documented security chip preparation.
- Connect the computer to AC power.
- Disconnect unnecessary peripheral devices.
- Follow all recovery screen instructions.
Do not interrupt the recovery process.
Refreshing Windows 8.1
Refreshing Windows can help when the computer performs poorly after installing software.
This procedure retains personal files and settings, but only applications that originally came with the computer and applications installed through the Windows Store are reinstalled.
- Open the Windows Charms bar.
- Select Settings > Change PC settings.
- Open Update and recovery > Recovery.
- Find Refresh your PC without affecting your files.
- Click Get started.
- Follow the on-screen instructions.
Resetting Windows to Factory Settings
A factory reset reinstalls Windows and the original supplied applications while restoring default settings.
Warning: This procedure deletes personal files and settings.
- Open the Charms bar.
- Select Settings > Change PC settings > Update and recovery > Recovery.
- Find Remove everything and reinstall Windows.
- Click Get started.
- Select Next.
- Choose the desired reset method.
- Follow the on-screen instructions.
Factory Reset Options
| Option | Description |
| Just Remove My Files | Performs a faster removal procedure, normally taking several minutes. |
| Fully Clean the Drive | Performs a more complete drive-cleaning procedure that may take several hours. |
Using Advanced Startup
Advanced Startup provides access to firmware configuration, Windows startup settings, external boot devices, and system-image recovery.
- Open Settings > Change PC settings.
- Select Update and recovery > Recovery.
- Under Advanced Startup, select Restart now.
- Open Troubleshoot > Advanced options.
- Select the required operation.
Windows Automatic Recovery
When Windows 8.1 fails to start twice consecutively, the Windows recovery environment starts automatically.
The recovery environment can operate independently of the installed Windows system and provides repair and recovery options.
Keep the computer connected to AC power during recovery.
Creating a Recovery USB Drive
A recovery USB drive provides an additional way to repair or restore the computer if Windows or the internal recovery partition becomes unusable.
Required USB Capacity
Use a USB drive with at least 16 GB of storage.
The actual capacity required depends on the size of the recovery image.
Warning: Creating a recovery USB drive deletes all existing information on the selected USB drive.
Creating the Recovery Drive
- Connect the computer to AC power.
- Open the Windows Charms bar.
- Select Search.
- Search for recovery.
- Select Create a recovery drive.
- Approve the User Account Control prompt.
- Select Copy the recovery partition from the PC to the recovery drive.
- Click Next.
- Connect the prepared USB drive.
- Select Next.
- Click Create.
- Follow the on-screen instructions until the process finishes.
After creating the recovery USB drive, Windows may offer the option to keep or delete the internal recovery partition.
Keeping the internal recovery partition preserves another recovery option.
If the partition is deleted, the USB recovery drive must be stored securely because it may be needed to refresh or reset the computer.
Recovering Windows Using USB
- Connect the computer to AC power.
- Insert the recovery USB drive.
- Turn on the computer.
- Enter the BIOS Setup Utility.
- Open the Boot submenu.
- Set the recovery USB drive as the first startup device.
- Follow the recovery instructions.
Lenovo Factory Recovery USB Key
A Lenovo factory recovery USB key can restore the computer to its original factory configuration.
The factory recovery USB key can be obtained through Lenovo Customer Support. Shipping and handling charges apply.
Using the Factory Recovery USB Key
- Connect the computer to AC power.
- Turn off the computer.
- Wait approximately five seconds.
- Insert the Lenovo factory recovery USB key.
- Turn on the computer and repeatedly press F2.
- Open the BIOS Boot submenu.
- Select the USB Hard Disk entry corresponding to the recovery key, shown in the format USB Hard Disk:UEFI.
- Set it as the first startup device.
- Follow the on-screen recovery instructions.
Troubleshooting Guide
The following table covers operating problems and conditions addressed in the Lenovo LaVie Z documentation.
| Problem | Possible Cause or Condition | Recommended Action |
| Battery level is low | Battery charge is nearly depleted. | Connect the AC power adapter and charge the battery. |
| Power LED flashes orange rapidly | Battery charge is extremely low. | Connect AC power. |
| Battery recharge LED flashes orange | Battery charging or deterioration error. | Stop relying on normal charging indication and contact Lenovo Support for diagnosis. |
| USB peripheral is not detected after shutdown | Fast Startup may affect peripheral detection. | Disable Fast Startup and shut down before installing or removing the peripheral. |
| Touchpad shortcut does not work | Standard PS/2 mouse driver may be in use. | Check the installed touchpad driver. |
| External display shortcut does not work | Required display driver may be unavailable. | Check the applicable display driver. |
| Wireless network cannot be connected | Wireless function or airplane mode settings may prevent communication. | Enable wireless functions and turn off airplane mode. |
| 5 GHz Wi-Fi is unavailable under the factory configuration | Adapter may be configured for 2.4 GHz operation. | Follow the Intel Wireless-AC 7265 configuration instructions. |
| Intel WiDi video is delayed | Wireless display transmission introduces latency. | Allow for the documented delay and check wireless connection quality. |
| Intel WiDi connection disconnects | Display or sound changes may terminate the connection. | Reconnect through the Windows wireless display controls. |
| Computer performs poorly after software installation | Recently installed software may affect Windows operation. | Use the Windows Refresh procedure. |
| Windows fails to start | Operating system startup problem. | Use Windows automatic recovery or the recovery USB drive. |
| Recovery cannot be completed | Product model information may be incorrect. | Contact the local Lenovo service provider. |
Wireless Connection Problems
When the required wireless network is unavailable:
- Confirm that wireless functions are enabled.
- Turn off airplane mode.
- Check the available network list.
- Verify the network credentials.
- For the documented Intel wireless adapter, review the Wireless Mode setting when 5 GHz operation is required.
External Display Problems
If an HDMI-connected display is not showing the desired output:
- Check the external display connection.
- Press Fn + F3.
- Select the required display mode.
- Confirm that the necessary display driver is installed.
Windows Recovery Problems
If Windows 8.1 cannot start, use the automatic recovery environment.
If internal recovery tools are unavailable, use a recovery USB drive created for the computer.
If recovery displays Recovery could not be completed, contact the local Lenovo service provider.
Maintenance and Storage
Proper handling helps prevent damage to the LaVie Z computer and its components.
Computer Care
- Keep ventilation openings clear of dust.
- Use the computer in a dry, well-ventilated environment.
- Avoid exposing the computer to liquids.
- Do not place heavy objects on the display or computer.
- Protect the computer against dropping, twisting, and strong vibration.
- Avoid pulling, bending, or pinching connected cables.
- Keep the AC adapter uncovered during operation.
- Inspect electrical accessories regularly for damage.
Moving and Transporting the Computer
Before moving or transporting the notebook:
- Shut down the computer or place it into sleep or hibernation mode.
- Disconnect external accessories when necessary.
- Place the computer in a padded carrying case.
- Avoid tightly packing the notebook with heavy objects.
Do not place the computer in a carrying case while it is fully powered on.
Long-Term Battery Storage
Lenovo recommends storing rechargeable batteries or products containing them at room temperature with approximately 30%–50% charge.
The battery should be charged about once per year to help prevent overdischarge.
Used batteries must be disposed of in accordance with applicable local regulations.
Accessibility Features
Windows includes accessibility tools for users with visual, hearing, mobility, or other accessibility needs.
Ease of Access Center
To open the accessibility settings:
- Open Control Panel.
- Select Ease of Access.
- Click Ease of Access Center.
Accessibility Tools
| Tool | Function |
| Narrator | Reads on-screen text and describes interface events. |
| Magnifier | Enlarges part or all of the screen. |
| On-Screen Keyboard | Provides a keyboard interface controlled by a pointing device. |
| Speech Recognition | Allows supported computer operations through voice commands. |
| Audio Description | Provides spoken descriptions of supported information. |
| Visual Notifications | Displays visual alerts instead of relying only on sounds. |
| High Contrast | Changes display contrast for improved visibility. |
| Text Size Settings | Adjusts displayed text size. |
Accessibility Keyboard Shortcuts
| Shortcut | Function |
| Windows + U | Open Ease of Access Center. |
| Right Shift for 8 Seconds | Enable or disable Filter Keys. |
| Shift Five Times | Enable or disable Sticky Keys. |
| Left Alt + Left Shift + PrtScn | Enable or disable High Contrast. |
| Windows + Plus (+) | Zoom in using Magnifier. |
| Windows + Minus (-) | Zoom out using Magnifier. |
Warranty Information
The Lenovo LaVie Z is subject to the applicable Lenovo Limited Warranty and the warranty information supplied with the computer.
Warranty coverage and service eligibility depend on the applicable product and service terms.
Checking Warranty Status
Warranty information can be accessed through:
https://www.lenovo.com/warranty-status
Authorized Repairs
The internal rechargeable battery and non-rechargeable coin-cell battery must be replaced by Lenovo-authorized service personnel.
Other internal repairs must be performed only when authorized by the product documentation or Lenovo Customer Support.
Unauthorized modifications, disassembly, or the use of incompatible parts may affect the applicable warranty coverage.
Customer Support Information
Lenovo provides customer support resources for product problems, warranty questions, recovery assistance, and authorized service.
Contacting Lenovo Support
| Resource | Details |
| Manufacturer | Lenovo |
| Product Support | https://www.lenovo.com/support |
| Support Telephone Directory | https://www.lenovo.com/support/phone |
| Warranty Status | https://www.lenovo.com/warranty-status |
| Recycling Information | https://www.lenovo.com/recycling |
Preparing for Technical Support
Before contacting Lenovo Support, identify the computer model and describe the problem.
Useful information includes:
- Product model number.
- Symptoms of the problem.
- Visible damage, if any.
- Power or charging indicator behavior.
- Windows startup or recovery problems.
- Actions already attempted.
If the computer shows signs of electrical damage, overheating, smoke, or battery failure, stop using it until it has been inspected by authorized service personnel.
Recycling and Environmental Information
Lenovo provides recycling information for computers, batteries, and electronic equipment.
Electronic products displaying the WEEE marking must be handled through appropriate electronic waste collection and recycling systems rather than discarded with ordinary household waste.
The product documentation also includes regulatory information concerning FCC radio-frequency requirements, electronic emissions, and applicable restrictions on hazardous substances.
For recycling information, visit https://www.lenovo.com/recycling.
Frequently Asked Questions
1. How do I enter BIOS on the Lenovo LaVie Z?
Turn on the computer and immediately press F2 several times. The BIOS Setup Utility opens and provides access to hardware configuration, security settings, boot options, and factory-default settings.
2. How do I reset the Lenovo LaVie Z to factory settings?
In Windows 8.1, open Settings > Change PC settings > Update and recovery > Recovery. Under Remove everything and reinstall Windows, select Get started, choose the required reset method, and follow the instructions. Back up important files first because a factory reset deletes personal data and settings.
3. How do I turn the Lenovo LaVie Z touchpad on or off?
Press Fn + Spacebar to enable or disable the touchpad. The shortcut requires the supported touchpad driver and does not operate when the driver is changed to the Standard PS/2 port mouse driver.
4. Why is the Lenovo LaVie Z battery light blinking orange?
A blinking orange battery recharge indicator identifies a charging error or battery deterioration error. This differs from the orange power indicator, which is used for low-battery warnings. Lenovo Support should be contacted when a charging error requires diagnosis.
5. How do I connect the Lenovo LaVie Z to Wi-Fi?
Enable wireless functions, turn off airplane mode, and click the network icon in the Windows notification area. Select the required Wi-Fi network and enter the credentials if prompted.
6. How do I enable 5 GHz Wi-Fi on the Lenovo LaVie Z?
Open Device Manager and locate Intel(R) Dual Band Wireless-AC 7265 under Network adapters. On the Advanced tab, select Wireless Mode and set its value to 6. 802.11a/b/g. Click OK and restart if required.
7. How do I connect an external monitor to the Lenovo LaVie Z?
Connect a compatible monitor or television through HDMI. Press Fn + F3, select Computer Screen Only, Duplicate, Extend, or Second Screen Only, and press Enter. The shortcut requires the appropriate display driver.