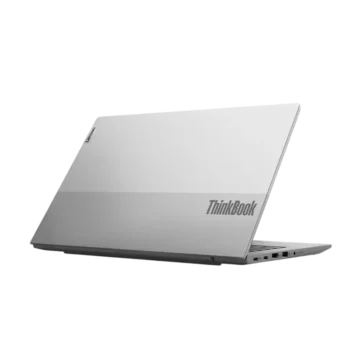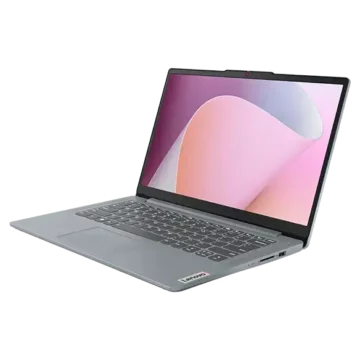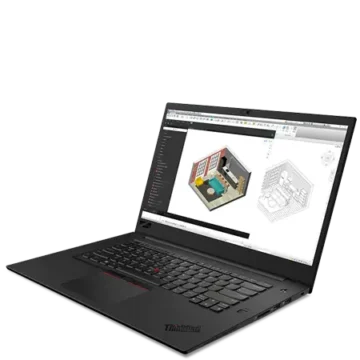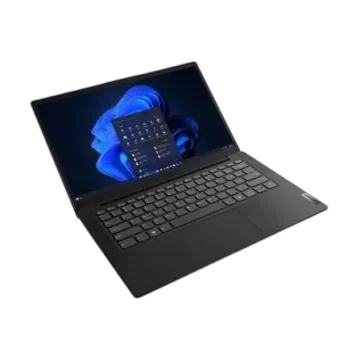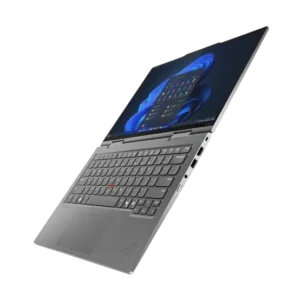
| Field | Details |
| Document Title | ThinkPad L13 Gen 6, L13 2-in-1 Gen 6, L13 Gen 6 AMD, L13 2-in-1 Gen 6 AMD, S2 Gen 10 and S2 2-in-1 Gen 10 User Guide |
| Document Type | User Guide |
| Brand Name | Lenovo |
| Product Name | ThinkPad S2 2-in-1 Gen 10 |
| Model Number(s) | 21R5, 21R6, 21R7, 21R8, 21R9, 21RA, 21RB, 21RC, 21RD, 21RE |
| Machine Type | 21RA (S2 2-in-1 Gen 10) |
| PDF File Size | 27 MB |
| Number of Pages | 123 |
| Languages | English |
Lenovo ThinkPad S2 2-in-1 Gen 10
The Lenovo ThinkPad S2 2-in-1 Gen 10 is a convertible notebook computer with a 360-degree rotating display, touchscreen controls, ThinkPad keyboard, TrackPoint pointing device, and integrated trackpad. It supports notebook, stand, tent, and tablet modes for different computing tasks.
Machine type 21RA features Intel-based hardware, LPDDR5X memory, M.2 solid-state storage, Thunderbolt 4 connectivity, HDMI output, wireless networking, and advanced security functions. Selected configurations also support fingerprint authentication, facial recognition, NFC, wireless WAN, and the rechargeable Lenovo Integrated Pen.
The computer includes Lenovo Commercial Vantage for device management, Intelligent Cooling for power and performance control, UEFI BIOS security settings, hardware diagnostics, and Windows recovery tools.
Product Overview
The ThinkPad S2 2-in-1 Gen 10 combines a conventional ThinkPad keyboard and pointing system with convertible touchscreen operation.
The display supports a 16:10 aspect ratio and 1920 × 1200 resolution. Its 360-degree hinges allow the screen to rotate into different positions without requiring a separate tablet.
The notebook includes a red TrackPoint pointing stick, three dedicated TrackPoint buttons, a multi-touch trackpad, built-in microphones, speakers, and a camera with a physical privacy shutter.
Main Features
- 360-degree convertible design.
- Notebook, stand, tent, and tablet modes.
- IPS display with 1920 × 1200 resolution.
- Multi-touch input on supported configurations.
- LPDDR5X onboard memory, up to 64 GB.
- M.2 2242 SSD storage, up to 2 TB.
- Thunderbolt 4 USB-C connectivity.
- USB-A 5 Gbps ports.
- HDMI 2.1 external display output.
- Dolby Atmos audio.
- Lenovo Smart Noise Cancellation.
- Integrated webcam with privacy shutter.
- TrackPoint pointing stick and three-button controls.
- Multi-touch trackpad.
- Rechargeable Lenovo Integrated Pen on supported configurations.
- Fingerprint reader integrated into the Power button on selected models.
- Facial recognition on selected models.
- Bluetooth and wireless LAN.
- Optional 4G cellular connectivity.
- Optional NFC.
- Intelligent Cooling performance modes.
- Lenovo Commercial Vantage.
- USB-C Restricted Mode.
- UEFI BIOS password protection.
- FIDO2 passwordless startup authentication.
- Hardware diagnostics and recovery tools.
Technical Specifications
General Specifications
| Specification | Details |
| Brand | Lenovo |
| Product Series | ThinkPad S2 |
| Product Name | S2 2-in-1 Gen 10 |
| Machine Type | 21RA |
| Compliance ID | TP00168A |
| Product Type | Convertible Notebook Computer |
| Processor Platform | Intel |
| Memory Type | LPDDR5X |
| Memory Installation | Soldered Onboard |
| Maximum Memory | Up to 64 GB |
| Storage Type | M.2 Solid-State Drive |
| SSD Form Factor | M.2 2242 |
| Maximum Storage | Up to 2 TB |
| Storage Slots | 1 |
| Display Technology | IPS |
| Display Aspect Ratio | 16:10 |
| Display Resolution | 1920 × 1200 |
| Touchscreen | Supported Configurations |
| Audio | Dolby Atmos |
| Noise Cancellation | Lenovo Smart Noise Cancellation |
| USB-C | Thunderbolt 4 |
| USB-A | USB 5 Gbps |
| Video Output | HDMI 2.1, USB-C |
| Wireless Connectivity | Wi-Fi, Bluetooth |
| Cellular Connectivity | 4G WWAN on Selected Models |
| NFC | Selected Models |
| Integrated Pen | Supported Configurations |
| Fingerprint Reader | Selected Models |
| Facial Recognition | Selected Models |
| Security | TPM, UEFI BIOS Passwords, FIDO2 |
| AC Power Adapter | 65 W |
Memory and Storage
| Component | Specification |
| Memory Technology | LPDDR5X |
| Memory Installation | Soldered Onboard |
| Maximum Supported Memory | 64 GB |
| SSD Type | M.2 Solid-State Drive |
| SSD Form Factor | 2242 |
| Storage Slot Quantity | 1 |
| Maximum SSD Capacity | 2 TB |
Display Specifications
| Specification | Details |
| Panel Technology | In-Plane Switching (IPS) |
| Display Resolution | 1920 × 1200 |
| Aspect Ratio | 16:10 |
| Touch Input | Multi-Touch |
| Display Rotation | Up to 360 Degrees |
| Convertible Modes | Notebook, Stand, Tent, Tablet |
Power Specifications
| Specification | Details |
| AC Adapter Power | 65 W |
| Adapter Input | 100–240 V AC |
| Input Frequency | 50–60 Hz |
| Adapter Output Voltage | 20 V DC |
| Listed Output Current | 2.25 A or 3.25 A |
| Rapid Charge | Approximately 80% in 1 hour when powered off with supported 65 W adapter |
| Recommended Charging Temperature | 10°C–35°C (50°F–95°F) |
USB and External Display Specifications
| Connection | Specification |
| Thunderbolt 4 | Up to 40 Gbps |
| USB-A | USB 5 Gbps |
| USB-C Peripheral Power Output | 5 V, 3 A |
| USB-C to VGA | Up to 1920 × 1200 at 60 Hz |
| USB-C to DisplayPort | Up to 7680 × 4320 at 60 Hz |
| HDMI | HDMI 2.1 |
| HDMI Maximum Output | Up to 4K at 60 Hz |
Actual data transfer speeds and display output depend on connected devices, cables, adapters, and operating conditions.
Parts and Components
The ThinkPad S2 2-in-1 Gen 10 includes components on the display assembly, keyboard base, sides, and underside.
Front Components
| Component | Function |
| Microphones | Capture sound and voice |
| Camera or Infrared Camera | Supports video recording and compatible authentication |
| Webcam Privacy Shutter | Physically covers the camera lens |
| Touchscreen | Provides touch-based interaction |
| Power Button | Turns the computer on and controls power behavior |
| Fingerprint Reader | Supports biometric authentication on selected models |
| TrackPoint Pointing Stick | Controls the pointer |
| TrackPoint Three Buttons | Provide mouse-style clicking and scrolling |
| Trackpad | Controls the pointer and supports multi-finger gestures |
| NFC Mark | Identifies the NFC contact area on supported models |
Camera Privacy Shutter
The integrated webcam includes a sliding privacy shutter.
Move the shutter to cover or uncover the camera lens.
The cover should be open when using video conferencing or facial recognition.
Fingerprint Reader
Selected configurations include a fingerprint reader integrated into the Power button.
It supports Windows Hello authentication and compatible firmware-level security functions.
TrackPoint Pointing Device
The TrackPoint system includes a pointing stick and three physical buttons.
It supports pointer movement, clicking, scrolling, and zooming.
Trackpad
The trackpad supports conventional mouse operations and multi-finger Windows gestures.
Side Ports and Connectors
The computer includes connections for external displays, USB peripherals, security accessories, and compatible communication devices.
| Component | Function |
| Security-Lock Slot | Accepts a compatible security cable |
| HDMI Connector | Connects compatible external displays |
| USB-A 5 Gbps | Connects USB peripherals |
| USB-A 5 Gbps with Always On USB | Connects USB devices and supports compatible charging behavior |
| Thunderbolt 4 USB-C | Supports high-speed data, display output, and charging |
| Audio Connector | Connects compatible audio equipment |
| Smart-Card Slot | Supports smart cards on selected configurations |
| Nano-SIM-Card Tray | Accepts a nano-SIM on supported WWAN models |
| Lenovo Integrated Pen Slot | Stores and charges the compatible pen |
Thunderbolt 4 USB-C Connector
The USB-C connector supports Thunderbolt 4 technology with transfer speeds up to 40 Gbps.
It can be used to:
- Connect compatible USB-C peripherals.
- Connect external displays.
- Transfer data.
- Charge compatible connected devices.
- Connect compatible docks and accessories.
HDMI Connector
The HDMI port supports HDMI 2.1 output with a maximum listed resolution of 4K at 60 Hz.
USB-A Connectors
USB-A 5 Gbps ports support compatible keyboards, mice, storage devices, printers, and other peripherals.
One connector provides Always On USB functionality.
Audio Connector
The audio connector supports compatible headphones and audio accessories.
Security-Lock Slot
The security-lock slot accepts compatible Kensington NanoSaver cable locks using Cleat locking technology.
Bottom Components
Emergency-Reset Hole
The emergency-reset hole allows the computer to be reset when it becomes unresponsive and cannot be turned off normally.
Speakers
The built-in speakers provide audio output for Windows, communication applications, and multimedia.
Ventilation
The notebook uses internal cooling components and ventilation openings to manage temperature during operation.
Caution: Use the computer on a hard, flat surface and avoid prolonged direct contact with the underside.
Safety Instructions
Before using the ThinkPad S2 2-in-1 Gen 10, read the supplied Safety and Warranty Guide, Setup Guide, and Generic Safety and Compliance Notices.
Electrical Safety
- Use an appropriate safety-certified power adapter.
- Use power cords that meet applicable national safety requirements.
- Do not use damaged adapters or cables.
- Keep the computer and power accessories away from excessive moisture.
- Disconnect power before performing procedures that require the computer to be powered off.
- Follow Lenovo’s component replacement instructions when servicing customer-replaceable parts.
Heat and Ventilation Safety
Caution: During operation, the underside may become warm enough to cause discomfort or harm after direct skin contact for more than ten seconds.
- Place the computer on a hard, flat surface.
- Keep ventilation openings clear.
- Avoid prolonged contact between hot surfaces and bare skin.
- Do not block cooling vents with soft materials.
Magnetic Components
The computer contains magnets.
Keep magnetically sensitive objects, including credit cards, away from the notebook.
Touchscreen Safety
- Do not press hard on the touchscreen.
- Do not use sharp or incompatible objects.
- Avoid input with unsuitable gloves or pens.
- Use a soft, lint-free cloth for cleaning.
Integrated Pen Safety
The Lenovo Integrated Pen is not waterproof.
Keep it away from water and excessive moisture.
Operating and Storage Conditions
| Condition | Supported Range |
| Maximum Altitude Without Pressurization | 3048 m (10,000 ft) |
| Operating Temperature | 5°C–35°C (41°F–95°F) |
| Storage in Original Packaging | -20°C–60°C (-4°F–140°F) |
| Storage Without Packaging | 5°C–43°C (41°F–109°F) |
| Minimum Battery Charging Temperature | 10°C (50°F) |
| Operating Relative Humidity | 8%–95% at 23°C wet-bulb temperature |
| Storage and Transportation Humidity | 5%–95% at 27°C wet-bulb temperature |
Initial Setup Instructions
Connecting the AC Power Adapter
- Connect the power cord to the AC adapter.
- Connect the adapter to the computer.
- Connect the power cord to an electrical outlet.
- Press the Power button.
Fully charging the computer before first use is recommended.
Completing Windows Setup
During initial Windows configuration:
- Select the country or region.
- Connect to an available network.
- Accept the license agreement.
- Create or sign in to a Microsoft account.
- Configure a password or supported biometric authentication.
- Customize Windows settings.
- Follow the on-screen instructions until setup is complete.
Important: Keep the computer connected to AC power and do not turn it off during the initial operating system setup.
Connecting to Wi-Fi
- Select the network icon on the right side of the Windows taskbar.
- Review the available wireless networks.
- Select the required network.
- Enter the network password if requested.
- Complete the connection.
Available wireless functions and frequency bands depend on the installed wireless module and regional regulations.
Connecting to a Cellular Network
Selected configurations support 4G wireless WAN connectivity.
A compatible WWAN module, nano-SIM card, and active cellular data plan are required.
Installing a Nano-SIM Card
- Turn off the computer.
- Insert a straightened paper clip into the nano-SIM tray hole.
- Remove the tray.
- Install the nano-SIM card in the correct orientation.
- Reinsert the tray.
- Turn on the computer.
- Open the network controls and select the cellular connection.
- Enter the information requested by the service provider.
Cellular service and connection speeds depend on the carrier and location.
Airplane Mode
Airplane Mode turns off wireless communication functions.
To enable it:
- Open the network controls in the Windows taskbar.
- Select Airplane mode.
Wi-Fi may be enabled separately while Airplane Mode is active when permitted.
Convertible Modes
The ThinkPad S2 2-in-1 Gen 10 supports a display rotation of up to 360 degrees.
The computer can operate in four physical modes.
Convertible Mode Guide
| Mode | Recommended Use |
| Notebook Mode | Typing and regular computer operation |
| Stand Mode | Video calls and presentations |
| Tent Mode | Video playback and slide shows |
| Tablet Mode | Writing, drawing, and touchscreen applications |
Notebook Mode
Use the computer like a standard laptop with the keyboard, TrackPoint, and trackpad.
Stand Mode
Rotate the display backward into a supported stand position for presentations and video communication.
Tent Mode
Position the computer with the display facing outward and the two halves forming a tent shape.
This arrangement is suitable for viewing videos and presentations.
Tablet Mode
Rotate the display fully backward to use the computer through the touchscreen.
Automatic Keyboard and Pointing Device Control
The keyboard and pointing devices are automatically disabled in:
- Stand Mode.
- Tent Mode.
- Tablet Mode.
They become active again when the computer returns to Notebook Mode.
Attention: Do not force the display hinges or apply excessive pressure to the upper corners of the screen.
Keyboard Shortcuts
The keyboard includes function keys and shortcuts for common computer operations.
Function Key Guide
| Function | Description |
| Speaker Mute | Mutes or unmutes speakers |
| Volume Down | Decreases volume |
| Volume Up | Increases volume |
| Microphone Control | Enables or disables microphone |
| Brightness Down | Decreases screen brightness |
| Brightness Up | Increases screen brightness |
| Display Selection | Selects and configures connected displays |
| Performance Mode | Changes Intelligent Cooling mode |
| Print Screen | Captures the screen |
| Snipping Tool | Opens screen capture tools |
| Phone Link | Opens Microsoft Phone Link |
| Customizable Key | Performs a function configured in Vantage |
Additional Keyboard Shortcuts
| Shortcut | Function |
| Fn + FnLock | Switches between special and standard function keys |
| Fn + Spacebar | Adjusts keyboard backlight on supported models |
| Fn + Tab | Opens Magnifier |
| Fn + 4 | Enters sleep mode |
| Fn + B | Break |
| Fn + K | Scroll Lock |
| Fn + P | Pause |
| Fn + S | System Request |
| Fn + N | Opens system information |
| Fn + G | Enables or disables TrackPoint Quick Menu tapping |
| Copilot Key | Opens Copilot or Windows Search, depending on availability |
FnLock Indicator
| Indicator | Function |
| Esc LED Off | Special function keys are enabled |
| Esc LED On | Standard F1–F12 functions are enabled |
Customizing Keyboard Settings
- Open Lenovo Commercial Vantage.
- Select Device > Input & Accessories.
- Change the available keyboard settings.
Using the TrackPoint
The TrackPoint pointing device performs mouse functions without requiring the hands to move away from the keyboard.
Moving the Pointer
Apply gentle pressure to the red pointing stick in the desired direction.
The amount of pressure affects pointer movement speed.
TrackPoint Button Functions
| Control | Function |
| Left Button | Left-click |
| Right Button | Right-click |
| Center Button | Scrolling |
| Ctrl + Center Button + Pointing Stick | Zooming |
Scrolling
- Press and hold the center TrackPoint button.
- Move the pointing stick vertically or horizontally.
- Release the button to stop scrolling.
Changing TrackPoint Settings
- Type Mouse settings in Windows Search.
- Open TrackPoint settings.
- Adjust the available settings.
Replacing the TrackPoint Cap
The pointing-stick cap can be replaced with a compatible grooved cap.
Use the replacement style described for the TrackPoint mechanism.
Using the Trackpad
The trackpad supports pointer movement, clicking, scrolling, and multi-finger gestures.
Basic Trackpad Gestures
| Gesture | Function |
| One-Finger Tap | Selects an item |
| One-Finger Double-Tap | Opens an item |
| Two-Finger Double-Tap | Opens a shortcut menu |
| Two-Finger Pinch | Zooms out |
| Two-Finger Spread | Zooms in |
| Two-Finger Slide | Scrolls horizontally or vertically |
| Three-Finger Tap | Opens Search |
| Four-Finger Tap | Opens Notification Center |
| Three- or Four-Finger Swipe Up | Shows open windows |
| Three- or Four-Finger Swipe Down | Shows the desktop |
| Three- or Four-Finger Swipe Sideways | Switches between open applications |
Disabling the Trackpad
- Open Settings > Bluetooth & devices > Touchpad.
- Turn off the Touchpad control.
Cleaning the Trackpad
If the trackpad becomes less responsive:
- Turn off the computer.
- Use a soft, lint-free cloth lightly moistened with lukewarm water or computer cleaner.
- Gently wipe the trackpad surface.
- Allow it to dry before use.
Touchscreen Instructions
The convertible touchscreen supports direct finger input.
Touchscreen Gestures
| Gesture | Function |
| Tap and Hold | Opens a shortcut menu |
| Swipe from Left Edge | Opens Widgets |
| Swipe from Right Edge | Opens Notification Center |
| Two-Finger Pinch | Zooms out |
| Two-Finger Spread | Zooms in |
| Three-Finger Swipe Up | Shows open windows |
| Three-Finger Swipe Down | Shows the desktop |
| Three-Finger Swipe Left or Right | Switches applications |
| Four-Finger Swipe Left or Right | Switches desktops |
Enabling Three- and Four-Finger Gestures
- Type touch gesture in Windows Search.
- Open the matching setting.
- Enable three- and four-finger touch gestures.
Cleaning the Touchscreen
- Turn off the computer.
- Wipe the screen using a dry, soft, lint-free cloth.
- Remove fingerprints and dust gently.
- Do not apply cleaning solvents to the cloth.
Lenovo Integrated Pen
Supported S2 2-in-1 Gen 10 configurations use the rechargeable Lenovo Integrated Pen.
The pen allows writing, drawing, and more precise touchscreen selection.
Pen Components
| Component | Function |
| Pen Tip | Touchscreen writing and selection |
| Eraser Button | Activates the supported eraser function |
| Click Button | Activates supported pen controls |
| Pen Charging Contacts | Allow charging inside the computer’s pen slot |
Charging the Lenovo Integrated Pen
- Turn on the computer or place it into sleep mode.
- Insert the pen into its integrated slot.
- Allow it to charge.
Pen Charging Times
| Charging Time | Approximate Charge |
| 15 seconds | 80% |
| 5 minutes | 100% |
Pen Care
- Keep the pen away from water.
- Avoid excessive moisture.
- Store it in its integrated slot when not in use.
Using a Compatible Pencil on the Touchscreen
Selected touchscreen configurations support graphite pencil input.
Supported Pencil Requirements
| Specification | Requirement |
| Pencil Hardness | HB, B, or 2B |
| Tip Diameter | More than 2 mm |
| Contact Area Diameter | More than 1.5 mm |
Operating Instructions
- Use a supported graphite pencil with an appropriate tip.
- Lightly draw a straight line to activate touchscreen responsiveness.
- Apply minimal pressure.
- Use the pencil for compatible touch input.
- Clean graphite dust from the display using a microfiber cloth.
Pen or pencil responsiveness may be affected by charging, low battery, or system performance conditions.
For detailed drawing and extended writing, the Lenovo Integrated Pen is recommended.
Connecting External Displays
The ThinkPad S2 2-in-1 Gen 10 supports external displays through HDMI and USB-C.
Wired Display Connections
- Connect a compatible HDMI or USB-C display cable.
- Connect the display to power.
- Turn on the display.
- Configure the display in Windows.
Supported External Resolutions
| Connection | Maximum Listed Resolution |
| Thunderbolt 4 USB-C | Up to 8K at 60 Hz |
| HDMI 2.1 | Up to 4K at 60 Hz |
Higher refresh rates may be available at reduced resolutions.
Connecting a Wireless Display
Both the computer and wireless display must support Miracast.
- Press Windows + K.
- Select the available wireless display.
- Follow the connection prompts.
Changing Display Settings
- Right-click an empty area of the Windows desktop.
- Select Display settings.
- Choose the required display.
- Adjust resolution, orientation, brightness, or display arrangement.
Lenovo Commercial Vantage
Lenovo Commercial Vantage provides system management, hardware controls, updates, and support features.
Opening Lenovo Commercial Vantage
- Type Lenovo Commercial Vantage in Windows Search.
- Open the application.
Main Functions
| Feature | Function |
| Device Information | Displays system status |
| Hardware Settings | Configures supported devices |
| Driver Updates | Downloads compatible drivers |
| BIOS and Firmware Updates | Installs supported updates |
| Hardware Scan | Tests hardware components |
| Battery Management | Adjusts charging settings |
| Warranty Information | Displays available warranty details |
| Quick Clean | Temporarily disables input devices during cleaning |
Lenovo View
Selected configurations include Lenovo View for camera, privacy, and video collaboration functions.
Lenovo View Features
| Feature | Function |
| Video Enhancer | Adjusts video brightness, contrast, and color |
| Background Removal | Conceals the background |
| Auto-Framing | Keeps the user centered during video calls |
| Virtual Presenter | Places the user’s image over presentation materials |
| Privacy Alert | Warns when someone appears behind the user |
| Privacy Guard | Blurs the screen when a potential onlooker is detected |
| Posture Warning | Reminds the user to adjust posture |
| Eye Wellness | Reminds the user to look away from the screen periodically |
Opening Lenovo View
Type Lenovo View in Windows Search and open the application.
The camera privacy shutter must be open for camera-based functions to operate.
TrackPoint Quick Menu
The TrackPoint Quick Menu provides access to several hardware and communication settings.
Opening the Quick Menu
Double-tap the TrackPoint pointing stick.
Available Functions
| Function | Description |
| Camera | Adjusts brightness and contrast |
| Microphone | Adjusts microphone settings |
| Voice Typing | Converts speech into text |
| Battery | Opens charging threshold controls |
| Audio Playback | Changes audio output and volume |
| Noise Suppression | Controls background noise filtering |
| Quick Clean | Temporarily disables input devices for cleaning |
Microphone Modes
| Mode | Function |
| Center | Focuses on the speaker’s voice |
| Spatial | Captures voice and surrounding sound |
Noise Suppression Modes
| Setting | Function |
| Off | Disables suppression |
| Low | Reduces low-level background noise |
| High | Reduces non-speech background noise |
Changing Quick Menu Activation
The menu is normally opened by double-tapping the TrackPoint.
Single-tap activation can also be configured in Advanced Settings.
Press Fn + G to enable or disable the TrackPoint tapping gesture.
Copilot in Windows
Copilot is available on supported Windows installations and in supported regions.
To open it:
- Press the Copilot key.
- Select the Copilot icon in the Windows taskbar.
Depending on regional availability, pressing the Copilot key may open Windows Search instead.
Intelligent Cooling and Performance Modes
Intelligent Cooling manages performance, temperature, fan speed, and power consumption.
Performance Modes
| Mode | Recommended Use |
| Best Power Efficiency | Lower power consumption, cooler and quieter operation |
| Balanced | General computing and switching between applications |
| Best Performance | Tasks requiring higher performance |
Changing Performance Mode
Press F8 to switch between available modes.
Alternatively:
- Right-click the battery icon in Windows.
- Open Power and sleep settings.
- Find Power mode.
- Select the preferred mode.
Cool and Quiet on Lap
When the computer detects lap-related movement in Best Performance mode, it may temporarily reduce performance to limit heat and discomfort.
Normal performance returns when the computer becomes stable.
Battery Charging and Power Management
Checking Battery Status
Open Settings > System to view battery status.
For additional battery information, use Lenovo Commercial Vantage.
Charging with AC Power
- Connect the supported power adapter.
- Plug the adapter into an electrical outlet.
- Allow the battery to charge.
Rapid Charge
The supported 65 W adapter can charge the battery to approximately 80% in one hour while the computer is turned off.
Actual charging time depends on the battery, operating conditions, and computer usage.
Battery Charging Temperature
The recommended battery charging range is 10°C–35°C.
Battery Charging Threshold
After reaching full charge, the battery must fall to 94% or lower before charging resumes.
Improving Battery Health
Use Lenovo Commercial Vantage to configure battery charging thresholds.
If the computer has been used under limited charging conditions for an extended period, the battery may need to discharge to approximately 20% and then recharge completely to restore its available full-charge capacity.
Computer-to-Computer Charging
The ThinkPad S2 2-in-1 Gen 10 supports compatible computer-to-computer USB-C charging.
Requirements
- Both devices must support Lenovo computer-to-computer charging.
- Both computers must have compatible USB-C charging connectors.
- A USB-C to USB-C charging cable is required.
- A data-only USB-C cable cannot be used for power transfer.
Charging Procedure
- Connect the power adapter to the first Lenovo computer.
- Connect both compatible computers using a USB-C charging cable.
- Allow the second computer to charge.
Charging speed depends on battery levels, adapter wattage, and computer usage.
Sleep and Power Settings
For ENERGY STAR-compliant configurations, the default AC-powered inactivity settings are:
| Setting | Default |
| Turn Off Display | After 5 minutes |
| Enter Sleep Mode | After 5 minutes |
Changing Power Settings
- Open Control Panel.
- Select Power Options.
- Change the preferred sleep, display, and Power button settings.
Bluetooth Connections
Pairing a Bluetooth Device
- Type Bluetooth in Windows Search.
- Enable Bluetooth.
- Turn on the Bluetooth accessory.
- Make the accessory discoverable.
- Select the device.
- Complete the pairing instructions.
Keep Bluetooth devices within approximately 10 meters (33 feet) when establishing a connection.
Swift Pair
For compatible accessories:
- Enable Swift Pair notifications.
- Turn on Bluetooth on both devices.
- Make the accessory discoverable.
- Select Connect when the Swift Pair notification appears.
NFC Connections
Selected configurations include NFC.
Enabling NFC
- Open Airplane Mode settings.
- Confirm that Airplane Mode is off.
- Enable NFC.
Connecting an NFC Device
Move the compatible NFC card or device near the NFC mark around the trackpad.
NFC cards must use NFC Data Exchange Format (NDEF) to be detected.
Smart-Card Instructions
Selected configurations include a smart-card reader.
Supported Smart-Card Dimensions
| Dimension | Measurement |
| Length | 85.60 mm (3.37 inches) |
| Width | 53.98 mm (2.13 inches) |
Attention: Do not insert a smart card with slits. This may damage the card reader.
Security Features
The ThinkPad S2 2-in-1 Gen 10 includes multiple hardware and firmware security functions.
Security Features
- Compatible security cable lock.
- Fingerprint authentication.
- Facial recognition on selected models.
- Power-on password.
- Supervisor password.
- System management password.
- NVMe storage password.
- FIDO2 authentication.
- Supervisor Certificate.
- USB-C Restricted Mode.
- TPM on supported configurations.
Setting Up Fingerprint Recognition
- Type Sign-in options in Windows Search.
- Select Fingerprint recognition (Windows Hello).
- Follow the instructions to enroll a fingerprint.
Place the finger in the center of the reader during enrollment.
Enrolling more than one fingerprint is recommended.
Fingerprint Login
When the fingerprint indicator is solid green, touch the reader with an enrolled finger.
Setting Up Facial Recognition
On configurations with an infrared camera:
- Open the camera privacy shutter.
- Search for Sign-in options.
- Select Facial recognition (Windows Hello).
- Follow the enrollment instructions.
USB-C Restricted Mode
The Intel-based ThinkPad S2 2-in-1 Gen 10 supports USB-C Restricted Mode.
This security function disables USB-C data transfer while keeping compatible charging functionality available.
Enabling or Disabling Restricted Mode
- Turn on the computer.
- Confirm that the remaining battery charge is at least 5%.
- Press Fn + U.
- Press Fn + S.
When the feature is active, USB-C data transfer is restricted.
UEFI BIOS Passwords
Available Password Types
| Password | Function |
| Power-On Password | Restricts computer startup |
| Supervisor Password | Protects BIOS configuration |
| System Management Password | Provides managed firmware access |
| NVMe Password | Protects access to SSD data |
Setting or Changing a BIOS Password
- Restart the computer.
- Press F1 when the Lenovo logo appears.
- Select Security > Password.
- Choose the password type.
- Follow the on-screen instructions.
Forgotten Passwords
Important: Record all firmware passwords and store them securely.
A forgotten supervisor password may require system board replacement.
If a single NVMe password or both user and administrator NVMe passwords are forgotten, Lenovo cannot reset the passwords or recover the protected data.
Applicable parts and service charges may be required.
FIDO2 Passwordless Startup
FIDO2 allows authentication with a registered security device instead of typing the power-on password.
Registering a FIDO2 USB Device
- Turn on the computer.
- Press F12 during startup.
- Enter the power-on password if requested.
- Select App Menu > ThinkShield Passwordless Power-On Device Manager.
- Insert the FIDO2 USB device.
- Select the device.
- Confirm registration.
- Press the security device’s button when prompted.
- Complete registration and restart.
Logging In with FIDO2
- Restart the computer.
- Insert the registered FIDO2 USB device.
- Follow the authentication prompt.
- Press the device button when requested.
The device must be inserted, or the power-on password entered, within 60 seconds of the authentication prompt.
UEFI BIOS Setup
Entering BIOS
- Turn on or restart the computer.
- Press F1 repeatedly when the Lenovo logo appears.
BIOS Menu Guide
| Menu | Function |
| Main | Displays system information |
| Config | Configures hardware and system settings |
| Date/Time | Changes date and time |
| Security | Manages security features and passwords |
| Startup | Controls startup configuration |
| Restart | Saves, discards, or resets settings |
Saving Custom BIOS Defaults
- Enter BIOS.
- Select Restart > Save Custom Defaults.
- Confirm the operation.
Loading Custom BIOS Defaults
- Enter BIOS.
- Select Restart > Load Custom Defaults.
- Confirm the operation.
Restoring Factory BIOS Defaults
- Enter BIOS.
- Select Restart > Load Factory Defaults.
- Confirm the operation.
Alternatively, press F9 and select Factory Defaults.
Troubleshooting Guide
The following troubleshooting information covers common hardware, software, connectivity, charging, and startup problems.
| Problem | Recommended Action |
| Computer does not turn on | Check the power adapter, outlet, and power connection |
| Computer stops responding | Use the emergency-reset hole |
| Battery is not recognized | Restart, reset power, and update battery drivers |
| Battery drains quickly | Reduce power usage and review battery settings |
| Battery does not charge | Check adapter wattage, temperature, and charging settings |
| Battery does not reach full charge | Check Smart Charge and battery settings |
| Camera is unavailable | Open privacy shutter, check permissions, and update driver |
| No audio | Check audio output, volume, and Windows troubleshooting |
| Keyboard does not work | Check layout, drivers, and accessibility settings |
| Keyboard backlight fails | Use Fn + Spacebar and update the keyboard driver |
| Trackpad does not respond | Enable it in Windows and check the driver |
| TrackPoint does not respond | Check TrackPoint settings and driver |
| Touchscreen does not respond | Clean screen, check driver, and install updates |
| Screen flickers | Check display drivers and incompatible applications |
| External display is unavailable | Reconnect cable and update graphics driver |
| Bluetooth fails | Restart pairing and check Bluetooth drivers |
| Wi-Fi fails | Check Wi-Fi, Airplane Mode, and wireless adapter |
| Fan is noisy | Reduce workload and select an appropriate power mode |
| HDMI fails | Check the cable and graphics driver |
| USB port fails | Check connection, power settings, and USB drivers |
| Pen does not work | Charge the pen and check Lenovo Pen Settings |
| Startup is slow | Update Windows, reduce startup apps, and free storage |
| Windows does not start | Check startup options and recovery tools |
| SSD is not detected | Check firmware and storage diagnostics |
Computer Does Not Respond
- Disconnect the AC power adapter.
- Insert a straightened paper clip into the emergency-reset hole.
- Reconnect AC power.
- Turn on the computer.
If the computer remains unresponsive, contact Lenovo Support.
Camera Does Not Work
- Open the camera privacy shutter.
- Open Settings > Bluetooth & devices > Cameras.
- Confirm that the camera is enabled.
- Open Settings > Privacy & security > Camera.
- Enable camera access.
- Update the camera driver through Device Manager.
- Run the camera troubleshooter.
No Sound
- Open Settings > System > Sound.
- Confirm the correct audio output device.
- Check the volume.
- Confirm that the computer is not muted.
- Run the Windows audio troubleshooter.
Keyboard Backlight Does Not Work
- Press Fn + Spacebar.
- Open Device Manager.
- Expand Keyboards.
- Update the keyboard driver.
- Restart the computer if required.
Touchpad Does Not Respond
- Open Settings > Bluetooth & devices > Touchpad.
- Enable the touchpad.
- If necessary, update or roll back the touchpad driver.
TrackPoint Does Not Work
- Open Settings > Bluetooth & devices > Mouse > TrackPoint settings.
- Confirm that the TrackPoint is enabled.
- Update the TrackPoint driver.
- Check Config > Keyboard/Mouse in BIOS if necessary.
Touchscreen Does Not Work
- Turn off the computer.
- Clean the screen using a dry, soft cloth.
- Restart the computer.
- Open Device Manager.
- Check the HID-compliant touchscreen device.
- Enable or update the touchscreen driver.
- Install available Windows updates.
Battery Drains Quickly
- Reduce screen brightness.
- Turn off unnecessary keyboard backlighting.
- Disconnect unused peripherals.
- Select Best Power Efficiency.
- Close unused power-intensive applications.
- Reset the battery gauge through Vantage when needed.
- Update battery drivers.
Battery Does Not Charge
- Confirm that the power adapter has suitable wattage.
- Check all power connections.
- Close high-load applications.
- Move the computer to a suitable charging temperature.
- Reset the battery gauge in Vantage.
- Update UEFI BIOS if required.
Battery Does Not Fully Charge
- Open Lenovo Commercial Vantage.
- Select Power > Battery Settings.
- Disable Smart Charge if a full charge is required.
- Use Battery Gauge Reset when appropriate.
Screen Flickers
- Open Task Manager with Ctrl + Shift + Esc.
- Check whether Task Manager also flickers.
- If it does, review the display driver.
- Use Roll Back Driver when appropriate.
- If only specific applications flicker, update or uninstall those applications.
Wi-Fi Does Not Connect
- Confirm Wi-Fi is enabled.
- Turn off Airplane Mode.
- Reconnect to the network.
- Try another supported frequency band.
- Run Windows network diagnostics.
- Restart the router.
- Update or reinstall the wireless driver if necessary.
Fan Makes Excessive Noise
- Close unnecessary power-intensive applications.
- Change to Balanced or Best Power Efficiency mode.
- Keep ventilation openings clear.
- Clean air vents using compressed air after shutting down and disconnecting power.
- Install available system updates.
Pen Does Not Work
- Charge the Lenovo Integrated Pen.
- Check any required pen connection settings.
- Update Lenovo Pen Settings.
- Restart the computer if necessary.
Error Codes and Diagnostic Lights
Startup Error Messages
| Error Code | Meaning | Recommended Action |
| 0190 | Critical low-battery error | Connect AC power and charge |
| 0191 | Invalid remote configuration change | Confirm the configuration and retry |
| 0199 | Supervisor password retry limit exceeded | Verify the supervisor password |
| 0271 | Date or time error | Correct date and time in BIOS |
| 210x/211x | Storage detection or read error | Check the storage device and obtain service if needed |
| UEFI Variable Storage Nearly Full | Firmware variable storage capacity issue | Review the BIOS cleanup prompt |
Battery-Charge LED Diagnostic Codes
When a supported hardware error occurs, the battery-charge indicator flashes amber and white in a repeating pattern.
| Error Code | Meaning | Recommended Action |
| 0001 | Reset error | Perform emergency reset; service if unresolved |
| 0002 | Internal bus error | System board service |
| 0283 | PCI resource error | Authorized service diagnosis |
| 0284 | Trusted Computing Group functionality error | System board service |
| 0285 | TPM initialization-related error | System board service |
| 0286 | Integrated graphics error | System board service |
| 0288 | Computer display error | Check an external display and obtain professional service |
Important: System board, display cable, and internal electrical repairs should be performed by qualified service personnel.
Hardware Diagnostics
Lenovo Vantage Hardware Scan
- Open Lenovo Commercial Vantage.
- Select Hardware Scan.
- Choose Quick Scan or Customize.
- Run the selected tests.
- Follow the results and instructions.
UEFI Diagnostics
- Connect the computer to AC power.
- Turn on the computer.
- Press F10 immediately.
- Follow the diagnostic instructions.
- Press Esc to exit.
UEFI Diagnostics can be used when Windows cannot start or the computer cannot connect to a network.
Lenovo Memory Self Repair
On supported Intel configurations, Lenovo Memory Self Repair can help address certain memory-related failures.
To open it:
- Restart the computer.
- Press F4 during startup.
Alternatively, open the startup App Menu using F12 and select Lenovo Memory Self Repair.
Follow the instructions and review the test result.
Windows Recovery Instructions
Creating a Recovery USB Drive
Prepare an empty USB drive with at least 32 GB of storage.
Warning: Creating the recovery drive deletes existing data on the USB drive.
- Search for Create a recovery drive.
- Open the application.
- Select Back up system files to the recovery drive.
- Click Next.
- Connect the USB drive.
- Select the drive.
- Click Create.
Resetting Windows
- Open Settings > System > Recovery.
- Select Reset this PC.
- Choose Keep my files or Remove everything.
- Follow the on-screen instructions.
Back up important information before selecting a recovery option that removes data.
Cleaning and Maintenance
Quick Clean
Lenovo Commercial Vantage includes Quick Clean functionality.
This temporarily disables the keyboard, screen, trackpad, and TrackPoint during cleaning.
Keyboard Cleaning
- Turn off the computer.
- Use compressed air to remove dust and debris.
- Use a cotton swab with rubbing alcohol to clean sticky areas around keys when required.
Trackpad Cleaning
- Turn off the computer.
- Use a soft, lint-free cloth lightly moistened with lukewarm water or computer cleaner.
- Gently wipe the surface.
Touchscreen Cleaning
- Turn off the computer.
- Use a dry, soft, lint-free cloth.
- Remove fingerprints and dust.
- Do not apply solvents to the cloth.
Ventilation Maintenance
- Shut down the computer.
- Disconnect AC power and connected cables.
- Use compressed air to remove dust from ventilation openings.
Customer Replaceable Units
Lenovo classifies replacement components as self-service or optional-service CRUs.
Self-Service CRUs
| Component | Classification |
| AC Power Adapter | Self-Service, Selected Models |
| Power Cord | Self-Service, Selected Models |
| Nano-SIM Tray | Self-Service, Selected Models |
| Base Cover Assembly | Self-Service |
| M.2 2242 SSD | Self-Service, Selected Models |
| M.2 SSD Bracket | Self-Service, Selected Models |
| Lenovo Integrated Pen | Self-Service |
Optional-Service CRUs
| Component | Classification |
| Built-In Battery | Optional-Service |
| Thermal Fan | Optional-Service |
| Wireless WAN Module | Optional-Service, Selected Models |
| Wireless WAN Module Bracket | Optional-Service, Selected Models |
| Coin-Cell Battery | Optional-Service |
| Speaker Assembly | Optional-Service |
Before Replacing a CRU
Disable Fast Startup and the built-in battery before opening the notebook.
Disabling Fast Startup
- Open Control Panel.
- Select Power Options.
- Click Choose what the power buttons do.
- Select Change settings that are currently unavailable.
- Clear Turn on fast startup.
- Save the changes.
Disabling the Built-In Battery
- Restart the computer.
- Press F1 at the Lenovo logo.
- Select Config > Power.
- Select Disable Built-in Battery.
- Confirm the action.
- Allow the computer to turn off.
- Wait 3–5 minutes for cooling.
Attention: Disconnect all external power before removing the base cover. Follow Lenovo’s component-specific replacement procedures.
Warranty Information
The ThinkPad S2 2-in-1 Gen 10 is covered by the applicable Lenovo Limited Warranty.
Warranty coverage and service entitlement depend on the purchased configuration and location.
Warranty Services
Eligible services may include:
- Hardware problem identification.
- Repair of covered Lenovo hardware.
- Applicable engineering changes.
Warranty Exclusions
Examples of services not covered include:
- Nonwarranted parts.
- Software problem identification.
- BIOS configuration during installation or upgrades.
- Driver modifications.
- Network operating system maintenance.
- Application installation and maintenance.
Full warranty terms are available at:
https://www.lenovo.com/warranty/llw_02
Warranty Status
https://support.lenovo.com/warranty-lookup
Customer Support Information
Lenovo provides product documentation, drivers, diagnostics, warranty information, and repair services.
Lenovo Support Resources
| Resource | Website |
| Lenovo Support | https://pcsupport.lenovo.com |
| Lenovo Contact | https://pcsupport.lenovo.com/contact-us |
| Warranty Lookup | https://support.lenovo.com/warranty-lookup |
| Parts Lookup | https://support.lenovo.com/parts-lookup |
| Authorized Service Locations | https://support.lenovo.com/partnerlocator |
| Repair Status | https://support.lenovo.com/track-repair-status |
| Driver and BIOS Downloads | https://pcsupport.lenovo.com |
| Lenovo Documentation | https://support.lenovo.com/documentation |
| Additional Warranty Services | https://pcsupport.lenovo.com/warrantyupgrade |
| Microsoft Support | https://support.microsoft.com |
Before Contacting Lenovo
Prepare:
- Product name.
- Machine type and serial number.
- Problem description.
- Error messages or diagnostic codes.
- Windows version.
- Applications involved.
- Steps needed to reproduce the problem.
The machine type and serial number can be found through system information or the product identification label.
Frequently Asked Questions
1. What are the specifications of the Lenovo ThinkPad S2 2-in-1 Gen 10?
The ThinkPad S2 2-in-1 Gen 10, machine type 21RA, features Intel-based hardware, LPDDR5X onboard memory up to 64 GB, M.2 2242 SSD storage up to 2 TB, a 1920 × 1200 IPS display, Thunderbolt 4, HDMI 2.1, Wi-Fi, Bluetooth, and a 360-degree convertible design.
2. How do I enter BIOS on the ThinkPad S2 2-in-1 Gen 10?
Restart the computer and press F1 repeatedly when the Lenovo logo appears. The UEFI BIOS menu provides access to security, startup, power, and hardware configuration settings.
3. How do I reset the ThinkPad S2 2-in-1 Gen 10 when it freezes?
Disconnect the AC adapter, insert a straightened paper clip into the emergency-reset hole, reconnect power, and restart the computer. Contact Lenovo Support if the system remains unresponsive.
4. How do I charge the Lenovo Integrated Pen?
Place the pen in its integrated charging slot while the computer is on or sleeping. The pen reaches approximately 80% charge in 15 seconds and 100% in about five minutes.
5. How do I switch between laptop and tablet modes?
Rotate the display through its supported 360-degree range. The computer supports notebook, stand, tent, and tablet modes. In the latter three modes, the keyboard and pointing devices are automatically disabled.
6. Why is my ThinkPad S2 2-in-1 Gen 10 battery not fully charging?
A charging threshold or Smart Charge setting may be limiting the charge. Open Lenovo Commercial Vantage, review Battery Settings, and disable Smart Charge when a full charge is needed.
7. How do I create a recovery USB for the ThinkPad S2 2-in-1 Gen 10?
Connect an empty USB drive with at least 32 GB of capacity. Search for Create a recovery drive in Windows, select Back up system files to the recovery drive, and follow the instructions. The process erases the USB drive.
8. Where can I download ThinkPad S2 2-in-1 Gen 10 drivers and BIOS updates?
Drivers, BIOS updates, firmware, diagnostic tools, and product documentation are available from Lenovo Support. Search for ThinkPad S2 2-in-1 Gen 10 or machine type 21RA to locate the appropriate files.