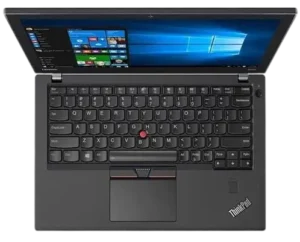
| Field | Details |
| Document Title | A275 User Guide |
| Document Type | User Guide |
| Brand Name | Lenovo |
| Product Name | ThinkPad A275 |
| Model Number(s) | A275; individual machine-type identifiers vary by configuration |
| PDF File Size | 8.64 MB |
| Number of Pages | 152 |
| Languages Covered | English |
Lenovo ThinkPad A275
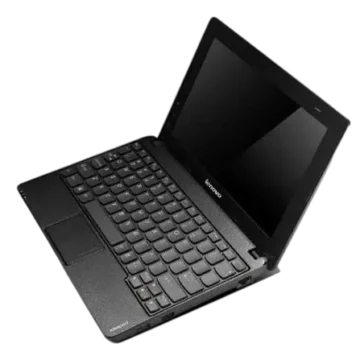
The Lenovo ThinkPad A275 is a 12.5-inch laptop computer designed for business computing, office applications, mobile productivity, and network communication. It features a six-row keyboard, TrackPoint pointing stick, multi-touch trackpad, wireless LAN, Bluetooth connectivity, and connections for external displays and accessories.
Depending on the configuration, the ThinkPad A275 includes an integrated camera, microphones, fingerprint reader, multi-touch display, smart-card reader, wireless WAN module, and GPS receiver. Available storage options include hard disk drives, solid-state drives, and M.2 storage.
The computer supports Windows 7 and Windows 10 configurations and includes the ThinkPad Setup utility for managing firmware settings, startup options, hardware functions, and security.
The ThinkPad A275 uses a removable rechargeable battery and includes an internal battery that must be disabled before certain hardware replacement procedures. Its power-management features support Sleep and Hibernation modes, while the USB-C connector provides compatible charging, data transfer, and external display functions.
The instructions cover the laptop’s components, specifications, first-time setup, keyboard controls, TrackPoint operation, wireless connections, battery management, security, BIOS configuration, system recovery, hardware replacement, maintenance, and troubleshooting.
Technical Specifications
Hardware Specifications
| Specification | Details |
| Brand | Lenovo |
| Product Name | ThinkPad A275 |
| Product Type | Notebook Computer |
| Processor Platform | AMD |
| Processor Information | Varies by Configuration |
| Display Size | 12.5 inches (317.5 mm) |
| Display Resolution | 1366 × 768 or 1920 × 1080 pixels |
| Display Technology | IPS on Selected Models |
| Touchscreen | Multi-Touch on Selected Models |
| Memory Type | DDR4 SODIMM |
| Keyboard | Six-Row Keyboard |
| Keyboard Backlight | Available on Selected Models |
| Pointing Devices | TrackPoint and Trackpad |
| Integrated Camera | Available on Selected Models |
| Built-In Microphones | Available on Selected Models |
| Audio | High Definition Audio |
| Wireless LAN | Yes |
| Bluetooth | Yes |
| Wireless WAN | Available on Selected Models |
| GPS | Available on Selected Models |
| Fingerprint Reader | Available on Selected Models |
| Security Chip | Available on Selected Models |
| Operating Systems Covered | Windows 7 and Windows 10 |
| Firmware | UEFI BIOS |
| Security Lock | Supported |
| Rechargeable Battery | Removable Battery and Built-In Battery |
| Power Adapter Options | 45W or 65W, Depending on Configuration |
Storage Options
| Storage Type | Specification |
| Hard Disk Drive | 2.5-inch, 7 mm Height |
| 2.5-inch Solid-State Drive | Available on Selected Models |
| M.2 SATA SSD | Available on Selected Models |
| M.2 PCIe-NVMe SSD | Available on Selected Models |
Dimensions
| Measurement | Value |
| Width | 305.5 mm (12 inches) |
| Depth | 208.5 mm (8.2 inches) |
| Thickness | 20.3 mm (0.8 inches) |
Power Specifications
| Specification | Value |
| AC Input Voltage | 100–240V AC |
| Input Frequency | 50–60 Hz |
| Maximum Heat Output Options | 45W (154 Btu/hr) or 65W (222 Btu/hr) |
| Battery Charging Time | Approximately 4–8 Hours |
| Recommended Charging Temperature | 10–35°C (50–95°F) |
Operating Environment
| Condition | Specification |
| Maximum Unpressurized Altitude | 3048 m (10,000 ft) |
| Operating Temperature Up to 2438 m | 5–35°C (41–95°F) |
| Storage Temperature | 5–43°C (41–109°F) |
| Maximum Operating Temperature Above 2438 m | 31.3°C (88°F) |
| Operating Relative Humidity | 8–95% at 23°C Wet-Bulb Temperature |
| Storage Relative Humidity | 5–95% at 27°C Wet-Bulb Temperature |
What’s Included with the Computer
The ThinkPad A275 is supplied with power accessories and product documentation.
| Item | Purpose |
| ThinkPad A275 Computer | Main laptop computer |
| AC Power Adapter | Supplies electrical power and charges the battery |
| Power Cord | Connects the adapter to an electrical outlet |
| Setup Guide | Provides initial setup information |
| Safety and Warranty Guide | Contains safety precautions and warranty information |
Additional components and accessories depend on the purchased configuration.
Parts and Components
Front Components
| Component | Function |
| Camera | Takes photographs and supports video conferencing on selected models |
| Microphones | Capture audio and voice on selected models |
| Power Button | Turns the computer on or activates a configured power function |
| Fingerprint Reader | Provides biometric authentication on selected models |
| TrackPoint Pointing Stick | Moves the pointer using fingertip pressure |
| TrackPoint Buttons | Provide left-click, right-click, and scrolling controls |
| Trackpad | Provides pointer movement, clicking, scrolling, and gestures |
Integrated Camera
The optional camera supports photography, video recording, and video communication.
When the camera is operating, its indicator light turns green.
Power Button
Press the Power button to turn on the computer.
The button can also be configured to shut down the computer or activate Sleep or Hibernation mode.
To change its function:
- Open Control Panel.
- Select Large Icons or Small Icons.
- Open Power Options > Choose what the power buttons do.
- Select the required action.
Left-Side Ports and Connections
| Component | Function |
| Power Connector | Connects the AC power adapter |
| Fan Louvers | Allow cooling air to circulate |
| USB-C Connector | Supports data transfer, compatible charging, and video output |
| HDMI Connector | Connects compatible digital displays |
| USB 3.0 Connector | Connects USB peripheral devices |
| Smart-Card Slot | Supports compatible smart cards on selected models |
USB-C Connector
The USB-C connector supports USB 3.1 functions.
With a compatible USB-C adapter, the port can be used to:
- Transfer data between connected devices
- Charge the computer
- Supply power to compatible peripheral devices
- Connect an external display
HDMI Connector
The HDMI connector supports digital audio and video output to compatible equipment.
Smart-Card Slot
Selected configurations include a smart-card reader for authentication, data storage, and application processing.
The reader supports compatible smart cards with the following dimensions:
| Measurement | Size |
| Length | 85.60 mm (3.37 inches) |
| Width | 53.98 mm (2.13 inches) |
| Thickness | 0.76 mm (0.03 inches) |
Important: Smart cards containing slits must not be inserted into the reader because they may damage it.
Right-Side Ports and Connections
| Component | Function |
| Audio Connector | Connects compatible headphones or headsets |
| Always On USB 3.0 Connector | Connects and charges compatible USB devices |
| Media-Card Slot | Accepts supported memory cards |
| Micro-SIM-Card Tray | Accepts a micro SIM card on selected models |
| Ethernet Connector | Connects to a wired local area network |
| Security-Lock Slot | Accepts a compatible security cable lock |
Audio Connector
The 3.5 mm four-pole connector supports compatible headsets.
Conventional standalone microphones are not supported through this connector.
Ethernet Status Lights
| Indicator | Meaning |
| Green Light On | Connected to a LAN |
| Yellow Light Blinking | Data is being transmitted |
Warning: Never connect a telephone cable to the Ethernet connector.
Bottom Components
Emergency-Reset Hole
The emergency-reset hole provides a way to reset the computer when it stops responding.
If a reset is required, the AC adapter must be disconnected before inserting a straightened paper clip into the reset hole.
Removable Battery
The removable battery supplies electrical power when an AC outlet is unavailable.
The battery can be replaced with a compatible Lenovo-approved battery.
Status Indicator Lights
| Indicator | Status | Meaning |
| Fn Lock | On | Fn Lock is enabled |
| Speaker Mute | On | Speakers are muted |
| Microphone Mute | On | Microphones are muted |
| Camera | On | Camera is in use |
| System Status | Blinks Three Times | Computer has just been connected to power |
| System Status | Solid On | Computer is operating normally |
| System Status | Fast Blinking | Computer is entering Sleep or Hibernation mode |
| System Status | Slow Blinking | Computer is in Sleep mode |
| System Status | Off | Computer is off or in Hibernation mode |
The system status indicators are located in the Power button and ThinkPad logo.
Important Safety Instructions
Electrical Safety
- Use only manufacturer-approved power cords and adapters.
- Do not connect damaged power cables or adapters.
- Keep electrical connections away from liquids.
- Do not operate the computer during an electrical storm.
- Connect power cords to properly wired electrical outlets.
- Disconnect power before opening the computer for authorized service.
- Never operate the computer with internal electrical components exposed.
Battery Safety
- Do not crush, puncture, disassemble, or short-circuit batteries.
- Keep batteries away from fire, water, and excessive heat.
- Replace the removable battery only with a compatible Lenovo-approved battery.
- Do not attempt to replace the built-in battery without authorized service.
- Do not attempt to replace the internal coin-cell battery yourself.
Warning: Incorrect battery replacement can cause fire, overheating, leakage, or explosion.
Heat and Ventilation Safety
The computer and AC adapter generate heat during operation.
Avoid prolonged contact between hot computer surfaces and the body.
Keep cooling openings clear.
Do not operate the computer on surfaces such as beds, sofas, or carpets that can block ventilation.
The temperature of air entering the computer must not exceed 35°C (95°F).
Display Safety
Do not open the display beyond 180 degrees.
Avoid placing objects between the keyboard and screen.
The LCD contains glass and may break if the computer is dropped or subjected to a strong impact.
If LCD fluid contacts the skin or eyes, rinse the affected area with water for at least 15 minutes and seek medical assistance if symptoms remain.
Headphone Safety
Excessive headphone volume may cause hearing damage.
Use compatible headphones and maintain a suitable listening volume.
Service Safety
Do not attempt internal repairs unless the component is designated as customer-replaceable and the appropriate replacement instructions are being followed.
Damaged power components, smoke, unusual odors, battery leakage, or signs of overheating require the computer to be disconnected and inspected by authorized service personnel.
Before First Use
Preparing the Computer
- Place the computer on a flat, stable surface.
- Make sure the ventilation openings are unobstructed.
- Connect the power cord to the AC adapter.
- Connect the adapter to the computer’s power connector.
- Plug the power cord into an electrical outlet.
- Press the Power button.
If the computer uses a USB-C power adapter, connect it to the USB-C connector instead.
Initial Operating System Setup
Follow the setup instructions displayed by the installed Windows operating system.
The available setup options depend on the Windows version installed on the computer.
Using the Keyboard
The ThinkPad A275 includes special keys for common computer functions.
Special Key Functions
| Function | Description |
| Speaker Mute | Turns speaker sound on or off |
| Volume Down | Decreases speaker volume |
| Volume Up | Increases speaker volume |
| Microphone Mute | Enables or disables microphone audio |
| Brightness Down | Reduces display brightness |
| Brightness Up | Increases display brightness |
| External Display | Opens display management options |
| Wireless Control | Enables or disables built-in wireless functions |
| Settings | Opens Windows Settings or Control Panel |
| Bluetooth Control | Controls Bluetooth on Windows 10 |
| Keyboard Settings | Opens keyboard configuration |
| User-Defined Key | Runs the configured shortcut or application |
Fn Key Combinations
| Shortcut | Function |
| Fn + Esc | Switches Fn Lock |
| Fn + B | Break |
| Fn + K | Scroll Lock |
| Fn + P | Pause |
| Fn + S | System Request |
| Fn + 4 | Puts the computer into Sleep mode |
| Fn + PrtSc | Opens Snipping Tool |
| Fn + Spacebar | Changes keyboard backlight settings on supported models |
Configuring Function Keys
- Open Control Panel.
- Change the view to Large Icons or Small Icons.
- Open Lenovo – Keyboard Manager.
- Select the preferred keyboard options.
On Windows 10, the user-defined key can also be configured through Lenovo Vantage > Hardware Settings > Input.
Using the TrackPoint Pointing Device
The ThinkPad pointing system includes a TrackPoint pointing stick, dedicated buttons, and a trackpad.
TrackPoint Controls
| Control | Function |
| Pointing Stick | Moves the pointer |
| Left-Click Button | Selects or opens an item |
| Right-Click Button | Opens a shortcut menu |
| Scroll Button | Scrolls horizontally or vertically |
Moving the Pointer
Place a fingertip on the TrackPoint cap and apply gentle pressure in the required direction.
The pointer moves according to the pressure applied.
Scrolling with TrackPoint
- Press and hold the middle scroll button.
- Apply pressure to the pointing stick vertically or horizontally.
- Release the button when scrolling is complete.
Using the Trackpad
The trackpad supports pointer movement, clicking, and multi-touch gestures.
| Gesture | Function |
| Slide One Finger | Moves the pointer |
| Tap Once | Left-click |
| Tap Two Fingers | Right-click |
| Move Two Fingers Vertically or Horizontally | Scroll |
| Pinch Two Fingers Together | Zoom out |
| Spread Two Fingers Apart | Zoom in |
| Swipe Three Fingers Up | Opens Task View in Windows 10 |
| Swipe Three Fingers Down | Shows the desktop in Windows 10 |
Customizing TrackPoint and Trackpad Settings
- Open Control Panel.
- Select Large Icons or Small Icons.
- Open Mouse.
- Configure the pointing-device settings.
TrackPoint, trackpad, and gesture functions can be enabled or disabled through the available settings.
Replacing the TrackPoint Cap
The TrackPoint cap is removable and can be replaced after extended use.
Use a compatible replacement cap with the grooved design specified for the pointing stick.
Using the Multi-Touch Display
Selected ThinkPad A275 configurations include a touchscreen.
Touchscreen Gestures
| Gesture | Function |
| Tap | Opens or selects an item |
| Tap and Hold | Opens a shortcut menu |
| Slide | Scrolls through content |
| Drag | Moves an item |
| Pinch | Zooms out |
| Spread | Zooms in |
| Rotate Fingers | Rotates supported objects in Windows 7 |
| Swipe from Right Edge | Opens Action Center in Windows 10 |
| Swipe from Left Edge | Opens Task View in Windows 10 |
| Swipe Down from Top | Shows the title bar or closes an application, depending on the gesture |
Touchscreen Care
Do not apply excessive pressure to the screen.
Avoid using sharp objects, fingernails, or gloves for touch input.
Turn off the computer before cleaning the touchscreen.
Use a soft, dry, lint-free cloth and wipe gently without applying pressure.
Power Management
Connecting AC Power
- Connect the power cord to the AC adapter.
- Connect the adapter to the computer.
- Plug the cord into an electrical outlet.
The rechargeable battery charges automatically while the computer receives AC power.
Checking Battery Status
Move the pointer over the battery icon in the Windows notification area.
The icon displays the remaining charge and estimated operating time.
Battery runtime depends on display brightness, wireless usage, storage activity, and other computer operations.
Charging the Battery
The battery normally requires approximately four to eight hours for a full charge.
Charging time depends on the battery, operating environment, and whether the computer is running.
The recommended charging temperature is 10–35°C (50–95°F).
The computer does not start another charging cycle when the remaining battery charge is above 95%.
Power-Saving Modes
| Mode | Function |
| Sleep | Saves the current session in memory and reduces power consumption |
| Hibernation | Saves the current session to storage and turns off the computer |
| Screen Blank | Turns off the display in Windows 7 |
| Wireless Off | Disables unused wireless functions |
Entering Sleep Mode
Press Fn + 4.
Alternatively, open the Windows Start menu and select Sleep.
To resume, press Fn or the Power button.
Configuring Power Plans
- Open Control Panel.
- Select Power Options.
- Choose or configure the preferred power plan.
Connecting to WiFi
Wireless LAN Setup
- Enable wireless communication using the appropriate keyboard key.
- Select the network icon in the Windows notification area.
- Choose the required wireless network.
- Enter the password if requested.
The computer reconnects automatically to remembered networks when they are available.
For better wireless reception, position the computer with minimal obstacles between it and the wireless access point.
Using Wireless WAN
Selected configurations include a wireless WAN module for cellular broadband connections.
Depending on the installed module and service provider, supported technologies may include HSPA, 3G, 4G, or LTE.
A compatible micro SIM card may be required.
Mobile Broadband Reception
For better reception:
- Position the computer on a flat surface.
- Open the display slightly beyond 90 degrees.
- Avoid locations surrounded by thick concrete or brick walls.
- Use locations with strong cellular reception.
Installing or Replacing a Micro SIM Card
The optional micro-SIM-card tray is located on the right side.
Replacement Instructions
- Shut down the computer.
- Disconnect the AC power adapter and external cables.
- Insert a straightened paper clip into the SIM tray release opening.
- Pull out the tray.
- Remove the existing micro SIM card if installed.
- Place the replacement micro SIM card in the correct orientation.
- Insert the tray into the computer.
Important: Use a micro SIM card. Do not insert a nano SIM card using a nano-to-micro adapter because the adapter may damage the slot.
Using Bluetooth
Bluetooth supports short-range communication with compatible devices.
Enabling Bluetooth in Windows 10
- Open Start.
- Select Settings > Devices > Bluetooth & other devices.
- Turn on Bluetooth.
Sending a File Through Bluetooth
- Make sure Bluetooth is enabled.
- Right-click the file.
- Select Send to > Bluetooth device.
- Choose the receiving device.
- Follow the on-screen instructions.
Using Airplane Mode
Airplane Mode disables wireless communication.
To enable or disable it in Windows 10:
- Open Start.
- Select Settings > Network & Internet > Airplane mode.
- Change the Airplane Mode setting.
Using the Camera and Audio
Opening the Camera
For Windows 10, open Start and select Camera.
For Windows 7, use Communications Utility.
The camera indicator turns green while the camera is operating.
Changing Camera Settings
In Windows 10, camera settings can be adjusted through the Camera application or Lenovo Vantage.
Audio Connections
The audio connector accepts compatible 3.5 mm four-pole headsets.
The computer supports audio playback and recording through its built-in audio hardware.
Using Memory Cards and Smart Cards
Supported Memory Cards
| Card Type | Supported |
| SD | Yes |
| SDHC | Yes |
| SDXC | Yes |
| MMC | Yes |
Inserting a Memory Card
- Locate the media-card slot.
- Position the card with its metal contacts facing downward and toward the slot.
- Insert the card firmly.
Inserting a Smart Card
On models with a smart-card reader, insert the compatible card with its metal contacts facing upward.
Removing a Card
- Use Windows Safely Remove Hardware and Eject Media.
- Eject the card through Windows.
- Press the card to release it.
- Remove it from the slot.
Do not remove cards during data transfer or while the computer is in Sleep or Hibernation mode.
Connecting an External Display
The ThinkPad A275 supports external monitors and projectors through HDMI and USB-C.
Maximum External Display Resolutions
| Connection | Maximum Supported Resolution |
| HDMI | 2560 × 1600 at 30 Hz |
| USB-C | 3840 × 2160 at 60 Hz |
The connected display must support the selected resolution.
Connecting a Wired Display
- Connect the display to HDMI or USB-C using a compatible cable.
- Connect the display to power.
- Turn on the display.
- Select the required display mode.
Display Modes
| Mode | Function |
| PC Screen Only | Uses the laptop display |
| Duplicate | Shows the same image on both displays |
| Extend | Extends the desktop across two displays |
| Second Screen Only | Uses only the external display |
Connecting a Wireless Display
Windows 10 supports compatible Miracast displays.
- Open Windows Settings.
- Select Devices > Bluetooth & other devices.
- Choose Add Bluetooth or other device.
- Select Wireless Display or Dock.
- Follow the pairing instructions.
Security Features
The ThinkPad A275 includes firmware password controls, optional fingerprint authentication, security-chip functions, and drive encryption support.
Available Password Types
| Password | Purpose |
| Power-On Password | Restricts computer startup |
| Supervisor Password | Protects ThinkPad Setup configuration |
| User Hard Disk Password | Restricts access to storage data |
| Master Hard Disk Password | Provides administrator access to protected storage |
Setting a BIOS Password
- Restart the computer.
- Press F1 when the Lenovo logo appears.
- Select Security > Password.
- Select the password type.
- Follow the on-screen instructions.
- Save the changes.
Important: A forgotten hard disk password cannot be reset by Lenovo, and protected data cannot be recovered through Lenovo service. Drive replacement may be required.
Fingerprint Reader Setup
Selected configurations include a fingerprint reader.
Enrolling Fingerprints in Windows 10
- Open Start > Settings > Accounts > Sign-in options.
- Select the fingerprint enrollment function.
- Follow the displayed instructions.
Scanning a Fingerprint
Place the upper joint of the finger on the reader with light pressure for approximately one to two seconds.
Lift the finger after the scan.
Fingerprint Indicator Lights
| Indicator | Meaning |
| Off | Reader is not ready |
| Solid Green | Ready for fingerprint input |
| Blinking Amber | Fingerprint authentication failed |
Fingerprint Reader Maintenance
Clean the reader using a dry, soft, lint-free cloth.
Keep fingers clean and dry.
If recognition problems continue, enroll a different finger.
ThinkPad Setup and BIOS Configuration
The ThinkPad Setup utility provides firmware configuration options.
Entering ThinkPad Setup
- Restart the computer.
- Press F1 when the startup logo appears.
- Use the arrow keys to select the required menu.
BIOS Navigation Controls
| Key | Function |
| F1 | Enter ThinkPad Setup during startup |
| Arrow Keys | Navigate menu items |
| Enter | Select a menu item |
| F5 | Decrease a setting value |
| F6 | Increase a setting value |
| Esc | Return to the previous menu |
| F9 | Restore default settings |
| F10 | Save changes and exit |
| F12 | Open the temporary Boot Menu during startup |
BIOS Main Menus
| Menu | Functions |
| Main | System and hardware information |
| Config | Network, USB, keyboard, display, and power settings |
| Date/Time | System date and time |
| Security | Passwords, fingerprint, security chip, and Secure Boot |
| Startup | Boot sequence and startup configuration |
| Restart | Save, discard, or restore configuration |
Changing the Boot Order
- Enter ThinkPad Setup.
- Select Startup > Boot.
- Choose the preferred startup order.
- Press F10 to save the changes.
For a temporary startup device selection, press F12 when the startup logo appears.
Configuring Always On USB
- Open ThinkPad Setup.
- Select Config > USB.
- Enable Always On USB.
- Configure Charge in Battery Mode if required.
- Save the changes.
Enabling AMD Virtualization
- Open ThinkPad Setup.
- Select the Security menu.
- Locate Virtualization > AMD-V Technology.
- Change the setting as required.
- Save the configuration.
Configuring Secure Boot
Secure Boot can be enabled or disabled through the Security menu.
Changing security settings may affect operating system startup. Only modify the settings required for the intended configuration.
Installing Windows and Device Drivers
The ThinkPad A275 includes instructions for Windows 7 and Windows 10 installation.
Important: Installing a new operating system deletes existing data from the internal storage drive. Back up important files before starting.
Windows 10 Installation
- Confirm that the Windows version is supported.
- Configure the security chip for TPM 2.0.
- Connect the operating system installation drive.
- Open ThinkPad Setup.
- Select the installation device under Startup > Boot.
- Enable OS Optimized Defaults.
- Save the settings using F10.
- Follow the installation instructions.
- Install required device drivers.
- Run Windows Update.
Windows 7 Installation Settings
| Installation Type | TPM Setting | Boot Mode |
| Windows 7 32-bit | TPM 1.2 | Legacy Only or Both |
| Windows 7 64-bit, Legacy | TPM 1.2 | Legacy Only |
| Windows 7 64-bit, UEFI | TPM 2.0 | UEFI Only |
For an NVMe storage drive, Windows 7 installation requires UEFI mode and additional applicable drivers.
Installing Drivers
Drivers can be obtained from:
Windows 7 also supports Lenovo System Update, while Windows 10 includes Lenovo Vantage for supported driver and firmware updates.
Windows Recovery Instructions
Resetting Windows 10
- Open Start > Settings > Update & Security > Recovery.
- Under Reset this PC, select Get started.
- Choose the required reset option.
- Follow the instructions.
Opening Advanced Startup
- Open Settings > Update & Security > Recovery.
- Select Restart now under Advanced Startup.
- Open Troubleshoot.
- Choose the required advanced recovery option.
Creating a Recovery USB Drive
A recovery USB drive requires at least 16 GB of storage.
Warning: Creating the recovery drive deletes existing data on the USB drive.
- Connect the USB storage device.
- Search Windows for Create a recovery drive.
- Open the utility.
- Approve the User Account Control prompt.
- Follow the instructions to create the recovery drive.
Recovering Windows Using USB
- Connect the recovery USB drive.
- Turn on the computer.
- Press F12 repeatedly before Windows starts.
- Select the recovery USB drive.
- Choose the keyboard layout.
- Open Troubleshoot.
- Select the required recovery function.
The computer must remain connected to AC power during recovery.
Windows 7 Recovery Media
Windows 7 configurations use Lenovo recovery media created through:
Start > All Programs > Lenovo PC Experience > Lenovo Tools > Factory Recovery Disks
Recovery media can include discs or a compatible USB drive with at least 16 GB of capacity.
Cleaning and Maintenance
Cleaning the Computer Cover
Use a lint-free cloth dampened with mild soap and water.
Do not apply liquid directly to the cover.
Cleaning the Keyboard
- Wipe individual keys with a lint-free cloth dampened with mild soap and water.
- Avoid cleaning several keys at once if the cloth could catch underneath them.
- Use a camera blower with a brush or cool air from a hair dryer to remove dust beneath the keys.
Do not spray cleaner directly onto the keyboard.
Cleaning the Screen
- Use a dry, soft, lint-free cloth.
- Gently wipe the display.
- If marks remain, lightly moisten the cloth with water or eyeglass cleaner.
- Allow the display to dry before closing it.
Storage Instructions
For extended storage, keep the rechargeable battery at approximately 30–50% charge.
Store the computer at room temperature and recharge the battery approximately once per year to prevent overdischarge.
Customer Replaceable Units
The ThinkPad A275 supports several customer-replaceable components.
Self-Service CRUs
| Component | Type |
| AC Power Adapter and Power Cord | Self-Service |
| Removable Battery | Self-Service |
| Base Cover Assembly | Self-Service |
| Micro-SIM-Card Tray | Self-Service |
Optional-Service CRUs
| Component | Type |
| Internal Storage Drive | Optional-Service |
| Internal Storage Drive Cable | Optional-Service |
| Memory Module | Optional-Service |
| DC-In Cable | Optional-Service |
| Wireless LAN Card | Optional-Service |
| Wireless WAN Card | Optional-Service |
Replacement work must follow the relevant Lenovo instructions and safety precautions.
Preparing for Hardware Replacement
Disabling the Built-In Battery
Before replacing a CRU, disable the built-in battery.
For Windows 10, first disable Fast Startup through Power Options.
Then:
- Restart the computer.
- Press F1 at the startup logo.
- Open Config > Power.
- Select Disable built-in battery.
- Choose Yes.
- Allow the computer to shut down.
- Wait three to five minutes for cooling.
The built-in battery is enabled again when the AC power adapter is reconnected.
Replacing the Removable Battery
- Disable the built-in battery.
- Turn off the laptop and disconnect power and cables.
- Close the display and turn the computer over.
- Release the left battery latch and detach the battery from the left.
- Release the right latch and detach the battery from the right.
- Insert the compatible replacement battery until it clicks into position.
- Confirm that both latches are locked.
- Turn the laptop upright and reconnect power.
Replacing the Memory Module
The ThinkPad A275 supports compatible DDR4 SODIMM memory.
Memory Replacement Instructions
- Disable the built-in battery.
- Shut down the computer and disconnect all cables.
- Remove the removable battery.
- Remove the base cover assembly.
- Release the memory socket latches.
- Remove the installed memory module.
- Align the replacement module with the socket.
- Insert the module at approximately 20 degrees.
- Pivot it downward until the latches engage.
- Reinstall the base cover and removable battery.
- Reconnect power.
Do not touch the memory module’s electrical contacts.
Replacing the Internal Storage Drive
The storage replacement method depends on the installed drive configuration.
Supported Drive Replacement Arrangements
| Drive Arrangement | Replacement Method |
| 2.5-Inch Drive | Remove the drive mounting screw, lift the drive, disconnect its cable, and install the replacement |
| M.2 SSD in Storage Bay | Remove the storage assembly and bracket before replacing the M.2 module |
| M.2 SSD in Wireless WAN Slot | Remove the retaining screw, lift the drive, and install the replacement in the slot |
Replacement Precautions
Before replacing internal storage:
- Back up important data.
- Disable the built-in battery.
- Disconnect external power.
- Remove the removable battery and base cover.
- Handle the drive by its edges.
- Avoid pressure, shocks, and vibration.
- Do not touch electrical contacts.
Internal storage replacement is intended for repair or upgrade, not frequent swapping.
Troubleshooting Guide
Common Problems and Solutions
| Problem | Recommended Action |
| Computer does not turn on | Check AC power, adapter connections, and the electrical outlet |
| Computer stops responding | Use the emergency-reset procedure |
| Battery is not charging | Check battery temperature and charging conditions |
| WiFi does not connect | Confirm wireless is enabled and Airplane Mode is off |
| Ethernet connection fails | Check the cable, driver, and network settings |
| Bluetooth headset has no sound | Select the correct Bluetooth playback device |
| TrackPoint or trackpad does not work | Check pointing-device settings |
| Display remains blank | Check power, brightness, and display output |
| External monitor has no image | Verify display mode, connection, and supported resolution |
| Fingerprint reader fails | Clean the reader and retry with an enrolled finger |
| USB device does not work | Check BIOS USB settings and the installed driver |
| Windows does not start | Use Windows recovery or recovery USB media |
Computer Does Not Respond
- Disconnect the AC adapter.
- Remove the removable battery.
- Insert a straightened paper clip into the emergency-reset hole.
- Reconnect the AC adapter.
- Restart the computer.
If the problem continues, disconnect external devices and repeat the startup attempt.
Contact Lenovo Support if the computer still does not start.
Liquid Spilled on the Keyboard
- Carefully disconnect the AC adapter.
- Turn off the computer immediately.
- Remove the removable battery if the computer cannot be turned off.
- Wait until the computer is completely dry before attempting to use it.
Important: Continuing to operate a liquid-damaged computer can cause additional electrical damage.
Battery Does Not Charge
A battery may not charge when its temperature is too high.
Allow a hot removable battery to cool to room temperature before reinstalling and charging it.
If an over-discharged battery cannot be fully charged within 24 hours, the guide recommends using a replacement battery.
Fingerprint Recognition Problems
Clean the fingerprint reader with a dry, soft, lint-free cloth.
Make sure the finger is clean and dry.
Use another enrolled finger if recognition continues to fail.
USB Device Problems
If a USB device fails:
- Check that the USB port is enabled in ThinkPad Setup.
- Open Device Manager.
- Check the device configuration and driver.
- Run diagnostics if required.
Error Codes and Messages
| Error Code | Meaning | Recommended Action |
| 0177 | Invalid Supervisor Password Data | Contact Lenovo service |
| 0183 | Security Settings CRC Error | Check Security settings in ThinkPad Setup, save, and restart |
| 0187 | EEPROM Access Error | Contact Lenovo service |
| 0188 | Invalid RFID Serialization Information | System board service required |
| 0189 | Invalid RFID Configuration Information | System board service required |
| 0190 | Critical Low Battery | Connect AC power and charge the battery |
| 0191 | Invalid Remote Security Change | Confirm the change and enter ThinkPad Setup |
| 0199 | Supervisor Password Retry Limit Exceeded | Confirm the password and enter ThinkPad Setup |
| 0270 | Real-Time Clock Error | Contact Lenovo service |
| 0271 | Incorrect Date and Time | Set date and time in ThinkPad Setup |
| 1802 | Unsupported Network Card | Remove the unsupported card |
| 1820 | Multiple External Fingerprint Readers | Disconnect all but the configured reader |
| 2100 | Main Hard Disk Detection Error | Have the drive serviced |
| 2101 | M.2 SSD Detection Error | Have the SSD serviced |
| 2110 | Main Hard Disk Read Error | Have the drive serviced |
| 2111 | M.2 SSD Read Error | Have the SSD serviced |
| 2200 | Invalid Machine Type or Serial Number | Contact Lenovo service |
| 2201 | Invalid Machine UUID | Contact Lenovo service |
| Fan Error | Cooling Fan Failure | Shut down immediately and arrange service |
| Thermal Sensing Error | Temperature Sensor Problem | Shut down immediately and arrange service |
UEFI Variable Storage Nearly Full
If the computer displays a warning that non-volatile UEFI variable storage is nearly full, press F1 to open ThinkPad Setup.
The system may ask whether operating-system-created variable data should be cleared.
Selecting Yes removes that data while retaining the global UEFI variables defined by the firmware specification.
Beep Error Codes
Lenovo SmartBeep can identify certain startup beep errors through a compatible smartphone application.
Using Lenovo SmartBeep
- Visit https://support.lenovo.com/smartbeep.
- Install the appropriate diagnostic application.
- Run the application near the laptop.
- Press Fn on the laptop to repeat the beep sequence.
- Review the decoded error information.
Common SmartBeep Codes
| Code | Meaning | Recommended Action |
| 0001 | Platform Reset Error | Reset the computer; authorized service if unresolved |
| 0002 | Internal Bus Error | System board service required |
| 0281 | Embedded Controller Error | System board service required |
| 0282 | Memory Module Error | Reinstall or replace memory; service if unresolved |
| 0283 | PCI Resource Error | Authorized service required |
| 0284 | Trusted Computing Function Error | System board service required |
| 0285 | TPM Initialization Error | System board service required |
| 0286 | Integrated Graphics Error | System board service required |
| 0287 | Discrete Graphics Error | Authorized service required |
| 0288 | Computer Display Error | Authorized service required |
Internal board-level repairs must be performed by authorized service personnel.
Warranty Information
The ThinkPad A275 is covered by the Lenovo Limited Warranty applicable to the purchased computer.
Warranty conditions and service eligibility are provided in the Safety and Warranty Guide.
Warranty Services
Applicable services may include:
- Hardware problem identification
- Qualifying hardware repairs
- Applicable engineering changes
Customer Replaceable Unit service and replacement conditions depend on the warranty applicable to the product.
The Lenovo Limited Warranty is available at:
https://www.lenovo.com/warranty/llw_02
Customer Support Information
Lenovo provides technical support, product documentation, drivers, diagnostics, warranty information, and service resources.
Official Support Resources
| Resource | Website |
| Lenovo Support | https://support.lenovo.com |
| Lenovo PC Support | https://pcsupport.lenovo.com |
| Regional Support Phone Numbers | https://pcsupport.lenovo.com/supportphonelist |
| Lenovo SmartBeep | https://support.lenovo.com/smartbeep |
| Lenovo Accessories | https://www.lenovo.com/accessories |
| Lenovo Recycling | https://www.lenovo.com/recycling |
| Lenovo Accessibility | https://www.lenovo.com/accessibility |
Information Required Before Contacting Support
Prepare the following information:
| Information | Details |
| Product Name | ThinkPad A275 |
| Machine Type and Model | Located on the product label |
| Serial Number | Located on the bottom of the computer |
| Problem Description | Symptoms and when they occur |
| Error Codes | Exact message or code displayed |
| Operating System | Installed Windows version |
| Related Software | Applications running when the problem occurred |
| Troubleshooting Results | Actions already attempted |
Frequently Asked Questions
1. How do I enter BIOS on the Lenovo ThinkPad A275?
Restart the computer and press F1 when the Lenovo logo appears. ThinkPad Setup opens, allowing changes to startup, security, USB, network, and hardware settings.
2. How do I reset a Lenovo ThinkPad A275 that will not respond?
Disconnect the AC adapter and remove the removable battery. Insert a straightened paper clip into the emergency-reset hole on the bottom of the laptop. Reconnect AC power and restart the computer.
3. What type of RAM does the ThinkPad A275 use?
The ThinkPad A275 uses DDR4 SODIMM memory. Memory replacement requires disabling the built-in battery, disconnecting power, removing the removable battery, and opening the base cover.
4. Does the ThinkPad A275 support USB-C charging?
Yes. The USB-C connector supports charging through an appropriate USB-C power adapter. It also supports data transfer and compatible external display connections.
5. How do I replace the ThinkPad A275 removable battery?
Disable the built-in battery through ThinkPad Setup, shut down the computer, disconnect power, and turn it over. Release the battery latches, remove the battery, and install a compatible Lenovo-approved replacement until it clicks into place.
6. How do I create a Windows 10 recovery USB for the ThinkPad A275?
Connect a USB drive with at least 16 GB of storage, search Windows for Create a recovery drive, and follow the instructions. The process erases existing files on the USB drive.
7. Why is the fingerprint reader not recognizing a finger?
A dirty or wet reader, an unclean or injured finger, or using a finger that has not been enrolled may cause recognition failures. Clean the reader with a dry, soft cloth and retry using a registered finger.
8. Where can I download drivers and BIOS updates for the ThinkPad A275?
Visit https://support.lenovo.com and select the appropriate computer model. On supported Windows 10 installations, Lenovo Vantage can also be used to find and install available driver and firmware updates.