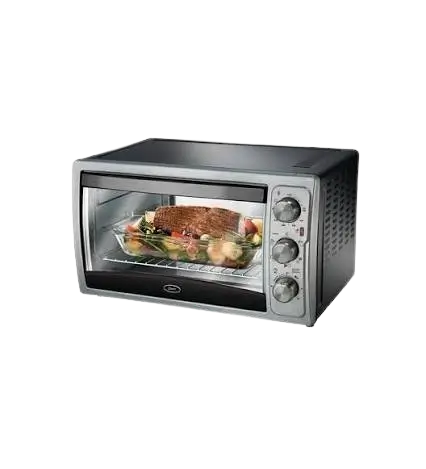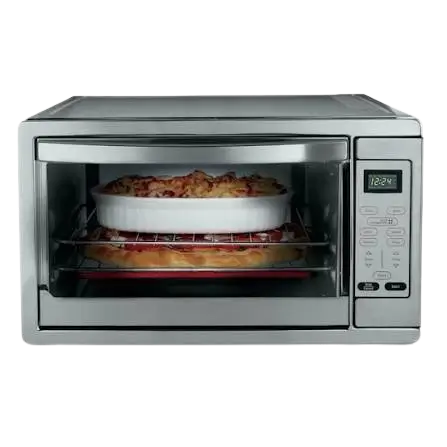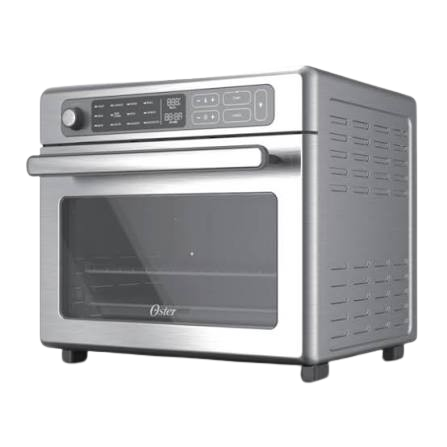
Oster Digital RapidCrisp Air Fryer Oven TSSTTVDAF1
The Oster Digital RapidCrisp Air Fryer Oven is a 120 Volt AC countertop oven with a glass door, a function knob, temperature and timer arrow keys, and Start and Cancel buttons. It air fries, toasts, bakes, convection bakes, broils, keeps food warm, defrosts and dehydrates. It also has Fries, Veggies, Pizza and Wings settings on some control panels. It ships with a baking pan, a wire rack, an air fry basket and a removable crumb tray.
The basket sits on top of the baking pan for air frying, and the oven has three rack positions. The TSSTTVDAF1 control panel shows twelve function labels. The TSSTTVDAF2 panel in the same manual shows nine. The oven is for household countertop use only.
Parts, Controls and Model Differences
Parts and Accessories
| Part | What it does |
|---|---|
| Wire Rack | Used for toasting, baking and broiling. |
| Baking Pan | Accommodates a wide variety of foods. |
| Air Fry Basket | Sits on top of the baking pan for all air frying. |
| Removable Crumb Tray | Pulls out for easy cleaning. |
| Glass Door | Lets you see food cooking. |
| Three Rack Positions | Let you match rack height to food size and the browning you want. |
| Interior Light (if equipped) | Turns on from the light key on the control panel. |
Control Panel
- Function Setting: Turn the knob to select the cooking function.
- Temperature Setting: Use the up and down arrows to adjust the cooking temperature.
- Timer/Toast Shade Setting: Use the up and down arrows to set the cooking time. In Toast mode, the same arrows set the toast shade.
- Interior Light: Press the light key to turn the interior light on.
- Start and Cancel: The panel has both buttons. Most function procedures end with pressing Start.
Functions by Model
| Function label | TSSTTVDAF1 panel | TSSTTVDAF2 panel |
|---|---|---|
| AIR FRY, CONVECT, KEEP WARM | Yes | Yes |
| TOAST, BROIL, DEFROST | Yes | Yes |
| BAKE, DEHYDRATE, FRIES | Yes | Yes |
| PIZZA | Yes | Not shown |
| WINGS | Yes | Not shown |
| VEGGIES | Yes | Not shown |
The manual marks the Pizza, Wings and Veggies instructions “(if equipped).” Use only the functions printed on your own control panel.
Specifications and Operating Limits
| Item | Value in the manual |
|---|---|
| Electrical supply | 120 Volt AC outlet |
| Clearance | 6 inches (152 mm) from the wall and on all sides |
| Preheat time | Allow 5–6 minutes |
| Toast shade range | 1–5 |
| Dehydrate time | Adjustable up to 12 hours |
| Defrost and Dehydrate temperature | Set and cannot be adjusted |
| Defrost timing for meat or fish | 15 to 20 minutes per side |
| Convection effect | Shortens cooking time by about 30% on average |
| Warranty | One year from the date of purchase |
The manual does not list wattage, capacity or product dimensions.
Important Safety Precautions
Read all instructions before using the oven. The manual says to follow basic safety precautions to reduce the risk of fire, electric shock and injury.
Placement and Power
- Use the oven on a dry, stable, level surface. Keep 6 inches (152 mm) clear from the wall and on all sides.
- Do not place it on or near wet surfaces or heat sources such as a hot gas or electric burner, or in a heated oven.
- A fire may occur if the oven is covered, touching or near flammable materials such as curtains, draperies, towels or walls. Do not store any item on top of the appliance while it is operating.
- Do not use it with a programmer, timer, wireless plug adapter or remote-control outlet. Do not connect it to a circuit that the utility regularly switches on and off.
- Do not let the cord hang over the edge of a table or counter or touch hot surfaces. Do not pull, twist or otherwise abuse the cord.
- Do not operate the oven with a damaged cord or plug, or after it malfunctions or is damaged. Do not try to replace or splice a damaged cord. Return the appliance to the manufacturer for examination, repair or adjustment.
- The plug is polarized, with one blade wider than the other. If it does not fit fully, reverse it. If it still does not fit, contact a qualified electrician. Do not modify the plug. Do not use an outlet that feels warm or holds the plug loosely.
- If you use an extension cord, its electrical rating must be at least as great as the appliance’s. It should not drape over the countertop where it can be pulled or tripped over. If the appliance is the grounded type, use a grounding-type 3-wire cord.
- To protect against electric shock, do not place or immerse the cord, plug or appliance in water or other liquid.
Hot Surfaces, Steam and the Glass Door
- Do not touch hot surfaces. Use handles or knobs, and protect your hands with non-slip oven mitts or similar.
- Hot steam is released during air fryer operation. Keep your hands and face at a safe distance from the vent.
- Use extreme caution when moving the appliance or removing a pan that contains hot oil or other hot liquids.
- The door is tempered glass. Inspect it for chips, cracks or other damage. Do not use the oven if the glass door is damaged, because the glass may shatter during use.
- If your oven has a STAY-ON feature, it stays on if the knob is turned counter-clockwise past zero. Use this feature with caution and do not operate the oven unattended for long periods.
What Not to Put in the Oven
- Do not place paper, cardboard, plastic or any material that may catch fire or melt in the oven.
- Do not insert oversize foods or metal utensils. They may create a fire or risk of electric shock.
- Do not cover the crumb tray or any part of the oven with metal foil. This causes overheating.
- Use extreme caution with containers made of materials other than metal or glass.
- Do not store materials other than manufacturer-recommended accessories in the oven when it is not in use.
- Empty the crumb tray after each use.
- Do not clean with metal scouring pads, because pieces can break off and touch electrical parts.
Use Restrictions
- The appliance is not for use by children or by persons with reduced physical, sensory or mental capabilities. Supervise closely when it is used near children.
- Use only manufacturer-recommended accessory attachments.
- Do not use it outdoors or for commercial purposes.
- Unplug it when not in use, before putting on or taking off parts, and before cleaning. Let it cool first. Disconnect by grasping the plug, not the cord.
Notices
- Some counter and table surfaces cannot withstand prolonged heat. Do not set the heated unit on a finished wood table. Place a hot pad or trivet under the oven.
- Slight smoke or odor during first use is normal with many heating appliances. It will not recur after a few uses.
Before First Use
- Remove any stickers from the surface of the oven.
- Open the oven door and remove all printed documents and paper from inside.
- Clean the rack, baking pan and air fry basket with hot water, a small amount of dishwashing liquid and a non-abrasive cleaning pad. Do not immerse the body of the unit in water.
- Dry the unit thoroughly.
- Choose an open area on a flat counter where the plug will reach an outlet.
- Plug the oven into a 120 Volt AC outlet.
During initial start-up you may notice a slight smell or smoke. The first-use note says to turn the temperature to max and let the oven run for approximately 5 minutes.
Warning: When the oven is in use or cooling down, keep 6 inches of clearance between the oven and any other surface, including cords. Make sure the cord is not resting against the back of the oven.
Opening the Oven Door
- Grab the center of the handle underhanded with your fingertips.
- Pull the oven door down carefully.
Caution: This appliance generates heat during use. Do not touch hot surfaces. Always use the handles or knobs.
Rack Positions, Preheating and Removing Food
Rack Positions
The oven has three rack positions. The position depends on food size and desired browning. Let the unit cool before removing the rack. The rack may tilt downward when pulled out, which can make food shift, so proceed with caution.
Preheating the Oven
- Select the desired function.
- Use the temperature arrows to set the temperature.
- Use the timer arrows to set the time, and allow 5–6 minutes for the oven to preheat.
The oven does not need to be preheated for air frying.
Removing Food
Always open the door fully and remove food carefully with an oven mitt.
How the Heating Elements Work
The top and bottom heating elements cycle on and off to maintain the set temperature. You may not see them glowing.
Cooking Functions at a Glance
| Function | Where to place food | What you adjust | Elements that operate |
|---|---|---|---|
| AIR FRY | Air fry basket on baking pan, middle rack position | Temperature and time | Top |
| TOAST | Wire rack, middle rack position | Toast shade 1–5 | Top and bottom |
| BAKE | Wire rack or baking pan, rack position by food | Temperature and time | Top and bottom |
| CONVECT | Wire rack or baking pan, rack position by food | Temperature and time | Top and bottom |
| BROIL | Baking pan, top or middle rack position | Temperature and time | Top |
| KEEP WARM | Wire rack, baking pan or air fry basket | Temperature and time | Top and bottom |
| DEFROST | Wire rack, baking pan or air fry basket | Time only (temperature fixed) | Top and bottom |
| DEHYDRATE | Air fry basket | Time only (temperature fixed), up to 12 hours | Top and bottom |
| FRIES | Air fry basket on baking pan, middle rack | Time and temperature, if necessary | Top |
| VEGGIES (if equipped) | Air fry basket on baking pan, middle rack | Time and temperature, if necessary | Top |
| PIZZA (if equipped) | Wire rack, middle rack position | Time and temperature, if necessary | Top and bottom |
| WINGS (if equipped) | Air fry basket on baking pan, middle rack | Time and temperature, if necessary | Top |
For every function, the manual warns that cooked food, the metal rack, the basket, the pan and the door can be very hot. Handle them with care and do not leave the unit unattended.
Air Fry
- Arrange food on the air fry basket and place the basket on top of the baking pan.
- Insert the baking pan into the middle rack position.
- Set the function to AIR FRY.
- Use the temperature arrows to set the temperature.
- Use the timer arrows to set the time.
- Press Start to begin cooking.
If you like, toss food evenly in oil before placing it in the oven.
Toast
Lighter breads and waffles need a lighter setting. Darker breads, muffins and English muffins need a darker setting.
- Arrange food on the wire rack in the middle rack position.
- Set the function to TOAST. Both the top and bottom heating elements operate once the timer is set.
- Use the timer arrows to choose a toast shade from 1 to 5.
- Press Start to begin cooking.
Bake
- Arrange food on the wire rack or in the baking pan. Choose the rack position by food size and type.
- Set the function to BAKE. Both the top and bottom heating elements operate once the timer is set.
- Use the temperature arrows to set the temperature.
- Use the timer arrows to set the time.
Convection Bake
A built-in fan circulates hot air in the oven chamber to heat food more evenly. On average, convection shortens cooking time by 30%, but this varies by food. Start with a shorter time and add more if needed. Baked goods benefit in particular, because the circulating air keeps the temperature consistent throughout.
- Arrange food on the wire rack or in the baking pan. Choose the rack position by food size and type.
- Set the function to CONVECT. Both the top and bottom heating elements operate once the timer is set.
- Use the temperature arrows to set the temperature.
- Use the timer arrows to set the time.
Adjustable Broil
- Arrange food on the baking pan and place it in the top or middle rack position, depending on food size.
- Close the door to the first notch, leaving a small gap at the top. This ensures adequate airflow during broiling.
- Set the function to BROIL. The top heating elements operate once the timer is set.
- Use the temperature arrows to set the temperature.
- Use the timer arrows to set the time. Turn the food over about halfway through the broiling cycle.
Keep Warm
The Keep Warm function is for warming food and keeping it warm after heating.
- Arrange food on the wire rack, in the baking pan or in the air fry basket.
- Set the function to KEEP WARM.
- Use the temperature arrows to set the temperature.
- Use the timer arrows to set the time.
Defrost
The temperature is set and cannot be adjusted. Always cook food promptly after thawing.
- Arrange food on the wire rack, in the baking pan or in the air fry basket.
- Set the function to DEFROST.
- Use the timer arrows to set the time. Allow 15 to 20 minutes per side for meats or fish.
- Press Start to begin defrosting.
Dehydrate
The temperature is set and cannot be adjusted.
- Arrange food on the air fry basket.
- Set the function to DEHYDRATE.
- Use the timer arrows to set the time. Dehydrate time can be adjusted up to 12 hours.
- Press Start to begin dehydrating.
Fries
- Arrange fries in a single layer on the air fry basket and place the basket on top of the baking pan. Insert the baking pan into the middle rack position.
- Set the function to FRIES.
- Use the timer arrows to adjust the time, if necessary.
- Use the temperature arrows to adjust the temperature, if necessary.
- Press Start to begin cooking.
Veggies (if equipped)
- Arrange vegetables in a single layer on the air fry basket and place the basket on top of the baking pan. Insert the baking pan into the middle rack position.
- Set the function to VEGGIES.
- Use the timer arrows to adjust the time, if necessary.
- Use the temperature arrows to adjust the temperature, if necessary.
- Press Start to begin cooking.
Pizza (if equipped)
- Arrange the pizza on the wire rack in the middle rack position.
- Set the function to PIZZA.
- Use the timer arrows to adjust the time, if necessary.
- Use the temperature arrows to adjust the temperature, if necessary.
- Press Start to begin cooking.
Wings (if equipped)
- Arrange wings in a single layer on the air fry basket and place the basket on top of the baking pan. Insert the baking pan into the middle rack position.
- Set the function to WINGS.
- Use the timer arrows to adjust the time, if necessary.
- Use the temperature arrows to adjust the temperature, if necessary.
- Press Start to begin cooking.
Air Fry Cooking Chart
All entries use the AIR FRY function. Cook times are estimates and may vary with food type and preparation.
| Food | Weight | Temperature (°F) | Time (min) | Oil? |
|---|---|---|---|---|
| Potatoes | ||||
| Hand-Cut Fries | 1 lb | 400 | 20 | Yes |
| Hand-Cut Sweet Potato Fries | 1 lb | 400 | 20 | Yes |
| Frozen Hash Brown | 1.3 lbs | 400 | 15 | No |
| Frozen Fries (Thick Cut) | 1.5 lbs | 450 | 20–25 | No |
| Frozen Fries (Thin Cut) | 1 lb | 450 | 10–15 | No |
| Meat/Poultry/Fish | ||||
| Chicken Wings | 1.7 lbs | 400 | 25 | No |
| Steak | 8 oz | 450 | 5–8 | No |
| Pork Chops | 8 oz | 400 | 20 | No |
| Hamburger | 4 oz | 400 | 10–15 | No |
| Breaded Chicken Breast | 1 lb | 350 | 10 | No |
| Breaded Fish | 1 lb | 400 | 10 | No |
| Bacon | 8 oz | 400 | 8–10 | No |
| Snacks | ||||
| Frozen Chicken Nuggets | 1 lb | 400 | 10–15 | No |
| Frozen Mozzarella Sticks | 1 lb | 400 | 8–10 | No |
| Frozen Onion Rings | 10 oz | 400 | 10 | No |
| Fresh Mixed Vegetables | 1.5 lbs | 400 | 20 | Yes |
Cleaning, Care and Storage
Cleaning
- Unplug the oven and let it cool before cleaning.
- Wipe it with a damp cloth. Do not immerse it in water.
Use only mild, soapy water. Abrasive cleaners, scrubbing brushes and chemical cleaners will damage the unit. Empty the crumb tray frequently to avoid crumb buildup. The air fry basket, wire rack and baking pan are dishwasher safe, on the top rack of the dishwasher only. The oven has no user-serviceable parts. Any servicing beyond the cleaning described here should be done by an authorized service representative.
Storage
Let the oven cool completely before storing it. If you store it for a long period, make sure it is clean and free of food particles. Store it in a dry location such as a table, countertop or cupboard shelf. Other than the recommended cleaning, no further user maintenance should be necessary.
Troubleshooting
| Problem | Potential cause | Solution |
|---|---|---|
| Overcooked or undercooked foods | Incorrect temperature or time setting | Adjust the time and temperature to taste. The countertop oven is smaller than a regular oven, so it heats up faster and generally cooks in shorter periods. |
| Overcooked or undercooked foods | Rack placement | Review the Positioning Rack information. The rack may need to be adjusted for the food type. |
| Burnt smell | First use | Heat the oven to 450°F for approximately 15 minutes to eliminate any manufacturing residue that may remain after shipping. |
| Burnt smell | Food buildup inside the oven, on the heating elements or in the crumb tray | Clean the oven as described in the cleaning section. |
| Oven does not turn on | Unit is unplugged | Plug the oven into a 120-volt AC outlet. |
| Only one heating element is heating up | The function setting determines which heating element operates | Check the instructions for each function to confirm which elements operate. |
| Heating elements do not stay on | Elements cycle on and off to maintain proper heat, and you may not see them glowing | Be certain the function is set as desired. |
| Oven light is not on | The light timer has timed out and shut the light off automatically | Press the light key on the control panel to turn the light back on. The light will shut off automatically again. |
| Oven light is not on | The light bulb has burned out | Contact the service center for replacement parts. |
Warranty and Customer Support
The One Year Limited Warranty covers defects in material and workmanship for one year from the date of purchase. Sunbeam Products, Inc. (or Newell Brands Canada ULC in Canada) will, at its option, repair or replace the product or any defective component. The warranty applies to the original retail purchaser and is not transferable. Keep the original sales receipt, because proof of purchase is required for warranty service.
Do not attempt to repair or adjust any electrical or mechanical function. Doing so voids the warranty. The warranty does not cover normal wear of parts or damage from negligent use or misuse, use on improper voltage or current, use contrary to the operating instructions, or disassembly, repair or alteration by anyone other than Sunbeam or an authorized Sunbeam service center. It also does not cover Acts of God, such as fire, flood, hurricanes and tornadoes.
For warranty service or product questions, call 1.800.334.0759 in the U.S.A. or 1-800-667-8623 in Canada, or visit oster.com or oster.ca. A convenient service center address will be provided. Do not return the product to the manufacturer’s addresses or to the place of purchase.
Frequently Asked Questions
Do I need to preheat the Oster air fryer oven before air frying?
No. The oven does not need to be preheated for air frying, so you can arrange food on the air fry basket, set the function and temperature, and start cooking. For other functions, select the function, set the temperature and time, and allow about 5–6 minutes for the oven to preheat.
Do I need to use oil when air frying?
It depends on the food. Frozen foods and foods that are already high in fat, such as chicken wings or bacon, do not need oil. For crispy, browned results on foods like hand-cut fries or vegetables, evenly coat the food with about one tablespoon of oil. The air fry chart marks hand-cut fries, hand-cut sweet potato fries and fresh mixed vegetables as the foods that use oil.
Should I flip or toss food halfway through cooking?
Large quantities of food benefit from being tossed halfway through the cooking cycle, which helps them cook and brown evenly. For broiling, turn the food over about halfway through the cycle.
What is the difference between the TSSTTVDAF1 and TSSTTVDAF2 control panels?
Both models cover Air Fry, Convect, Keep Warm, Toast, Broil, Defrost, Bake, Dehydrate and Fries. The TSSTTVDAF1 panel also has Pizza, Wings and Veggies, which the TSSTTVDAF2 panel does not show. The manual marks those three functions “if equipped,” so follow the labels printed on your own panel.
Is it normal for the oven to smell or smoke the first time I use it?
Yes. A slight smell or smoke at first start-up is normal with many heating appliances and should not come back after a few uses. The first-use note suggests turning the temperature to max and running the oven for approximately 5 minutes. The troubleshooting section suggests heating the oven to 450°F for approximately 15 minutes to clear manufacturing residue left from shipping. If the smell returns later, check for food buildup inside the oven, on the heating elements or in the crumb tray, and clean them after the oven has cooled.
How should I adjust cooking time for convection bake?
On average, convection shortens cooking time by about 30%, though the exact amount varies by food. Start with a shorter time than a conventional recipe calls for, then add time if the food needs it. Baked goods benefit most, because the circulating air keeps the oven temperature consistent.
How do I set the toast shade?
Put the food on the wire rack in the middle rack position, set the function to TOAST, and use the timer arrows to pick a shade from 1 to 5. Lighter breads and waffles need a lighter setting. Darker breads, muffins and English muffins need a darker setting. Then press Start.
Can I change the temperature when defrosting or dehydrating?
No. The temperature is fixed for both Defrost and Dehydrate, so you adjust only the time. For meats or fish, allow 15 to 20 minutes per side to defrost, and cook the food promptly after thawing. Dehydrate time can be set up to 12 hours.
Why is the oven light off?
Either the light has timed out or the bulb has burned out. The light shuts off automatically after a period, so press the light key on the control panel to turn it back on. If it still does not come on, the bulb may have burned out. In that case, contact the service center for replacement parts.
Why is only one heating element heating up, or why don’t the elements stay on?
Each function uses specific elements. Air Fry, Broil, Fries, Veggies and Wings use the top elements. Toast, Bake, Convect, Keep Warm, Defrost, Dehydrate and Pizza use both top and bottom. The elements also cycle on and off to hold the set temperature, so you may not see them glowing even though the oven is working. Confirm the function is set as you intended.
Can I put the oven parts in the dishwasher?
The air fry basket, wire rack and baking pan are dishwasher safe on the top rack only. Do not put the oven body in the dishwasher or immerse it in water. Unplug it, let it cool and wipe it with a damp cloth and mild soapy water. Avoid abrasive cleaners, scrubbing brushes, chemical cleaners and metal scouring pads. Empty the crumb tray after each use.
Can I use foil, paper or plastic in the oven?
Do not cover the crumb tray or any part of the oven with metal foil, because it causes overheating. Do not put paper, cardboard, plastic or anything else that can catch fire or melt inside the oven. Use extra caution with containers made of materials other than metal or glass. Keep 6 inches (152 mm) of clearance from walls and other surfaces on all sides.