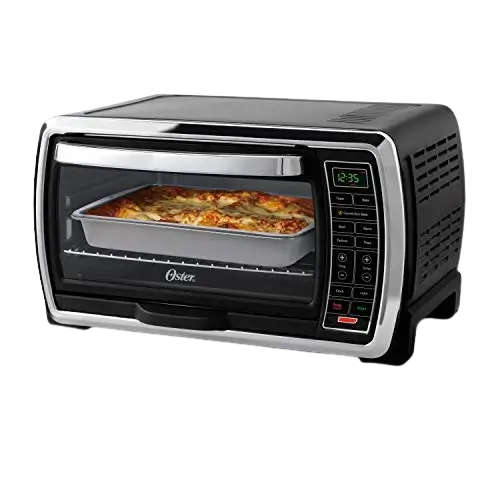
Oster Small Digital Oven TSSTTVDGSM
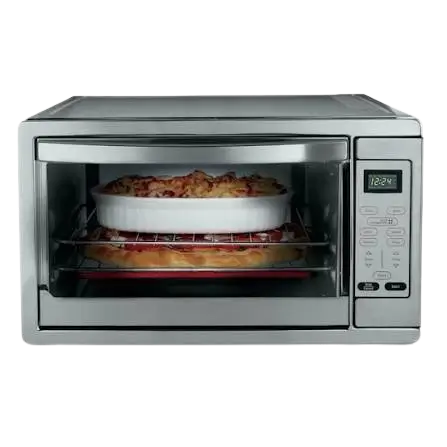
The Oster Small Digital Oven TSSTTVDGSM is a household countertop oven (called a toaster oven in the manufacturer’s setup instructions) with four cooking functions: Toast, Bake, Broil and Pizza. A digital Time Display and a control panel with Timer and Temp arrow buttons let you set toast shade, cooking time and temperature, and a separate Clock button sets the oven clock.
The oven includes a removable wire rack, a broil rack and a baking pan, a removable crumb tray, a tempered glass door for viewing food, easy-clean interior walls and two rack positions. It is intended for household use only.
Parts and Features
The product diagram identifies nine numbered features.
| No. | Part or feature | Purpose |
|---|---|---|
| 1 | Removable Wire Rack | Holds food or the pan; see rack positioning below |
| 2 | Broil Rack | Sits inside the baking pan for broiling |
| 3 | Baking Pan | Used for baking, or with the broil rack for broiling |
| 4 | Time Display | Shows the clock, time and settings |
| 5 | Removable Crumb Tray | Collects crumbs and fallen food particles; pulls out for easy cleaning |
| 6 | Control Panel | Function, arrow, clock, Stop/Cancel and Start buttons |
| 7 | Tempered Glass Door | Lets you view food from the front |
| 8 | Easy Clean Interior Walls | Allow fast clean-up |
| 9 | Two Rack Positions | Let you adjust for food size and browning |
Control Panel Buttons
| Button | Function |
|---|---|
| Toast | Toasts bread, bagels and similar foods |
| Bake | Selects baking |
| Broil | Selects broiling |
| Pizza | Selects pizza baking |
| Timer arrows | Adjust time or toast shade |
| Temp arrows | Adjust temperature or toast shade |
| Timer/Temp | Switches between time and temperature after Bake, Broil or Pizza has been selected |
| Clock | Sets the oven clock |
| Stop/Cancel | Stops heating or cancels the selected function |
| Start | Starts the baking or cooking process |
Before You Use the Oven for the First Time
- Remove any stickers from the surface of the oven.
- Open the oven door and remove all printed documents and paper from inside.
- Clean the rack and pan with hot water, a small amount of dishwashing liquid and a nonabrasive sponge or cleaning pad. Do not immerse the cord, plug or body of the unit in water.
- Dry the unit thoroughly before using it.
- Choose a location in an open area on a flat counter where the plug will reach an outlet.
- Plug the oven into an electrical outlet.
Setting the Clock
- Press the Clock button once. The clock flashes.
- Use the arrow buttons to set the hour, then press Clock again.
- Use the arrow buttons to set the minutes.
- Press Clock once more to set the time.
Cooking Functions
For every function, place the oven rack in the position you want before the oven starts heating.
Toast
- Arrange the food on the wire rack.
- Press Toast, then use either set of arrows (Timer/Temp) to select the toast shade.
- Press Start.
- When toasting is finished, open the door fully and remove the food carefully.
Different breads need different settings. Lighter breads and waffles need a lighter setting; darker breads, muffins and English muffins need a darker setting.
Bake
- Arrange the food on the wire rack or in the baking pan.
- Press Bake once, then use the temperature arrows to select the temperature.
- Press Timer/Temp, then use the timer arrows to select the time.
- Press Start.
- When baking is finished, open the door fully and remove the food carefully.
Both heating elements cycle on and off to maintain the selected temperature.
Broil
- Place the broil rack inside the baking pan.
- Arrange the food on the broil rack.
- Place the pan on top of the wire rack inside the oven.
- Close the door to the first notch, leaving a 3-inch open gap at the top. This provides adequate airflow during broiling.
- Press Broil once, then use the temperature arrows to select the temperature.
- Press Timer/Temp, then use the timer arrows to select the time.
- Press Start.
Only the top heating element cycles on and off to maintain the selected temperature.
WARNING: DO NOT LEAVE THE OVEN UNATTENDED.
Pizza
- Arrange the pizza on the wire rack.
- Press Pizza once, then use the temperature arrows to select the temperature.
- Press Timer/Temp, then use the timer arrows to select the time.
- Press Start.
Rack and Pan Positioning
Positioning the Rack
The oven has two rack positions, so you can accommodate a wide variety of foods. The best position depends on the size of the food and the browning you want. For the best toast and pizza results, use the upper rack position. Allow the unit to cool before removing the rack.
Please note: the rack may tilt downward when pulled out, which can make food shift. Proceed with caution.
Positioning the Pan
Place the baking pan on top of the wire rack as shown in the manual’s figures. One arrangement is shown for baking and a different one for grilling or broiling.
Safety Precautions
Read all instructions, product labels and warnings before using the oven, and save the instructions. Key precautions include:
- Do not touch hot surfaces. Use oven mitts when handling hot materials, and let metal parts cool before cleaning. Allow the unit to cool thoroughly before putting in or taking off parts. Use the oven handles when moving the unit.
- Unplug the oven when it is not in use and before cleaning. Make sure the oven is turned off before unplugging.
- Do not immerse the appliance in water or any other liquid.
- Close supervision is necessary when the appliance is used near children. This appliance is not for use by children.
- Do not operate the appliance with a frayed or damaged cord or plug, after it malfunctions, or after it is dropped or damaged. Return it to the nearest authorized service facility for examination, repair or adjustment.
- Do not use attachments that the manufacturer does not recommend; they may cause fire, electric shock or personal injury.
- Do not use the appliance outdoors, for commercial purposes, or for anything other than its intended use. This unit is for household use only.
- Do not let the cord dangle over the edge of a tabletop or countertop or touch hot surfaces.
- Do not place the appliance near a hot gas or electric burner or in a heated oven.
- Use extreme caution with containers made of any material other than metal or glass.
- A fire may occur if the oven is covered or touches flammable materials such as curtains, draperies or walls while operating. Do not store items on top of the appliance while it is operating.
- Pull the unit out a minimum of 6 inches from walls on all sides, and remove cords from other products from behind the oven.
- Do not store materials in the oven other than the manufacturer’s recommended accessories, and do not place flammable materials such as paper, cardboard or plastic inside it.
- Do not cover the oven rack or trays with metal foil. This will cause overheating of the appliance.
- Do not insert oversized foods or metal utensils; they may create a fire or risk of electrical shock.
- Do not clean with metal scouring pads. Pieces can break off and touch electrical parts, creating a risk of electrical shock.
- Use extreme caution when removing the tray or disposing of hot grease.
- To turn the appliance off, return all controls to the OFF position. To disconnect, turn all controls to OFF, then remove the plug from the wall outlet.
Power Cord and Plug
A short power-supply cord is provided to reduce the risk of becoming entangled in or tripping over a longer cord. If you use an extension cord, its electrical rating must be at least as great as the rating of the appliance, and it must be arranged so it does not drape over the countertop or tabletop where it can be pulled on by children or tripped over.
For products purchased in the United States and Canada only: the appliance has a polarized plug (one blade is wider than the other). It fits a polarized outlet only one way. If the plug does not fit fully, reverse it. If it still does not fit, contact a qualified electrician. Do not attempt to defeat this safety feature.
Cleaning and Storage
Cleaning
Unplug the oven and let it cool before cleaning. Wipe it with a damp cloth, using only mild, soapy water, and do not immerse it in water. Abrasive cleaners, scrubbing brushes and chemical cleaners will damage the coating on the unit. Empty the crumb tray frequently to avoid crumb buildup. The oven racks are dishwasher safe (top of the dishwasher only). Other than this recommended cleaning, no further user maintenance should be necessary.
Storage
Let the appliance cool completely before storing it. If you will store it for a long period, make sure the oven is clean and free of food particles. Store it in a dry location, such as on a table, countertop or cupboard shelf.
Troubleshooting
| Problem | Potential cause | Solution |
|---|---|---|
| Overcooked or undercooked foods | Incorrect temperature or time setting | Adjust the time and temperature to the desired taste. The oven is smaller than a regular oven, so it heats up faster and generally cooks in shorter periods of time. |
| Overcooked or undercooked foods | Rack placement | See the rack positioning section; the rack may need adjusting for the food type. |
| Burnt smell | Food buildup inside the oven, on the heating elements or in the crumb tray | See the cleaning section. |
| Oven does not turn on | Unit is unplugged | Plug the oven into an appropriate electrical outlet, then set the timer/temperature to the desired setting. |
| Oven does not turn on | Start was not pressed | Press Start. |
| Only one heating element is heating up | The selected function determines which heating element operates | When toasting, make sure the oven is not set to broil. |
| Heating elements do not stay on | Heating elements cycle on and off to maintain proper heat | Be certain the function is as desired. |
| Cannot change function button | The current function needs to be canceled | Press Stop/Cancel. |
Warranty and Support
The product carries a 1 Year Limited Warranty. The warranty provider, Sunbeam Products, Inc. doing business as Jarden Consumer Solutions (or, in Canada, Sunbeam Corporation (Canada) Limited doing business as Jarden Consumer Solutions), warrants the product against defects in material and workmanship for one year from the date of purchase and will, at its option, repair or replace a defective product or component.
The warranty is valid for the original retail purchaser only, is not transferable, and requires proof of purchase, so keep the original sales receipt. Do not attempt to repair or adjust any electrical or mechanical function; doing so voids the warranty. Normal wear, misuse, use on improper voltage or current, use contrary to the operating instructions, and disassembly or repair by anyone other than an authorized service center are not covered.
For warranty service or questions, call 1.800.334.0759 in the U.S.A. or 1.800.667.8623 in Canada, and a convenient service center address will be provided. Do not return the product to the warranty addresses or to the place of purchase. Product information is also available at www.oster.com.
Frequently Asked Questions
How do I set the clock on the Oster Small Digital Oven TSSTTVDGSM?
Press the Clock button once, and the display starts flashing. Use the arrow buttons to set the hour and press Clock again, then use the arrow buttons to set the minutes. Press Clock one more time to lock in the time.
What should I do before using the oven for the first time?
Start by removing any stickers from the outside and taking out all printed documents and paper inside the oven. Wash the rack and pan with hot water, a little dishwashing liquid and a nonabrasive sponge or pad, and dry the unit thoroughly. Never immerse the cord, plug or body of the oven in water. Then place the oven in an open area on a flat counter within reach of an outlet and plug it in.
How do I toast bread, bagels or waffles?
Set the rack where you want it, arrange the food on the wire rack, press Toast, and choose a shade with either set of arrows. Then press Start. Lighter breads and waffles need a lighter shade, while darker breads, muffins and English muffins need a darker one. For the best toast results, use the upper rack position, and when toasting finishes, open the door fully and remove the food carefully.
How do I bake in this oven?
Put the food on the wire rack or in the baking pan, press Bake once, and use the temperature arrows to choose the temperature. Press Timer/Temp, use the timer arrows to choose the time, and press Start. Both heating elements cycle on and off to hold the temperature. When baking ends, open the door fully and remove the food carefully.
How do I broil, and why does the door need to stay slightly open?
Place the broil rack inside the baking pan, arrange the food on it, and set the pan on top of the wire rack inside the oven. Close the door only to the first notch so a 3-inch gap remains at the top, which provides adequate airflow during broiling. Press Broil once, set the temperature with the temperature arrows, press Timer/Temp, set the time with the timer arrows, and press Start. Do not leave the oven unattended while broiling.
How do I use the Pizza function?
Place the pizza on the wire rack, press Pizza once, and set the temperature with the temperature arrows. Press Timer/Temp, set the time with the timer arrows, and press Start. The upper rack position is recommended for the best pizza results.
Which rack position should I use, and why did my food shift when I pulled out the rack?
The oven has two rack positions, and the right one depends on the size of the food and how much browning you want. Use the upper position for the best toast and pizza results. The rack can tilt downward when it is pulled out, which can make food slide, so pull it out with caution and let the oven cool before removing the rack.
Can I cover the rack or tray with aluminum foil?
No. Covering the oven rack or trays with metal foil causes the appliance to overheat. Never place paper, cardboard, plastic or other materials that could catch fire or melt inside the oven, and do not insert oversized foods or metal utensils. If you use containers made of anything other than metal or glass, use extreme caution.
How much space does the oven need around it?
Pull the oven out a minimum of 6 inches from walls on all sides while it is in use, and remove cords from other products from behind it. Do not cover the oven or let it touch flammable materials such as curtains, draperies or walls while it operates, and do not store anything on top of it during operation.
Why won’t my oven turn on?
First confirm that the oven is plugged into an appropriate outlet and that you have set the timer and temperature to the setting you want. Then make sure you pressed Start, because the oven does not begin heating until you do. If the cord or plug is frayed or damaged, or the oven has malfunctioned or been dropped, do not operate it; return it to the nearest authorized service facility.
Why is only one heating element heating, or why do the elements keep turning off?
The function you select determines which heating element operates, and Broil uses only the top element. If you are toasting, make sure the oven is not set to broil. During Bake, Broil and the other heating functions, the elements also cycle on and off to maintain the correct heat, so it is normal for them not to stay on constantly. If a function is not what you wanted, press Stop/Cancel to cancel it and select the function again.
How do I clean the oven, and can the racks go in the dishwasher?
Unplug the oven and let it cool, then wipe it with a damp cloth and mild, soapy water. Do not immerse it in water, and avoid abrasive cleaners, scrubbing brushes, chemical cleaners and metal scouring pads, which can damage the coating or break off and touch electrical parts. Empty the crumb tray frequently. The racks are dishwasher safe on the top rack of the dishwasher only. A burnt smell can come from food buildup inside the oven, on the heating elements or in the crumb tray, so cleaning is the recommended fix.