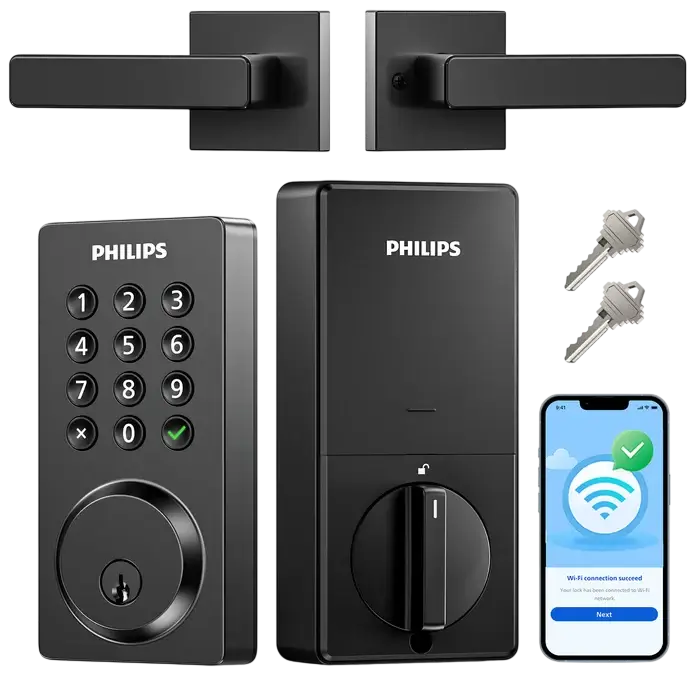
Philips Home Access Smart Deadbolt 4200 Series
The Philips Home Access Smart Deadbolt 4200 series is a battery-powered deadbolt that you can lock and unlock with a keypad PIN code, a registered fingerprint, a mechanical key, or the Philips Home Access app. Inside the door, a thumb turn works the bolt by hand, and the app or a voice assistant can operate it too. The lock stores up to 100 User PIN Codes and 20 fingerprints, keeps a record of lock activity, supports shared and temporary access, and offers Auto-Lock, Silent Mode and Away Mode. It connects to Wi-Fi on the 2.4GHz band only and runs on 8 AA alkaline batteries that you buy separately.
Door Requirements and Key Specifications
Check these measurements before you start. The lock fits doors that meet all of the following values.
| Item | Requirement |
| Door thickness | 1-3/8″ to 2″ (35mm to 50mm) |
| Hole in the door face (bore) | 1-1/2″ or 2-1/8″ (38mm or 54mm) |
| Hole in the door edge | 1″ (25mm) |
| Backset | 2-3/8″ or 2-3/4″ (60mm or 70mm) |
| Door frame hole depth | At least 1″ (25mm) deep |
| Batteries | 8 AA alkaline (not included) |
| Wi-Fi | 2.4GHz only |
| Recommended router distance | Within 65ft (20m) |
| Master PIN Code and User PIN Code length | 4 to 10 digits |
| User PIN Codes stored | 100 |
| Fingerprints stored | 20 |
| Tool required | #2 Phillips screwdriver |
Parts and Controls
What Is in the Box
The package contains the Exterior Assembly, Latch Bolt, Mounting Plate, Interior Assembly, Battery Cover, Interior Assembly Screws (5, including 2 spares), Mounting Plate Screws (2), Strike Plate, Strike Plate Screws (2), Latch Bolt Screws (2), 2 Mechanical Keys, a Drilling Template, the User Manual and a Quick Start Guide. The 8 AA alkaline batteries are not included.
Exterior Assembly
- Keypad
- Cancel Key
- Confirm Key with backlit indicator
- Fingerprint Sensor
- Keyhole Cover
- Keyhole
Interior Assembly
- Battery Cover
- Reset Button
- Thumb Turn
Safety Instructions and Cautions
Read all instructions before you use the lock. Damage caused by not following them is not covered by the warranty.
- Use only components the manufacturer provided and suggested accessories.
- Use only AA alkaline batteries.
- Do not force the product apart to trigger an alarm or damage it.
- Do not scrape the fingerprint sensor with sharp objects, because that can cause permanent damage.
- Do not remove the batteries during lock setup and operation.
- Change the default Master PIN Code immediately in the Philips Home Access app after installation.
- Keep batteries away from fire sources.
- Do not connect the 2 poles of a battery to metal, which can cause a short circuit and a potential explosion.
- Have any replacement component handled by Philips, a Philips-authorized service center or a professional technician.
- Do not use parts or accessories made by others, except batteries.
- Do not expose the lock to places with water leaks or splashing.
- Return locks to an authorized Philips service center. Follow local regulations and do not put used products or batteries in normal household waste.
Installing the Lock
Prepare the Door
- Measure the hole in the door. It must be 1-1/2″ or 2-1/8″ (38mm or 54mm). Measure the hole in the door edge, which must be 1″ (25mm).
- Measure the backset. It must be 2-3/8″ or 2-3/4″ (60mm or 70mm).
- Confirm the door is 1-3/8″ to 2″ (35mm to 50mm) thick.
- Make sure the hole in the door frame is drilled at least 1″ (25mm) deep so the deadbolt can extend into the frame when the door is locked.
Make sure the door frame is aligned with the door and nothing blocks the frame hole.
Set the Backset and Install the Latch Bolt
- Hold the Latch Bolt in front of the door hole with its face flush against the door edge. If the slotted hole is centered in the door hole, no adjustment is needed.
- If it is not centered, rotate and pull the Latch Bolt as illustrated to extend it to the 2-3/8″ (60mm) or 2-3/4″ (70mm) backset.
- For a 1-1/2″ (38mm) bore hole, use a 1″ (25mm) drill bit to extend the latch hole at least 13/64″ (5mm) deep. A 2-1/8″ (54mm) bore hole needs no extension. After extending the hole, insert the Latch Bolt again to check the fit.
- Install the Latch Bolt with the Latch Bolt Screws, following the illustration.
- Rotate the Latch Bolt with a screwdriver to confirm it turns smoothly. If it cannot rotate because the door hole is too small, remove it and chisel a small channel at the top of the hole to give the cam room to rotate.
- Install the Strike Plate on the door frame with the Strike Plate Screws. The hole in the frame must be at least 1″ (25mm) deep.
Install the Exterior Assembly
Before installing the Exterior and Interior Assemblies, make sure the Latch Bolt is fully retracted (the unlocked position). Do not insert the key while installing.
- Check the hole diameter. For a 1-1/2″ (38mm) hole, remove the spacer. For a 2-1/8″ (54mm) hole, go straight to the next step.
- With the Latch Bolt fully retracted, route the cable beneath the Latch Bolt and insert the tailpiece through the slot in the Latch Bolt.
- Secure the Mounting Plate with the Mounting Plate Screws, routing the cable through the hole in the mounting plate. Do not overtighten the screws.
Install the Interior Assembly
Do not load batteries before you finish installing the lock.
- Push the Battery Cover up in the direction shown in the illustration.
- Push the cable connector from the Exterior Assembly firmly into the socket on the Interior Assembly until it is completely attached.
- Keep the Thumb Turn vertical and the tailpiece horizontal, then place the Interior Assembly on the Mounting Plate.
- Secure it with the 3 Interior Assembly Screws. Do not use other screws.
- Install the 8 AA alkaline batteries following the direction guide inside the battery holder. Make sure the cable is not pinched, or the lock will not work properly.
- Keep the door open and unlocked. Press and hold the Reset Button for 5 seconds, and keep holding until you hear a long beep and the latch bolt extends automatically.
Remove the Batteries
- Remove the 4 outer batteries from right to left.
- Pull the ribbon to lift out the 4 inner batteries, again from right to left.
Setting Up the Philips Home Access App
- Scan the QR code in the manual’s setup section to download the Philips Home Access app.
- Register and log in to create your user account.
- Bring your phone close to the lock and turn on the Location and Bluetooth permissions.
- Scan the QR code on the back of the battery cover to add the device.
If the lock is not found, confirm that the app has Location and Bluetooth permissions.
If the Wi-Fi Connection Fails
- Check that your Wi-Fi connection is stable.
- Use a 2.4GHz network only. On a dual-band router, turn off the 5GHz band.
- Keep the router and lock within 65ft (20m), and avoid walls and interference sources such as microwaves.
- Too many devices on the Wi-Fi network can affect the lock’s connection.
- Make sure the lock firmware and app are up to date, and upgrade promptly if an update is available.
Features and Default Settings
Feature settings can be adjusted in the Philips Home Access app.
Feature Definitions
- Master PIN Code: Required for programming and for adjusting settings. It can also unlock the deadbolt in Away Mode and Privacy Mode. Keep it confidential.
- 4 Ways to Unlock: Fingerprint, PIN code, key, or a touch in the app. Add fingerprints and PIN codes through the app settings, but enroll fingerprints on the lock itself.
- Simple Sharing: Share access with family or friends through the app. Access can only be shared and accepted through the app.
- Lock Activities Record: A detailed record of lock interactions, such as lock and unlock events and user access.
- Multi-mode PIN codes: Create PIN codes remotely in the app for needs such as inviting guests or ordering a service technician.
- One-Touch Locking: Press and hold any key on the keypad for 2 seconds, press the Confirm key once without entering a code, or use a fingerprint when the lock is unlocked.
- Auto-Lock: The lock locks itself after it has been unlocked. Disabled by default. The app can set it between 10 and 180 seconds.
- Silent Mode: Mutes keypad sounds. You will still hear low battery warnings and system alerts. Enable it in the app.
- Away Mode: Intended for vacations or long trips. It restricts all User PIN Codes and fingerprints until the Master PIN Code is entered on the keypad. If the lock is unlocked with the Thumb Turn, it sounds an alarm for 1 minute and sends a notification through the app. Enable it in the app. Entering the Master PIN Code on the keypad, or setting it in the app, disables the alarm and Away Mode.
Default Settings
| Function | Default Setting |
| Master PIN Code | 12345678 |
| Auto-Lock | Disabled |
| Silent Mode | Disabled |
| Shut Down Time | 3 minutes |
| Away Mode | Disabled |
Programming the Lock from the Keypad
The default Master PIN Code is 12345678. Change it before programming anything else. The indicator light flashes red when a code you entered is not saved successfully. If no key is pressed for more than 10 seconds, the lock exits programming mode. The manufacturer recommends managing settings through the app.
In the sequences below, the Cancel key is the ✖ key and the Confirm key is the ✓ key. After each ✓ press, a green light confirms the step.
| Task | Keypad sequence |
| Change the default Master PIN Code | Press ✖ 2 times, enter the Master PIN Code (default 12345678), press ✓, enter the new Master PIN Code, press ✓, re-enter it, press ✓ |
| Change the Master PIN Code | Press ✖ 2 times, enter the Master PIN Code, press ✓, press 1, enter the new Master PIN Code, press ✓, re-enter it, press ✓ |
| Add a User PIN Code | Press ✖ 2 times, enter the Master PIN Code, press ✓, press 2, enter the new User PIN Code, press ✓, re-enter it, press ✓ |
| Delete a User PIN Code | Press ✖ 2 times, enter the Master PIN Code, press ✓, press 3, enter the User PIN Code to delete, press ✓ |
| Add a User Fingerprint | Press ✖ 2 times, enter the Master PIN Code, press ✓, press 4, scan the finger 8 times (each successful scan is confirmed by a green light) |
| Delete a User Fingerprint | Press ✖ 2 times, enter the Master PIN Code, press ✓, press 5, scan the fingerprint to delete 1 time |
| Timed Auto-Lock | Press ✖ 2 times, enter the Master PIN Code, press ✓, press 7, then press 1 (Auto-Lock off), 2 (30s), 3 (60s), 4 (120s) or 5 (180s), then press ✓ |
| Away Mode | Press ✖ 2 times, enter the Master PIN Code, press ✓, press 8, then press ✓ |
To improve fingerprint recognition, register the finger from different angles during the 8 scans.
Locking and Unlocking the Door
Unlocking from Outside
- Enter a PIN code.
- Use a registered fingerprint.
- Use a mechanical key.
- Use the Philips Home Access app.
Unlocking from Inside
- Rotate the Thumb Turn to the unlocked position.
- Use the Philips Home Access app.
- Use a voice assistant.
Locking from Outside
- Press and hold any keypad button for at least 2 seconds to lock in Manual Mode, or press the Confirm key once without entering a code.
- In Auto-Lock mode, the lock locks automatically.
- Use the app.
- Use a mechanical key.
- Use a fingerprint.
Locking from Inside
- Rotate the Thumb Turn to the locked position to lock in Manual Mode.
- In Auto-Lock mode, the lock locks automatically.
- Use the app.
- Use a voice assistant.
Factory Reset
A factory reset erases all user and network settings, unpairs the lock from users’ accounts and removes all paired accessories. It also activates the lock-handing process again.
- Keep the door open and unlocked.
- Press and hold the Reset Button for 5 seconds.
- Keep holding until you hear a long beep and the latch bolt extends automatically.
Troubleshooting
| Issue | What to do |
| The Latch Bolt does not operate correctly after installation | Check that the backset is set to the proper length. Confirm the Latch Bolt was retracted before installation. Restore factory defaults and enter the default Master PIN Code to set up the lock. |
| After installation the Latch Bolt makes sounds but does not work | Reinstall and reset the lock. Before installing, fully retract the Latch Bolt (unlocked position) and do not insert the key. Check the Exterior Assembly cable connector is seated in the Interior Assembly socket. Keep both assemblies and the Latch Bolt aligned and parallel to the door edge. Hold the Reset Button at least 5 seconds until you hear a beep. Use 8 new AA dry batteries, not rechargeable ones and not new mixed with old. |
| Door handing is not activated after the batteries are installed | Press the Reset Button for at least 5 seconds until you hear the tone prompting you to restore the default settings. |
| The lock turns in the wrong direction | Hold the Reset Button at least 5 seconds until you hear a beep to activate the lock-handing process. If that fails, the lock is probably installed incorrectly: reinstall it and reset again. |
| Cannot pull the key out of the keyhole | Disassemble the lock, rotate to pull out the key, and reinstall the lock. Do not insert the key during installation. |
| The lock rotates only if the key is inserted | Make sure the Latch Bolt is installed correctly. |
| The lock does not lock or unlock smoothly with the Thumb Turn | Confirm the Mounting Screws are properly installed. |
| The lock only locks but does not unlock, or the Latch Bolt goes in and out uncontrollably | If the door locks and unlocks smoothly while open, the door frame is the problem: make sure the frame hole is at least 1″ (25mm) deep. If the problem continues with the door open, hold the Reset Button at least 5 seconds until you hear a beep. If resetting fails, reinstall the lock and reset again. If nothing helps, contact support. |
| Failed to lock | Keep the Exterior and Interior Assemblies aligned and parallel to the door edge, and keep the Latch Bolt parallel to the door edge. |
| The Master PIN Code cannot be changed | Change it in the app, or restore factory settings and reprogram all user PIN codes. |
| Failed to scan the QR code on the device | Scan in a well-lit place or use your phone’s flashlight. Keep enough distance between the phone and QR code, with the code centered on the screen. Direct light or sunlight can cause reflections that interfere with scanning. |
| Failed to add the device via Bluetooth | Make sure the lock has enough power and your phone is close. Turn Bluetooth on. On Android, enable Location Service. |
| Failed to set up the lock | Make sure it is installed correctly. Insert fresh batteries and make sure the cable is not pinched. After installation, reset the lock to factory settings to complete setup. |
| Forgot the Master PIN Code | Change it in the app, or perform a factory reset, which deletes all PIN codes and returns the Master PIN Code to 12345678. |
| Cannot add fingerprints, or a fingerprint does not work | Change the default Master PIN Code before adding fingerprints. Keep the finger and sensor dry and clean. Add several fingerprints of the same finger, or try other fingers. Register from different angles and press harder during the 8 scans. |
| Low battery alerts | Remove the batteries and insert 8 new AA alkaline batteries. |
| The keypad is not responding | Check the batteries are inserted correctly. If the battery indicator flashes continuously, replace them with 8 new AA alkaline batteries. Check the cable is connected and was not damaged during installation. |
| Auto-Lock is not working | If the battery indicator flashes continuously, replace the batteries. Make sure Auto-Lock is enabled in the app. |
| The app shows the door open when it is closed | Re-calibrate the lock with the door position sensor in the app. If that does not help, check whether another magnet has been brought near the lock and remove it. |
Warranty and Support
The lock carries a 2-year limited warranty covering defects in materials and workmanship under normal use and conditions, as determined by Conex or its authorized dealer. For details, visit http://www.usa.philips.com or contact the reseller you bought it from. For help in the U.S.A. and Canada, call +1 (833) 599-9111. Product support is also listed at www.philips.com/support, and you can register the product at www.philips.com/myphilips.
Frequently Asked Questions
What is the default Master PIN Code on the Philips 4200 series smart deadbolt?
The default Master PIN Code is 12345678. Change it as soon as installation is finished, preferably in the Philips Home Access app, and do it before you add any other PIN codes or fingerprints. Anyone who knows the default code could program the lock, so keep the new Master PIN Code confidential. It can be 4 to 10 digits long.
How many PIN codes and fingerprints can this lock store?
The lock holds up to 100 User PIN Codes and 20 fingerprints, in addition to the Master PIN Code. User and Master PIN Codes are each 4 to 10 digits. Keep in mind that fingerprints must be enrolled on the lock itself, even though you can manage PIN codes and other settings from the app.
How do I lock the door from outside without the app?
You have several choices. Press and hold any key on the keypad for at least 2 seconds, or press the Confirm key once without entering a code. You can also use a registered fingerprint while the lock is unlocked, or use a mechanical key. If Auto-Lock is turned on, the door locks itself after it has been unlocked.
How do I turn on Auto-Lock and how long can the delay be?
Auto-Lock is off by default. In the Philips Home Access app you can set a delay between 10 and 180 seconds. From the keypad, press ✖ twice, enter the Master PIN Code, press ✓, then press 7. Choose 1 for off, 2 for 30 seconds, 3 for 60 seconds, 4 for 120 seconds or 5 for 180 seconds, and press ✓ to confirm. If Auto-Lock stops working, a continuously flashing battery indicator means the batteries are low and need replacing with 8 new AA alkaline batteries.
What does Away Mode do?
Away Mode is meant for vacations and long trips. While it is on, every User PIN Code and fingerprint is blocked until the Master PIN Code is entered on the keypad. If someone unlocks the door with the Thumb Turn, the lock sounds an alarm for 1 minute and sends a notification to the app. You turn Away Mode on in the app, and you can switch off the alarm and the mode by entering the Master PIN Code on the keypad or by changing the setting in the app.
How do I add a fingerprint, and what if it will not register?
Press ✖ twice, enter the Master PIN Code, press ✓, press 4, then scan your finger 8 times. A green light confirms each successful scan. Lift and reposition the finger between scans so the lock sees different angles, and press a little harder if recognition is poor. Keep both the finger and the sensor dry and clean, and consider enrolling the same finger more than once. Also make sure you have already replaced the default Master PIN Code, since fingerprint enrollment is expected to follow that change.
Which batteries does the lock use, and how do I know they are low?
It takes 8 AA alkaline batteries, which are not included. Do not use rechargeable batteries, and do not mix new and old batteries. A battery indicator that flashes continuously means the batteries are low, and the lock also gives low battery alerts even in Silent Mode. Replace all 8 with new AA alkaline batteries. Remove the 4 outer batteries first, then pull the ribbon to lift out the 4 inner ones, and do not take the batteries out during setup or normal operation.
How do I factory reset the lock?
Keep the door open and unlocked, then press and hold the Reset Button inside the lock for 5 seconds. Keep holding until you hear a long beep and the latch bolt extends by itself. The reset erases all user and network settings, unpairs the lock from user accounts, removes paired accessories and restarts the lock-handing process, so you will need to set the lock up again.
What can I do if I forgot the Master PIN Code?
If you can still reach the Philips Home Access app, change the Master PIN Code there. If not, a factory reset is the other option. It deletes all PIN codes and puts the Master PIN Code back to 12345678, so choose a new one right away and reprogram your User PIN Codes afterward.
Why will my lock not connect to Wi-Fi?
The lock supports 2.4GHz networks only, so on a dual-band router turn off the 5GHz band. Keep the router within 65ft (20m) of the lock, away from walls and interference sources like microwaves, and make sure the connection is stable. A crowded network can also cause trouble, and an out-of-date lock firmware or app should be updated.
What should I do if the app cannot find the lock or I cannot scan the QR code?
Turn on Bluetooth and Location permissions for the app, and on Android make sure Location Service is enabled. Keep your phone close to the lock and make sure the lock has enough battery power. For the QR code on the back of the battery cover, scan in good light, use your phone’s flashlight if needed, center the code on the screen and leave some distance. Direct sunlight or lighting can cause reflections that prevent scanning.
Why does my lock turn the wrong way or make noise without moving the bolt?
Both usually point to the installation or the lock-handing setting. Hold the Reset Button for at least 5 seconds until you hear a beep to activate lock handing. If that does not fix it, reinstall the lock. Before reassembling, fully retract the Latch Bolt, do not insert the key, make sure the cable connector is firmly seated and not pinched, and keep both assemblies and the Latch Bolt parallel to the door edge. Then reset the lock again with 8 new AA batteries.