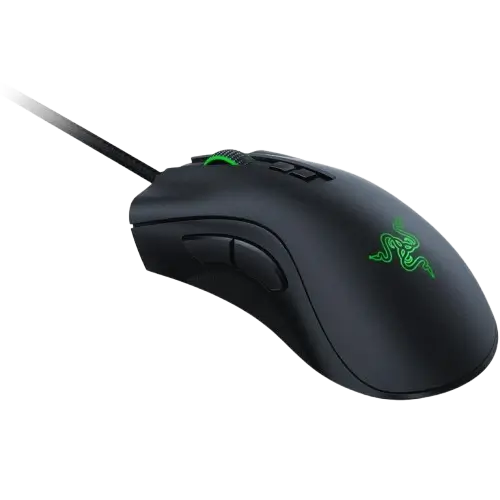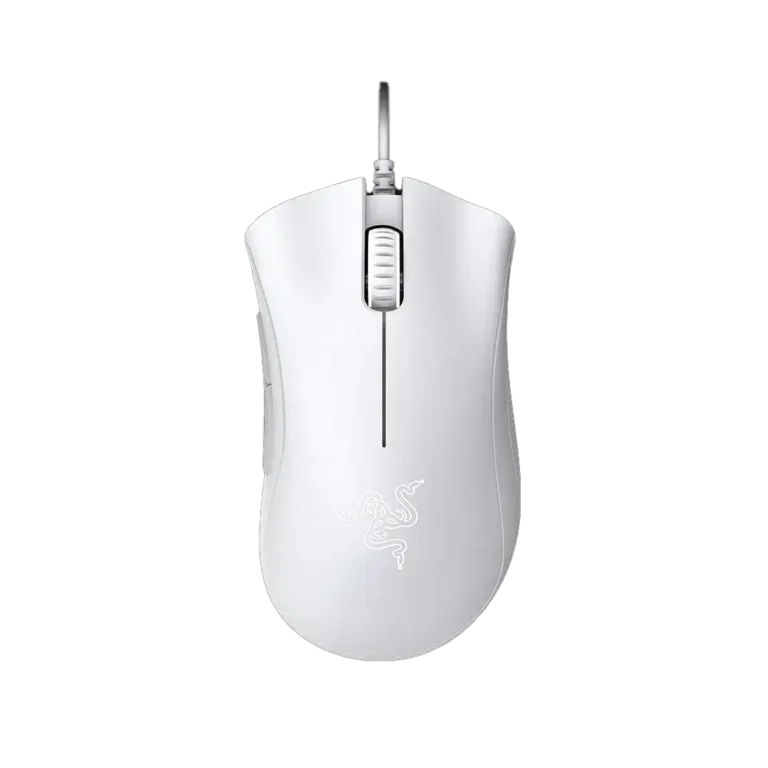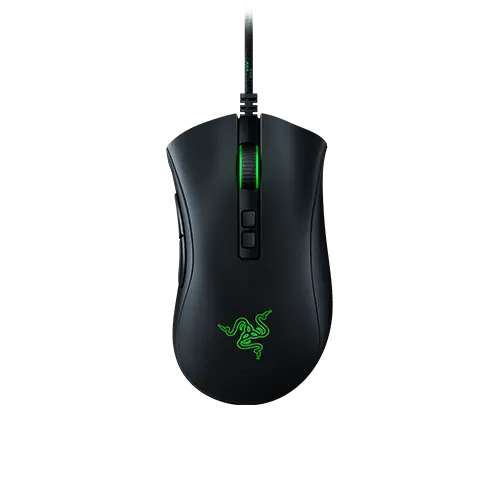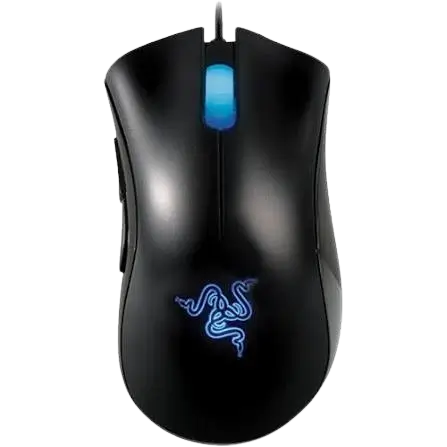
Razer DeathAdder Essential
The Razer DeathAdder Essential is a wired, right-handed gaming mouse with a 6,400 DPI optical sensor and five programmable Hyperesponse buttons. Its Razer Mechanical Mouse Switches are rated for a 10 million-click life cycle. It connects to a computer’s USB Type-A port and works as a mouse right away.
With Razer Synapse on Windows, you can also remap buttons, set DPI stages, choose a polling rate, create profiles and adjust the single-color green lighting.
Parts and Controls
The mouse has seven labeled parts:
| Part | Description |
|---|---|
| Left mouse button | Primary button |
| Right mouse button | Secondary button |
| Scroll wheel | Gaming-grade tactile scroll wheel; also clicks |
| Mouse button 5 | Side button (default “Forward” in most browsers) |
| Mouse button 4 | Side button (default “Backward” in most browsers) |
| True 6,400 DPI optical sensor | On the underside |
| Ultraslick mouse feet | Three pads on the underside |
The serial number is printed on the underside label, near the lower mouse foot. The box also includes an Important Product Information Guide.
Technical Specifications
| Specification | Value |
|---|---|
| Sensor | True 6,400 DPI optical sensor |
| Maximum speed / acceleration | Up to 220 inches per second (IPS) / 30 G |
| Buttons | Five independently programmable Hyperesponse buttons |
| Switches | Razer Mechanical Mouse Switches, 10 million-click life cycle |
| Scroll wheel | Gaming-grade tactile |
| Design | Ergonomic, right-handed |
| Polling | 1000 Hz Ultrapolling |
| Lighting | Single-color green |
| Software | Razer Synapse 3 enabled |
| Length | 127 mm / 5.0 in |
| Width | 73 mm / 2.90 in |
| Height | 43 mm / 1.70 in |
| Weight | 96 g / 0.211 lbs |
| Operating temperature | 0°C (32°F) to 40°C (104°F) |
Dimensions and weight are approximate.
Requirements and Setup
What You Need
- A USB Type-A port on your computer.
- For Razer Synapse: Windows® 7 64-bit (or higher) and an internet connection for software installation.
Connect the Mouse
- Connect the mouse to a USB port on your computer.
- Adjust the DPI to suit your playstyle, or use Razer Synapse to fine-tune your own sensitivity and customize the lighting.
- Install Razer Synapse when prompted, or download the installer from razer.com/synapse.
An internet connection is required for installation, updates and cloud-based features. Registering for a Razer ID account is recommended but optional. Available features can vary with the software version, the connected devices and supported apps.
DPI Stages
The mouse has five default DPI stages: 400, 800, 1600 (default), 3200 and 6400. You can customize them in Razer Synapse.
Important: Higher DPI makes the cursor travel farther for the same physical mouse movement.
Change DPI Stages in Razer Synapse
- Open Razer Synapse and go to Mouse > Performance.
- Under Sensitivity, keep Sensitivity Stages switched on.
- Choose the Number of Stages from the dropdown (5 by default).
- Enter the DPI value you want for each stage.
Assign DPI Controls to a Button
On the Customize subtab, select a button, choose Sensitivity and pick one of these functions:
| Function | What it does |
|---|---|
| Sensitivity Clutch | Switches to a predefined DPI while the button is held. Releasing it returns to the previous sensitivity. |
| Sensitivity Stage Up | Raises the current sensitivity by one stage. |
| Sensitivity Stage Down | Lowers the current sensitivity by one stage. |
| On-The-Fly Sensitivity | Press the button and move the scroll wheel up or down to raise or lower the DPI. |
| Cycle Up Sensitivity Stages | Moves up one stage. After the highest stage, the next press returns to stage 1. |
| Cycle Down Sensitivity Stages | Moves down one stage. After stage 1, the next press goes to the highest stage. |
Razer Synapse Overview
Razer Synapse is organized into three main tabs: Synapse, Mouse and Profiles.
Synapse Tab
This is the default tab when you first launch Synapse.
- Dashboard: An overview of your Razer devices, modules and online services. The online services shortcuts cover registering your product, viewing compatible devices, the Razer Store and Razer Support.
- Modules: Lists installed and available modules, including Alexa, Chroma Connect, Chroma Studio, Chroma Visualizer, Hue and Macro.
- Global Shortcuts: Bind operations or Synapse functions to custom key combinations. These work across all device profiles but only from Razer Synapse-enabled device inputs.
Mouse Tab
The Mouse tab is the main tab for this mouse. It covers button assignment, DPI sensitivity and lighting. Changes made here are saved automatically to your system and to cloud storage.
Button Assignment
Use the Customize subtab to change what each button does. You can open the Sidebar button to see all current assignments, or select a button directly on the mouse image. The default assignments are Left Click, Right Click, Scroll Click, Scroll Up, Scroll Down, Mouse Button 4 and Mouse Button 5.
After selecting a button, you can set it to any of these functions:
| Function | Description |
|---|---|
| Default | Returns the button to its original setting. |
| Keyboard Function | Makes the button act as a keyboard function. Turbo mode repeats the function while the button is held. |
| Mouse Function | Substitutes another mouse function: Left Click, Right Click, Scroll Click, Double Click, Mouse Button 4 (“Backward” in most browsers), Mouse Button 5 (“Forward” in most browsers), Scroll Up, Scroll Down, Scroll Left or Scroll Right. Turbo mode is available for some of these. |
| Sensitivity | DPI controls (see DPI Stages above). |
| Macro | Runs a prerecorded sequence of keystrokes and button presses. Visible only when the Macro module is installed. |
| Inter-device | Changes the functions of other Synapse-enabled devices, such as using a Razer keyboard to change this mouse’s sensitivity stage. |
| Switch Profile | Loads a different profile’s button assignments and shows an on-screen notification. |
| Switch Lighting | Switches between advanced lighting effects. Visible only when the Chroma Studio module is installed. |
| Razer Hypershift | Activates Hypershift mode while the button is held. |
| Launch Program | Opens an app (search for it) or a website (type the address). |
| Multimedia | Volume Down, Volume Up, Mute Volume, Mic Volume Up, Mic Volume Down, Mute Mic, Mute All, Play / Pause, Previous Track, Next Track. |
| Windows Shortcuts | Assigns a Windows operating system shortcut command. |
| Text Function | Types prewritten text when the button is pressed. Supports full Unicode and special symbols from character maps. |
| Disable | Makes the button unusable. |
Hypershift Mode
Hypershift is a secondary set of button assignments that is active while the Hypershift key is held down. By default, the Hypershift key is the fn key of a Razer Synapse-supported keyboard. You can also assign any mouse button as the Hypershift key.
Performance Settings
The Performance subtab controls sensitivity, acceleration and polling rate.
Polling Rate
A higher polling rate means the computer receives mouse status updates more often, which improves pointer reaction time. Choose from the dropdown:
| Polling rate | Interval |
|---|---|
| 125 Hz | 8 ms |
| 500 Hz | 2 ms |
| 1000 Hz | 1 ms |
Mouse Properties
This option opens the Windows Mouse Properties, where you can change operating system settings that directly affect the mouse.
Lighting Settings
The Lighting subtab changes the mouse’s light settings.
- Brightness: Toggle the option to turn lighting off, or use the slider to raise or lower brightness.
- Switch Off Lighting: A power-saving tool that turns lighting off when your computer’s display turns off, and/or after the mouse has been idle for a set number of minutes.
- Effects: Choose Breathing (the lighting fades in and out) or Static (the LEDs stay lit).
Profiles and Linked Games
A profile stores all of your Razer peripheral’s settings. By default, the profile name is based on your system’s name.
Manage Profiles
On the Mouse tab, press the Miscellaneous button (three dots) to add, rename, duplicate or delete a profile. On the Profiles > Devices subtab you can also import profiles from your computer or the cloud with the import button, create new ones with the add button, and export profiles from the Miscellaneous menu.
Link Games to Profiles
Each profile can activate automatically when you run a particular application.
- Open Profiles > Linked Games.
- Click a game in the list. Use the add button if it isn’t listed.
- Click Select a device and its profile to launch automatically during gameplay, then choose the device or Chroma Effect.
- If needed, use the Miscellaneous button on the linked entry to pick a specific profile or Chroma Effect.
Games stay listed here even when they aren’t linked to a Razer device. You can sort them alphabetically, by last played or by most played.
Synapse Settings and Factory Reset
Open the Settings window with the gear button in Razer Synapse.
- General tab: Change the display language, startup behavior, theme (Light or Dark) and on-screen notifications. You can also sync profiles to the cloud manually and open the master guide.
- Reset tab: Factory reset connected Razer devices that have on-board memory, and/or reset the Synapse tutorials. Resetting a device erases all profiles stored in that device’s on-board memory.
- About tab: Shows software information and terms-of-use links, and lets you check for updates.
Safety, Comfort and Maintenance
Safety Guidelines
- If the mouse doesn’t work properly and troubleshooting doesn’t help, unplug it and contact the Razer hotline or go to support.razer.com.
- Don’t take the device apart, because doing so voids your warranty. Don’t operate it under abnormal current loads.
- Keep it away from liquid, humidity and moisture.
- Operate it only between 0°C (32°F) and 40°C (104°F). If the temperature goes beyond that range, unplug and/or switch off the device and let the temperature stabilize.
Comfort
- Place the keyboard and monitor directly in front of you, with the mouse next to the keyboard. Keep your elbows at your sides and your keyboard within easy reach.
- Adjust your chair and table so the keyboard and mouse are at or below elbow height.
- Keep your feet well supported, your posture straight and your shoulders relaxed.
- Relax your wrist and keep it straight during gameplay. Avoid bending, extending or twisting your hands for long periods when repeating tasks.
- Don’t rest your wrists on hard surfaces for long periods. Use a wrist rest.
- Customize your keys to reduce repetitive or awkward motions.
- Don’t sit in one position all day. Get up and stretch your arms, shoulders, neck and legs.
If you feel pain, numbness or tingling in your hands, wrists, elbows, shoulders, neck or back while using the mouse, consult a qualified medical doctor immediately.
Cleaning and Care
Once a month, unplug the mouse from the computer and clean it with a soft cloth or cotton swab to prevent dirt buildup. Don’t use soap or harsh cleaning agents.
Some surfaces wear the mouse feet and may require constant care and eventual replacement. A premium Razer mouse mat is recommended, since the sensor is tuned for Razer mouse mats.
Warranty and Support
The mouse comes with a 2-year limited warranty. You can register at razerid.razer.com. Current warranty terms are at razer.com/warranty, and support is at support.razer.com.
Frequently Asked Questions
How do I set up the Razer DeathAdder Essential?
Plug the mouse’s USB cable into a USB Type-A port on your computer. Then adjust the DPI to match your playstyle, or install Razer Synapse for finer control over sensitivity and lighting. Synapse installs when prompted, or you can download the installer from razer.com/synapse. Synapse needs Windows 7 64-bit or higher and an internet connection for installation.
What DPI settings does the DeathAdder Essential have by default?
It has five DPI stages: 400, 800, 1600, 3200 and 6400, with 1600 as the default. The sensor is a true 6,400 DPI optical sensor, so 6400 is the top stage. If those values don’t suit you, you can customize the stages in Razer Synapse.
How do I change the DPI on this mouse?
Open Razer Synapse, go to Mouse > Performance, and enter the DPI value for each sensitivity stage. To switch stages while you play, assign a Sensitivity function to a button on the Customize subtab. Options include Sensitivity Stage Up, Sensitivity Stage Down, Cycle Up or Down Sensitivity Stages, On-The-Fly Sensitivity and Sensitivity Clutch. Clutch temporarily switches to a predefined DPI while you hold the button, then returns to your previous DPI when you release it.
Do I need Razer Synapse to use the mouse?
You only need a USB Type-A port to plug the mouse in and use it. Synapse is required for customization: button assignments, custom DPI stages, polling rate, lighting, profiles and macros. It runs on Windows 7 64-bit or higher and needs an internet connection to install, update and use cloud features. A Razer ID account is recommended but optional.
Can I remap the buttons on the DeathAdder Essential?
Yes. All five buttons are independently programmable, and the scroll directions can be assigned too. In Synapse, open Mouse > Customize and select the button you want to change. You can turn it into a keyboard key, another mouse function, a multimedia control, a Windows shortcut, a text string, a program or website launcher, or a profile switch. You can also disable it. Choosing Default restores the original function. The Macro option appears only after you install the Macro module.
What is Hypershift on this mouse?
Hypershift is a second set of button assignments that is active only while you hold the Hypershift key. By default, that key is the fn key on a Razer Synapse-supported keyboard. You can instead assign any mouse button as the Hypershift key by setting it to Razer Hypershift in the Customize options.
How do I change the polling rate?
Open Razer Synapse, go to Mouse > Performance, and use the Polling Rate dropdown. You can choose 125 Hz (8 ms), 500 Hz (2 ms) or 1000 Hz (1 ms). A higher rate means the computer receives mouse updates more often, which improves pointer reaction time.
How do I turn off or change the mouse lighting?
In Synapse, go to Mouse > Lighting. Toggle Brightness to turn the lighting off, or use the slider to dim it. You can also choose Breathing, where the lighting fades in and out, or Static, where the LEDs stay lit. To save power, Switch Off Lighting can turn the lighting off when your display turns off and/or after the mouse has been idle for a set number of minutes.
Can I use different settings for different games?
Yes, by creating profiles and linking them to games. Add profiles on Profiles > Devices, or from the Miscellaneous (three-dot) menu on the Mouse tab. Then open Profiles > Linked Games, select a game, and choose Select a device and its profile to launch automatically during gameplay. The linked profile then activates when you run that application. You can also assign a button to Switch Profile to change profiles manually.
How should I clean the DeathAdder Essential?
Unplug the mouse from the computer first, then wipe it with a soft cloth or a cotton swab to remove dirt. A monthly cleaning is recommended. Don’t use soap or harsh cleaning agents, and keep the mouse away from liquid, humidity and moisture. If the feet wear out from rough surfaces, they will eventually need replacement, so a premium Razer mouse mat is recommended.
What should I do if the mouse isn’t working properly?
Check your settings and connection first. If the mouse still doesn’t operate properly, unplug it and contact the Razer hotline or visit support.razer.com. Don’t take the mouse apart, because that voids the warranty. Also make sure it is operating between 0°C (32°F) and 40°C (104°F). If it goes outside that range, unplug and/or switch it off and let the temperature stabilize.
How do I factory reset the mouse, and where do I find the serial number and warranty details?
To factory reset, open the Settings window in Razer Synapse (the gear button) and go to the Reset tab. Resetting erases all profiles stored in the device’s on-board memory. The serial number is printed on the underside of the mouse, near the lower mouse foot. The mouse has a 2-year limited warranty, and you can register at razerid.razer.com. For current terms, visit razer.com/warranty.