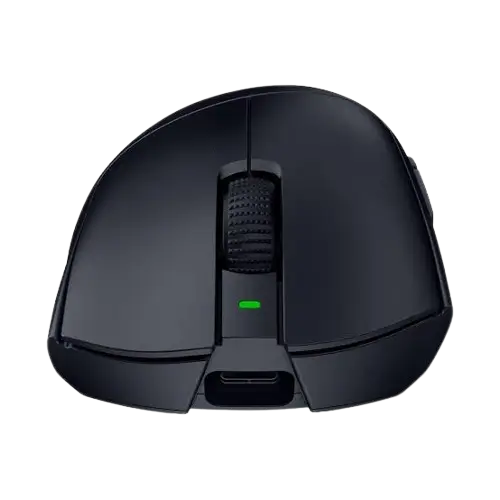
Razer DeathAdder V3 HyperSpeed
The Razer DeathAdder V3 HyperSpeed is a right-handed, ergonomic wireless gaming mouse that connects either through a Razer HyperSpeed Wireless (2.4 GHz) dongle or through its USB Type-C charging cable. It uses a Razer Focus X 26K Optical Sensor (up to 26,000 DPI), Optical Mouse Switches Gen-3 rated for 90 million clicks, and 100% PTFE mouse feet. It has eight programmable controls, one on-board memory profile and five default DPI stages that you cycle with the Power / DPI cycle button on the underside. The free Razer Synapse software for Windows lets you remap buttons, set DPI stages, change the polling rate, tune power settings and link profiles to games.
What Comes With the Mouse
The package contains the mouse, a Razer HyperSpeed Wireless Dongle with a USB dongle adapter, a USB Type A to USB Type C cable and an Important Product Information Guide.
Product Requirements
- A USB Type A port on your PC.
- For Razer Synapse: Windows 10 64-bit (or higher) and an internet connection for software installation.
Mouse Parts and Controls
| Label | Part |
| A | Indicator LED |
| B | Left mouse button |
| C | Right mouse button |
| D | Scroll wheel |
| E | Mouse button 5 |
| F | Mouse button 4 |
| G | USB Type C port |
| H | PTFE mouse feet |
| I | Power / DPI cycle button |
| J | Razer Focus X 26K Optical Sensor |
| K | Wireless dongle compartment |
The Power / DPI cycle button is on the underside of the mouse. Hold it for 2 seconds to power the mouse on or off, and press it briefly to cycle through the DPI stages.
Technical Specifications
| Specification | Value |
| Form factor | Right-handed ergonomic |
| Connectivity | HyperSpeed Wireless, wired |
| RGB lighting | No |
| Sensor | Focus X Optical Sensor |
| Max sensitivity (DPI) | 26,000 |
| Max speed (IPS) | 500 |
| Max acceleration (G) | 40 |
| Programmable controls | 8 |
| Switch type | Optical Mouse Switches Gen-3 |
| Switch lifecycle | 90-million clicks |
| On-board memory profiles | 1 |
| Mouse feet | 100% PTFE |
| Cable | USB Type A to USB Type C cable |
| Tilt scroll wheel | No |
Setting Up the Mouse
Charging the Mouse
Plug the USB Type A end of the cable into a USB port on your PC and the USB Type C end into the mouse. Fully charge the mouse before its first use for best results. A depleted battery takes approximately 4 hours to charge fully.
The charging-status diagram shows the indicator LED moving from red at 0% through orange and yellow (breathing) to solid green at 100%, which takes about 4 hours.
The mouse needs a USB connection that can supply enough power to charge it. Charging may be affected on a non-powered USB hub or a non-powered USB port, such as those commonly found on keyboards and other peripherals.
When prompted, install Razer Synapse, or download the installer from razer.com/synapse, to personalize DPI settings, button configurations, polling rate and other features.
Connecting in Wired Mode
Connect the mouse to any USB port on your PC with the charging cable. The mouse then works in wired mode.
Connecting in HyperSpeed Wireless (2.4 GHz) Mode
- Connect the wireless dongle to your PC. The illustration shows two options: plug the dongle directly into a USB Type A port, or connect the USB Type A to USB Type C cable to the USB dongle adapter and plug the dongle into the adapter.
- Press and hold the Power / DPI cycle button for 2 seconds to power on the mouse.
When the connection is made, the indicator LED shows solid white and the mouse is ready for use in 2.4 GHz wireless mode.
Everyday Operation
Powering the Mouse On or Off
Press and hold the Power / DPI cycle button for 2 seconds to power the mouse on or off.
Low Battery Warning
When battery power drops below 5%, the indicator LED blinks red twice at repeated intervals. This pattern repeats until the battery is drained or you connect the mouse to a PC with the charging cable.
Changing the DPI Stage
Press the Power / DPI cycle button to switch DPI stages. The indicator LED briefly changes color to show the active stage. The default stages and their colors are:
| DPI | LED color |
| 400 | Red |
| 800 | Green |
| 1600 (default) | Blue |
| 3200 | Cyan |
| 6400 | Yellow |
You can customize these stages in Razer Synapse.
Configuring the Mouse With Razer Synapse
An internet connection is required for installation, updates and cloud-based features. A Razer ID account is recommended but optional. Features depend on the current software version, the connected devices and supported apps, so they can change.
Synapse Tab
The Synapse tab opens by default and includes the Dashboard, Gamer Room, Modules and Global Shortcuts subtabs. The Dashboard gives an overview of your Razer devices, modules and online services. Gamer Room lets you power Gamer Room devices on or off and toggle Synapse Override on a selected device. Modules lists installed and available modules. Global Shortcuts binds operations or Synapse functions to key combinations from Synapse-enabled device inputs that apply across all profiles.
Mouse Tab: Customize
Changes in the Mouse tab are saved automatically to your system and cloud storage. The Customize subtab covers button assignments, profiles, Standard / Hypershift mode and HyperSpeed Multi-Device Pairing.
Profiles. A profile stores all your Razer peripheral settings. The default profile name is based on your system name. Use the Miscellaneous button to add, import, rename, duplicate, export, reset or delete a profile.
Hypershift. Hypershift is a secondary set of button assignments that is active while the Hypershift key is held down. By default, the Hypershift key is the fn key of a Razer Synapse-supported keyboard, and you can also set any mouse button as the Hypershift key.
HyperSpeed Multi-Device Pairing. This feature pairs an additional HyperSpeed-compatible device with the dongle of this mouse. The dongle can support a keyboard and a mouse at the same time, so separate dongles are not needed. The mouse must be connected in HyperSpeed Wireless (2.4 GHz) mode, and each peripheral can connect to only one dongle at a time.
Reassigning Buttons
Click the Sidebar button to see all current button assignments, or select a specific button on the Customize subtab. Each button can be set to one of these functions:
| Function | What it does |
| Default | Returns the button to its original setting. |
| Keyboard Function | Turns the button into a keyboard function. Turbo mode repeats the function while the button is held. |
| Mouse Function | Substitutes another mouse function: Left Click, Right Click, Scroll Click, Double Click, Mouse Button 4 (Backward in most browsers), Mouse Button 5 (Forward in most browsers), Scroll Up, Scroll Down, Scroll Left or Scroll Right. Turbo mode is available for some of these. |
| Sensitivity | Changes DPI with a button. Options are Sensitivity Clutch, Sensitivity Stage Up, Sensitivity Stage Down, On-The-Fly Sensitivity, Cycle Up Sensitivity Stages and Cycle Down Sensitivity Stages. |
| Macro | Runs a prerecorded sequence of keystrokes and button presses with precise timing. Visible only when the Macro module is installed. |
| Inter-device | Changes the functions of other Synapse-enabled devices, such as using a Razer keyboard to change the mouse’s sensitivity stage. |
| Switch Profile | Loads another profile’s button assignments and shows an on-screen notification. |
| Switch Lighting | Switches between advanced lighting effects. Visible only when the Chroma Studio module is installed. |
| Razer Hypershift | Activates Hypershift mode while the button is held. |
| Launch Program | Opens an app or a website. |
| Multimedia | Volume Down, Volume Up, Mute Volume, Mic Volume Up, Mic Volume Down, Mute Mic, Mute All, Play / Pause, Previous Track and Next Track. |
| Windows Shortcuts | Assigns a Windows shortcut command. |
| Text Function | Types prewritten text when the button is pressed, with full Unicode support. |
| Disable | Makes the button unusable. |
The Sensitivity options work as follows:
- Sensitivity Clutch: switches to a predefined DPI while the button is held, then returns to the previous sensitivity on release.
- Sensitivity Stage Up / Down: raises or lowers the current sensitivity by one stage.
- On-The-Fly Sensitivity: hold the designated button and move the scroll wheel up or down to raise or lower the DPI.
- Cycle Up / Cycle Down Sensitivity Stages: moves one stage at a time. After the highest stage, Cycle Up returns to stage 1. After stage 1, Cycle Down returns to the highest stage.
Mouse Tab: Performance
The Performance subtab controls sensitivity, acceleration and polling rate.
- Sensitivity. Higher DPI makes the cursor travel farther for the same mouse movement.
- Sensitivity Stages. You can create up to 5 stages and cycle through them with the Power / DPI cycle button.
- Enable X-Y. By default the horizontal (X) and vertical (Y) axes share one sensitivity value. Select Enable X-Y to set them separately.
- Polling Rate. A higher polling rate means the computer receives mouse status updates more often, which reduces input latency. Choose 125Hz, 500Hz or 1000Hz.
- Mouse Properties. Opens Windows Mouse Properties for operating system settings that affect the mouse.
Mouse Tab: Calibration
Calibration optimizes the sensor for your surface. Smart Tracking sets the distance at which the sensor stops tracking when you lift the mouse, which helps avoid unwanted cursor movement. The Synapse screenshot shows 1 mm and 2 mm tracking-distance options.
Mouse Tab: Power
The Power subtab sets the mouse to enter sleep mode after being idle for a chosen time and manages energy use when the battery is low. The screenshot shows a Wireless Power Saving slider (1 to 15 minutes) and a Low Power Mode slider (0 to 100% battery level).
Mouse Tab: Advanced
Dynamic Sensitivity fine-tunes responsiveness and movement acceleration with presets or a custom curve:
- Classic: sensitivity increases exponentially during faster motion, similar to traditional Windows acceleration.
- Natural: predictable cursor movement with a capped maximum sensitivity.
- Jump: low sensitivity during slow movement that shifts instantly to high sensitivity during quick flicks, suited to players who want very low sensitivity but still need 180° turns in one flick.
- Custom: your own dynamic sensitivity settings.
Profiles Tab and Linked Games
The Profiles tab manages profiles and links them to games and applications. In the Devices subtab, import profiles from your computer or the cloud with the import button, create new profiles with the add button, and use the Miscellaneous button to rename, duplicate, export or delete one. A profile can be set to activate when you run an application through the Linked Games option.
In the Linked Games subtab you can add games, view devices linked to games and search for games. Games can be sorted alphabetically, by last played or by most played. To link a game, click it in the list, click Select a device and its profile to launch automatically during gameplay, and choose the Razer device or Chroma Effect. Added games stay listed even if they are not linked to a Razer device.
Synapse Settings Window
Open the Settings window with the gear button in Razer Synapse.
- General: display language, startup behavior, theme and on-screen notifications. You can also sync profiles to the cloud manually and view the master guide of connected devices and installed modules.
- Dashboard: choose which device recommendations appear.
- Firmware: view the firmware version of your devices and go to the Software and Firmware Update page to check for an update.
- Reset: perform a factory reset on connected Razer devices with on-board memory, or reset the Synapse tutorials. All profiles stored on the selected device’s on-board memory are erased when you reset a device.
- About: software information, terms of use links, update checks and Razer community links.
Safety Guidelines
- If the mouse does not operate properly and troubleshooting does not help, unplug it and contact the Razer hotline or go to support.razer.com.
- Do not take the device apart and do not operate it under abnormal current loads. Doing so voids your warranty.
- Keep the device away from liquid, humidity and moisture.
- Operate the device only between 0°C (32°F) and 40°C (104°F). If the temperature goes outside this range, unplug or switch off the device until the temperature returns to an optimal level.
Battery Warning
The mouse contains a Li-ion rechargeable battery whose life expectancy depends on usage. If you suspect the battery is drained, try charging it. Caution: do not open, mutilate or expose the battery to conducting materials (metal), moisture, liquid, fire or heat, which may cause the battery to leak or explode and result in personal injury. Battery life varies with usage.
Comfort
- Place the keyboard and monitor directly in front of you with the mouse next to the keyboard. Keep your elbows at your sides and the keyboard within easy reach.
- Adjust chair and table height so the keyboard and mouse are at or below elbow height.
- Keep your feet well supported, your posture straight and your shoulders relaxed.
- During gameplay, relax your wrist and keep it straight. If you repeat the same task with your hands, avoid bending, extending or twisting them for long periods.
- Do not rest your wrists on hard surfaces for long periods. Use a wrist rest.
- Do not sit in one position all day. Get up, step away from your desk and stretch your arms, shoulders, neck and legs.
If you feel pain, numbness or tingling in your hands, wrists, elbows, shoulders, neck or back while using the mouse, consult a qualified medical doctor immediately.
Cleaning and Care
Once a month, unplug the mouse from the computer and clean it with a soft cloth or cotton swab to prevent dirt buildup. Do not use soap or harsh cleaning agents.
Razer recommends a premium Razer mouse mat for the best movement and control. The sensor is tuned and tested to read and track best on Razer mouse mats, and some surfaces cause undue wear on the feet that requires constant care and eventual replacement.
Warranty and Support
You can register the product at razerid.razer.com/warranty. Current Limited Product Warranty terms are at razer.com/warranty, and support is available at support.razer.com.
Frequently Asked Questions
How long does the Razer DeathAdder V3 HyperSpeed take to charge?
A fully depleted battery takes approximately 4 hours to charge. Connect the USB Type A to USB Type C cable between a USB port on your PC and the mouse, and fully charge it before first use for best results. Use a USB port that can supply enough power, because a non-powered USB hub or a non-powered port such as those found on some keyboards and peripherals may affect charging.
How do I connect the mouse wirelessly?
Plug the HyperSpeed Wireless Dongle into your PC, then press and hold the Power / DPI cycle button on the underside of the mouse for 2 seconds. When the indicator LED shows solid white, the mouse is connected and ready in 2.4 GHz wireless mode. If a USB port is hard to reach, the illustration shows the dongle plugged into the USB dongle adapter, which connects to the charging cable.
How do I turn the mouse on and off?
Press and hold the Power / DPI cycle button for 2 seconds. The same 2-second hold powers the mouse on and off.
What does a blinking red light mean?
Two red blinks repeating at intervals mean the battery is below 5%. The pattern continues until the battery runs out or you connect the mouse to a PC with the charging cable, so plug it in to start recharging.
How do I change the DPI, and how do I know which stage is active?
Press the Power / DPI cycle button to step through the stages: 400, 800, 1600 (default), 3200 and 6400. The indicator LED briefly changes color to show the active stage: red for 400, green for 800, blue for 1600, cyan for 3200 and yellow for 6400. You can customize the stages in Razer Synapse, where you can create up to 5.
Which polling rates does the mouse support, and where do I change it?
You can choose 125Hz, 500Hz or 1000Hz. Open Razer Synapse, go to the Mouse tab, select the Performance subtab and pick the rate under Polling Rate. A higher rate means the computer receives mouse status updates more often, which reduces input latency.
Do I need Razer Synapse to use the mouse?
Synapse is what you use to personalize DPI settings, button assignments, polling rate and other features, and it requires Windows 10 64-bit (or higher) and an internet connection for installation. The setup steps for charging, wired use and 2.4 GHz wireless use involve only the cable, the dongle and the Power / DPI cycle button. A Razer ID account is recommended but optional.
Can I reassign the mouse buttons?
Yes. The mouse has 8 programmable controls. In Synapse, open the Mouse tab, then the Customize subtab, select a button and choose a function such as a keyboard function, mouse function, sensitivity control, macro, profile switch, multimedia control, Windows shortcut, text function or Disable. Macro appears only when the Macro module is installed. The Default option returns a button to its original setting.
Can I pair a keyboard with the same dongle as the mouse?
Yes, if the keyboard is HyperSpeed-compatible. The dongle can support a keyboard and a mouse at the same time. In Synapse, use HyperSpeed Multi-Device Pairing on the Customize subtab while the mouse is connected in HyperSpeed Wireless (2.4 GHz) mode. Each peripheral can connect to only one dongle at a time.
What is Smart Tracking?
Smart Tracking sets how far the sensor can be lifted from the surface before it stops tracking, which helps avoid unwanted cursor movement. It is in the Calibration subtab of the Mouse tab in Synapse, where the screenshot shows 1 mm and 2 mm options.
How can I make the mouse go to sleep sooner or save battery?
Open the Power subtab in the Mouse tab of Synapse. There you can set the mouse to enter sleep mode after it has been idle for a chosen number of minutes (the screenshot shows a range of 1 to 15) and set a Low Power Mode battery threshold for wireless use (the screenshot shows 0 to 100%).
How should I clean the mouse?
Once a month, unplug the mouse from the computer and wipe it with a soft cloth or cotton swab to prevent dirt buildup. Do not use soap or harsh cleaning agents. Keep the mouse away from liquid, humidity and moisture, and use it only between 0°C (32°F) and 40°C (104°F).