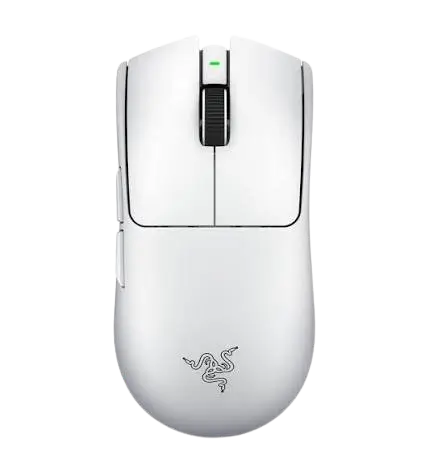
Razer Viper V4 Pro
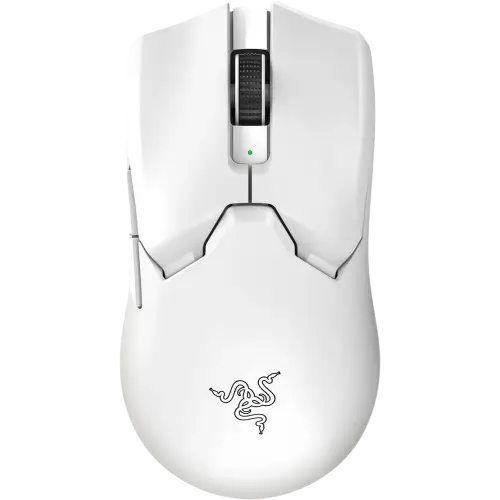
The Razer Viper V4 Pro is a wireless gaming mouse that connects either by USB cable (wired mode) or through the included Razer HyperSpeed Wireless Gen-2 dongle. It uses Razer Optical Mouse Switches Gen-4 for the left and right buttons, a Razer Optical Scroll Wheel, PTFE mouse feet, and the Razer Focus Pro 50K Optical Sensor Gen-3. Two side buttons (Mouse button 4 and Mouse button 5) and a Power/DPI stage cycle button on the underside complete the controls. A status indicator beside the scroll wheel reports battery, connection and DPI information.
Out of the box, the mouse offers five DPI stages (400, 800, 1600 default, 3200 and 6400) and polling rates from 125 Hz to 8000 Hz. Razer Synapse, the optional configuration software, customizes buttons, DPI stages, polling rate, lift-off distance, sensor rotation, macros and the dongle’s indicator LEDs. The mouse contains a Li-ion rechargeable battery and is covered by a 2-year warranty when registered.
What Is in the Box
The package contains:
- Razer Viper V4 Pro mouse
- Razer HyperSpeed Wireless Gen-2 dongle
- USB Type A to Type C cable
- Razer Mouse Grip Tape
- Important product information guide
Mouse Parts and Controls
| Label | Part |
| A | Mouse status indicator |
| B | Razer Optical Mouse Switches Gen-4 (left and right mouse buttons) |
| C | Razer Optical Scroll Wheel |
| D | Mouse button 5 |
| E | Mouse button 4 |
| F | USB Type C port |
| G | PTFE mouse feet |
| H | Power/DPI stage cycle button |
| I | Razer Focus Pro 50K Optical Sensor Gen-3 |
Dongle Parts
| Label | Part |
| J | USB Type C port |
| K | Dongle status indicator (connection quality, battery level, polling rate) |
Requirements
Product Requirements
The mouse needs a USB Type A port on your computer.
Razer Synapse Requirements
| Requirement | Detail |
| Operating system | Windows 11 (or higher), or macOS 15 with Apple Silicon “M” series (or higher) |
| Internet | An internet connection is required for software installation |
Warranty and Registration
The mouse comes with a 2-year warranty. Register the device at razerid.razer.com to get covered and unlock Razer benefits. A valid proof of purchase is required for any Limited Warranty claim. The serial number is on the underside of the mouse, in the location marked in the guide’s illustration. For current warranty terms, visit razer.com/warranty.
Setting Up the Mouse
Charging the Mouse
Fully charge the mouse before first use. Connect it directly to your computer’s USB port with the provided cable. A completely depleted battery takes about 4 hours to charge fully.
- Plug the USB Type A end of the cable into your computer.
- Plug the USB Type C end into the mouse’s USB Type C port.
- Leave the mouse connected until the status indicator shows the full-charge color.
Battery Indicator While Charging
The mouse status indicator beside the scroll wheel shows the charging level.
| Charging Battery Level | Status Indicator |
| Full | Breathing Green |
| High | Breathing Yellow |
| Mid | Breathing Orange |
| Low | Breathing Red |
| Critical | Blinking Red |
Wired Mode
Connect the USB Type A end of the cable to your computer and the USB Type C end to the mouse.
Razer HyperSpeed Wireless Mode
- Connect the dongle to a USB Type A port on your computer using the provided cable. The cable’s Type C end plugs into the dongle.
- Press and hold the Power/DPI stage cycle button on the underside of the mouse for 2 seconds to power it on.
- Watch the status indicator. Blinking white means the mouse is connecting. Static white for 3 seconds means it is connected.
Using the Mouse
Powering the Mouse On and Off
Press and hold the Power/DPI stage cycle button on the underside for 2 seconds.
Changing the DPI Stage
Press the Power/DPI stage cycle button briefly. The status indicator shows the active stage by color.
| DPI | Indicator Color |
| 400 | Red |
| 800 | Green |
| 1600 (default) | Blue |
| 3200 | Cyan |
| 6400 | Yellow |
You can customize the DPI stages through Razer Synapse.
Changing the Polling Rate
The guide’s illustration shows holding the scroll wheel while pressing the Power/DPI stage cycle button. The dongle’s third indicator then shows the selected rate. You can also set the polling rate in Razer Synapse.
| Polling Rate | Dongle Indicator |
| 125Hz | Violet |
| 500Hz | Blue |
| 1000Hz | Green |
| 2000Hz | Yellow |
| 4000Hz | Orange |
| 8000Hz | Red |
Reading the Dongle Indicators
The dongle has three indicator lights. The first shows connection quality, the second shows battery level and the third shows polling rate. The Synapse section of the guide refers to the dongle as the “Razer HyperPolling Wireless Dongle.”
| Connection Quality | Indicator |
| Excellent | Green |
| Good | Yellow |
| Weak | Orange |
| Critical | Red |
| Disconnected | Off |
| Battery Level | Indicator |
| 100% | Green |
| 75% | Yellow |
| 50% | Orange |
| 25% | Red |
The dongle indicators can be customized in Razer Synapse.
Installing Razer Synapse
Install Razer Synapse when prompted, or download the installer from razer.com/synapse. Synapse requires an internet connection to install, update, access and save cloud-based features. Registering a Razer ID is recommended but optional. The guide covers the new Razer Synapse app and notes that its features may change with the software version, connected devices and supported add-ons.
Razer Synapse: Interface and Navigation
Window and Navigation Buttons
| Button | Function |
| Minimize | Minimizes the app to the taskbar while it keeps running in the background |
| Maximize | Expands the window to fill the screen; click again to restore |
| Close | Closes all relevant tabs and terminates the application |
| Previous Tab | Returns to the last tab you visited |
| Next Tab | Moves forward after you have used Previous Tab |
| Refresh Tab | Reloads the current page |
| Download Update | Appears when the app has changes to install |
| More | Opens a pop-up for the Devices, Modules and Other Installed Apps tabs |
| Settings | Opens the Settings tab |
| Profile | Opens Log In, Feedback, Rate This Software, Add WiFi Device and Exit options |
| Info | Hover to see more information about a feature |
On macOS, the minimize, maximize and close buttons appear as the yellow, green and red window controls.
Synapse Tab
The Synapse tab is the default tab when you first launch the software.
- Dashboard: An overview of your Razer devices, modules and online services.
- Gamer Room: Shows devices with the Razer Aether Light feature. Synapse Override lets you customize lighting and make it react to Chroma-enabled games and Chroma Connect apps. Controlled By Gamer Room App lists devices controlled remotely by the Gamer Room app.
- Devices & Modules: Displays installed modules and modules available to install.
- Global Shortcuts: Binds operations or Synapse functions to custom key combinations that apply across all device profiles. Only Razer Synapse-enabled device inputs are recognized.
Configuring the Viper V4 Pro in Synapse
The Viper V4 Pro tab is the main tab for your mouse. Changes made here save automatically to your local system and cloud storage.
Profiles
A profile stores all of your Razer device settings. By default, the profile name is based on your system’s name. Use the Profiles dropdown bar to switch profiles. To add, import, rename, duplicate, export or delete a profile, use the Miscellaneous button next to the profile.
Customize
The Customize subtab modifies button assignments. The Remap Menu button reveals all current assignments, or you can select a specific button directly on the mouse diagram. The assignments shown include Right Click, Scroll Click, Scroll Up, Scroll Down, Mouse Button 4, Mouse Button 5 and Cycle Up Sensitivity Stages.
Standard and Hypershift
Hypershift mode is a secondary set of button assignments that is active while the Hypershift key is held down. By default, the Hypershift key is the fn key on a Razer Synapse-supported keyboard, but you can assign any mouse button as the Hypershift key.
Indicator LED
This setting customizes the dongle to show either your mouse’s connection or battery status, or only battery warnings when the mouse needs charging.
Button Functions
After selecting a button, you can assign one of these functions.
| Function | What It Does |
| Default | Returns the button to its original setting |
| Keyboard Function | Assigns a keyboard function; Turbo mode repeats it while the button is held |
| Mouse Function | Substitutes another mouse function (see below) |
| Sensitivity | Controls DPI (see below) |
| Macro | Runs a prerecorded sequence; visible only when the Macro module is installed |
| Inter-device | Changes the functionality of other Synapse-enabled devices, such as using a Razer keyboard to change the mouse’s sensitivity stage |
| Switch Profile | Loads a different profile; an on-screen notification appears |
| Switch Chroma Effect | Switches between Chroma Effect profiles in Chroma Studio; visible only when the Chroma Studio module is installed |
| Razer Hypershift | Activates Hypershift mode while the button is held |
| Launch | Opens an app or website using the assigned button |
| Multimedia | Assigns media and audio controls |
| Windows Shortcuts | Assigns a Windows operating system shortcut command |
| Text Function | Types prewritten text when the button is pressed; supports full Unicode and special symbols from character maps |
| Disable | Makes the button unusable |
Mouse Function Options
- Left Click: Performs a left click.
- Right Click: Performs a right click.
- Scroll Click: Activates the universal scrolling function.
- Double Click: Performs a double left click.
- Scroll Up / Scroll Down: Performs the matching scroll command.
- Mouse Button 4: Performs a “Backward” command in most internet browsers.
- Mouse Button 5: Performs a “Forward” command in most internet browsers.
- Scroll Left / Scroll Right: Performs the matching scroll command.
Turbo mode is available for some mouse functions. It emulates repeatedly pressing and releasing the function while the button is held.
Sensitivity Options
- Sensitivity Clutch: Switches to a predefined DPI while the button is held. Releasing it returns to the previous sensitivity.
- Sensitivity Stage Up / Down: Increases or decreases the current sensitivity by one stage.
- On-The-Fly Sensitivity: Hold the designated button and move the scroll wheel up or down to raise or lower the DPI.
- Cycle Up Sensitivity Stages: Moves up one stage and returns to stage 1 after the highest stage.
- Cycle Down Sensitivity Stages: Moves down one stage and returns to the highest stage after stage 1.
Multimedia Options
Volume Down, Volume Up, Mute Volume, Mic Volume Up, Mic Volume Down, Mute Mic, Mute All (microphone and audio output), Play / Pause, Previous Track and Next Track.
Performance
The Performance subtab adjusts sensitivity, acceleration and polling rate.
- Sensitivity: Controls how far the cursor travels for a given physical movement. A higher DPI moves the cursor farther.
- Sensitivity Stages: A stage is a preset sensitivity value. You can create up to 5 stages and cycle through them with the DPI cycle button or with DPI Stage Up/Down buttons.
- Polling Rate: A higher rate means the computer receives your mouse’s status more often, which reduces input latency and improves pointer reaction time.
- Smart Polling Rate Switcher: When enabled, the polling rate adjusts automatically while a game runs in full-screen mode.
- Sensitivity Matcher: Calibrates the mouse to mimic the feel and movement of another mouse. A second mouse is required.
- Mouse Properties: Opens the Windows Mouse Properties for operating system settings that affect the mouse.
Power
The Power subtab manages the mouse’s energy consumption when running on battery. You can also set the mouse to enter sleep mode after a period of inactivity.
Calibration
The Calibration subtab optimizes the sensor for your mouse surface.
- Smart Tracking: Sets the distance at which the sensor stops tracking when lifted, to avoid unwanted cursor movement.
- Enable Asymmetric Cut-Off: Lets you set different values for the lift-off and landing distances. Test these distances thoroughly, because values that are too low may cause surface compatibility issues.
- Tracking Distance: A slider that sets the vertical height at which the sensor stops tracking.
Advanced
- Dynamic Sensitivity: Offers adaptive control of DPI and mouse input. Choose a preset curve or create a custom one.
- Classic: Raises sensitivity with faster movements, like Windows mouse acceleration.
- Natural: Gradually boosts DPI for controlled, predictable actions in arena FPS games.
- Jump: Instantly shifts DPI from low to high during rapid swipes, suited to quick turns in tactical FPS games.
- Custom: Your own sensitivity curve.
- Rotation: Adjusts the sensor angle to match your setup and grip style, for precise horizontal movement.
Linked Games
The Linked Games tab lets you add apps, view peripherals linked to apps and search for listed apps.
Games Subtab
This subtab links apps to your peripherals. You can sort apps alphabetically, by last played or by most played. Apps stay listed even if they are not linked to a Razer device.
- Add an app that is not listed with the Add button (search manually) or the Scan button (search automatically). The Search button finds a specific game or program in the list.
- Click the app in the list.
- Select a device and its profile. The device switches to that profile each time you launch the app.
Devices Subtab
This subtab shows your peripherals and the apps linked to them. Select a device to see its linked apps, add new ones or remove them, and filter with the Views and Order dropdown lists.
- To add an app, drag and drop its executable file into the box, or click the Add button to open the search window.
- In the search window, use Refresh to rescan installed apps, Search to find a specific program, or Browse to locate the app manually.
- Click the tick box at the top left corner of the app to link it. Your device then switches to the selected profile whenever you launch the app.
Macros
A macro is a set of recorded keystrokes, button presses and cursor movements that you can bind to your device and run at any time.
My Macros
The My Macros subtab creates, edits and organizes macros. The Macro dropdown bar lists your macros and lets you search, sort, create folders and create new macros. The New Macro link creates and selects a macro quickly.
Recording a Macro
- Click the Record button, or open the dropdown menu first to set recording options.
- Perform the keystrokes, button presses and cursor movements you want recorded.
- Click the Stop button, or press the Shortcut key, to end the session.
The recording options are:
- Start Delay: A delay of 1 to 5 seconds before recording starts.
- Shortcut Key: A key that starts a recording even when Synapse is in the background.
- Delay Settings: The time between commands.
- Mouse Movement Tracking: Enables recording of mouse movement and sets how it is recorded.
After recording, you can edit each command by selecting it on the macro screen. Commands run in order from the top. The Insert menu on the left adds delays, keystrokes and button presses, an entire macro group, app launches, run commands, typed text and loops.
Key Binds
The Key Binds subtab shows the shortcut keys for the selected macro. Click the Assign Macro To Your Devices button to bind the macro to a key or button without leaving the Macro tab.
Synapse Settings and Feedback
Synapse Subtab
- Auto Launch: Configures the app’s startup behavior.
- Notifications: Shows on-screen notifications even when you run full-screen apps.
- Recommendations: Shows the latest products and features on your Dashboard based on your installed devices and linked games.
- Tutorials Reset: Reactivates all tutorials for Synapse features.
- Synapse 3 Profile Migration: Transfers your device’s profiles, macros and Chroma effects from Synapse 3 to the new Synapse.
- Device Lighting: Chooses which app controls the lighting effects on your device.
General Subtab
- Language: Changes the display language of Razer Synapse.
- About: Shows the software version, the copyright statement, links to Razer’s terms of use and quick access to Razer’s social communities.
Feedback Tab
Use this tab to send comments, suggestions and software problems to Razer. You can also earn rewards for reporting bugs.
Safety Guidelines
- If the mouse does not work properly and troubleshooting does not help, unplug it and contact the Razer hotline or go to support.razer.com.
- Keep the mouse’s accessories out of the reach of small children to avoid accidents or injuries.
- Do not take the device apart or operate it under abnormal current loads. Doing so voids the warranty.
- Keep the device away from liquid, humidity and moisture.
- Operate the device only between 0°C (32°F) and 40°C (104°F). If the temperature goes outside this range, unplug or switch off the device until it stabilizes.
Battery Warning
The mouse contains a Li-ion rechargeable battery, and its life expectancy depends on usage. If you suspect the battery is drained, try charging it.
Caution: Do not open, mutilate, or expose the battery to conducting materials (metal), moisture, liquid, fire or heat. Doing so may cause the battery to leak or explode, resulting in personal injury.
Comfort and Ergonomics
Long periods of repetitive motion, poor peripheral positioning, incorrect body position and poor habits may be associated with discomfort and injury to nerves, tendons and muscles. To reduce the risk:
- Place your keyboard and monitor directly in front of you with the mouse next to it. Keep your elbows at your sides and the keyboard within easy reach.
- Set your chair and table height so the keyboard and mouse are at or below elbow height.
- Keep your feet well supported, your posture straight and your shoulders relaxed.
- During gameplay, relax your wrist and keep it straight. For repeated tasks, avoid bending, extending or twisting your hands for long periods.
- Do not rest your wrists on hard surfaces for long periods. Use a wrist rest.
- Do not sit in one position all day. Get up, step away from your desk and stretch your arms, shoulders, neck and legs.
If you feel pain, numbness or tingling in your hands, wrists, elbows, shoulders, neck or back, consult a qualified medical doctor immediately.
Maintenance
The mouse needs little maintenance. Once a month, unplug it from the computer and clean it with a soft cloth or cotton swab to prevent dirt buildup. Do not use soap or harsh cleaning agents.
Razer recommends one of its premium mouse mats. The mouse’s sensor is tuned to read and track best on Razer mouse mats. Some surfaces cause extra wear on the feet, which then need constant care and eventual replacement.
Frequently Asked Questions
How long does the Razer Viper V4 Pro take to charge?
A completely depleted battery takes about 4 hours to charge fully. For best results, charge it fully before first use by plugging the provided cable directly into your computer’s USB port. While charging, the status indicator breathes green when full, yellow when high, orange at mid level and red when low.
How do I connect the mouse wirelessly?
Plug the Razer HyperSpeed Wireless Gen-2 dongle into your computer’s USB Type A port using the provided cable. Then press and hold the Power/DPI stage cycle button on the underside of the mouse for 2 seconds. The status indicator blinks white while connecting and stays white for 3 seconds once connected.
What does the red blinking light on the mouse mean?
A blinking red status indicator means the battery level is critical. Connect the mouse with the USB cable to charge it. Breathing red also appears while charging when the level is low.
What do the three lights on the dongle show?
The first light shows connection quality, from green (excellent) through yellow (good) and orange (weak) to red (critical). It is off when disconnected. The second shows battery level: green at 100%, yellow at 75%, orange at 50% and red at 25%. The third shows the polling rate, from violet at 125Hz to red at 8000Hz. In Razer Synapse you can customize what the dongle displays.
What are the default DPI settings, and how do I change them?
The mouse has five stages: 400, 800, 1600 (default), 3200 and 6400. Press the Power/DPI stage cycle button to move between them, and watch the status indicator color: red, green, blue, cyan or yellow, in that order. In Razer Synapse’s Performance subtab you can create up to 5 sensitivity stages of your own.
Which polling rates does the mouse support?
The indicator table lists 125Hz, 500Hz, 1000Hz, 2000Hz, 4000Hz and 8000Hz. You can change the rate with the shortcut shown in the guide’s illustration or in Razer Synapse. Synapse also has a Smart Polling Rate Switcher that adjusts the rate automatically while a game runs in full-screen mode.
What do I need to run Razer Synapse?
You need Windows 11 (or higher), or macOS 15 on an Apple Silicon “M” series Mac (or higher), plus an internet connection for installation. Download the installer from razer.com/synapse. A Razer ID account is recommended but optional.
Can I remap the buttons or create macros?
Yes. In Razer Synapse’s Customize subtab, you can assign keyboard, mouse, sensitivity, macro, launch, multimedia, Windows shortcut and text functions to the buttons. You can also turn a button into a Hypershift key or disable it. Macros are recorded in the Macro tab, and the Macro function appears in the Customize options once the Macro module is installed.
How should I clean the mouse, and what temperature can it operate in?
Unplug the mouse once a month and wipe it with a soft cloth or cotton swab. Do not use soap or harsh cleaning agents. Use it only between 0°C (32°F) and 40°C (104°F), and keep it away from liquid, humidity and moisture.