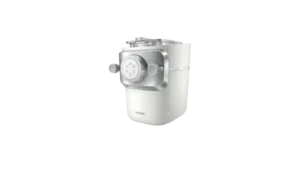
| Field | Details |
| Document Title | Philips HR2660 Pasta Maker User Manual |
| Document Type | User Manual |
| Brand Name | Philips |
| Product Name | Pasta Maker |
| Model Number(s) | HR2660, HR2660/00, HR2660/03 |
| PDF File Size | 1 MB |
| Number of Pages | 38 |
| Languages | English, French, Spanish |
Philips Pasta Maker HR2660
The Philips HR2660 Pasta Maker is an electric pasta-making appliance designed to mix dough and extrude fresh pasta or noodles. It uses interchangeable shaping discs to prepare different pasta shapes, including spaghetti, fettuccine, penne, lasagna sheets, angel hair, and thick spaghetti.
The pasta maker features an automatic program that mixes flour and liquid ingredients before extruding pasta through the selected shaping disc. It also includes an Extrusion Only function for processing dough remaining in the mixing chamber after the automatic cycle finishes.
Product Overview and Features
The Philips HR2660 combines dough mixing and pasta extrusion in one appliance. Flour is placed inside the mixing chamber, while the required liquid is added through a slot in the chamber lid after mixing begins.
The mixing paddle combines the ingredients, and the machine automatically pushes the prepared dough through the selected shaping disc.
Main Features
| Feature | Description |
| Automatic pasta-making program | Mixes dough and automatically extrudes pasta. |
| Extrusion Only function | Processes remaining dough after the automatic program finishes. |
| Interchangeable shaping discs | Produces different pasta and noodle shapes. |
| Digital control panel | Controls power, automatic operation, extrusion, and pausing. |
| Mixing paddle | Combines flour and liquid ingredients. |
| Pasta cutter | Cuts extruded pasta to the desired length. |
| Flour/water measuring cup | Helps measure ingredients for pasta preparation. |
| Shaping disc storage | Provides a drawer for storing pasta shaping discs. |
| Safety switches | Prevent operation when certain components are incorrectly assembled. |
| Removable mixing chamber | Allows the chamber to be removed for cleaning. |
| Cleaning accessories | Help remove dough from shaping disc openings. |
| Multiple flour recipes | Supports recipes using wheat, semolina, rice, lentil, chickpea, pea, and other flours. |
HR2660 Model Variants
| Model | Shaping Disc Configuration |
| HR2660/00 | Six shaping discs |
| HR2660/03 | Eight shaping discs |
Both versions have an automatic pasta-making program, an Extrusion Only function, and removable mixing components.
Parts and Components
The Philips HR2660 includes components for mixing dough, shaping pasta, cutting the finished strands, and cleaning the appliance.
Main Machine Components
| Part | Component | Function |
| A | Mixing chamber lid | Covers the mixing chamber and contains the liquid inlet slot. |
| B | Mixing chamber lid safety switch hole | Forms part of the lid safety mechanism. |
| C | Power cord | Connects the appliance to the electrical supply. |
| D | Disc holder safety switch | Helps prevent operation when components are incorrectly installed. |
| E | Main unit | Houses the motor and electronic components. |
| F | Shaping disc storage | Stores pasta shaping discs. |
| G | Water/flour cup | Measures flour and liquid ingredients. |
| H | Cleaning brush | Helps clean removable components. |
| I | Angel hair shaping disc cleaning brush | Cleans the openings in the angel hair shaping disc. |
| J | Pasta cutter | Cuts extruded pasta to the required length. |
| K | Front panel knobs | Secure the front panel to the appliance. |
| L | Front panel | Holds the shaping disc assembly in position. |
| M | Shaping disc | Determines the shape of the extruded pasta. |
| N | Disc holder | Supports the selected shaping disc. |
| O | Disc holder safety switch lever | Forms part of the disc holder safety mechanism. |
| P | Mixing paddle | Mixes flour and liquid ingredients into dough. |
| Q | Mixing chamber | Holds ingredients during mixing and extrusion. |
Mixing Chamber and Paddle
The mixing chamber holds flour while the mixing paddle combines it with the liquid ingredients.
The chamber lid must be correctly installed before the appliance can operate.
Liquid is added through the slot in the lid after the automatic mixing process begins.
Front Panel and Shaping Disc Assembly
The front panel secures the disc holder and shaping disc.
Both front panel knobs must be tightened before the appliance is used.
Important: If the front panel or shaping disc is incorrectly assembled, a safety switch prevents the pasta maker from operating.
Control Panel, Buttons, and Display
The Philips HR2660 has a digital control panel with four operating buttons and a display.
| Control | Function |
| On/Off | Switches the pasta maker on or off. |
| Automatic | Selects the automatic pasta-making program. |
| Extrusion Only | Activates additional extrusion after dough mixing has finished. |
| Start/Pause | Starts or pauses the selected operation. |
| Display | Shows operating information and error codes. |
Automatic Program
The Automatic program combines dough mixing and pasta extrusion.
After the program starts:
- The mixing paddle begins mixing the ingredients.
- Liquid is added through the lid slot.
- The machine continues mixing.
- A beep sounds when mixing finishes.
- Pasta extrusion begins automatically after a few seconds.
Extrusion Only Function
The Extrusion Only function can process dough remaining inside the mixing chamber after the automatic pasta-making process finishes.
The additional extrusion cycle lasts three minutes.
Warning: Do not select Extrusion Only before dough mixing is complete. Doing so may damage the pasta maker.
Start/Pause Button
The Start/Pause button begins the selected pasta-making program.
It is also used to resume an interrupted process after the mixing chamber lid has been correctly closed.
Technical Specifications
| Specification | Details |
| Brand | Philips |
| Model family | HR2660 |
| Model variants | HR2660/00, HR2660/03 |
| Product type | Electric pasta maker |
| Operating programs | Automatic, Extrusion Only |
| Control type | Digital |
| Flour quantity per batch | Approximately 250–500 g |
| Minimum batch quantity | Approximately 250 g / 8.8 oz |
| Maximum batch quantity | 500 g / 17.6 oz |
| Extra extrusion duration | 3 minutes |
| Recommended maximum continuous operation | 45 minutes |
| Recommended rest period | 15 minutes after continuous operation |
| Maximum ingredient temperature | Below 60°C / 140°F |
| Maximum surrounding temperature specified in warning | Below 60°C / 140°F |
| Shaping discs — HR2660/00 | 6 |
| Shaping discs — HR2660/03 | 8 |
| Removable mixing chamber | Yes |
| Shaping disc storage drawer | Yes |
| Dishwasher cleaning | Not permitted |
| Warranty | One-year limited warranty |
| Electrical voltage | Refer to the rating on the bottom of the appliance |
Pasta Shaping Discs and Available Shapes
The Philips HR2660 uses interchangeable shaping discs to produce different pasta shapes.
The available discs depend on the model version.
Shaping Disc Compatibility
| Pasta Shape | HR2660/00 | HR2660/03 |
| Spaghetti | Yes | Yes |
| Fettuccine | Yes | Yes |
| Penne | Yes | Yes |
| Lasagna | Yes | Yes |
| Angel Hair | Yes | Yes |
| Tagliatelle | No | Yes |
| Pappardelle | No | Yes |
| Thick Spaghetti | Yes | Yes |
How to Select a Shaping Disc
- Switch off the appliance.
- Unplug it from the electrical outlet.
- Loosen the front panel knobs.
- Remove the front panel carefully.
- Remove the currently installed shaping disc.
- Place the required shaping disc into the disc holder.
- Make sure the inner cavity of the shaping disc fits correctly into the holder.
- Reattach the front panel.
- Tighten both front panel knobs.
The shaping disc must be firmly installed before pasta preparation begins.
Important Safety Instructions
The Philips HR2660 contains electrical components and moving mechanical parts. The appliance must be correctly assembled and operated according to the following precautions.
Electrical Safety
- Read all instructions before using the pasta maker.
- Never immerse the motor unit in water or another liquid.
- Do not rinse the motor unit under running water.
- Clean the motor unit using only a moist cloth.
- Check that the electrical voltage on the bottom of the appliance matches the local power supply.
- Do not use the appliance if the plug, power cord, or other components are damaged or visibly cracked.
- Switch off and unplug the appliance when it is not being used.
- Disconnect the power before assembling, removing, or cleaning components.
- Do not allow the power cord to hang over the edge of a table or countertop.
- Keep the cord away from hot surfaces, including stoves.
- Never pour water or another liquid onto the digital display.
- Do not operate the appliance outdoors.
When unplugging the appliance, pull the plug rather than the power cord.
Moving Parts and Safety Mechanisms
- Avoid contact with moving components.
- Never reach into the mixing chamber while the appliance is plugged in.
- Do not insert objects into the appliance.
- Never bypass the lid safety mechanism.
- Make sure the shaping disc and front panel are securely installed.
- Tighten the front panel knobs before operation.
- Switch off and unplug the appliance before changing accessories.
- Do not move the appliance while it is operating.
- Do not place heavy objects on the appliance.
Ingredient and Temperature Precautions
- Do not use ingredients at or above 60°C (140°F).
- Do not place the pasta maker in surroundings at or above 60°C (140°F).
- Do not pour liquid directly into the mixing chamber before closing the lid.
- Add liquid slowly through the lid slot after mixing starts.
- Do not pour liquid into the safety switch hole.
- Do not exceed the recommended flour quantities.
- Do not use less flour than the minimum recommended amount.
Cleaning Safety
- Do not clean the appliance in a dishwasher.
- Do not use scouring pads or abrasive cleaning agents.
- Do not use aggressive liquids such as gasoline, alcohol, propanol, petrol, or acetone.
- Take care around sharp edges when removing or cleaning parts.
- Clean the appliance after every use.
- Make sure the appliance is unplugged before cleaning.
Continuous Operation
Philips recommends allowing the appliance to rest for 15 minutes after 45 minutes of continuous use.
If multiple pasta batches are being prepared, clean the shaping disc with the supplied cleaning tool after each batch.
Child Safety
Children must be supervised to prevent them from playing with the appliance.
People with reduced physical, sensory, or mental capabilities, or those without sufficient operating experience, must receive appropriate supervision and instruction from a person responsible for their safety.
Before First Use
All parts that come into contact with food must be cleaned thoroughly before the first pasta-making cycle.
Disassembling the Pasta Maker for Initial Cleaning
- Make sure the appliance is unplugged.
- Remove the mixing chamber lid.
- Loosen the front panel control knobs.
- Carefully remove the front panel.
- Remove the shaping disc.
- Remove the shaping disc holder.
- Remove the mixing paddle.
- Remove the mixing chamber.
- Clean all detachable parts.
- Wipe the cleaned components dry.
- Pull out the shaping disc storage drawer.
- Clean the shaping discs and cleaning tools.
Warning: The front panel is heavy. Take extra care when removing or reinstalling it.
How to Assemble the Philips HR2660 Pasta Maker
Correct assembly is essential because the appliance uses safety switches to prevent operation when certain parts are incorrectly installed.
Step-by-Step Assembly
- Install the mixing chamber. Push the mixing chamber into the main unit until correctly positioned.
- Insert the mixing paddle. Align the paddle with the opening in the main unit.
- Secure the mixing paddle. Push it fully into the appliance.
- Attach the disc holder. Position the shaping disc holder on the machine.
- Install the shaping disc. Place the selected shaping disc into its holder.
- Check the disc alignment. Make sure the inner cavity of the shaping disc fits correctly with the disc holder.
- Attach the front panel. Position the front panel on the main unit.
- Tighten the knobs. Fasten both front panel control knobs securely.
- Close the mixing chamber lid. Make sure the lid is fully and correctly installed.
The pasta maker is ready for ingredients once the assembly is complete.
Assembly Safety Check
Before switching on the appliance, check that:
- The mixing chamber is fully inserted.
- The mixing paddle is correctly seated.
- The disc holder is properly installed.
- The selected shaping disc is secured.
- The front panel is completely attached.
- Both front panel knobs are tight.
- The mixing chamber lid is closed correctly.
An incorrectly installed front panel, shaping disc, or lid can prevent the machine from operating.
Preparing Ingredients for Pasta Making
The correct flour-to-liquid ratio is essential for successful pasta extrusion.
The Philips HR2660 uses flour and liquid measurements based on the selected flour type.
Flour Quantities
| Batch Size | Flour Quantity |
| One batch | Approximately 250 g / 8.8 oz |
| Large batch | Approximately 500 g / 17.6 oz |
Use the supplied water/flour cup and a kitchen scale to measure the ingredients.
A kitchen scale helps obtain the correct quantities for the selected recipe.
Do not add more than 500 g of flour to the mixing chamber.
Measuring Water and Eggs
The required liquid quantity depends on the type and amount of flour.
When preparing egg pasta:
- Measure the ingredients according to the recipe.
- Mix the egg evenly with the water.
- Use the prepared liquid mixture during the automatic mixing cycle.
For vegetable pasta, vegetable juice must also be mixed evenly with water before being added through the lid slot.
Any additional ingredients introduced through the liquid slot must be in liquid form.
Philips HR2660 Pasta Maker Recipe and Flour-to-Water Ratio Chart
The following recipes use 250 g (8.8 oz) of flour or flour mixture per batch.
The liquid quantities and binders are based on the pasta maker’s recipe table.
Pasta Flour and Liquid Measurements
| Flour or Flour Mixture | Flour Quantity | Liquid | Additional Binder |
| Lentil flour | 250 g | 75 ml | 1 tbsp xanthan gum |
| Lentil flour | 250 g | 75 ml | None |
| Pea flour | 250 g | 75 ml | 1 tbsp xanthan gum |
| Pea flour | 250 g | 75 ml | None |
| Chickpea flour | 250 g | 75 ml | 1 tbsp xanthan gum |
| Chickpea flour | 250 g | 75 ml | None |
| Buckwheat and rice flour | 150 g buckwheat + 100 g rice flour | 130 ml | 1 egg |
| Corn and rice flour | 50 g corn flour + 200 g rice flour | 120 ml | 1 tbsp xanthan gum |
| Rice flour | 250 g | 120 ml | 1 tbsp xanthan gum |
| Wheat flour | 250 g | 95 ml | None |
| Wheat flour | 250 g | 95 ml | 1 egg |
| Spelt flour | 250 g | 85–90 ml | None |
| Whole grain flour | 250 g | 115 ml | None |
| Semolina | 250 g | 105 ml | None |
| Semolina | 250 g | 110 ml | 1 egg |
For egg recipes, follow the measuring cup’s water-and-egg markings and mix the egg evenly with the liquid before adding it.
Gluten-Free and Vegan Pasta
The recipe chart includes several flour options for gluten-free pasta.
These include:
- Lentil flour.
- Pea flour.
- Chickpea flour.
- Rice flour.
- Buckwheat and rice flour.
- Corn and rice flour.
Vegan recipes in the chart include flour mixtures that do not contain eggs.
Some gluten-free recipes use xanthan gum as a binder to help hold the dough together.
Important Notes About Recipe Ratios
Flour characteristics may vary with the season and the region where ingredients are produced.
These differences can affect the amount of liquid required.
When preparing gluten-free pasta or pasta using legume flour, the manufacturer notes that approximately 10–20 ml less liquid may be needed than the recommended amount in some cases.
The quantity should be adjusted according to the flour and dough consistency.
How to Make Pasta with the Philips HR2660
The automatic pasta-making program mixes the ingredients and then extrudes the dough through the selected shaping disc.
Step-by-Step Pasta Preparation
- Make sure the pasta maker is correctly assembled.
- Select and install the required shaping disc.
- Use a kitchen scale to measure the flour.
- Remove the mixing chamber lid.
- Pour the flour into the mixing chamber.
- Close the mixing chamber lid.
- Measure the required amount of water or other liquid according to the selected recipe.
- Insert the power plug into the electrical outlet.
- Wait for the appliance to sound once and for all indicator lights to flash once.
- Press On/Off to switch on the pasta maker.
- Select Automatic mode if it is not already active.
- Press Start/Pause to begin the automatic pasta-making program.
- Wait until the mixing paddle begins operating.
- Slowly pour the measured liquid along the entire length of the slot in the mixing chamber lid.
- Allow the appliance to continue mixing the ingredients.
- Wait for the beep indicating the mixing process has finished.
- Allow the appliance to begin extruding pasta automatically.
- Use the pasta cutter to cut the extruded pasta to the desired length.
- Allow the automatic program to finish.
Important: Do not add extra ingredients after the measured liquid has been poured into the mixing chamber during the mixing cycle. This may affect the pasta texture.
How Automatic Pasta Extrusion Works
After the dough-mixing stage finishes, the machine sounds a beep.
Pasta begins emerging through the shaping disc after a few seconds.
The selected shaping disc determines the type of pasta produced.
Use the pasta cutter to cut the pasta as it comes out.
Cutting the Pasta
The pasta cutter can be used to divide extruded pasta into the required lengths.
The desired length depends on the selected pasta shape and intended recipe.
The cooking time of the prepared pasta varies according to personal preference, pasta shape, and number of servings.
Using the Extrusion Only Function
Some dough may remain inside the mixing chamber after the automatic pasta-making cycle finishes.
The Extrusion Only program can process this remaining dough.
How to Start Extra Extrusion
- Wait until the automatic pasta-making process is complete.
- Check whether dough remains in the mixing chamber.
- Press the Extrusion Only button.
- Press Start/Pause.
- Allow the appliance to complete the additional extrusion cycle.
The extra extrusion program lasts three minutes.
Warning: Do not use Extrusion Only before the dough-mixing process has finished. Selecting it too early can damage the pasta maker.
Understanding the Correct Pasta Dough Consistency
The consistency of the dough is one of the most important factors in successful pasta preparation.
The Philips HR2660 is designed to process dough that has a crumbly texture after mixing.
Dough Consistency Guide
| Dough Condition | Appearance | Meaning |
| Too dry | Resembles loose flour with little visible binding. | The mixture is too dry for successful pasta making. |
| Correct consistency | Forms small, crumbly pieces. | The mixture has the intended texture for extrusion. |
| Too wet | Forms a smooth, cohesive dough mass. | The mixture is too wet for the recommended process. |
The correct dough should look crumbly inside the mixing chamber rather than forming a smooth dough ball.
What Happens When the Dough Is Too Dry?
Excessively dry dough may not extrude successfully.
The manual identifies incorrect flour-to-liquid ratios as a cause of extrusion failure.
If extrusion fails because the ratio is incorrect, the ingredients should be prepared again using the appropriate measurements.
What Happens When the Dough Is Too Wet?
Dough that forms a smooth, cohesive mass rather than crumbly pieces is too wet for the recommended pasta-making process.
Different types of flour absorb liquid differently, so the liquid quantity must match the selected recipe.
Gluten-Free Pasta Dough
Gluten acts as a binder and helps pasta hold together.
Gluten-free flour may require another binding ingredient, such as:
- Eggs.
- Xanthan gum.
Different gluten-free flours behave differently during pasta preparation.
The manual identifies quinoa and buckwheat as flour types that can work well.
Coconut flour is identified as a flour that may not be suitable for pasta making.
Cleaning the Philips HR2660 Pasta Maker
The pasta maker must be cleaned after every use.
Regular cleaning removes flour and dough residues from the mixing chamber, paddle, disc holder, and shaping discs.
Before Cleaning
- Switch off the pasta maker.
- Disconnect the power plug from the electrical outlet.
- Make sure the machine has stopped operating.
- Remove the mixing chamber lid.
- Loosen the front panel knobs.
Warning: The front panel is heavy. Handle it carefully during removal.
How to Disassemble the Pasta Maker for Cleaning
Remove the components in the following order:
- Front panel.
- Shaping disc.
- Shaping disc holder.
- Mixing paddle.
- Mixing chamber.
Keep the removed components together for cleaning.
Cleaning the Main Unit
Use a dry cloth to remove flour residues from the main unit.
The motor unit must never be immersed in water or rinsed under running water.
Cleaning the Shaping Discs
- Remove the shaping disc from the disc holder.
- Use the supplied cleaning tool to remove dough residue.
- Clean the disc with water after removing the dough.
- Allow the disc to air-dry.
- Use the appropriate cleaning tool to clear any remaining dough from the openings.
The shaping discs should be allowed to air-dry for approximately 2–4 hours before the remaining dough is pushed out of the holes using the cleaning tool.
For the angel hair shaping disc, use the corresponding cleaning brush.
Cleaning the Removable Components
Clean the removable parts after each use.
These include:
- Mixing chamber lid.
- Mixing chamber.
- Mixing paddle.
- Shaping disc.
- Shaping disc holder.
- Front panel.
Wipe the components dry after cleaning.
Important: Do not use a dishwasher to clean the appliance or its parts.
Cleaning the Control Panel and Exterior
Use a dry cloth to clean the control panel and outside surfaces of the pasta maker.
Do not pour water or cleaning liquid onto the display.
Cleaning Products to Avoid
Do not use:
- Metal scouring pads.
- Abrasive cleaning materials.
- Caustic cleaning products.
- Gasoline.
- Alcohol.
- Propanol.
- Petrol.
- Acetone.
These products may damage the appliance or its components.
Maintenance Instructions
Proper cleaning and operating intervals help prevent the mixing and extrusion mechanisms from becoming blocked.
Maintenance Schedule
| Maintenance Task | Frequency | Instructions |
| Clean the mixing chamber | After every use | Remove dough and flour residues. |
| Clean the mixing paddle | After every use | Remove accumulated dough. |
| Clean shaping discs | After every use | Use the supplied cleaning tools. |
| Clean shaping disc openings | As needed after drying | Allow discs to air-dry for 2–4 hours before clearing remaining dough. |
| Clean the main unit | After use or when flour collects | Wipe flour residues with a dry cloth. |
| Clean the control panel | As needed | Use a dry cloth. |
| Check front panel knobs | Before use | Make sure they are securely fastened. |
| Check shaping disc installation | Before use | Confirm that the disc is correctly fitted. |
| Rest the appliance | After prolonged continuous operation | Allow approximately 15 minutes of rest after 45 minutes of use. |
Continuous Pasta Making
If several batches are being prepared:
- Complete the current pasta-making cycle.
- Clean the shaping disc with the supplied cleaning tool.
- Check for remaining dough residues.
- Prepare the next batch within the recommended operating limits.
The appliance should not be used continuously beyond the recommended operating interval without a rest period.
Storage Instructions
Before storing the pasta maker:
- Switch off the appliance.
- Unplug it from the electrical outlet.
- Allow it to cool.
- Clean all removable parts.
- Make sure the components are completely dry.
- Store the shaping discs in the designated storage drawer.
Storing the Shaping Discs
The appliance includes a drawer for shaping disc storage.
The storage drawer has slots for different disc thicknesses.
Place thicker shaping discs in the corresponding larger slots and thinner discs in the slots intended for them.
Correct storage keeps the discs together and ready for the next use.
Troubleshooting Guide
The following troubleshooting instructions cover power problems, assembly faults, interrupted operation, overheating, water leakage, and pasta-making errors.
Philips HR2660 Troubleshooting Table
| Problem | Possible Cause | Recommended Solution |
| Indicator lights do not turn on | Power plug is not connected correctly. | Check the power plug and electrical outlet. |
| Machine beeps but does not operate | Mixing chamber, shaping disc, or front panel is incorrectly assembled. | Reassemble the components correctly. |
| Safety switch activates unexpectedly | Front panel knobs are loose. | Securely fasten the front panel. |
| Machine stops or restarts during processing | Too much flour was added. | Use no more than 500 g of flour per batch. |
| Machine stops when lid is opened | Lid safety switch has activated. | Close the lid and press Start/Pause. |
| Machine stops without alarm or flashing indicators | Appliance has overheated. | Disconnect power and allow it to cool for 15 minutes. |
| Small amount of water leaks out | Water was added before the program started. | Add liquid only after mixing begins. |
| E1 appears | Shaping disc is missing or incorrectly installed. | Install the disc holder, shaping disc, and front panel correctly. |
| E1 appears | Mixing chamber lid is missing or incorrectly installed. | Attach the lid correctly. |
| E2 appears with flashing lights and alarm | Mixing paddle is blocked, dough is too dry, or the wrong program was selected. | Disconnect power, clean the appliance, and restart according to the instructions. |
| E4 appears | Appliance malfunction. | Switch off, unplug, reconnect, and restart. Contact service if the problem remains. |
Indicator Lights Do Not Turn On
If the control panel does not illuminate:
- Check that the power plug is correctly connected.
- Check that the electrical outlet is working.
- Reconnect the plug if necessary.
Pasta Maker Beeps but Does Not Start
If the machine makes a sound after On/Off is pressed but does not operate, the mixing chamber, shaping disc, or front panel may be assembled incorrectly.
- Switch off and unplug the appliance.
- Check the mixing chamber.
- Confirm that the paddle and disc holder are installed.
- Check the shaping disc.
- Reattach the front panel.
- Tighten the front panel knobs.
- Close the mixing chamber lid.
Appliance Stops or Restarts Unexpectedly
The safety switch may activate if the front panel is loose or if the mixing chamber contains too many ingredients.
Make sure the front panel is securely fastened.
The maximum permitted flour quantity is 500 g (17.6 oz) per batch.
If the flour quantity was exceeded, reduce the amount before preparing another batch.
Machine Stops When the Lid Is Opened
The machine stops automatically when the mixing chamber lid is opened during processing.
This is a safety function.
To resume:
- Close the lid correctly.
- Press Start/Pause.
Do not bypass or interfere with the lid safety mechanism.
Pasta Maker Stops Without a Warning
The appliance may stop without an alarm or flashing indicators if it overheats during extended continuous operation.
- Disconnect the appliance from the electrical supply.
- Allow it to cool.
- Wait approximately 15 minutes before restarting.
Philips recommends keeping continuous operation below 45 minutes.
Water Leaks from the Pasta Maker
A small amount of water may leak if liquid is added to the chamber before the automatic program begins.
To prevent this:
- Add the flour to the mixing chamber.
- Close the lid.
- Start the automatic pasta-making program.
- Wait until mixing begins.
- Slowly pour the liquid through the lid slot.
Error Codes and Their Solutions
E1 Error Code — Incorrect Assembly
E1 appears when the shaping disc or mixing chamber lid is missing or incorrectly installed.
Possible causes:
- The shaping disc is not attached.
- The disc holder is incorrectly installed.
- The front panel is not secured.
- The mixing chamber lid is missing or incorrectly attached.
Recommended solution:
- Switch off and unplug the machine before adjusting components.
- Attach the disc holder to the main unit.
- Install the selected shaping disc correctly.
- Secure the front panel.
- Tighten the front panel knobs.
- Close the mixing chamber lid correctly.
E2 Error Code — Mixing or Processing Problem
E2 may appear when the pasta maker stops during processing.
The indicators flash rapidly, and an alarm sounds.
Possible causes:
- The mixing paddle is blocked by a foreign object.
- The dough is too dry.
- The wrong program was selected.
Recommended solution:
- Disconnect the appliance from the electrical supply.
- Allow the machine to stop completely.
- Clean the pasta maker.
- Check for blockages or remaining dough.
- Confirm the correct recipe and program.
- Restart the pasta-making process according to the operating instructions.
E4 Error Code — Appliance Malfunction
E4 indicates an appliance malfunction.
Recommended solution:
- Switch off the pasta maker.
- Unplug it from the electrical outlet.
- Reconnect the appliance.
- Restart the machine.
If E4 continues to appear, contact the Philips service center.
Do not attempt unauthorized internal repairs.
Replacement Parts and Accessories
The pasta maker uses interchangeable shaping discs and cleaning tools.
Shaping Disc Accessories
| Accessory | HR2660/00 | HR2660/03 |
| Spaghetti shaping disc | Included | Included |
| Fettuccine shaping disc | Included | Included |
| Penne shaping disc | Included | Included |
| Lasagna shaping disc | Included | Included |
| Angel hair shaping disc | Included | Included |
| Thick spaghetti shaping disc | Included | Included |
| Tagliatelle shaping disc | — | Included |
| Pappardelle shaping disc | — | Included |
The appliance also includes a pasta cutter, measuring cup, and cleaning tools.
Use only Philips-approved replacement parts and accessories.
The use of accessories or parts from other manufacturers that Philips does not recommend may invalidate the warranty.
Warranty Information
One-Year Limited Warranty
The Philips HR2660 Pasta Maker is covered by a one-year limited warranty.
Philips warrants the product against defects in:
- Materials.
- Workmanship.
- Assembly.
Coverage applies under normal use according to the product specifications and safety warnings.
The warranty begins on the original date of purchase.
Warranty Eligibility
The warranty applies only to the original purchaser and is not transferable.
To request warranty service, the purchaser must provide an original sales receipt showing:
- Product name.
- Date of purchase.
Warranty Service
Philips may repair the appliance or replace it at its discretion.
The warranty limits liability to repair or replacement, with exclusions for incidental, special, and consequential damages where permitted by law.
Additional legal rights may apply depending on the state, province, or country.
For warranty assistance, visit: https://www.philips.com/support
Customer Support Information
Philips provides product support, troubleshooting assistance, and warranty service through its customer service channels.
| Support Service | Contact |
| Official Support Website | https://www.philips.com/support |
| Product Registration | https://www.philips.com/welcome |
| Pasta Maker Website | https://www.philips.com/myPastaMaker |
| United States Support Phone | 1-800-933-7876 |
| Canada Support Phone | +1 (800) 371-7597 |
| Recycling Information | https://www.recycle.philips.com |
United States Importer
Philips Domestic Appliances North America Corporation
1600 Summer Street
Stamford, CT 06905
United States of America
Canada Importer
Philips Domestic Appliances Canada, Inc.
40 University Avenue, Suite 904
Toronto, Ontario M5J 1T1
Canada
If troubleshooting does not resolve an operating problem, contact Philips Consumer Care or an authorized service center.
Frequently Asked Questions
How do I use the Philips HR2660 Pasta Maker?
Install the mixing chamber, paddle, disc holder, shaping disc, and front panel. Add the measured flour, close the lid, and switch on the machine. Start the Automatic program and slowly add the measured liquid through the lid slot after mixing begins. The machine mixes the dough and automatically extrudes the pasta.
How much flour can I put in the Philips HR2660 Pasta Maker?
The recommended flour quantity is approximately 250–500 g per batch. The maximum amount is 500 g (17.6 oz). Exceeding this quantity can trigger the safety switch and interrupt operation.
How much water should I use for 250 g of flour?
The liquid quantity depends on the flour type. The recipe chart specifies 95 ml for wheat flour, 105 ml for semolina without egg, 115 ml for whole grain flour, and 85–90 ml for spelt flour. Follow the appropriate flour-to-liquid ratio for the selected recipe.
Why is my Philips HR2660 Pasta Maker not extruding pasta?
An incorrect flour-to-liquid ratio can prevent successful extrusion. The dough should have a crumbly consistency rather than being too wet or too dry. If the ratio is incorrect and extrusion fails, prepare the ingredients again using the recommended measurements.
What does E1 mean on the Philips HR2660 Pasta Maker?
E1 indicates that the shaping disc or mixing chamber lid is missing or incorrectly installed. Check the disc holder, shaping disc, front panel, and lid. Make sure all parts are properly secured before restarting.
How do I fix an E2 error on the Philips Pasta Maker?
E2 may indicate that the mixing paddle is blocked, the dough is too dry, or the wrong program was selected. Disconnect the appliance, clean the machine, check the ingredients and program, and restart according to the operating instructions.
How do I clean the Philips HR2660 shaping discs?
Remove the shaping disc and use the supplied cleaning tool to remove dough residues. Clean it with water, allow it to air-dry for approximately 2–4 hours, and use the appropriate cleaning tool to remove remaining dough from the openings. Do not clean the shaping discs in a dishwasher.
How long is the Philips HR2660 Pasta Maker warranty?
The Philips HR2660 has a one-year limited warranty covering defects in materials, workmanship, and assembly under normal use. The warranty applies to the original purchaser and requires an original sales receipt showing the product name and purchase date.