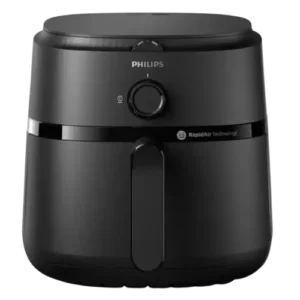
| Field | Details |
| Document Title | Philips 2000 Series Airfryer NA220/NA221 User Manual |
| Document Type | User Manual |
| Brand Name | Philips |
| Product Name | 2000 Series Airfryer |
| Model Number(s) | NA220, NA221 |
| PDF File Size | 837 KB |
| Number of Pages | 38 |
| Languages | English, Spanish, French |
Philips 2000 Series Airfryer NA220
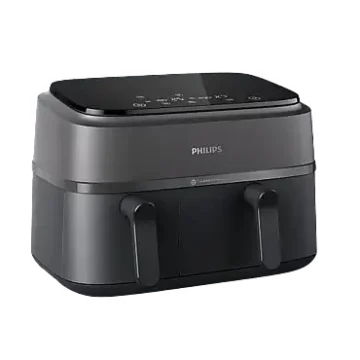
The Philips 2000 Series Airfryer NA220 and NA221 is a digital air fryer designed to cook food using circulating hot air. It can prepare foods such as French fries, chicken, fish, vegetables, bread, muffins, and other baked or roasted dishes.
The appliance features a digital control panel with adjustable cooking temperature and time, preset cooking programs, a keep-warm function, and a see-through window for checking food during cooking. The removable pan and frying insert have nonstick surfaces and can be cleaned in a dishwasher.
The Philips 2000 Series Airfryer operates without filling the pan with cooking oil or frying fat. Cooking temperatures and times can be selected manually or through the available presets.
The appliance does not require preheating before cooking. Food can be placed in the pan, the required settings selected, and the cooking cycle started directly.
Product Overview and Features
The Airfryer uses hot air to cook ingredients placed inside its removable pan. The frying insert supports the food while allowing air to circulate during cooking.
The control panel provides manual temperature and time adjustments, along with preset cooking programs for commonly prepared foods.
| Feature | Description |
| Hot air cooking | Uses circulating hot air to prepare food without filling the pan with oil. |
| Digital control panel | Controls cooking temperature, time, and preset programs. |
| Preset cooking programs | Provides preset settings for fries, chicken, fish, vegetables, muffins, meat chops, and breakfast foods. |
| Adjustable temperature | Allows users to select the temperature required for different foods. |
| Adjustable cooking time | Allows cooking duration to be set using the digital controls. |
| Keep Warm | Maintains food at 80°C (170°F) for a preset 30 minutes. |
| See-through window | Allows food to be checked during cooking. |
| Light button | Controls the appliance’s light. |
| Start/Pause function | Pauses or resumes a cooking cycle. |
| Automatic pause | Pauses cooking when the pan is removed and resumes when it is reinserted. |
| Removable frying insert | Supports food inside the cooking pan. |
| Nonstick cooking surfaces | Helps with cleaning the pan and frying insert. |
| Dishwasher-safe parts | The pan and frying insert can be washed in a dishwasher. |
The Airfryer is intended for normal household use and must be placed on a stable, level, heat-resistant surface with adequate clearance for ventilation.
Parts and Components
The Philips 2000 Series NA220 and NA221 includes the following main components.
| Part No. | Component | Function |
| 1 | Control panel | Contains the cooking controls and digital display. |
| 2 | Frying insert | Supports ingredients inside the pan during cooking. |
| 3 | MAX indication | Marks the maximum permitted food level. |
| 4 | Pan | Holds the frying insert and ingredients during cooking. |
| 5 | See-through window | Provides a view of the food inside the cooking compartment. |
| 6 | Power cord | Connects the appliance to the electrical supply. |
| 7 | Cord wrap | Provides storage for the power cord. |
| 8 | Air outlets | Release hot air and steam during operation. |
Pan and Frying Insert
The removable pan holds the ingredients and frying insert.
The frying insert must always be installed before cooking. It should be placed inside the pan before food is added.
Important: Never operate the Airfryer pan without the frying insert.
Do not fill the pan beyond the MAX marking or exceed the recommended quantities in the cooking table.
See-Through Window
The pan includes a transparent window that allows food to be observed during cooking.
The light button on the control panel can be used to control the appliance’s light.
Control Panel, Buttons, and Display
The digital control panel contains nine main control groups labeled A through I.
| Control | Name | Function |
| A | Temperature button | Selects the cooking temperature for adjustment. |
| B | On/Off button | Switches the appliance on or off. |
| C | Keep Warm button | Selects the keep-warm function. |
| D | Light button | Controls the appliance’s light. |
| E | Preset menus | Provides preset cooking programs. |
| F | Decrease button | Reduces the selected time or temperature. |
| G | Start/Pause button | Starts, pauses, or resumes cooking. |
| H | Increase button | Raises the selected time or temperature. |
| I | Time button | Selects the cooking timer for adjustment. |
How the Digital Display Works
During cooking, the display alternates between the selected cooking temperature and the remaining cooking time.
During the final minute, the timer counts down in seconds.
When the selected cooking time finishes, the appliance sounds a timer bell.
If the required cooking time is not set within 30 minutes, the appliance switches off automatically for safety.
Start/Pause Button
The Start/Pause button controls the cooking cycle.
- Press it to start cooking.
- Press it during operation to pause cooking.
- Press it again to resume cooking.
The appliance also pauses automatically when the pan is removed.
When the pan is returned, cooking resumes.
Technical Specifications
| Specification | Details |
| Brand | Philips |
| Product series | 2000 Series |
| Model numbers | NA220, NA221 |
| Product type | Digital air fryer |
| Cooking technology | Hot air cooking |
| Control type | Digital |
| Temperature control | Adjustable |
| Cooking time control | Adjustable |
| Preset programs | 8 cooking presets |
| Keep Warm function | 30 minutes at 80°C (170°F) |
| Viewing window | Yes |
| Removable pan | Yes |
| Frying insert | Removable |
| Pan and frying insert cleaning | Dishwasher-safe |
| Preheating | Not required |
| Operating ambient temperature | 5°C–40°C |
| Minimum ventilation clearance | 10 cm at the back, both sides, and above |
| Recommended fries quantity | Up to 500 g (18 oz) per batch |
| Cooling time before cleaning or handling | Approximately 30 minutes |
| Warranty | Two-year limited warranty |
| Electrical connection | Grounded wall outlet |
The electrical supply voltage must match the rating marked on the appliance.
Important Safety Instructions
The Philips 2000 Series Airfryer is an electrical heating appliance. Basic electrical, fire, burn, and food safety precautions must be followed whenever it is used.
Electrical Safety
- Read all instructions before using the appliance.
- Do not immerse the appliance, power cord, or plug in water or other liquids.
- Do not allow water or other liquids to enter the appliance.
- Connect the appliance only to a properly grounded wall outlet protected by an earth leakage circuit breaker.
- Make sure the plug is properly inserted into the outlet.
- Check that the voltage indicated on the appliance matches the local electrical supply.
- Do not use the appliance if the plug, power cord, or appliance is damaged.
- Keep the power cord away from hot surfaces.
- Do not allow the cord to hang over the edge of a table or countertop.
- Do not use an external timer or separate remote-control system.
- Unplug the Airfryer when it is not being used and before cleaning, assembling, disassembling, or storing it.
If the power cord is damaged, it must be replaced by Philips, an authorized service agent, or similarly qualified personnel.
Fire and Heat Safety
- Never fill the cooking pan with oil or frying fat.
- Do not cover the air inlets or outlets while the appliance is operating.
- Do not place the Airfryer on or near a hot gas stove, electric burner, cooking plate, or heated oven.
- Keep the appliance away from curtains, tablecloths, and other combustible materials.
- Do not place anything on top of the appliance while it is operating.
- Do not put oversized foods or metal utensils inside the appliance.
- Do not place cardboard, plastic, wood, cotton, baking paper, or other flammable materials inside the appliance.
- Do not use loose, lightweight ingredients that may be lifted by the airflow.
- Make sure food does not become stuck in the heating element.
Warning: The cooking pan, frying insert, heating element, and interior surfaces can become very hot during operation.
Do not touch the inside of the appliance while it is operating.
Hot Steam and Burn Prevention
During cooking, hot air and steam escape through the air outlets.
Keep hands and face at a safe distance from these openings.
Take particular care when removing the pan because hot steam may escape from the cooking compartment.
Use oven-safe gloves when handling the hot pan or frying insert.
Place the hot pan on a heat-resistant worktop, trivet, or similar surface.
Allow the appliance to cool for approximately 30 minutes before handling or cleaning it.
Safe Placement
Place the Airfryer on a horizontal, level, stable, and heat-resistant surface.
Maintain at least 10 cm (approximately 4 inches) of free space:
- Behind the appliance.
- On the left side.
- On the right side.
- Above the appliance.
Do not place the Airfryer directly against a wall or another appliance.
Do not operate it beneath objects that could be damaged by hot steam, including cabinets.
Child Safety
Children must be supervised to prevent them from playing with the appliance.
The appliance must not be used by people with reduced physical, sensory, or mental capabilities, or by people without the required experience, unless appropriate supervision or instructions are provided by a responsible person.
Children must not perform cleaning or maintenance without supervision.
Food Safety
- Make sure food is fully cooked before serving.
- Do not exceed the maximum food level marked inside the pan.
- Cook potatoes until golden yellow rather than dark brown.
- Remove burnt food remnants.
- Do not cook fresh potatoes above 180°C to reduce acrylamide formation.
- Store potatoes at a temperature appropriate for the variety and above 6°C to help reduce acrylamide exposure.
Extension Cord Safety
If an extension cord is used:
- Its electrical rating must be at least equal to the Airfryer’s rating.
- It must be a grounded, three-wire extension cord.
- Position the cord so it cannot be pulled by children or create a tripping hazard.
The appliance has a polarized plug. If it does not fit the outlet, reverse it. If it still does not fit, contact a qualified electrician.
Do not modify the plug.
Before First Use
Before using the Airfryer for the first time, the appliance and removable cooking components must be prepared.
Initial Preparation
- Remove all packaging materials from the appliance.
- Remove any stickers or labels, if present.
- Remove the pan from the Airfryer.
- Take out the frying insert.
- Thoroughly clean the pan and frying insert according to the cleaning instructions.
- Dry the cleaned components.
- Reinstall the frying insert inside the pan.
- Place the Airfryer on a stable, level, heat-resistant surface.
- Leave the required ventilation clearance around the appliance.
- Make sure the power cord does not touch hot surfaces.
The Airfryer does not need to be preheated before normal cooking.
A small amount of smoke may be produced during the first use. The manual identifies this as normal.
How to Use the Philips 2000 Series Airfryer
Basic Air Frying Instructions
The appliance cooks food using circulating hot air. The pan must contain the frying insert before food is added.
- Remove the pan. Pull the pan handle to slide the pan out of the Airfryer.
- Insert the frying insert. Place it correctly inside the pan.
- Add the ingredients. Put the food on the frying insert.
- Check the food quantity. Do not exceed the MAX indication or the recommended amount in the cooking table.
- Reinsert the pan. Slide the pan completely into the Airfryer.
- Connect the power. Insert the plug into a suitable wall outlet.
- Switch on the appliance. Press On/Off.
- Select the temperature. Press Temperature.
- Adjust the temperature. Use Increase or Decrease.
- Select the cooking time. Press Time.
- Adjust the timer. Use Increase or Decrease.
- Start cooking. Press Start/Pause.
- Check the food during cooking. Shake, stir, or turn ingredients when required.
- Wait for the timer. The appliance sounds a bell when the cooking time ends.
- Check the food. Carefully remove the pan and check whether the ingredients are fully cooked.
- Remove the cooked food. Use suitable kitchen utensils to transfer the ingredients to a plate or bowl.
If the food requires additional cooking, return the pan and add a few minutes to the timer.
Important: Do not touch the pan during cooking or immediately afterward. Its surfaces can become extremely hot.
How to Pause and Resume Cooking
Cooking can be paused in two ways.
Using Start/Pause
- Press Start/Pause during cooking.
- Wait while the cooking cycle pauses.
- Press Start/Pause again to resume.
Removing the Pan
- Pull the pan out using its handle.
- The appliance automatically pauses.
- Perform the required food adjustment.
- Slide the pan back into the Airfryer.
- The cooking cycle resumes.
How to Shake or Turn Food
Some ingredients require shaking or turning during cooking.
This is particularly important for French fries, frozen snacks, vegetables, and certain meat products.
- Pull out the pan using its handle.
- Place the pan on a heat-resistant worktop.
- Shake, stir, or turn the ingredients using suitable kitchen utensils.
- Return the pan to the appliance.
For larger portions, the manual recommends shaking or turning ingredients two to three times during cooking where indicated.
Removing Food After Cooking
When the timer sounds:
- Pull the pan out carefully.
- Place it on a heat-resistant surface.
- Check whether the ingredients are fully cooked.
- Use tongs or another suitable kitchen utensil to remove the food.
- Transfer the food to a plate or serving bowl.
Hot oil or rendered fat may collect at the bottom of the pan.
Use oven-safe gloves and take care when pouring off accumulated fat.
For large or delicate foods, use tongs rather than tipping the pan.
The Airfryer can begin another batch immediately after the previous batch has finished.
Philips 2000 Series Airfryer Cooking Time and Temperature Chart
The following cooking settings provide starting points for different foods.
Cooking time may vary depending on the ingredients’ size, shape, quantity, and type.
Recommended Cooking Settings
| Food | Quantity | Time | Temperature | Instructions |
| Thin frozen fries (7 × 7 mm) | 200–500 g | 13–30 min | 180°C / 360°F | Shake or stir 2–3 times. |
| Homemade fries (10 × 10 mm) | 200–500 g | 20–32 min | 180°C / 360°F | Shake or stir 2–3 times. |
| Frozen chicken nuggets | 200–500 g | 10–20 min | 200°C / 400°F | Shake or turn halfway. |
| Frozen spring rolls | 200–500 g | 10–20 min | 200°C / 400°F | Shake or turn halfway. |
| Hamburger (about 150 g) | 1–2 pieces | 12–16 min | 150°C / 300°F | — |
| Meatloaf | 400–600 g | 45–55 min | 150°C / 300°F | Use the baking accessory. |
| Boneless meat chops (about 190 g) | 1–2 pieces | 14–20 min | 200°C / 400°F | Turn halfway. |
| Chicken drumsticks (about 125 g) | 2–6 pieces | 15–27 min | 180°C / 360°F | Shake or turn halfway. |
| Chicken breast (about 160 g) | 1–4 pieces | 15–25 min | 180°C / 360°F | — |
| Whole fish (300–400 g) | 1 piece | 20 min | 180°C / 360°F | — |
| Fish fillets (about 200 g) | 1–3 pieces | 18–20 min | 200°C / 400°F | — |
| Mixed vegetables | 200–500 g | 14–20 min | 200°C / 400°F | Shake or stir halfway. |
| Muffins (about 50 g) | 1–7 pieces | 15–18 min | 180°C / 360°F | — |
| Cake | 400–600 g | 40–50 min | 160°C / 325°F | Use the baking accessory. |
| Pre-baked bread or rolls | 1–5 pieces | 6–10 min | 200°C / 400°F | — |
| Homemade bread | 400–600 g | 40–50 min | 160°C / 325°F | Use the baking accessory. Keep the dough relatively flat. |
| Breakfast | 3 eggs and 2 slices of toast | 12 min | 160°C / 325°F | Cook eggs for 7 minutes, then add toast. |
These are approximate cooking settings. Cooking time and temperature may need adjustment for differences in food size, thickness, and quantity.
For homemade bread, the dough should be shaped as flat as possible to prevent it from touching the heating element as it rises.
Cooking with Preset Programs
The Airfryer includes preset cooking menus for frequently prepared foods.
Each preset contains a starting cooking time and temperature.
How to Use a Cooking Preset
- Remove the pan and insert the frying insert.
- Place the ingredients inside the pan.
- Slide the pan into the appliance.
- Connect the power cord.
- Press On/Off.
- Select the desired preset cooking program.
- Press Start/Pause to begin cooking.
The appliance uses the selected preset settings.
Preset Cooking Programs
| Preset | Time | Temperature | Quantity or Instructions |
| Frozen potato-based snacks | 28 min | 180°C / 360°F | Up to 500 g. Shake or stir 2–3 times. |
| Fresh fries | 35 min | 180°C / 360°F | Up to 500 g. Cut to 10 × 10 mm; soak, dry, and lightly coat with oil. |
| Chicken drumsticks | 20 min | 180°C / 360°F | Up to 6 pieces. Shake or turn during cooking. |
| Fish fillets | 20 min | 200°C / 400°F | Up to 3 fillets of about 200 g each. |
| Muffins | 20 min | 160°C / 325°F | Up to 7 muffins. |
| Meat chops | 20 min | 200°C / 400°F | Up to 2 boneless meat chops. |
| Mixed vegetables | 18 min | 180°C / 360°F | Up to 500 g, roughly chopped. Use the XL baking accessory. |
| Breakfast | 12 min | 160°C / 325°F | Up to 3 eggs and 2 slices of toast. Use the breakfast accessory. |
| Keep Warm | 30 min | 80°C / 170°F | Temperature cannot be adjusted. |
Frozen Fries Preset
The frozen potato-based snack program is suitable for foods such as:
- Frozen French fries.
- Frozen potato wedges.
- Frozen criss-cross fries.
- Similar frozen potato-based snacks.
Use a maximum quantity of 500 g (18 oz) and shake or stir two to three times during cooking.
Fresh Fries Preset
For fresh French fries:
- Use suitable floury potatoes.
- Cut them into approximately 10 × 10 mm strips.
- Soak them in water for 30 minutes.
- Dry them thoroughly.
- Add approximately ¼–1 tablespoon of cooking oil.
- Cook up to 500 g per batch.
- Shake or stir two to three times.
Keep Warm Function
The Keep Warm program maintains food at the preset temperature of 80°C (170°F) for 30 minutes.
The temperature cannot be adjusted.
To activate the function:
- Press On/Off.
- Select Keep Warm.
- Press Start/Pause.
How to Make Homemade French Fries
For homemade French fries, use fresh, slightly floury potatoes suitable for frying.
Cooking in batches of up to 500 g helps produce an even result.
Preparing the Potatoes
- Peel the potatoes.
- Cut them into strips approximately 10 × 10 mm thick.
- Place the strips in a bowl of water.
- Soak for at least 30 minutes.
- Empty the water.
- Dry the potato strips using a dish towel or paper towel.
Adding Oil
- Pour approximately one tablespoon of cooking oil into a bowl.
- Add the dried potato strips.
- Mix until the potatoes are lightly coated.
- Remove the strips using fingers or a slotted utensil.
- Leave excess oil in the bowl.
Do not pour the entire bowl contents into the Airfryer because excess oil may enter the pan.
Cooking the Fries
- Place the prepared potato strips inside the pan with the frying insert installed.
- Select the fresh fries preset or appropriate manual settings.
- Start cooking.
- Shake or stir the fries two to three times during cooking.
- Continue until the fries are fully cooked and golden yellow.
For fresh potatoes, do not exceed 180°C to minimize acrylamide formation.
Cleaning Instructions
The Philips 2000 Series Airfryer must be cleaned after every use.
The pan, frying insert, and interior cooking surfaces have nonstick coatings that require non-abrasive cleaning methods.
Before Cleaning
- Press On/Off to switch off the appliance.
- Remove the power plug from the wall outlet.
- Allow the appliance to cool completely.
- Remove the pan if faster cooling is required.
- Wait approximately 30 minutes before handling or cleaning hot components.
Warning: Do not use metal utensils, metal scouring pads, steel-wire brushes, or abrasive cleaning materials on nonstick surfaces.
How to Clean the Pan and Frying Insert
- Remove the cooled pan from the appliance.
- Remove the frying insert.
- Dispose of accumulated oil or rendered fat from the bottom of the pan.
- Wash the pan and frying insert with hot water, dishwashing liquid, and a non-abrasive sponge.
- Alternatively, clean both components in a dishwasher.
- Remove any remaining food residues.
- Allow the components to dry before reassembly.
Removing Stuck Food Residues
If food sticks to the pan or frying insert:
- Fill the pan with hot water and dishwashing liquid.
- Allow the parts to soak for 10–15 minutes.
- Use a non-abrasive sponge to remove the loosened food residues.
- Rinse thoroughly.
If grease stains remain after normal washing, a liquid degreaser can be used.
Cleaning the Heating Element
Food residues may collect near the heating element.
To clean the heating element:
- Switch off and unplug the Airfryer.
- Allow the appliance to cool completely.
- Use a soft- or medium-bristle cleaning brush to remove food residues.
- Avoid damaging the heating element’s coating.
Do not use a steel-wire brush or hard-bristle brush.
Cleaning the Interior
- Make sure the appliance has cooled completely.
- Remove the pan.
- Clean the accessible interior surfaces using hot water and a non-abrasive sponge.
- Remove remaining food residues.
Do not immerse the main appliance in water or rinse the appliance body under a tap.
Cleaning the Exterior and Control Panel
- Wipe the exterior using a moist cloth.
- Clean the control panel carefully.
- Dry the control panel with a clean cloth.
Make sure no moisture remains on the control panel after cleaning.
Maintenance Instructions
The Airfryer requires regular cleaning and inspection of its cooking components.
Recommended Maintenance Schedule
| Maintenance Task | Frequency | Instructions |
| Empty collected oil and fat | After each use | Dispose of accumulated grease from the pan. |
| Clean pan | After each use | Wash with hot water and dishwashing liquid or in a dishwasher. |
| Clean frying insert | After each use | Remove food residues using non-abrasive cleaning methods. |
| Clean heating element | When food residues are present | Use a soft- or medium-bristle brush after cooling. |
| Wipe exterior | As needed | Use a moist cloth. |
| Dry control panel | After cleaning | Remove any remaining moisture. |
| Check removable parts | Before moving or storing | Make sure all parts are correctly secured. |
Protecting the Nonstick Coating
The nonstick coating can become scratched if the frying insert is inserted incorrectly or sharp utensils are used.
To reduce the risk of damage:
- Lower the frying insert carefully into the pan.
- Avoid allowing the insert to strike the pan walls.
- Do not use metal cleaning utensils.
- Do not use abrasive cleaning materials.
Handling Excess Cooking Fat
Excess fat from ingredients collects at the bottom of the pan.
If it needs to be removed between batches:
- Place the hot pan on a heat-resistant surface.
- Use oven-safe gloves.
- Carefully remove the frying insert.
- Pour off the excess oil or rendered fat.
- Reinsert the frying insert before cooking again.
Take care to avoid burns from hot grease.
Storage Instructions
Before storing the Airfryer:
- Press On/Off to switch off the appliance.
- Unplug it from the electrical outlet.
- Allow it to cool completely.
- Clean the pan and frying insert.
- Make sure all components are dry.
- Reinstall the removable parts correctly.
- Secure the components before moving or storing the appliance.
Carrying the Airfryer Safely
Always carry the appliance horizontally.
Support the pan at the front of the Airfryer while carrying it.
If the appliance is tilted downward, the pan may slide out and damage the appliance or pan.
Make sure all removable parts are secured before moving the Airfryer.
Troubleshooting Guide
The following troubleshooting instructions address common operating and cooking problems.
Philips Airfryer Troubleshooting Table
| Problem | Possible Cause | Recommended Solution |
| Airfryer does not turn on | Power plug is not properly connected. | Check the wall outlet and power connection. |
| Airfryer does not turn on | Several appliances are connected to the same outlet. | Try another outlet and check the fuses. |
| Exterior becomes hot during cooking | Heat from the cooking chamber reaches the outer surfaces. | This is normal. Avoid touching marked hot areas. |
| Homemade fries are not cooked as expected | Incorrect potato variety. | Use fresh, floury potatoes suitable for frying. |
| Fries cook unevenly | Too many ingredients in the pan. | Follow the recommended quantities. |
| Fries cook unevenly | Ingredients were not shaken or turned. | Shake or stir during cooking as instructed. |
| Small areas of nonstick coating appear to peel | Frying insert has scratched the pan during insertion or cleaning. | Insert the frying insert carefully and avoid abrasive tools. |
| White smoke appears | Fatty ingredients release grease. | Carefully remove excess rendered fat from the pan. |
| White smoke appears | Grease residue remains from a previous cooking cycle. | Thoroughly clean the pan after each use. |
| White smoke appears | Breading or coating is not attached firmly. | Press the coating firmly onto the food. |
| White smoke appears | Marinade or meat juices splatter into hot grease. | Pat the ingredients dry before cooking. |
| Display shows E1 | Appliance fault or defect. | Contact Philips Consumer Care or an authorized service center. |
Airfryer Does Not Switch On
If the Philips 2000 Series Airfryer does not switch on:
- Check that the power plug is fully inserted into the wall outlet.
- Confirm that the outlet is providing power.
- If multiple appliances are connected to the same outlet, try another outlet.
- Check the electrical fuses.
The Airfryer has a high power requirement, so multiple appliances sharing the same outlet may cause electrical problems.
Outside of the Airfryer Becomes Hot
The exterior may become hot because heat from the cooking chamber transfers to the outer walls.
This is normal during operation.
The handles and controls intended for operation remain sufficiently cool to touch under normal conditions.
However, the pan, frying insert, and internal housing become very hot.
Some exterior areas can also become too hot to touch during extended operation.
These areas are identified by a hot-surface warning symbol.
Avoid touching them.
Homemade French Fries Are Not Crispy or Cook Evenly
Several factors can affect the cooking result.
Incorrect potatoes: Use fresh, floury potatoes suitable for frying. Do not store potatoes in a refrigerator.
Too much food: Follow the recommended quantity rather than overloading the pan.
Insufficient shaking: Shake or stir the fries two to three times during cooking.
Use the homemade fries preparation instructions for cutting, soaking, drying, and cooking the potatoes.
Small Spots of Nonstick Coating Appear to Peel
Small spots may develop on the pan’s nonstick surface when it is scratched by cleaning tools or the frying insert.
If the frying insert enters the pan at an angle, its edge can strike the side of the pan and cause small pieces of coating to chip.
The manufacturer states that these small chips are not harmful because the materials used are food-safe.
To prevent further damage:
- Insert the frying insert carefully.
- Avoid contact with the pan walls.
- Do not use harsh cleaning tools.
- Do not use abrasive cleaning materials.
White Smoke Comes Out of the Airfryer
White smoke can occur when fatty ingredients or grease residues heat up during cooking.
| Possible Cause | Solution |
| Cooking fatty ingredients | Carefully remove excess oil or rendered fat and continue cooking. |
| Grease from previous cooking remains in the pan | Clean the pan thoroughly after every use. |
| Breading or food coating becomes airborne | Press the breading or coating firmly onto the food. |
| Marinade or meat juices splash into hot fat | Pat food dry before placing it in the pan. |
Error Codes and Display Messages
Philips Airfryer E1 Error
If the display shows E1, the appliance has a fault or defect.
The manufacturer instructs users to contact Philips service or the Consumer Care Center in their country.
Do not attempt to open or repair the appliance.
An authorized service center should examine the appliance.
Accessories
The Philips 2000 Series supports cooking methods that use the removable frying insert and, where specified, additional cooking accessories.
| Accessory | Application |
| Frying insert | Supports ingredients inside the pan during air frying. |
| Baking accessory | Used for meatloaf, cakes, and homemade bread. |
| XL baking accessory | Used for the mixed vegetables preset. |
| Breakfast accessory | Used for the breakfast preset. |
Only original Philips accessories should be used according to the manufacturer’s instructions.
Warranty Information
Two-Year Limited Warranty
The Philips 2000 Series Airfryer is covered by a two-year limited warranty provided by Versuni Holding B.V.
The warranty covers defects in:
- Materials.
- Workmanship.
- Assembly.
Coverage applies under normal use when the appliance is operated according to its specifications and warnings.
The warranty period begins on the date of purchase.
Warranty Eligibility
The warranty applies only to the original purchaser and cannot be transferred.
To request warranty service, proof of purchase is required.
The original sales receipt must show:
- Product name.
- Date of purchase.
Warranty Service
Under the warranty terms, Versuni may repair the product or replace it at its discretion.
Liability is limited to repair or replacement, and incidental, special, and consequential damages are excluded where permitted by law.
Warranty rights may vary depending on the state, province, or country.
For warranty assistance, visit: https://www.philips.com/support
Customer Support Information
Philips provides product assistance and warranty support through its customer service channels.
| Support Service | Contact |
| Official Support Website | https://www.philips.com/support |
| Product Registration | https://www.philips.com/welcome |
| HomeID Website | https://home.id/welcome |
| Recycling Information | https://www.recycle.philips.com |
| United States and Canada Support Phone | 1-833-737-1212 |
| Warranty Provider | Versuni Holding B.V. |
United States Importer
Versuni USA Corporation
1600 Summer Street
Stamford, CT 06905
United States of America
Canada Importer
Versuni Canada Inc.
40 University Avenue, Suite 904
Toronto, Ontario M5J 1T1
Canada
For faults that cannot be corrected using the troubleshooting instructions, contact Philips Consumer Care or an authorized service center.
Frequently Asked Questions
How do I use the Philips 2000 Series Airfryer NA220?
Place the frying insert inside the pan, add food without exceeding the MAX indication, and reinsert the pan. Press On/Off, select the cooking temperature and time, and press Start/Pause. Shake or turn the ingredients when required. Check that the food is fully cooked when the timer sounds.
Does the Philips 2000 Series Airfryer need preheating?
No. The NA220 and NA221 do not require preheating. Ingredients can be placed inside the pan, the required cooking time and temperature selected, and cooking started immediately.
How do I set the temperature on the Philips NA220 Airfryer?
Press the Temperature button and use the Increase or Decrease controls to choose the required temperature. Press the Time button to adjust the cooking duration, then press Start/Pause to begin cooking.
What temperature should I use for French fries in the Philips NA221 Airfryer?
The manual recommends 180°C (360°F) for frozen and homemade French fries. Frozen fries generally require 13–30 minutes, while homemade fries require approximately 20–32 minutes. Shake or stir the fries two to three times during cooking.
Can the Philips 2000 Series Airfryer pan go in the dishwasher?
Yes. The pan and frying insert can be cleaned in a dishwasher. They can also be washed using hot water, dishwashing liquid, and a non-abrasive sponge. Allow the parts to cool before cleaning.
Why is my Philips 2000 Series Airfryer producing white smoke?
White smoke may appear when fatty ingredients release grease, old grease residues heat up, breading becomes airborne, or meat juices splash into hot fat. Clean the pan after each use, remove excess grease carefully, and pat ingredients dry when appropriate.
What does E1 mean on the Philips 2000 Series Airfryer?
E1 indicates an appliance fault or defect. Philips instructs users to contact its service hotline or the Consumer Care Center in their country. The appliance should not be opened or repaired by the user.
How long is the Philips NA220 and NA221 Airfryer warranty?
The Philips 2000 Series NA220 and NA221 is covered by a two-year limited warranty from the date of purchase. The warranty applies to the original purchaser, is nontransferable, and requires an original sales receipt showing the product name and purchase date.