| Field | Details |
| Document Title | Philips 3000 Series Airfryer User Manual |
| Document Type | User Manual |
| Brand Name | Philips |
| Product Name | 3000 Series Dual Basket Airfryer |
| Model Number(s) | NA350, NA351, NA352, NA353, NA350/03, NA350/08, NA352/04, NA352/08, NA352/24, NA353/14 |
| PDF File Size | 966 KB |
| Number of Pages | 42 |
| Languages | English, Spanish, French |
Philips 3000 Series Airfryer NA350
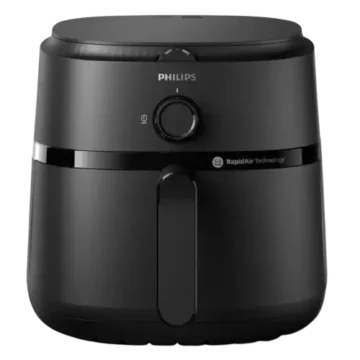
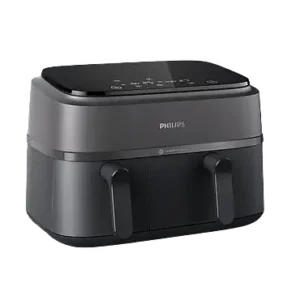
The Philips 3000 Series Airfryer is a dual-basket air fryer designed to prepare two portions of food using separate cooking chambers. The appliance includes a large pan and a small pan, allowing different foods to be cooked at individual temperatures and cooking times.
The Philips 3000 Series covers models NA350, NA351, NA352, and NA353. It features a digital control panel, eight cooking presets, a shaking reminder, and a Copy function that transfers cooking settings between the two pans. The Time function coordinates cooking so both pans finish at the same time.
The Airfryer uses circulating hot air to cook foods such as French fries, chicken drumsticks, fish, vegetables, cakes, and meat chops. The appliance does not require preheating and operates without filling the pans with cooking oil.
Product Overview and Features
The Philips 3000 Series Airfryer has two separate cooking chambers designed for preparing food simultaneously.
The smaller pan uses a removable bottom plate, while the larger pan uses a removable basket. Each chamber can be controlled independently through the digital control panel.
Main Features
| Feature | Description |
| Dual-basket cooking | Two separate pans for preparing different foods. |
| Independent cooking controls | Temperature and cooking time can be set separately for each pan. |
| Copy function | Copies the cooking temperature and time from one pan to the other. |
| Time function | Coordinates the two pans to finish cooking at the same time. |
| Eight cooking presets | Preset cooking programs for common foods. |
| Shaking reminder | Provides a reminder halfway through cooking when enabled. |
| Digital control panel | Controls power, temperature, time, cooking programs, and functions. |
| Start/Stop function | Starts, pauses, and resumes cooking. |
| Automatic pause | Cooking pauses when a pan is removed and resumes when it is reinserted. |
| Adjustable cooking settings | Time and temperature can be changed during cooking. |
| Reheat preset | Reheats food using a preset temperature and time. |
| Keep-warm setting | Maintains food at 80°C (175°F). |
| Dishwasher-safe cooking components | Removable pans and cooking inserts can be cleaned in a dishwasher. |
| Cord holder | Stores the cord and acts as a spacer behind the appliance. |
Supported Models and Accessories
The user manual covers the NA350, NA351, NA352, and NA353 model families.
Some specific model versions include additional cooking accessories.
| Model Version | Model-Specific Accessory |
| NA350/03 | Breakfast kit |
| NA350/08 | Breakfast kit |
| NA352/04 | Double-layer rack with skewers |
| NA352/08 | Double-layer rack with skewers |
| NA352/24 | Double-layer rack with skewers |
| NA353/14 | Double-layer rack with skewers |
The double-layer rack is designed for the large pan. The breakfast kit is installed in the small pan.
Parts and Components
The Philips 3000 Series Airfryer includes two removable cooking pans, an electronic control panel, and components for food preparation and storage.
Main Components
| Part No. | Component | Function |
| 1 | Control panel | Operates the cooking chambers and machine functions. |
| 2 | Bottom plate for small pan | Supports food inside the smaller cooking pan. |
| 3 | Small pan | Holds ingredients in the smaller cooking chamber. |
| 4 | Basket for big pan | Supports ingredients inside the larger pan. |
| 5 | Big pan | Holds the larger cooking basket and food. |
| 6 | Double-layer rack with skewers | Allows two-level cooking in the big pan on compatible models. |
| 7 | Breakfast kit | Holds eggs and toast in the small pan on compatible models. |
| 8 | Cord holder | Stores the power cord and maintains spacing behind the appliance. |
| 9 | Power cord | Connects the appliance to the electrical supply. |
| 10 | Air outlets | Release hot air and steam during cooking. |
Small Pan and Bottom Plate
The small pan contains a removable bottom plate.
Before cooking, the bottom plate must be placed correctly inside the small pan.
The bottom plate can be removed for cleaning and when installing the breakfast kit on supported models.
Big Pan and Basket
The large cooking pan uses a removable basket.
When installing the basket:
- Remove the big pan from the appliance.
- Align the basket correctly.
- Make sure the basket flaps are positioned on the left and right sides.
- Lower the basket into the pan.
If the basket is rotated by 90 degrees, it will not fit correctly.
A small amount of force may be necessary to position the basket.
Important: The Airfryer must not be operated without the appropriate pan and cooking basket or bottom plate installed.
Control Panel and Button Functions
The Philips 3000 Series uses a digital control panel with dedicated buttons for each pan, temperature adjustment, cooking time, presets, and coordinated cooking functions.
Control Panel Guide
| Control | Name | Function |
| A | Temperature Up | Increases the selected cooking temperature. |
| B | Temperature Down | Decreases the selected cooking temperature. |
| C | On/Off | Switches the Airfryer on or off. |
| D | Small Pan Shaking Indicator | Indicates the shaking reminder for the small pan. |
| E | Small Pan Button | Selects the small cooking chamber. |
| F | Back | Returns from an incorrectly selected preset. |
| G | Time Function | Coordinates cooking so both pans finish together. |
| H | Copy Function | Copies time and temperature settings between pans. |
| I | Shaking Reminder | Enables or disables the shaking reminder. |
| J | Big Pan Button | Selects the large cooking chamber. |
| K | Big Pan Shaking Indicator | Indicates the shaking reminder for the big pan. |
| L | Start/Stop | Starts, pauses, or resumes cooking. |
| M | Time Down | Reduces the cooking time. |
| N | Time Up | Increases the cooking time. |
| O | Preset Buttons | Selects one of the eight preset cooking programs. |
Understanding the Display
When the small pan is selected, the time and temperature indicators on the left side of the control panel begin flashing.
The corresponding controls can then be used to adjust its cooking settings.
Selecting the big pan allows its settings to be adjusted independently.
During the final minute of cooking, the remaining time counts down in seconds.
The appliance also produces sound notifications when:
- A cooking cycle finishes.
- Food needs shaking or turning when the reminder is active.
Technical Specifications
| Specification | Details |
| Brand | Philips |
| Series | 3000 Series |
| Model families | NA350, NA351, NA352, NA353 |
| Product type | Dual-basket air fryer |
| Cooking method | Hot air circulation |
| Cooking chambers | 2 |
| Pan sizes | Small pan and big pan |
| Control type | Digital |
| Temperature adjustment | Independent for each pan |
| Time adjustment | Independent for each pan |
| Cooking presets | 8 per pan |
| Copy function | Yes |
| Coordinated cooking Time function | Yes |
| Shaking reminder | Yes |
| Automatic pause on pan removal | Yes |
| Preheating | Not required |
| Keep-warm temperature | 80°C / 175°F |
| Recommended maximum keep-warm period | 30 minutes |
| Fresh fries quantity — big pan | 800 g / 28 oz |
| Fresh fries quantity — small pan | 300 g / 11 oz |
| Minimum ventilation clearance | 10 cm behind, on both sides, and above |
| Cooling time before handling or cleaning | Approximately 30 minutes |
| Cleaning | Removable pans and cooking inserts are dishwasher-safe |
| Warranty | Two-year limited warranty |
| Electrical rating | Check the rating on the appliance |
Important Safety Instructions
The Philips 3000 Series Airfryer operates at high temperatures. Electrical, heat, ventilation, and food safety precautions must be followed during every cooking cycle.
Electrical Safety
- Read all instructions before using the appliance.
- Do not immerse the appliance, power cord, or plug in water or other liquids.
- Never rinse the main appliance housing under running water.
- Do not allow water or other liquids to enter the appliance.
- Do not plug in the appliance or use its control panel with wet hands.
- Check that the appliance voltage matches the local electrical supply.
- Do not operate the appliance if its power cord, plug, or housing is damaged.
- Keep the power cord away from hot surfaces.
- Do not allow the cord to hang over the edge of a table or countertop.
- Switch off and unplug the appliance before cleaning.
- Unplug the appliance after use.
A damaged appliance must be examined or repaired by an authorized service facility.
Electrical Circuit Precautions
The dual cooking chambers require significant electrical power.
Warning: Do not operate other powerful electrical appliances on the same circuit at the same time.
Examples include:
- Electric kettles.
- Electric grills.
- Similar high-power appliances.
Using several high-power appliances together may trip the circuit breaker and interrupt the power supply.
Fire Safety
- Never fill either pan with oil, frying fat, or another liquid.
- Keep the air inlet and outlet openings clear.
- Do not operate the appliance near curtains, tablecloths, or other flammable materials.
- Do not place the Airfryer on or near a hot gas stove, electric cooking plate, or heated oven.
- Do not place anything on top of the appliance during operation.
- Do not insert oversized food or metal utensils that may create a fire or electric shock risk.
- Do not place baking paper, cardboard, plastic, wood, cotton, or other flammable materials inside the cooking chamber.
- Do not use lightweight foods such as popcorn or tortilla wraps.
- Make sure food does not contact or become stuck in the heating element.
Warning: If dark smoke comes out of the Airfryer, unplug it immediately. Wait until the smoke stops before removing the pan.
Hot Surfaces and Steam
The pans, baskets, heating elements, and internal cooking chambers become hot during use.
- Do not touch hot surfaces.
- Use the handles to remove the pans.
- Wear oven-safe gloves when handling hot pans or accessories.
- Keep hands and face away from air outlets.
- Take care when opening the cooking chambers because hot steam may escape.
- Allow the appliance to cool completely before cleaning or handling hot components.
The appliance should cool for approximately 30 minutes before cleaning.
Safe Placement and Ventilation
Place the Airfryer on a level, horizontal, stable, heat-resistant surface.
Maintain at least 10 cm (approximately 4 inches) of free space:
- Behind the appliance.
- On both sides.
- Above the appliance.
Do not place anything on top of the Airfryer.
Do not use it beneath cabinets or near materials that could be damaged by steam.
Food Safety
- Make sure food is fully cooked before serving.
- Do not exceed the maximum food level indicated in the basket.
- Cook potatoes until golden yellow rather than dark brown.
- Remove burnt food remnants.
- Do not cook fresh potatoes above 180°C (360°F) to minimize acrylamide formation.
- Store potatoes at a temperature suitable for the variety and above 6°C (42°F).
- Take care when using any delayed-start function with perishable foods because bacteria can multiply.
Extension Cord Safety
If an extension cord is used:
- Its electrical rating must be at least equal to that of the appliance.
- It must be a grounded, three-wire extension cord.
- It must be positioned so children cannot pull it and people cannot trip over it.
The appliance has a polarized plug. If the plug does not fit the outlet, reverse it.
If it still does not fit, contact a qualified electrician.
Do not modify the plug.
Before First Use
Before cooking for the first time, remove the packaging, clean the food-contact parts, and attach the cord holder.
Initial Preparation
- Remove all packaging materials.
- Remove any stickers or labels, if present.
- Remove both cooking pans.
- Remove the small pan bottom plate.
- Remove the basket from the large pan.
- Clean the removable cooking components according to the cleaning instructions.
- Allow the cleaned parts to dry.
- Reinstall the small pan bottom plate.
- Reinstall the big pan basket in the correct orientation.
- Attach the cord holder to the designated position on the back of the appliance until it clicks into place.
Installing the Cord Holder
The cord holder is fitted to the rear of the appliance.
It has two purposes:
- It provides storage for the power cord.
- It acts as a spacer between the appliance and the wall to help prevent heat buildup.
Important: The cord holder must not be used as a carrying handle.
Positioning the Airfryer
- Place the appliance on a stable, horizontal, heat-resistant surface.
- Maintain at least 10 cm clearance around the required sides and above the appliance.
- Make sure the air outlets remain unobstructed.
- Keep the appliance away from cabinets and objects that could be damaged by hot steam.
- Insert both cooking pans correctly.
The Airfryer does not require preheating.
A small amount of smoke during the first use is normal.
Operating Instructions
How to Use Both Cooking Pans
The small and large pans have separate controls and can be used with different cooking times and temperatures.
- Pull out the small pan using its handle.
- Install the bottom plate inside the small pan.
- Pull out the big pan.
- Insert the basket inside the big pan.
- Place the ingredients in the cooking compartments.
- Do not overfill either basket.
- Reinsert both pans into the appliance.
- Plug the power cord into the wall outlet.
- Press On/Off.
- Select the Small Pan button.
- Use Temperature Up or Down to adjust the small pan temperature.
- Use Time Up or Down to select the required cooking duration.
- Select the Big Pan button.
- Adjust the big pan cooking time and temperature separately.
- Enable the shaking reminder if required.
- Press Start/Stop to begin cooking.
The Airfryer begins the selected cooking processes.
Adjusting Time and Temperature During Cooking
Cooking settings can be changed while the appliance is operating.
- Select the pan that requires adjustment.
- Use Temperature Up or Down to change its cooking temperature.
- Use Time Up or Down to change the remaining cooking time.
The new settings are applied to the selected pan.
How to Pause Both Cooking Pans
- Press Start/Stop during cooking.
- Both pans pause.
- Press Start/Stop again to resume cooking.
How to Pause Only One Pan
- Press the button for the pan that needs to be paused.
- Press Start/Stop.
- The selected pan pauses.
- Press Start/Stop again to resume that pan.
Automatic Pause When Removing a Pan
The Airfryer automatically pauses the relevant cooking process when a pan is pulled out.
To continue:
- Remove the pan using its handle.
- Perform the required action, such as shaking or turning the food.
- Reinsert the pan correctly.
Cooking resumes when the pan is returned.
How to Shake or Turn Food
Some foods require shaking or turning during cooking to produce consistent results.
- Pull out the relevant pan.
- Hold the pan by its handle.
- Shake the ingredients over a sink.
- Reinsert the pan into the Airfryer.
When the shaking reminder is enabled, the appliance provides a sound notification halfway through cooking.
When Cooking Finishes
The appliance sounds a timer bell when the selected cooking time has elapsed.
- Pull out the cooking pan.
- Place it on a heat-resistant surface.
- Check whether the food is fully cooked.
- If additional cooking is required, reinsert the pan and add a few minutes.
- When the food is ready, remove it using barbecue tongs or another suitable utensil.
Warning: Do not tilt the pan while removing food because the basket may fall out.
Hot oil or rendered fat may collect at the bottom of the pan.
For large or delicate foods, use tongs to remove the ingredients.
Copy Function — Using the Same Settings for Both Pans
The Copy function allows the cooking temperature and time selected for one pan to be transferred to the other pan.
This is useful when preparing food requiring identical cooking settings in both chambers.
How to Use Copy
- Switch on the Airfryer.
- Select one cooking pan.
- Set the required cooking temperature.
- Set the required cooking time.
- Press the Copy function button to copy these settings to the other pan.
- Start cooking using Start/Stop.
The Copy function transfers the selected temperature and cooking duration between pans.
Time Function — Finishing Both Pans Together
The Time function coordinates cooking so both pans finish at the same time.
Each pan can still have its own temperature and cooking time.
How to Use the Time Function
- Place the food in both cooking pans.
- Reinsert the pans.
- Switch on the Airfryer.
- Select the small pan.
- Set its cooking temperature and duration.
- Select the big pan.
- Set its cooking temperature and duration.
- Press the Time function button.
- Press Start/Stop to begin the coordinated cooking cycle.
The appliance coordinates the two cooking programs so they finish together.
The Time function can also be used when each pan has a different cooking preset.
Shaking Reminder Function
The shaking reminder helps users remember to shake or turn food during cooking.
When enabled, the appliance provides a reminder after half of the cooking duration has passed.
How to Enable the Shaking Reminder
- Select the required cooking pan.
- Press the Shaking Reminder button.
- Confirm that the corresponding shaking indicator is active.
- Start the cooking cycle.
How to Disable the Shaking Reminder
- Select the relevant pan.
- Press the Shaking Reminder button again.
The reminder can be enabled or disabled at any point during cooking.
What to Do When the Reminder Sounds
- Pull out the relevant pan.
- Shake or turn the ingredients.
- Return the pan to the appliance.
The cooking process resumes.
Cooking with Preset Programs
The Philips 3000 Series Airfryer includes eight cooking presets for each pan.
The default settings differ between the small and big pans for certain foods.
How to Select a Preset
- Prepare the cooking pan and add the ingredients.
- Insert the pan into the appliance.
- Connect the power cord.
- Press On/Off.
- Select the required pan.
- Choose the desired cooking preset.
- Press Start/Stop to begin cooking.
If the wrong preset is selected, press Back and select the correct program.
One pan can use a preset while the other uses manual settings.
Different presets can also be selected for both pans.
Big Pan Cooking Presets
| Preset | Cooking Time | Temperature | Shaking Reminder |
| Frozen potato-based snacks | 38 min | 200°C / 400°F | Enabled |
| Fresh fries | 36 min | 180°C / 360°F | Enabled |
| Chicken drumsticks | 30 min | 200°C / 400°F | Disabled |
| Fish | 25 min | 180°C / 360°F | Disabled |
| Cake (baking accessory) | 50 min | 140°C / 280°F | Disabled |
| Meat chops | 24 min | 200°C / 400°F | Disabled |
| Vegetables | 25 min | 200°C / 400°F | Enabled |
| Reheat | 5 min | 160°C / 320°F | Disabled |
The large pan supports the double-layer rack supplied with specific model versions.
Small Pan Cooking Presets
| Preset | Cooking Time | Temperature | Shaking Reminder |
| Frozen potato-based snacks | 35 min | 200°C / 400°F | Enabled |
| Fresh fries | 36 min | 180°C / 360°F | Enabled |
| Chicken drumsticks | 28 min | 200°C / 400°F | Disabled |
| Fish | 26 min | 180°C / 360°F | Disabled |
| Cake (muffin) | 20 min | 160°C / 320°F | Disabled |
| Meat chops | 24 min | 200°C / 400°F | Disabled |
| Vegetables | 30 min | 200°C / 400°F | Enabled |
| Reheat | 5 min | 160°C / 320°F | Disabled |
These preset times and temperatures are starting settings for preparing the relevant foods.
The actual cooking result depends on factors such as ingredient size, quantity, and food type.
How to Make Homemade French Fries
For homemade French fries, use fresh, slightly floury potatoes suitable for frying.
The recommended amounts are:
| Cooking Pan | Peeled Potato Quantity |
| Big pan | 800 g / 28 oz |
| Small pan | 300 g / 11 oz |
Preparing the Potatoes
- Peel the potatoes.
- Cut them into sticks approximately 10 × 10 mm thick.
- Place the potato sticks in a bowl of water.
- Soak them for at least 30 minutes.
- Empty the water.
- Dry the potato sticks using a dish towel or paper towel.
Adding Cooking Oil
- Pour one tablespoon of cooking oil into a bowl.
- Add the prepared potato sticks.
- Mix until the potatoes are lightly coated.
- Remove the potatoes using fingers or a slotted kitchen utensil.
- Leave excess oil in the bowl.
Do not pour the entire contents of the bowl into the pan because excess oil may enter the cooking compartment.
Cooking Homemade Fries
- Place the prepared potatoes in the appropriate basket.
- Reinsert the pan into the Airfryer.
- Press On/Off.
- Select the relevant pan.
- Choose the Fresh Fries preset.
- Press Start/Stop.
- Shake the pan twice when the shaking reminder sounds.
- Continue cooking until the cycle finishes.
- Check that the fries are fully cooked.
The Fresh Fries preset uses 180°C (360°F) for 36 minutes in both pans.
Reheating and Keeping Food Warm
Reheat Preset
Both cooking pans include a Reheat preset.
| Setting | Value |
| Preset duration | 5 minutes |
| Temperature | 160°C / 320°F |
| Shaking reminder | Disabled |
To use the Reheat function:
- Place the food in the selected pan.
- Insert the pan into the Airfryer.
- Switch on the appliance.
- Select the pan.
- Choose Reheat.
- Press Start/Stop.
Keeping Food Warm
Cooked food can be kept warm by setting the Airfryer to 80°C (175°F) and selecting the required time.
Philips recommends not keeping food warm for longer than 30 minutes because its quality may deteriorate.
If French fries lose too much crispness while being kept warm, the manual suggests either shortening the warming period or cooking them for another two to three minutes at 180°C (360°F).
Using the Double-Layer Rack and Skewers
Applicable models: NA352/04, NA352/08, NA352/24, NA353/14.
The double-layer accessory allows food to be prepared on two levels inside the big pan.
It is compatible only with the large cooking pan.
How to Use the Double-Layer Rack
- Remove the big pan from the appliance.
- Place the first portion of food in the basket.
- Position the double-layer rack above the food.
- Add the second portion of food to the upper level.
- Reinsert the big pan.
- Select the cooking temperature and time appropriate for the food.
- Press Start/Stop to begin cooking.
- When cooking finishes, use oven-safe gloves and tongs to remove the food.
Warning: The double-layer rack becomes hot during cooking. Handle it carefully.
How to Use the Skewers
The supplied skewers can be used together with the double-layer rack.
- Thread the desired meat and vegetables onto the skewers.
- Place the skewers into the designated grooves on the double-layer rack.
- Insert the big pan into the appliance.
- Set the cooking temperature and time appropriate for the ingredients.
- Start cooking.
- After cooking, use oven-safe gloves and tongs to remove the food.
Using the Breakfast Kit
Applicable models: NA350/03, NA350/08.
The breakfast kit allows up to four eggs and four slices of toast to be prepared using the small pan.
Installing the Breakfast Kit
- Remove the small pan from the appliance.
- Remove the bottom plate from the small pan.
- Install the breakfast kit inside the pan.
- Place up to four eggs in the kit.
- Reinsert the pan.
The bottom plate must be removed before installing the breakfast kit so the toast can fit correctly.
Cooking Eggs and Toast
- Install the breakfast kit in the small pan.
- Place the eggs in the kit.
- Insert the pan into the Airfryer.
- Select the cooking settings appropriate for the breakfast ingredients.
- Press Start/Stop.
- Halfway through cooking, add the slices of bread.
- Continue cooking.
- Remove the eggs and toast carefully using tongs.
The shaking reminder can be enabled to provide a reminder when it is time to add the toast.
If the bread slices do not fit, cut them in half.
Warning: Always use tongs when removing the cooked eggs and toast to avoid burns.
Cleaning Instructions
Clean the Philips 3000 Series Airfryer after every use.
Remove accumulated oil, grease, and food residues from both cooking pans.
The pans, basket, and internal cooking surfaces have nonstick coatings that must be protected from abrasive cleaning materials.
Before Cleaning
- Press On/Off to switch off the Airfryer.
- Remove the power plug from the wall outlet.
- Allow the appliance to cool completely.
- Remove the cooking pans if faster cooling is required.
- Wait approximately 30 minutes before handling hot components.
Warning: Do not use metal kitchen utensils, steel-wire brushes, or abrasive cleaning materials on nonstick surfaces.
Cleaning the Pans and Cooking Inserts
- Remove the small and big pans.
- Remove the small pan bottom plate and large pan basket.
- Dispose of any accumulated oil or rendered fat.
- Wash the pans and removable cooking inserts using hot water, dishwashing liquid, and a non-abrasive sponge.
- Alternatively, wash the pans and cooking inserts in a dishwasher.
- Rinse and allow the components to dry.
Removing Stuck Food Residues
If food remains stuck to the pans or cooking inserts:
- Fill the affected pan with hot water and dishwashing liquid.
- Soak the components for 10–15 minutes.
- Use a non-abrasive sponge to remove the softened food residues.
- Rinse thoroughly.
If grease stains remain after normal washing, a liquid degreaser can be used.
Cleaning the Heating Element
Food residues may collect near the heating element.
- Switch off and unplug the Airfryer.
- Allow the cooking chambers to cool completely.
- Use a soft- or medium-bristle cleaning brush to remove food residues.
- Avoid scraping or damaging the heating element coating.
Do not use a steel-wire brush or hard-bristle brush.
Cleaning the Interior
- Make sure the Airfryer is cool.
- Remove both pans.
- Clean the inside using hot water and a non-abrasive sponge.
- Remove remaining food residues.
Cleaning the Exterior
To prevent scratches:
- Wipe the exterior gently with a clean, soft, smooth cloth that is slightly moistened.
- Wipe the surface again using a dry cloth if necessary.
Reinstalling the Divider
A divider is positioned between the small and large cooking chambers.
If the divider is accidentally pulled out during cleaning, reinstall it in the correct position before using the appliance again.
Maintenance Instructions
Regular cleaning and correct handling of the removable cooking components help maintain the appliance.
Recommended Maintenance Schedule
| Maintenance Task | Frequency | Instructions |
| Empty collected cooking fat | After every use | Dispose of accumulated fat from the pans. |
| Clean both pans | After every use | Wash with dishwashing liquid and a non-abrasive sponge or in a dishwasher. |
| Clean the small pan bottom plate | After every use | Remove and wash thoroughly. |
| Clean the large pan basket | After every use | Remove food residue and grease. |
| Clean heating elements | When food residue is present | Use a soft- or medium-bristle cleaning brush after cooling. |
| Clean the appliance interior | As needed | Use hot water and a non-abrasive sponge. |
| Wipe the exterior | As needed | Use a soft, slightly damp cloth. |
| Check the divider | After cleaning if disturbed | Reinstall it correctly. |
| Check removable parts | Before carrying or storing | Make sure all components are secured. |
Protecting the Nonstick Coating
Avoid using metal utensils or abrasive cleaners inside the pans.
The cooking basket must be installed in the correct orientation to prevent it from striking the sides of the pan.
Removing Excess Cooking Fat
Fat released from ingredients collects at the bottom of the cooking pans.
If excess fat must be removed after a batch:
- Place the hot pan on a heat-resistant surface.
- Wear oven-safe gloves.
- Carefully remove the cooking insert.
- Pour off the accumulated fat.
- Reinstall the cooking insert before preparing another batch.
Storage Instructions
Before storing the Philips 3000 Series Airfryer:
- Switch off the appliance.
- Unplug it from the wall outlet.
- Allow the appliance to cool completely.
- Clean both pans and their removable cooking components.
- Make sure all parts are dry.
- Reinstall the cooking inserts and secure the removable parts.
- Wrap the power cord around the cord holder on the back of the Airfryer.
Carrying the Airfryer
Always carry the appliance horizontally.
The pans may slide or fall out if the appliance is tilted, potentially damaging the removable components.
Make sure the pans, basket, bottom plate, and other removable parts are correctly secured before moving the Airfryer.
Do not use the cord holder as a carrying handle.
Troubleshooting Guide
The following troubleshooting instructions cover common operating problems, cooking issues, smoke, and display errors.
Philips 3000 Series Airfryer Troubleshooting Table
| Problem | Possible Cause | Recommended Solution |
| Airfryer does not switch on | Power plug is not connected correctly. | Check that the plug is fully inserted into the outlet. |
| Airfryer does not switch on | Several appliances are connected to the same outlet. | Try another outlet and check the fuses. |
| Exterior becomes hot | Heat from the cooking chamber reaches the outer surfaces. | This is normal. Avoid touching areas marked with the hot-surface symbol. |
| Homemade fries cook unevenly | Incorrect potato variety. | Use fresh, floury potatoes suitable for frying. |
| Fries are not cooked as expected | Too much food in the pan. | Follow the recommended quantity and preparation instructions. |
| Fries cook unevenly | Ingredients require shaking during cooking. | Shake or turn the food according to the cooking instructions. |
| Small areas of nonstick coating peel | The basket scratches the pan during insertion or cleaning. | Insert the basket correctly and avoid harsh cleaning tools. |
| White smoke appears | Fatty foods release grease. | Carefully remove excess fat. |
| White smoke appears | Grease residue remains from previous cooking. | Thoroughly clean the pans after every use. |
| White smoke appears | Breading or coating is not attached firmly. | Press the breading or coating firmly onto the food. |
| White smoke appears | Marinade or meat juices splash into hot grease. | Pat the ingredients dry before cooking. |
| E1 error appears | Appliance fault or low storage temperature. | Follow the E1 troubleshooting instructions. |
| E4–E12 appears | Possible appliance malfunction. | Disconnect and reconnect the appliance. Contact Philips if the error continues. |
Airfryer Does Not Turn On
If the Airfryer does not switch on:
- Check the electrical plug.
- Make sure the plug is fully inserted into the wall outlet.
- Check whether other powerful appliances are connected to the same outlet or circuit.
- Try another suitable outlet.
- Check the electrical fuses.
Because the Airfryer has two cooking chambers, it draws significant electrical power.
Running additional high-power appliances on the same circuit may cause the circuit breaker to trip.
Exterior Becomes Hot During Cooking
The appliance’s external surfaces can become hot because heat from the cooking chambers transfers to the outside walls.
This is normal.
The handles and controls intended for use during operation remain sufficiently cool to touch under normal conditions.
However, the pans, baskets, and internal cooking chambers become very hot.
Some exterior areas may also become too hot to touch during extended use.
These areas are identified by a hot-surface warning symbol.
Avoid touching the marked areas.
Homemade French Fries Are Not Crispy or Cook Evenly
Possible causes include incorrect potatoes, excessive quantities, and insufficient shaking.
Incorrect potato variety: Use fresh, floury potatoes suitable for frying. Avoid storing potatoes in a refrigerator.
Overloaded cooking pan: Use the recommended amounts of 800 g for the big pan or 300 g for the small pan.
Ingredients not shaken: Shake the potatoes during cooking when the shaking reminder sounds.
Follow the homemade fries preparation instructions for cutting, soaking, drying, and lightly coating the potatoes with oil.
Small Areas of Nonstick Coating Appear to Peel
Small marks can occur when the nonstick surface is scratched during cleaning or when inserting the basket.
If the basket is inserted at an angle, its edge may strike the pan wall and cause small chips in the coating.
Philips states that small coating chips of this type are not harmful because the materials used are food-safe.
To reduce the risk of further damage:
- Insert the basket in the correct orientation.
- Make sure the basket flaps align with the left and right sides.
- Avoid metal cleaning tools.
- Do not use abrasive cleaning materials.
White Smoke Comes Out of the Airfryer
White smoke may occur when fatty ingredients release grease or when old grease residues become hot.
| Possible Cause | Recommended Solution |
| Food contains a high amount of fat. | Carefully pour off excess rendered fat and continue cooking. |
| Grease remains from an earlier cooking cycle. | Clean the pans thoroughly after each use. |
| Breading or coating becomes airborne. | Press the coating firmly onto the ingredients. |
| Marinade or meat juices splash into hot fat. | Pat the ingredients dry before placing them in the pan. |
Important: Dark smoke is different from the white smoke described above. If dark smoke appears, unplug the appliance immediately and wait for the smoke to stop before removing the pan.
Error Codes and Display Problems
E1 Error Code
If the display shows E1, the possible causes include:
- An appliance fault or defect.
- The Airfryer having been stored in an environment that was too cold.
How to Troubleshoot E1
If the Airfryer was stored at a low temperature:
- Disconnect it from the electrical supply.
- Allow it to warm to room temperature for at least 15 minutes.
- Reconnect the appliance.
- Check whether E1 remains visible.
If E1 continues to appear, contact Philips Consumer Care or an authorized service center.
If the appliance is defective, Philips service assistance is required.
E4–E12 Error Codes
The E4–E12 range indicates a possible appliance malfunction.
To troubleshoot:
- Unplug the Airfryer from the electrical outlet.
- Reconnect the power plug.
- Check the display.
If the error remains, contact the Philips service hotline or Consumer Care Center.
Do not attempt to open or repair the appliance.
Warranty Information
Two-Year Limited Warranty
The Philips 3000 Series Airfryer is covered by a two-year limited warranty provided by Versuni Holding B.V.
The warranty covers defects in:
- Materials.
- Workmanship.
- Assembly.
Coverage applies when the appliance is used normally and according to its operating specifications and safety warnings.
The warranty period begins on the date of purchase.
Warranty Eligibility
The warranty applies only to the original purchaser and cannot be transferred.
To request warranty service, the purchaser must provide an original sales receipt showing:
- Product name.
- Date of purchase.
Warranty Service and Conditions
Versuni may repair the appliance or replace it at its discretion.
Liability is limited to repair or replacement. Incidental, special, and consequential damages are excluded where permitted by law.
Warranty rights may vary depending on the state, province, or country.
Improper use, professional or semi-professional operation, or repairs performed without authorization may invalidate the warranty under the manufacturer’s stated conditions.
For warranty assistance, visit:
https://www.philips.com/support
Customer Support Information
Philips provides product support, troubleshooting assistance, and warranty service through its official customer support channels.
| Support Service | Contact |
| Official Support Website | https://www.philips.com/support |
| Product Registration | https://www.philips.com/welcome |
| HomeID Welcome Page | https://home.id/welcome |
| Recycling Information | https://www.recycle.philips.com |
| United States and Canada Support | 1-833-737-1212 |
| Warranty Provider | Versuni Holding B.V. |
United States Importer
Versuni USA Corporation
1600 Summer Street
Stamford, CT 06905
United States of America
Canada Importer
Versuni Canada Inc.
40 University Avenue, Suite 904
Toronto, Ontario M5J 1T1
Canada
If troubleshooting does not resolve an operating problem or display error, contact Philips Consumer Care or an authorized service center.
Frequently Asked Questions
How do I use the Philips 3000 Series Dual Basket Airfryer?
Place the bottom plate inside the small pan and the basket inside the big pan. Add food, insert the pans, and switch on the appliance. Select each pan and set its temperature and cooking time. Press Start/Stop to begin. Shake or turn food when required and check that the ingredients are fully cooked before serving.
How does the Copy function work on the Philips 3000 Series Airfryer?
The Copy function transfers the selected temperature and cooking time from one pan to the other. Set the cooking temperature and duration for one pan, then press Copy to apply the same settings to the second pan.
How do I make both baskets finish cooking at the same time?
Set the required cooking temperature and time for each pan separately, then select the Time function. This coordinates the cooking programs so both pans finish at the same time, even when different presets or settings are used.
How do I turn on the shaking reminder?
Select the required cooking pan and press the Shaking Reminder button. The appliance provides a reminder halfway through the cooking cycle. Select the pan and press the same button again to disable the reminder.
Can the Philips 3000 Series Airfryer pans go in the dishwasher?
Yes. The removable pans and cooking inserts can be washed in a dishwasher. They can also be cleaned with hot water, dishwashing liquid, and a non-abrasive sponge. Allow the appliance to cool completely before cleaning.
What does E1 mean on the Philips 3000 Series Airfryer?
E1 may indicate an appliance fault or that the appliance was stored in an environment that was too cold. If it was stored at a low temperature, let it reach room temperature for at least 15 minutes before reconnecting it. If the error continues, contact Philips Consumer Care.
How do I fix an E4–E12 error on the Philips Airfryer?
Unplug the appliance and reconnect it. If an error in the E4–E12 range remains visible, contact Philips service or the Consumer Care Center. These errors may indicate an appliance malfunction.
How long is the Philips 3000 Series Airfryer warranty?
The Philips 3000 Series Airfryer has a two-year limited warranty covering defects in materials, workmanship, and assembly under normal use. The warranty is provided by Versuni Holding B.V., applies to the original purchaser, and requires an original receipt showing the product name and purchase date.