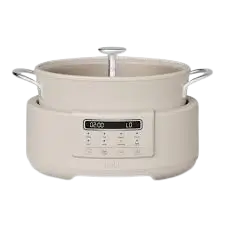
| Document Detail | Information |
| Document Title | MULTI 10-in-1 7qt Multicooker Instruction Manual |
| Document Type | Instruction Manual |
| Brand Name | bella |
| Product Name | MULTI 10-in-1 7qt Multicooker |
| Model Number(s) | 35430, 35454, 35488, 35514 |
| PDF File Size | 5 MB |
| Number of Pages | 28 |
| Languages | English, Spanish |
bella MULTI 7qt Multicooker 35430
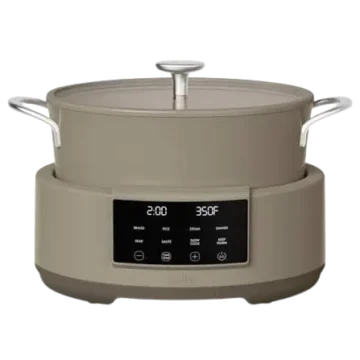
The bella MULTI 10-in-1 7qt Multicooker is a countertop electric cooking appliance designed for preparing a variety of meals using multiple cooking methods. It features a removable 7-quart non-stick cooking pot, a tempered glass lid, a steam tray, and a digital control panel with adjustable cooking time and temperature settings.
The multicooker provides eight dedicated cooking presets: Sear, Sauté, Slow Cook, Braise, Simmer, Steam, Rice, and Keep Warm. These functions support cooking tasks ranging from browning meat and preparing stews to steaming vegetables, cooking rice, and keeping prepared food warm for serving.
The removable non-stick aluminum cooking pot is also oven-safe up to 500°F (260°C) for a maximum of one hour. This allows food to be browned in an oven or broiler after being prepared in the multicooker. The glass lid and electrical base must not be placed in the oven.
The control panel displays cooking time and temperature settings. Users can select a preset, adjust the available settings, and start cooking using the Power button. Several cooking functions automatically switch to Keep Warm when the selected cooking cycle finishes.
These instructions cover setup, cooking functions, time and temperature settings, rice preparation, steaming, food safety, cleaning, maintenance, and warranty information.
Product Overview
The bella MULTI 7qt Multicooker combines several cooking methods in one electric countertop appliance.
Its wide, removable non-stick cooking pot is designed for preparing meals directly inside the heated base unit. The included glass lid has a silicone rim and steam opening, while the removable steam tray can be placed inside the pot for steaming foods.
The control panel includes a digital time display, temperature display, eight preset function buttons, and adjustment controls.
Main Features
- 7-quart cooking capacity: Removable cooking pot for preparing meals.
- Eight cooking presets: Sear, Sauté, Slow Cook, Braise, Simmer, Steam, Rice, and Keep Warm.
- Adjustable temperature: Available for compatible cooking functions.
- Adjustable cooking time: Allows cooking duration changes within preset limits.
- Non-stick aluminum cooking pot: Designed for cooking and easier food removal.
- Oven-safe cooking pot: Withstands temperatures up to 500°F for a maximum of one hour.
- Tempered glass lid: Includes a silicone rim and steam hole.
- Removable steam tray: Supports steaming with its fold-out feet.
- Rice cooking programs: Separate settings for white and brown rice.
- Automatic Keep Warm: Activates after selected cooking cycles.
- Digital control panel: Displays cooking settings and remaining time.
- Preheat indicator: Shows PrE until the selected temperature is reached.
- Temperature unit selection: Supports Fahrenheit and Celsius.
- Audible indicators: Signals cooking and preheating events.
- Non-skid feet: Help keep the appliance stable on the countertop.
What’s Included
The multicooker consists of the electric base and removable cooking components.
| Component | Description |
| Multicooker Base Unit | Main electrical heating unit with digital controls |
| Non-Stick Cooking Pot | Removable 7-quart cooking container with handles |
| Tempered Glass Lid | Lid with silicone rim, handle, and steam hole |
| Steam Tray | Removable tray with fold-out feet for steaming |
Parts and Components
The main components are identified in the product illustration.
| Part | Function |
| Lid Handle | Used to lift the glass lid |
| Tempered Glass Lid | Covers the cooking pot and contains a steam hole |
| Silicone Lid Rim | Fits around the edge of the glass lid |
| Steam Tray | Supports food above water during steaming |
| Cooking Pot Handles | Used for lifting and carrying the removable cooking pot |
| Non-Stick Cooking Pot | Holds food and cooking liquids |
| Base Unit | Provides electrical heating and supports the cooking pot |
| Control Panel | Selects cooking functions, time, and temperature |
| Non-Skid Feet | Help stabilize the multicooker |
| Polarized Plug | Connects the appliance to electrical power |
Removable Cooking Pot
The cooking pot has a non-stick aluminum surface.
It can be used inside the multicooker for cooking and removed for cleaning or oven use.
Important: The cooking pot is oven-safe up to 500°F (260°C) for a maximum of one hour. No other appliance components should be placed in the oven.
Tempered Glass Lid
The glass lid includes:
- A lid handle.
- A silicone rim.
- A steam hole.
The steam hole allows steam to escape during cooking.
Warning: Always position the steam hole toward the back when replacing the lid. Use protective oven mitts when handling the hot lid.
Steam Tray
The steam tray has fold-out feet that support food above the water inside the cooking pot.
It is used with the Steam function.
Non-Skid Feet
The feet underneath the base unit help keep the appliance stable on a suitable countertop.
Control Panel and Button Functions
The multicooker has a digital control panel with time and temperature displays, preset buttons, and adjustment controls.
| Control | Function |
| Time Display | Shows cooking time |
| Temperature Display | Shows the selected temperature or heat setting |
| Braise | Activates the braising preset |
| Rice | Activates the rice cooking preset |
| Steam | Activates the steaming preset |
| Simmer | Activates the simmering preset |
| Sear | Activates the searing preset |
| Sauté | Activates the sauté preset |
| Slow Cook | Activates the slow cooking preset |
| Keep Warm | Activates the warming function |
| Minus (−) | Decreases cooking time or temperature |
| Time/Temp | Selects time or temperature for adjustment |
| Plus (+) | Increases cooking time or temperature |
| Power | Activates, starts, pauses, or stops cooking |
Time Display
The time display shows the selected cooking duration.
During an active cooking cycle, the display counts down the remaining time after any required preheating is complete.
Temperature Display
The temperature display shows the selected temperature or heat level.
Some functions use numerical temperatures, while others use Low/High or numbered settings.
Time/Temp Button
The Time/Temp button allows users to switch between time and temperature adjustments.
- Press Time/Temp once to select the cooking time.
- Use + or − to adjust the time.
- Press Time/Temp twice to select temperature.
- Use + or − to adjust the available temperature setting.
Adjustments must remain within the selected function’s operating range.
Power Button
The Power button is used to activate the controls and begin cooking.
Pressing and holding Power for two seconds stops cooking and places the multicooker into Sleep Mode.
Technical Specifications
| Specification | Details |
| Brand | bella |
| Product Name | MULTI 10-in-1 7qt Multicooker |
| Product Identifiers | 35430, 35454, 35488, 35514 |
| Product Type | Electric Countertop Multicooker |
| Cooking Pot Capacity | 7 qt |
| Cooking Pot Material | Non-Stick Aluminum |
| Lid Material | Tempered Glass |
| Lid Rim | Silicone |
| Electrical Supply | 120V AC |
| Power Plug | Polarized |
| Dedicated Cooking Presets | 8 |
| Cooking Functions | Sear, Sauté, Slow Cook, Braise, Simmer, Steam, Rice, Keep Warm |
| Sear Temperature Range | 150°F–400°F |
| Sauté Temperature Range | 150°F–400°F |
| Slow Cook Settings | LO, HI |
| Braise Settings | 1, 2, 3 |
| Simmer Settings | 1, 2, 3 |
| Rice Programs | White Rice, Brown Rice |
| Maximum Raw Rice Quantity | 7 Cups |
| Maximum Cooked Rice Yield | Approximately 14 Cups |
| Keep Warm Time Range | 30 Minutes–12 Hours |
| Oven-Safe Cooking Pot | Up to 500°F for 1 Hour |
| Glass Lid Oven-Safe | No |
| Induction Compatible Cooking Pot | No |
| Intended Use | Household |
| Mechanical Warranty | 2 Years |
| Non-Mechanical Parts Warranty | 90 Days |
Important Safety Instructions
The bella MULTI multicooker uses electrical heating to prepare food. The cooking pot, lid, base unit, and steam produced during operation may become extremely hot.
Follow all safety precautions to reduce the risk of burns, electrical shock, fire, or property damage.
Electrical Safety
- Read all instructions before using the multicooker.
- Connect the appliance only to a 120V AC wall outlet.
- Never immerse the electrical base, power cord, or plug in water or another liquid.
- Unplug the appliance when not in use and before cleaning.
- Allow the multicooker to cool before attaching or removing parts.
- Do not operate the appliance with a damaged cord or plug.
- Stop using the appliance if it malfunctions or becomes damaged.
- Do not attempt to repair the multicooker yourself.
- Do not use an extension cord.
- Use a separate electrical circuit if other appliances are overloading the circuit.
Warning: Never place food directly inside the electrical base unit. Cook only in the supplied removable cooking pot.
Hot Surface and Steam Safety
- Do not touch hot surfaces with bare hands.
- Use potholders or protective oven mitts when handling the cooking pot and lid.
- Keep hands and face away from the lid’s steam opening.
- Be careful when removing the lid because hot steam can escape.
- Always orient the steam hole toward the back when replacing the lid.
- Tilt the lid away from the hands and face when opening.
- Allow hot condensation to drip back into the cooking pot.
- Use extreme care when moving the appliance containing hot oil or liquids.
Warning: Steam escaping from the lid can cause serious burns.
Cooking Safety
- Use the multicooker only for its intended purpose.
- Do not use the appliance outdoors.
- Do not use it for deep-frying.
- Do not leave the multicooker unattended during operation.
- Do not operate it in an unstable position.
- Keep the appliance away from flammable materials.
- Provide adequate space above and around the appliance for airflow.
- Do not operate the multicooker near curtains, clothing, dish towels, or similar materials.
- Do not place the unit near a hot burner or inside a heated oven.
Child Safety
Spilled hot food can cause serious burns.
- Keep the multicooker and its cord away from children.
- Never drape the cord over a countertop edge.
- Never use an electrical outlet located below the countertop.
- Never use an extension cord.
- Supervise children near the appliance.
- Do not allow children to play with the multicooker.
People with reduced physical, sensory, or mental capabilities or limited experience should use the appliance only with appropriate supervision or instruction from a responsible person.
Oven Use Safety
Only the removable non-stick cooking pot is approved for oven use.
| Component | Oven Use |
| Non-Stick Cooking Pot | Up to 500°F for a Maximum of 1 Hour |
| Tempered Glass Lid | Not Oven-Safe |
| Electrical Base Unit | Not Oven-Safe |
| Steam Tray | Not Approved for Oven Use |
Use protective oven mitts when handling a hot cooking pot.
If the Appliance Malfunctions
- Press Power to stop the appliance.
- Unplug the power cord immediately.
- Do not continue operating the multicooker.
- Contact Consumer Service if repair or assistance is required.
If the appliance falls into water, unplug it immediately without reaching into the water.
Polarized Plug and Power Cord
Polarized Plug
The multicooker has a polarized plug with one blade wider than the other.
The plug fits into a polarized outlet in only one direction.
If the plug does not fit:
- Remove it.
- Reverse the orientation.
- Try inserting it again.
- If it still does not fit, contact a qualified electrician.
Do not modify the plug.
Power Cord Requirements
The appliance is supplied with a short power cord to reduce entanglement and tripping hazards.
Do not use an extension cord with this multicooker.
Electrical Circuit
If the circuit is overloaded by other appliances, the multicooker may not operate properly.
Operate it on an electrical circuit separate from other appliances.
Before First Use
The multicooker must be cleaned and operated once with water before food is prepared.
Initial Cleaning
- Carefully unpack the multicooker.
- Remove all packaging materials.
- Wash the cooking pot, glass lid, and steam tray in warm, soapy water.
- Rinse the components thoroughly.
- Dry all cleaned components.
- Wipe the base unit with a clean, dry cloth.
- Place the appliance on a flat, stable countertop.
Initial Water-Only Heating Cycle
- Place the cooking pot inside the electrical base.
- Add 4 cups of water.
- Cover the cooking pot with the glass lid.
- Connect the power cord to a 120V AC outlet.
- A tone will sound, and the preset buttons will illuminate briefly.
- Press Power to activate the control panel.
- Select Steam.
- Press Time/Temp.
- Press − to reduce the time to 10 minutes.
- Press Power to start.
- The display will show PrE while the appliance preheats.
- When preheating is complete, a tone will sound, and the countdown begins.
- When the time expires, three tones will sound, and the multicooker will turn off automatically.
- Wearing oven mitts, carefully remove the lid.
- Lift the cooking pot using its handles and protective oven mitts.
- Pour out the hot water.
- Rinse and dry the cooking pot thoroughly.
- Return the pot to the base unit.
During initial use, a slight odor or vapor may occur. This is normal for many new heating appliances and should disappear after several uses.
How to Use the bella MULTI Multicooker
The multicooker uses preset functions that can be selected and adjusted before cooking.
Step 1: Prepare the Cooking Pot
- Select the ingredients for the recipe.
- Place the removable cooking pot inside the base unit.
- Add the ingredients according to the recipe.
- Position the lid when required by the selected cooking function.
For best results, the general operating instructions recommend filling the cooking pot no more than halfway.
When preparing soups or stews, leave approximately 2 inches of space between the food and the top of the cooking pot.
Step 2: Connect Electrical Power
Plug the power cord into a 120V AC electrical outlet.
A tone sounds, and the preset buttons illuminate for approximately one second before switching off.
Step 3: Activate the Controls
Press Power.
A tone sounds, and the controls become available.
Step 4: Select a Cooking Function
Choose one of the following:
- Sear.
- Sauté.
- Slow Cook.
- Braise.
- Simmer.
- Steam.
- Rice.
- Keep Warm.
Step 5: Set Cooking Time
- Press Time/Temp once.
- Use + or − to adjust the cooking time.
Some presets have fixed cooking times.
Step 6: Set Temperature
- Press Time/Temp twice.
- Use + or − to adjust the temperature or heat level.
Some functions use fixed temperatures or numbered heat settings.
Step 7: Start Cooking
Press Power.
For functions that require preheating, the appliance displays PrE until the selected temperature is reached.
The cooking timer then begins counting down.
Step 8: Complete Cooking
When the selected cooking cycle finishes, three tones sound.
Depending on the function, the multicooker either switches to Keep Warm or enters Sleep Mode.
Step 9: Disconnect Power
- Stop the appliance when required.
- Allow the components to cool.
- Unplug the power cord when the multicooker is not in use.
Use protective oven mitts when handling hot components.
How to Change Fahrenheit to Celsius
The control panel supports Fahrenheit and Celsius temperature displays.
Switching Temperature Units
- Make sure cooking has not started.
- Press and hold Time/Temp and + simultaneously.
- Continue holding for 2 seconds.
- The temperature display switches between °F and °C.
How to Stop or Change a Cooking Function
Stop Cooking
Press and hold Power for 2 seconds.
The multicooker produces one beep and enters Sleep Mode.
Change Cooking Functions
- Press Power to stop the current cycle.
- Wait for the cooking function buttons to illuminate.
- Select the new cooking function.
- Adjust the available time and temperature settings.
- Press Power again to start the new cycle.
Cooking Time and Temperature Chart
The multicooker has eight dedicated presets with different default settings and adjustment ranges.
| Function | Default Temperature or Level | Default Time | Adjustable Temperature or Level | Adjustable Time |
| Sear | 350°F | 5 Minutes | 150°F–400°F | 1–30 Minutes |
| Sauté | 350°F | 10 Minutes | 150°F–400°F | 1–60 Minutes |
| Slow Cook LO | LO | 6 Hours | LO | 30 Minutes–12 Hours |
| Slow Cook HI | HI | 4 Hours | HI | 30 Minutes–12 Hours |
| Braise | 2 | 3 Hours | 1, 2, 3 | 30 Minutes–8 Hours |
| Simmer | 2 | 15 Minutes | 1, 2, 3 | 5 Minutes–1 Hour |
| Steam | Fixed | 20 Minutes | Fixed | 10 Minutes–1 Hour |
| Rice | Program 1 | Automatic | Program 1 or 2 | Automatic |
| Keep Warm | Fixed | 4 Hours | Fixed | 30 Minutes–12 Hours |
The numbered cooking settings correspond to Low (1), Medium (2), and High (3) for the functions where they are available.
Sear Function
The Sear function is used to brown the surface of food at a relatively high temperature.
It can be used before slow cooking, braising, or preparing other recipes.
Sear Settings
| Setting | Value |
| Default Temperature | 350°F |
| Adjustable Temperature | 150°F–400°F |
| Default Time | 5 Minutes |
| Adjustable Time | 1–30 Minutes |
How to Use Sear
- Place the cooking pot in the base unit.
- Leave the lid off.
- Press Power.
- Select Sear.
- Adjust the time and temperature using Time/Temp and + or −.
- Press Power to begin preheating.
- Wait until preheating is complete.
- Add the ingredients to the cooking pot.
- Brown the food as required.
When the selected time expires, three tones sound, and the multicooker enters Sleep Mode.
Searing Tips
- Use a small quantity of cooking fat.
- The manual recommends approximately 1–3 tablespoons of butter, oil, or shortening, depending on the recipe.
- Use the cooking pot without the lid when heating oil.
- Reduce the temperature when using butter or olive oil because these have lower smoke points.
- If the oil begins smoking, hold Power for two seconds to stop cooking and allow the appliance to cool.
Important: Do not use aerosol cooking sprays. These can leave buildup that reduces the non-stick surface’s performance.
Sauté Function
The Sauté function supports cooking food quickly in a small amount of fat.
Sauté Settings
| Setting | Value |
| Default Temperature | 350°F |
| Adjustable Temperature | 150°F–400°F |
| Default Time | 10 Minutes |
| Adjustable Time | 1–60 Minutes |
How to Use Sauté
- Position the cooking pot inside the multicooker.
- Select Sauté.
- Adjust the time and temperature.
- Press Power.
- Wait for preheating to finish.
- Add the food.
- Sauté until the cooking cycle finishes or the desired result is reached.
The appliance enters Sleep Mode when the preset time expires.
Shallow-Frying Instructions
The Sear and Sauté section also describes shallow frying.
For shallow frying, the manual specifies 1–2 cups of vegetable or peanut oil.
This is not a deep-frying function. The appliance must not be used for deep-frying.
Shallow-Frying Tips
- Dry food before placing it in hot oil.
- Coat food with flour, breadcrumbs, or crushed nuts when appropriate.
- Let breaded foods rest on a wire rack for 20–30 minutes before frying.
- Refrigerate breaded cheese before frying.
- Do not overcrowd the cooking pot.
- Use tongs or a spatula to turn food.
- Check internal food temperatures with an instant-read thermometer.
- Drain fried food on paper towels after cooking.
Warning: Always wear protective oven mitts when handling food near hot oil.
Slow Cook Function
The Slow Cook function prepares food over an extended period using lower temperatures.
It is suitable for stews, chili, beans, soups, sauces, and tougher cuts of meat.
Slow Cook Settings
| Setting | Default Time | Adjustable Time |
| LO | 6 Hours | 30 Minutes–12 Hours |
| HI | 4 Hours | 30 Minutes–12 Hours |
How to Use Slow Cook
- Place the ingredients in the cooking pot.
- Add the required liquids according to the recipe.
- Position the lid.
- Press Power.
- Select Slow Cook.
- Choose LO or HI using Time/Temp and + or −.
- Adjust the cooking time if necessary.
- Press Power to begin cooking.
The countdown starts when cooking begins.
At the end of the cycle, three tones sound, and the multicooker automatically advances to Keep Warm for two hours.
Slow Cooking Tips
- Less tender cuts of meat are well suited to slow cooking.
- Searing fatty meat before slow cooking can add color and flavor.
- Whole herbs and spices can provide more flavor than crushed or ground versions.
- Cut ingredients into similarly sized pieces for more even cooking.
- Place root vegetables, such as carrots, potatoes, turnips, and beets, at the bottom of the cooking pot.
- Cover root vegetables with liquid.
- Add fresh dairy ingredients, such as milk, sour cream, or yogurt, shortly before serving.
Braise Function
The Braise function combines gentle cooking with liquid.
It is suitable for preparing meat dishes and other recipes that benefit from longer cooking times.
Braise Settings
| Setting | Value |
| Default Heat Level | 2 (Medium) |
| Available Heat Levels | 1 (Low), 2 (Medium), 3 (High) |
| Default Time | 3 Hours |
| Adjustable Time | 30 Minutes–8 Hours |
How to Use Braise
- Add the ingredients to the cooking pot.
- Press Power.
- Select Braise.
- Adjust the cooking time using Time/Temp and + or −.
- Select heat level 1, 2, or 3.
- Press Power to start.
- Wait until the appliance has finished preheating.
- Cover the cooking pot with the lid.
- Allow the cooking cycle to continue.
When the cycle ends, three tones sound, and the multicooker advances to Keep Warm for two hours.
Braising Liquid Requirements
Add enough cooking liquid to cover approximately half of the meat.
Do not fully submerge the meat.
Add more liquid during cooking when necessary.
Important: Never allow the cooking pot to boil dry.
Oven Browning After Braising
The removable cooking pot can be transferred to an oven or broiler for additional surface browning.
The cooking pot is oven-safe up to 500°F (260°C) for a maximum of one hour.
Remove it from the electrical base before oven use.
Do not put the glass lid or base unit in the oven.
Simmer Function
The Simmer function cooks food at a controlled heat level.
Searing food before simmering can improve flavor and texture.
Simmer Settings
| Setting | Value |
| Default Heat Level | 2 (Medium) |
| Available Heat Levels | 1 (Low), 2 (Medium), 3 (High) |
| Default Time | 15 Minutes |
| Adjustable Time | 5 Minutes–1 Hour |
Caution: The Simmer function must be used without the lid.
How to Use Simmer
- Place the ingredients in the cooking pot.
- Leave the lid off.
- Press Power.
- Select Simmer.
- Adjust the cooking time.
- Select heat level 1, 2, or 3.
- Press Power to begin preheating.
- Wait for the cooking timer to begin counting down.
- Allow the selected cooking cycle to finish.
When the cycle ends, three tones sound, and the multicooker switches to Keep Warm for two hours.
Steam Function
The Steam function uses the included steam tray to cook food above hot water.
Steam Settings
| Setting | Value |
| Default Time | 20 Minutes |
| Adjustable Time | 10 Minutes–1 Hour |
| Temperature | Fixed |
How to Use Steam
- Unfold the feet of the steam tray.
- Place the tray inside the cooking pot.
- Add 3 cups of water to the cooking pot.
- Arrange food in a single layer on the steam tray.
- Cover with the glass lid.
- Press Power.
- Select Steam.
- Adjust the cooking time if necessary.
- Press Power to start.
- Wait until preheating is complete.
- Allow the timer to count down.
When the time expires, three tones sound, and the multicooker turns off automatically.
Steaming Tips
- Check the liquid level periodically.
- Do not allow the cooking pot to run dry.
- Additional liquid may be added when needed.
- Suitable steaming liquids listed in the manual include water, broth, wine, beer, and seasoned liquids.
How to Remove the Lid Safely
- Wear protective oven mitts.
- Hold the lid handle.
- Carefully lift the lid while keeping hands and face away from the steam.
- Tilt the lid away from the body.
- Hold it over the pot so condensed hot water drips back inside.
Warning: Hot steam and condensation may cause serious burns.
Rice Function
The Rice function provides two cooking programs for preparing white and brown rice.
| Program | Rice Type |
| Program 1 | White Rice |
| Program 2 | Brown Rice |
The rice cooking duration is automatic and cannot be manually adjusted.
Rice Capacity
The multicooker can prepare up to 7 cups of uncooked rice, producing approximately 14 cups of cooked rice, depending on the rice variety.
For the rice charts, one cup equals 8 fluid ounces (236 ml).
How to Cook Rice
- Wash the rice.
- Place the washed rice inside the cooking pot.
- Add the amount of liquid shown in the corresponding rice chart.
- Cover with the lid.
- Press Power.
- Select Rice.
- Use Time/Temp to select Program 1 or Program 2.
- Press Power to begin cooking.
When cooking finishes, three tones sound, and the multicooker automatically switches to Keep Warm for one hour.
After Rice Cooking
Allow the cooked rice to rest for approximately 10 minutes before stirring or serving.
This allows the remaining steam to complete the cooking process.
Carefully open the lid and use a non-metal, long-handled utensil to fluff the rice and release steam.
Water may occasionally spill over during rice cooking.
White Rice Cooking Chart
Use Program 1 for white rice.
| Raw White Rice | Water | Estimated Cooking Time | Approximate Cooked Rice |
| 1 Cup | 1½ Cups | 30–40 Minutes | 2 Cups |
| 2 Cups | 3 Cups | 32–42 Minutes | 4 Cups |
| 3 Cups | 4 Cups | 35–45 Minutes | 6 Cups |
| 4 Cups | 5 Cups | 38–48 Minutes | 8 Cups |
| 5 Cups | 6 Cups | 40–50 Minutes | 10 Cups |
| 6 Cups | 7 Cups | 43–53 Minutes | 12 Cups |
| 7 Cups | 8 Cups | 45–55 Minutes | 14 Cups |
The water quantity may be adjusted according to taste during future cooking sessions.
Brown Rice Cooking Chart
Use Program 2 for brown rice.
| Raw Brown Rice | Water | Estimated Cooking Time | Approximate Cooked Rice |
| 1 Cup | 2¼ Cups | 48–58 Minutes | 2 Cups |
| 2 Cups | 3¼ Cups | 56–66 Minutes | 4 Cups |
| 3 Cups | 4¾ Cups | 60–70 Minutes | 6 Cups |
| 4 Cups | 6¼ Cups | 65–75 Minutes | 8 Cups |
| 5 Cups | 7¾ Cups | 70–80 Minutes | 10 Cups |
| 6 Cups | 9¼ Cups | 78–88 Minutes | 12 Cups |
| 7 Cups | 10¾ Cups | 80–90 Minutes | 14 Cups |
Brown rice generally requires more water and a longer cooking time than white rice.
Rice Cooking Tips
Cooking Wild Rice
When preparing wild rice, add approximately 25%–50% more water.
Follow the rice package instructions.
Rice Is Too Dry or Hard
If the rice remains dry, hard, or chewy when the multicooker enters Keep Warm:
- Add ½–1 cup of water.
- Stir the rice.
- Allow additional cooking time to soften it.
Rice Is Too Wet
If the cooked rice is soggy:
- Open the lid and stir the rice to check its consistency.
- Close the lid.
- Continue on Keep Warm for 10–30 minutes as needed.
- Stir periodically to release excess moisture.
Adding Flavor to Rice
Stock, broth, or bouillon can be used instead of water to add flavor.
When using salt, the manual recommends kosher salt and increasing the quantity to approximately 1½ times the amount of table salt specified in a recipe.
Rice Keep Warm Limit
Do not leave cooked rice in the multicooker on Keep Warm for more than two hours.
Keep Warm Function
The Keep Warm function maintains the temperature of cooked food before serving.
It can activate automatically after certain cooking presets or be selected independently.
Automatic Keep Warm
| Cooking Function | Automatic Keep Warm |
| Slow Cook | 2 Hours |
| Braise | 2 Hours |
| Simmer | 2 Hours |
| Rice | 1 Hour |
| Sear | No |
| Sauté | No |
| Steam | No |
Adjusting Keep Warm Duration
The warming duration can be adjusted from 30 minutes to 12 hours in 30-minute increments.
Use Time/Temp and + or − to change the duration.
Using Keep Warm as a Standalone Function
- Press Power.
- Select Keep Warm.
- The default duration of 4 hours appears.
- Adjust the time using Time/Temp and + or −.
- Select a duration between 30 minutes and 12 hours.
- Press Power to begin warming.
When the selected warming time expires, three tones sound, and the appliance enters Sleep Mode.
The two-hour maximum holding instruction for cooked rice must still be followed.
Cooking Completion Sounds and Display Indicators
The multicooker uses audible signals and display messages to indicate its operating status.
| Indicator | Meaning |
| Single Tone After Plug-In | Appliance Has Received Electrical Power |
| Briefly Illuminated Preset Buttons | Initial Power Connection Indication |
| PrE | Appliance Is Preheating |
| Tone After Preheating | Selected Temperature Has Been Reached |
| Time Countdown | Cooking Cycle Is Running |
| Three Tones | Selected Cooking or Warming Cycle Has Finished |
| Single Tone After Holding Power | Cooking Stopped and Sleep Mode Activated |
Preheat Display
When a cooking function requires preheating, PrE appears on the display.
The timer begins counting down after preheating finishes.
Automatic Shutoff
The multicooker automatically shuts off or enters Sleep Mode after certain cooking cycles.
For functions that activate Keep Warm, the appliance switches off when the warming period expires.
Food Temperature Guidelines
The instruction manual includes the following internal food-temperature guidance attributed to the USDA.
| Food | Internal Temperature Printed in the Manual |
| Beef and Lamb | 145°F (63°C) |
| Pork | 160°F (71°C) |
| Poultry | 170°F–180°F (77°C–82°C) |
| Reheated Meat or Poultry | 165°F (74°C) |
Use an instant-read food thermometer when checking internal cooking temperatures.
Non-Stick Cooking Pot Care
The removable aluminum cooking pot has a non-stick surface that requires appropriate utensils and cleaning methods.
Protecting the Non-Stick Surface
- Use nylon, plastic, wood, or rubber utensils.
- Never cut food directly on the cooking pot surface.
- Do not use abrasive cleansers.
- Do not use rough scouring pads.
- Never heat the pot while empty.
- Do not use the pot for making popcorn, caramelizing sugar, or preparing candy.
- Do not use chipped, cracked, or broken cookware.
- Do not place a hot cooking pot directly on the countertop.
Cooking Pot Discoloration
Some browning on the bottom of the cooking pot may occur with use.
The exterior bottom may also darken if the pot is cleaned in a dishwasher.
For best results, the manufacturer recommends washing the non-stick cooking pot by hand.
Cooking Pot and Induction Compatibility
The removable cooking pot is not suitable for induction cooking.
Cleaning Instructions
The multicooker must be unplugged and completely cooled before cleaning.
Before Cleaning
- Turn off the multicooker.
- Unplug the power cord.
- Allow the appliance to cool completely.
- Remove the glass lid.
- Remove the cooking pot and steam tray.
Cleaning the Glass Lid and Steam Tray
The glass lid and steam tray can be cleaned in a dishwasher.
For handwashing:
- Wash the components in warm, soapy water.
- Rinse thoroughly.
- Dry completely.
Cleaning the Non-Stick Cooking Pot
Handwashing is recommended for the non-stick aluminum pot.
- Allow the pot to cool.
- Wash it in warm, soapy water.
- Rinse thoroughly.
- Dry the interior and exterior completely.
Removing Stuck-On Food
If food becomes stuck to the cooking pot:
- Fill the pot with warm, soapy water.
- Allow it to soak.
- Clean away loosened residue.
- For stubborn residue, use a baking soda paste with a plastic scouring pad.
- Rinse and dry thoroughly.
Removing Water Spots and Mineral Deposits
Distilled white vinegar may be used to remove water spots or mineral buildup.
For more difficult stains:
- Add a small amount of distilled white vinegar to the pot.
- Allow it to soak.
- Clean the affected area.
- Rinse and dry the cooking pot.
Cleaning the Base Unit
- Unplug the appliance.
- Allow it to cool completely.
- Wipe the interior and exterior of the base unit with a soft, slightly damp cloth or sponge.
- Dry the surfaces thoroughly.
Warning: Never immerse the electrical base unit or power cord in water or another liquid.
Do not use abrasive cleaners or scouring pads on the base.
Maintenance Instructions
The bella MULTI multicooker requires minimal routine maintenance.
Its removable cooking components should be kept clean, while the base unit should remain dry.
Maintenance Guide
| Maintenance Task | Instructions |
| Clean Cooking Pot | Wash after use; handwashing recommended |
| Clean Glass Lid | Wash by hand or in a dishwasher |
| Clean Steam Tray | Wash by hand or in a dishwasher |
| Remove Stuck Food | Soak in warm, soapy water |
| Remove Mineral Deposits | Use distilled white vinegar |
| Clean Base Unit | Wipe with a slightly damp cloth and dry |
| Inspect Components | Do not use chipped, cracked, or broken parts |
| Store Appliance | Keep clean, dry, and unplugged |
Professional Servicing
The multicooker contains no user-serviceable internal parts.
Do not attempt to disassemble or repair the electrical base.
Any service requiring disassembly beyond normal cleaning must be performed by a qualified appliance repair technician.
Storage Instructions
Store the multicooker only after all components have cooled, been cleaned, and dried.
How to Store the Multicooker
- Unplug the appliance.
- Allow it to cool completely.
- Clean the cooking pot, glass lid, and steam tray.
- Dry all components thoroughly.
- Place the cooking pot inside the base unit.
- Place the steam tray inside the cooking pot.
- Position the glass lid on top.
- Store the appliance in its original box or another clean, dry location.
Power Cord Storage
Keep the power cord loosely coiled.
Do not wrap it tightly around the appliance.
Operating Problems and Troubleshooting
The following guidance covers operating conditions and corrective steps described in the instruction manual.
| Problem or Condition | Possible Cause | Recommended Action |
| Appliance Does Not Operate Properly | Electrical Circuit May Be Overloaded | Operate on a Separate Electrical Circuit |
| Crackling Noise While Heating | Exterior of Cooking Pot May Be Wet | Keep the Outside of the Cooking Pot Completely Dry |
| PrE Appears | Appliance Is Preheating | Allow Preheating to Finish |
| Oil Begins Smoking | Cooking Temperature May Be Too High | Stop Cooking and Allow the Appliance to Cool |
| Rice Is Dry or Chewy | Rice Needs Additional Water or Cooking Time | Add ½–1 Cup of Water and Stir |
| Rice Is Too Wet | Excess Moisture Remains | Continue on Keep Warm for 10–30 Minutes, Stirring Periodically |
| Food Sticks to Cooking Pot | Food Residue Remains on Surface | Soak in Warm, Soapy Water Before Cleaning |
| Water Spots or Mineral Stains | Mineral Deposits | Clean Using Distilled White Vinegar |
| Appliance Malfunctions During Use | Appliance Fault | Turn Off, Unplug, and Contact Consumer Service |
Crackling Noise While Heating
A crackling sound may occur if the outside of the cooking pot is wet when it is placed into the base unit.
Always dry the cooking pot’s exterior before use.
This helps prevent damage to the internal appliance components.
Oil Begins Smoking
If cooking oil starts to smoke:
- Press and hold Power for two seconds.
- Allow the appliance to cool.
- Reduce the cooking temperature as needed.
Butter and olive oil have lower smoke points than some other cooking fats.
Rice Is Too Dry
Add ½–1 cup of water and stir.
Allow additional time for the rice to soften.
Rice Is Too Wet
Continue on Keep Warm for approximately 10–30 minutes, stirring periodically to release excess moisture.
Appliance Malfunctions
If the multicooker develops a malfunction:
- Press Power to stop operation.
- Unplug it immediately.
- Stop using the appliance.
- Contact Consumer Service.
Do not attempt electrical repairs.
Warranty Information
The bella MULTI 7qt Multicooker includes a limited warranty provided by Sensio Inc., doing business as Made by Gather.
The warranty covers qualifying mechanical defects in materials and workmanship for two years from the initial delivery date.
Non-mechanical parts are covered for 90 days.
Warranty Coverage
| Warranty Detail | Information |
| Warranty Provider | Sensio Inc. dba Made by Gather |
| Mechanical Warranty | 2 Years |
| Non-Mechanical Parts Coverage | 90 Days |
| Warranty Start | Initial Delivery Date |
| Eligible Purchaser | Original Retail Purchaser |
| Transferability | Non-Transferable |
| Proof of Purchase | Original Sales Receipt |
| Warranty Remedy | Repair, Replacement, or Refund at Provider’s Discretion |
| Customer Service | 1-866-832-4843 |
What the Warranty Covers
During the applicable warranty period, Sensio may repair or replace a qualifying defective product or issue a refund.
The remedy is determined by Sensio.
Warranty Exclusions
The warranty excludes normal wear and damage caused by:
- Negligent use.
- Incorrect voltage or current.
- Improper routine maintenance.
- Use contrary to the operating instructions.
- Unauthorized disassembly.
- Repairs or alterations by unauthorized personnel.
- Natural events such as fires, floods, hurricanes, or tornadoes.
The warranty also contains limitations on incidental and consequential damages. Applicable consumer rights and restrictions may vary by jurisdiction.
How to Request Warranty Service
- Contact Customer Service at 1-866-832-4843.
- Explain the product problem.
- Follow the telephone troubleshooting instructions.
- If the issue cannot be resolved, obtain a case number.
- Follow the product return instructions.
Returning the Product for Warranty Service
If a product return is required, attach a tag containing:
- Customer name.
- Customer address.
- Daytime telephone number.
- Case number.
- Description of the problem.
Include a copy of the original sales receipt.
Package the product carefully and ship it to the address provided by Sensio, with shipping and insurance prepaid.
Sensio does not accept responsibility for the product while it is in transit to its Customer Service Center.
Customer Support Information
Customer support for the bella MULTI multicooker is provided by Sensio Inc. dba Made by Gather.
| Contact Detail | Information |
| Brand | bella |
| Company | Sensio Inc. dba Made by Gather |
| Customer Service Phone | 1-866-832-4843 |
| Customer Service Email | help@bellahousewares.com |
| Brand Website | https://bellakitchenware.com |
| Company Location | New York, NY 10019, USA |
Product Registration
Product registration is available through https://bellakitchenware.com.
When to Contact Customer Service
Contact Consumer Service if the appliance has a damaged power cord or plug, develops a malfunction, requires professional repair, or needs warranty assistance.
Frequently Asked Questions
How do I use the bella MULTI 7qt Multicooker?
Place the cooking pot inside the base unit, add ingredients, and connect the appliance to a 120V AC outlet. Press Power, select the desired function, and adjust the available time and temperature settings using Time/Temp and + or −. Press Power again to begin cooking. Some functions require preheating before the timer starts.
What cooking functions does the bella MULTI multicooker have?
The multicooker has eight dedicated presets: Sear, Sauté, Slow Cook, Braise, Simmer, Steam, Rice, and Keep Warm. Each preset has its own default settings and available adjustments.
How do I cook rice in the bella 7qt Multicooker?
Wash the rice, add it to the cooking pot, and pour in the amount of liquid specified in the rice chart. Select Rice, then choose Program 1 for white rice or Program 2 for brown rice using Time/Temp. Press Power to begin. The appliance automatically switches to Keep Warm for one hour after cooking.
Can the bella MULTI 7qt cooking pot go in the oven?
Yes. The removable non-stick cooking pot is oven-safe up to 500°F (260°C) for a maximum of one hour. The glass lid and electrical base unit are not oven-safe. Remove the cooking pot from the base before placing it in an oven or broiler.
How do I steam food in the bella MULTI multicooker?
Unfold the steam tray feet and place the tray inside the cooking pot. Add three cups of water, arrange food in a single layer on the tray, and cover with the lid. Select Steam, adjust the time between 10 minutes and one hour, and press Power. Use oven mitts when removing the hot lid.
How do I change the temperature from Fahrenheit to Celsius?
Before cooking begins, press and hold the Time/Temp and + buttons simultaneously for two seconds. This switches the temperature display between Fahrenheit and Celsius.
How long does the bella MULTI keep food warm?
The standalone Keep Warm function defaults to four hours and can be adjusted from 30 minutes to 12 hours. Slow Cook, Braise, and Simmer automatically enter Keep Warm for two hours, while Rice uses a one-hour automatic warming period. The manual instructs users not to keep cooked rice on Keep Warm for more than two hours.
How do I clean the bella MULTI 7qt Multicooker?
Unplug the appliance and let it cool completely. Wash the removable cooking pot in warm, soapy water; handwashing is recommended. The glass lid and steam tray can be cleaned in a dishwasher. Wipe the electrical base with a slightly damp cloth or sponge and dry thoroughly. Never immerse the base or power cord in water.