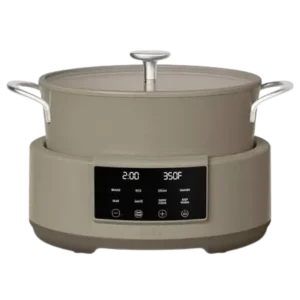
| Field | Details |
| Document Title | MULTI 10-in-1 8.5qt Multicooker Instruction Manual |
| Document Type | Instruction Manual |
| Brand Name | BELLA |
| Product Name | MULTI 10-in-1 8.5qt Multicooker |
| Model Number(s) | 35480 |
| Item Number | 2887016 |
| PDF File Size | 5 MB |
| Number of Pages | 16 |
| Languages | English |
BELLA MULTI 8.5qt Multicooker 35480
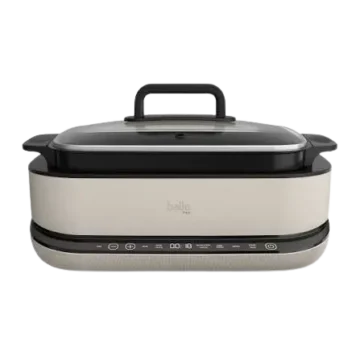
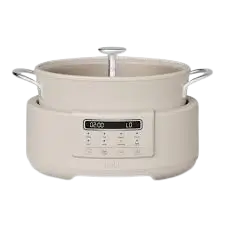
The BELLA MULTI 10-in-1 8.5qt Multicooker is an electric countertop cooking appliance designed for preparing meals using different cooking methods, including searing, sautéing, slow cooking, braising, simmering, steaming, and rice cooking. It features a removable 8.5-quart nonstick cooking pot, a digital control panel, a tempered glass lid, and a steaming tray.
The multicooker offers eight selectable cooking functions with adjustable cooking times and temperatures or heat levels, depending on the selected program. It also includes a Keep Warm function for holding prepared food after cooking.
The removable aluminum cooking pot can be used in an oven at temperatures up to 500°F for a maximum of one hour. The glass lid, silicone pot holders, and electric base must not be placed in the oven.
The following instructions cover the multicooker’s parts, setup, digital controls, cooking programs, time and temperature settings, rice-to-water ratios, steaming, cleaning, storage, safety precautions, and warranty service.
Product Overview and Technical Specifications
The BELLA MULTI 8.5qt Multicooker combines several cooking methods in a single countertop appliance. It is intended for indoor household use and operates from a 120 V AC electrical wall outlet.
The multicooker uses a removable nonstick aluminum cooking pot that fits inside the electric base. A digital control panel provides access to the cooking programs and allows cooking times and temperatures to be adjusted.
| Specification | Details |
| Brand | BELLA |
| Product Line | MULTI |
| Product Name | 10-in-1 8.5qt Multicooker |
| Product Type | Electric multicooker |
| Cooking Capacity | 8.5 quarts |
| Electrical Supply | 120 V AC |
| Power Plug | Polarized plug |
| Control Type | Digital touch control panel |
| Selectable Cooking Functions | 8 |
| Cooking Programs | Braise, Rice, Steam, Simmer, Sear, Sauté, Slow Cook, Keep Warm |
| Cooking Pot | Removable nonstick aluminum pot |
| Oven-Safe Cooking Pot | Up to 500°F for a maximum of 1 hour |
| Glass Lid | Tempered glass with silicone rim and steam hole |
| Steam Tray | Included, with folding feet |
| Pot Holders | 2 silicone pot holders |
| Temperature Display | Fahrenheit and Celsius |
| Keep Warm Timer Range | 30 minutes to 12 hours |
| Rice Capacity | Up to 8 cups raw rice |
| Intended Use | Indoor household countertop use only |
Main Cooking Functions
The multicooker includes the following selectable functions:
- Sear: Browns the surface of meat and other ingredients using high heat.
- Sauté: Cooks ingredients in a small amount of oil or fat.
- Slow Cook: Prepares food over an extended period using LOW or HI heat.
- Braise: Cooks ingredients slowly with a controlled amount of liquid.
- Simmer: Maintains a selected heat level for cooking sauces, soups, and other mixtures.
- Steam: Cooks food using steam generated from water in the cooking pot.
- Rice: Provides separate programs for white rice and brown rice.
- Keep Warm: Holds cooked food warm for a selected period.
The product is marketed as a 10-in-1 multicooker, and its control panel provides eight individually selectable cooking functions.
Parts and Components
The BELLA MULTI 8.5qt Multicooker consists of a removable cooking pot, electric base, tempered glass lid, steaming tray, and accessories used for handling hot cookware.
| Part | Description and Function |
| Lid Handle | Allows the glass lid to be lifted using suitable heat protection. |
| Tempered Glass Lid | Covers the cooking pot and includes a silicone rim and steam hole. |
| Steam Tray | Holds food above water during steaming. |
| Cooking Pot Handles | Provide gripping points for lifting and moving the removable pot. |
| Nonstick Cooking Pot | Holds ingredients for cooking and can be used separately in the oven within its stated temperature limit. |
| Base Unit | Contains the electrical heating components and supports the cooking pot. |
| Digital Control Panel | Controls cooking programs, time, temperature, and power. |
| Nonskid Feet | Help keep the appliance stable on a flat surface. |
| Silicone Pot Holders | Two accessories used for handling the hot cooking pot and lid. |
| Polarized Plug | Connects the appliance to a suitable 120 V AC outlet. |
Removable Nonstick Cooking Pot
The removable aluminum cooking pot is used for all cooking functions.
It has a nonstick interior to help prevent food from sticking during normal cooking.
The cooking pot can also be removed from the electric base and placed in an oven or broiler for additional browning.
Oven limit: The cooking pot is oven-safe up to 500°F for a maximum of one hour.
The cooking pot is not suitable for induction cooking.
Tempered Glass Lid
The tempered glass lid includes a silicone rim and steam hole.
The lid helps retain heat and moisture during cooking programs that require covered operation.
When positioning the lid, the steam hole should face toward the back of the multicooker.
Warning: The glass lid is not oven-safe.
Hot steam and condensation can accumulate beneath the lid. Always use protective oven mitts when lifting it.
Steam Tray
The included steam tray has folding feet that allow it to stand inside the cooking pot.
During steaming, water is added beneath the tray, and food is arranged on top.
The cooking pot is then covered with the glass lid.
Silicone Pot Holders
Two silicone pot holders are included for handling the cooking pot and lid.
They provide additional protection when removing hot components from the multicooker.
Important: The supplied silicone pot holders are not oven-safe.
Use suitable oven mitts when handling the cooking pot after oven or broiler use.
Digital Control Panel and Button Functions
The multicooker features a digital control panel with separate time and temperature displays, eight cooking function buttons, adjustment controls, and a POWER button.
Control Panel Guide
| Control | Function |
| Time Display | Shows the selected cooking time and remaining time during operation. |
| Temperature Display | Shows the selected temperature or cooking level. |
| BRAISE | Selects the Braise cooking program. |
| RICE | Selects the Rice cooking program. |
| STEAM | Selects the Steam cooking program. |
| SIMMER | Selects the Simmer cooking program. |
| SEAR | Selects the Sear cooking program. |
| SAUTÉ | Selects the Sauté cooking program. |
| SLOW COOK | Selects the Slow Cook cooking program. |
| KEEP WARM | Selects the Keep Warm function. |
| Minus (−) | Decreases the selected time or temperature. |
| TIME/TEMP | Switches between cooking time and temperature adjustments. |
| Plus (+) | Increases the selected time or temperature. |
| POWER | Activates the multicooker and starts or stops cooking. |
POWER Button
The POWER button controls activation, cooking, and shutdown.
When the appliance is first connected to electricity, a tone sounds and the preset buttons illuminate briefly before turning off.
Pressing POWER activates the control panel.
After selecting a cooking program and adjusting the settings, pressing POWER again begins cooking.
Holding POWER for two seconds during operation stops cooking and places the multicooker into Sleep Mode.
TIME/TEMP Button
The TIME/TEMP button allows cooking time and temperature to be adjusted.
To change cooking time:
- Select the desired cooking function.
- Press TIME/TEMP once.
- Press + or − to adjust the time.
To change cooking temperature:
- Select a cooking function that supports temperature adjustment.
- Press TIME/TEMP twice.
- Press + or − to select the preferred temperature or heat level.
Switching Between Fahrenheit and Celsius
The temperature display can be changed between Fahrenheit and Celsius.
Press and hold the TIME/TEMP control for approximately three seconds to switch the temperature unit.
Plus and Minus Buttons
The + button increases a selected cooking time or temperature.
The − button decreases the selected value.
The available adjustment range depends on the selected cooking program.
Display and Audible Signals
| Display or Signal | Meaning |
| Initial tone when plugged in | The appliance has received electrical power. |
| Preset buttons illuminate briefly | Initial power connection sequence. |
| PrE | The multicooker is preheating. |
| Cooking timer countdown | The selected cooking cycle is underway. |
| Three audible tones | A cooking cycle has finished. |
| One tone after holding POWER for 2 seconds | Cooking has stopped and the appliance has entered Sleep Mode. |
The appliance may automatically enter Keep Warm mode after certain cooking programs. Steam, Sear, and Sauté have different completion behavior.
Important Safety Instructions
The BELLA MULTI 8.5qt Multicooker generates high temperatures, hot liquids, and escaping steam during operation.
Proper precautions are necessary to prevent burns, electrical shock, fire, and damage to the appliance.
Electrical Safety
- Connect the appliance only to a 120 V AC electrical wall outlet.
- Never immerse the electric base, plug, or power cord in water or other liquids.
- Do not operate the multicooker with a damaged power cord or plug.
- Do not use the appliance after a malfunction or other damage.
- Unplug the multicooker whenever it is not in use.
- Disconnect the appliance before cleaning.
- Allow the appliance to cool before adding or removing components.
- Keep the power cord away from hot surfaces.
- Do not allow the cord to hang over a countertop or table.
- Do not place the appliance on or near a hot gas burner, electric burner, or heated oven.
- Do not use attachments that are not recommended by the manufacturer.
Warning: Never place food directly inside the electric base unit. All cooking must take place in the supplied cooking pot.
Hot Surfaces and Steam Safety
The multicooker produces hot steam during cooking, particularly when the lid is lifted.
- Always use potholders or oven mitts when handling hot components.
- Keep hands and face away from the steam hole in the glass lid.
- Position the lid’s steam hole toward the back of the appliance.
- Use caution when removing the lid because hot condensation may collect underneath.
- Tilt the lid away from the hands and face when opening.
- Hold the tilted lid above the cooking pot so condensation can drip back inside.
- Do not touch the cooking pot or base while hot.
- Exercise extreme caution when handling hot oil or other heated liquids.
Warning: Escaping steam can cause serious burns. Never place bare hands or the face above the lid’s steam opening.
Preventing Spills and Burns
Spilled hot food and liquids can cause serious injuries.
- Keep the multicooker and power cord away from children.
- Never allow the cord to hang over the counter.
- Do not use an electrical outlet located below the countertop.
- Do not use an extension cord with this appliance.
- Keep the multicooker on a stable surface.
- Never leave the appliance unattended during operation.
Safe Placement and Ventilation
Place the multicooker on a sturdy, level, heat-resistant countertop.
Allow adequate space above and around the appliance for air circulation.
Keep the appliance away from curtains, wall coverings, clothing, dish towels, and other flammable materials.
A heat-resistant trivet or cutting board is recommended underneath the multicooker to help prevent heat damage to the countertop.
Cooking Restrictions
- Do not use the multicooker for deep-frying food.
- Do not heat the cooking pot while it is empty.
- Do not allow the pot to boil dry during cooking.
- Do not use the electric base in an oven.
- Do not put the glass lid in an oven.
- Do not put the supplied silicone pot holders in an oven.
- Do not use the cooking pot on an induction cooktop.
- Do not use damaged, cracked, chipped, or broken cooking components.
- Do not attempt to repair the appliance.
The cooking pot alone may be used in an oven up to 500°F for no more than one hour.
Child Safety
Children must be supervised to prevent them from playing with the appliance.
The multicooker is not intended for use by persons, including children, with reduced physical, sensory, or mental abilities or insufficient experience unless they receive suitable supervision or instruction.
Polarized Plug
The multicooker uses a polarized electrical plug with one blade wider than the other.
If the plug does not fit into the outlet:
- Remove the plug.
- Reverse its orientation.
- Try inserting it again.
- If it still does not fit, contact a qualified electrician.
Do not modify the polarized plug.
Power Cord Safety
The multicooker has a short electrical cord to reduce the risk of tripping or entanglement.
Do not use an extension cord.
If the electrical circuit is overloaded by other appliances, the multicooker may not operate correctly. It should be used on a separate electrical circuit.
Emergency Shutdown
If the multicooker begins to malfunction:
- Press the POWER button to stop operation.
- Disconnect the power cord from the wall outlet immediately.
- Stop using the appliance.
- Contact Customer Service.
Do not attempt to disassemble or repair the electric base.
Before First Use
The multicooker requires an initial cleaning and water-only steaming cycle before food is prepared.
Cleaning Before Initial Operation
- Carefully unpack the multicooker.
- Remove all packaging materials.
- Wash the cooking pot, glass lid, and steam tray in warm, soapy water.
- Rinse the washed components.
- Dry all components thoroughly.
- Wipe the electric base with a clean, dry cloth.
- Place the cooking pot and accessories back into the base as appropriate.
- Position the multicooker on a sturdy, clean, flat countertop.
First-Time Water-Only Heating Cycle
Before cooking food for the first time, run the multicooker using water only.
- Pour 4 cups of water into the cooking pot.
- Place the pot inside the electric base.
- Cover it with the glass lid.
- Connect the multicooker to a 120 V AC electrical outlet.
- Wait for the initial tone and brief illumination of the preset buttons.
- Press POWER to activate the control panel.
- Press STEAM.
- Press TIME/TEMP and use the − button to set the cooking time to 10 minutes.
- Press POWER to begin the cycle.
- The display will show PrE while preheating.
- When the required temperature is reached, a tone will sound and the countdown will begin.
- Allow the 10-minute cycle to finish.
- When the timer expires, three tones will sound and the multicooker will switch off automatically.
- Wearing the supplied silicone pot holders, carefully remove the glass lid.
- Lift the cooking pot out by its handles.
- Discard the hot water carefully.
- Rinse and dry the cooking pot.
- Return the pot to the base.
Important: The supplied silicone pot holders must not be used inside an oven.
Initial Vapor or Odor
A small amount of vapor or odor may occur during the first operation.
The manual describes this as normal for heating appliances and indicates that it should disappear after the first few uses.
General Operating Instructions
The multicooker allows cooking functions to be selected using the digital control panel.
Cooking time and temperature can be adjusted when supported by the selected program.
How to Start Cooking
- Prepare the ingredients according to the recipe.
- Place the food in the removable cooking pot.
- Position the cooking pot inside the electric base.
- Use the lid when required by the selected cooking function.
- Connect the appliance to a 120 V AC outlet.
- Press POWER to activate the multicooker.
- Select the desired cooking program.
- Press TIME/TEMP and use + or − to adjust the cooking time.
- Press TIME/TEMP again when temperature adjustment is required, then select the desired temperature or heat level.
- Press POWER to start cooking.
Follow the specific operating instructions for each cooking program, particularly when preheating or uncovered cooking is required.
Recommended Food Quantity
For general cooking, the manual recommends filling the cooking pot no more than halfway for best results.
When preparing soups or stews, leave approximately 2 inches of space between the food and the top of the cooking pot.
When cooking meat and vegetables together, place the vegetables into the pot first, followed by the meat and remaining ingredients.
How to Adjust Cooking Time
- Select the desired cooking function.
- Press TIME/TEMP once.
- Use + or − to change the cooking time.
- Start the program.
Cooking time adjustment limits vary by function.
How to Adjust Cooking Temperature
- Select a cooking function that allows temperature adjustment.
- Press TIME/TEMP twice.
- Use + or − to select the desired temperature or cooking level.
- Start cooking.
Some programs use numerical temperatures, while others use LOW, HI, or numbered heat levels.
How to Change Cooking Functions
A cooking function can be changed while the appliance is operating.
- Press POWER to stop the current cycle.
- Wait for the available cooking functions to illuminate.
- Select the new function.
- Adjust the settings if necessary.
- Press POWER again to begin cooking.
How to Stop Cooking Early
Cooking can be stopped at any time.
Press and hold POWER for approximately 2 seconds.
The appliance will beep once and enter Sleep Mode.
Cooking Completion and Automatic Keep Warm
When certain cooking programs finish, three audible tones sound.
The multicooker may automatically switch to Keep Warm for a program-dependent period.
The manual specifies:
- Slow Cook, Braise, and Simmer: automatic Keep Warm for 2 hours.
- Rice: automatic Keep Warm for 1 hour.
- Steam: turns off when cooking is complete.
- Sear and Sauté: enter Sleep Mode after completion.
Keep Warm can also be selected independently.
Multicooker Cooking Functions and Settings Chart
The multicooker provides eight cooking functions with different default settings and adjustment limits.
| Cooking Function | Default Temperature or Level | Default Time | Adjustable Temperature or Level | Adjustable Time |
| Sauté | 350°F | 5 min | 150–400°F | 1–30 min |
| Sear | 350°F | 10 min | 150–400°F | 1–60 min |
| Slow Cook — LO | LO | 6 hours | LO | 30 min–12 hours |
| Slow Cook — HI | HI | 4 hours | HI | 30 min–12 hours |
| Braise | Level 2 | 3 hours | Levels 1, 2, 3 | 30 min–8 hours |
| Simmer | Level 2 | 15 min | Levels 1, 2, 3 | 5 min–1 hour |
| Steam | Fixed | 20 min | Fixed | 10 min–1 hour |
| Rice | Program 1 | Automatic | Programs 1, 2 | Automatic |
| Keep Warm | Fixed | 4 hours | Fixed | 30 min–12 hours |
The time ranges above follow the printed cooking-program chart. A separate Sear & Sauté paragraph in the manual reverses their maximum time limits; the range shown by the appliance’s controls should be used when setting either program.
Sear and Sauté Instructions
The Sear and Sauté programs are used for browning and cooking ingredients in the removable cooking pot.
Both programs allow temperature adjustment from 150°F to 400°F.
How to Use the Sear Function
- Place the cooking pot inside the multicooker base.
- Press POWER.
- Select SEAR.
- Adjust the cooking time or temperature if required.
- Press POWER to start.
- Allow the multicooker to preheat.
- When preheating is complete, the cooking timer will begin counting down.
- Add the prepared ingredients.
- Cook according to the recipe.
- When the time expires, three tones will sound and the appliance will enter Sleep Mode.
Searing can help develop browning and texture on the surface of food.
How to Use the Sauté Function
- Place the cooking pot into the base.
- Add the desired cooking fat according to the recipe.
- Leave the lid off.
- Activate the multicooker using POWER.
- Select SAUTÉ.
- Adjust the temperature and cooking time.
- Press POWER to begin heating.
- Allow the appliance to preheat.
- Add the ingredients when the preheating process is complete.
- Cook until the desired result is reached.
Using Cooking Oil
When heating oil, the lid must be removed.
The manual recommends adding approximately 1–3 tablespoons of butter, oil, or shortening for general sautéing and searing, depending on the recipe.
Butter and olive oil have lower smoke points. Reduce the cooking temperature when necessary to avoid burning.
Caution: Do not use aerosol cooking sprays. They can cause residue buildup and reduce the nonstick performance of the cooking pot.
Shallow Frying
The manual also provides instructions for shallow frying using the Sear or Sauté functions.
For shallow frying, use approximately 1–2 cups of vegetable or peanut oil.
Begin with the default cooking temperature and adjust it as needed.
The appliance must not be used for deep frying.
Shallow Frying Tips
- Dry food before adding it to hot oil to reduce splattering.
- Coat suitable foods with flour, breadcrumbs, or crushed nuts.
- Allow breaded food to rest on a wire rack for 20–30 minutes before frying so the coating can set.
- Refrigerate breaded cheese and similar foods before frying.
- Avoid overcrowding the cooking pot.
- Turn food using tongs or a spatula when the surrounding bubbles begin to decrease.
- Check internal food temperature with an instant-read thermometer.
- Drain fried food on paper towels after removing it from the oil.
Warning: If the oil begins smoking, press and hold POWER for 2 seconds to stop the appliance, then allow the multicooker to cool.
Slow Cook Instructions
The Slow Cook function prepares food over an extended period using LOW or HI heat.
It is suitable for stews, chili, beans, soups, sauces, and tougher cuts of meat.
Slow Cook Settings
| Setting | Default Time | Adjustable Time |
| LO | 6 hours | 30 minutes–12 hours |
| HI | 4 hours | 30 minutes–12 hours |
How to Use Slow Cook
- Add the ingredients to the cooking pot according to the recipe.
- Place the cooking pot inside the base.
- Press POWER.
- Select SLOW COOK.
- Use TIME/TEMP and the + or − buttons to choose LO or HI.
- Adjust the cooking time as needed.
- Press POWER to start cooking.
- The timer will begin counting down.
- When the cooking time expires, three beeps will sound.
- The multicooker will automatically enter Keep Warm for 2 hours.
Slow Cooking Tips
- Tougher and less expensive cuts of meat are suitable for slow cooking.
- Sear fatty meats before slow cooking to add browning and flavor.
- Whole herbs and spices can provide stronger flavor during slow cooking.
- Cut food into similar-sized pieces for more even cooking.
- Place root vegetables such as carrots, potatoes, turnips, and beets at the bottom of the pot.
- Cover root vegetables with liquid because they generally require longer cooking times than many meats.
- Add fresh dairy ingredients such as milk, sour cream, or yogurt shortly before serving.
Braise Instructions
The Braise function cooks food using controlled heat and liquid.
It offers three heat levels and an adjustable cooking time.
Braise Settings
| Setting | Details |
| Default Heat Level | 2 |
| Available Heat Levels | 1 (Low), 2 (Medium), 3 (High) |
| Default Time | 3 hours |
| Adjustable Time | 30 minutes–8 hours |
How to Braise Food
- Add the ingredients to the cooking pot.
- Place the pot inside the multicooker base.
- Press POWER.
- Select BRAISE.
- Adjust the cooking time using TIME/TEMP and + or −.
- Select the desired heat level: 1, 2, or 3.
- Press POWER to begin cooking.
- Allow the multicooker to preheat.
- Once preheating is complete, the timer begins counting down.
- Cover the cooking pot with the lid.
- Allow the food to cook for the selected time.
- When cooking finishes, three beeps sound and Keep Warm begins for 2 hours.
Liquid Requirements for Braising
Add enough liquid to cover approximately half of the meat.
Do not fully submerge the meat.
More liquid may be added during cooking when necessary.
Important: Do not allow the cooking pot to boil dry.
Oven Browning After Braising
For additional browning on top of a prepared dish, the cooking pot may be removed from the electric base and placed in an oven or broiler.
The pot is oven-safe up to 500°F for a maximum of one hour.
The electric base, glass lid, and supplied silicone pot holders must not be placed in the oven.
Simmer Instructions
The Simmer function provides controlled cooking using three selectable heat levels.
The manual recommends searing food before simmering when additional browning and flavor are desired.
Important: The Simmer function must be operated without the lid.
Simmer Settings
| Setting | Details |
| Default Heat Level | 2 |
| Available Heat Levels | 1 (Low), 2 (Medium), 3 (High) |
| Default Time | 15 minutes |
| Adjustable Time | 5 minutes–1 hour |
How to Use Simmer
- Add the ingredients to the cooking pot.
- Leave the glass lid off.
- Press POWER to activate the multicooker.
- Select SIMMER.
- Adjust the time using TIME/TEMP and + or −.
- Select heat level 1, 2, or 3.
- Press POWER to begin cooking.
- Allow the pot to preheat.
- Once the selected heat level is reached, the timer begins counting down.
- Continue cooking until the cycle finishes.
- The multicooker sounds three beeps and automatically advances to Keep Warm for 2 hours.
The cooking pot may also be transferred to an oven or broiler for top browning within its specified temperature and time limits.
Steam Cooking Instructions
The Steam function cooks food using steam generated from water inside the cooking pot.
The included steam tray supports food above the water.
Steam Settings
| Setting | Details |
| Default Cooking Time | 20 minutes |
| Adjustable Time | 10 minutes–1 hour |
| Temperature | Fixed, not adjustable |
| Initial Water Quantity | 3 cups |
How to Steam Food
- Unfold the feet of the steam tray.
- Place the tray inside the removable cooking pot.
- Add 3 cups of water to the cooking pot.
- Arrange the food in a single layer on the steam tray.
- Cover the cooking pot with the glass lid.
- Position the lid’s steam hole toward the back.
- Press POWER.
- Select STEAM.
- Use TIME/TEMP and + or − to adjust the cooking time.
- Press POWER to begin.
- The multicooker will preheat.
- When preheating finishes, the timer begins counting down.
- When the selected time expires, three tones sound.
- The multicooker turns off automatically.
Steam Cooking Safety
Warning: Steam escaping from the appliance is extremely hot.
When removing the lid:
- Wear protective oven mitts.
- Keep the hands and face away from the steam hole.
- Lift the lid carefully.
- Tilt the lid away from the body.
- Hold it above the cooking pot so collected condensation can drip back inside.
Steaming Tips
Check the liquid level periodically to prevent the cooking pot from running dry.
The manual allows suitable liquids such as broth, wine, beer, water, or seasoned cooking liquids to be added during cooking when necessary.
The steam tray should be arranged so that food can cook in a single layer.
Rice Cooking Instructions
The BELLA MULTI 8.5qt Multicooker includes two automatic rice programs.
- Program 1: White rice.
- Program 2: Brown rice.
The cooking time for Rice mode is automatic and cannot be manually adjusted.
The multicooker can accommodate up to 8 cups of raw rice, producing approximately 16 cups of cooked rice, depending on the rice type.
For the following rice charts, one cup equals 8 fl oz. or approximately 236 mL.
How to Cook Rice
- Measure the required amount of raw rice.
- Wash the rice.
- Place the washed rice inside the cooking pot.
- Add the amount of water or cooking liquid specified in the rice chart.
- Cover the pot with the glass lid.
- Press POWER.
- Select RICE.
- Press TIME/TEMP to choose Program 1 for white rice or Program 2 for brown rice.
- Press POWER to start cooking.
- Allow the automatic rice cycle to finish.
- When cooking is complete, three beeps sound.
- The multicooker automatically switches to Keep Warm for 1 hour.
- Allow the cooked rice to rest for approximately 10 minutes before stirring or serving.
- Carefully lift the lid and use a nonmetal, long-handled utensil to stir the rice and release steam.
Water may spill over during rice cooking. Follow the specified rice-to-water ratios and use caution when lifting the lid.
White Rice Cooking Chart
The following chart provides the water quantities, estimated cooking times, and approximate yields for white rice.
| Raw White Rice | Water | Estimated Cooking Time | Approx. Cooked Yield |
| 1 cup | 1½ cups | 28–38 min | 2 cups |
| 2 cups | 3 cups | 30–40 min | 4 cups |
| 3 cups | 4 cups | 36–46 min | 6 cups |
| 4 cups | 5 cups | 42–52 min | 8 cups |
| 5 cups | 6 cups | 46–56 min | 10 cups |
| 6 cups | 7 cups | 48–58 min | 12 cups |
| 7 cups | 8½ cups | 55–65 min | 14 cups |
| 8 cups | 9½ cups | 55–65 min | 16 cups |
Water quantity can be adjusted in later cooking cycles according to the desired rice texture.
Brown Rice Cooking Chart
Brown rice generally requires more water and a longer cooking time than white rice.
| Raw Brown Rice | Water | Estimated Cooking Time | Approx. Cooked Yield |
| 1 cup | 2¼ cups | 60–75 min | 2 cups |
| 2 cups | 3¼ cups | 63–78 min | 4 cups |
| 3 cups | 4¾ cups | 65–85 min | 6 cups |
| 4 cups | 6¼ cups | 73–88 min | 8 cups |
| 5 cups | 7¾ cups | 75–90 min | 10 cups |
| 6 cups | 9¼ cups | 78–93 min | 12 cups |
| 7 cups | 10¾ cups | 83–95 min | 14 cups |
| 8 cups | 12¼ cups | 85–98 min | 16 cups |
These times are estimates. Cooking results may vary depending on the type of rice and amount of cooking liquid.
Rice Cooking Tips and Adjustments
Cooking Wild Rice
When preparing wild rice, increase the water quantity by approximately 25–50% and follow the rice package instructions.
Rice Is Too Dry or Chewy
If the rice remains dry, firm, or chewy when the multicooker switches to Keep Warm:
- Add approximately ½–1 cup of water.
- Stir the rice.
- Allow the additional water and continued cooking time to soften it.
Rice Is Too Wet or Soggy
If cooked rice contains excess moisture:
- Open the lid when the multicooker switches to Keep Warm.
- Stir the rice and check its consistency.
- Close the lid.
- Leave the rice on Keep Warm for another 10–30 minutes as needed.
- Stir periodically to help release excess moisture.
Using Broth or Stock
Stocks, broths, or bouillon can replace water when preparing rice to add flavor and change the finished texture.
Adding Salt
For recipes requiring salt, the manual recommends kosher salt.
It also suggests using approximately 1½ times the amount of kosher salt compared with table salt when following this guidance.
Maximum Keep Warm Time for Rice
Do not leave cooked rice in the multicooker on Keep Warm for more than 2 hours.
Keep Warm and Buffet Service
The multicooker’s Keep Warm function maintains prepared food after cooking.
It can operate automatically after supported cooking programs or be selected independently.
Automatic Keep Warm
When a supported cooking cycle finishes, the multicooker sounds three beeps and switches to Keep Warm.
The automatic duration depends on the selected cooking function.
| Cooking Program | Automatic Keep Warm |
| Slow Cook | 2 hours |
| Braise | 2 hours |
| Simmer | 2 hours |
| Rice | 1 hour |
| Steam | Turns off after cooking |
| Sear | Enters Sleep Mode after cooking |
| Sauté | Enters Sleep Mode after cooking |
When the selected Keep Warm period ends, the appliance turns off automatically.
How to Adjust Keep Warm Time
Keep Warm duration can be adjusted in 30-minute increments, within an available range of 30 minutes to 12 hours.
- Select or enter Keep Warm mode.
- Press TIME/TEMP.
- Press + or − to change the time.
- Use the desired setting within the supported range.
How to Use Keep Warm as a Standalone Function
- Press POWER to activate the control panel.
- Select KEEP WARM.
- The default duration of 4 hours will appear.
- Use TIME/TEMP and + or − to select a time between 30 minutes and 12 hours.
- Press POWER to begin.
- The countdown timer will start.
- When the selected period ends, three beeps sound and the multicooker enters Sleep Mode.
For cooked rice, follow the manual’s separate instruction not to leave it on Keep Warm for more than 2 hours.
Cooking Temperature Guidelines
The instruction manual includes the following internal food temperature guidance for checking meat and poultry.
| Food Category | Internal Temperature Listed |
| Beef, Lamb, and Similar Meats | 145°F / 63°C |
| Pork | 160°F / 71°C |
| Poultry | 170–180°F / 77–82°C |
| Reheated Meat and Poultry | 165°F / 74°C |
These are the internal temperatures printed in the supplied instruction manual.
Use an instant-read food thermometer when checking the internal temperature of meat, poultry, or other foods that require temperature verification.
Nonstick Cooking Pot Care
The removable aluminum cooking pot has a nonstick interior that requires careful handling.
Protecting the Nonstick Surface
- Use nylon, plastic, wooden, or rubber cooking utensils.
- Never cut food directly inside the pot.
- Do not use abrasive cleaners or scouring pads.
- Do not heat the pot while empty.
- Do not use aerosol cooking sprays.
- Do not use the pot to pop popcorn.
- Do not use the pot to caramelize sugar or prepare candy.
- Do not use a pot that is chipped, cracked, or broken.
Preventing Damage to the Electric Base
Always dry the outside of the cooking pot before placing it inside the electric base.
If the outer surface is wet, a crackling noise may occur during heating.
Keeping the pot exterior dry helps protect the appliance’s internal components.
Oven Use
The cooking pot can be placed in an oven or broiler at temperatures up to 500°F for a maximum of one hour.
Important: Only the removable cooking pot is approved for this oven use.
The glass lid, silicone pot holders, and electric base are not oven-safe.
Use protective oven mitts when handling the pot after oven use.
Normal Exterior Discoloration
Browning or darkening on the exterior bottom of the cooking pot may occur with use.
Dishwasher cleaning may also darken the exterior bottom.
Hand washing is recommended for better results.
Cleaning and Maintenance Instructions
The multicooker requires routine cleaning of its removable cooking pot, lid, steam tray, and electric base.
Always disconnect the appliance and allow it to cool completely before cleaning.
How to Clean the Cooking Pot
- Unplug the multicooker.
- Allow the cooking pot to cool completely.
- Remove the pot from the electric base.
- Wash it using warm, soapy water.
- Rinse thoroughly.
- Dry both the interior and exterior surfaces.
- Return the clean, dry pot to the base.
Hand washing is recommended to help maintain the appearance of the aluminum cooking pot.
Dishwasher-Safe Components
| Component | Cleaning Method |
| Tempered Glass Lid | Dishwasher-safe or wash by hand |
| Steam Tray | Dishwasher-safe or wash by hand |
| Nonstick Cooking Pot | Hand washing recommended |
| Electric Base | Wipe with a soft, slightly damp cloth |
Removing Stuck-On Food
If food adheres to the nonstick cooking pot:
- Fill the pot with warm, soapy water.
- Allow the residue to soak.
- Clean the loosened food gently.
- For stubborn residue, use a baking soda paste with a plastic scouring pad.
- Rinse and dry thoroughly.
Do not use abrasive materials that may scratch the nonstick surface.
Removing Water Spots and Mineral Deposits
Distilled white vinegar can be used to remove water spots or mineral deposits.
- Apply distilled white vinegar to the affected area.
- Wipe the surface.
- For stubborn stains, pour a small amount of vinegar into the cooking pot.
- Allow the affected area to soak.
- Clean and dry the pot thoroughly.
Cleaning the Electric Base
The electric base contains the heating and electrical components.
- Disconnect the multicooker from electricity.
- Allow it to cool completely.
- Use a soft, slightly damp cloth or sponge.
- Wipe the interior and exterior surfaces.
- Avoid abrasive cleaners and scouring pads.
- Allow the base to dry before reassembly.
Warning: Never immerse the electric base or power cord in water or other liquids.
Routine Maintenance
The multicooker contains no user-serviceable internal components.
Any repairs requiring disassembly, other than regular cleaning, must be performed by a qualified appliance repair technician.
Do not attempt to repair a malfunctioning appliance.
Troubleshooting Guide
The following troubleshooting information covers operating conditions and corrective actions described in the multicooker’s instructions.
| Problem or Situation | Possible Cause or Explanation | Recommended Action |
| Multicooker does not operate properly | The electrical circuit may be overloaded by other appliances. | Use a separate electrical circuit. |
| Crackling noise during heating | The outside of the cooking pot may be wet. | Turn off and unplug the appliance, allow it to cool, and dry the pot exterior before use. |
| Multicooker displays PrE | The appliance is preheating. | Wait until the selected temperature is reached and the timer starts counting down. |
| Rice is dry, hard, or chewy | Additional water or cooking time may be needed. | Add ½–1 cup of water, stir, and continue as directed. |
| Rice is soggy | Excess moisture remains in the rice. | Continue on Keep Warm for 10–30 minutes as needed, stirring periodically. |
| Food sticks to the cooking pot | Residue has adhered to the nonstick surface. | Soak in warm, soapy water and clean gently. |
| Water spots appear on the cooking pot | Mineral deposits or water residue. | Wipe with distilled white vinegar. |
| Exterior bottom of the pot darkens | Normal use or dishwasher washing may discolor the exterior. | Hand wash the pot for best results. |
| Oil begins smoking during searing or sautéing | The selected heat may be too high for the cooking fat. | Hold POWER for 2 seconds to stop the appliance and allow it to cool. |
| Appliance malfunctions during cooking | A product malfunction has occurred. | Press POWER, unplug immediately, and discontinue use. Contact Customer Service. |
Multicooker Not Starting
If the appliance does not operate properly, confirm that it is connected to a suitable 120 V AC outlet.
The multicooker should be operated on a separate circuit when possible.
Press POWER to activate the controls, select the cooking function, and press POWER again to begin.
If the appliance malfunctions, stop using it and contact Customer Service.
Crackling Noise During Heating
A crackling noise may occur if the exterior of the cooking pot is wet when it is placed inside the base.
Turn off and unplug the appliance, allow it to cool, and dry the pot thoroughly before using it again.
Multicooker Showing PrE
The PrE display indicates that the multicooker is preheating.
This is a normal operating condition.
When the required temperature has been reached, a tone sounds and the cooking timer begins counting down.
Rice Not Fully Cooked
Rice may remain hard or chewy if additional water or cooking time is needed.
The manual recommends adding ½–1 cup of water and stirring to help soften it.
Excess Moisture in Rice
If rice is soggy after cooking, allow it to continue on Keep Warm for 10–30 minutes as needed, stirring periodically to help release excess moisture.
When to Contact Customer Service
If the appliance begins malfunctioning:
- Press POWER to stop operation.
- Disconnect the multicooker from the electrical outlet.
- Stop using the appliance.
- Contact Customer Service for further assistance.
Do not attempt to disassemble or repair the electric base.
Storage Instructions
The multicooker should be cleaned, cooled, and completely dried before storage.
How to Store the Multicooker
- Turn off the appliance.
- Disconnect the power cord from the electrical outlet.
- Allow all components to cool completely.
- Clean the cooking pot, lid, and steam tray.
- Dry all components thoroughly.
- Place the cooking pot inside the electric base.
- Position the steam tray inside the cooking pot.
- Place the lid on top.
- Loosely coil the power cord.
- Store the multicooker in its original box or a clean, dry location.
Never store the multicooker while it is hot or wet.
Do not wrap the power cord tightly around the appliance.
Warranty Information
The BELLA MULTI 8.5qt Multicooker includes a limited two-year warranty provided by SENSIO Inc., doing business as Made by Gather.
The warranty begins on the date of delivery and applies only to the original retail purchaser.
Warranty Coverage
| Warranty Detail | Coverage |
| Warranty Provider | SENSIO Inc. dba Made by Gather |
| Mechanical Defects | 2 years from the date of delivery |
| Non-Mechanical Parts | 90 days |
| Warranty Start Date | Original delivery date |
| Eligible Purchaser | Original retail purchaser |
| Transferability | Non-transferable |
| Proof of Purchase | Original sales receipt required |
| Available Remedies | Repair, replacement, or refund at the warranty provider’s discretion |
The two-year warranty covers mechanical defects in materials and workmanship.
Non-mechanical parts are covered for 90 days.
The warranty provider may repair or replace a defective product or issue a refund during the applicable warranty period.
Warranty Exclusions
The limited warranty does not cover normal wear or damage caused by:
- Negligent product use.
- Incorrect electrical voltage or current.
- Improper routine maintenance.
- Operation contrary to the instructions.
- Unauthorized disassembly.
- Repairs or alterations performed by anyone other than qualified SENSIO Inc. personnel.
- Natural disasters, including fires, floods, hurricanes, and tornadoes.
The warranty also includes limitations concerning incidental and consequential damages and implied warranties.
Some exclusions or limitations may not apply in every state, province, or jurisdiction. Specific legal rights may vary.
How to Request Warranty Service
- Contact Customer Service at 1-866-832-4843.
- Describe the issue with the multicooker.
- Follow the assistance provided by the customer service representative.
- If the problem cannot be resolved by telephone, obtain a case number and return instructions.
- Prepare a label containing the purchaser’s name, address, daytime telephone number, case number, and a description of the problem.
- Include a copy of the original sales receipt.
- Carefully package the product with the required documentation.
- Return it according to the supplied instructions, with shipping and insurance prepaid.
SENSIO Inc. does not accept responsibility or liability for the returned product while it is in transit to its customer service center.
Customer Support and Contact Information
BELLA provides customer support for product questions, operating problems, and warranty-related assistance.
| Contact Type | Details |
| Brand | BELLA |
| Company | SENSIO Inc. dba Made by Gather |
| Customer Service Phone | 1-866-832-4843 |
| Customer Service Email | help@bellahousewares.com |
| Website | https://bellakitchenware.com |
| Support Hours | Monday–Friday, 9 AM–5 PM ET |
| Support Languages | English, French, Spanish |
| Company Location | New York, NY 10019, USA |
| Distributor | Costco Wholesale Corporation |
| Distributor Address | 999 Lake Drive, Issaquah, WA 98027, USA |
| Distributor Website | https://www.costco.com |
Product Registration
The instruction manual provides a product registration option through the BELLA website.
Registration can be accessed at https://bellakitchenware.com.
Retain the original sales receipt because proof of purchase is required for warranty validation.
Frequently Asked Questions
How do you use the BELLA MULTI 8.5qt Multicooker?
Place the removable cooking pot inside the electric base, add ingredients, and connect the appliance to a 120 V AC outlet. Press POWER, select the desired cooking function, and adjust the time and temperature using TIME/TEMP and the + or − buttons. Press POWER again to begin cooking. Follow the selected function’s instructions for preheating, lid use, and cooking completion.
What cooking functions are available on the BELLA MULTI 10-in-1 Multicooker?
The multicooker provides eight selectable functions: Sear, Sauté, Slow Cook, Braise, Simmer, Steam, Rice, and Keep Warm. Individual programs have different default cooking times, temperatures, and adjustment ranges.
How do you cook rice in the BELLA 8.5qt Multicooker?
Place washed rice in the cooking pot and add the recommended quantity of water. Select RICE, then choose Program 1 for white rice or Program 2 for brown rice using TIME/TEMP. Press POWER to start. Cooking time is automatic. When the cycle finishes, the multicooker switches to Keep Warm for one hour.
How much rice can the BELLA MULTI 8.5qt Multicooker cook?
The manual states that the multicooker can accommodate up to 8 cups of raw rice, producing approximately 16 cups of cooked rice. The cooking charts provide water quantities and estimated cooking times for white and brown rice.
Is the BELLA MULTI 8.5qt cooking pot oven-safe?
Yes. The removable nonstick cooking pot is oven-safe up to 500°F for a maximum of one hour. The glass lid, silicone pot holders, and electric base are not oven-safe. The cooking pot is also not suitable for induction cooking.
How do you use the Steam function on the BELLA Multicooker?
Unfold the feet of the steam tray and place it inside the cooking pot. Add 3 cups of water, arrange food in a single layer on the tray, and cover with the glass lid. Select STEAM, adjust the time between 10 minutes and one hour, and start cooking. When the timer finishes, the multicooker sounds three tones and turns off.
How do you clean the BELLA MULTI 8.5qt Multicooker?
Unplug the appliance and allow it to cool completely. Wash the removable cooking pot by hand using warm, soapy water. The glass lid and steam tray may be washed in a dishwasher. Clean the electric base with a soft, slightly damp cloth. Never immerse the base or power cord in water.
What is the warranty on the BELLA MULTI 8.5qt Multicooker?
The multicooker includes a limited two-year warranty for mechanical defects in materials and workmanship and 90 days of coverage for non-mechanical parts. Coverage begins on the original delivery date and requires proof of purchase. For warranty assistance, contact Customer Service at 1-866-832-4843 or help@bellahousewares.com.