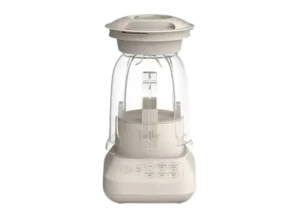
| Document Detail | Information |
| Document Title | Flip & Store Blender Instruction Manual |
| Document Type | Instruction Manual |
| Brand Name | bella |
| Product Name | Flip & Store Blender |
| Model Number(s) | 35103, 35144, 35145, 35146, 35218 |
| PDF File Size | 3 MB |
| Number of Pages | 24 |
| Languages | English, Spanish |
bella Flip & Store Blender 35103
The bella Flip & Store Blender is a 10-speed countertop blender designed for preparing smoothies, milkshakes, frozen drinks, purees, and other blended foods. It features a plastic blending jar, a removable measuring cap, a blade assembly, and an electronic control panel with five dual-function buttons.
The blender provides 10 programmed blending functions across HIGH and LOW speed settings. These include Milkshake, Icy Drink, Smoothie, Ice Crush, Blend, Puree, Chop, Grind, Whisk, and Stir. Each function operates for a fixed cycle duration and stops automatically when its programmed time expires.
A separate Pulse function provides short bursts of power for processing ingredients and moving food away from the blades. The blender also features a compact Flip & Store design that allows the jar to be inverted over the motor base for convenient storage.
Product Overview
The bella Flip & Store Blender combines multiple food preparation functions with a compact storage design.
The plastic jar attaches to the blade base, which connects to the motor unit. A fitted lid with a removable measuring cap covers the jar during blending.
The electronic control panel uses HIGH and LOW settings to access 10 different blending functions through five mode buttons.
Main Features
- 10 programmed blending functions: Includes Milkshake, Puree, Icy Drink, Chop, Smoothie, Grind, Ice Crush, Whisk, Blend, and Stir.
- HIGH and LOW speed settings: Provide access to different blending programs.
- Pulse function: Delivers controlled bursts of power.
- Automatic program shutoff: Each blending function has a fixed cycle duration.
- Plastic blending jar: Holds ingredients during processing.
- Removable measuring cap: Fits into the center of the lid.
- Blade assembly: Processes food through the selected blending function.
- Flip & Store design: Allows compact storage with the jar positioned upside down over the motor base.
- Cord storage: Built into the base.
- Top-rack dishwasher-safe parts: The plastic jar and lid can be washed on the top dishwasher rack.
- Orange indicator lights: Show power status, speed selection, and active programs.
- 120V AC operation: Designed for household electrical use.
Parts and Components
The blender has five main components identified in the product diagram.
| Component | Function |
| Lid with Measuring Cap | Covers the jar and provides a removable center opening |
| Plastic Jar | Holds ingredients for blending |
| Blade Base | Contains the cutting blades and connects to the jar |
| Motor Base | Houses the motor and supports the assembled jar |
| Speed Control | Provides power, speed selection, Pulse, and blending functions |
Lid with Measuring Cap
The lid covers the plastic jar during operation.
A removable measuring cap fits into the center opening. The cap is installed by inserting it into the lid and twisting it counterclockwise until it locks.
Important: The lid must be correctly secured before the blender is operated.
When blending hot liquids, the center measuring cap must be removed as directed in the safety instructions.
Plastic Blending Jar
The plastic jar holds the ingredients during blending.
It has a maximum fill line that must not be exceeded.
The jar must be securely connected to the blade base before it is installed on the motor unit.
Warning: Never use the blender if the jar is cracked or chipped.
Blade Base
The blade base contains the cutting blades.
It connects to the bottom of the plastic jar and includes a sealing gasket to help secure the assembly.
The blades are extremely sharp.
Caution: Handle the blade assembly only by its collar. Do not touch the cutting blades.
Motor Base
The motor base provides power to the cutting assembly.
It supports the assembled blending jar and contains the electronic controls.
The base must be positioned on a flat, clean, and dry surface.
Speed Control
The control panel includes:
- Power button.
- HIGH/LOW speed selector.
- Pulse button.
- Milkshake/Puree button.
- Icy Drink/Chop button.
- Smoothie/Grind button.
- Ice Crush/Whisk button.
- Blend/Stir button.
The selected speed determines which function is activated by each dual-function button.
Technical Specifications
| Specification | Details |
| Brand | bella |
| Product Name | Flip & Store Blender |
| Model Number(s) | 35103, 35144, 35145, 35146, 35218 |
| Product Type | Electric Countertop Blender |
| Electrical Supply | 120V AC |
| Electrical Plug | Polarized |
| Blending Jar | Plastic |
| Lid | Removable with Measuring Cap |
| Blade Assembly | Blade Base with Sealing Gasket |
| Speed Settings | HIGH, LOW |
| Programmed Blending Functions | 10 |
| Additional Function | Pulse |
| HIGH Functions | Milkshake, Icy Drink, Smoothie, Ice Crush, Blend |
| LOW Functions | Puree, Chop, Grind, Whisk, Stir |
| Program Duration | 50–85 Seconds, Depending on Function |
| Automatic Program Shutoff | Yes |
| Maximum Ice Cubes Recommended at One Time | 6 |
| Flip & Store Design | Yes |
| Cord Storage | Built Into Base |
| Jar Cleaning | Top-Rack Dishwasher-Safe |
| Lid Cleaning | Top-Rack Dishwasher-Safe |
| Motor Base Cleaning | Damp Cloth or Sponge |
| Intended Use | Household |
| Mechanical Warranty | 2 Years |
| Non-Mechanical Parts Warranty | 90 Days |
Important Safety Instructions
The bella Flip & Store Blender contains sharp cutting blades and electrically powered moving components. Follow these precautions to reduce the risk of personal injury, electric shock, and appliance damage.
Electrical Safety
- Read all instructions before using the blender.
- Connect the appliance only to a 120V AC electrical outlet.
- Never immerse the motor base, power cord, or plug in water or another liquid.
- Do not operate the blender with wet hands.
- Protect the appliance from water splashes.
- Turn off and unplug the blender when it is not in use.
- Unplug the appliance before assembling or removing parts.
- Disconnect power before cleaning.
- Always grasp the plug when disconnecting it from the outlet. Never pull the power cord.
- Do not use the blender if its power cord or plug is damaged.
- Stop using the appliance if it malfunctions, has been dropped, or becomes damaged.
- Contact Customer Service for information about examination, repair, or adjustment.
Warning: Never immerse the motor base in water or another liquid. Doing so may cause electric shock.
Blade and Moving Parts Safety
- Keep hands away from the cutting blades.
- Keep utensils out of the blending jar while the blender is operating.
- Avoid contact with all moving parts.
- Use the blade collar when handling the cutting assembly.
- Never place the blade assembly directly onto the motor base without the jar properly attached.
- Make sure the blade assembly and jar are fully assembled before operating.
- A scraper may be used only when the blender is not running.
- Do not use attachments, canning jars, cups, or lids that are not recommended or sold for use with this appliance.
Caution: The cutting blades are extremely sharp and can cause serious injuries if touched.
Blending Jar Safety
- Always operate the blender with the lid correctly installed.
- Do not operate the blender with an empty jar.
- Never fill ingredients beyond the MAX line.
- Do not use a cracked or chipped jar.
- Add sufficient liquid before processing ingredients.
- Make sure the jar is securely connected to the blade base.
- Make sure the assembled jar is correctly fitted onto the motor base.
- Secure the lid and measuring cap before starting a normal blending function.
Warning: Insufficient liquid during processing may cause the plastic jar to break or chip.
Hot Liquid Safety
When processing hot liquids, remove the center measuring cap from the two-piece lid.
Boiling liquids can cause the lid to unlock from the jar, allowing hot liquid to escape and cause serious injury.
Warning: Do not blend boiling liquids. Hot liquids require particular care because escaping liquid can cause burns.
Child Safety
The appliance is not intended for use by people, including children, with reduced physical, sensory, or mental capabilities or insufficient experience unless they receive appropriate supervision and instruction.
Children must be supervised to prevent them from playing with the blender.
Close supervision is required when the appliance is used by or near children.
Placement and Operating Safety
- Use the blender indoors only.
- Place the motor base on a stable surface.
- Never operate the blender in an unstable position.
- Do not allow the power cord to hang over the edge of a table or countertop.
- Keep the cord away from hot surfaces, including the stove.
- Use the appliance only for its intended purpose.
- Do not operate a damaged or malfunctioning blender.
- Keep hands and utensils clear of the blades when the power indicator is flashing.
If the Blender Falls Into Water
If the appliance falls or accidentally becomes immersed in water:
- Disconnect it from electrical power immediately.
- Do not reach into the water.
- Do not use the appliance afterward.
If the Blender Malfunctions
If the appliance begins malfunctioning during operation:
- Stop the blender immediately.
- Unplug the power cord.
- Do not continue operating the appliance.
- Do not attempt to repair it yourself.
Contact Customer Service for examination or repair information.
Polarized Plug and Power Cord Instructions
Polarized Plug
The blender has a polarized plug with one blade wider than the other.
The plug fits into a polarized electrical outlet in only one direction.
If it does not fit completely:
- Remove the plug.
- Reverse its orientation.
- Try inserting it again.
- If the plug still does not fit, contact a qualified electrician.
Do not modify the plug.
Power Cord Requirements
The appliance includes a short power cord to reduce entanglement and tripping risks.
Extension Cord Precautions
If a longer detachable power cord or extension cord is used:
- Its marked electrical rating must be at least equal to that of the blender.
- For a grounded appliance, use a grounding-type three-wire extension cord.
- Position the cord so it does not hang over the countertop or table where children could pull it or someone could trip.
Electrical Circuit Requirements
An overloaded electrical circuit may prevent the blender from operating correctly.
The appliance should be operated on a separate electrical circuit from other appliances.
Countertop Protection
To help protect countertop, tabletop, or furniture finishes, place non-plastic coasters or placemats beneath the appliance.
Without this protection, some surface finishes may darken, become stained, or develop permanent marks.
Before First Use
The blender’s removable components must be cleaned before the initial blending session.
Initial Preparation
- Carefully unpack the Flip & Store Blender.
- Remove all packaging materials.
- Check that the components are present and in good condition.
- Handle the blade assembly only by its collar.
- Wash the lid, measuring cap, and plastic jar in warm, soapy water.
- Rinse all washed components thoroughly.
- Dry them completely.
- Wipe the motor base with a damp cloth if necessary.
Warning: Never touch the cutting blades directly.
Initial Jar Cleaning with Pulse
Before preparing food, the blending jar should also be rinsed using the Pulse function.
- Assemble the blender according to the operating instructions.
- Fill the jar approximately one-quarter full with clean, warm water.
- Secure the lid.
- Operate Pulse several times.
- Stop the blender and unplug it.
- Remove the jar.
- Rinse the jar thoroughly.
The blender is ready for normal food preparation after cleaning.
How to Assemble the Flip & Store Blender
The plastic jar, sealing gasket, blade base, and lid must be correctly assembled before operation.
Step 1: Position the Motor Base
Place the motor base on a flat, clean, and dry countertop or table.
Make sure the blender is unplugged.
Step 2: Install the Sealing Gasket
Position the sealing gasket along the inner edge of the blade base.
Check that it is seated correctly.
Step 3: Attach the Blade Base to the Jar
- Position the plastic jar over the blade base.
- Connect the jar to the blade assembly.
- Turn the blade base counterclockwise until it is secured.
- Check that the connection is correctly assembled.
Important: Make sure the plastic jar is properly attached to the blade base before continuing.
Step 4: Install the Jar on the Motor Base
- Lift the assembled jar and blade base.
- Position the assembly over the motor unit.
- Lower it onto the motor base.
- Make sure the assembled jar is securely engaged.
Step 5: Add Ingredients
Place the ingredients into the plastic jar.
Add sufficient liquid for the selected mixture.
Do not exceed the jar’s MAX fill line.
Step 6: Install the Measuring Cap
- Position the measuring cap over the opening in the lid.
- Insert it into the opening.
- Turn the cap counterclockwise until locked.
Step 7: Attach the Lid
- Position the lid over the plastic jar.
- Turn it counterclockwise until it locks securely.
- Check that the lid is correctly fitted before operating.
The assembled blender is now ready for operation.
How to Use the bella Flip & Store Blender
The blender uses two speed settings and five dual-function mode buttons to provide 10 programmed blending functions.
Step 1: Check the Assembly
Before connecting power, confirm that:
- The plastic jar is securely attached to the blade base.
- The sealing gasket is positioned correctly.
- The jar is properly fitted onto the motor base.
- The ingredients do not exceed the MAX line.
- Sufficient liquid has been added.
- The lid is securely locked.
- The measuring cap is correctly positioned for normal blending.
Step 2: Connect Power
Plug the appliance into a 120V AC electrical outlet.
Step 3: Press Power
Press the Power button.
The orange indicator light illuminates and flashes.
The blender defaults to the HIGH speed setting.
Step 4: Select HIGH or LOW
Choose the speed setting using the HIGH/LOW button.
- HIGH: Milkshake, Icy Drink, Smoothie, Ice Crush, and Blend.
- LOW: Puree, Chop, Grind, Whisk, and Stir.
Step 5: Select a Blending Function
Press the desired mode button.
The corresponding orange light illuminates, and the programmed blending cycle begins.
Step 6: Allow the Program to Run
Each function operates for a fixed duration.
The blender stops that function automatically when its programmed cycle finishes.
The number of cycles required to reach the desired consistency may vary depending on the ingredients, quantities, and recipe.
Step 7: Stop Blending Manually
A blending function can be stopped before the programmed cycle finishes.
Press either:
- Power.
- The currently illuminated mode button.
Step 8: Turn Off and Unplug
When processing is complete:
- Press Power to turn off the blender.
- Unplug the power cord.
- Lift the plastic jar from the motor base.
Control Panel and Button Functions
The blender’s electronic control panel provides access to five dual-function buttons, HIGH/LOW selection, Pulse, and Power.
| Button | Function |
| Power | Activates the blender and stops operation |
| HIGH/LOW | Switches between HIGH and LOW programs |
| Pulse | Provides short bursts of blending power |
| Milkshake/Puree | Selects Milkshake on HIGH or Puree on LOW |
| Icy Drink/Chop | Selects Icy Drink on HIGH or Chop on LOW |
| Smoothie/Grind | Selects Smoothie on HIGH or Grind on LOW |
| Ice Crush/Whisk | Selects Ice Crush on HIGH or Whisk on LOW |
| Blend/Stir | Selects Blend on HIGH or Stir on LOW |
Power Button
Press Power to activate the blender.
An orange light illuminates and flashes.
Press Power again to stop operation.
HIGH/LOW Button
The HIGH/LOW button changes the selected speed group.
When the blender is powered on, HIGH is selected by default.
Press HIGH/LOW until the orange indicator illuminates beneath LOW to select the lower-speed functions.
Pulse Button
Press Pulse to operate the blender in short bursts.
The blades operate while the Pulse button is pressed.
Release the button to stop.
Dual-Function Buttons
The five paired function buttons select different programs depending on whether HIGH or LOW is active.
For example:
- HIGH + Smoothie/Grind activates Smoothie.
- LOW + Smoothie/Grind activates Grind.
Blending Modes and Automatic Cycle Times
The Flip & Store Blender provides 10 programmed functions.
Each program has a fixed operating time and stops automatically.
| Function | Speed Setting | Automatic Cycle Time | Intended Use |
| Milkshake | HIGH | 57 Seconds | Blending Fruit, Syrups, and Milk |
| Icy Drink | HIGH | 75 Seconds | Preparing Frozen Drinks |
| Smoothie | HIGH | 85 Seconds | Blending Fresh or Frozen Fruits and Vegetables |
| Ice Crush | HIGH | 54 Seconds | Crushing Ice Cubes |
| Blend | HIGH | 60 Seconds | Blending Soft Fruits and Vegetables with Liquid |
| Puree | LOW | 54 Seconds | Pureeing Cooked Vegetables |
| Chop | LOW | 80 Seconds | Chopping Fresh Vegetables |
| Grind | LOW | 60 Seconds | Grinding Coffee and Spices |
| Whisk | LOW | 60 Seconds | Mixing Sauces, Eggs, and Batters |
| Stir | LOW | 50 Seconds | Combining Ingredients |
HIGH Speed Functions
The HIGH setting provides Milkshake, Icy Drink, Smoothie, Ice Crush, and Blend programs.
Milkshake Mode
Milkshake mode is designed for combining fresh fruits or syrups with milk.
Automatic cycle: 57 seconds.
How to Use Milkshake Mode
- Add the milkshake ingredients to the plastic jar.
- Secure the lid.
- Press Power.
- Leave the speed selection on HIGH.
- Press Milkshake/Puree.
- The orange indicator illuminates.
- Allow the blending cycle to run.
The function stops automatically after 57 seconds.
Press Milkshake/Puree again to stop the program before the cycle finishes.
Icy Drink Mode
Icy Drink mode is intended for preparing frozen mixed drinks.
Automatic cycle: 75 seconds.
How to Use Icy Drink Mode
- Remove the required ice cubes from the freezer.
- Allow them to rest for approximately five minutes before blending.
- Add the ice and other ingredients to the jar.
- Use a maximum of six ice cubes at one time for best results.
- Secure the lid.
- Press Power.
- Select HIGH.
- Press Icy Drink/Chop.
- Allow the program to run until the desired consistency is reached.
Additional ingredients or ice cubes can be added through the lid opening.
Press Power or the illuminated Icy Drink/Chop button to stop the program manually.
The function stops automatically after 75 seconds.
Smoothie Mode
Smoothie mode is designed for processing fresh or frozen fruits and vegetables.
Automatic cycle: 85 seconds.
How to Use Smoothie Mode
- Add the smoothie ingredients to the jar.
- Add the required liquid.
- Secure the lid.
- Press Power.
- Select HIGH.
- Press Smoothie/Grind.
- Allow the program to run.
The function stops automatically after 85 seconds.
Press Smoothie/Grind again to stop the cycle earlier.
Ice Crush Mode
Ice Crush mode is designed for crushing ice used in frozen drinks and desserts.
Automatic cycle: 54 seconds.
How to Use Ice Crush Mode
- Place up to six ice cubes inside the jar.
- Prepare the blender for operation.
- Secure the lid.
- Press Power.
- Select HIGH.
- Press Ice Crush/Whisk.
- Allow the programmed cycle to run.
The function stops automatically after 54 seconds.
Press Ice Crush/Whisk again to stop the function manually.
Blend Mode
Blend mode is intended for processing soft vegetables or fruits with liquid.
Automatic cycle: 60 seconds.
How to Use Blend Mode
- Add soft fruits or vegetables to the jar.
- Add the desired liquid.
- Secure the lid.
- Press Power.
- Select HIGH.
- Press Blend/Stir.
- Allow the mixture to process.
The program stops automatically after 60 seconds.
Press Blend/Stir again to stop the function earlier.
LOW Speed Functions
The LOW setting provides Puree, Chop, Grind, Whisk, and Stir programs.
Puree Mode
Puree mode is designed for blending cooked vegetables with liquid.
Water, milk, or cream can be added to prepare the desired consistency.
Automatic cycle: 54 seconds.
How to Use Puree Mode
- Place the cooked vegetables in the jar.
- Add water, milk, or cream as needed.
- Secure the lid.
- Press Power.
- Press HIGH/LOW until LOW is selected.
- Press Milkshake/Puree.
- Allow the program to run.
The function stops automatically after 54 seconds.
Press Milkshake/Puree again to stop the function manually.
Chop Mode
Chop mode is designed for cutting fresh vegetables into smaller pieces.
Automatic cycle: 80 seconds.
Preparing Vegetables for Chopping
Raw vegetables should be cut into pieces no larger than approximately ½ inch (1.27 cm) before being placed in the blender.
How to Use Chop Mode
- Prepare the vegetables in pieces of the recommended size.
- Add them to the plastic jar.
- Secure the lid.
- Press Power.
- Select LOW.
- Press Icy Drink/Chop.
- Allow the program to run.
The function stops automatically after 80 seconds.
Press Icy Drink/Chop again to stop the program manually.
Grind Mode
Grind mode is intended for grinding coffee and spices.
Automatic cycle: 60 seconds.
How to Use Grind Mode
- Add the ingredients to the jar.
- Secure the lid.
- Press Power.
- Select LOW.
- Press Smoothie/Grind.
- Allow the program to run.
The function stops automatically after 60 seconds.
Press Smoothie/Grind again to stop the function earlier.
Whisk Mode
Whisk mode is designed for combining ingredients in sauces and batters.
Examples include:
- Mayonnaise.
- Eggs for omelets.
- Cake batter.
- Pancake batter.
Automatic cycle: 60 seconds.
How to Use Whisk Mode
- Add the ingredients to the jar.
- Secure the lid.
- Press Power.
- Select LOW.
- Press Ice Crush/Whisk.
- Allow the program to run.
The function stops automatically after 60 seconds.
Press Ice Crush/Whisk again to stop the function manually.
Stir Mode
Stir mode is intended for combining ingredients.
Automatic cycle: 50 seconds.
How to Use Stir Mode
- Place the ingredients in the plastic jar.
- Secure the lid.
- Press Power.
- Select LOW.
- Press Blend/Stir.
- Allow the ingredients to combine.
The function stops automatically after 50 seconds.
Press Blend/Stir again to stop the program earlier.
How to Use the Pulse Function
The Pulse function allows ingredients to be processed in short, controlled bursts.
It is particularly useful when food collects around the cutting blades or at the bottom of the jar.
Pulse Instructions
- Assemble the blender with the required ingredients.
- Secure the lid.
- Press Power.
- Press and hold Pulse.
- Release Pulse to stop the blades.
- Allow the blades to stop completely.
- Repeat as needed.
When to Use Pulse
Pulse can be used to:
- Process ingredients in short bursts.
- Move clumped ingredients away from the blades.
- Process ingredients collecting at the bottom of the jar.
- Perform the water-only quick-cleaning cycle.
Important: For best results, allow the blades to come to a complete stop between Pulse operations.
Blending Tips and Operating Limits
Use the Correct Speed Setting
Choose HIGH for:
- Milkshakes.
- Icy drinks.
- Smoothies.
- Ice crushing.
- Blending soft fruits and vegetables.
Choose LOW for:
- Pureeing cooked vegetables.
- Chopping.
- Grinding.
- Whisking.
- Stirring.
Limit Ice Cube Quantity
For Icy Drink and Ice Crush functions, the manual recommends processing a maximum of six ice cubes at one time.
Prepare Ice Before Making Frozen Drinks
When using Icy Drink mode, remove ice cubes from the freezer approximately five minutes before blending.
Cut Vegetables Before Chopping
For Chop mode, cut raw vegetables into pieces no larger than approximately ½ inch before processing.
Add Enough Liquid
The blender requires sufficient liquid for proper processing.
Warning: Failure to add enough liquid may cause the jar to break or chip.
Do Not Overfill the Jar
Never add ingredients above the MAX line.
Do Not Operate an Empty Jar
The blender must not be operated when the plastic jar is empty.
Keep the Lid Secured
Make sure the lid is locked before operating the blender.
For normal blending, the measuring cap must also be correctly installed.
Multiple Blending Cycles
The number of programmed cycles needed to reach the desired consistency depends on the ingredients, quantities, and recipe.
Orange Indicator Lights
The control panel uses orange indicator lights to identify the selected operating state.
| Indicator | Meaning |
| Flashing Orange Power Light | Blender Is Powered On and Ready |
| Orange Light at HIGH | HIGH Speed Group Selected |
| Orange Light at LOW | LOW Speed Group Selected |
| Illuminated Pulse Light | Pulse Is Activated |
| Illuminated Mode Button | Selected Blending Program Is Active |
Power Indicator
When Power is pressed, the orange indicator illuminates and flashes.
A flashing light indicates that the blender is ready to operate.
Caution: Avoid contact with the blades and moving parts whenever the appliance is connected and ready for operation.
HIGH/LOW Indicator
HIGH is selected by default when the blender is powered on.
Press HIGH/LOW to change the selected speed group.
Program Indicator
The selected program button illuminates orange while the function is activated.
How to Clean the Flip & Store Blender
The blender should be cleaned after use to remove food residue from the jar, lid, and blade assembly.
Always unplug the appliance before cleaning.
Quick Cleaning with Pulse
For a quick rinse after blending:
- Fill the plastic jar approximately one-quarter full with clean, warm water.
- Secure the lid.
- Press Power.
- Press Pulse several times.
- Allow the blades to stop completely.
- Turn off and unplug the blender.
- Remove the jar.
- Rinse thoroughly.
Cleaning the Plastic Jar
- Unplug the blender.
- Remove the jar from the motor base.
- Remove the lid.
- Wash the plastic jar in warm, soapy water.
- Rinse thoroughly.
- Dry completely.
Cleaning the Lid and Measuring Cap
- Remove the lid from the jar.
- Clean the lid and measuring cap using warm, soapy water.
- Rinse thoroughly.
- Dry completely before reassembly.
Cleaning the Blade and Blade Collar
The cutting blades require careful handling.
- Make sure the blender is unplugged.
- Handle the blade assembly using the blade collar.
- Clean the blade and collar using a small brush.
- Avoid placing fingers near the cutting edges.
- Dry the cleaned components thoroughly.
Warning: Never touch the cutting blades directly. Their sharp edges can cause injury.
Cleaning the Motor Base
- Unplug the appliance.
- Wipe the motor base with a damp cloth or sponge.
- Dry the exterior thoroughly.
Warning: Never immerse the motor base, plug, or power cord in water or another liquid.
Cleaning Precautions
Do not use rough scouring pads or abrasive cleansers on the plastic or metal components.
These materials can damage the appliance surfaces.
Dishwasher-Safe Components
The plastic jar and lid can be cleaned in a dishwasher.
| Component | Cleaning Instructions |
| Plastic Jar | Top-Rack Dishwasher-Safe Only |
| Lid | Top-Rack Dishwasher-Safe Only |
| Blade and Blade Collar | Clean Carefully Using a Small Brush |
| Motor Base | Wipe with Damp Cloth or Sponge |
Check the Lid Gasket After Dishwashing
After dishwasher cleaning, check that the lid’s gasket seal is correctly positioned.
Heat from some dishwashers may cause the seal to become loose.
The sealing gasket used in the blade-base assembly must also be properly positioned when the jar is reassembled.
Maintenance Instructions
The bella Flip & Store Blender requires limited routine maintenance.
Its removable components should be cleaned, and the motor base must be kept dry.
Maintenance Guide
| Maintenance Task | Instructions |
| Clean Plastic Jar | Rinse after use and wash with warm, soapy water |
| Clean Lid | Wash after use; top-rack dishwasher-safe |
| Clean Blade Assembly | Use a small brush and handle by blade collar |
| Inspect Lid Gasket | Check after dishwashing |
| Check Blade-Base Gasket | Seat correctly during jar assembly |
| Clean Motor Base | Wipe using a damp cloth or sponge |
| Check Power Cord | Do not operate if damaged |
| Inspect Jar | Do not use if cracked or chipped |
| Store Appliance | Keep unplugged in a clean, dry location |
Appliance Servicing
The appliance contains no user-serviceable internal parts.
Any servicing requiring disassembly beyond normal cleaning must be performed by a qualified appliance repair technician.
Do not attempt to repair the motor or electrical components yourself.
Flip & Store Storage Instructions
The blender belongs to the bella Fit Anywhere family and features a compact storage design.
How to Store the Blender
- Turn off the blender.
- Unplug the power cord.
- Clean the jar, lid, and other removable components.
- Dry all components thoroughly.
- Prepare the blender for storage.
- Flip the plastic jar upside down over the motor base, following the compact storage arrangement shown in the instructions.
- Store the appliance in a clean, dry location.
The inverted jar allows the appliance to occupy less vertical space during storage.
Cord Storage
The blender has a cord storage area built into the base.
Excess cord can be stored in this area when the appliance is not in use.
Power Cord Precautions
- Never store the blender while it is hot.
- Never store it while connected to electrical power.
- Do not wrap the cord tightly around the appliance.
- Avoid applying pressure to the cord where it enters the motor base.
Excessive stress at the cord connection can cause fraying or breakage.
General Storage Location
The blender can be stored in its original packaging or another clean, dry location.
Operating Checks and Troubleshooting
The following guidance addresses operating conditions and corrective actions supported by the instruction manual.
| Problem or Condition | Possible Cause or Explanation | Recommended Action |
| Blender Does Not Operate Properly | Electrical Circuit May Be Overloaded | Operate on a Separate Electrical Circuit |
| Ingredients Collect Around Blades | Ingredients Have Become Clumped | Use Pulse to Move Ingredients |
| Ingredients Remain at Bottom of Jar | Ingredients Have Collected Near the Blade | Use Controlled Pulse Bursts |
| Ingredients Need Additional Processing | Processing Time Varies by Quantity and Recipe | Use Additional Program Cycles as Needed |
| Spills Occur During Blending | Lid or Measuring Cap May Not Be Secured | Check That the Lid and Cap Are Properly Locked |
| Plastic Jar Is Cracked or Chipped | Jar Is Damaged | Do Not Use the Jar |
| Lid Seal Becomes Loose | Dishwasher Heat May Affect the Gasket | Check That the Seal Is Correctly Positioned |
| Blender Malfunctions or Is Damaged | Appliance Requires Inspection or Service | Stop, Unplug, and Contact Customer Service |
Blender Does Not Operate Properly
An electrical circuit overloaded by other appliances may interfere with normal operation.
Use a separate electrical circuit as instructed.
If the appliance is damaged or malfunctioning, stop using it and contact Customer Service.
Ingredients Are Stuck Around the Blade
Pulse can help move ingredients that have collected around the cutting blade or at the bottom of the jar.
Press and release Pulse in short bursts, allowing the blades to stop completely between pulses.
Never place hands or utensils inside the jar while the blender is running.
Blended Ingredients Are Not at the Desired Consistency
Each blending program has a fixed operating time.
Depending on the recipe, quantity, and ingredients, additional blending cycles may be necessary.
Blender Lid Is Not Secured Properly
Before using any blending function, make sure the lid is correctly locked onto the jar.
For normal blending, the center measuring cap must also be secured.
Plastic Jar Is Damaged
Do not use the blender with a cracked or chipped jar.
The safety instructions also warn that inadequate liquid during blending may damage the jar.
Blender Malfunctions During Operation
If the appliance stops operating correctly:
- Stop the current blending function.
- Unplug the power cord.
- Do not continue using the appliance.
- Contact Customer Service for assistance.
Do not attempt internal repairs.
Warranty Information
The bella Flip & Store Blender includes a limited warranty provided by SENSIO Inc.
The warranty covers qualifying mechanical defects in materials and workmanship for two years from the original retail purchase date.
Non-mechanical parts are covered for 90 days.
Warranty Coverage
| Warranty Detail | Information |
| Warranty Provider | SENSIO Inc. |
| Mechanical Warranty | 2 Years |
| Non-Mechanical Parts Warranty | 90 Days |
| Warranty Start | Original Retail Purchase Date |
| Eligible Purchaser | Original Retail Purchaser |
| Transferability | Non-Transferable |
| Proof of Purchase | Original Sales Receipt |
| Available Remedy | Repair, Replacement, or Refund at Provider’s Discretion |
| Customer Service | 1-866-832-4843 |
What the Warranty Covers
During the applicable warranty period, SENSIO Inc. may repair or replace a qualifying defective product or issue a refund.
The remedy is determined by SENSIO Inc.
Warranty Exclusions
The warranty does not cover normal wear or damage caused by:
- Negligent use.
- Incorrect voltage or electrical current.
- Improper routine maintenance.
- Use contrary to the operating instructions.
- Unauthorized disassembly.
- Repairs or modifications performed by unauthorized personnel.
- Natural events such as fires, floods, hurricanes, or tornadoes.
The warranty also includes limitations on incidental and consequential damages. Applicable consumer rights and restrictions may vary by state, province, or jurisdiction.
How to Request Warranty Service
- Contact Customer Service at 1-866-832-4843.
- Explain the product problem.
- Follow the telephone troubleshooting instructions.
- If the problem cannot be resolved, obtain a case number.
- Follow the product return instructions provided by the representative.
Returning the Product for Warranty Service
If a return is required, attach a tag containing:
- Customer name.
- Customer address.
- Daytime telephone number.
- Case number.
- Description of the problem.
Include a copy of the original sales receipt.
Carefully package the product and send it to the address provided by SENSIO Inc., with shipping and insurance prepaid.
SENSIO Inc. does not accept responsibility for the product while it is in transit to its Customer Service Center.
Customer Support Information
Customer support for the bella Flip & Store Blender is provided by SENSIO Inc., doing business as Made by Gather.
| Contact Detail | Information |
| Brand | bella |
| Company | SENSIO Inc. dba Made by Gather |
| Customer Service Phone | 1-866-832-4843 |
| Customer Service Email | help@bellahousewares.com |
| Brand Website | https://bellakitchenware.com |
| Company Location | New York, NY 10016, USA |
Product Registration
Product registration is available through https://bellakitchenware.com.
When to Contact Customer Service
Contact Customer Service if the blender has a damaged power cord or plug, develops a malfunction, has been dropped or damaged, requires professional repair, or needs warranty assistance.
Frequently Asked Questions
How do I use the bella Flip & Store Blender?
Assemble the plastic jar and blade base with the sealing gasket correctly positioned. Attach the jar to the motor base, add ingredients and enough liquid, and secure the lid. Plug the blender into a 120V AC outlet, press Power, select HIGH or LOW, and press the desired blending function. The selected program runs for its fixed duration and stops automatically.
How many speeds does the bella Flip & Store Blender have?
The blender has 10 programmed blending functions across HIGH and LOW speed settings. HIGH provides Milkshake, Icy Drink, Smoothie, Ice Crush, and Blend. LOW provides Puree, Chop, Grind, Whisk, and Stir. A separate Pulse function provides short bursts of power.
How long does each blending program run?
The programmed cycle times range from 50 to 85 seconds. Milkshake runs for 57 seconds, Icy Drink for 75 seconds, Smoothie for 85 seconds, Ice Crush and Puree for 54 seconds, Chop for 80 seconds, Grind, Whisk, and Blend for 60 seconds, and Stir for 50 seconds.
Can the bella Flip & Store Blender crush ice?
Yes. The Ice Crush function operates on HIGH and has a fixed cycle duration of 54 seconds. The instructions recommend crushing up to six ice cubes at one time. Icy Drink mode can also process ice for frozen drinks and automatically stops after 75 seconds.
How do I use Pulse on the bella blender?
Press and hold Pulse to operate the blades in short bursts. Release the button to stop. Pulse is useful for moving ingredients that have collected around the blades or at the bottom of the jar. Allow the blades to stop completely between pulses.
Are the bella Flip & Store Blender jar and lid dishwasher-safe?
Yes. The plastic jar and lid are dishwasher-safe on the top rack only. After dishwashing, check that the lid gasket is properly positioned because dishwasher heat may loosen it. The motor base must only be wiped with a damp cloth or sponge.
How do I clean the bella Flip & Store Blender?
Unplug the appliance. For quick cleaning, fill the jar approximately one-quarter full with clean, warm water and use Pulse several times. Rinse thoroughly. The jar and lid can also be washed in warm, soapy water. Clean the blade and blade collar using a small brush, and wipe the motor base with a damp cloth. Never immerse the motor base in water.
How do I store the bella Flip & Store Blender?
Turn off and unplug the blender, clean and dry its components, then invert the plastic jar over the motor base using the Flip & Store arrangement shown in the instructions. The base also includes cord storage. Keep the appliance in a clean, dry place, and do not wrap the power cord tightly around it.