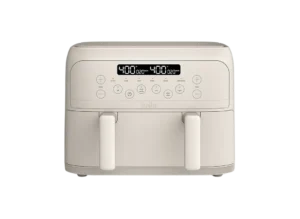
| Document Detail | Information |
| Document Title | 4QT TriZone® Air Fryer Instruction Manual |
| Document Type | Instruction Manual |
| Brand Name | bella |
| Product Name | 4QT TriZone® Air Fryer |
| Model Number(s) | 35106, 35150, 35151, 35152 |
| PDF File Size | 632 KB |
| Number of Pages | 32 |
| Languages | English, Spanish |
bella TriZone Air Fryer 35106
The bella 4QT TriZone® Air Fryer is a countertop cooking appliance with a removable 4-quart basket that can be used as one large cooking area or divided into two independently controlled zones. It provides six cooking functions: Air Fry, Roast, Broil, Bake, Reheat, and Dehydrate.
The air fryer includes a removable basket divider, two crisping trays, and a digital touchscreen control panel. With the divider removed, the entire basket operates as one cooking zone. When the divider is installed, the left and right sections can use different cooking functions, temperatures, and times.
Dual Mode allows two foods to be prepared simultaneously with separate settings. The SYNC TIME function can coordinate the programmed cooking cycles so both zones finish together.
The six cooking presets provide adjustable temperature and time settings, with a maximum cooking temperature of 450°F for applicable functions. The Dehydrate function offers lower temperatures and longer cooking times for drying herbs, fruits, and vegetables.
These instructions cover basket assembly, touchscreen controls, TriZone cooking, Dual Mode, Single Zone operation, SYNC TIME, cooking presets, recommended temperatures, food preparation, cleaning, storage, safety, and warranty service.
Product Overview
The bella 4QT TriZone® Air Fryer uses circulating heated air to cook food inside a removable basket.
Its main feature is a flexible cooking basket that supports three arrangements:
- TriZone Mode: Uses the complete 4-quart basket without the divider.
- Dual Mode: Uses the basket divider to create independently controlled left and right cooking zones.
- Single Zone Mode: Uses one selected section of the divided basket.
The air fryer features a digital display for cooking temperature and remaining time. Touch controls allow users to select a cooking program, adjust settings, pause cooking, or turn off the appliance.
Main Features
- 4-quart cooking basket: Removable basket with a recommended maximum food quantity of 3.3 lb.
- TriZone cooking: Uses the complete basket without the divider.
- Dual Mode: Allows separate settings for the left and right zones.
- Single Zone cooking: Operates one side of the divided basket.
- SYNC TIME: Coordinates cooking completion for two programmed zones.
- Six cooking presets: Air Fry, Roast, Broil, Bake, Reheat, and Dehydrate.
- Adjustable temperature: Uses 5°F increments within the selected preset’s available range.
- Adjustable cooking time: Uses one-minute increments for standard functions and one-hour increments for Dehydrate.
- Digital touchscreen: Provides cooking controls, settings, and operating indicators.
- Two crisping trays: Support food during cooking.
- Removable basket divider: Separates the cooking basket into left and right zones.
- Ceramic-coated cooking components: Require non-abrasive cleaning.
- Non-skid feet: Help stabilize the appliance during use.
- No preheating required: Cooking can begin without a separate preheating cycle.
What’s Included in the Box
The air fryer is supplied with removable cooking components installed inside the main basket.
| Item | Description |
| Air Fryer Body | Main appliance containing the heating system and touchscreen |
| 4QT Cooking Basket | Removable basket used for cooking |
| Crisping Trays | Two removable trays with rubber corner supports |
| Basket Divider | Separates the cooking basket into left and right zones |
The crisping trays and basket divider are packed inside the cooking basket when the appliance is supplied.
Parts and Components
The product diagram identifies the main appliance body, touchscreen, removable basket, non-skid feet, and electrical cord. The assembly instructions also identify the basket divider and two crisping trays.
| Component | Function |
| Touch Membrane Control Panel | Selects cooking functions, zones, time, and temperature |
| 4QT Removable Air Fryer Basket | Holds food during cooking |
| Basket Divider | Separates the basket into two cooking zones |
| Crisping Trays | Support food and allow hot air circulation |
| Basket Handles | Provide grip points for removing the basket |
| Non-Skid Feet | Help stabilize the appliance |
| Power Cord with Polarized Plug | Connects the air fryer to electrical power |
Removable Cooking Basket
The 4-quart basket slides into the front of the air fryer.
It can operate as one large basket or as two separate cooking sections when the divider is installed.
Important: The basket must be fully inserted and closed before the air fryer can operate.
Basket Divider
The removable divider separates the basket into left and right zones.
Install it when using Dual Mode or Single Zone Mode.
Remove it when cooking across the full basket in TriZone Mode.
Crisping Trays
The air fryer includes two crisping trays.
Each tray has a handle and rubber corner supports to help secure it inside the basket.
The trays support food and allow heated air to circulate during cooking.
Touchscreen Control Panel
The touchscreen provides controls for:
- Power.
- LEFT and RIGHT zone selection.
- Temperature adjustment.
- Cooking time adjustment.
- Dual Mode.
- SYNC TIME.
- START/STOP.
- Six preset cooking functions.
Non-Skid Feet
The non-skid feet are positioned underneath the air fryer and help maintain stability on a flat countertop.
Technical Specifications
| Specification | Details |
| Brand | bella |
| Product Name | 4QT TriZone® Air Fryer |
| Model Number(s) | 35106, 35150, 35151, 35152 |
| Product Type | Electric Countertop Air Fryer |
| Basket Capacity | 4 qt |
| Recommended Maximum Food Weight | 3.3 lb |
| Maximum Basket Fill | Two-Thirds Full |
| Cooking Zones | Left, Right, Full Basket |
| Operating Arrangements | TriZone, Dual Mode, Single Zone |
| Cooking Presets | 6 |
| Cooking Functions | Air Fry, Roast, Broil, Bake, Reheat, Dehydrate |
| Maximum Preset Temperature | 450°F |
| Lowest Adjustable Temperature | 90°F in Dehydrate |
| Temperature Adjustment | 5°F Increments |
| Standard Time Adjustment | 1-Minute Increments |
| Dehydrate Time Adjustment | 1-Hour Increments |
| Maximum Dehydrate Duration | 24 Hours |
| SYNC TIME | Included |
| Digital Touchscreen | Included |
| Crisping Trays | 2 |
| Basket Divider | Included |
| Cooking Surface | Ceramic-Coated Components |
| Electrical Supply | 120V AC |
| Plug Type | Polarized |
| Preheating | Not Required |
| Intended Use | Household |
| Mechanical Warranty | 2 Years |
| Non-Mechanical Parts Warranty | 90 Days |
Important Safety Instructions
The bella TriZone Air Fryer produces high temperatures and releases steam during cooking. Improper use can cause burns, fire, electric shock, injury, or damage to the appliance.
Electrical Safety
- Read all instructions before using the air fryer.
- Connect the appliance only to a 120V AC electrical outlet.
- Never immerse the air fryer body, electrical cord, or plug in water or another liquid.
- Unplug the appliance when it is not in use.
- Disconnect power before cleaning.
- Allow the air fryer to cool before removing or installing components.
- Do not operate the appliance with a damaged cord or plug.
- Stop using the air fryer if it malfunctions or becomes damaged.
- Do not use accessories that are not recommended by the manufacturer.
- Do not operate the air fryer outdoors.
- Keep the power cord away from hot surfaces.
- Do not let the cord hang over a table or countertop edge.
- Do not place the appliance near a hot burner or inside a heated oven.
Warning: Any repair requiring disassembly beyond normal cleaning must be performed by a qualified appliance repair technician.
Hot Surface and Steam Safety
The basket, crisping trays, and food become hot during operation.
- Do not touch hot surfaces with bare hands.
- Always use protective oven mitts when handling hot cooking components.
- Use the basket handles when removing the cooking basket.
- Avoid steam escaping from the basket and air outlet.
- Allow hot components to cool before cleaning.
- Place a removed hot basket on a flat, heat-resistant surface.
- Do not move the air fryer while it is hot or contains hot food.
- Use caution when handling cooking oil or other hot liquids.
Warning: The appliance retains heat after it has been turned off. Hot surfaces and escaping steam can cause burns.
Basket and Food Safety
- Make sure the crisping tray is correctly installed before adding food for air frying.
- Do not overfill the cooking basket.
- Never fill the basket more than two-thirds full.
- Make sure the basket is securely closed during operation.
- Do not insert oversized food or metal utensils that may create a fire or electrical hazard.
- Do not place paper, cardboard, plastic, or similar materials inside the air fryer.
- Do not cover appliance components with aluminum foil.
- Do not store items on top of the appliance while it is operating or hot.
- Use caution with cooking containers made from materials other than metal or glass.
Important: Overfilling the basket may damage the air fryer and cause serious injury.
Placement and Ventilation Safety
- Place the appliance on a flat, stable, heat-resistant surface.
- Keep at least 4 inches of clearance between the appliance and nearby walls or objects.
- Do not block the air inlet or outlet openings on the back and sides.
- Keep the air fryer away from curtains and other flammable materials.
- Do not cover the appliance during operation.
- Do not place objects on top of it while it is operating.
- Never leave the air fryer unattended during use.
Prohibited Cooking Methods
Warning: The air fryer must not be used to boil water.
Warning: The air fryer must not be used for deep frying food in oil.
The appliance is designed for cooking with circulating heated air.
Child Safety
Keep the air fryer and its power cord away from children and infants.
Close supervision is required when the appliance is used by or near children.
People with reduced physical, sensory, or mental capabilities or limited experience must receive appropriate supervision or instruction before using the appliance.
If the Air Fryer Malfunctions
If the appliance begins malfunctioning during operation:
- Pull the cooking basket out of the air fryer body.
- Unplug the power cord.
- Stop using the appliance.
- Do not attempt to repair it yourself.
Contact a qualified appliance repair technician or Customer Service.
Polarized Plug and Power Cord Instructions
Polarized Plug
The appliance has a polarized electrical plug with one blade wider than the other.
It fits into a polarized outlet in only one direction.
If the plug does not fit:
- Remove it from the outlet.
- Reverse its position.
- Try inserting it again.
- If it still does not fit, contact a qualified electrician.
Do not modify the plug.
Extension Cord Precautions
The air fryer includes a short power cord to reduce the risk of entanglement or tripping.
If a longer detachable power cord or extension cord is used:
- Its electrical rating must be at least equal to the rating of the air fryer.
- A grounded appliance requires a grounding-type three-wire extension cord.
- Position the cord so it cannot be pulled by children or create a tripping hazard.
Electrical Circuit
An overloaded electrical circuit may prevent the air fryer from operating correctly.
Operate it on a separate electrical circuit from other appliances.
Countertop Protection
To help protect countertop or furniture finishes, place non-plastic coasters or placemats between the air fryer and the surface.
Before First Use
The cooking basket, crisping trays, and divider must be cleaned before preparing food.
Step 1: Remove the Packaging
Remove all packaging materials and labels from the inside and outside of the appliance.
Check for packaging underneath and around the cooking basket and crisping trays.
Step 2: Remove the Cooking Basket
Firmly grasp the basket handles and pull the basket out of the air fryer body.
Step 3: Remove the Accessories
Lift the basket divider and crisping trays out of the basket using their handles.
Step 4: Wash the Cooking Components
Wash the following components in hot, soapy water:
- Removable cooking basket.
- Two crisping trays.
- Basket divider.
Rinse and dry thoroughly.
Step 5: Clean the Air Fryer Body
Wipe the exterior of the appliance with a damp cloth.
Warning: Never immerse the air fryer body in water.
Step 6: Install the Crisping Trays
- Hold each crisping tray with its handle facing upward.
- Position the tray inside the basket.
- Fit the rubber corners securely into place.
Step 7: Install the Basket Divider if Required
When using Dual Mode or Single Zone Mode, position the divider firmly in the center of the basket.
For full-basket TriZone cooking, remove the divider.
Step 8: Reinsert the Basket
Slide the cooking basket into the air fryer.
Make sure it is correctly seated and fully closed.
First-Use Odor
A slight odor may occur during the first use.
This is described as normal and should not affect the flavor of the food.
How to Assemble the Cooking Basket
The basket arrangement depends on the selected cooking mode.
Full-Basket TriZone Assembly
- Remove the cooking basket.
- Remove the basket divider.
- Install the crisping trays when required.
- Add food without exceeding the recommended filling limit.
- Insert the basket fully into the air fryer.
Dual Zone Assembly
- Remove the cooking basket.
- Position the divider firmly in the center.
- Install the crisping trays as needed.
- Arrange food in the left and right sections.
- Insert the basket securely into the appliance.
Single Zone Assembly
- Install the basket divider.
- Add food to the selected cooking section.
- Position the crisping tray when required.
- Insert the basket fully.
- Select the desired zone using the touchscreen.
Important: The air fryer will not operate unless the cooking basket is fully closed.
Touchscreen Control Panel Guide
The control panel provides power, preset selection, zone control, time adjustment, temperature adjustment, synchronization, and cooking start/stop functions.
| Control | Function |
| POWER | Turns the appliance on or off |
| LEFT | Selects the left cooking zone |
| RIGHT | Selects the right cooking zone |
| TEMP + | Increases temperature |
| TEMP − | Decreases temperature |
| TIME + | Increases cooking time |
| TIME − | Decreases cooking time |
| DUAL MODE | Enables separate left and right zone settings |
| SYNC TIME | Coordinates completion of both cooking zones |
| START/STOP | Starts, pauses, or resumes cooking |
| AIR FRY | Selects air frying |
| ROAST | Selects roasting |
| BROIL | Selects broiling |
| BAKE | Selects baking |
| REHEAT | Selects reheating |
| DEHYDRATE | Selects dehydrating |
Power Button
When the air fryer is plugged in:
- An audible tone sounds.
- The digital display illuminates.
- The display then darkens.
When POWER is pressed:
- Another tone sounds.
- The touchscreen illuminates.
- The display remains active for five minutes.
Press POWER during operation to turn off the appliance.
LEFT and RIGHT Zone Controls
The LEFT and RIGHT buttons select the cooking zone to be programmed.
When a zone is selected, its indicator flashes to show that time, temperature, or function settings can be changed.
An active zone is identified by a steady indicator light.
Temperature Controls
Use TEMP + or TEMP − to change the selected cooking temperature.
Temperature changes in 5°F increments, within the available range of the selected function.
Time Controls
Use TIME + or TIME − to change cooking duration.
Standard cooking functions use one-minute increments.
Dehydrate uses one-hour increments, as specified in the English operating instructions.
DUAL MODE
DUAL MODE allows the left and right sections to be programmed independently when the basket divider is installed.
Each zone can have its own cooking function, temperature, and time.
SYNC TIME
SYNC TIME coordinates the completion of two programmed cooking zones.
Both zones must be programmed before synchronization can be activated.
START/STOP
Press START/STOP to begin cooking.
Press it again to pause cooking.
Press it once more to resume.
Cooking Presets and Temperature Settings
The bella TriZone Air Fryer includes six preset functions.
| Cooking Function | Default Temperature | Default Time | Adjustable Temperature | Adjustable Time |
| AIR FRY | 400°F | 15 Minutes | 170–450°F | 1–60 Minutes |
| ROAST | 400°F | 20 Minutes | 350–450°F | 1–60 Minutes |
| BROIL | 450°F | 10 Minutes | Fixed at 450°F | 1–30 Minutes |
| BAKE | 350°F | 16 Minutes | 170–400°F | 1–60 Minutes |
| REHEAT | 250°F | 6 Minutes | 170–400°F | 1–60 Minutes |
| DEHYDRATE | 130°F | 8 Hours | 90–170°F | 1–24 Hours |
Temperature Adjustment
The temperature can be increased or decreased in 5°F increments within the selected preset’s available range.
BROIL operates at a fixed temperature of 450°F.
Time Adjustment
The standard cooking programs allow time changes in one-minute increments.
DEHYDRATE uses one-hour increments.
Adjusting Settings During Cooking
Time and temperature settings can be changed while cooking.
For Dual Mode:
- Press LEFT or RIGHT.
- Select the zone to be adjusted.
- Use the temperature or time controls.
- Continue cooking with the updated settings.
How to Use TriZone Mode
TriZone Mode uses the entire 4-quart cooking basket as one cooking area.
The basket divider must be removed.
Step 1: Prepare the Basket
Remove the divider.
Install the crisping trays if required.
Place the food inside the basket.
Step 2: Insert the Basket
Slide the basket fully into the air fryer.
Step 3: Connect Power
Plug the power cord into a suitable 120V AC electrical outlet.
An audible tone sounds, and the display illuminates.
Step 4: Press POWER
Press POWER to activate the control panel.
The six preset indicators and DUAL MODE indicator illuminate.
Step 5: Select a Cooking Preset
Choose one of the following:
- AIR FRY.
- ROAST.
- BROIL.
- BAKE.
- REHEAT.
- DEHYDRATE.
The selected preset remains illuminated.
Step 6: Adjust Temperature and Time
Use the temperature controls on the left side of the display.
Use the time controls on the right side.
Step 7: Start Cooking
Press START/STOP.
The countdown begins.
The display shows the selected temperature and remaining cooking time.
Step 8: Check Food During Cooking
Open the basket when necessary to check, turn, or shake the food.
Use oven mitts when handling hot components.
Step 9: Pause or Resume Cooking
Press START/STOP to pause.
Press START/STOP again to resume.
Step 10: Turn Off
Press POWER to stop operation and return the air fryer to standby.
Unplug the appliance when it is not in use.
How to Use Dual Mode
Dual Mode allows different foods to cook in separate left and right sections.
The basket divider must be installed.
Step 1: Install the Divider
Place the basket divider firmly in the center of the removable basket.
Install crisping trays when required.
Step 2: Add Food
Arrange the ingredients in their respective sections.
Do not overfill either side.
Step 3: Connect Power
Plug in the air fryer.
The display illuminates briefly, and an audible tone sounds.
Step 4: Press POWER
Activate the touchscreen.
Step 5: Select DUAL MODE
Press DUAL MODE.
The mode indicator flashes.
The left zone is the initial selection.
Step 6: Program the Left Zone
- Press LEFT if required.
- Select a cooking preset.
- Adjust the temperature using TEMP + or −.
- Adjust the cooking duration using TIME + or −.
Step 7: Program the Right Zone
- Press RIGHT.
- Select the desired cooking preset.
- Adjust the right-side temperature.
- Adjust the right-side cooking duration.
Step 8: Use SYNC TIME if Required
When both zones have been programmed, SYNC TIME can be selected to coordinate their completion.
Important: SYNC TIME must be selected before cooking begins.
Step 9: Start Cooking
Press START/STOP.
The programmed cooking cycles begin.
Step 10: Adjust Either Zone
During operation, select LEFT or RIGHT before changing the corresponding time or temperature.
Step 11: Pause or Stop Cooking
Press START/STOP to pause or resume.
Press POWER to stop the appliance and return to standby.
Dual Mode Temperature Precautions
Avoid setting extremely different temperatures between the two zones.
Heat from the hotter zone may affect the cooking temperature in the neighboring section, even when the divider is installed.
How to Use SYNC TIME
SYNC TIME allows two independently programmed cooking zones to finish at the same time.
This is useful when the foods require different cooking durations.
SYNC TIME Instructions
- Install the basket divider.
- Select DUAL MODE.
- Program the left cooking zone.
- Program the right cooking zone.
- Confirm that both zones have their required settings.
- Press SYNC TIME.
- Press START/STOP to begin the synchronized cooking process.
The display may show HOLD while the air fryer coordinates the final cooking times.
What HOLD Means
HOLD indicates that the air fryer is synchronizing the cooking cycles so both zones finish together.
SYNC TIME Restriction
SYNC TIME cannot be activated after cooking has started.
Both zones must be programmed before the synchronized cycle begins.
How to Use Single Zone Mode
Single Zone Mode operates one section of the divided basket.
Step 1: Install the Divider
Position the divider in the center of the basket.
Install the crisping trays if required.
Step 2: Add Food
Place food into the selected cooking section.
Step 3: Insert the Basket
Make sure the basket is fully closed.
Step 4: Connect Power
Plug in the air fryer.
Step 5: Press POWER
Activate the display.
Step 6: Select DUAL MODE
Press DUAL MODE.
The LEFT indicator flashes by default.
Step 7: Select the Zone
Use the appropriate zone control to select the section being operated.
Step 8: Select a Preset
Choose the required cooking function.
Step 9: Adjust Settings
Use TEMP + or − and TIME + or − to set the required cooking temperature and duration.
Step 10: Start Cooking
Press START/STOP.
The selected zone begins cooking.
Step 11: Stop Cooking
Press START/STOP to pause or resume.
Press POWER to stop and return to standby.
Air Fry Function
AIR FRY uses heated circulating air to cook and brown food.
AIR FRY Settings
| Setting | Value |
| Default Temperature | 400°F |
| Default Time | 15 Minutes |
| Temperature Range | 170–450°F |
| Time Range | 1–60 Minutes |
Air Frying Instructions
- Install the crisping trays as required.
- Arrange food inside the basket.
- Insert the basket fully.
- Press POWER.
- Select AIR FRY.
- Adjust time and temperature if necessary.
- Press START/STOP.
- Check and turn or shake food during cooking.
- Continue until the food is cooked.
Air Frying Tips
- Pat ingredients dry before cooking.
- Arrange food so air can circulate.
- Cook freshly breaded foods in small batches.
- Refrigerate breaded food for at least 30 minutes before cooking.
- Lightly coat food with oil when appropriate.
- Use a light dusting of cornstarch on poultry skin if desired.
- Check food approximately halfway through cooking.
- Adjust time and temperature according to cooking progress.
The preset chart also identifies one shake at approximately two-thirds of the cooking time for AIR FRY.
Roast Function
ROAST is intended for preparing meats, poultry, and other suitable foods.
ROAST Settings
| Setting | Value |
| Default Temperature | 400°F |
| Default Time | 20 Minutes |
| Temperature Range | 350–450°F |
| Time Range | 1–60 Minutes |
Roasting Instructions
- Prepare and season the food.
- Position it inside the cooking basket.
- Insert the basket.
- Press POWER.
- Select ROAST.
- Adjust temperature and cooking time.
- Press START/STOP.
- Turn and check the food halfway through roasting.
- Use a food thermometer to check internal temperature.
Roasting Tips
- Roast large, tender cuts of meat and poultry.
- Season food before cooking.
- Place roasts with the fat side facing upward.
- Brush lean meat, chicken, or fish with oil, margarine, or melted butter to encourage browning.
- Turn food halfway through roasting.
- Use a meat thermometer to check doneness.
The instructions discuss allowing meat to rest for 15–20 minutes after roasting, during which its internal temperature may continue to rise.
Food must reach the appropriate final internal temperature before serving.
Broil Function
BROIL uses a fixed temperature of 450°F.
It is intended for browning and cooking suitable thinner foods.
BROIL Settings
| Setting | Value |
| Default Temperature | 450°F |
| Adjustable Temperature | Fixed |
| Default Time | 10 Minutes |
| Time Range | 1–30 Minutes |
Broiling Instructions
- Prepare the food.
- Place it inside the basket.
- Insert the basket securely.
- Press POWER.
- Select BROIL.
- Adjust cooking time if required.
- Press START/STOP.
- Check the food during cooking.
- Use a food thermometer when preparing meat or fish.
Broiling Tips
BROIL can be used to:
- Melt cheese.
- Brown breadcrumb toppings.
- Cook thin, tender cuts of meat.
- Prepare chops, poultry, and fish.
- Broil suitable fruits and vegetables.
For better browning:
- Pat marinated meat and fish dry.
- Brush lean foods with oil or melted butter.
- Remove excess fat.
- Score meat edges to help prevent curling.
- Thaw frozen meat and fish before broiling.
Bake Function
BAKE provides a temperature range of 170°F to 400°F.
BAKE Settings
| Setting | Value |
| Default Temperature | 350°F |
| Default Time | 16 Minutes |
| Temperature Range | 170–400°F |
| Time Range | 1–60 Minutes |
Baking Instructions
- Prepare the food according to the recipe.
- Place it in a suitable container or directly into the appropriate cooking arrangement.
- Insert the basket.
- Press POWER.
- Select BAKE.
- Adjust the temperature and time.
- Press START/STOP.
- Check the food during cooking.
Baking Tips
The manual recommends that some baking recipes may require a temperature reduction of approximately 50°F, to a minimum of 300°F.
Check food packaging to confirm that any cooking container is suitable for use in an air fryer.
Reheat Function
REHEAT is used to warm previously cooked food.
REHEAT Settings
| Setting | Value |
| Default Temperature | 250°F |
| Default Time | 6 Minutes |
| Temperature Range | 170–400°F |
| Time Range | 1–60 Minutes |
Reheating Instructions
- Place the food inside the cooking basket.
- Insert the basket.
- Press POWER.
- Select REHEAT.
- Use the default 250°F for six minutes or adjust the settings.
- Press START/STOP.
- Check the serving temperature.
- Repeat or extend the cooking cycle if additional heating is required.
The basket can be pulled out to interrupt cooking and check food.
Dehydrate Function
DEHYDRATE combines low heat with steady air circulation to remove moisture from food.
It can be used for drying herbs, fruits, and vegetables.
DEHYDRATE Settings
| Setting | Value |
| Default Temperature | 130°F |
| Default Time | 8 Hours |
| Temperature Range | 90–170°F |
| Time Range | 1–24 Hours |
| Time Adjustment | 1-Hour Increments |
How to Dehydrate Food
- Wash and prepare the food.
- Cut it into suitable pieces or slices.
- Arrange food with space between the pieces.
- Install the basket and crisping trays.
- Press POWER.
- Select DEHYDRATE.
- Adjust temperature and drying time.
- Press START/STOP.
- Turn food several times during drying.
- Continue until the required dryness is reached.
Dehydrating Tips
- Use fresh, ripe ingredients.
- Slice fruits evenly.
- Leave space between slices.
- Turn food periodically during dehydration.
- Rotate food halfway through the drying time.
- Use the appropriate low-temperature setting for the selected ingredient.
Air Frying and Roasting Cooking Chart
The following temperatures and times are approximate and based on the food sizes and quantities listed.
Cooking times may vary according to the amount of food and the selected basket arrangement.
Vegetables Cooking Chart
| Food | Temperature | Single Zone | TriZone |
| Asparagus, Thin Spears, 1 Bunch | 400°F | 5–7 min | 10–14 min |
| Asparagus, Thick Spears, 1 Bunch | 400°F | 7–9 min | 12–15 min |
| Cauliflower Florets, 3–4 Cups | 400°F | 13–18 min | 18–25 min |
| Eggplant, 1½-Inch Cubes | 400°F | 15 min | 24 min |
| Kale, 3 Cups, Stems Removed | 375°F | 9 min | 15–18 min |
| Bell Peppers, 1-Inch Pieces | 375°F | 10 min | 15–20 min |
| Breaded Pickles | 400°F | 5–7 min | 9–13 min |
| Fresh French Fries, ¼–⅓-Inch Thick | 400°F | 16–20 min | 30–40 min |
| Potatoes, 1-Inch Cubes | 400°F | 12–14 min | 24–35 min |
| Potato Wedges | 390°F | 20–25 min | 35–40 min |
| Broccoli Florets, 3–4 Cups | 400°F | 15–20 min | 22–28 min |
| Brussels Sprouts, 1 lb | 375°F | 12–15 min | 20–25 min |
| Corn on the Cob, 4 Ears | 390°F | 12–15 min | 18–20 min |
| Carrots, 2½ Cups, ½-Inch Pieces | 400°F | 10–12 min | 20–24 min |
| Mushrooms, 3 Cups Sliced | 400°F | 10–12 min | 18–22 min |
| Jalapeño or Poblano Peppers | 375°F | 10 min | 12–15 min |
| Zucchini, ¼-Inch Discs | 400°F | 14–17 min | 22–24 min |
| Root Vegetables, ½-Inch Pieces | 400°F | 15–20 min | 25–40 min |
Beef Cooking Chart
| Food | Temperature | Single Zone | TriZone |
| Hamburgers, ¼ lb, Up to 4 | 360°F | 12–16 min | 16–18 min |
| Hot Dogs or Sausages | 360°F | 10–15 min | 20–25 min |
| Meatloaf, 1 lb | 360°F | 33–40 min | 45–50 min |
| Steak, Two 8 oz Steaks | 360°F | 8–21 min | 10–24 min |
| Beef Tenderloin, 1 lb, Rare | 360°F | 16 min | 18–20 min |
| Beef Tenderloin, 1 lb, Medium | 360°F | 18 min | 20–24 min |
Chicken Cooking Chart
| Food | Temperature | Single Zone | TriZone |
| Boneless, Skinless Chicken Breast | 360°F | 18–20 min | 22–25 min |
| Boneless Chicken Thighs, 6–8 oz Each | 360°F | 20–25 min | 28–30 min |
| Battered Chicken Tenders | 360°F | 13–15 min | 16–19 min |
| Chicken Wings, 2 lb | 400°F | 22–27 min | 40–45 min |
Pork and Lamb Cooking Chart
| Food | Temperature | Single Zone | TriZone |
| Lamb Loin Chops, 1-Inch Thick | 400°F | 8–12 min | 14–18 min |
| Pork Chops, 1-Inch Thick | 375°F | 10–14 min | 20–25 min |
| Pork Chops, 2-Inch Thick | 375°F | 15–19 min | 22–28 min |
Fish and Seafood Cooking Chart
| Food | Temperature | Single Zone | TriZone |
| Shrimp, Thawed and Battered | 325°F | 12 min | 14–15 min |
| Catfish Fingers, Thawed and Battered | 400°F | 10–15 min | 18–25 min |
| Shrimp, Thawed and Sauced | 325°F | 5–8 min | 10–12 min |
| Salmon Fillets, Thawed | 400°F | 9–12 min | 17–24 min |
Frozen Food Cooking Chart
The frozen foods listed below should be cooked directly from frozen.
Do not thaw them before air frying unless their preparation instructions require otherwise.
| Food | Temperature | Single Zone | TriZone |
| Cheese Sticks | 350°F | 6–9 min | 10–12 min |
| Thick Frozen French Fries, 2 Cups | 400°F | 17–21 min | 24–30 min |
| Frozen French Fries | 400°F | 15–17 min | 20–24 min |
| Onion Rings | 360°F | 12–16 min | 18–22 min |
| Chicken Nuggets, 12 oz Box | 360°F | 10–15 min | 17–22 min |
| Fish Sticks | 400°F | 12–18 min | 18–22 min |
| Precooked Meatballs, 1-Inch | 390°F | 7–9 min | 11–14 min |
| Pizza, 7 × 8 Inches | 360°F | 12–15 min | 15–17 min |
Desserts Cooking Chart
| Food | Temperature | Single Zone | TriZone |
| Apple Turnovers | 400°F | 10 min | 14 min |
| Donuts | 350°F | 8 min | 9–11 min |
Cooking Chart Notes
The listed times are estimates.
- Smaller batches may require shorter cooking times.
- Check food approximately halfway through cooking.
- Adjust time and temperature when necessary.
- Lightly oil food for browning and crispness unless it is already pre-oiled.
- Use a food thermometer to confirm that meat, poultry, and fish are fully cooked before serving.
Food Internal Temperature Guidelines
The manual provides the following USDA cooking-temperature guidance.
| Food | Internal Temperature Listed |
| Beef and Lamb | 145°F / 63°C |
| Pork | 160°F / 71°C |
| Poultry | 170–180°F / 77–82°C |
| Reheated Meat and Poultry | 165°F / 74°C |
Important: Use an accurate food thermometer to check internal temperatures. Cooking time alone does not confirm that food has reached the required temperature.
Dehydration Time and Temperature Chart
The DEHYDRATE function can be used for herbs, fruits, and vegetables.
Herbs and Kale
| Food | Temperature | Drying Time |
| Oregano | 135°F | 2–3 Hours |
| Thyme | 135°F | 3–4 Hours |
| Tarragon | 135°F | 3–4 Hours |
| Parsley | 135°F | 2–3 Hours |
| Rosemary | 135°F | 2–3 Hours |
| Sage | 135°F | 3–4 Hours |
| Kale Chips, Stems Removed | 135°F | 2–3 Hours |
Fruit and Vegetable Dehydration
| Food | Temperature | Time in English Instructions |
| Apple Rounds, Cored, ¼-Inch Slices | 135°F | 8–9 Hours |
| Mango or Papaya Pieces, ¼-Inch Slices | 135°F | 8–10 Hours |
| Kiwi, ¼-Inch Rounds | 135°F | 6 Hours |
| Orange Slices | 135°F | 2–3 Hours |
| Roma Tomatoes, Skin Side Down | 150°F | 2–3 Hours |
| Cherry or Grape Tomatoes, Skin Side Down | 150°F | 3–4 Hours |
Drying-time note: The English and Spanish sections contain different times for orange slices and tomatoes. The Spanish section lists orange slices at 10 hours, Roma tomatoes at 8–9 hours, and cherry/grape tomatoes at 5–9 hours. Check the food throughout dehydration and continue until the desired dryness is reached.
Preparing Fruit for Dehydration
- Wash fruit skins thoroughly.
- Remove cores or peel fruit where appropriate.
- Cut fruit into approximately ¼-inch-thick slices.
- Arrange the pieces with space between them.
- Set the recommended temperature and drying duration.
- Turn or rotate the food during dehydration.
Air Frying Tips for Better Results
Dry Food Before Cooking
Pat ingredients dry to improve browning and reduce excess smoke.
Shake or Turn Food
Check and turn or shake food halfway through cooking.
The preset chart also provides an approximate two-thirds-of-cooking-time shake reminder for selected functions.
Avoid Overcrowding
Arrange food so hot air can circulate.
Do not fill the basket more than two-thirds full.
Prepare Breaded Food Carefully
For freshly breaded food:
- Cut ingredients into smaller pieces.
- Press the coating firmly onto the food.
- Refrigerate breaded food for at least 30 minutes.
- Arrange pieces without touching.
- Cook in smaller batches.
Use a Light Oil Coating
Spray oils distribute oil evenly.
The instructions identify the following suitable oils:
- Canola oil.
- Olive oil.
- Avocado oil.
- Coconut oil.
- Grapeseed oil.
- Peanut oil.
- Vegetable oil.
Reduce Smoke from Fatty Foods
Bacon, sausages, and chicken wings may release fat during cooking.
The manual recommends emptying accumulated fat between batches when necessary.
Caution: Hot oil may collect at the bottom of the basket. Handle the basket carefully and use protective oven mitts.
Cooking Frozen Food
Prepackaged frozen foods may require less time than the package’s conventional cooking directions.
Frozen Food Instructions
- Check the package for cooking instructions.
- Select the appropriate air fryer temperature.
- Place the frozen food in the basket.
- Start the cooking cycle.
- Check food halfway through cooking.
- Adjust the remaining time or temperature if needed.
- Check doneness when cooking finishes.
Use the recommended temperatures and times in the frozen food chart as a starting point.
Cleaning Instructions
The air fryer must be unplugged and completely cooled before cleaning.
Before Cleaning
- Turn off the appliance.
- Unplug the electrical cord.
- Allow the air fryer to cool fully.
- Remove the cooking basket.
- Remove the crisping trays and basket divider.
Cleaning the Cooking Basket
- Wash the basket in hot, soapy water.
- Use a soft cloth or sponge.
- Rinse thoroughly.
- Dry completely.
Cleaning the Crisping Trays
- Remove both trays.
- Wash them in hot, soapy water.
- Rinse thoroughly.
- Dry completely before reassembly.
Cleaning the Basket Divider
- Remove the divider from the basket.
- Wash it in hot, soapy water.
- Rinse thoroughly.
- Dry completely.
Cleaning the Air Fryer Body
Wipe the exterior using a soft, non-abrasive, damp cloth.
Warning: Never immerse the air fryer body, electrical cord, or plug in water or another liquid.
Protecting the Ceramic Coating
Do not use:
- Metal kitchen utensils.
- Metal scouring pads.
- Abrasive cleansers.
- Harsh abrasive cleaning products.
These materials may damage the ceramic coating.
Maintenance Instructions
The bella TriZone Air Fryer requires limited routine maintenance.
Maintenance Guide
| Maintenance Task | Instructions |
| Clean Cooking Basket | Wash in Hot, Soapy Water |
| Clean Crisping Trays | Wash and Dry Thoroughly |
| Clean Basket Divider | Wash in Hot, Soapy Water |
| Clean Air Fryer Body | Wipe with Soft, Damp Cloth |
| Protect Ceramic Coating | Avoid Metal Utensils and Abrasive Cleaners |
| Check Basket Position | Make Sure Basket Is Fully Closed |
| Keep Ventilation Clear | Do Not Block Air Inlets or Outlet |
| Inspect Power Cord | Do Not Use if Damaged |
| Store Components | Keep Clean and Dry |
Appliance Servicing
The air fryer contains no user-serviceable internal components.
Any maintenance requiring disassembly beyond normal cleaning must be performed by a qualified appliance repair technician.
Do not attempt internal repairs.
Storage Instructions
Store the air fryer only after it has cooled completely and all components are clean and dry.
How to Store the Air Fryer
- Turn off the appliance.
- Unplug the power cord.
- Allow it to cool completely.
- Clean the basket, crisping trays, and divider.
- Dry all removable components.
- Place the clean crisping trays and divider inside the cooking basket.
- Insert the basket into the air fryer body.
- Store the appliance in its original box or another clean, dry location.
Important: Never store the air fryer while it is hot or wet.
Troubleshooting and Operating Issues
The following table covers operating conditions and corrective actions described in the instructions.
| Problem or Condition | Possible Cause | Recommended Action |
| Air Fryer Will Not Operate | Basket Is Not Fully Closed | Insert the Basket Completely |
| Air Fryer Does Not Operate Properly | Electrical Circuit May Be Overloaded | Use a Separate Electrical Circuit |
| Food Cooks Unevenly | Food Needs Turning or Shaking | Check and Turn Food During Cooking |
| Food Is Not Crisp Enough | Excess Moisture or Overcrowding | Dry Food and Cook Smaller Batches |
| Excessive Smoke During Cooking | Fat Accumulation or Moist Food | Dry Food and Remove Excess Fat Between Batches |
| Dual Zones Affect Each Other | Large Temperature Difference Between Zones | Avoid Extremely Different Zone Temperatures |
| HOLD Appears | SYNC TIME Is Coordinating Cooking | Allow the Programmed Cycle to Continue |
| SYNC TIME Cannot Be Selected | Cooking Has Already Started | Program Both Zones Before Starting |
| Food Needs More Time | Cooking Time Varies by Quantity and Size | Adjust Time Within the Preset Range |
| Appliance Malfunctions | Appliance Requires Inspection | Remove Basket, Unplug, and Stop Using |
Air Fryer Will Not Start
The air fryer will not operate unless the cooking basket is fully closed.
Make sure the basket is correctly inserted into the front of the appliance.
Food Is Not Cooking Evenly
Check and turn or shake food during cooking.
Avoid overcrowding and leave enough space for air circulation.
Food Is Not Crispy
Dry food before cooking.
Use smaller batches when necessary and lightly coat suitable foods with oil.
Air Fryer Produces Excessive Smoke
Foods with high fat content can release oil into the basket.
The instructions recommend removing accumulated fat between batches when necessary.
HOLD Appears on the Display
HOLD is associated with the SYNC TIME function.
It indicates that the appliance is coordinating the completion times of the two programmed zones.
SYNC TIME Does Not Work
SYNC TIME is available before cooking starts.
Both zones must be programmed before selecting the synchronization function.
Dual Zone Temperatures Differ
The divider separates the basket into cooking sections, but heat from one zone may influence the other.
Avoid setting extremely different temperatures between the zones.
Air Fryer Malfunctions During Cooking
If the appliance begins malfunctioning:
- Pull out the cooking basket.
- Unplug the power cord.
- Stop using the air fryer.
- Contact qualified service personnel.
Do not attempt to repair the appliance yourself.
Warranty Information
The bella 4QT TriZone® Air Fryer includes a limited warranty provided by SENSIO Inc.
The warranty covers qualifying mechanical defects in materials and workmanship for two years from the original retail purchase date.
Non-mechanical parts are covered for 90 days.
Warranty Coverage
| Warranty Detail | Information |
| Warranty Provider | SENSIO Inc. |
| Mechanical Warranty | 2 Years |
| Non-Mechanical Parts Warranty | 90 Days |
| Warranty Start | Original Retail Purchase Date |
| Eligible Purchaser | Original Retail Purchaser |
| Transferability | Non-Transferable |
| Required Proof | Original Sales Receipt |
| Available Remedy | Repair, Replacement, or Refund at Provider’s Discretion |
| Customer Service | 1-866-832-4843 |
What the Warranty Covers
During the applicable warranty period, SENSIO Inc. may repair or replace a qualifying defective product or issue a refund.
The remedy is determined by SENSIO Inc.
Warranty Exclusions
The warranty does not cover normal wear or damage resulting from:
- Negligent use.
- Incorrect electrical voltage or current.
- Improper routine maintenance.
- Use contrary to the operating instructions.
- Unauthorized disassembly.
- Repairs or modifications by anyone other than qualified SENSIO Inc. personnel.
- Natural disasters such as fires, floods, hurricanes, or tornadoes.
The warranty also includes limitations on incidental and consequential damages. Applicable consumer rights and restrictions may vary by jurisdiction.
How to Request Warranty Service
- Contact Customer Service at 1-866-832-4843.
- Describe the problem.
- Follow the telephone troubleshooting instructions.
- If the issue cannot be resolved, obtain a case number.
- Follow the product return instructions provided by SENSIO Inc.
Returning the Product for Warranty Service
If a return is required, attach a tag containing:
- Customer name.
- Customer address.
- Daytime telephone number.
- Case number.
- Description of the problem.
Include a copy of the original sales receipt.
Carefully package the product and send it to the address provided by SENSIO Inc., with shipping and insurance prepaid.
SENSIO Inc. does not accept responsibility for the returned product while it is in transit to its Customer Service Center.
Customer Support Information
Customer support for the bella 4QT TriZone® Air Fryer is provided by SENSIO Inc., doing business as Made by Gather.
| Contact Detail | Information |
| Brand | bella |
| Company | SENSIO Inc. dba Made by Gather |
| Customer Service Phone | 1-866-832-4843 |
| Customer Service Email | help@bellahousewares.com |
| Brand Website | https://bellakitchenware.com |
| Company Location | New York, NY 10016, USA |
Product Registration
Product registration is available through https://bellakitchenware.com.
When to Contact Customer Service
Contact Customer Service if the air fryer has a damaged power cord or plug, develops a malfunction, requires qualified servicing, or needs warranty assistance.
Frequently Asked Questions
How do I use the bella 4qt TriZone Air Fryer?
Place the air fryer on a flat, heat-resistant surface and prepare the basket. Remove the divider for full-basket TriZone cooking or install it for Dual Mode or Single Zone operation. Add food without filling the basket more than two-thirds full, insert it securely, and press POWER. Select a cooking preset, adjust temperature and time, then press START/STOP.
What are the six cooking functions on the bella TriZone Air Fryer?
The six functions are AIR FRY, ROAST, BROIL, BAKE, REHEAT, and DEHYDRATE. Each has a default cooking temperature and time, with adjustment ranges depending on the selected function.
How do I use Dual Mode on the bella TriZone Air Fryer?
Install the basket divider and place the foods in the left and right sections. Press POWER, select DUAL MODE, then program each zone using LEFT or RIGHT. Choose the cooking preset and adjust time and temperature for each side. Press START/STOP to begin cooking.
How does SYNC TIME work on the bella TriZone Air Fryer?
SYNC TIME coordinates the cooking cycles so the left and right zones finish together. Both zones must be programmed before selecting SYNC TIME. The display may show HOLD while the appliance synchronizes the cooking periods. SYNC TIME cannot be activated after cooking begins.
What is the maximum cooking capacity of the bella 4qt TriZone Air Fryer?
The basket has a capacity of four quarts, with a recommended maximum food weight of 3.3 lb. The instructions also state that the basket should never be filled more than two-thirds full to maintain proper cooking and air circulation.
What temperature does the bella TriZone Air Fryer use?
The temperature depends on the selected program. AIR FRY defaults to 400°F, ROAST to 400°F, BROIL to 450°F, BAKE to 350°F, REHEAT to 250°F, and DEHYDRATE to 130°F. Temperature adjustments use 5°F increments within each function’s supported range.
How do I clean the bella TriZone Air Fryer?
Turn off and unplug the appliance, then allow it to cool completely. Remove the cooking basket, crisping trays, and divider. Wash these components in hot, soapy water and dry thoroughly. Wipe the air fryer body using a soft, non-abrasive, damp cloth. Do not use metal utensils or abrasive cleaners that may damage the ceramic coating.
Why is my bella TriZone Air Fryer not working?
The air fryer will not operate unless the cooking basket is fully closed. Check that the basket is inserted correctly. An overloaded electrical circuit may also interfere with operation. If the appliance malfunctions, remove the basket, unplug it, and stop using it. Contact Customer Service or qualified repair personnel for assistance.