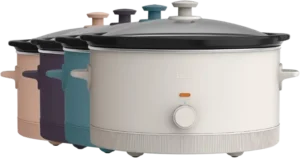
| Document Detail | Information |
| Document Title | 6QT Slow Cooker Instruction Manual |
| Document Type | Instruction Manual |
| Brand Name | bella |
| Product Name | 6QT Manual Slow Cooker |
| Model Number(s) | 35120, 35172, 35173, 35174, 35231 |
| PDF File Size | 420 KB |
| Number of Pages | 20 |
| Languages | English, Spanish |
bella 6qt Slow Cooker 35120
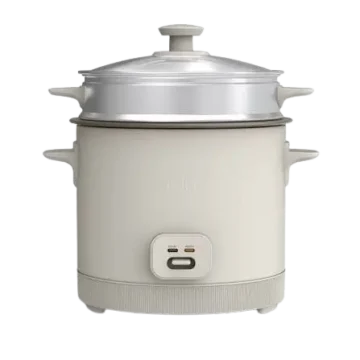
The bella 6qt Manual Slow Cooker is a countertop electric cooking appliance designed for preparing meals over extended periods using controlled heat. It features a removable 6-quart stoneware cooking pot, a tempered glass lid, and a manual temperature control knob with LOW, HIGH, WARM, and OFF settings.
The slow cooker is suitable for preparing meat and vegetable dishes, soups, stews, and other recipes that benefit from gradual cooking. The LOW setting allows food to cook over longer periods, while HIGH provides faster cooking. The WARM setting is intended to maintain the serving temperature of food that has already been cooked.
The removable stoneware pot holds the ingredients during cooking and can be taken out for serving or cleaning. The tempered glass lid helps retain moisture and heat, while the base unit contains the electrical heating system.
Product Overview
The bella 6qt Slow Cooker is a manually controlled household slow cooker with three operating heat settings.
Its removable stoneware pot sits inside an electrically heated base. A tempered glass lid covers the pot during cooking.
The temperature control knob allows LOW, HIGH, or WARM to be selected, while OFF disconnects the heating function.
Unlike a programmable slow cooker, this model uses a manual control knob to select the cooking setting. Cooking time is determined by the recipe and monitored by the user.
Main Features
- 6-quart capacity: Removable stoneware pot for preparing meals.
- Three heat settings: LOW, HIGH, and WARM.
- Manual temperature control: Rotary knob for selecting the desired setting.
- OFF position: Stops the heating function.
- Tempered glass lid: Covers food during cooking.
- Removable stoneware pot: Can be lifted out for serving and cleaning.
- Base handles: Provide handling points on the main unit.
- Non-skid feet: Help stabilize the appliance on the countertop.
- Dishwasher-safe components: The stoneware pot and glass lid can be cleaned in a dishwasher.
- Polarized plug: Identified in the English electrical instructions.
- Household operation: Designed for indoor countertop use.
Parts and Components
The slow cooker has eight main parts identified in the product diagram.
| Component | Function |
| Lid Handle | Provides a grip for lifting the glass lid |
| Tempered Glass Lid | Covers the stoneware pot during cooking |
| Stoneware Pot | Removable container that holds the food and cooking liquids |
| Base Unit | Contains the heating system and supports the stoneware pot |
| Base Handle | Provides handling points on the main appliance |
| Temperature Setting Knob | Selects OFF, LOW, HIGH, or WARM |
| Non-Skid Feet | Help keep the appliance stable |
| Polarized Plug | Connects the appliance to an electrical outlet |
Tempered Glass Lid
The tempered glass lid sits over the stoneware cooking pot.
It helps retain heat and moisture during cooking. The lid must be handled carefully because sudden temperature changes, direct heat, chips, cracks, or deep scratches can weaken the glass.
Always use potholders or protective oven mitts when removing a hot lid.
Removable Stoneware Pot
The stoneware pot holds the food during cooking.
It is designed specifically for use with the slow cooker base and must not be placed directly on a stovetop, open flame, or other heating surface.
The pot is removable for serving and cleaning.
Important: Never use a chipped, cracked, or broken stoneware pot.
Base Unit
The base unit contains the electrical heating system.
The stoneware pot fits inside the base during operation.
Food and liquids must always be placed in the removable stoneware pot, not directly inside the electrical base.
Base Handles
Handles are positioned on the sides of the base unit.
Use extreme caution when moving the appliance, particularly if it contains hot food or liquid.
Temperature Setting Knob
The temperature setting knob provides manual control over the slow cooker.
The available positions are:
- OFF.
- LOW.
- HIGH.
- WARM.
Non-Skid Feet
The non-skid feet are located underneath the base.
They help keep the slow cooker stable on a suitable countertop.
Technical Specifications
| Specification | Details |
| Brand | bella |
| Product Name | 6QT Manual Slow Cooker |
| Model Number(s) | 35120, 35172, 35173, 35174, 35231 |
| Product Type | Electric Manual Slow Cooker |
| Capacity | 6 qt |
| Cooking Pot | Removable Stoneware |
| Lid | Tempered Glass |
| Control Type | Manual Rotary Knob |
| Cooking Settings | LOW, HIGH |
| Food Warming Setting | WARM |
| Power Off Setting | OFF |
| Electrical Supply | 120V AC |
| Plug Type | Polarized, per English Instructions |
| Recommended LOW Cooking Time | 8–10 Hours |
| Recommended HIGH Cooking Time | 4–6 Hours |
| Maximum WARM Holding Time | 4 Hours |
| Initial Heating Cycle | Approximately 30 Minutes on HIGH |
| Stoneware Pot Cleaning | Dishwasher-Safe |
| Glass Lid Cleaning | Dishwasher-Safe |
| Intended Use | Household, Countertop |
| Extension Cord | Do Not Use |
| Mechanical Warranty | 2 Years |
| Non-Mechanical Parts Warranty | 90 Days |
Important Safety Instructions
The bella 6qt Slow Cooker generates heat and releases steam during operation. Improper use can cause burns, electric shock, fire, personal injury, or property damage.
Follow the safety precautions before using, cleaning, or storing the appliance.
Electrical Safety
- Read all operating and safety instructions before using the slow cooker.
- Connect the appliance only to a 120V AC electrical wall outlet.
- Never immerse the base unit, electrical cord, or plug in water or another liquid.
- Unplug the appliance when it is not in use.
- Disconnect power before cleaning.
- Allow the appliance to cool before installing or removing components.
- Do not operate the appliance with a damaged cord or plug.
- Stop using the slow cooker if it malfunctions or becomes damaged.
- Do not use attachments that are not recommended by the manufacturer.
- Never place food or liquid directly into the electrical base unit.
- Do not attempt to repair a malfunctioning appliance.
Warning: To reduce the risk of electrical shock, cook only in the removable stoneware pot provided with the appliance.
Hot Surface Safety
The base unit, stoneware pot, and glass lid become hot during operation.
- Do not touch hot surfaces with bare hands.
- Use the designated handles or knobs.
- Always use potholders or protective oven mitts when handling hot stoneware.
- Use extreme caution when moving the appliance while it contains hot food, water, or other liquids.
- Do not place a hot stoneware pot on a wet or cold surface.
- Do not place hot stoneware directly on an unprotected countertop.
- Use a protective trivet underneath the hot cooking pot.
Warning: Hot stoneware and cooking liquids can cause serious burns.
Steam Safety
Opening the glass lid releases hot steam and condensation.
To reduce the risk of scalding:
- Use protective oven mitts.
- Hold the designated lid handle.
- Lift the lid carefully.
- Tilt it away from the hands and face.
- Allow condensed water to drip back into the stoneware pot.
Never position the face or hands directly above escaping steam.
Stoneware Pot Safety
The stoneware pot is made from ceramic material and can crack or break if handled incorrectly.
- Never use the stoneware pot directly on a gas or electric stovetop.
- Do not place it over an open flame.
- Do not use it under a broiler.
- Do not place it beneath a microwave browning element.
- Do not use it in a toaster oven.
- Never heat the stoneware pot while empty.
- Avoid sudden or extreme temperature changes.
- Do not place hot stoneware into cold water.
- Do not place a hot pot on a wet or cold surface.
- Do not use the stoneware pot for popcorn, caramelizing sugar, or making candy.
- Do not use a pot that is chipped, cracked, or broken.
- Do not attempt to repair damaged stoneware.
- Do not strike utensils against the pot rim to loosen food.
Important: The stoneware pot is designed for use with this slow cooker only.
Glass Lid Safety
The tempered glass lid must be protected from direct heat and sudden temperature changes.
- Do not place the lid in a heated oven.
- Do not expose it to a broiler.
- Keep it away from hot stovetop burners.
- Do not place it inside a microwave oven.
- Keep it away from oven heat vents.
- Do not place a hot lid on a cold or wet surface.
- Do not use the lid if it is chipped, cracked, or deeply scratched.
If the lid has been exposed to any of the prohibited direct-heat conditions, do not use it again, even if no damage is visible.
Placement and Fire Safety
- Use the appliance on a stable countertop.
- Do not operate it in an unstable position.
- Do not use it outdoors.
- Do not place it near a hot gas burner or electric heating element.
- Do not place the slow cooker inside a heated oven.
- Provide sufficient open space above and around the appliance for air circulation.
- Keep it away from curtains, wall coverings, clothing, dish towels, and other flammable materials.
- Do not leave the slow cooker unattended during operation.
- Do not allow the power cord to hang over the countertop edge.
- Keep the power cord away from hot surfaces.
Child Safety
Warning: Spilled hot food can cause serious burns.
- Keep the slow cooker and its electrical cord away from children.
- Do not allow the cord to hang over the counter.
- Never connect the appliance to an outlet below the countertop.
- Never use an extension cord.
- Closely supervise the appliance when children are nearby.
If the Slow Cooker Falls Into Water
If the appliance falls or becomes immersed in water:
- Unplug it from the electrical outlet immediately.
- Do not reach into the water.
- Do not attempt to operate the appliance.
If the Slow Cooker Malfunctions
If the appliance begins operating incorrectly:
- Turn the temperature control knob to OFF.
- Unplug it immediately.
- Stop using the appliance.
- Do not attempt repairs.
Contact an authorized service facility or qualified appliance repair technician for assistance.
Polarized Plug and Power Cord Instructions
Polarized Plug
The English instructions describe a polarized plug with one blade wider than the other.
The plug is designed to fit into a polarized electrical outlet in one direction.
If the plug does not fit:
- Remove it from the electrical outlet.
- Reverse the plug.
- Try inserting it again.
- If it still does not fit, contact a qualified electrician.
Do not modify the electrical plug.
The Spanish cord instructions also refer to a grounded three-prong plug. The actual supplied plug must not be altered.
Power Cord Requirements
The appliance includes a short power cord to reduce the risk of entanglement and tripping.
Do not use an extension cord with this slow cooker.
Power Cord Safety Tips
- Never pull or yank the power cord.
- Always hold the plug when connecting or disconnecting power.
- Inspect the cord before every use.
- Check for cuts, fraying, or abrasion marks.
- Do not wrap the cord tightly around the appliance.
- Avoid putting pressure on the cord where it enters the slow cooker.
Warning: Do not operate the appliance if its power cord is damaged, it operates intermittently, or it stops working completely.
If the cord shows signs of damage, the appliance requires servicing and cord replacement by qualified personnel.
Electrical Circuit Requirements
An overloaded electrical circuit may prevent the slow cooker from operating properly.
The manufacturer recommends operating it on a separate electrical circuit from other appliances.
Countertop Protection
Place non-plastic coasters or placemats between the slow cooker and the countertop or tabletop finish.
This helps prevent discoloration, stains, or permanent marks caused by the interaction between appliance materials and furniture finishes.
Before First Use
The removable stoneware pot and glass lid must be washed before preparing food.
The appliance also requires an initial heating cycle using water.
Step 1: Unpack the Slow Cooker
Carefully remove the appliance and its components from the packaging.
Step 2: Wash the Stoneware Pot
Wash the removable cooking pot in warm, soapy water.
Rinse thoroughly and dry completely.
Step 3: Wash the Glass Lid
Clean the tempered glass lid using warm, soapy water.
Rinse and dry thoroughly.
Step 4: Wipe the Base Unit
Use a soft, moist cloth to wipe the interior and exterior surfaces of the base unit.
This removes dust collected during packaging and handling.
Warning: Never immerse the base, power cord, or plug in water.
Step 5: Install the Cooking Pot
Place the clean stoneware pot inside the base unit.
Step 6: Add Water
Pour 4 cups of water into the stoneware pot, as directed in the English first-use instructions.
Step 7: Position the Glass Lid
Cover the stoneware pot with the tempered glass lid.
Step 8: Connect Power
Plug the slow cooker into a 120V AC wall outlet.
Step 9: Select HIGH
Turn the temperature control knob to HIGH.
Allow the appliance to operate for approximately 30 minutes.
Step 10: Turn Off the Appliance
After approximately 30 minutes:
- Turn the knob to OFF.
- Unplug the power cord.
- Allow the appliance to cool completely.
Step 11: Empty and Rinse
- Remove the cooled stoneware pot.
- Discard the water.
- Rinse the pot thoroughly.
- Dry it completely.
- Return the pot to the base unit.
The slow cooker is now prepared for normal use.
First-use quantity note: The English section specifies four cups of water, while the Spanish section specifies two cups. The procedure above follows the English instructions.
Initial Smoke or Odor
A slight odor or small amount of smoke may occur during the first few minutes of initial use.
The manufacturer identifies this as normal and states that it should disappear quickly and not recur after the appliance has been used a few more times.
How to Use the bella 6qt Slow Cooker
The slow cooker uses a manual temperature control knob to select LOW, HIGH, or WARM.
Step 1: Prepare the Recipe
Prepare the ingredients according to the selected recipe.
The cooking time and heating setting should follow the recipe’s recommended instructions.
Step 2: Add Food to the Stoneware Pot
Place the prepared ingredients inside the removable stoneware pot.
The stoneware pot should be at room temperature when it is placed into the base for cooking.
Step 3: Position the Glass Lid
Cover the stoneware pot with the tempered glass lid.
Step 4: Connect Power
Plug the slow cooker into a 120V AC electrical wall outlet.
Step 5: Select the Cooking Setting
Turn the temperature control knob to either:
- LOW.
- HIGH.
Use the recipe instructions to determine the appropriate setting.
Important: WARM is intended for keeping already-cooked food warm, not for cooking raw ingredients.
Step 6: Allow Food to Cook
Leave the food to cook for the duration specified by the recipe.
The slow cooker heats food gradually, and cooking time depends on the selected setting, ingredients, and recipe.
Step 7: Select WARM When Cooking Finishes
When food is fully cooked, WARM may be selected to hold it for a short period before serving.
Do not use WARM for more than four hours.
Step 8: Turn Off the Slow Cooker
When cooking or warming is complete:
- Turn the temperature control knob to OFF.
- Unplug the appliance.
Step 9: Remove the Lid Safely
- Put on protective oven mitts.
- Hold the lid handle.
- Carefully lift and tilt the lid away from the face and hands.
- Allow hot condensation to drip back into the stoneware pot.
Step 10: Remove the Cooking Pot
Grasp the stoneware pot by its handles using protective oven mitts.
Lift the pot from the base unit.
If serving food directly from the stoneware pot, place a protective trivet or heat-resistant pad underneath it.
Temperature Control Knob Settings
The slow cooker has three operating heat settings and an OFF position.
| Setting | Function | Intended Use |
| OFF | Stops Heating | Turning Off the Appliance |
| LOW | Lower-Temperature Slow Cooking | Recipes Requiring Longer Cooking Times |
| HIGH | Higher-Temperature Slow Cooking | Recipes Requiring Shorter Cooking Times |
| WARM | Maintains the Temperature of Cooked Food | Short-Term Holding Before Serving |
LOW Setting
LOW provides gradual cooking over longer periods.
The manufacturer explains that slow cooking takes place at temperatures near boiling.
LOW is suitable for recipes requiring extended cooking times.
HIGH Setting
HIGH cooks food more quickly than LOW.
The manual compares HIGH cooking to preparing food in a covered pot on a stovetop.
Food generally cooks on HIGH in approximately half the time required on LOW.
Additional liquid may be needed because food can boil on HIGH.
WARM Setting
WARM maintains the serving temperature of food that has already been cooked.
Do not cook food on WARM.
Do not keep food on WARM for more than four hours.
OFF Setting
Turn the control knob to OFF to stop heating.
Always unplug the appliance when it is not in use.
Slow Cooker Cooking Time Guide
The recommended cooking time depends on the recipe and ingredients.
For many meat-and-vegetable dishes, the manufacturer provides the following general guidelines.
| Cooking Setting | Recommended Cooking Time |
| LOW | 8–10 Hours |
| HIGH | 4–6 Hours |
These are general guidelines rather than fixed cooking times for every recipe.
Cooking on LOW
LOW is intended for longer cooking periods.
The manual also notes that many recipes containing uncooked meat and vegetables require approximately 6–8 hours on LOW.
Cooking on HIGH
HIGH generally requires about half the cooking time of LOW.
Because food may boil on HIGH, additional liquid may be necessary.
Choosing Cooking Time
Follow the cooking time and heating position recommended by the recipe.
The manual temperature knob does not replace the need to monitor cooking time.
How to Use the WARM Setting
WARM is intended to hold cooked food at a suitable serving temperature for a short period.
WARM Instructions
- Complete cooking using LOW or HIGH.
- Turn the temperature control knob to WARM.
- Keep the cooked food covered until it is ready to serve.
- Use WARM only for a short holding period.
- Turn the knob to OFF when warming is finished.
- Unplug the appliance.
Important: Do not cook food on WARM, and do not keep food on WARM for more than four hours.
Slow Cooking Tips
The following recommendations help produce consistent results when using the slow cooker.
Brown Meat Before Slow Cooking
Meat does not brown during normal slow cooking.
For recipes that require browning:
- Heat a small amount of oil in a separate skillet.
- Brown the meat.
- Transfer the browned meat into the stoneware pot.
- Continue cooking according to the recipe.
Browning can improve the appearance of the cooked meat and help reduce excess fat.
Use Whole Herbs and Spices
Whole herbs and spices can provide better flavor during slow cooking than crushed or ground versions.
Adjust the Amount of Liquid
Liquids do not evaporate as quickly in a slow cooker as they do during conventional cooking.
When adapting a recipe that was not originally written for slow cooking:
- Reduce the amount of liquid.
- Add more liquid later if necessary.
- Treat rice and soup recipes as exceptions to the general reduction rule.
Reduce Excess Liquid
If too much liquid remains at the end of cooking:
- Remove the glass lid carefully.
- Turn the temperature control knob to HIGH.
- Continue cooking for approximately 30–45 minutes.
This allows some of the liquid to reduce.
Cook Meat and Vegetables Evenly
Cut ingredients into similarly sized pieces.
Smaller, evenly sized pieces generally cook more quickly and evenly than large whole pieces such as roasts or poultry.
Cooking High-Fat Meat
Meat with a high fat content can produce dishes with less concentrated flavor.
The instructions recommend browning or precooking fatty meat to reduce some of the fat and preserve its color.
For high-fat cuts:
- Use less added liquid.
- Place thick onion slices beneath the meat so it does not sit directly in the fat.
- Remove excess fat from the surface before serving.
A spoon, slotted spoon, or slice of bread may be used to remove surface fat.
Use WARM Only After Cooking
Once the food is fully cooked, WARM may be selected to maintain its serving temperature.
Never use WARM to cook raw ingredients.
Converting Standard Recipes to Slow Cooking
Some recipes designed for conventional cooking can be adapted for a slow cooker.
The manufacturer provides several recommendations for vegetables, dairy ingredients, and starchy foods.
Root Vegetables
Root vegetables generally require longer cooking times than many types of meat.
Examples include:
- Carrots.
- Potatoes.
- Turnips.
- Beets.
Place these vegetables at the bottom of the stoneware pot.
Cover them with cooking liquid.
Fresh Milk and Yogurt
When a recipe includes fresh milk or yogurt, add it during the last two hours of cooking.
Evaporated Milk
Evaporated milk can be added at the beginning of the cooking process.
Rice, Noodles, and Pasta
Rice, noodles, and pasta are not recommended for long cooking periods in the slow cooker.
The manufacturer recommends cooking these ingredients separately and adding them during the final 30 minutes of slow cooking.
Standard Recipe Conversion Guide
| Ingredient or Task | Recommended Approach |
| Root Vegetables | Place at Bottom of Pot and Cover with Liquid |
| Fresh Milk | Add During Last 2 Hours |
| Yogurt | Add During Last 2 Hours |
| Evaporated Milk | May Be Added at Beginning |
| Rice | Cook Separately and Add During Last 30 Minutes |
| Noodles | Cook Separately and Add During Last 30 Minutes |
| Pasta | Cook Separately and Add During Last 30 Minutes |
| Browning Meat | Brown Separately in a Skillet Before Slow Cooking |
| Reducing Excess Liquid | Remove Lid and Use HIGH for Approximately 30–45 Minutes |
Stoneware Pot Care
The stoneware pot requires careful handling because ceramic materials can crack or break when exposed to impact or sudden temperature changes.
Preventing Stoneware Damage
- Always use oven mitts or potholders when handling hot stoneware.
- Do not place hot stoneware directly on a countertop.
- Use a protective trivet.
- Never place the stoneware pot on a gas or electric burner.
- Do not use the pot over an open flame.
- Do not expose it to a broiler or microwave browning element.
- Do not use it in a toaster oven.
- Do not strike utensils against the rim.
- Avoid abrasive cleansers and scouring pads.
- Never use a chipped, cracked, or broken pot.
- Do not attempt to repair damaged stoneware.
Avoid Sudden Temperature Changes
Sudden changes in temperature may cause the stoneware to crack.
For example:
- Do not add refrigerated foods to a heated stoneware pot.
- Do not place a hot pot in cold water.
- Do not place hot stoneware on a cold or wet surface.
- Do not transfer a cold pot directly into a hot cooking environment.
Never Heat an Empty Stoneware Pot
Place food in the stoneware pot before turning on the appliance.
Do not heat the pot while it is empty.
Food Storage and Reheating
Do not use the stoneware pot for general food storage or reheating.
In particular, do not store food in the stoneware pot in a refrigerator and then place that cold pot into the heated base.
The sudden temperature change may cause the stoneware to crack.
Avoid Impact Damage
Do not strike the stoneware against a faucet or other hard surface.
Even minor damage can weaken the pot.
Warning: Never use a stoneware pot that is chipped, cracked, or broken.
Tempered Glass Lid Care
The tempered glass lid can break if exposed to direct heat, rapid temperature changes, or physical damage.
Protecting the Glass Lid
- Do not place the lid under a broiler.
- Do not place it inside a microwave oven.
- Keep it away from hot stovetop burners.
- Do not place it in a heated oven.
- Keep it away from oven heat vents.
- Do not place a hot lid on a wet or cold surface.
- Do not strike it against a faucet or another hard surface.
- Do not use the lid if it is chipped, cracked, or deeply scratched.
Cooling the Glass Lid
After removing the lid:
- Place it on a dry, heat-resistant surface.
- Allow it to cool.
- Avoid contact with cold water or wet surfaces.
Removing the Lid During Cooking
Always use protective oven mitts.
Lift the lid carefully and tilt it away from the body so that escaping steam does not reach the hands or face.
Allow hot condensation to drip back into the cooking pot.
Damaged Glass Lid
If the lid becomes chipped, cracked, or scratched, stop using it.
The instructions require damaged glass lids to be discarded rather than repaired.
Cleaning Instructions
The slow cooker should be cleaned after use.
Always unplug the appliance and allow it to cool completely before cleaning.
Before Cleaning
- Turn the temperature setting knob to OFF.
- Unplug the power cord.
- Allow the slow cooker to cool completely.
- Remove the glass lid.
- Remove the stoneware pot.
Cleaning the Stoneware Pot
The stoneware pot can be washed by hand or in a dishwasher.
Handwashing Instructions
- Allow the pot to cool completely.
- Wash it in warm, soapy water.
- Rinse thoroughly.
- Dry completely.
Dishwasher Instructions
The stoneware pot is dishwasher-safe.
When placing it in the dishwasher, position it securely so it will not strike other items during the washing cycle.
Cleaning the Tempered Glass Lid
The tempered glass lid can also be cleaned in a dishwasher.
For handwashing:
- Allow the lid to cool completely.
- Wash it in warm, soapy water.
- Rinse thoroughly.
- Dry completely.
Removing Stuck-On Food
If food residue becomes attached to the stoneware:
- Fill the cooled pot with warm, soapy water.
- Allow it to soak.
- Clean the softened residue.
For more stubborn food deposits, a paste of baking soda may be used with a plastic scouring pad.
Do not use abrasive cleaning materials that can scratch or damage the cookware.
Removing Water Spots and Mineral Deposits
Distilled white vinegar can be used to remove water spots or mineral deposits from the stoneware.
- Wipe the affected area with distilled white vinegar.
- For difficult stains, pour a small amount into the pot.
- Allow it to soak.
- Rinse thoroughly.
- Dry completely.
Cleaning the Base Unit
- Make sure the appliance is unplugged.
- Allow it to cool completely.
- Wipe the interior and exterior of the base with a soft, slightly damp cloth or sponge.
- Dry thoroughly.
Warning: Never immerse the electrical base unit, power cord, or plug in water or another liquid.
Cleaning Precautions
Do not use abrasive cleansers or scouring pads on the base unit.
These materials may damage the appliance surfaces.
Dishwasher-Safe Components
The removable stoneware pot and tempered glass lid can be cleaned in a dishwasher.
| Component | Cleaning Method |
| Stoneware Pot | Dishwasher-Safe or Handwash |
| Tempered Glass Lid | Dishwasher-Safe or Handwash |
| Base Unit | Wipe with Soft, Slightly Damp Cloth |
| Power Cord and Plug | Must Not Be Immersed in Water |
Maintenance Instructions
The bella 6qt Slow Cooker requires limited routine maintenance.
Its main maintenance needs are careful handling of the stoneware and glass components, regular cleaning, and power cord inspection.
Maintenance Guide
| Maintenance Task | Instructions |
| Clean Stoneware Pot | Wash After Use |
| Clean Glass Lid | Wash After Use |
| Clean Base Unit | Wipe with Slightly Damp Cloth |
| Inspect Stoneware | Do Not Use if Chipped, Cracked, or Broken |
| Inspect Glass Lid | Do Not Use if Chipped, Cracked, or Deeply Scratched |
| Check Power Cord | Inspect Before Each Use for Cuts or Abrasion |
| Prevent Thermal Shock | Avoid Sudden Temperature Changes |
| Store Appliance | Keep Clean, Dry, and Unplugged |
Inspecting the Electrical Cord
Before every use, inspect the power cord for:
- Cuts.
- Abrasion marks.
- Fraying.
- Other visible damage.
If any damage is found, do not operate the appliance.
The cord must be serviced or replaced by qualified personnel.
Preventing Ceramic and Glass Damage
Do not allow the stoneware pot or glass lid to strike hard surfaces.
Avoid placing hot components in cold water or on wet surfaces.
Appliance Repairs
The slow cooker contains no user-serviceable internal parts.
Any repair requiring disassembly beyond normal cleaning must be performed by a qualified appliance repair technician.
Do not attempt to repair the electrical components yourself.
Storage Instructions
The appliance must be clean, dry, and completely cooled before storage.
How to Store the Slow Cooker
- Turn the temperature control knob to OFF.
- Unplug the appliance.
- Allow the unit to cool completely.
- Wash the stoneware pot and glass lid.
- Dry all components thoroughly.
- Place the stoneware pot inside the base unit.
- Position the glass lid over the stoneware pot.
- Store the appliance in its original box or another clean, dry place.
Protecting the Glass Lid During Storage
To protect the glass lid:
- Wrap it with a soft cloth.
- Place it upside down over the stoneware pot.
Power Cord Storage
Keep the electrical cord loosely coiled.
Do not wrap the cord tightly around the appliance.
Important: Never store the slow cooker while it is hot or wet.
Troubleshooting and Operating Problems
The following guidance covers operating conditions, precautions, and corrective actions described in the instructions.
| Problem or Condition | Possible Cause | Recommended Action |
| Slow Cooker Does Not Operate Properly | Electrical Circuit May Be Overloaded | Use a Separate Electrical Circuit |
| Power Cord Has Cuts or Abrasion | Cord Is Damaged | Stop Using Appliance and Arrange Qualified Service |
| Slow Cooker Operates Intermittently | Appliance Requires Service | Stop Using and Have Appliance Inspected |
| Slight Smoke or Odor During First Use | Normal Initial Heating Condition Described in Manual | Initial Smoke or Odor Should Disappear Quickly |
| Stoneware Pot Cracks | Sudden Temperature Change or Impact | Do Not Use Damaged Stoneware |
| Glass Lid Cracks or Shatters | Thermal Shock, Direct Heat, or Physical Damage | Stop Using and Discard Damaged Lid |
| Food Contains Too Much Liquid | Slow Cooking Retains More Liquid | Remove Lid and Use HIGH for Approximately 30–45 Minutes |
| Meat Is Not Browned | Slow Cooking Does Not Brown Meat | Brown Meat Separately in a Skillet Before Slow Cooking |
| Slow Cooker Malfunctions During Operation | Appliance Fault | Turn OFF, Unplug, and Seek Qualified Service |
Slow Cooker Does Not Operate Properly
An overloaded electrical circuit may prevent the slow cooker from operating correctly.
The manufacturer recommends using a separate electrical circuit from other appliances.
If the slow cooker malfunctions or stops working, turn it OFF, unplug it, and arrange qualified servicing.
Power Cord Is Damaged
Do not operate the appliance if the electrical cord has cuts, fraying, or abrasion marks.
The cord requires inspection and replacement by qualified personnel.
Slight Smoke or Odor During First Use
A small amount of smoke or a slight odor may occur during the first few minutes of initial operation.
The instructions state that this should disappear quickly and should not recur after the appliance has been used a few more times.
Food Contains Too Much Liquid
Slow cooking produces less liquid evaporation than conventional cooking.
If excess liquid remains:
- Carefully remove the glass lid.
- Turn the temperature control knob to HIGH.
- Allow the liquid to reduce for approximately 30–45 minutes.
Meat Does Not Brown
Meat does not normally brown in the slow cooker.
Brown meat in a separate skillet before transferring it to the stoneware pot if the recipe requires browning.
Stoneware Pot Becomes Cracked
The stoneware may crack if exposed to sudden temperature changes or impact.
Do not use or attempt to repair a cracked stoneware pot.
Glass Lid Is Damaged
If the tempered glass lid is chipped, cracked, or scratched, stop using it.
Damaged glass lids must be discarded.
Slow Cooker Malfunctions During Cooking
If the slow cooker begins malfunctioning:
- Turn the control knob to OFF.
- Unplug the power cord immediately.
- Stop using the appliance.
- Do not attempt to repair it yourself.
Contact a qualified repair technician or Customer Service.
Warranty Information
The bella 6qt Slow Cooker includes a limited warranty provided by SENSIO Inc.
The warranty covers qualifying mechanical defects in materials and workmanship for two years from the initial retail purchase date.
Non-mechanical parts are covered for 90 days.
Warranty Coverage
| Warranty Detail | Information |
| Warranty Provider | SENSIO Inc. |
| Mechanical Warranty | 2 Years |
| Non-Mechanical Parts Warranty | 90 Days |
| Warranty Start | Original Retail Purchase Date |
| Eligible Purchaser | Original Retail Purchaser |
| Transferability | Non-Transferable |
| Required Proof | Original Sales Receipt |
| Available Remedy | Repair, Replacement, or Refund at Provider’s Discretion |
| Customer Service | 1-866-832-4843 |
What the Warranty Covers
During the applicable warranty period, SENSIO Inc. may repair or replace a product found to have a qualifying defect or issue a refund.
The remedy is determined by SENSIO Inc.
Warranty Exclusions
The warranty does not cover normal wear or damage caused by:
- Negligent use.
- Incorrect electrical voltage or current.
- Improper routine maintenance.
- Use contrary to the operating instructions.
- Unauthorized disassembly.
- Repairs or alterations by anyone other than qualified SENSIO Inc. personnel.
- Natural events such as fires, floods, hurricanes, or tornadoes.
The warranty also includes limitations on incidental and consequential damages. Applicable rights and restrictions may vary by state, province, or jurisdiction.
How to Request Warranty Service
- Contact Customer Service at 1-866-832-4843.
- Explain the product problem.
- Follow the instructions provided by the customer service representative.
- If the issue cannot be resolved by telephone, obtain a case number.
- Follow the product return instructions provided by SENSIO Inc.
Returning the Product for Warranty Service
If a return is required, attach a tag containing:
- Customer name.
- Customer address.
- Daytime telephone number.
- Case number.
- Description of the problem.
Include a copy of the original sales receipt.
Carefully package the appliance and send it to the address provided by SENSIO Inc., with shipping and insurance prepaid.
SENSIO Inc. does not accept responsibility for the returned product while it is in transit to its Customer Service Center.
Customer Support Information
Customer support for the bella 6qt Slow Cooker is provided by SENSIO Inc., doing business as Made by Gather.
| Contact Detail | Information |
| Brand | bella |
| Company | SENSIO Inc. dba Made by Gather |
| Customer Service Phone | 1-866-832-4843 |
| Customer Service Email | help@bellahousewares.com |
| Brand Website | https://bellakitchenware.com |
| Company Location | New York, NY 10016, USA |
Product Registration
Product registration is available through https://bellakitchenware.com.
When to Contact Customer Service
Contact Customer Service if the slow cooker has a damaged power cord or plug, stops operating correctly, requires professional repair, or needs warranty assistance.
Frequently Asked Questions
How do I use the bella 6qt Slow Cooker?
Place the prepared ingredients into the removable stoneware pot and cover with the glass lid. Plug the slow cooker into a 120V AC wall outlet and select LOW or HIGH using the temperature control knob. Follow the cooking time recommended by the recipe. After cooking, WARM may be used for a short holding period. Turn the knob to OFF and unplug the appliance when finished.
What are the settings on the bella 6qt Slow Cooker?
The slow cooker has four control positions: OFF, LOW, HIGH, and WARM. LOW is used for longer cooking periods, HIGH for faster cooking, and WARM for maintaining the serving temperature of food that has already been cooked.
How long does food take to cook in the bella 6qt Slow Cooker?
The manual provides general cooking guidelines of 8–10 hours on LOW and 4–6 hours on HIGH for many meat-and-vegetable dishes. It also notes that many recipes containing uncooked meat and vegetables require approximately 6–8 hours on LOW. Follow the cooking time specified by the recipe.
Can I cook food on the WARM setting?
No. WARM is intended only for keeping cooked food at serving temperature. It must not be used to cook raw ingredients. The manual also states that food should not remain on WARM for more than four hours.
How do I prepare the bella 6qt Slow Cooker before first use?
Wash the stoneware pot and glass lid in warm, soapy water, rinse, and dry. Wipe the base with a soft, moist cloth. The English instructions then direct users to place four cups of water in the stoneware pot, cover it, and operate the slow cooker on HIGH for approximately 30 minutes. Turn OFF, unplug, cool, discard the water, rinse, and dry.
Can the bella slow cooker stoneware pot go in the oven or on a stovetop?
The stoneware pot must not be used on a stovetop, open flame, under a broiler, beneath a microwave browning element, or in a toaster oven. It is designed for use with the slow cooker base. Avoid sudden temperature changes because the stoneware may crack or break.
Are the bella 6qt Slow Cooker pot and glass lid dishwasher-safe?
Yes. Both the stoneware pot and tempered glass lid can be cleaned in a dishwasher. Position the stoneware securely so it does not hit other items. Both components can also be washed by hand in warm, soapy water. Allow them to cool completely before cleaning.
What is the warranty on the bella 6qt Slow Cooker?
The slow cooker has a two-year limited warranty for qualifying mechanical defects and 90-day coverage for non-mechanical parts. The warranty applies to the original retail purchaser and requires proof of purchase. For warranty assistance, contact 1-866-832-4843 or help@bellahousewares.com