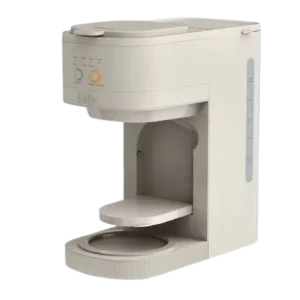
| Field | Details |
| Document Title | VersaBrew 2-in-1 Coffee System Instruction Manual |
| Document Type | Instruction Manual |
| Brand Name | BELLA |
| Product Name | VersaBrew 2-in-1 Coffee System |
| Model Number(s) | 35104, 35147, 35148, 35149, 35221 |
| PDF File Size | 788 KB |
| Number of Pages | 24 |
| Languages | English, Spanish |
BELLA VersaBrew Coffee System 35104
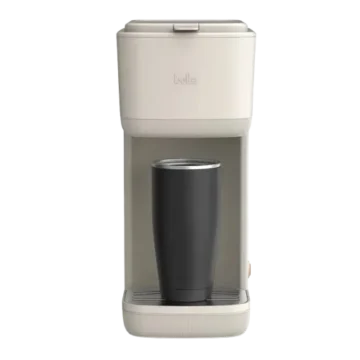
The BELLA VersaBrew 2-in-1 Coffee System is an electric coffee maker designed for brewing full carafes, individual cups, and coffee over ice. It combines a drip coffee brewing system with a single-serve station that accepts compatible coffee capsules or ground coffee through a reusable filter.
The coffee maker features a 1.8-liter (60-ounce) water tank, adjustable carafe and single-serve brewing sizes, a flip-down drip tray, and a warming plate for keeping brewed carafe coffee warm.
Carafe brewing offers 6-cup, 10-cup, and 12-cup selections. Single-serve brewing provides 8-ounce, 10-ounce, and 12-ounce options. The Over Ice function allows coffee to be brewed directly into a glass or travel mug containing ice.
The appliance uses two main brewing buttons: Carafe and Single / Over Ice. After a brewing size is selected, the coffee maker automatically begins brewing following a five-second selection period.
The carafe system also includes an automatic two-hour Keep Warm function, while a CLEAN indicator reminds users when descaling is required.
These instructions cover the VersaBrew Coffee System’s parts, controls, first-time preparation, carafe brewing, single-serve operation, coffee capsule setup, iced coffee, puncture needle care, descaling, cleaning, safety precautions, troubleshooting, and warranty information.
Product Overview and Technical Specifications
The BELLA VersaBrew 2-in-1 Coffee System is designed for household coffee preparation using a single water tank and interchangeable brewing accessories.
The carafe brewing system uses a removable filter basket holder and permanent coffee filter. The single-serve system uses a pod adapter or reusable ground coffee filter.
| Specification | Details |
| Brand | BELLA |
| Product Line | VersaBrew |
| Product Name | 2-in-1 Coffee System |
| Product Type | Drip and single-serve coffee maker |
| Electrical Supply | 120 V AC, 60 Hz |
| Power Plug | Polarized plug |
| Water Tank Capacity | 1.8 L / 60 oz. |
| Maximum Carafe Selection | 12 cups |
| Carafe Brewing Sizes | 6, 10, and 12 cups |
| Default Carafe Selection | 12 cups |
| Single-Serve Brewing Sizes | 8, 10, and 12 oz. |
| Default Single-Serve Selection | 10 oz. |
| Brewing Options | Carafe, Single Serve, Over Ice |
| Coffee Compatibility | Ground coffee and compatible coffee capsules |
| Brewing Controls | Carafe and Single / Over Ice buttons |
| Automatic Brewing Start | 5 seconds after selection |
| Carafe Keep Warm Duration | 2 hours |
| Single-Serve Completion | Automatic stop after brewing |
| Water Level Indicator | Water window |
| Warming Plate | Included |
| Drip Tray | Flip-down design |
| Cleaning Indicator | CLEAN reminder |
| Country of Manufacture | China |
| Intended Use | Household use only |
Main Features
The VersaBrew Coffee System includes the following functions:
- 2-in-1 brewing system: Prepares carafe coffee and individual servings using one appliance.
- Three carafe sizes: Select 6, 10, or 12 cups.
- Three single-serve sizes: Select 8, 10, or 12 ounces.
- Compatible coffee capsule brewing: Uses a removable pod adapter with puncture needles.
- Reusable ground coffee filters: Allows coffee to be prepared using ground coffee.
- Over Ice function: Brews coffee into a cup or travel mug containing ice.
- Automatic brewing: Starts five seconds after a size is selected.
- Two-hour Keep Warm: Keeps carafe coffee warm after brewing.
- Adjustable drip tray: Flips up for carafe brewing and down for single-serve brewing.
- CLEAN reminder: Indicates when the coffee maker requires descaling.
- Removable puncture needle attachment: Can be removed for cleaning.
- Cord storage: Provides a designated area for storing the electrical cord.
What’s Included in the Box
The VersaBrew Coffee System includes the coffee maker and the removable brewing components identified in the instruction manual.
| Item | Description |
| Coffee Maker Body | Main appliance with brewing controls, water tank, and warming plate. |
| Glass Carafe | Collects drip-brewed coffee. |
| Carafe Lid | Covers the glass carafe. |
| Measuring Scoop | Measures ground coffee. |
| Permanent Filter | Holds ground coffee during carafe brewing. |
| Filter Basket Holder | Supports the permanent filter during carafe brewing. |
| Reusable Single-Serve Ground Coffee Filter | Holds ground coffee for single-serve brewing. |
| Pod Adapter | Holds compatible coffee capsules. |
| Pod Adapter Attachment | Removable attachment containing a puncture needle. |
The appliance also includes an integrated flip-down drip tray, water tank, and cord storage.
Parts and Components
The BELLA VersaBrew Coffee System contains the following components identified in the product diagram.
| Part | Description and Function |
| Measuring Scoop | Used to measure ground coffee. |
| Permanent Filter | Holds ground coffee for drip carafe brewing. |
| Filter Basket Lid | Covers the filter basket. |
| Filter Basket Holder | Supports the permanent coffee filter. |
| Carafe Lid | Covers the glass carafe. |
| Carafe Handle | Provides a grip for lifting and pouring. |
| Glass Carafe | Collects coffee during carafe brewing. |
| Flavor Infusion Tube | Component fitted to the carafe lid assembly. |
| Reusable Ground Coffee Filter | Used for single-serve brewing with ground coffee. |
| Pod Adapter | Holds compatible single-serve coffee capsules. |
| Pod Adapter Attachment | Removable puncture needle component. |
| Flip-Down Drip Tray | Supports a cup or travel mug during single-serve brewing. |
| Brewing Buttons | Select carafe, single-serve, and Over Ice functions. |
| Warming Plate | Keeps carafe coffee warm after brewing. |
| Handle | Used to open the upper brewing compartment. |
| Top Lid | Covers the brewing compartment. |
| Water Tank Lid | Covers the water filling opening. |
| Water Tank | Holds water for brewing. |
| Water Window | Shows the water level. |
| Cord Storage | Provides storage for the electrical cord. |
Glass Carafe
The glass carafe collects coffee prepared using the drip brewing system.
It includes a handle, lid, and flavor infusion tube assembly.
The carafe must be positioned on the warming plate before carafe brewing begins.
Important: Do not use a cracked carafe or one with a loose or weakened handle.
Never place the carafe directly on a stovetop or other cooking range.
Permanent Coffee Filter
The permanent filter holds ground coffee during carafe brewing.
It fits into the removable filter basket holder inside the upper brewing compartment.
The permanent filter can be removed and cleaned after use.
Filter Basket Holder
The filter basket holder is used for drip carafe brewing.
It is placed inside the upper brewing compartment with the permanent filter installed.
The filter basket lid and top lid must be closed before brewing.
Single-Serve Pod Adapter
The pod adapter holds compatible single-serve coffee capsules.
It is installed in the brewing compartment when preparing coffee using capsules.
The adapter uses puncture needles to open the capsule during brewing.
Reusable Single-Serve Ground Coffee Filter
The reusable ground coffee filter allows single servings to be prepared using ground coffee instead of a disposable capsule.
It is identified separately from the permanent carafe filter.
Flip-Down Drip Tray
The drip tray changes position depending on the selected brewing mode.
- Carafe mode: Flip the drip tray upward to create space for the glass carafe.
- Single-serve mode: Flip the drip tray downward to support a mug or travel cup.
The drip tray must be positioned correctly before starting a brewing cycle.
Water Tank and Water Window
The water tank holds up to 1.8 liters, or 60 ounces, of water.
A water window allows the water level to be checked.
Important: Never fill above the MAX marking, and do not add warm or hot water.
Brewing Control Panel and Indicator Lights
The VersaBrew Coffee System uses two main buttons and indicator lights to select brewing modes and beverage sizes.
Control Panel Guide
| Control or Indicator | Function |
| Carafe Button | Selects carafe brewing and cycles through carafe sizes. |
| Single / Over Ice Button | Selects single-serve brewing and activates Over Ice mode. |
| 6 CUP Indicator | Selects a 6-cup carafe. |
| 10 CUP Indicator | Selects a 10-cup carafe. |
| 12 CUP Indicator | Selects a 12-cup carafe. |
| 8 oz. Indicator | Selects an 8-ounce single serving. |
| 10 oz. Indicator | Selects a 10-ounce single serving. |
| 12 oz. Indicator | Selects a 12-ounce single serving. |
| CLEAN Indicator | Flashes when descaling is required. |
| Carafe Function Indicator | Illuminates during carafe brewing. |
| Single-Serve Function Indicator | Illuminates or pulses according to the selected single-serve mode. |
Carafe Button
The Carafe button starts the drip coffee selection process.
When pressed:
- The default or previously selected carafe size illuminates.
- The Carafe button flashes while the size can be changed.
- Additional presses cycle through 6, 10, and 12 cups.
- After approximately five seconds without further input, the selected size is confirmed.
- The coffee maker begins brewing automatically.
The default carafe selection is 12 cups.
Single / Over Ice Button
The Single / Over Ice button controls individual coffee brewing.
A normal press selects hot single-serve brewing.
Pressing and holding the button for three seconds activates Over Ice mode.
The available single-serve sizes are 8, 10, and 12 ounces.
The default size is 10 ounces.
Five-Second Automatic Start
The coffee maker does not require a separate Start button after a brewing size is selected.
Once the preferred setting is chosen, the corresponding button flashes.
After five seconds without another selection, the button becomes steadily illuminated and brewing begins automatically.
CLEAN Indicator
The CLEAN indicator flashes when the appliance requires descaling.
The cleaning function is activated by pressing and holding the Carafe and Single / Over Ice buttons together for five seconds.
Important Safety Instructions
The BELLA VersaBrew Coffee System heats water and produces hot coffee and steam. Incorrect use can cause burns, electrical shock, fire, or damage to the appliance.
Electrical Safety
- Connect the coffee maker only to a 120 V AC, 60 Hz electrical outlet.
- Never immerse the appliance, power cord, or plug in water or another liquid.
- Disconnect the appliance when it is not being used.
- Unplug the coffee maker before cleaning.
- Allow the appliance to cool before installing or removing parts.
- Do not operate the coffee maker with a damaged cord or plug.
- Do not use the appliance after it malfunctions, falls, or becomes damaged.
- Keep the power cord away from hot surfaces.
- Do not allow the cord to hang over the edge of a table or countertop.
- Do not place the coffee maker on or near a hot gas burner, electric burner, or heated oven.
- Do not use accessories that are not recommended by the manufacturer.
- Do not use the appliance outdoors.
Warning: Do not remove the bottom cover of the coffee maker. There are no user-serviceable components inside.
Hot Coffee and Steam Safety
The brewing system produces hot water and steam during operation.
- Do not touch hot surfaces.
- Use the designated handles and controls.
- Keep hands away from the coffee outlet during brewing.
- Do not open the upper brewing lid while coffee is being prepared.
- Do not lift the capsule compartment lid during single-serve brewing.
- Use caution when handling the glass carafe containing hot coffee.
- Allow the appliance to cool before cleaning.
- Remember that the warming plate and heating components may remain hot after use.
Warning: Opening the brewing compartment during operation may cause hot water to spray from the puncture needle.
Sharp Puncture Needle Safety
The single-serve capsule system contains two sharp puncturing needles.
One needle is located inside the capsule adapter.
The second needle is positioned on the underside of the upper adapter compartment.
Warning: These needles can cause cuts or puncture injuries.
- Never place fingers inside the pod adapter.
- Do not touch the needle inside the upper brewing compartment.
- Use caution when removing the needle attachment.
- Never attempt to open the capsule compartment during brewing.
- Handle the removable needle carefully during cleaning.
Safe Placement
Use the coffee maker only on a flat, stable countertop.
Position it away from the counter edge to prevent accidental tipping.
Do not place the appliance inside a cabinet while it is operating.
Do not place objects directly on top of the coffee maker during use.
Water Tank Safety
- Fill the water tank only with cool water during normal brewing.
- Never add warm or hot water.
- Do not exceed the 1.8 L / 60 oz. MAX marking.
- Close the water tank lid before brewing.
- Do not open the brewing chamber while a brewing cycle is running.
Glass Carafe Safety
The glass carafe requires careful handling.
- Do not use a cracked carafe.
- Do not use a carafe with a loose or weakened handle.
- Never place the carafe directly on a stovetop.
- Do not put a hot carafe on a wet or cold surface.
- Do not clean the carafe with abrasive cleaners or steel wool.
- Avoid striking the glass against hard objects.
- Use the handle when lifting or pouring.
Child Safety
Children must be supervised to prevent them from playing with the appliance.
The coffee maker is not intended for individuals with reduced physical, sensory, or mental capabilities or insufficient experience unless they receive appropriate supervision or instruction.
Close supervision is necessary when the appliance is used by or near children.
Polarized Plug
The coffee maker uses a polarized electrical plug with one blade wider than the other.
If the plug does not fit into the outlet:
- Remove the plug.
- Reverse its orientation.
- Try inserting it again.
- If it still does not fit, contact a qualified electrician.
Never modify the polarized plug.
Extension Cord Safety
The appliance is supplied with a short power cord to reduce the risk of tripping or entanglement.
If a longer detachable cord or extension cord is used:
- Its marked electrical rating must be at least equal to the appliance’s rating.
- If the appliance is grounded, the extension cord must be a grounding-type three-wire cord.
- The cord must be arranged so it does not hang over a table or countertop where children could pull it or someone could trip over it.
Countertop Protection
The manual recommends placing nonplastic coasters or place mats between the coffee maker and finished countertop or furniture surfaces.
This helps prevent darkening, stains, or permanent marks that may be caused by plasticizers.
Electrical Circuit Requirements
An overloaded electrical circuit may prevent the coffee maker from operating properly.
The appliance should be operated on a separate electrical circuit from other appliances.
Emergency Shutdown
If the coffee maker malfunctions:
- Stop the active operation using the relevant controls.
- Remove the plug from the electrical outlet.
- Discontinue use.
- Allow the appliance to cool.
- Contact authorized service personnel.
Do not attempt internal repairs.
Before First Use
The coffee maker and removable accessories must be cleaned before preparing the first beverage.
First-Time Preparation
- Carefully remove the coffee maker and accessories from their packaging.
- Remove all stickers and labels.
- Remove the filter basket holder, reusable ground coffee filter, and measuring scoop.
- Wash the removable components using clean water and mild detergent.
- Rinse thoroughly.
- Dry the cleaned components.
- Reinstall the filter basket holder and appropriate accessories.
- Place the coffee maker on a flat, stable surface.
Important: Never immerse the coffee maker body, electrical cord, or plug in water.
Filling the Water Tank
The VersaBrew Coffee System has a water tank with a maximum capacity of 1.8 liters, or 60 ounces.
How to Fill the Water Tank
- Open the water tank lid.
- Fill a pitcher with cool water.
- Pour the water into the coffee maker’s tank.
- Check the water level through the water window.
- Stop filling before the water exceeds the MAX marking.
- Close the water tank lid securely.
Maximum water capacity: 1.8 L / 60 oz.
Do not add warm or hot water.
Selecting Carafe or Single-Serve Mode
The coffee maker uses different attachments and drip tray positions depending on the selected brewing mode.
Brewing Mode Setup Guide
| Brewing Mode | Required Attachment | Drip Tray Position | Receiving Container |
| Carafe | Filter basket holder with permanent filter | Up | Glass carafe |
| Single Serve With Capsule | Pod adapter | Down | Mug or travel cup |
| Single Serve With Ground Coffee | Reusable single-serve ground coffee filter | Down | Mug or travel cup |
| Over Ice | Suitable single-serve brewing attachment | Down | Glass or travel mug containing ice |
How to Change From Carafe to Single-Serve Mode
- Make sure the coffee maker is not brewing.
- Allow the brewing compartment to cool before handling.
- Open the top lid.
- Remove the carafe filter basket holder.
- Install the appropriate single-serve adapter.
- Close the top lid securely.
- Flip the drip tray downward.
- Position a cup or travel mug beneath the coffee outlet.
How to Change From Single Serve to Carafe Mode
- Stop any active brewing cycle.
- Allow the brewing compartment to cool.
- Open the upper lid.
- Carefully remove the single-serve adapter.
- Install the filter basket holder and permanent coffee filter.
- Close the filter basket lid and top lid.
- Flip the drip tray upward.
- Position the glass carafe on the warming plate.
How to Brew Coffee in Carafe Mode
The carafe brewing system prepares drip coffee using ground coffee and the permanent filter.
The available selections are 6, 10, and 12 cups.
Step-by-Step Carafe Brewing Instructions
- Fill the water tank. Add cool water without exceeding the 1.8 L / 60 oz. MAX marking.
- Prepare the filter. Install the permanent filter inside the removable filter basket holder.
- Add ground coffee. Place the desired amount of ground coffee in the permanent filter.
- Install the holder. Insert the filter basket holder into the upper brewing compartment.
- Close the lids. Close the filter basket lid and upper lid securely.
- Position the drip tray. Flip it upward to create space for the glass carafe.
- Place the carafe. Set the glass carafe on the warming plate.
- Connect the power. Plug the coffee maker into a suitable electrical outlet.
- Select Carafe. Press the Carafe button.
- Choose the size. The default 12-cup indicator illuminates. Press Carafe again to cycle through 6, 10, and 12 cups.
- Confirm the selection. Wait approximately five seconds without pressing another button.
- Allow brewing to begin. The Carafe button becomes steadily illuminated and the coffee maker starts automatically.
- Wait for completion. The Carafe indicator and selected size indicator remain illuminated during brewing.
- Keep Warm. When brewing finishes, the appliance automatically enters Keep Warm for two hours.
- Finish. After the warming period, the indicator lights turn off.
Carafe Brewing Size Chart
| Selection | Brewing Size |
| 6 CUP | 6 cups |
| 10 CUP | 10 cups |
| 12 CUP | 12 cups |
The default selection is 12 cups.
How to Change Carafe Size
- Press Carafe.
- Wait for the default or previously selected size indicator to illuminate.
- While the Carafe button is flashing, press it again to change the selected size.
- Continue until the desired size illuminates.
- Wait five seconds to confirm.
Brewing begins automatically after the selection period.
Carafe Brewing Indicator Lights
During brewing, the selected carafe size light and Carafe function light remain illuminated.
Once brewing finishes, the selected size indicator turns off and the appliance enters Keep Warm.
Carafe Keep Warm Function
The VersaBrew Coffee System automatically keeps carafe coffee warm for two hours after brewing.
How Keep Warm Works
- The selected carafe brewing cycle finishes.
- The coffee maker enters Keep Warm automatically.
- The warming plate continues operating for two hours.
- When the warming period ends, the indicator lights turn off.
Keep Warm Duration
| Function | Duration |
| Automatic Carafe Keep Warm | 2 hours |
| End of Keep Warm | Indicator lights turn off |
The warming plate may retain heat after operation.
Avoid touching it until it has cooled.
How to Brew Single-Serve Coffee
The single-serve brewing system prepares individual coffee servings using compatible capsules or ground coffee.
The available serving sizes are 8, 10, and 12 ounces.
Single-Serve Preparation
- Fill the water tank with cool water.
- Do not exceed the MAX line.
- Open the top brewing compartment.
- Install the appropriate single-serve brewing adapter.
- Prepare the coffee capsule or reusable ground coffee filter.
- Close the top lid firmly.
- Flip the drip tray downward.
- Place a cup or travel mug beneath the coffee outlet.
- Connect the appliance to a 120 V AC, 60 Hz outlet.
Single-Serve Brewing Instructions
- Press the Single / Over Ice button.
- The default 10-ounce indicator illuminates.
- The Single / Over Ice button flashes.
- To change the serving size, press the button again while it is flashing.
- Select 8, 10, or 12 ounces.
- Wait five seconds without pressing another button.
- The selected cup size is confirmed.
- The coffee maker automatically begins brewing.
- During brewing, the single-serve function light and selected size indicator remain illuminated.
- When brewing finishes, the indicator lights turn off.
Single-Serve Cup Size Chart
| Selection | Brew Size |
| 8 oz. | 8 ounces |
| 10 oz. | 10 ounces |
| 12 oz. | 12 ounces |
The default single-serve selection is 10 ounces.
How to Change Single-Serve Size
- Press Single / Over Ice.
- Wait for the default or previously selected cup size to illuminate.
- While the button is flashing, press it again to cycle through the available sizes.
- Stop when the desired size illuminates.
- Wait five seconds for brewing to begin.
How to Brew Coffee Using Capsules
The VersaBrew Coffee System uses a removable pod adapter for compatible single-serve coffee capsules.
Capsule Brewing Instructions
- Fill the water tank with cool water.
- Make sure the appliance is not actively brewing.
- Open the top brewing compartment.
- Install the single-serve pod adapter.
- Make sure the adapter is correctly positioned.
- Place a compatible coffee capsule inside the adapter.
- Close the upper lid firmly.
- Flip the drip tray downward.
- Place a mug or travel cup beneath the coffee outlet.
- Press Single / Over Ice.
- Select the desired 8-, 10-, or 12-ounce serving.
- Wait five seconds for automatic brewing.
- Allow the brewing cycle to finish.
Warning: Never open the upper lid during brewing. Hot water may spray from the capsule puncture needle.
Compatible Coffee Capsule Safety
Only use capsules intended for this appliance.
Do not force a coffee capsule into the adapter if it does not fit properly.
Never place fingers inside the pod adapter or upper brewing compartment because both contain sharp puncture needles.
How to Use Ground Coffee for Single-Serve Brewing
The VersaBrew includes a reusable ground coffee filter for preparing individual servings without disposable coffee capsules.
Ground Coffee Brewing Instructions
- Make sure the coffee maker is not operating.
- Open the top brewing compartment.
- Prepare the reusable single-serve ground coffee filter with ground coffee.
- Position the filter in the appropriate single-serve adapter arrangement.
- Close the upper lid securely.
- Flip the drip tray downward.
- Place a cup or travel mug beneath the outlet.
- Press Single / Over Ice.
- Select 8, 10, or 12 ounces.
- Wait five seconds for brewing to begin.
- Allow the selected cycle to finish.
- Remove the reusable filter after the machine has cooled and clean it before reuse.
The reusable single-serve filter is separate from the permanent filter used for carafe brewing.
How to Make Iced Coffee With VersaBrew
The Over Ice function allows coffee to be brewed directly into a glass or travel mug containing ice.
Step-by-Step Over Ice Instructions
- Fill the water tank with cool water.
- Install the appropriate single-serve brewing attachment.
- Prepare the coffee capsule or ground coffee filter.
- Close the top brewing compartment.
- Flip the drip tray downward.
- Place ice inside a suitable glass or travel mug.
- Position the glass or mug beneath the coffee outlet.
- Press and hold Single / Over Ice for 3 seconds.
- The Over Ice function activates.
- The default 10-ounce indicator illuminates.
- Press Single / Over Ice again to cycle through 8, 10, and 12 ounces.
- Wait five seconds after choosing the desired size.
- The coffee maker automatically begins brewing over ice.
- During brewing, the Single indicator slowly pulses on and off.
- The selected cup size indicator remains illuminated.
- When brewing finishes, all indicator lights turn off and the appliance shuts off automatically.
Over Ice Size Settings
| Selection | Setting |
| 8 oz. | 8-ounce Over Ice selection |
| 10 oz. | Default Over Ice selection |
| 12 oz. | 12-ounce Over Ice selection |
Over Ice Indicator Light
During Over Ice brewing, the Single indicator slowly pulses.
The selected cup size indicator remains illuminated until the cycle finishes.
When brewing ends, the indicator lights turn off and the appliance shuts down automatically.
Installing the Removable Puncture Needle
The VersaBrew uses a removable puncture needle attachment in its single-serve brewing system.
The attachment has locked and unlocked positions.
Puncture Needle Installation
- Make sure the coffee maker is not brewing and has cooled.
- Open the upper brewing compartment.
- Locate the removable puncture needle attachment.
- Position the attachment in its mounting location.
- Secure it in the locked position shown by the attachment markings.
- Check that the component is properly seated before using the capsule brewing function.
The attachment can be removed by moving it to the unlocked position.
Warning: The needle is sharp. Never touch its pointed end.
Puncture Needle Locations
| Needle Location | Function |
| Inside the Pod Adapter | Punctures part of the coffee capsule during brewing. |
| Underside of the Upper Adapter Compartment | Punctures the upper section of the capsule. |
Keep fingers away from both needles when installing accessories or cleaning the brewing compartment.
Descaling Reminder and CLEAN Indicator
The VersaBrew Coffee System has a CLEAN reminder light.
When the CLEAN indicator flashes, descaling is required.
Descaling removes mineral deposits from the water system.
Descaling Solution
The manual specifies a mixture of white vinegar and cold water.
| Ingredient | Ratio |
| White Vinegar | 1 part |
| Cold Water | 3 parts |
How to Descale the BELLA VersaBrew Coffee Maker
- Prepare a solution using one part white vinegar and three parts cold water.
- Fill the glass carafe with the prepared solution.
- Pour the solution into the coffee maker’s water tank without exceeding the MAX marking.
- Make sure the coffee filter is installed in the removable filter basket holder.
- Remove the puncture needle attachment from the single-serve pod adapter.
- Plug the appliance into a 120 V AC electrical outlet.
- Press and hold the Carafe and Single / Over Ice buttons simultaneously for five seconds.
- The CLEAN indicator illuminates.
- The coffee maker enters cleaning mode.
- Allow the cleaning process to run.
- After descaling, rinse the system by brewing two or three full carafes of clean, cold water.
- Reinstall the puncture needle attachment.
- Allow the coffee maker to cool for at least 15 minutes before its next use.
How to Activate CLEAN Mode
To enter cleaning mode:
- Connect the appliance to electricity.
- Press and hold Carafe and Single / Over Ice together.
- Continue holding for five seconds.
- Release the buttons when the CLEAN indicator illuminates.
Rinsing After Descaling
The vinegar solution must be rinsed from the brewing system before coffee is prepared again.
The manual recommends brewing 2–3 full carafes of clean, cold water through the appliance.
Discard the rinse water.
Allow the coffee maker to cool for 15 minutes before returning it to normal use.
Cleaning the Puncture Needles
The single-serve brewing system includes a removable puncture needle attachment that can be cleaned separately.
Puncture Needle Cleaning Instructions
- Make sure the coffee maker is not operating.
- Unplug the appliance.
- Allow the brewing compartment to cool.
- Open the upper brewing compartment.
- Carefully remove the pod adapter attachment.
- Rinse the attachment under running water.
- Allow it to drain and dry.
- Reinstall the attachment before the next capsule brewing cycle.
The removable puncture needle attachment is dishwasher-safe.
Warning: Never touch the sharp puncture needle with fingers.
Cleaning and Maintenance Instructions
The VersaBrew Coffee System requires regular cleaning of its removable filters, carafe, pod adapter, and exterior housing.
Always disconnect the appliance and allow it to cool before cleaning.
How to Clean the Coffee Maker Exterior
- Unplug the coffee maker.
- Allow it to cool.
- Use a soft, damp cloth.
- Wipe the exterior housing.
- Dry the cleaned surface.
Do not use abrasive cleaners or scouring pads that could scratch the exterior finish.
Important: Never immerse the coffee maker body in water or another liquid.
Cleaning the Glass Carafe
- Allow the glass carafe to cool.
- Remove the carafe from the warming plate.
- Rinse it with water or clean it using an appropriate washing method.
- Clean the removable lid and associated detachable components.
- Allow the carafe to dry.
Do not use steel wool or other abrasive materials on the glass carafe.
Never place a hot carafe on a wet or cold surface.
Cleaning the Permanent Filter
- Stop the coffee maker.
- Unplug it and allow the brewing compartment to cool.
- Remove the permanent filter.
- Discard the used coffee grounds.
- Rinse the filter under running water.
- Clean it thoroughly.
- Dry or drain the filter before reinstalling.
Cleaning the Single-Serve Ground Coffee Filter
The reusable single-serve filter can be removed after brewing and cleaned.
- Allow the brewing compartment to cool.
- Open the upper lid.
- Remove the reusable filter.
- Discard the used coffee grounds.
- Rinse the filter under running water.
- Allow it to dry before reuse.
Dishwasher-Safe Components
The manual identifies several removable accessories as dishwasher-safe.
| Component | Cleaning Method |
| Carafe Coffee Filter | Rinse under water or use dishwasher |
| Reusable Single-Serve Coffee Filter | Rinse under water or use dishwasher |
| Removable Puncture Needle Attachment | Rinse under running water or use dishwasher |
| Other Removable Brewing Accessories | Rinse under water or use dishwasher |
| Coffee Maker Housing | Wipe with a soft, damp cloth |
Do not place the electrical coffee maker body in a dishwasher.
Routine Maintenance
| Maintenance Task | Instructions |
| Permanent Coffee Filter | Remove used grounds and rinse after use. |
| Single-Serve Filter | Discard used grounds and clean after brewing. |
| Pod Adapter | Clean after use as needed. |
| Puncture Needle Attachment | Remove and rinse carefully when cleaning is required. |
| Glass Carafe | Clean after use and handle carefully. |
| Exterior Housing | Wipe with a soft, damp cloth. |
| Water System | Descale when the CLEAN indicator flashes. |
| Power Cord | Do not use if damaged. |
| Internal Servicing | Refer repairs to authorized service personnel. |
The appliance contains no user-serviceable internal components.
Do not remove the bottom cover or attempt internal repairs.
Troubleshooting Guide
The following table covers operating conditions, indicator behavior, and corrective actions supported by the VersaBrew instruction manual.
| Problem or Situation | Possible Cause or Explanation | Recommended Action |
| Brewing does not start immediately after selecting a size | The machine has a five-second selection period. | Wait five seconds after making the selection. |
| Carafe brewing is not set up correctly | The filter basket holder or glass carafe may not be positioned for carafe mode. | Install the filter basket holder, close the lids, flip the drip tray up, and position the carafe. |
| Single-serve brewing setup is incomplete | The pod adapter, drip tray, or upper lid may not be correctly positioned. | Check the adapter, flip the drip tray down, and close the lid securely. |
| Carafe indicator lights turn off after warming | The automatic two-hour Keep Warm period has ended. | This is normal operation. |
| Single-serve indicator lights turn off after brewing | The brewing cycle has finished. | This is normal operation. |
| Single indicator pulses during Over Ice brewing | Over Ice mode is operating. | Allow brewing to finish. |
| CLEAN indicator flashes | Descaling is required. | Run the vinegar-and-water cleaning procedure. |
| Capsule puncture needle needs cleaning | Residue may be present on the removable attachment. | Remove the attachment carefully and rinse it under running water. |
| Coffee maker does not operate properly on a shared electrical circuit | The circuit may be overloaded. | Operate the appliance on a separate circuit. |
| Coffee maker malfunctions during use | An appliance malfunction has occurred. | Stop operation, unplug the appliance, and seek authorized service. |
VersaBrew Coffee Maker Not Brewing Immediately
The VersaBrew uses an automatic five-second brewing delay.
After selecting a carafe or single-serve size, the corresponding button flashes.
When the five-second selection period expires, the button becomes steadily illuminated and brewing begins automatically.
Carafe Mode Not Brewing Correctly
Check the carafe brewing setup:
- Make sure the water tank contains cool water.
- Confirm that the permanent filter and filter basket holder are correctly installed.
- Close the filter basket lid.
- Close the upper lid.
- Flip the drip tray upward.
- Position the glass carafe on the warming plate.
- Select the required carafe size.
If the appliance malfunctions, discontinue use and contact authorized service personnel.
Single-Serve Mode Not Brewing
Check the single-serve brewing arrangement.
- Fill the water tank without exceeding MAX.
- Install the appropriate single-serve adapter.
- Check that the brewing compartment lid is securely closed.
- Flip the drip tray downward.
- Place a mug beneath the outlet.
- Select the preferred brewing size.
- Wait five seconds for automatic brewing.
Coffee Maker CLEAN Light Flashing
A flashing CLEAN indicator means descaling is required.
Use a mixture of one part white vinegar and three parts cold water.
Enter cleaning mode by pressing and holding Carafe and Single / Over Ice together for five seconds.
Rinse the coffee maker by brewing two or three full carafes of fresh water afterward.
Carafe Coffee Stops Warming After Two Hours
The carafe system automatically enters Keep Warm after brewing.
The warming function operates for two hours.
After the warming period finishes, all indicator lights turn off.
This is normal operation.
Single-Serve Lights Turn Off After Brewing
The single-serve brewing system automatically stops when the selected brewing cycle finishes.
The indicator lights turn off at completion.
Single Indicator Slowly Pulses During Iced Coffee Brewing
The Single indicator slowly pulses during Over Ice operation.
The selected cup size indicator remains illuminated until brewing finishes.
This is normal.
When to Contact Customer Service
If the appliance malfunctions or becomes damaged:
- Stop the active brewing function.
- Unplug the coffee maker.
- Allow it to cool.
- Do not attempt to disassemble the appliance.
- Contact Customer Service.
Repairs must be performed by the manufacturer, its service agent, or another appropriately qualified person.
Storage Instructions
The coffee maker should be disconnected and allowed to cool before storage.
How to Prepare the Coffee Maker for Storage
- Finish the brewing cycle.
- Disconnect the appliance from the electrical outlet.
- Allow the coffee maker and warming plate to cool.
- Clean the removable filters and brewing accessories.
- Clean and dry the glass carafe.
- Wipe the exterior housing.
- Store the removable accessories with the coffee maker.
- Use the integrated cord storage area to organize the power cord.
Do not store the appliance while it is operating or hot.
Warranty Information
The BELLA VersaBrew 2-in-1 Coffee System includes a limited two-year warranty provided by SENSIO Inc.
The warranty begins on the date of purchase and applies only to the original retail purchaser.
Limited Warranty Coverage
| Warranty Detail | Coverage |
| Warranty Provider | SENSIO Inc. |
| Mechanical Defects | 2 years from the original purchase date |
| Non-Mechanical Parts | 90 days |
| Warranty Start Date | Original retail purchase date |
| Eligible Purchaser | Original retail purchaser |
| Transferability | Non-transferable |
| Proof of Purchase | Original sales receipt required |
| Available Remedies | Repair, replacement, or refund at SENSIO Inc.’s discretion |
The two-year limited warranty covers mechanical defects in materials and workmanship.
Non-mechanical parts are covered for 90 days.
During the applicable warranty period, SENSIO Inc. may repair or replace a defective appliance or issue a refund.
Warranty Exclusions
The warranty does not cover normal wear or damage resulting from:
- Negligent product use.
- Incorrect electrical voltage or current.
- Improper routine maintenance.
- Operation contrary to the instructions.
- Unauthorized disassembly.
- Repairs or modifications performed by anyone other than qualified SENSIO Inc. personnel.
- Natural disasters, including fires, floods, hurricanes, and tornadoes.
The warranty also includes limitations concerning incidental and consequential damages and implied warranties.
Some exclusions or limitations may not apply in every state, province, or jurisdiction. Specific legal rights may vary.
How to Request Warranty Service
- Contact Customer Service at 1-866-832-4843.
- Describe the problem with the coffee maker.
- Follow the troubleshooting assistance provided by the customer service representative.
- If the problem cannot be resolved by telephone, obtain a case number and return instructions.
- Attach a label containing the purchaser’s name, address, daytime telephone number, case number, and description of the problem.
- Include a copy of the original sales receipt.
- Carefully package the appliance with the required documentation.
- Return the product according to the supplied instructions, with shipping and insurance prepaid.
SENSIO Inc. does not accept responsibility or liability for the product while it is in transit to its customer service center.
Customer Support and Contact Information
BELLA provides customer support for product questions, operating problems, and warranty assistance.
| Contact Type | Details |
| Brand | BELLA |
| Company | SENSIO Inc. dba Made by Gather |
| Customer Service Phone | 1-866-832-4843 |
| Customer Service Email | help@bellahousewares.com |
| Website | https://bellakitchenware.com |
| Company Location | New York, NY 10016, USA |
| Country of Manufacture | China |
Product Registration
The instruction manual provides a product registration option through the BELLA website.
Registration can be accessed at https://bellakitchenware.com.
Retain the original sales receipt because proof of purchase is required for warranty validation.
Frequently Asked Questions
How do you use the BELLA VersaBrew 2-in-1 Coffee System?
Fill the water tank with cool water, install the appropriate brewing attachment, and position the glass carafe or single-serve mug. Press Carafe for drip coffee or Single / Over Ice for an individual serving. Select the desired brewing size and wait five seconds. The coffee maker begins brewing automatically.
What are the brewing sizes on the BELLA VersaBrew Coffee Maker?
Carafe brewing offers 6, 10, and 12 cups, with 12 cups as the default selection. Single-serve brewing offers 8, 10, and 12 ounces, with 10 ounces as the default. Over Ice mode also provides 8-, 10-, and 12-ounce selections.
How do you make iced coffee with the BELLA VersaBrew?
Prepare the single-serve brewing attachment, add ice to a glass or travel mug, and place it beneath the coffee outlet. Press and hold Single / Over Ice for three seconds. Select 8, 10, or 12 ounces, then wait five seconds for brewing to begin automatically. The Single indicator pulses during Over Ice brewing.
Can the BELLA VersaBrew use coffee capsules and ground coffee?
Yes. The coffee maker includes a pod adapter for compatible coffee capsules, a reusable ground coffee filter for single-serve brewing, and a permanent filter for carafe brewing. The correct attachment must be installed for the selected brewing method.
How long does the BELLA VersaBrew keep coffee warm?
After carafe brewing finishes, the coffee maker automatically enters Keep Warm mode for two hours. When the warming period ends, the indicator lights turn off. The single-serve brewing function stops automatically after each selected cycle.
How do you clean the BELLA VersaBrew Coffee Maker?
Unplug the appliance and allow it to cool. Wipe the exterior with a soft, damp cloth. Remove used coffee grounds and rinse the reusable filters. The removable puncture needle attachment can be rinsed under running water or cleaned in a dishwasher. Never immerse the coffee maker body in water.
What does the CLEAN light mean on the BELLA VersaBrew?
A flashing CLEAN indicator means the coffee maker needs descaling. Prepare a solution of one part white vinegar and three parts cold water. Press and hold Carafe and Single / Over Ice together for five seconds to activate cleaning mode. After descaling, brew two or three full carafes of clean water to rinse the system.
What is the warranty on the BELLA VersaBrew Coffee System?
The appliance includes a limited two-year warranty covering mechanical defects in materials and workmanship and 90 days of coverage for non-mechanical parts. Coverage begins on the original retail purchase date and requires proof of purchase. For assistance, contact Customer Service at 1-866-832-4843 or help@bellahousewares.com.