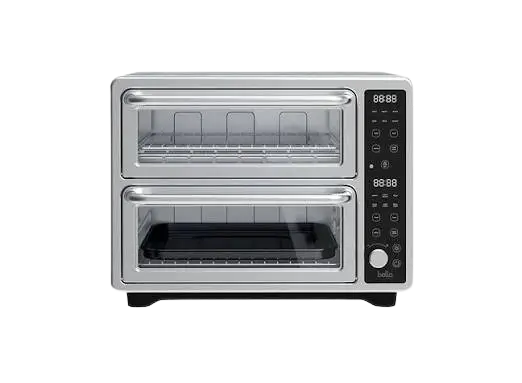
Bella Pro DoubleUp Oven with Probe Thermometer
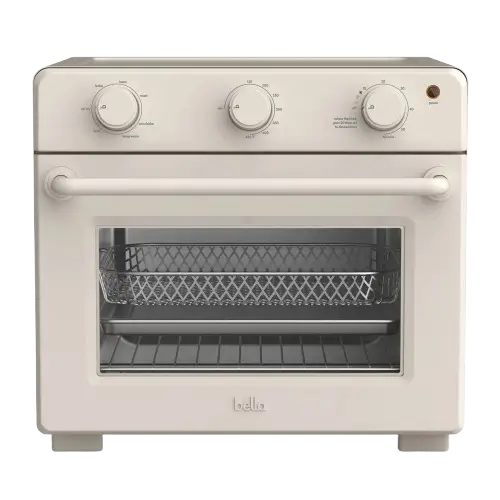
The Bella Pro DoubleUp Oven is a countertop toaster oven with two separate cooking chambers, each with its own glass door, display, and set of controls. A single knob adjusts time and temperature for both chambers, and a SYNC button can make both chambers finish at the same time.
The upper chamber offers six presets: Toast, Bagel, Roast, Bake, Broil, and Reheat. The lower chamber offers six presets with convection and air-fry capability: Air Fry, Conv. Roast, Pizza, Conv. Bake, Keep Warm, and Dehydrate. A temperature probe can be used with Roast, Bake, Broil, Air Fry, Conv. Bake, and Conv. Roast, and one chamber at a time. The oven is for household use only and runs on a 120V AC outlet.
Included accessories are a bake/broil pan, wire rack, air fryer/dehydrator basket, and crumb tray, plus the probe.
Important Safety Instructions
Read all instructions before using the oven. Everyone who uses or cleans it must read and understand the manual first.
CAUTION, HOT SURFACES: The oven generates heat and escaping steam during use. Take precautions to prevent burns, fires, other injury, and property damage.
General Safeguards
- Do not touch hot surfaces. Use handles or knobs. Oven mitts or gloves and long-handled utensils are recommended.
- Do not immerse the cord, plug, or appliance in water or other liquid. If the appliance falls or accidentally becomes immersed, unplug it from the wall outlet immediately. Do not reach into the water.
- The appliance is not intended for use by persons (including children) with reduced physical, sensory, or mental capabilities, or a lack of experience and knowledge, unless a person responsible for their safety has supervised or instructed them. Close supervision is necessary when the appliance is used by or near children.
- Unplug the oven when not in use and before cleaning. Let it cool before putting on or taking off parts.
- Do not operate the oven with a damaged cord or plug, or after it malfunctions or is damaged in any way. Take it to a qualified technician for examination, repair, or electrical or mechanical adjustment.
- If the oven begins to malfunction during use, remove the plug from the wall outlet. Do not use or attempt to repair a malfunctioning appliance.
- Use only accessory attachments recommended by the manufacturer. Others may cause injuries.
- Do not use the oven outdoors, in an unstable position, on or near a hot gas or electric burner, or in a heated oven.
- Do not let the cord hang over the edge of a table or counter or touch hot surfaces.
- Use extreme caution when moving an appliance that contains hot oil or other liquids.
- Do not use the oven for anything other than its intended use.
- Never leave the oven unattended while in use.
- To reduce the risk of injury to persons or property, unplug the oven before inserting food, and keep it unplugged from the wall outlet when not in use.
Fire and Overheating Hazards
- Do not insert oversize foods or metal utensils. They may create a fire or risk of electric shock.
- Do not cover the oven, or let it touch flammable material such as curtains, draperies, walls, wall coverings, clothing, or dishtowels while it operates. Do not store any item on top of it during operation.
- Provide adequate air space above and on all sides for air circulation.
- Do not place paper, cardboard, plastic, or similar materials in the oven.
- Do not cover the crumb tray or any part of the oven with metal foil. This will cause overheating.
- Do not cover the oven with anything that prevents steam from escaping. This may cause warping, discoloration, malfunction, or even fire.
- Use extreme caution with containers made of anything other than metal or glass.
- Do not store materials in the oven when it is not in use, other than the manufacturer’s recommended accessories.
- Use extreme caution when removing the crumb tray or disposing of hot grease.
- Do not clean with metal scouring pads. Pieces can break off and touch electrical parts, creating a risk of electric shock.
Power, Plug, and Cord
- Plug the cord only into a 120V AC electrical wall outlet.
- The plug is polarized (one blade is wider than the other) and fits a polarized outlet only one way. If it does not fit fully, reverse it. If it still does not fit, contact a qualified electrician. Do not modify the plug in any way.
- A short power-supply cord reduces the risk of entanglement or tripping. A longer detachable cord or an extension cord may be used with care. Its marked electrical rating should be at least as great as the appliance’s. If the appliance is the grounded type, use a grounding-type 3-wire cord. Arrange the cord so that it does not drape over the countertop or tabletop where children could pull it or anyone could trip over it.
- If the circuit is overloaded with other appliances, the oven may not operate properly. Operate it on a separate electrical circuit from other appliances.
- To disconnect, press the POWER button, then remove the plug from the wall outlet.
CAUTION (plasticizers): Place non-plastic coasters or place mats between the oven and the countertop or tabletop finish. Otherwise plasticizers may migrate to the finish, and the finish may darken, develop permanent blemishes, or stain.
Save these instructions.
Parts and Components
| No. | Part |
| 1 | Upper cooking chamber |
| 2 | Lower cooking chamber |
| 3 | Glass door |
| 4 | Door handle |
| 5 | Backlighted digital display |
| 6 | Control panel |
| 7 | Convection/air fry fan (not shown in the illustration) |
| 8 | Polarized plug (not shown) |
| 9 | Upper heating element (not shown) |
| 10 | Lower heating element (not shown) |
| 11 | Probe insert |
| 12 | Bake/broil pan (accessory) |
| 13 | Wire rack (accessory) |
| 14 | Air fryer/dehydrator basket (accessory) |
| 15 | Crumb tray (accessory) |
Your product may vary slightly from the illustration.
Control Panel Functions
Each chamber has its own display, MENU, TEMP, TIME, and START/STOP buttons. The POWER, LIGHT, and SYNC buttons and the knob are shared.
| Control | Function | Notes |
| Digital display | Shows time, temperature, and status | When the unit is plugged in, a beep sounds and the control panel appears for 1 second. |
| POWER | Press once to enter standby mode; press again to shut down | Pressing it at any time turns the oven off. |
| Upper MENU | Cycles the upper chamber functions: TOAST > BAGEL > ROAST > BAKE > BROIL > REHEAT | A beep sounds, the active function flashes, and the default TIME/TEMP appears. |
| Lower MENU | Cycles the lower chamber functions: AIR FRY > CONV. ROAST > PIZZA > CONV. BAKE > KEEP WARM > DEHYDRATE | A beep sounds, the active function flashes, and the default TIME/TEMP appears. |
| START/STOP | Starts cooking once a function is selected; press again to stop | Each chamber has its own button. |
| TEMP | Press, then turn the knob to change the displayed temperature | |
| TIME | Press, then turn the knob to change the displayed time | |
| LIGHT | Turns on the oven light in both chambers | The light turns off after 30 seconds. |
| SYNC | Makes both chambers finish cooking at the same time | Set both chambers first, then press SYNC. |
Function Chart
| Chamber | Function | Default Temp | Temp Range | Default Time | Time Range | Preheat |
| Upper | Toast | 450°F | / | Darkness 4 | Darkness 1–7 | |
| Upper | Bagel | 450°F | / | Darkness 4 | Darkness 1–7 | |
| Upper | Roast | 380°F | 350–450°F | 30 mins | 1–60 mins | Yes |
| Upper | Bake | 350°F | 170–450°F | 25 mins | 1–99 mins | Yes |
| Upper | Broil | 450°F | / | 10 mins | 1–30 mins | Yes |
| Upper | Reheat | 250°F | 170–450°F | 15 mins | 1–60 mins | |
| Lower | Air Fry | 400°F | 170–450°F | 25 mins | 1–60 mins | Yes |
| Lower | Conv. Roast | 400°F | 350–450°F | 35 mins | 1–60 mins | Yes |
| Lower | Pizza | 350°F | 350–450°F | 20 mins | 1–60 mins | Yes |
| Lower | Conv. Bake | 350°F | 170–450°F | 30 mins | 1–99 mins | Yes |
| Lower | Keep Warm | 170°F | 150–200°F | 60 mins | 1–99 mins | |
| Lower | Dehydrate | 120°F | 80–180°F | 8 hrs | 1–72 hrs |
How Preheating Works
When you select Roast, Bake, Broil, Air Fry, Conv. Roast, Pizza, or Conv. Bake, the oven needs a few minutes to reach the optimum temperature. The text PRE HEAT appears on the screen while it heats. The timer counts down only after preheating is complete. When the desired temperature is reached, 3 beeps sound, the text disappears, and the oven continues cooking in the selected function.
Cooking in Both Chambers
When both chambers are used at the same time, the cooking time automatically increases by 1.5x.
Food Weight and Size Limits
WARNING:
- Food cooked on the shelf must be no wider than 9 inches and must fit comfortably in the oven without touching either the lower or the upper heating elements.
- The oven can cook up to a 3 lb. chicken or turkey and up to a 3 lb. roast.
- Periodically check cooking progress with a meat thermometer.
Before Using the Oven for the First Time
CAUTION: Do not immerse the oven or let the cord contact water or other liquids.
Unpacking and Placement
- Read all operating instructions carefully.
- Unpack the oven and accessories, and remove all packaging materials and any labels from the outer surfaces.
- Place the oven on a level surface such as a countertop or table. Keep the sides, back, and top at least 4 inches away from any walls, cabinets, or objects.
- Do not store anything on top of the oven during operation. It can scratch, mar, or discolor the surface.
- Wash the wire rack, bake/broil pan, air fry basket, and crumb tray in warm, soapy water. Rinse and dry them thoroughly before placing them in the oven. Do not use abrasive cleaners.
- Make sure the crumb tray is in place on the bottom of the upper cooking chamber.
Running the Empty Burn-Off Cycle
Operate the unit empty for at least 30 minutes once before cooking, to clear it of oils used in manufacturing. Run each chamber as follows.
- Plug the cord into a 120V AC wall outlet. A long beep sounds and the control panel flashes once. Press the POWER button.
- If no buttons are pressed within 5 minutes, the display turns off as the oven rests in standby mode. Press any button to light the display again.
- Press the upper MENU button until BAKE appears. Increase the temperature to 400°F. The default 25:00 minutes is displayed.
- Press the upper START/STOP button. The time counts down, burning off residue or oils on the oven and heating elements.
- At the end of the 25:00 minutes, END is displayed, 5 beeps sound, and the oven returns to standby mode.
- Press the lower MENU button until CONV. BAKE appears. Increase the temperature to 400°F. The default 30:00 minutes is displayed.
- Press the lower START/STOP button. The time counts down, burning off residue or oils on the oven and heating elements.
- At the end of the 30:00 minutes, END is displayed, 5 beeps sound, and the oven returns to standby mode.
CAUTION: Appliance surfaces are hot during and after use. Always wear protective, insulated oven mitts when touching a hot oven.
The oven does not operate until you press START/STOP. Press POWER at any time to turn the oven off.
Using the Upper Cooking Chamber
The upper chamber has six presets: Toast, Bagel, Roast, Bake, Broil, and Reheat.
- Plug the cord into the wall outlet. A beep sounds and the control panel appears for 1 second.
- Press the POWER button once to enter standby mode.
- Press MENU on the upper control panel to cycle through the presets (TOAST > BAGEL > ROAST > BAKE > BROIL > REHEAT).
- Once a function is selected, the default temperature and time alternate on the upper LED screen.
- To change the temperature, press the upper TEMP button, then turn the knob.
- To change the time, press the upper TIME button, then turn the knob.
- When the desired time and temperature appear, press the START/STOP button for that chamber.
- Watch the remaining time count down on the screen. When it reaches 00:00, END appears on the upper control panel, 5 beeps sound, and the oven returns to standby mode.
When you select Broil, the oven preheats first (PRE HEAT appears, and the timer starts only after preheating finishes; 3 beeps sound when the temperature is reached).
Press START/STOP at any time to stop cooking. Press it again to resume.
Quantity, density, and weight of the food change the total cooking time, and smaller batches cook faster and with better results. Always check the food halfway through the cooking time to decide the final time and temperature.
Using the Lower Cooking Chamber
The lower chamber has six presets: Air Fry, Conv. Roast, Pizza, Conv. Bake, Keep Warm, and Dehydrate.
- Plug the cord into the wall outlet. A beep sounds and the control panel appears for 1 second.
- Press the POWER button once to enter standby mode.
- Press MENU on the lower control panel to cycle through the presets (AIR FRY > CONV. ROAST > PIZZA > CONV. BAKE > KEEP WARM > DEHYDRATE).
- Once a function is selected, the default temperature and time alternate on the lower LED screen.
- To change the temperature, press the lower TEMP button, then turn the knob.
- To change the time, press the lower TIME button, then turn the knob.
- When the desired time and temperature appear, press the START/STOP button for that chamber.
- Watch the remaining time count down on the screen. When it reaches 00:00, END appears on the lower control panel, 5 beeps sound, and the oven returns to standby mode.
Air Fry and Pizza preheat first (PRE HEAT appears, and the timer starts only after preheating finishes; 3 beeps sound when the temperature is reached). See the Function Chart for every preset that preheats.
Press START/STOP at any time to stop cooking. Press it again to resume. As in the upper chamber, check food halfway through the cooking time and adjust.
Cooking Both Chambers to Finish Together with SYNC
- Set the function, temperature, and time for the upper chamber.
- Set the function, temperature, and time for the lower chamber.
- Press the SYNC button.
The chamber with the longer time starts cooking first, and the other chamber follows so that both finish at the same time.
Using the Temperature Probe
The probe measures the internal temperature of food and ends the cooking cycle when the target is reached. It is available only with the Roast, Bake, Broil, Air Fry, Conv. Bake, and Conv. Roast presets.
- Select the cooking preset you want.
- Insert the temperature probe into the control panel. By default, the probe is assigned to the lower cooking chamber.
- Push the knob to select the chamber where the probe will be used. The probe can be programmed to only one chamber at a time. Once the probe is inserted, the SYNC function is disabled.
- Turn the knob to set the desired internal temperature. The probe temperature range is 120–200°F.
- Cook. The temperature is shown with the letter P before the three digits, which tells you the probe is in use. During cooking, the LED screen alternates every 5 seconds between the preset internal temperature and the desired internal temperature.
- When the desired temperature is reached, END appears on the lower control panel, 5 beeps sound, and the oven returns to standby mode.
IMPORTANT: The probe stops working once it reaches the desired internal temperature.
IMPORTANT: Because the timer is not used with the probe, the unit stops automatically after 60 minutes and returns to standby mode to prevent overheating.
USDA Internal Temperature Guidelines
Always gauge internal temperature with a meat thermometer. Insert it into the thickest portion of a roast, away from bones and fatty areas. The U.S. Department of Agriculture recommends these internal temperatures to be sure harmful bacteria are killed.
| Food | Internal Temperature |
| Ground turkey and chicken | 165°F |
| Ground beef, veal, lamb, and pork | 160°F |
| Chicken and turkey, white meat | 170°F |
| Chicken and turkey, dark meat | 180°F |
| Goose and duck | 180°F |
| Fresh beef, veal, lamb, and similar | At least 145°F |
| Fresh pork | At least 160°F |
| Re-heated meat and poultry products | 165°F |
Cleaning and Care
The oven contains no user-serviceable parts. Do not try to repair it yourself. Any servicing that requires disassembly other than cleaning must be done by a qualified appliance repair technician.
- Let the oven and all accessories cool completely before cleaning.
- Wipe the outside with a damp cloth and dry it thoroughly. For stubborn stains, a non-abrasive liquid cleaner may be used. Rinse and dry thoroughly. Do not use metal scouring pads or abrasive cleaners that scratch the surface.
- After each use, clean the interior with a mild or non-abrasive cleaner and a plastic scouring pad to avoid build-up. Do not rub too hard, because the surface can scratch.
- To remove baked-on food, pour a small amount of cooking oil onto it and let it stand for 5 to 10 minutes. Remove the softened food with a soft cloth. Do not use steel wool, scouring pads, or abrasive cleaners.
- Rinse and dry the interior thoroughly before closing the glass door. Clean the glass door with a cloth or sponge dampened with warm, sudsy water, then dry it thoroughly.
- Wash the bake/broil pan, wire rack, air fry mesh basket, and crumb tray in soapy water and dry them thoroughly. These accessories may be washed in the dishwasher.
- If crumbs and spills build up on the crumb tray, wipe it with a damp cloth. Always dry the crumb tray thoroughly before replacing it.
- Do not use abrasive cleaners or metal scouring pads on the bake/broil pan, wire rack, or crumb tray. For stubborn stains, use a nylon or polyester mesh pad and a mild, non-abrasive cleaner, then rinse and dry thoroughly.
CAUTION: Do not use spray-on or other oven cleaners. They may cause cosmetic and/or electrical damage to the oven.
Storing the Oven
- Unplug the oven, let it cool, and clean it before storing.
- Store the oven in its box in a clean, dry place.
- Never store the appliance while it is hot or still plugged in.
- Never wrap the cord tightly around the appliance, and do not stress the cord where it enters the unit. It could fray and break.
Warranty and Customer Service
SENSIO Inc. provides a Limited Two-Year Warranty on this product. For two years from the date of purchase, the product is warranted to be free from mechanical defects in material and workmanship. Non-mechanical parts are covered for 90 days. At its sole discretion, SENSIO Inc. will repair or replace a defective product, or issue a refund, during the warranty period.
- The warranty is valid only for the original retail purchaser from the date of initial retail purchase, and it is not transferable.
- Keep the original sales receipt. Proof of purchase is required for warranty validation.
- Retail stores selling the product cannot alter, modify, or revise the warranty terms.
- The warranty does not cover normal wear of parts, or damage from negligent use, improper voltage or current, improper routine maintenance, use contrary to the operating instructions, or disassembly, repair, or alteration by anyone other than qualified SENSIO Inc. personnel. Acts of God such as fire, floods, hurricanes, or tornadoes are also excluded.
- SENSIO Inc. is not liable for incidental or consequential damages from breach of any express or implied warranty. Some states, provinces, or jurisdictions do not allow these limitations, so they may not apply to you, and warranty rights may vary by state, province, and/or jurisdiction.
How to Obtain Warranty Service
- Contact Customer Service at the toll-free number 1-866-832-4843. A representative will try to resolve the issue by phone.
- If the issue cannot be resolved, you will receive a case number and be asked to return the product to SENSIO Inc.
- Attach a tag to the product with your name, address, daytime contact telephone number, case number, and a description of the problem.
- Include a copy of the original sales receipt.
- Package the tagged product and receipt carefully, and send it with shipping and insurance prepaid to SENSIO Inc.’s address. SENSIO Inc. bears no responsibility or liability for the product while it is in transit.
For customer service questions or comments, call 1-866-832-4843 or email help@bellahousewares.com. To register the product, scan the QR code on the manual cover or visit bellakitchenware.com.
Frequently Asked Questions
Do I need to run the oven empty before cooking for the first time?
Yes. Run each chamber empty once, for at least 30 minutes in total, to burn off oils used in manufacturing. In the upper chamber, select BAKE, raise the temperature to 400°F, and run the default 25:00 minutes. In the lower chamber, select CONV. BAKE, raise the temperature to 400°F, and run the default 30:00 minutes. Each cycle ends with END on the display and 5 beeps. Before you start, wash the rack, pan, basket, and crumb tray, and confirm the crumb tray is in place.
Why does the timer not start counting down right after I press START/STOP?
The preset is probably preheating. Roast, Bake, Broil, Air Fry, Conv. Roast, Pizza, and Conv. Bake preheat first, and the screen shows PRE HEAT. The countdown begins only after preheating finishes. When the oven reaches temperature, 3 beeps sound and PRE HEAT disappears. Toast, Bagel, Reheat, Keep Warm, and Dehydrate do not preheat.
How do I make both chambers finish at the same time?
Set up both chambers with their own function, temperature, and time, then press SYNC. The chamber with the longer time starts first, and the other starts later so that both finish together. Note that using both chambers at once automatically increases cooking time by 1.5x. SYNC is disabled while the temperature probe is inserted.
How do I use the temperature probe?
Select Roast, Bake, Broil, Air Fry, Conv. Bake, or Conv. Roast, then plug the probe into the control panel. It defaults to the lower chamber, and you can push the knob to choose the other chamber. Turn the knob to set a target internal temperature between 120°F and 200°F. When the target is reached, the oven shows END, beeps 5 times, and returns to standby. If the target is never reached, the oven stops on its own after 60 minutes, because the timer is not used in probe mode.
How much food can the oven hold?
Food on the shelf must be no wider than 9 inches and must fit without touching the upper or lower heating elements. The oven can cook a chicken or turkey up to 3 lb. and a roast up to 3 lb. Use a meat thermometer to check progress periodically.
Can I put the accessories in the dishwasher?
Yes. The bake/broil pan, wire rack, air fry mesh basket, and crumb tray may be washed in the dishwasher, or washed by hand in soapy water. Dry each one thoroughly, and dry the crumb tray completely before putting it back. Avoid metal scouring pads and abrasive cleaners on these parts. For stubborn stains, use a nylon or polyester mesh pad with a mild, non-abrasive cleaner.
How do I stop or turn off the oven?
To pause cooking in one chamber, press that chamber’s START/STOP button. Pressing it again resumes cooking. To turn the whole oven off, press POWER. To disconnect it completely, press POWER and then pull the plug from the wall outlet. If no buttons are pressed for 5 minutes, the display turns off and the oven rests in standby mode. Press any button to wake it.
What should I do if the oven malfunctions or I need warranty service?
Unplug the oven from the wall outlet right away and do not try to repair it. Then call Customer Service at 1-866-832-4843. A representative will first try to solve the problem by phone, and if that fails, will give you a case number for returning the product. Have your original sales receipt ready, because proof of purchase is required.