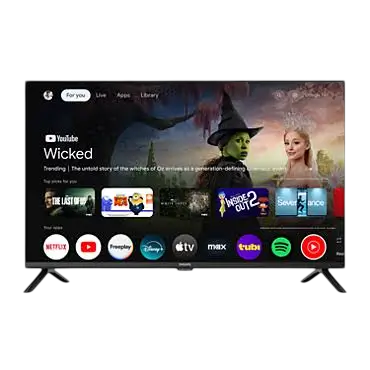
Philips Google TV 32PFL6446/F7
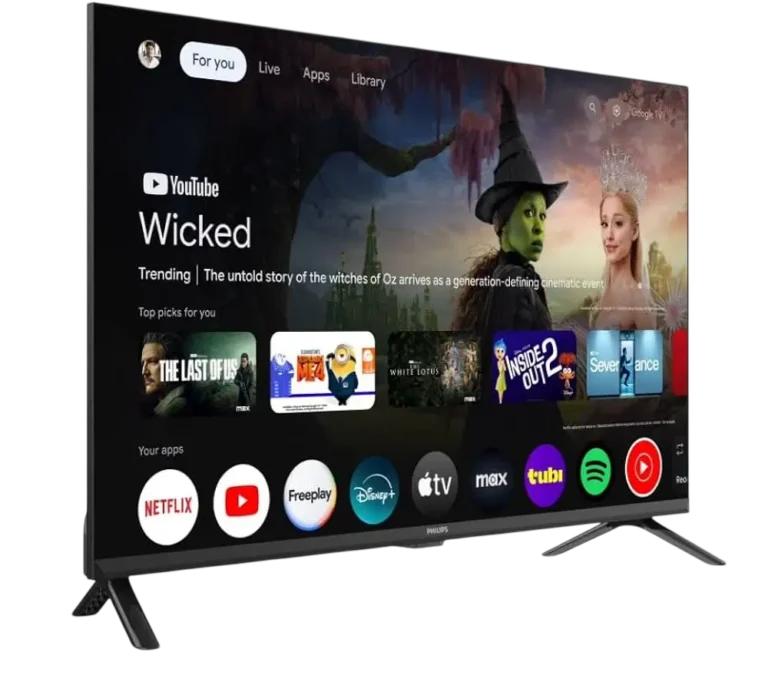
The Philips Google TV 32PFL6446/F7 is a 32-inch (16:9) HD television that runs Google TV and also has a built-in ATSC (digital) and NTSC (analog) tuner, so antenna channels, streaming apps and connected devices all live on one set. It ships with a Bluetooth remote that has a Google Assistant button, and it connects to your network over Wi-Fi (IEEE 802.11a/b/g/n/ac, 2.4 GHz/5 GHz) or an Ethernet port. On the back you will find two HDMI inputs (HDMI 1 is the ARC input), one USB 2.0 port, a Mini AV composite input, an optical digital audio output, a headphone jack and an antenna/cable input.
This page also covers the 40-inch Full HD sibling, the 40PQF7446/F7, which has three HDMI inputs and two USB ports. Where the two models differ, the differences are called out in the sections below.
Specifications and Covered Models
Differences between the two models
| Item | 32PFL6446/F7 | 40PQF7446/F7 |
| Screen size and aspect ratio | 32 in, 16:9 | 40 in, 16:9 |
| Picture type | HD, 1366 x 768 pixels, 60 Hz | FHD, 1920 x 1080 pixels, 60 Hz |
| HDMI inputs | 2 (HDMI 1 with ARC, HDMI 2) | 3 (HDMI 1 with ARC, HDMI 2, HDMI 3) |
| USB ports | 1 (USB 2.0, 5 V, 500 mA) | 2 (USB 2.0, 5 V, 500 mA) |
Specifications shared by both models
| Item | Specification |
| Viewing angles | 178° (V) by 178° (H) |
| Built-in tuner | ATSC (digital) / NTSC (analog) |
| Sound | Mono, Stereo; 5-band equalizer |
| Screen (aspect) settings | Automatic, Super zoom, 4:3, Movie expand 14:9, Movie expand 16:9, Wide screen, Full screen, Unscaled |
| Over-the-air DTV (ATSC) | VHF: 2–13; UHF: 14–69 (each channel may carry sub-channels such as 2.1–2.9 or 3.1–3.9) |
| Over-the-air analog (NTSC) | VHF: 2–13; UHF: 14–69 |
| Cable (analog NTSC) | 2–13, A–W, W+1–W+94 (analog W+1–W+84), A-5–A-1, 5A |
| Tuning system | Channel frequency synthesized tuning system |
| Channel access | Channel scan, GUIDE, UP/DOWN |
| Composite input | 1 (Mini AV IN) |
| HDMI video signals | 480i/p, 720p, 1080i/p, 2160p at 24/30 Hz |
| HDMI HDR signals | HDR10, HLG (Hybrid Log-Gamma) |
| HDMI digital audio signals | LPCM, AC3 |
| PC input video signal | Up to 4096 x 2160 |
| Wireless LAN | IEEE 802.11a/b/g/n/ac (2.4 GHz/5 GHz) |
| Bluetooth | Version 5.1 |
| Ethernet port | 1 |
| Digital audio output | 1 (optical), supports Dolby Audio |
| Headphone output | 1, 1/8 in (3.5 mm) |
| Power requirements | 120 V~ +/– 10 %, 60 Hz +/– 0.5 % |
| Operating temperature | 41 °F (5 °C) to 104 °F (40 °C) |
Specifications are subject to change without prior notice.
What Is in the Box
The package includes the following items:
- Quick start guide
- Safety instruction / limited warranty sheet
- AC power cord
- Remote control and 2 AAA (1.5 V) batteries
- 2 stand bases and 4 stand screws, ST4 x 0.787 in (20 mm)
If you lose the stand screws, buy replacement Phillips-head screws locally. To replace any other included accessory, use the part name or number shown in the illustrations and call the toll-free customer support line on the cover of the manual (1-833-978-3323).
If you use a universal remote with this TV, make sure its component code is set to the Philips brand. Check the instructions that came with the universal remote. Interoperability with every universal remote is not guaranteed.
Safety and Placement
Moving and positioning the TV
- A large-screen TV is heavy. Two or more people are needed to carry and handle it. Hold the upper and lower frames firmly.
- Install the TV in a horizontal, stable position. Keep it out of direct sunlight and away from dust and strong vibration.
- Leave at least 4 inches (10 cm) of ventilation space around the TV. Do not put it in a built-in cabinet or rack, and do not cover the vents with a tablecloth, curtain, newspaper or similar items.
- Do not place the TV where it can be exposed to water, oil or grease, such as near a bathtub, basin, kitchen sink, washing tub, swimming pool or kitchen exhaust fan, or in a damp basement.
- Do not place any objects directly on or under the TV, especially lighted candles or other flames. Do not put objects filled with liquid, such as vases, on it.
- The TV is not evaluated for tropical environments. Avoid places with rapid temperature changes. Operating temperature is 41 °F (5 °C) to 104 °F (40 °C). The set may become slightly warm depending on the environment, which is not a malfunction.
- If you keep the front cardboard from the carton (included on select models only), use it when moving or shipping the TV. When packing, do not put the stand on the same side as the screen.
- Before moving the TV, unplug the AC power plug and disconnect attached cables to protect the connectors. Be careful not to pinch the power cord under the TV when you set it down.
Stability and child safety
- Always use cabinets, stands or mounting methods recommended by the TV manufacturer, and furniture that can safely support the TV. Make sure the TV does not overhang the edge of the furniture.
- Never put the TV on tall furniture such as a cupboard or bookcase unless both the furniture and the TV are anchored to a suitable support. Never put it on cloth or other material between the TV and the furniture.
- Do not place items that tempt children to climb, such as toys and remote controls, on top of the TV or the furniture it stands on.
- Route cords and cables so they cannot be tripped over, pulled or grabbed.
- To prevent injury, the TV must be securely attached to the furniture or wall according to the instructions. Tipping, shaking or rocking the TV may cause injury or death.
Power, cleaning products and electrical safety
- Do not insert the AC power cord into the outlet until all connections are made, and keep the plug easy to reach. To turn the TV off completely, unplug the AC power plug.
- Unplug the TV during lightning storms or when it will not be used for a long time.
- Never use a gas duster or compressed air duster on this TV. Gas trapped inside the unit may ignite and explode.
- Do not open the cover. There are no user-serviceable parts inside. Refer servicing to qualified service personnel.
- Do not expose the TV to rain or moisture, dripping or splashing.
Remote control batteries
Replacing a battery with an incorrect type may defeat a safeguard and risks fire or explosion. Do not throw batteries into a fire or hot oven, and do not crush or cut them. Do not leave batteries in an extremely hot place such as direct sunshine or on a hot surface, and do not expose them to extremely low air pressure, because any of these can cause an explosion or leakage of flammable liquid or gas.
Wireless operation
Keep the TV’s wireless radiator at least 20 cm (about 8 inches) away from your body. The 5150–5250 MHz Wi-Fi band is restricted to indoor use.
Installing the Stands and Wall Mounting
Attaching the stands
The manual illustrates steps 1 and 2 (take the stands out of the carton, then lift the TV out). You need a Phillips-head screwdriver and a wide, open space.
- Cover a table top with a cloth or blanket to avoid damaging the screen. Holding both sides of the TV, lay it on the table with the screen side down, on the front cardboard.
- Fasten the stands to the TV with the 4 included screws (2 screws per stand). Hold each stand while you tighten its screws so it does not fall.
- Check that both stands are securely fastened.
- Carefully lift the TV, using two people as the illustration shows, and place it on a stable, level surface.
Make sure all screws are tight. A stand that is not properly attached can cause the TV to fall, which can injure people and damage the unit. To remove a stand, reverse the procedure and take care not to drop it.
Wall mounting
The TV meets the VESA standard for wall mounting. Ask your local dealer for a wall mount bracket that is compatible with your TV model, and follow the wall mount’s own instruction book. The bracket must be installed by experts.
| Mounting item | 32 in / 40 in models (top and bottom screws) |
| Screw diameter (E) | M6 |
| Screw depth (D) | Minimum 10 mm, maximum 10 mm |
| Screw quantity | 2 top, 2 bottom |
| A × B × C | 200 × 200 × 200 |
When installing on a wall, leave this much space: top 11.8 in (30 cm), left and right 5.9 in (15 cm), bottom 3.9 in (10 cm).
- Use two people to mount the TV on a wall bracket. Do not mount it while the TV is plugged in or turned on, because that can cause electric shock.
- Do not use screws longer or shorter than the specified length. Screws that are too long can damage the inside of the TV. Screws that are too short can let the TV fall.
- Do not tighten screws with excessive force.
- Do not install the TV on a ceiling or slanted wall. The TV and bracket may fall and cause severe injury.
- Skyworth USA Corporation is not responsible for damage or injury if you install the bracket or mount the TV yourself.
TV Control Button and Back Panel Terminals
TV control button
The TV has a power-style control button on its lower edge for use when the remote is not at hand.
- In standby mode, press the TV control button to turn the TV on.
- While the TV is on, a short press opens a soft-keyboard menu with these items: Find my remote, Power Off, Source, Volume-, Volume+, Channel- and Channel+.
- Inside that menu, short press the button to move the cursor and long press it to select the highlighted item.
The “Find my remote” item appears only if the Bluetooth remote has a buzzer on its back and has been paired with the TV. Channel -/+ may not appear in the menu on some screens, such as the home screen.
Terminals
| Terminal | What it does |
| Ethernet port (LAN) | Wired internet connection with an Ethernet cable and RJ-45 connector. |
| Digital audio output (Optical) | Digital audio (SPDIF) output to home theaters and other digital audio systems. |
| HDMI inputs | Digital audio and video from devices such as DVD/Blu-ray players, soundbars, cable or satellite set-top boxes and PCs. HDMI 1 also outputs TV audio to an ARC-compliant soundbar or home theater system. |
| USB 2.0 (5 V, 500 mA) | Data input from a USB memory stick only. |
| ANTENNA IN (75 ohm) | Signal input from an antenna or cable/satellite set-top box. |
| HEADPHONE | 3.5 mm stereo jack for personal listening. |
| MINI AV IN | Composite analog video and audio input. |
The 32PFL6446/F7 has HDMI 1 and HDMI 2 and one USB port. The 40PQF7446/F7 has HDMI 1, HDMI 2 and HDMI 3 and two USB ports. The USB port is designed for peripherals such as a keyboard or mouse, but full functionality of any particular keyboard or mouse is not guaranteed. Trying one will not damage the TV.
Connecting Your Devices
Buy the cables you need separately. Connect all devices before you plug in the AC power cord.
Antenna, cable and satellite boxes
You can connect an antenna directly with an RF cable, a satellite or cable set-top box with an RF cable, or a set-top box with an HDMI cable (the better picture). If the set-top box connects by RF cable, set the TV to channel 3 or 4, or the channel your provider specifies.
- Outdoor or attic antennas work better than a set-top box antenna or an indoor antenna. An antenna that received analog TV should also work for digital reception.
- Depending on your antenna system, you may need combiners (mixers) or splitters. Their minimum RF bandpass must be 2,000 MHz (2 GHz).
- Unplug the RF coaxial cable from the antenna jack before moving the TV.
- An antenna selector makes it easy to switch between antenna and cable.
- For antenna questions, the manual points to www.antennaweb.org. If you get no signal from your cable service, contact your cable provider.
Game consoles and Blu-ray or DVD players
HDMI gives the highest picture and sound quality, carries video and audio in one cable, and is required for full high-definition video and for HDMI control (HDMI CEC). Use an UltraHD 4K HDMI cable for 4K video. HDMI supports HDCP (High-bandwidth Digital Content Protection).
For standard quality, use a composite connection. Connect the device to MINI AV IN with the AV converting cable that the manual says is provided with the TV, joined to a normal video and audio (L/R) cable. Do not place a recorder too close to the screen, because some recorders are sensitive to interference from the TV.
Soundbar or home theater
Choose one of two connections.
- Optical: connect a digital audio optical cable from DIGITAL OUT (OPTICAL) to the amplifier or soundbar. This carries multi-channel audio such as 5.1ch digital broadcast sound.
- HDMI ARC: connect an HDMI cable from the HDMI 1 (ARC) input to the ARC input of the audio device. This sends TV audio to the device without a separate digital audio cable.
ARC works only on HDMI 1. The audio device must be HDMI CEC and ARC compliant, and HDMI control must be set to On for volume control from the TV remote.
PC as a monitor
Connect the PC with an HDMI cable or an HDMI-DVI cable. The supported formats are below. Other formats or non-standard signals will not display correctly.
| Format | Resolution | Refresh rate |
| VGA | 640 x 480 | 60 Hz |
| SVGA | 800 x 600 | 60 Hz |
| XGA | 1,024 x 768 | 60 Hz |
| WXGA | 1,280 x 768 and 1,360 x 768 | 60 Hz |
| FHD | 1,920 x 1,080 | 24/30/60 Hz |
| UHD | 3,840 x 2,160 and 4,096 x 2,160 | 24/30/60 Hz |
- With HDMI-DVI the maximum operation is 2160p at 30 Hz. HDMI-DVI also needs a separate analog (L/R) audio connection, and DVI does not display 480i.
- Use an HDMI-DVI conversion cable with a ferrite core. To reduce noise, attach a ferrite core to the PC’s AC power cord, or run a laptop on its battery.
- Use a certified HDMI cable with the HDMI logo. A High Speed HDMI cable is recommended for compatibility.
- Never connect a PC directly to the TV’s Ethernet port.
Internet by Ethernet cable
Connect a shielded Ethernet cable from your router or network equipment to the Ethernet port, then set the network settings under Network & Internet. Do not plug any cable other than Ethernet into that port. Use a router that supports 10BASE-T/100BASE-TX. If your modem has no router function, add a broadband router, and if it has no free port, add a hub.
Headphones
Plugging headphones into the HEADPHONE jack mutes the TV speakers.
Remote Control
Installing the batteries
- Slide the battery cover down to open it.
- Insert 2 AAA (1.5 V) batteries, matching the polarity marks inside the compartment.
- Slide the cover back into position.
Remove the batteries if you will not use the remote for a long time.
Remote buttons
The TV comes with a Bluetooth remote with voice control through Google Assistant.
| Button | Function |
| POWER | While the TV is on, a short press puts it in fastboot mode and a long press puts it in standby mode. Fastboot uses more energy but turns the TV on faster. Standby saves more energy but takes a standard time to turn on. |
| GOOGLE ASSISTANT (microphone) | Short press wakes the voice assistant. Press and hold to speak a command, then release to run it. |
| ACCOUNT | Sign in with your Google account. |
| DASHBOARD | Opens the Google TV dashboard. |
| Navigation (up/down/left/right) | Moves through menus. Up/Down also change channels. |
| OK | Confirms or runs the selected item, or opens the channel list. |
| BACK | Returns to the previous level or exits the current screen. |
| GUIDE | Opens Live TV or the Electronic Program Guide. |
| HOME | Opens the home screen. |
| FREE TV | Opens Google TV Freeplay. |
| VOLUME UP/DOWN | Adjusts the volume. |
| SOURCE | Opens the source menu. |
| MUTE | Mutes or restores the sound. |
| DAILY KEY | Starts the shortcut function, or sets it up the first time. |
| Application buttons | Open specific apps directly (the manual’s illustration shows Netflix, YouTube and Tubi). |
| MEDIA | Opens the media player. |
| APPS | Shows all apps. |
| INFO | Displays program information. |
| Virtual keyboard | Opens the virtual keyboard (Live TV only). |
| CH up/down | Selects programs in ascending or descending order. |
| MENU | Displays the main menu. |
Remote LED states
The LED next to the POWER button shows the remote’s status.
- Unlit: no button has been pressed.
- Lit in red: a button was pressed in infrared mode.
- Lit in green: a button was pressed in Bluetooth mode.
- Blinking green: the remote is in Bluetooth pairing mode.
Google Assistant and privacy
Press and hold the Google Assistant button and speak into the microphone on the remote. To delete your voice-command history, press the Google Assistant button and say “Delete what I just said.”
First-Time Setup
Plug the AC power cord into the outlet and press POWER on the remote. Plug in the cord only after all other connections are made. Settings in the initial setup may vary by region, model or Google service availability.
You need a Wi-Fi internet connection and a Google Account. The Google Home app on your phone is recommended but optional.
Set up with the Google Home app
- Pair the remote with the TV. On any screen, you can press the Google Assistant button to quick-pair the Bluetooth remote.
- Select your language and your region or country.
- On your phone, open Google Home. At the top left tap Add (+), then Set up device, then Set up new devices in your home.
- Choose or add a home, tap Scan code, and allow the app to use the phone camera.
- Scan the QR code on the TV screen. It may take a few minutes for your phone and TV to connect.
- Follow the instructions in the Home app and on the TV screen.
Set up with the remote
Use this if you get stuck in the Home app, cannot update it, or your TV does not appear in it. Press the DOWN navigation button to highlight “Manual setup (with TV remote),” then press OK. This takes longer and needs typing with the remote.
On-screen setup steps
After the language and region, the setup continues in this order:
- Select your TV mode (Google TV or basic TV, see the next section).
- Connect the TV to a Wi-Fi network.
- Enter your Google account and password.
- Read and accept the Google Terms of Service and Privacy Policy.
- Choose whether Google Assistant can search across all your TV apps.
- Select your services and apps.
- Read and accept the End User License Agreement.
- Select your time zone.
- Select the tuner mode (how you receive TV channels), then start channel tuning.
- Install your apps.
- Set up optional features and go to Google TV.
To turn on TalkBack during setup, press DASHBOARD, then choose Accessibility > TalkBack > Enable > OK.
Basic TV mode
Basic TV is available only on TVs that come with Google TV built in. If you choose it during setup, you can finish setup faster and use the TV without a Google Account or an internet connection. Without internet, the TV does not get important security updates.
- You can: watch TV through cable, satellite, the TV tuner or an antenna with the TV app; play media from other inputs; use a limited set of pre-installed apps.
- You cannot: use features that need a Google Account sign-in, access your Play Library, install apps, use Assistant to search for content, or cast from another device.
To switch to Google TV later, scroll to the Google TV banner on the home screen, select Set up Google TV, and follow the on-screen instructions. After Google TV has been set up, you cannot switch back to basic TV unless you factory reset the TV.
Home Screen, Dashboard and Settings
Home screen tabs
What you see on the Google TV home screen depends on where you live and the language you choose. If you choose English, French or Spanish, the tabs are Account, For you, Live (U.S. only), Apps, Library, Search and Dashboard. With other languages or countries, the tabs are Home, Apps and Library. Use the up/down and left/right navigation buttons to pick a tab or item, then press OK.
Dashboard
Press DASHBOARD on the remote to open the dashboard. It gives quick access to Screensaver, Inputs, Picture, Sound, Wi-Fi, Accessibility, Bluetooth and Notifications. Choose All settings (the gear icon at the top right of the home screen) for the full settings list.
Every settings path in this page starts the same way: press DASHBOARD, select All settings, press OK, then pick the category named.
Channels and inputs
To add channels for the first time or add more:
- Go to Settings > Channels & Inputs > Channels.
- Select your signal type, Antenna or Cable, in Channel Installation mode.
- Start channel installation.
Under Inputs you can switch or manage TV inputs. HDMI LINK (CEC) lets Philips-brand devices with CEC operate together with the TV. It includes HDMI control, Device auto power off and TV auto power on. Interoperability with other brands of CEC devices is not guaranteed. If you see picture, color or sound problems from a device on an HDMI port, try changing HDMI EDID Version.
Picture settings
Go to Display & Sound > Picture. Picture modes are User, Standard (normal viewing), Vivid, Sports, Movie, Game (for PCs and game consoles) and Energy Saving (low power consumption).
- Backlight adjusts LED brightness. Brightness adjusts the black level. Contrast adjusts the white level.
- Saturation sets color intensity. Hue adjusts tint and is useful for flesh tones. Sharpness adjusts edge sharpness but cannot add detail that is not in the content.
- Advanced Settings holds Color Temperature, Noise Reduction and more. Reset to Default restores all picture settings to factory values.
- Screen sets the aspect ratio: Automatic, Super Zoom, 4:3, Movie expand 14:9, Movie expand 16:9, Wide Screen, Full Screen or Unscaled.
Sound settings
Go to Display & Sound > Sound. Sound modes are User, Standard, Vivid, Sports, Movie, Music and News (sets the anchor’s voice at a comfortable volume). Some sound settings are unavailable depending on the broadcast format.
- Basic Settings cover Balance, Bass, Treble, Surround Sound, Equalizer Detail and Auto Volume Control.
- Speakers: choose Off to use an external audio device only, or On to use the TV speakers when no external device is connected.
- Speaker Delay corrects lip-sync problems on the TV speakers. ARC turns the HDMI-ARC function on or off.
- Downmix Mode is Stereo or Surround. Dialog Enhancer is Off, Low, Medium or High. Reset to Default restores all sound settings.
Audio output
Digital Output offers Auto, Bypass, PCM, Dolby Digital, Dolby Digital Plus and MAT. Digital Output Delay synchronizes picture with sound from an amplifier on the SPDIF jack, and Bluetooth Delay does the same for a Bluetooth device. Higher values add more delay.
Audio Output Device offers Auto, TV Speaker, HDMI ARC, HDMI eARC, Bluetooth, Headphone, SPDIF, and the combinations TV Speaker and Bluetooth, TV Speaker and Headphone, and TV Speaker and SPDIF.
Network and Wi-Fi
- Open Network & Internet.
- Confirm Wi-Fi is on and the TV is connected to the correct network.
- If not, select your network and enter the password if asked.
Use Add new network for a hidden network name. If problems continue, turn Wi-Fi off and back on.
System settings
- About: check for a system update, name the TV (a name like “Living Room TV” helps you pick it when casting), view status and legal information, or reset.
- Power & Energy: set an energy mode and timers that turn the TV on or off automatically.
- Date & Time: use network-provided time, or turn it off to set date, time, time zone and 12/24-hour format by hand.
- Language, Keyboard, Storage, Cast and System sounds are also here.
- Restart turns the TV off and on again and keeps all settings.
- Factory reset (Settings > System > About > Reset > Factory reset) restores default settings and erases all data, accounts, files and downloaded apps.
- Privacy covers location, microphone and camera access (for apps and the remote), usage and diagnostics, and ads.
To update the TV, go to System > About > System update and follow the on-screen instructions. The TV must be connected to the internet.
Accounts, Apps and Recommendations
Add or remove a Google account
To add an account, open Accounts & Profiles, select Add an account and sign in. You can use other accounts in apps such as YouTube, but home screen recommendations follow the primary account. If you use a work or school account, some services may not work.
To remove one, open Accounts & Profiles, select the profile, then choose Remove > Remove account. If you cannot use the TV screen, go to your device in your Google Account on a phone or computer (signed in to the same account), choose the TV, and select Sign out.
Install and remove apps
- Press and hold the Google Assistant button, or select Search on the home screen.
- Say or type the app name, open the app page and select Install. You can also browse the Apps tab by category.
- If a purchase fails, try a different payment method such as a credit card or PayPal.
To remove an app, scroll to Apps, find it under Your apps, hold OK until a menu appears, and select View details > Uninstall.
Improve recommendations
- Add your streaming services under your account > Your services, and turn on only the ones you subscribe to.
- Rate suggestions under your account > Content preferences.
- Add titles to your watchlist from a title’s details page (+ Add to Watchlist). Use Watched it? and Like or Dislike to tune suggestions.
Apps only mode
Apps only mode hides personalized recommendations, which is handy when you have guests. Turn it on under Accounts & sign-in > primary Google TV account > Apps only mode, and turn it off the same way. In this mode you cannot use Search or Google Assistant, and you cannot like, dislike, add to the watchlist or mark titles as watched. Your Library is not on the home screen, but you can find purchases in the YouTube app under Library > Purchases.
Live TV, Program Guide and Captions
On the home screen, select Live TV in your apps. Press GUIDE for the latest program schedule. Broadcast in Live TV works with an antenna only. To watch a cable set-top box, press SOURCE and choose the external device.
Favorite channels
- In Live TV, go to Broadcast and open the All channels view.
- Move to a program, press and hold OK for about 3 seconds, then release.
- Select Add to favorites. Switch from All to a Favourite 1 to 5 view to see your favorites.
To remove a favorite, hold OK on the program, choose Edit favourites, select the list, and press OK so the tick disappears.
Streaming live TV
Pluto TV channels are free once you install the Pluto TV app. For YouTube TV, the primary Google TV account must be the one with the subscription. For Sling TV or Philo, download the app, then link Sling TV to your Google Account or add Philo to your services.
Closed captions
In Live TV Settings > Broadcast you can turn captions on or off and choose the caption service, text size, font, color, opacity, edge and background.
- Captions work only when the broadcast signal contains caption data. They do not display over an HDMI or component connection.
- With an external cable or satellite box, use that box’s own menu for captions.
- A black box on screen means captions are in text mode. Select CC-1, CC-2, CC-3 or CC-4 to clear it.
- Captions can lag a few seconds on live broadcasts and after changing channel or volume, and poor signals can add errors.
Kids Profile and Parental Controls
Kids profiles may not be available in some regions or on some devices.
Add and use a kids profile
- Under Accounts & sign-in, select Add a kid > Get started, then Get started under Welcome parents.
- Select a child already in your family group, or choose Add a kid and follow the prompts.
- Choose the apps for the kid’s home screen and follow the remaining setup instructions.
To switch to a kids profile, go to Accounts & Profiles and select it. To allow or hide apps, open the kid’s profile, select Manage apps, and check or uncheck the blue box beside each app.
Screen time, bedtime and profile lock
- Daily limit: select the kid’s profile > Screen time > Daily limit, pick the days, and set hours in 15-minute steps up to 8 hours.
- Bedtime: select Screen time > Bedtime, pick the days, and set start and end times in 30-minute steps.
- Bonus time: from the timeout screen, select More time, enter the adult’s Google Account PIN or password, and choose an amount in 15-minute steps up to 8 hours.
- Profile lock: select the kid’s profile > Profile lock and enter your Google Account PIN or password, then turn it on. You then need that PIN or password to exit the kids profile.
- Library ratings: under the kid’s profile > Family Library, set the maximum rating for Movies and TV. This applies only to content purchased from Google and shared with the kid, not to apps.
- To hide a title, highlight it in the kid’s profile, hold the select button and choose Hide (or Report inaccurate rating). To unhide, use Hidden movies & TV shows in the kid’s profile.
Parental controls for Live TV
- Press HOME and select the Live TV app, then press BACK to open the TV guide.
- Move the cursor to the Live TV Settings icon and press DOWN to choose Live or Broadcast.
- Press DOWN to select Parental Control and enter your Google PIN.
- Turn Parental Control on. In Live, choose Rating System or Change PIN. In Broadcast, choose Channel Block, Rating System, Rating Lock or RRT5 Lock.
The first time you open parental controls you are asked to set a Google PIN. If you forget it, you can reset it only by performing a factory reset (DASHBOARD > All settings > System > About > Reset > Factory reset).
Phone Remote, Ambient Mode, Casting and Google Meet
Use your phone as a remote
The Google TV app on an Android phone (select countries only) works as a virtual remote. Open the app, tap Remote near the bottom right, tap Scanning for devices, choose your TV and follow the prompts. Your phone and TV must be on the same Wi-Fi network. With the virtual remote you can navigate, control media, turn the TV on or off, use Google Assistant, change volume and type text.
Ambient mode
Ambient mode shows photos when you are not watching anything, and you must be signed in to a Google account. Go to System > Ambient Screensaver and choose Google Photos, Art gallery or Custom. Under More settings you can control slideshow speed, portrait Google Photos, which albums are used, weather (°C, °F or both) and whether the time shows.
Cast to your TV
- Put your device on the same Wi-Fi network as the TV.
- Open the app with the content and select the Cast icon.
- Select the name of your TV. When the Cast icon changes color, you are connected.
To stop, select Cast > Disconnect on your device. You can only cast from the latest version of a Google Cast-enabled app or Chrome browser.
If casting fails, confirm both devices are on the same Wi-Fi network, then check that casting is enabled: go to Apps > See all apps, find Google Cast (select Show system apps or look in Disabled apps if needed) and select Enable if it is off. Then restart the TV from System > Restart.
USB camera for Google Meet
Google Meet is not pre-installed. You need internet of 10 Mbps or faster, a Google account and an external USB camera with a built-in microphone that supports Android 11.0 or later. Connect the camera to the TV before launching Meet, then follow the on-screen setup for camera and mic access. The microphone on the remote cannot be used on Meet calls.
If the camera or audio does not work, check that the camera is connected, supports Android 11.0 or later and has a built-in mic, that the mic is not muted, and that TV volume is not muted or very low. Then turn the TV off, disconnect and reconnect the camera, turn the TV on and reopen Meet.
Bluetooth Accessories
You can connect several Bluetooth devices, such as headphones or game controllers, but only one audio device at a time.
- Open Remotes & Accessories > Pair accessory.
- Put your device in pairing mode or make it visible.
- Select the device from the list, then select Pair on the pairing request.
To reconnect a paired device, open Remotes & Accessories, choose the device under Accessories and select Connect. Paired accessories can be renamed or forgotten there.
Accessibility
Open Accessibility for TalkBack (screen reader), text to speech, text scaling, bold text, color correction, closed captions, audio description, Switch Access, high contrast text (experimental) and keyboard accessibility. To use the accessibility shortcut, enable it under Accessibility > Accessibility shortcut, then press and hold the BACK and DOWN buttons together for 3 seconds. By default it turns on TalkBack. To turn TalkBack on, choose Accessibility > TalkBack > Enable > OK.
Troubleshooting
Videos will not play or apps misbehave
Work through these steps in order and stop when the problem is solved.
- Check Wi-Fi: open Network & Internet, confirm Wi-Fi is on and connected to the right network, reopen your app and play again. If it still fails, turn Wi-Fi off and on.
- Check for system updates: System > About > System update > Check for update, then install any update.
- Restart: System > Restart.
- Check the account: under Accounts & Profiles, confirm the signed-in account is the one you use for the service.
- Clear app data: Apps > See all apps, select the app, then Clear data > OK.
- Factory reset: System > About > Reset. This erases all data, so try the other steps first.
For buffering, ask your internet provider to check your connection speed and line quality, use a stable home Wi-Fi or wired network, and avoid mobile hot spots or public wireless connections.
Remote control problems
Remove and reinsert the batteries, then press the Google Assistant button on any screen to quick-pair the Bluetooth remote with the TV.
Picture problems
- Power is on but no image: check the source device connection, select the right input with SOURCE, make sure the HDMI mode matches your source device’s output resolution, and check the antenna/cable connection.
- Sound but no picture, or an abnormal picture: change the resolution output of the source device and change input until you get picture and sound.
- Distorted or flickering picture: check the antenna/cable connection, keep the antenna cable away from other cables, leave space between optional devices and the TV, and use a high quality 75-ohm coaxial cable.
- Ghosts, lines or streaks: electrical interference from nearby appliances can affect picture quality. Try other channels, since the problem may be the broadcast station or a weak signal.
- No picture or wrong resolution on HDMI: check the antenna/cable connection, use a Premium High Speed HDMI cable that supports 18 Gbps, and set Settings > Channels & Inputs > Inputs > HDMI 1/2/3 > HDMI EDID Version to Auto, Compatibility, Standard or Enhance.
- High resolution HDR pictures missing: connect a 4K playable device, use a Premium High Speed HDMI cable (18 Gbps), set the correct HDMI EDID Version, and check the connected device for the latest settings or firmware.
Sound problems
- No sound: check the device is on HDMI 1 (ARC), that the power is on, that cables go to the right output jacks, and that the TV is not muted or set to volume 0. Unplug the AC power cord for about 1 minute, plug it in and turn the TV on again.
- Make sure no headphones are plugged into the headphone jack. If headphones or a Bluetooth audio device are connected, no sound comes from the TV speakers or from an audio system on ARC/eARC, so remove or disconnect them.
- Sound from both an ARC audio system and the TV speakers needs a digital optical cable connection and Digital Output set to PCM in Display & Sound > Audio Output.
- The TV cannot play through headphones or a Bluetooth audio device and the TV speakers at the same time.
- Intermittent sound or poor picture on one channel: try other channels, since the problem may be limited to that station or a weak signal.
Set-top box problems
If you cannot watch cable or satellite programs, check that the HDMI cable is secure at both ends, unplug and reconnect it, try a shorter cable if yours is 15 ft or longer, and try a different HDMI input. Confirm the box outputs a supported resolution (640×480, 1280×720, 1920×1080 or 3840×2160). For 4K with HDR set the TV HDMI setting to Enhance. For an older box without 4K or HDR, set Standard or Compatibility. With an HDMI connection, select the correct source with SOURCE.
Bluetooth devices will not connect
- Turn the Bluetooth device off and on, then try pairing again.
- Disconnect paired devices you are not using.
- Unplug the TV for 10 seconds, plug it back in and pair again once it is on.
- Test the device with a phone or tablet. If it works there, factory reset the TV. If it does not, update the device’s software or contact its manufacturer.
Cleaning, Servicing and Warranty
Cleaning
Disconnect the AC power cord first. Clean the front panel and exterior with a soft microfiber cloth or lens brush. Never use solvent or alcohol, and do not spray insecticide near the TV, because chemicals can damage or discolor surfaces. Do not spray liquids on the screen or other exterior surfaces, because liquid inside the TV can cause shorts, electric shock or fire.
Servicing and screen pixels
If the TV stops working, do not try to fix it yourself. There are no user-serviceable parts inside. Call the toll-free support line on the cover (1-833-978-3323) to find an authorized service center. A small number of black dots or bright points of light on the screen is a structural property of LCD displays within industry standards and is not a malfunction.
Limited warranty
The limited warranty is one (1) year from the original purchase date from an authorized dealer, and it covers defects in materials and workmanship for the original purchaser or gift recipient. Keep the original sales receipt as proof of purchase. At its option, the company will repair the product, exchange it or refund the purchase price. The warranty does not cover items such as shipping charges, installation or setup labor, damage from improper installation, power surges, lightning, retained images from fixed stationary content, unauthorized repair, commercial or institutional use, or failure to operate per the user manual. To get help, call the Customer Care Center at 1-833-978-3323. Skyworth USA Corporation is the warrantor. Read the full warranty terms in the printed Limited Warranty.
Frequently Asked Questions
How do I turn the Philips Google TV on and off, and what is the difference between standby and fastboot?
Press POWER on the remote. While the TV is on, a short press puts it in fastboot mode and a long press puts it in standby mode. Fastboot saves less energy but wakes the TV in a short time, while standby saves more energy and takes a standard time to turn on. If the remote is not handy, press the TV control button to turn the TV on from standby. While the TV is on, short press that button to open the menu, move to Power Off, and long press to select it. Neither mode cuts power completely. To turn the TV off entirely, unplug the AC power plug.
How do I set up the TV for the first time?
Plug the AC power cord into the outlet (after all other connections are made) and press POWER on the remote. Pair the remote, choose your language and region, then finish setup with the Google Home app on your phone or with the remote itself. For the app route, open Google Home, tap Add (+) > Set up device > Set up new devices in your home, choose a home, tap Scan code and scan the QR code on the TV screen. You need a Wi-Fi connection and a Google Account. If the app gets stuck or the TV does not show up, press DOWN to highlight “Manual setup (with TV remote)” and press OK to set up with the remote.
Can I use the TV without a Google Account or an internet connection?
Yes, if you choose basic TV mode during setup. Basic TV lets you finish setup faster and watch through an antenna, cable, satellite or the TV tuner, play media from other inputs and use a limited set of pre-installed apps. You cannot use features that need a Google Account, install apps, use Google Assistant to search for content, or cast. Without an internet connection the TV also will not receive important security updates. You can move to Google TV later by selecting Set up Google TV on the home screen, but once Google TV is set up you can only go back to basic TV by factory resetting the TV.
How do I pair the Bluetooth remote with the TV?
On any screen, press the Google Assistant button on the remote to quick-pair it with the TV. If the remote is not responding, remove and reinsert the batteries first. A blinking green LED next to the POWER button means the remote is in Bluetooth pairing mode, and an LED that lights green when you press a button means the remote is working in Bluetooth mode.
How can I find a misplaced remote?
Short press the TV control button to open the on-screen menu, short press to move to Find my remote, and long press to select it. This item appears only when the remote has a buzzer on its back and has already been paired with the TV. If you do not see it in the menu, your remote either lacks the buzzer or is not paired.
How do I connect a soundbar or home theater system to the TV?
Use either HDMI ARC or an optical cable. For ARC, connect an HDMI cable from the TV’s HDMI 1 (ARC) input to the ARC input on the soundbar or amplifier. ARC works only on HDMI 1, and the audio device must support HDMI CEC and ARC. Turn HDMI control on if you want to adjust volume with the TV remote. For optical, connect a digital audio optical cable from the TV’s DIGITAL OUT (OPTICAL) jack to the audio device, which carries multi-channel sound such as 5.1ch digital broadcasts. If you want sound from both the TV speakers and an audio system at once, use the optical connection and set Digital Output to PCM under Display & Sound > Audio Output.
Why is there no sound from my TV?
Start with the simple checks: make sure the TV is not muted and the volume is above 0, and check that every cable is plugged into the correct output on your source device. Then look for something stealing the audio. Headphones in the headphone jack mute the TV speakers, and a connected Bluetooth audio device stops sound from the TV speakers and from an audio system on ARC. If you use a soundbar over HDMI, it must be on HDMI 1. If the problem remains, unplug the AC power cord for about 1 minute, plug it back in and turn the TV on. If only one channel has poor or broken sound, try other channels, because that station or a weak signal may be the cause.
Why won’t my HDMI device show 4K or HDR?
Check three things. First, the connected device must be 4K-capable and have its latest settings or firmware. Second, use a Premium High Speed HDMI cable that supports 18 Gbps. Third, set the right HDMI EDID Version at Settings > Channels & Inputs > Inputs > the HDMI input you are using > HDMI EDID Version, choosing Auto, Compatibility, Standard or Enhance. Choose Enhance if the device outputs 4K with HDR, and Standard or Compatibility for an older device without 4K or HDR. The 32PFL6446/F7 has HDMI 1 and 2 only, and the 40PQF7446/F7 adds HDMI 3. The HDMI inputs list HDR10 and HLG support.
How do I add antenna or cable channels?
Go to Settings > Channels & Inputs > Channels, select your signal type, Antenna or Cable, in Channel Installation mode, then start channel installation. Make sure the antenna or cable is connected before you run it. If you connect a cable or satellite box with an RF cable instead, set the TV to channel 3 or 4, or the channel your provider specifies. If you watch the box over HDMI, pick that input with SOURCE rather than scanning for channels.
How do I cast from my phone or laptop to the TV, and what if it doesn’t work?
Put your device on the same Wi-Fi network as the TV, open an app that supports Google Cast (or Chrome on a computer), select the Cast icon and pick your TV’s name. When the Cast icon changes color, you are connected. To stop, select Cast > Disconnect on your device. If you cannot cast, confirm both devices are on the same Wi-Fi network, then open Apps > See all apps and check that Google Cast is enabled (use Show system apps or the Disabled apps section if you cannot find it). Select Enable if needed and restart the TV from System > Restart.
How do I set a daily screen time limit or bedtime for a kids profile?
Open Accounts & sign-in and select your child’s profile, then choose Screen time. For a daily limit, pick Daily limit, select the days and set the hours in 15-minute steps up to 8 hours. For a bedtime, pick Bedtime, select the days and set start and end times in 30-minute steps. To keep your child from leaving the profile, turn on Profile lock, which needs the adult’s Google Account PIN or password to exit. When time runs out, you can add bonus time from the timeout screen by entering your Google Account PIN or password.
What should I do if I forget my Google PIN for parental controls?
The only reset method described is a factory reset. Open the dashboard, then go to All settings > System > About > Reset > Factory reset. That erases all data, accounts, files and downloaded apps, so use it only when you cannot recover the PIN another way. After the reset you will go through setup again, and you will be asked to create a new Google PIN the first time you open the parental control system.