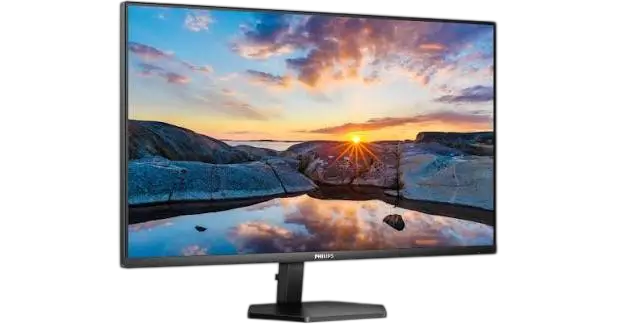
Philips 3000 Series Monitor 32E1N3100LA
The Philips 32E1N3100LA is a 31.5-inch (80 cm) Full HD monitor with a VA panel, W-LED backlight and a 16:9 aspect ratio. Its native resolution is 1920 x 1080 at 60 Hz, and it supports up to 75 Hz at that resolution. It has two HDMI 1.4 inputs, one VGA input, an audio input and an audio output, plus built-in 5 W x 2 speakers. Picture features include SmartImage Game presets, SmartContrast, LowBlue Mode, EasyRead, Flicker Free and Adaptive Sync. A single joystick-style button on the rear controls power, the on-screen display (OSD), volume, input selection and SmartImage. The stand tilts from -5° to +20°, and the monitor accepts a 100 mm x 100 mm VESA mount.
Key Specifications
Display and Picture
| Specification | Value |
| Panel type | VA |
| Backlight | W-LED |
| Panel size | 31.5″ (80 cm) |
| Aspect ratio | 16:9 |
| Pixel pitch | 0.36375 (H) mm x 0.36375 (V) mm |
| Contrast ratio (typ.) | 3000:1 |
| Native resolution | 1920 x 1080 @ 60 Hz |
| Maximum resolution | 1920 x 1080 @ 75 Hz |
| Viewing angle | 178° (H) / 178° (V) @ C/R > 10 (typ.) |
| Vertical refresh rate | 48 Hz – 75 Hz |
| Horizontal frequency | 30 kHz – 85 kHz |
| Monitor colors | 16.7M |
| Picture enhancement | SmartImage Game |
| sRGB, Flicker Free, LowBlue Mode, Adaptive Sync, EasyRead | Yes |
Connectivity and Convenience
| Specification | Value |
| Signal input sources | HDMI, VGA |
| Connectors | 2 x HDMI 1.4 (HDCP 1.4), 1 x VGA, 1 x Audio in, 1 x Audio out |
| Sync input | Separate Sync, Sync on Green |
| Built-in speakers | 5 W x 2 |
| OSD languages | English, German, Spanish, Greek, French, Italian, Hungarian, Dutch, Portuguese, Brazil Portuguese, Polish, Russian, Swedish, Finnish, Turkish, Czech, Ukrainian, Simplified Chinese, Traditional Chinese, Japanese, Korean |
| Mounting and security | VESA mount (100 x 100 mm), Kensington lock |
| Compatibility | Plug & Play, DDC/CI, sRGB, Windows 11/10/8.1/8, Mac OS X |
| Stand tilt | -5 / +20 degrees |
Power
| Item | 100 VAC, 60 Hz | 115 VAC, 60 Hz | 230 VAC, 50 Hz |
| Normal operation | 30.7 W (typ.) | 30.5 W (typ.) | 30.3 W (typ.) |
| Sleep (standby mode) | 0.5 W | 0.5 W | 0.5 W |
| Off mode | 0.3 W | 0.3 W | 0.3 W |
| Heat dissipation, normal operation | 104.78 BTU/hr (typ.) | 104.10 BTU/hr (typ.) | 103.42 BTU/hr (typ.) |
| Heat dissipation, sleep | 1.71 BTU/hr | 1.71 BTU/hr | 1.71 BTU/hr |
| Heat dissipation, off mode | 1.02 BTU/hr | 1.02 BTU/hr | 1.02 BTU/hr |
The power supply is built in and accepts 100-240 VAC, 50/60 Hz. The power LED is white in on mode and blinks white in standby/sleep mode. Power figures were measured at native resolution (1920 x 1080), contrast 50%, brightness 80% and a 6500K color temperature with a full white pattern. Philips states this data is subject to change without notice.
Dimensions and Weight
| Item | Dimensions (W x H x D) | Weight |
| Product with stand | 715 x 514 x 248 mm | 7.50 kg |
| Product without stand | 715 x 420 x 62 mm | 5.78 kg |
| Product with packaging | 930 x 517 x 162 mm | 11.35 kg |
Operating and Storage Conditions
| Condition | Operation | Non-operation |
| Temperature range | 0°C to 40°C | -20°C to 60°C |
| Relative humidity | 20% to 80% | 10% to 90% |
| Atmospheric pressure | 700 to 1060 hPa | 500 to 1060 hPa |
The cabinet is black with a texture finish. The product is listed as RoHS compliant, with 100% recyclable packaging and a 100% PVC BFR free housing.
Package Contents and Base Installation
What Comes in the Box
The package shows the monitor, the stand, the base, a Quick Start guide and a power cable. An HDMI cable, a VGA cable and an audio cable are also pictured, but these items are marked as different according to region, so your box may not include all of them.
Attaching the Base
- Place the monitor face down on a smooth surface. Take care not to scratch or damage the screen.
- Hold the stand with both hands.
- Gently attach the base to the stand.
- Use your fingers to tighten the screw at the bottom of the base so the base is secured tightly to the stand.
- Gently attach the stand to the VESA mount area until the latch locks the stand.
Caution: Place the monitor face down on a smooth surface, and pay attention not to scratch or damage the screen.
Ports and Connecting the Monitor to a PC
Rear Connectors
| No. | Connector |
| 1 | AC power input |
| 2 | HDMI 1 input |
| 3 | HDMI 2 input |
| 4 | VGA input |
| 5 | Audio input |
| 6 | Audio Out |
| 7 | Kensington anti-theft lock |
Connecting to a Computer
- Connect the power cord firmly to the back of the monitor.
- Turn off your computer and unplug its power cable.
- Connect the monitor signal cable to the video connector on the back of your computer.
- Plug the power cord of your computer and your monitor into a nearby outlet.
- Turn on your computer and monitor. If the monitor displays an image, installation is complete.
Control Button and On-Screen Display
Control Button Functions
The monitor has a single toggle button on the rear side that works like a joystick. Toggle it in four directions to move the cursor, and press it to select the highlighted option.
| Action | Function |
| Press the button | Switches power on. Press for more than 3 seconds to switch power off. |
| Toggle right | Opens the OSD menu. Confirms an OSD adjustment. |
| Toggle down | Adjusts the volume level. Adjusts the OSD menu. |
| Toggle up | Changes the signal input source. Adjusts the OSD menu. |
| Toggle left | Opens the SmartImage Game menu (FPS, Racing, RTS, Gamer 1, Gamer 2, LowBlue Mode, EasyRead and Off). Returns to the previous OSD level. |
OSD Menu Structure
The OSD lets you adjust screen performance or select functions through an on-screen instruction window. The table below shows the main menus and their settings.
| Main menu | Settings |
| Game Setting | Adaptive Sync (On, Off); MPRT (On, Off); MPRT Level (0~20); SmartResponse (Off, Fast, Faster, Fastest); SmartFrame (On, Off, with Size 1 to 7, Brightness 0~100, Contrast 0~100, H. position, V. position) |
| LowBlue Mode | On, Off; when On, level 1, 2, 3 or 4 |
| Input | VGA, 1 HDMI 1.4, 2 HDMI 1.4, Auto |
| Picture | SmartImage (FPS, Racing, RTS, Gamer1, Gamer2, LowBlue Mode, EasyRead, Off); Picture Format (Wide screen, 4:3); Brightness 0~100; Contrast 0~100; Sharpness 0~100; SmartContrast (On, Off); Gamma (1.8, 2.0, 2.2, 2.4, 2.6); Pixel Orbiting (On, Off); Over Scan (On, Off) |
| Audio | Volume 0~100; Stand-Alone (On, Off); Mute (On, Off); Audio Source (Audio In, HDMI1, HDMI2) |
| Color | Color Temperature (Native, 5000K, 6500K, 7500K, 8200K, 9300K, 11500K); sRGB; User Define (Red, Green, Blue, each 0~100) |
| Language | English, Deutsch, Español, Ελληνική, Français, Italiano, Magyar, Nederlands, Português, Português do Brasil, Polski, Русский, Svenska, Suomi, Türkçe, Čeština, Українська, 简体中文, 繁體中文, 日本語, 한국어 |
| OSD Setting | Horizontal 0~100; Vertical 0~100; Transparency (Off, 1, 2, 3, 4); OSD Time Out (5s, 10s, 20s, 30s, 60s) |
| Setup | Auto; Power LED (0, 1, 2, 3, 4); H.Position 0~100; V.Position 0~100; Phase 0~100; Clock 0~100; Resolution Notification (On, Off); Reset (Yes, No); Information |
Resolution Notification
This monitor is designed for optimal performance at its native resolution of 1920 x 1080. If you power it on at a different resolution, an alert appears on screen: Use 1920 x 1080 for best results. You can switch this alert off from Setup in the OSD menu.
SmartImage Modes
SmartImage provides presets that optimize the display for different types of content by adjusting brightness, contrast, color and sharpness in real time.
Selecting a SmartImage Mode
- Toggle the control button to the left to open the SmartImage on-screen display.
- Toggle up or down to move between the SmartImage modes.
- The SmartImage display stays on screen for 5 seconds, or you can toggle left again to confirm your choice.
Available Modes
| Mode | Purpose |
| FPS | For first-person shooter games. Improves black-level detail in dark scenes. |
| Racing | For racing games. Provides the fastest response time and high color saturation. |
| RTS | For real-time strategy games. A portion of the screen you choose can be highlighted through SmartFrame, and the picture quality of that portion can be adjusted. |
| Gamer 1 | Your own preference settings saved as Gamer 1. |
| Gamer 2 | Your own preference settings saved as Gamer 2. |
| LowBlue Mode | For comfortable productivity use. Uses software to reduce shortwave blue light. |
| EasyRead | Helps improve reading of text-based applications such as PDF e-books. Raises the contrast and edge sharpness of text and adjusts brightness, contrast and color temperature. |
| Off | No optimization by SmartImage Game. |
SmartContrast, Adaptive Sync and MPRT
SmartContrast
SmartContrast analyzes the content on screen in real time and adjusts colors and backlight intensity. It raises the backlight for brighter, crisper images and dims it for clear display of images on dark backgrounds. You can turn it on or off under Picture in the OSD menu.
Adaptive Sync
Adaptive Sync lets the graphics card update the monitor the moment a new picture is ready, which avoids the tearing that occurs when the two update at different rates and the lag and reduced frame rate that v-sync can cause. Turn it on or off under Game Setting in the OSD menu.
The compatible setup listed for Adaptive Sync is:
- Operating system: Windows 11/10/8.1/8.
- Graphics cards (R9 290/300 Series and R7 260 Series): AMD Radeon R9 300 Series, R9 Fury X, R9 360, R7 360, R9 295X2, R9 290X, R9 290, R9 285, R7 260X and R7 260.
- Processors (A-Series desktop and mobility APUs): AMD A10-7890K, A10-7870K, A10-7850K, A10-7800, A10-7700K, A8-7670K, A8-7650K, A8-7600 and A6-7400K.
MPRT Motion Blur Reduction
To reduce motion blur, MPRT makes the LED backlight strobe in sync with the screen refresh, which may cause a noticeable brightness change. Keep these limits in mind:
- MPRT requires a refresh rate of 75 Hz or higher.
- Adaptive Sync and MPRT cannot be enabled at the same time.
- MPRT adjusts brightness for blur reduction, so you cannot adjust brightness while MPRT is on.
- MPRT is a gaming-optimized mode and may cause noticeable screen flicker. Turn it off when you are not using the gaming function.
Color Settings
Open the OSD menu and choose Color to reach three settings:
- Color Temperature: Native, 5000K, 6500K, 7500K, 8200K, 9300K or 11500K. Settings around 5000K give a warm, red-white tone, while 11500K gives a cool, blue-white tone.
- sRGB: A standard setting intended to keep colors consistent between devices such as digital cameras, monitors, printers and scanners.
- User Define: Set your own preference by adjusting red, green and blue, each from 0 to 100.
Supported Resolutions and Preset Modes
The monitor works best at its native resolution of 1920 x 1080. For the best output, make sure your graphics card can reach the maximum resolution and refresh rate of this display.
| Horizontal frequency (kHz) | Resolution | Vertical frequency (Hz) |
| 31.47 | 720 x 400 | 70.09 |
| 31.47 | 640 x 480 | 59.94 |
| 35.00 | 640 x 480 | 66.67 |
| 37.86 | 640 x 480 | 72.81 |
| 37.50 | 640 x 480 | 75.00 |
| 35.16 | 800 x 600 | 56.25 |
| 37.88 | 800 x 600 | 60.32 |
| 46.88 | 800 x 600 | 75.00 |
| 48.08 | 800 x 600 | 72.19 |
| 47.73 | 832 x 624 | 74.55 |
| 48.36 | 1024 x 768 | 60.00 |
| 56.48 | 1024 x 768 | 70.07 |
| 60.02 | 1024 x 768 | 75.03 |
| 44.77 | 1280 x 720 | 59.86 |
| 60.00 | 1280 x 960 | 60.00 |
| 63.89 | 1280 x 1024 | 60.02 |
| 79.98 | 1280 x 1024 | 75.03 |
| 55.94 | 1440 x 900 | 59.89 |
| 65.29 | 1680 x 1050 | 59.95 |
| 84.00 | 1920 x 1080 | 75.00 |
| 67.50 | 1920 x 1080 | 60.00 |
Power Management and Power LED
If your PC has a VESA DPM compliant display card or software installed, the monitor can automatically reduce its power use when it is idle. When it detects input from a keyboard, mouse or other input device, it wakes up automatically.
| VESA mode | Video | H-sync | V-sync | Power used | LED color |
| Active | On | Yes | Yes | 30.5 W (typ.), 52.1 W (max.) | White |
| Sleep (standby mode) | Off | No | No | 0.5 W | White (blinking) |
| Off mode | Off | – | – | 0.3 W | Off |
Tilt, Positioning and VESA Mounting
Adjusting the Tilt
The stand tilts from -5° (forward) to +20° (backward).
Warning: To avoid screen damage such as the panel peeling from the bezel, never tilt the monitor downward by more than -5 degrees. Damage caused by exceeding this limit is not covered under warranty. Do not press the screen while adjusting the angle, and grasp only the bezel.
Removing the Base for VESA Mounting
- Place the monitor face down on a smooth surface, taking care not to scratch or damage the screen. Then lift the monitor stand.
- While keeping the release button pressed, tilt the base and slide it out.
The monitor accepts a 100 mm x 100 mm VESA-compliant mounting interface, and the VESA mounting screw size is M4. Philips advises always contacting the manufacturer for wall-mount installation.
Safety Precautions and Care
Operation
- Keep the monitor out of direct sunlight, very strong bright lights and away from other heat sources. Lengthy exposure can cause discoloration and damage.
- Keep the display away from oil. Oil can damage the plastic cover and void the warranty.
- Remove any object that could fall into the ventilation holes or prevent proper cooling, and do not block the ventilation holes on the cabinet.
- Position the monitor so the power plug and outlet are easily accessible.
- If you turn the monitor off by detaching the power cable or DC power cord, wait 6 seconds before reattaching it for normal operation.
- Always use the approved power cord provided by Philips. If your power cord is missing, contact your local service center.
- Operate the monitor only with the specified power supply. An incorrect voltage can cause malfunction and may cause fire or electric shock.
- Do not pull or bend the power cable or signal cable, and do not place the monitor or other heavy objects on the cables. Damaged cables may cause fire or electric shock.
- Do not subject the monitor to severe vibration or high impact during operation, and do not knock or drop it during operation or transportation.
- Use of controls, adjustments or procedures other than those specified in the documentation may result in exposure to shock, electrical hazards and/or mechanical hazards.
- Excessive sound pressure from earphones and headphones can cause hearing loss. Setting the equalizer to maximum raises the earphone and headphone output voltage and therefore the sound pressure level.
Cleaning and Maintenance
- Do not put excessive pressure on the LCD panel. When moving the monitor, grasp the frame to lift it, and never lift it by placing your hand or fingers on the LCD panel.
- Unplug the monitor if you will not use it for an extended period.
- Unplug the monitor before cleaning it with a slightly damp cloth. You may wipe the screen with a dry cloth when the power is off.
- Never use organic solvents such as alcohol, or ammonia-based liquids, to clean the monitor. Oil-based cleaning solutions may damage the plastic parts and void the warranty.
- Do not expose the monitor to dust, rain, water or excessive moisture. If it gets wet, wipe it with a dry cloth as soon as possible.
- If a foreign substance or water gets into the monitor, turn the power off immediately and disconnect the power cord. Remove the foreign substance or water, and send the monitor to the maintenance center.
- Do not store or use the monitor where it is exposed to heat, direct sunlight or extreme cold, and do not leave it in a car or trunk in direct sunlight.
- Use the monitor at 0-40°C (32-104°F) and 20-80% RH for the best performance and a longer lifetime.
- Only qualified service personnel should open the casing cover. Consult a service technician if the monitor does not operate normally after you have followed the instructions.
Burn-in and Ghost Images
Showing still or static images for a long time can cause burn-in, also called after-imaging or ghost imaging, on an LCD panel. In most cases it fades gradually after the power has been switched off. Always run a moving screen saver when you leave the monitor unattended, and run a periodic screen refresh application if the monitor will show unchanging static content.
Warning: Failing to use a screen saver or periodic screen refresh application may result in severe burn-in, after-image or ghost image symptoms that do not disappear and cannot be repaired. This damage is not covered under the warranty.
Eye Comfort
Excessive use of the monitor can cause eye discomfort. Philips suggests taking shorter breaks more often, such as a 5-10 minute break after 50-60 minutes of continuous screen use, rather than a 15-minute break every two hours. To help reduce eye strain:
- Look at objects at varying distances after long periods of focusing on the screen.
- Blink often while you work.
- Gently close and roll your eyes to relax.
- Position the screen at a suitable height and angle for you.
- Set brightness and contrast to an appropriate level.
- Match the room lighting to your screen brightness, and avoid fluorescent lighting and surfaces that reflect too much light.
- See a doctor if you have symptoms.
Troubleshooting
These checks cover problems you can correct yourself. If the problem continues after you try them, contact a Philips customer service representative.
No Picture or Cable Messages
- No picture, power LED not lit: Make sure the power cord is plugged into the outlet and into the back of the monitor. Make sure the power button on the rear of the monitor is in the OFF position, then press it to the ON position.
- No picture, power LED white: Make sure the computer is on, the signal cable is properly connected to the computer, and the monitor cable has no bent pins on the connector side (repair or replace the cable if it does). The Energy Saving feature may also be active.
- Screen shows “Check cable connection”: Make sure the monitor cable is properly connected to your computer, check the cable for bent pins, and make sure the computer is on.
- Auto does not work: The Auto function applies only in VGA analog mode. If the result is not satisfactory, adjust manually through the OSD menu.
Image Problems
- Image is not centered: Use the Auto function in the OSD, or adjust Phase/Clock under Setup. Phase/Clock works only in VGA mode.
- Image vibrates on the screen: Check that the signal cable is securely connected to the graphics board or PC.
- Vertical flicker: Use the Auto function in the OSD, or remove the vertical bars with Phase/Clock under Setup (VGA mode only).
- Horizontal flicker: Use the Auto function in the OSD, or adjust Phase/Clock under Setup (VGA mode only).
- Image looks blurred, indistinct or too dark: Adjust contrast and brightness in the OSD.
- Image looks distorted or text is fuzzy: Set the PC display resolution to the monitor’s native resolution, 1920 x 1080.
- After-image remains after power-off: See the burn-in guidance above.
- Green, red, blue, dark and white dots on screen: These remaining dots are a normal characteristic of the liquid crystal technology used today. See the pixel defect policy below.
- Power-on light is too bright: Adjust it with Power LED under Setup in the OSD. Philips notes this function can differ by display.
Smoke or Sparks
If you see smoke or sparks, do not perform any troubleshooting steps. Disconnect the monitor from the mains power source immediately for safety, and contact a Philips customer service representative right away.
Pixel Defect Policy and Warranty
Pixel Defect Tolerances
Philips states that no manufacturer can guarantee that every panel is free of pixel defects, but it guarantees that a monitor with an unacceptable number of defects will be repaired or replaced under warranty. To qualify, the number of defects must exceed the acceptable levels below. A pixel has three sub pixels (red, green and blue). Bright dot defects are sub pixels that are always lit, and black dot defects are sub pixels that are always dark. A red or blue bright dot must be more than 50 percent brighter than neighboring dots, while a green bright dot must be 30 percent brighter.
| Bright dot defects | Acceptable level |
| 1 lit sub pixel | 2 |
| 2 adjacent lit sub pixels | 1 |
| 3 adjacent lit sub pixels (one white pixel) | 0 |
| Distance between two bright dot defects | More than 15 mm |
| Total bright dot defects of all types | 2 |
| Black dot defects | Acceptable level |
| 1 dark sub pixel | 3 or fewer |
| 2 adjacent dark sub pixels | 2 or fewer |
| 3 adjacent dark sub pixels | 0 |
| Distance between two black dot defects | More than 15 mm |
| Total black dot defects of all types | 3 or fewer |
| Total dot defects | Acceptable level |
| Total bright or black dot defects of all types | 5 or fewer |
One or two adjacent sub pixel defects count as one dot defect.
Warranty and Customer Care
The Philips guarantee applies when the product is handled properly for its intended use, in line with its operating instructions, and when you present the original invoice or cash receipt showing the purchase date, dealer name, and the model and production number. The standard warranty period depends on your region. For warranty coverage and support requirements for your region, visit www.philips.com/support or contact your local Philips Customer Care Center.
An extended warranty package is offered through a Certified Service Center. It must be purchased within 30 calendar days of the original purchase date, and proof of original purchase and of the extended warranty purchase is required. During the extended period the service includes pickup, repair and return, but you are responsible for all costs accrued.
| Extended warranty period | Total warranty period |
| + 1 Year | Local standard warranty period +1 |
| + 2 Years | Local standard warranty period +2 |
| + 3 Years | Local standard warranty period +3 |
Regional service hotline numbers and the standard warranty period are in the separate Important Information manual, which can be downloaded from the Philips website support page.
Disposal and Recycling
Under European Directive 2012/19/EU on waste electrical and electronic equipment (WEEE), this product must not be disposed of with normal household waste. You are responsible for taking it to a designated collection point. To find drop-off locations, contact your local government office, your household waste disposal organization or the store where you bought the product. The monitor contains materials that can be recycled and reused, and you can ask your sales representative about local regulations for disposing of the old monitor and its packaging.
Frequently Asked Questions
What should I do if the screen shows “Cannot display this video mode”?
This message usually means the PC is sending a resolution or refresh rate the monitor cannot show, so the fix is to set the PC back to 1920 x 1080. Unplug all cables and connect your PC to the monitor you used previously. In Windows, open the Display settings (Start menu, Settings or Control Panel, then Display), and on the Settings tab move the desktop area slider to 1920 x 1080 pixels. Open Advanced Properties, set the refresh rate to 60 Hz and click OK. Restart the computer and confirm the PC is still set to 1920 x 1080 at 60 Hz. Then shut down, disconnect the old monitor, reconnect the Philips monitor, turn on the monitor and finally turn on the PC.
What refresh rate should I use?
Set the PC to 60 Hz for everyday use, since that is the recommended refresh rate for this monitor. If you notice a disturbance on screen, you can raise it to 75 Hz to see whether that removes it. 75 Hz at 1920 x 1080 is the maximum, and the monitor accepts vertical refresh rates from 48 Hz to 75 Hz. Features such as MPRT need 75 Hz or higher.
Why is there no picture on my monitor?
Start with the power light. If it is not lit, check that the power cord is seated in both the outlet and the back of the monitor, then make sure the rear power button is in the OFF position and press it to ON. If the light is white, make sure the computer is turned on, the signal cable is firmly connected, and the cable has no bent pins on the connector side. The Energy Saving feature may also be active. If the screen shows “Check cable connection,” go through the same cable and computer checks. If you see smoke or sparks, stop and disconnect the monitor from mains power immediately, then contact Philips customer service.
How do I switch between HDMI 1, HDMI 2 and VGA?
Toggle the rear control button up to change the signal input source. You can also open the OSD menu, go to Input, and choose VGA, 1 HDMI 1.4, 2 HDMI 1.4 or Auto. Make sure the cable from the device you want to view is plugged into the matching port on the back: HDMI 1, HDMI 2 or VGA.
How do I switch SmartImage modes for gaming, reading or low blue light?
Toggle the control button left to open the SmartImage menu, then toggle up or down to pick FPS, Racing, RTS, Gamer 1, Gamer 2, LowBlue Mode, EasyRead or Off. The menu closes on its own after 5 seconds, or you can toggle left again to confirm. Gamer 1 and Gamer 2 hold your own saved preference settings. EasyRead suits text-heavy reading such as PDF e-books, and LowBlue Mode is intended for productivity work.
Can I use MPRT and Adaptive Sync at the same time?
No. Adaptive Sync and MPRT cannot be enabled at the same time, so turn one off before using the other. MPRT also needs a refresh rate of 75 Hz or higher, locks out brightness adjustment while it is on, and can cause noticeable flicker or brightness changes because the backlight strobes with the refresh. Turn MPRT off when you are not gaming.
How do I reset the monitor if I get lost in the OSD menu?
Open the OSD menu, go to Setup, choose Reset and select Yes. This recalls all of the original factory settings, which is a quick way out if you have changed several settings and are not sure what you altered. Reset returns every setting to its default, including any you want to keep, so note any values you want to re-enter first.
How do I lock or unlock the hot keys?
Press the down control for 10 seconds. The display then shows an “Attention” notice with the new status: “Display controls locked” when the controls are locked, or “Display control unlocked” when they are unlocked. Repeat the same 10-second press to switch back.
How do I prevent or clear a ghost image on the screen?
Ghost images, also called burn-in or after-imaging, come from leaving still or static content on screen for a long time. In most cases the image fades gradually after the monitor is switched off. To prevent it, run a moving screen saver whenever you leave the monitor unattended, and use a periodic screen refresh application if the screen will show unchanging content. Severe burn-in that results from skipping these steps may not disappear, cannot be repaired and is not covered by the warranty.
How should I clean the screen?
Unplug the monitor first, then wipe the screen with a clean, soft cloth. A dry cloth is fine when the power is off, and a slightly damp cloth is acceptable once it is unplugged. Never use organic solvents, ammonia-based liquids or oil-based cleaners, since oil-based products can damage the plastic parts and void the warranty. One caution: the safety instructions advise against alcohol, while the FAQ section names isopropyl alcohol as the only solvent for extensive cleaning (ruling out ethyl alcohol, ethanol, acetone and hexane). Because the two differ, contact Philips Customer Care before using any liquid solvent.
How many bad pixels are covered by the warranty?
A monitor qualifies for repair or replacement only when its defects exceed the acceptable levels: more than 2 bright sub pixel dots, or more than 3 black sub pixel dots, or more than 5 bright and black dot defects combined, with no allowance for three adjacent lit or dark sub pixels. Two bright dot defects must also be more than 15 mm apart, and the same distance applies to black dot defects. A few stray red, green, blue, dark or white dots within these limits are treated as a normal characteristic of liquid crystal panels.
How far can I tilt the monitor forward?
The stand tilts from -5° forward to +20° backward, and you must not tilt it downward by more than -5 degrees. Going further can peel the panel away from the bezel, and that damage is not covered by the warranty. When adjusting the angle, grasp only the bezel and avoid pressing on the screen.