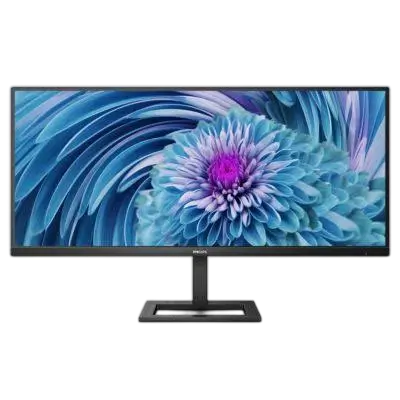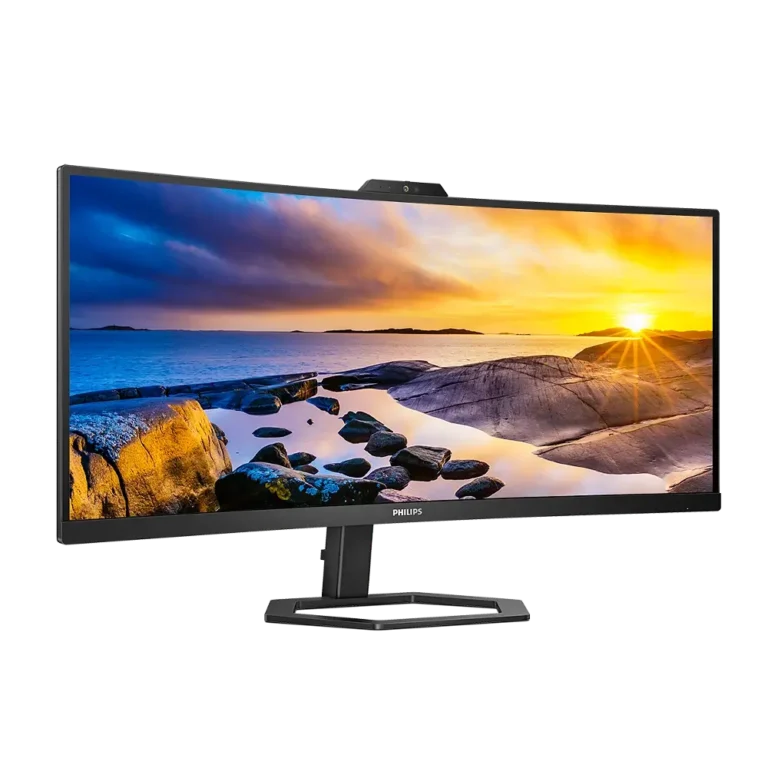
Philips Curved Monitor 5000 Series 34E1C5600HE
The Philips 34E1C5600HE is a 34-inch (86.36 cm) curved VA monitor with a 21:9 aspect ratio and a native resolution of 3440 x 1440. It accepts video over HDMI 2.0, DisplayPort 1.2 and USB-C (DisplayPort Alt mode), and the USB-C port can also power a compatible laptop with up to 65 W through Smart Power. A built-in 5.0 megapixel webcam with a microphone supports Windows Hello facial recognition on Windows 10 and Windows 11, while the 5 W x 2 speakers, four USB-A downstream ports and a noise-cancelling function help with video calls. MultiView shows two sources at once in PIP or PBP layout, and SmartImage presets, Adaptive Sync and a stand with 130 mm of height adjustment round out everyday use.
What Is in the Box
The package includes the monitor, the stand and base, a Quick Start guide, a power cord and signal and USB cables. The cables shown are HDMI, DP (DisplayPort), USB C-C, USB C-A and USB C-C/A, and which ones come with your unit differs according to region.
Safety and Care
Use of controls, adjustments or procedures other than those specified in the documentation may result in exposure to shock, electrical hazards and/or mechanical hazards. Read and follow these instructions when connecting and using the monitor.
Placement and Power
- Keep the monitor out of direct sunlight, very strong bright lights and away from other heat sources. Lengthy exposure may cause discoloration and damage.
- Keep the display away from oil, which can damage the plastic cover and void the warranty.
- Do not block the ventilation holes, and remove any object that could fall into them or prevent proper cooling.
- Position the monitor so the power plug and outlet are easily accessible.
- If you turn the monitor off by detaching the power cable or DC power cord, wait 6 seconds before reattaching it for normal operation.
- Always use the approved power cord provided by Philips. If it is missing, contact your local service center.
- Operate the monitor only with the specified power supply. An incorrect voltage can cause malfunction and may cause fire or electric shock.
- Do not pull or bend the power or signal cables, and do not place the monitor or other heavy objects on them. Damaged cables may cause fire or electric shock.
- Use the monitor within these ranges: temperature 0-40°C (32-104°F) and humidity 20-80% RH.
- Do not store or use the monitor where it is exposed to heat, direct sunlight or extreme cold, and do not leave it in a car or trunk in direct sunlight.
Handling and Tilt Limit
- Do not subject the monitor to severe vibration or high impact during operation, and do not knock or drop it during operation or transportation.
- Do not put excessive pressure on the LCD panel. To move the monitor, grasp the frame to lift it; never lift it with your hand or fingers on the panel.
- Do not tilt the monitor downward by more than -5 degrees, to avoid damage such as the panel peeling from the bezel. Damage from exceeding the -5 degree downward tilt is not covered under warranty.
- Only qualified service personnel should open the casing cover.
Cleaning and Moisture
- Unplug the monitor before cleaning it with a slightly damp cloth. With the power off, the screen may also be wiped with a dry cloth.
- Never use organic solvents such as alcohol, or ammonia-based liquids. Oil-based cleaning solutions may damage the plastic parts and void the warranty.
- Do not expose the monitor to dust, rain, water or excessive moisture. If it gets wet, wipe it with a dry cloth as soon as possible.
- If a foreign substance or water gets into the monitor, turn the power off immediately, disconnect the power cord, remove the substance or water, and send the monitor to a maintenance center.
- Unplug the monitor if you will not use it for an extended period.
Burn-in and Ghost Images
Showing still or static images for a long time can cause burn-in, also called after-imaging or ghost imaging. In most cases it fades gradually after the power has been switched off. Always run a moving screen saver when you leave the monitor unattended, and run a periodic screen refresh application if the monitor will show unchanging static content. Failure to do so may result in severe burn-in that will not disappear and cannot be repaired, and this damage is not covered under warranty.
Eye Comfort and Volume
Excessive sound pressure from earphones and headphones can cause hearing loss, and setting the equalizer to maximum raises the headphone output voltage and the sound pressure level. To reduce eye strain, take shorter breaks more often, for example a 5-10 minute break after 50-60 minutes of continuous screen use. Look at objects at varying distances, blink often, gently close and roll your eyes, set the screen to a suitable height and angle, adjust brightness and contrast to a suitable level, and match room lighting to screen brightness while avoiding fluorescent lighting and highly reflective surfaces. See a doctor if symptoms persist.
Setting Up the Monitor
Install the Base
The monitor has a curved design. When you attach or detach the base, place protective material under the monitor and do not press down on it, to avoid damage.
- Keep the monitor face down on a cushion so the screen is not scratched or damaged.
- Hold the stand with both hands and gently attach the base to the stand.
- Use your fingers to tighten the screw at the bottom of the base.
- Gently attach the stand to the VESA mount area until the latch locks the stand.
Rear Connectors
| No. | Connector |
| 1 | AC power input |
| 2 | HDMI input |
| 3 | DisplayPort input |
| 4 | USB C |
| 5 | USB downstream / USB fast charger |
| 6 | USB downstream |
| 7 | USB downstream |
| 8 | USB downstream |
| 9 | Audio Out |
| 10 | Kensington anti-theft lock |
Connect the Monitor to a PC
- Connect the power cord firmly to the back of the monitor.
- Turn off your computer and unplug its power cable.
- Connect the monitor signal cable to the video connector on the back of your computer.
- Plug the power cords of your computer and your monitor into a nearby outlet.
- Turn on your computer and the monitor. If the monitor displays an image, installation is complete.
USB Charging and USB Standby Mode
The USB ports can supply standard power output, and some have a charging function, identifiable by a power icon. You can use them to charge a smartphone or power an external hard drive. The display must be powered on at all times for this function to work.
Some Philips displays may not power or charge a device in Sleep/Standby mode, when the white power LED is blinking. If that happens, open the OSD menu, go to USB Setting, set USB Standby Mode to On (default is Off), and USB power and charging stay active even when the monitor is in sleep or standby mode.
Wireless Device Interference
USB 2.4 GHz wireless devices such as a mouse, keyboard or headphones may suffer interference from the high-speed signal of USB 3.2 devices, which can reduce radio transmission efficiency. To reduce it, keep USB 2.0 receivers away from the USB 3.2 connection port, or use a standard USB extension cable or USB hub to add distance between the wireless receiver and the USB 3.2 port.
Controls and On-Screen Display
Control Button
The monitor has a single toggle button on the rear side that works like a joystick. Toggle it in four directions to move the cursor and press it to select an option.
| Action | Function |
| Press the button | Switch power on. Press for more than 3 seconds to switch power off. |
| Toggle right | Access the OSD menu, and confirm an OSD adjustment. |
| Toggle down | Adjust the speaker volume, and adjust the OSD menu. |
| Toggle up | Change the signal input source, and adjust the OSD menu. |
| Toggle left | Open the SmartImage Game menu (FPS, Racing, RTS, Gamer 1, Gamer 2, LowBlue Mode, EasyRead, Off), and return to the previous OSD level. |
OSD Menu Structure
On-Screen Display (OSD) lets you adjust screen performance or select monitor functions through an on-screen window. Use this table as a reference when working through the menus.
| Main menu | Submenu | Options |
| Game Setting | Adaptive Sync | On, Off |
| MPRT | On, Off | |
| MPRT Level | 0~20 | |
| SmartResponse | Off, Fast, Faster, Fastest | |
| SmartFrame | On, Off; Size (1, 2, 3, 4, 5, 6, 7); Brightness (0~100); Contrast (0~100); H. position; V. position | |
| LowBlue Mode | On, Off | On has levels 1, 2, 3, 4 |
| Input | HDMI 2.0, DisplayPort, USB C, Auto | Auto: On, Off |
| Picture | SmartImage | FPS, Racing, RTS, Gamer1, Gamer2, LowBlue Mode, EasyRead, Off |
| Brightness, Contrast, Sharpness | 0~100 each | |
| SmartContrast | On, Off | |
| Gamma | 1.8, 2.0, 2.2, 2.4, 2.6 | |
| Pixel Orbiting | On, Off | |
| Over Scan | On, Off | |
| PIP/PBP | PIP / PBP Mode | Off, PIP, PBP |
| PIP / PBP Input | HDMI 2.0, DisplayPort, USB C | |
| PIP Size | Small, Middle, Large | |
| PIP Position | Top-Right, Top-Left, Bottom-Right, Bottom-Left | |
| Swap | Swaps main and sub sources | |
| SmartSize | Panel Size | 17″ (5:4), 19″ (5:4), 19″W (16:10), 22″W (16:10), 18.5″W (16:9), 19.5″W (16:9), 20″W (16:9), 21.5″W (16:9), 23″W (16:9), 24″W (16:9), 27″W (16:9), 34″W |
| 1:1, Aspect | Listed as submenu entries | |
| Audio | Volume | 0~100 |
| Mute | On, Off | |
| Audio Source | HDMI, DisplayPort, USB C | |
| Noise Cancelling | On, Off | |
| Color | Color Temperature | Native, 5000K, 6500K, 7500K, 8200K, 9300K, 11500K |
| sRGB | Standard color setting | |
| User Define | Red 0~100, Green 0~100, Blue 0~100 | |
| Language | 21 languages | English, Deutsch, Español, Ελληνική, Français, Italiano, Magyar, Nederlands, Português, Português do Brasil, Polski, Русский, Svenska, Suomi, Türkçe, Čeština, Українська, 简体中文, 繁體中文, 日本語, 한국어 |
| OSD Setting | Horizontal, Vertical | 0~100 each |
| Transparency | Off, 1, 2, 3, 4 | |
| OSD Time Out | 5s, 10s, 20s, 30s, 60s | |
| USB Setting | USB-C Setting | High Data Speed, High Resolution |
| USB Standby Mode | On, Off | |
| Setup | Resolution Notification | On, Off |
| Smart Power | On, Off | |
| Reset | Yes, No | |
| Information | Shows monitor information |
Native Resolution Alert
The monitor is designed for best performance at its native resolution of 3440 x 1440. If it is powered on at a different resolution, an on-screen alert says to use 3440 x 1440 for best results. You can switch this alert off with Resolution Notification in the Setup menu.
Lock or Unlock the Hot Keys
Press the down button for 10 seconds to lock or unlock the hot keys. The display then shows an attention message, either “Display controls unlocked” or “Display controls locked”.
Restore Factory Settings
If you get lost while making OSD adjustments, press the OSD button, select Reset in the Setup menu, and choose Yes to recall all the original factory settings.
Built-in Webcam, Microphone and Windows Hello
The top of the monitor holds a microphone, a webcam activity light, the 5.0 megapixel webcam and an IR sensor for face identification. The webcam also works with Windows Hello facial recognition, which logs you in to Windows devices in less than 2 seconds, 3 times faster than a password.
Enable the Webcam
Connect a USB cable from your PC to the USB C port of the monitor. The webcam is then ready, and Windows Hello works as long as the Windows Hello setting in Windows 10 or later is complete. With an edition lower than Windows 10, or with Mac OS, the webcam works without facial recognition. With Windows 7 a driver is required to activate the webcam.
| Operating system | Webcam | Windows Hello |
| Windows 7 | Yes | No |
| Windows 8 | Yes | No |
| Windows 8.1 | Yes | No |
| Windows 10 | Yes | Yes |
| Windows 11 | Yes | Yes |
Set Up Windows Hello in Windows 10
- Slide the shutter at the top of the display toward the camera-on position (to the right).
- Connect the USB cable from your PC to the USB C port of the monitor.
- In the Settings app, click Accounts.
- Click Sign-in options in the sidebar.
- Set up a PIN code first. Once you add it, the Windows Hello option unlocks.
- Review the options available under Windows Hello.
- Click Get started. The setting is complete.
The manual advises checking the Windows official website for the latest information, because the information in the guide can change without notice.
Camera Shutter and Microphone
Slide the shutter to the right to turn on the camera for use with the Hello webcam 5M software. Slide it to the left to turn off the camera and cover the lens. Closing the shutter does not turn off the microphone, because the camera and microphone are separate devices and the microphone can be used without the camera. To turn off the microphone, go to the settings of your video conferencing software and disconnect the microphone, or do it in the operating system.
Voltage Setting and Water Ripple
Different regions have different voltages, and an inconsistent voltage setting may cause water ripple when using this webcam. Make the voltage setting the same as the voltage of your region. You can also adjust the image settings, for example the White Balance value, in the menu to suit the visual effect.
Speakers and Noise Cancelling
The monitor has built-in speakers (5 W x 2). Use the down toggle to adjust the volume, or set Volume (0~100) and Mute in the Audio menu.
Noise Cancelling is on by default. When the monitor is connected over USB-C during video conferencing, it automatically filters for human sounds. You can turn it off under Noise Cancelling in the Audio menu of the OSD.
If multiple devices are connected to the display, both may play through the speaker at the same time. It is recommended to disable the audio output of the non-primary device.
Stand Adjustment and VESA Mounting
Tilt and Height
The stand tilts from -5 to +20 degrees and adjusts in height by 130 mm. Do not tilt the monitor downward by more than -5 degrees, to avoid screen damage such as panel peeling. Do not press the screen while adjusting the angle, and grasp only the bezel.
Remove the Base for VESA Mounting
The monitor accepts a 100 mm x 100 mm VESA-compliant mounting interface, using M4 VESA mounting screws. Always contact the manufacturer for wall-mount installation.
- Place the monitor face down on a smooth surface, taking care not to scratch or damage the screen, then lift the monitor stand.
- While keeping the release button pressed, tilt the base and slide it out.
MultiView (PIP and PBP)
MultiView lets you view two sources side by side, such as a desktop PC and a notebook, so you can keep a video feed in a small window while you work, or edit a file from one computer while using another. All three inputs (HDMI, DisplayPort and USB C) can be combined as main and sub sources in any pairing.
Turn On MultiView
- Toggle right to enter the OSD menu.
- Toggle up or down to select the PIP / PBP main menu, then toggle right to confirm.
- Select PIP / PBP Mode and toggle right.
- Select PIP or PBP and toggle right to confirm.
- Go back to set PIP / PBP Input, PIP Size, PIP Position or Swap, toggling right to confirm each selection.
MultiView Options
- PIP (Picture in Picture): opens a sub-window of another signal source over the main picture.
- PBP (Picture by Picture): opens a sub-window side by side with the main picture.
- PIP / PBP Input: choose HDMI 2.0, DisplayPort or USB C as the sub display source.
- PIP Size: Small, Middle or Large.
- PIP Position: Top-Right, Top-Left, Bottom-Right or Bottom-Left.
- Swap: swaps the main and sub sources. The video and its audio source swap at the same time.
- Off: stops the MultiView function.
In PBP mode, black strips appear at the top and bottom of the screen to keep the correct aspect ratio. To see two sources side by side without black strips, adjust your device resolutions as the pop-up attention message says. An analog signal does not support this full-screen PBP display.
The audio source is normally linked to the main picture source. To change it, open the Audio menu and choose Audio Source. The monitor remembers your last choice the next time you turn it on.
SmartImage, SmartContrast and Gaming Settings
SmartImage Presets
SmartImage analyzes the content on your screen and dynamically adjusts brightness, contrast, color saturation and sharpness in real time for the scenario you choose.
- Toggle left to open the SmartImage on-screen display.
- Toggle up or down to choose a mode.
- The SmartImage display stays on screen for 5 seconds, or you can toggle left to confirm.
| Mode | Purpose |
| FPS | For first-person shooter games. Improves dark-theme black level detail. |
| Racing | For racing games. Provides the fastest response time and high color saturation. |
| RTS | For real-time strategy games. A user-selected portion can be highlighted through SmartFrame, and its picture quality adjusted. |
| Gamer 1 | Your own preference settings, saved as Gamer 1. |
| Gamer 2 | Your own preference settings, saved as Gamer 2. |
| LowBlue Mode | Uses software technology to reduce harmful shortwave blue light, for easier-on-the-eyes productivity. |
| EasyRead | Improves reading of text applications such as PDF ebooks by raising text contrast and edge sharpness and adjusting brightness, contrast and color temperature. |
| Off | No optimization by SmartImage Game. |
SmartContrast
SmartContrast analyzes the displayed content in real time to adjust colors and control backlight intensity. It steps up backlighting for clearer, brighter images or dims it for clear display of images on dark backgrounds. You turn it on or off in the Picture menu.
MPRT Notes
- MPRT reduces motion blur by strobing the LED backlight in sync with screen refresh, which may cause noticeable brightness change.
- A refresh rate of 75 Hz or higher is required for MPRT.
- Adaptive Sync and MPRT cannot be enabled at the same time.
- Brightness cannot be adjusted while MPRT is turned on.
- MPRT is a gaming-optimized mode and may cause noticeable screen flickering. Turn it off when you are not gaming.
Adaptive Sync
Adaptive Sync lets the graphics card update the monitor the moment a new picture is ready, which avoids the tearing seen without v-sync and the jerky image and reduced mouse responsiveness that v-sync can cause. Turn it on with Adaptive Sync in the Game Setting menu. The manual lists these compatible items.
- Operating system: Windows 10/8.1/8/7.
- Graphics cards: AMD Radeon R9 300 Series, R9 Fury X, R9 360, R7 360, R9 295X2, R9 290X, R9 290, R9 285, R7 260X and R7 260.
- Processors (A-Series desktop and mobility APUs): AMD A10-7890K, A10-7870K, A10-7850K, A10-7800, A10-7700K, A8-7670K, A8-7650K, A8-7600 and A6-7400K.
USB-C Power Delivery and Smart Power
Smart Power lets the monitor deliver up to 65 W through the USB-C port, compared with the standard 45 W, which is useful for recharging a high-performance laptop with a single cable. It also enables protections that limit current draw to prevent damage to the device.
Turn On Smart Power
- Toggle right to enter the OSD menu.
- Toggle up or down to select the Setup main menu, then toggle right to confirm.
- Toggle up or down to turn Smart Power on or off.
Power Through the USB-C Port
- Connect the device to the USB-C port.
- Turn on Smart Power.
- With Smart Power on and USB-C used for power, the maximum power delivery depends on the monitor brightness value. Lower the brightness manually to increase power delivery.
| Level | Brightness value | Power delivery from USB-C |
| Level 1 | 0~70 | 65 W |
| Level 2 | 71~100 | 45 W |
- If Smart Power is on and the DFP (Downstream Facing Port) is using more than 5 W, USB-C can deliver only up to 45 W.
- If Smart Power is off, USB-C can deliver only up to 45 W.
Technical Specifications
Picture and Display
| Specification | Value |
| Monitor panel type | VA |
| Backlight | W-LED system |
| Panel size | 34″ W (86.36 cm) |
| Aspect ratio | 21:9 |
| Pixel pitch | 0.23175 (H) mm x 0.23175 (V) mm |
| Contrast ratio (typ.) | 3000:1 |
| Optimum resolution | 3440 x 1440 @ 60 Hz |
| Viewing angle | 178° (H) / 178° (V) @ C/R > 10 (typ.) |
| Picture enhancement | SmartImage Game |
| Vertical refresh rate | 48 Hz – 100 Hz |
| Horizontal frequency | 30 KHz – 160 KHz |
| Monitor colors | 16.7M |
| sRGB, Flicker Free, LowBlue Mode, Adaptive Sync, EasyRead | Yes |
Connectivity and USB
| Specification | Value |
| Signal input | HDMI, DisplayPort, USB-C (DisplayPort Alt mode) |
| Connectors | 1 x USB C (upstream), 1 x HDMI 2.0 (HDCP 2.2, HDCP 1.4), 1 x DisplayPort 1.2 (HDCP 2.2, HDCP 1.4), 1 x Audio out, 4 x USB A (downstream with x1 fast charge BC 1.2) (5V/1.5A) |
| Sync input | Separate Sync |
| USB C | Upstream, DisplayPort Alt mode, HDCP 2.2, HDCP 1.4 |
| USB Power Delivery | USB PD version 3.0, up to 65W (5V/3A, 7V/3A, 9V/3A, 10V/3A, 12V/3A, 15V/3A, 20V/3.25A) |
| USB A | x1 fast charge B.C 1.2, up to 7.5W (5V/1.5A) |
| Super Speed | USB C / USB A: USB 3.2 Gen1, 5 Gbps |
Convenience and Stand
| Specification | Value |
| Built-in speakers | 5W x 2 |
| Built-in webcam | 5.0 megapixel webcam with microphone and LED indicator (works with Windows Hello) |
| MultiView | PIP/PBP mode, 2 devices |
| OSD languages | English, German, Spanish, Greek, French, Italian, Hungarian, Dutch, Portuguese, Brazil Portuguese, Polish, Russian, Swedish, Finnish, Turkish, Czech, Ukrainian, Simplified Chinese, Traditional Chinese, Japanese, Korean |
| Other convenience | VESA mount (100 x 100 mm), Kensington Lock |
| Plug & Play compatibility | DDC/CI, sRGB, Windows 11/10/8.1/8/7, Mac OS X |
| Tilt | -5 / +20 degree |
| Height adjustment | 130 mm |
Power, Dimensions and Environment
| Specification | Value |
| Power supply | Built-in, 100-240VAC, 50/60Hz |
| Normal operation | 57.3 W at 100VAC 60Hz, 57.0 W at 115VAC 60Hz, 57.5 W at 230VAC 50Hz (typ.) |
| Sleep (standby mode) | 0.5 W at each voltage |
| Off mode | 0.3 W at each voltage |
| Heat dissipation, normal operation | 195.56 BTU/hr at 100VAC, 194.54 BTU/hr at 115VAC, 196.25 BTU/hr at 230VAC (typ.) |
| Heat dissipation, sleep / off | 1.71 BTU/hr / 1.02 BTU/hr |
| Power LED | On mode: White. Standby/Sleep mode: White (blinking) |
| Product with stand (WxHxD) | 808 x 557 x 281 mm |
| Product without stand (WxHxD) | 808 x 381 x 111 mm |
| Product with packaging (WxHxD) | 980 x 519 x 226 mm |
| Weight: with stand / without stand / with packaging | 9.29 kg / 7.16 kg / 14.80 kg |
| Operating temperature / humidity / pressure | 0°C to 40°C / 20% to 80% / 700 to 1060hPa |
| Non-operating temperature / humidity / pressure | -20°C to 60°C / 10% to 90% / 500 to 1060hPa |
| Cabinet | Black, texture finish |
| Environmental | RoHS yes, packaging 100% recyclable, 100% PVC BFR free housing |
Specifications are subject to change without notice. The manual points to www.philips.com/support for the latest leaflet.
Resolution and Preset Modes
The maximum resolution is 3440 x 1440 @ 100 Hz and the recommended resolution is 3440 x 1440 @ 60 Hz. The display works best at its native resolution of 3440 x 1440, so make sure your graphics card can reach the maximum resolution and refresh rate of this display.
| H. freq (kHz) | Resolution | V. freq (Hz) |
| 31.47 | 720 x 400 | 70.09 |
| 31.47 | 640 x 480 | 59.94 |
| 35.00 | 640 x 480 | 66.67 |
| 37.86 | 640 x 480 | 72.81 |
| 37.50 | 640 x 480 | 75.00 |
| 35.16 | 800 x 600 | 56.25 |
| 37.88 | 800 x 600 | 60.32 |
| 46.88 | 800 x 600 | 75.00 |
| 48.08 | 800 x 600 | 72.19 |
| 47.73 | 832 x 624 | 74.55 |
| 48.36 | 1024 x 768 | 60.00 |
| 56.48 | 1024 x 768 | 70.07 |
| 60.02 | 1024 x 768 | 75.03 |
| 44.77 | 1280 x 720 | 59.86 |
| 63.89 | 1280 x 1024 | 60.02 |
| 79.98 | 1280 x 1024 | 75.03 |
| 55.94 | 1440 x 900 | 59.89 |
| 65.29 | 1680 x 1050 | 59.95 |
| 89.48 | 1720 x 1440 | 59.97 |
| 67.50 | 1920 x 1080 | 60.00 |
| 67.17 | 2560 x 1080 | 59.98 |
| 44.41 | 3440 x 1440 | 29.99 |
| 88.82 | 3440 x 1440 | 59.97 |
| 150.97 | 3440 x 1440 | 99.98 |
Power Management
If your PC has a VESA DPM-compliant display card or software installed, the monitor can automatically reduce power use when idle, and it wakes up automatically when it detects keyboard, mouse or other input.
| VESA mode | Video | H-sync | V-sync | Power used | LED color |
| Active | On | Yes | Yes | 57.0 W (typ.), 202.4 W (max.) | White |
| Sleep (Standby mode) | Off | No | No | 0.5 W | White (blinking) |
| Off mode | Off | – | – | 0.3 W | Off |
These figures were measured at native resolution 3440 x 1440, contrast 50%, brightness 80% and color temperature 6500K with a full white pattern, and are subject to change without notice.
Pixel Defect Policy
Pixel or sub-pixel defects on TFT panels are sometimes unavoidable, and no manufacturer can guarantee a panel free from them. Philips guarantees that a monitor with an unacceptable number of defects will be repaired or replaced under warranty. To qualify, the number of defects must exceed the acceptable levels below. The policy is valid worldwide. A bright dot is an always-lit sub-pixel that stands out on a dark pattern, and a black dot is an always-dark sub-pixel that stands out on a light pattern.
| Bright dot defects | Acceptable level |
| 1 lit sub-pixel | 2 |
| 2 adjacent lit sub-pixels | 1 |
| 3 adjacent lit sub-pixels (one white pixel) | 0 |
| Distance between two bright dot defects | >15mm |
| Total bright dot defects of all types | 2 |
| Black dot defects | Acceptable level |
| 1 dark sub-pixel | 5 or fewer |
| 2 adjacent dark sub-pixels | 2 or fewer |
| 3 adjacent dark sub-pixels | 1 |
| Distance between two black dot defects | >15mm |
| Total black dot defects of all types | 5 or fewer |
The total of bright or black dot defects of all types must be 10 or fewer. One or two adjacent sub-pixel defects count as one dot defect. A red or blue bright dot must be more than 50 percent brighter than neighboring dots, and a green bright dot 30 percent brighter.
Warranty and Customer Care
For warranty coverage and support valid in your region, visit www.philips.com/support or contact your local Philips Customer Care Center. The warranty period is shown in the Warranty Statement in the Important information manual, and regional service hotlines are on the Philips website support page.
An extended warranty service package is offered through a Certified Service Center. Buy it within 30 calendar days of your original purchase date. The extended period adds 1, 2 or 3 years to the local standard warranty period, proof of original purchase and of the extended warranty purchase is required, and during the extended period the service includes pickup, repair and return, with the user responsible for all costs accrued.
Troubleshooting
These are problems an owner can correct. If a problem persists after you try the solutions, contact a Philips customer service representative.
No Picture
- Power LED not lit: make sure the power cord is plugged into the outlet and into the back of the monitor. Then make sure the power button on the rear of the monitor is in the OFF position, and press it to the ON position.
- Power LED is white: make sure the computer is turned on, the signal cable is properly connected to the computer, and the monitor cable has no bent pins on the connector side. If it does, repair or replace the cable. The Energy Saving feature may also be active.
- Screen says “Check cable connection”: make sure the monitor cable is properly connected to your computer (also see the Quick Start Guide), and check the monitor cable for bent pins. Make sure the computer is turned on.
Smoke or Sparks
If you see smoke or sparks, do not perform any troubleshooting steps. Disconnect the monitor from the mains power source immediately for safety, and contact a Philips customer service representative right away.
Image Problems
- Image vibrates on the screen: check that the signal cable is properly and securely connected to the graphics board or PC.
- Image appears blurred, indistinct or too dark: adjust the contrast and brightness in the On-Screen Display.
- Image appears distorted, or text is fuzzy or blurred: set the PC display resolution to the monitor’s recommended native resolution, 3440 x 1440.
- After-image, burn-in or ghost image remains after power is turned off: in most cases it disappears gradually over time. Always run a moving screen saver when away, and a periodic screen refresh application if static content is displayed. Severe burn-in cannot be repaired and is not covered under warranty.
- Green, red, blue, dark and white dots on the screen: the remaining dots are a normal characteristic of the liquid crystal used in today’s technology. See the Pixel Defect Policy above.
- Image not centered, or vertical or horizontal flicker: the manual lists the Auto function and the Phase/Clock setting for these, and states that they apply only in VGA analog mode. The specifications for this monitor list HDMI, DisplayPort and USB-C inputs. The Auto function is not applicable in DVI-digital mode because it is not necessary.
- Power-on light is too strong: the manual says you can adjust it with the power LED setup in the OSD, and notes that functionality differs according to display. The OSD menu listed for this monitor does not show a power LED entry.
For further help, see the service contact information in the Important information manual and contact a Philips customer service representative.
Frequently Asked Questions
What resolution and refresh rate should I use with the Philips 34E1C5600HE?
Use the native resolution of 3440 x 1440. The recommended setting is 3440 x 1440 at 60 Hz, and the maximum is 3440 x 1440 at 100 Hz, provided your graphics card can reach it. If you run a different resolution, the monitor shows an alert to use 3440 x 1440 for best results, and you can switch that alert off with Resolution Notification in the Setup menu. If you see disturbance on screen at 60 Hz, you can try 100 Hz to see whether it goes away.
What should I do if the screen says “Cannot display this video mode”?
The monitor works best at 3440 x 1440, so the fix is to set your PC to that resolution. Unplug all cables and reconnect the monitor you used before. In Windows, open the Display settings, move the desktop area setting to 3440 x 1440 pixels, open Advanced Properties, set the refresh rate to 60 Hz and click OK. Restart the computer and check that it is still at 3440 x 1440. Then shut down, disconnect the old monitor, reconnect the Philips monitor, turn on the monitor and then the PC.
How do I charge my laptop through the USB-C port?
Connect the laptop to the USB-C port, then turn on Smart Power in the Setup menu of the OSD (toggle right, select Setup, then toggle up or down to switch Smart Power on). With Smart Power on, the monitor can deliver up to 65 W, compared with the standard 45 W. One cable can then carry video, data and power, as long as your laptop supports power delivery over USB-C.
Why is my laptop receiving only 45 W instead of 65 W?
There are three conditions that limit USB-C to 45 W. Smart Power may be off. The monitor brightness may be set to 71 or higher, since 65 W is available only at brightness 0 to 70 and 45 W applies from 71 to 100. Or a downstream USB port may be drawing more than 5 W while Smart Power is on. Turn Smart Power on, lower the brightness, and unplug heavy loads from the USB downstream ports to see which one applies.
How do I set up the webcam and Windows Hello?
Slide the shutter at the top of the display to the right so the camera is on, and connect a USB cable from your PC to the USB C port on the monitor. In Windows 10 or Windows 11, open Settings, choose Accounts, then Sign-in options. Set up a PIN code first, since Windows Hello unlocks only after that, then click Get started under the Windows Hello option and follow the prompts. On Windows 7, 8 and 8.1 the webcam works but Windows Hello does not, and Windows 7 also needs a driver.
Does closing the camera shutter turn off the microphone?
No. Sliding the shutter to the left turns off the camera and covers the lens, but the camera and microphone are separate devices, so the microphone keeps working. To turn off the microphone, disconnect it in the settings of your video conferencing software or in the operating system.
Why can’t Windows detect the webcam, and why is the face recognition option greyed out?
Restart the Windows biometric service so the webcam is detected again. Press Ctrl + Shift + Esc to open Task Manager, open the Services tab, and scroll to WbioSrvc (Windows Biometric Service). If its status shows Running, right-click it and stop the service first, then restart it manually. Go back to the sign-in options menu to set up the webcam again.
How do I show two computers on the screen at once?
Turn on MultiView. Toggle right to open the OSD, choose PIP / PBP, then PIP / PBP Mode, and pick PIP for a small window over the main picture or PBP for two sources side by side. Then use PIP / PBP Input to choose HDMI 2.0, DisplayPort or USB C for the second source. In PIP you can also set the window size (Small, Middle, Large) and its corner, and Swap exchanges the main and sub sources along with their audio. Audio normally follows the main source, and you can pick a different one under Audio Source in the Audio menu.
Why does the PIP or PBP sub-window flicker?
The sub-window source is likely using interlaced timing. Change the signal on that source to progressive timing and the flicker should stop.
How do I keep the USB ports charging when the monitor is asleep?
Turn on USB Standby Mode. Open the OSD, go to USB Setting, and set USB Standby Mode to On. It is Off by default, which is why some units stop powering or charging a device when they enter Sleep/Standby, with the white power LED blinking. The monitor must be powered on for the USB charging function to work normally.
How do I lock or unlock the monitor’s hot keys?
Press the down button on the rear joystick for 10 seconds. The monitor then shows an attention message, either “Display controls locked” or “Display controls unlocked”, so you can see the current state.
How should I clean the screen?
For normal cleaning, use a clean, soft cloth. For more extensive cleaning, use isopropyl alcohol, and do not use other solvents such as ethyl alcohol, ethanol, acetone or hexane. Unplug the monitor first if you clean it with a slightly damp cloth, avoid pressing on the panel, and never use oil-based cleaners, which can damage the plastic parts and void the warranty.