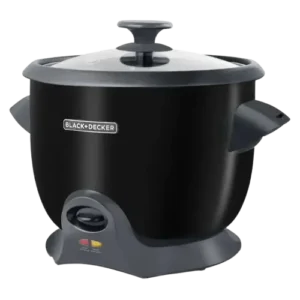
| Brand Name | BLACK+DECKER |
| Product Name | Rice Cooker |
| Model Number(s) | RC620B, RC620W, RC628W |
| File Size | 316 KB |
| Number of Pages | 40 |
| Languages Covered | English and Spanish |
BLACK+DECKER Rice Cooker RC620B
The BLACK+DECKER RC620 and RC628 series rice cookers are household appliances designed for cooking rice and preparing other foods such as soups, stews, pasta, hot cereal, steamed vegetables, fish, and other steamed foods.
The rice cooker uses a simple COOK/WARM control system. When rice finishes cooking, the control switch automatically moves from COOK to WARM. A removable steaming basket also allows vegetables or other foods to be steamed either separately or while a small quantity of rice cooks below.
The RC620 models can prepare up to 10 supplied rice-cup measures of dry rice, while the RC628 model can accommodate up to 15 supplied rice-cup measures of dry rice. One supplied rice measure equals 3/4 standard cup, or 6 fluid ounces.
Models and Electrical Specifications
The technical information printed at the end of the manual provides the following ratings:
| Model | Power | Voltage | Frequency |
| RC620B | 700 W | 120 V AC | 60 Hz |
| RC620W | 700 W | 120 V AC | 60 Hz |
| RC620SS | 700 W | 120 V AC | 60 Hz |
| RC628W | 1000 W | 120 V AC | 60 Hz |
Although RC620SS appears in the electrical-rating section, the cover of this specific manual lists RC620B, RC620W, and RC628W as its primary models.
Parts and Components
The product diagram on page 26 identifies the rice cooker and its removable accessories.
| No. | Part | Part Number |
| 1 | Lid handle | — |
| 2 | Tempered glass lid | RC620-01 |
| 3 | Cooking bowl | RC620-02 |
| 4 | Cool-touch side handles | — |
| 5 | Steaming basket | RC620-03 |
| 6 | Rice measuring cup | RC620-04 |
| 7 | Serving spoon | RC620-05 |
| 8 | Cooking base | — |
| 9 | COOK indicator light | — |
| 10 | Control switch | — |
| 11 | WARM indicator light | — |
| 12 | Steam vent | — |
| 13 | Lid hanger | — |
The illustration also shows where the steaming basket, rice measure, serving spoon, indicator lights, control switch, steam vent, and lid hanger are positioned.
Control Switch and Indicator Lights
The BLACK+DECKER rice cooker uses one control switch and two indicator lights.
WARM Indicator
The WARM light automatically turns on when the appliance is plugged into an electrical outlet. The cooker begins heating in WARM mode immediately.
COOK Indicator
Pushing the control switch downward starts the cooking cycle. The COOK indicator light illuminates while the appliance cooks.
Automatic WARM Mode
When rice is finished, the control switch automatically moves upward and the appliance switches to WARM. The manual recommends letting cooked rice rest on WARM for approximately 15 minutes with the lid in place before serving.
Important Safety Instructions
The appliance is intended for household use. Standard precautions should be followed whenever it is operated.
Important BLACK+DECKER rice cooker safety instructions include:
- Read all instructions before operating the appliance.
- Do not touch hot surfaces; use handles or knobs.
- Do not immerse the cord, plug, or cooking base in water or another liquid.
- Supervise children closely when the appliance is used near them.
- Do not operate the rice cooker if its cord or plug is damaged or if the appliance has malfunctioned or been damaged.
- Do not use accessories that are not recommended by the manufacturer.
- Do not operate the appliance outdoors.
- Do not allow the power cord to hang over the edge of a table or counter.
- Keep the cord away from hot surfaces.
- Do not place the cooker on or near a hot gas burner, electric burner, or heated oven.
- Use extra care when moving the appliance if it contains hot liquid.
- Unplug the cooker when it is not being used and before cleaning.
- Let the appliance cool before installing or removing parts.
- Do not place the appliance on an unstable surface.
- Do not use it to heat or cook non-food materials.
- Do not cook directly inside the cooking base. Food must be placed inside the supplied cooking bowl.
- Lift the glass lid carefully because hot steam escapes during operation.
- Never place the removable cooking bowl on a stove burner or open flame.
- Do not cut food directly inside the cooking bowl because doing so can scratch its surface.
Hot Steam Warning
Steam exits through the vent in the glass lid during cooking. The lid should be positioned so the steam vent points away from cabinets and walls.
Hands should never be placed over the steam vent while the cooker is operating because escaping steam can cause burns.
Polarized Plug
On 120V versions, the appliance uses a polarized plug with one blade wider than the other.
It is designed to fit a polarized outlet in only one direction. If the plug does not fit, it should be reversed. If it still does not fit, a qualified electrician should be contacted.
The plug should not be modified.
Tamper-Resistant Screw
The housing includes a tamper-resistant screw intended to prevent removal of the outer cover.
The manual states that there are no user-serviceable components inside the cooking base. Repair should be performed only by authorized service personnel.
Before First Use
Before operating the BLACK+DECKER rice cooker for the first time:
- Remove all packing materials.
- Remove stickers and the plastic band around the power plug.
- Wash all removable components according to the cleaning instructions.
- Dry the cooking bowl completely.
- Place the clean cooking bowl inside the cooking base.
- Put the appliance on a stable, heat-resistant surface.
- Keep cloth, liquid, and other flammable materials away from the unit.
- Leave sufficient clearance around and above the cooker so heat and steam do not damage cabinets or walls.
The product can be registered through the product-registration website listed in the manual.
First-Use Odor
A small amount of smoke or a slight odor may be noticed during the first few minutes of operation. According to the manual, this can result from manufacturing oil and does not affect appliance performance.
How to Use the Rice Cooker
How to Cook Rice
These BLACK+DECKER rice cooker instructions apply to the RC620 and RC628 models covered by the manual.
Step 1: Measure the Rice
Use the rice cup supplied with the appliance.
Do not substitute a standard 8-ounce measuring cup when following the cooker markings.
The supplied rice measure holds:
3/4 standard cup = 6 fluid ounces
Maximum dry-rice capacity:
- RC620: 10 rice measures
- RC628: 15 rice measures
One supplied rice measure of uncooked rice produces approximately 2 standard cups of cooked rice.
Step 2: Rinse the Rice
Rinse uncooked rice with water to remove excess starch, then drain it.
Step 3: Add Water
For white rice:
- Add the desired number of supplied rice measures.
- Fill the cooking bowl with water to the numbered line that matches the number of measures being cooked.
For example, when using four supplied measures of white rice, water is added to the 4 marking.
Butter, oil, or seasonings can also be added if desired.
Brown rice uses different water quantities and should follow the rice-cooking chart below.
Step 4: Insert the Cooking Bowl
Place the cooking bowl into the cooking base and install the glass lid.
Step 5: Plug In the Cooker
Once connected to an outlet, the WARM indicator automatically illuminates and the cooker begins heating on WARM.
Step 6: Start Cooking
Push the control switch downward.
The COOK indicator will illuminate and the cooking cycle will begin.
Step 7: Allow Automatic Cooking to Finish
When the rice is ready, the control switch automatically flips upward and the cooker enters WARM mode.
Step 8: Let the Rice Rest for 15 Minutes
For the best result, keep the lid on and leave the rice in WARM mode for approximately 15 minutes.
Then stir the rice using the supplied serving spoon before serving.
Step 9: Unplug After Use
Disconnect the cooker when it is no longer needed and allow it to cool completely before cleaning.
Rice-to-Water Chart
White Rice Cooking Chart
The following settings apply to long-grain white, jasmine, basmati, yellow, and medium-grain rice.
| Dry Rice | Water | Approx. Cooking Time | Approx. Cooked Yield |
| 2 rice measures | Fill to mark 2 | 21–26 min. | 3.5 cups |
| 4 rice measures | Fill to mark 4 | 25–30 min. | 7 cups |
| 6 rice measures | Fill to mark 6 | 29–34 min. | 10.5 cups |
| 8 rice measures | Fill to mark 8 | 33–38 min. | 14 cups |
| 10 rice measures | Fill to mark 10 | 37–42 min. | 17.5 cups |
| RC628: 12 measures | Fill to mark 12 | 35–46 min. | 21 cups |
| RC628: 15 measures | Fill to mark 15 | 38–49 min. | 28 cups |
Brown Rice Cooking Chart
| Dry Rice | Water | Approx. Cooking Time | Approx. Cooked Yield |
| 2 rice measures | 3 cups | 28–33 min. | 4.5 cups |
| 4 rice measures | 6 cups | 32–37 min. | 9 cups |
| 6 rice measures | 9 cups | 36–41 min. | 13.5 cups |
| 8 rice measures | 12 cups | 40–45 min. | 18 cups |
| RC628: 10 measures | 15 cups | 42–54 min. | 22 cups |
The manual recommends leaving rice on WARM for at least 15 minutes before serving. Other grains not shown in the chart should be prepared according to their package instructions.
Cooking Soups, Stews and Other Foods
The rice cooker can also prepare foods other than rice.
To cook soups, stews, or similar dishes:
- Put the ingredients into the cooking bowl.
- Insert the bowl into the cooking base.
- Install the lid.
- Plug in the appliance.
- Push the control switch downward to COOK.
- Use a separate kitchen timer if the recipe requires a specific cooking period.
- When the food is ready, move the control switch upward manually to WARM.
- Unplug the unit when finished.
For liquids such as soups and stews, the cooker may not automatically enter WARM mode until the liquid has boiled away or been absorbed. The manual therefore advises monitoring the cooking process and not leaving the appliance unattended.
How to Steam Food
Using the Steaming Basket
- Insert the cooking bowl into the cooking base.
- Add 1 1/2 cups of water to the cooking bowl.
- Add seasoning if desired.
- Place food inside the steaming basket.
- Put the steaming basket inside the cooking bowl.
- Make sure the water does not touch the basket.
- Install the lid.
- Plug in the cooker.
- Push the control switch to COOK.
- Begin checking food for doneness after approximately 5 minutes.
- Unplug the cooker after cooking.
When steaming food without rice underneath, the cooker will not automatically switch to WARM, so cooking must be monitored.
Cooking Rice and Steaming Vegetables at the Same Time
The rice cooker can cook rice while vegetables steam above it.
- Put the cooking bowl into the base.
- Add no more than two supplied measures of dry rice.
- Add the corresponding quantity of water from the rice chart.
- Add fresh or frozen vegetables to the steaming basket.
- Place the basket above the rice and install the lid.
- Push the control switch downward to COOK.
- Begin checking vegetables after approximately five minutes.
- If the vegetables finish first, carefully remove the steaming basket.
- Replace the glass lid immediately so the rice can continue cooking.
- When the rice finishes, the cooker will automatically switch to WARM.
- Leave the rice on WARM for about 15 minutes before serving.
Steamed Vegetable Cooking Times
Use approximately 1 1/2 to 2 cups of water, stock, or vegetable broth at cold or room temperature.
| Vegetable | Amount | Approx. Time |
| Fresh asparagus | 1/2 lb. | 15–18 min. |
| Fresh green beans | 1/2 lb. | 15–18 min. |
| Fresh beets, quartered | 1 lb. | 26–28 min. |
| Fresh broccoli | 1 lb. | 15–18 min. |
| Brussels sprouts | 4 cups | 24–26 min. |
| Cabbage | 1 lb. | 24–26 min. |
| Carrots | 12 oz. | 18–20 min. |
| Cauliflower | 12 oz. | 22–25 min. |
| Corn | 1 1/2 lb. / 2–4 ears | 20–22 min. |
| Snow or sugar snap peas | 8 oz. | 12–14 min. |
| New red potatoes | 6 medium | 24–26 min. |
| Fresh spinach | 4 packed cups | 10–15 min. |
| Butternut squash | 1 lb. | 24–26 min. |
| Yellow squash or zucchini | 1 lb. | 16–18 min. |
| Frozen mixed vegetables | 10 oz.–1 lb. | 16–18 min. |
| Frozen peas | 1 lb. | 14–16 min. |
The preparation details and serving suggestions for these vegetables appear in the steaming charts on pages 33–34 of the manual.
Steamed Fish Cooking Chart
The manual recommends adding 1 1/2 cups of water to the cooking bowl and adding thick lemon slices to the water when steaming fish.
| Fish | Amount | Preparation | Approx. Time |
| Salmon | 1 1/2 lb. | Fillets | 20–22 min. |
| Scallops | 1 lb. | Medium size | 14–16 min. |
| Snapper | 1 lb. | Whole, head and tail removed | 20–22 min. |
| Shrimp | 1 lb. / about 20–24 | Steam until pink | 15–18 min. |
| Swordfish | 1 lb. | 2 medium steaks | 15–17 min. |
Additional Ways to Use the Rice Cooker
Pasta
For pasta, the manual instructs users to:
- Add approximately 6–7 cups of water to the cooking bowl.
- Bring the water to a boil using COOK mode.
- Add up to 1/2 pound of pasta.
- Stir and cover.
- Cook until the pasta reaches the desired consistency.
- Drain well.
Oatmeal and Hot Cereal
The guide recommends steel-cut oats.
When preparing oatmeal:
- Do not fill the bowl more than halfway with liquid.
- Stir occasionally for even heating.
- The cooker will switch to WARM when well-done oatmeal is finished.
- For a different texture, monitor the cooker and switch to WARM manually at the desired consistency.
- Choose recipes that cook in one hour or less.
Packaged Soups, Pasta and Stews
When preparing packaged foods:
- Do not fill above the highest marked water level.
- Stir occasionally.
- Use a separate kitchen timer.
- Do not use the rice cooker’s control switch as a cooking-time indicator for soups and stews.
- Use boneless meat and poultry cut into cubes no larger than approximately 1 1/2 inches.
- Add frozen vegetables near the end of cooking.
- Select recipes that require one hour or less.
Useful Rice Cooking Tips
The manual gives several practical tips for better rice.
If Rice Starts Boiling Over
Remove the lid and stir for a couple of minutes.
Leaving the lid off briefly allows some liquid to evaporate and helps cool the mixture slightly. Replace the lid afterward and repeat if necessary.
Reduce Foaming
Adding a small quantity of butter or oil to the water can reduce foaming.
Softer Rice
For softer, fluffier rice, use slightly more water.
Firmer Rice
For firmer rice, use slightly less water.
Do Not Keep Small Portions Warm Too Long
Small quantities of cooked rice can become dry if left on WARM for an extended period.
Thin Crust on the Bottom
A thin rice crust may form on the bottom of the cooking bowl during cooking or while the rice rests. It can simply be removed if it is not wanted.
Cleaning the Rice Cooker
Always unplug the appliance and allow it to cool completely before cleaning.
Cleaning the Cooking Bowl and Glass Lid
- Wash the bowl and lid in warm, soapy water.
- If food is stuck to the cooking bowl, fill it with warm soapy water.
- Let it soak.
- Clean it using a plastic scouring pad.
- Rinse thoroughly.
- Dry completely.
Both the cooking bowl and tempered glass lid are dishwasher safe.
Cleaning the Cooking Base
The cooking base must never be immersed in water or any other liquid.
Wipe its interior and exterior using a soft, slightly damp cloth or sponge.
Do not use abrasive cleaners or harsh scouring pads because they may damage the appliance surfaces.
If Water Gets Into the Switch or Heating Plate Area
Allow the rice cooker to dry completely before using it again.
Rice Cooker Storage
Before storing the appliance:
- Make sure it is fully cool.
- Make sure it is completely dry.
- Do not wrap the electrical cord tightly around the cooker.
- Keep the cord loosely coiled.
- The glass lid can be placed upside down on the rice cooker to reduce storage space.
Troubleshooting
Rice Is Not Fully Cooked
Possible causes:
- The rice was not allowed enough time to finish.
- There was not enough water.
Solution:
Allow the rice to sit in WARM mode for 15 minutes after the cooker changes from COOK to WARM.
If needed, add several tablespoons of water, push the control switch back to COOK, and cook longer. Once the cooker returns to WARM, let the rice rest another 15 minutes.
Cooking Bowl Has Starch Buildup
Possible cause:
Starch has accumulated on the sides or bottom.
Solution:
Fill the bowl with hot soapy water and leave it for several minutes. Clean the sides and bottom with a nylon scrubber, then rinse thoroughly.
Rice Boils Over
Possible causes:
- Too much rice is being cooked.
- Too much water was added.
Solutions:
- Do not exceed the model’s recommended maximum capacity.
- Match the number of rice measures to the corresponding water markings.
- Add approximately one tablespoon of butter or oil to the water to reduce foaming.
Rice Is Too Dry
Possible cause:
Too much rice or too little water.
Solution:
Use the supplied rice measuring cup rather than a standard cup. The supplied measure equals 3/4 cup or 6 fluid ounces of uncooked rice.
Rice Is Gummy or Sticky
Possible cause:
Too much water or too little rice.
Solution:
Use the water markings inside the cooking bowl and maintain the intended relationship between the supplied 3/4-cup rice measure and the corresponding water-level marking.
Replacement Parts and Accessories
The parts diagram provides the following component numbers:
| Replacement Part | Part Number |
| Tempered glass lid | RC620-01 |
| Cooking bowl | RC620-02 |
| Steaming basket | RC620-03 |
| Rice measuring cup | RC620-04 |
| Serving spoon | RC620-05 |
For parts and accessories in the United States and Canada, the manual lists 1-800-738-0245.
Warranty Information
United States and Canada
The manual provides a two-year limited warranty for products sold in the United States and Canada.
Warranty Period
Coverage lasts for two years from the original purchase date, provided proof of purchase is available.
What the Warranty Covers
The warranty covers defects in materials or workmanship, subject to the conditions in the manual.
The stated remedy is a reasonably similar replacement product that may be new or factory refurbished.
What the Warranty Does Not Cover
Exclusions include:
- Damage caused by commercial use
- Misuse, abuse, or neglect
- Modified products
- Products used or serviced outside the country of purchase
- Glass components
- Accessory items packaged with the appliance
- Shipping and handling associated with replacement
- Certain consequential or incidental damages, subject to applicable law
Customer Support
For general consumer support and warranty service in the United States and Canada:
Consumer Service: 1-800-231-9786
For replacement parts and accessories:
Parts and Accessories: 1-800-738-0245
The troubleshooting section also directs users needing additional assistance to the consumer service team at 1-800-231-9786.
The manual additionally contains country-specific service contacts for Argentina, Chile, Colombia, Costa Rica, Ecuador, El Salvador, Guatemala, Honduras, Mexico, Nicaragua, Panama, Peru, Puerto Rico, the Dominican Republic, and Venezuela.
Frequently Asked Questions
How do you use a BLACK+DECKER rice cooker?
Measure rice with the supplied 3/4-cup rice measure, rinse it, add it to the cooking bowl, and add the correct amount of water. Insert the bowl into the base, install the lid, plug in the appliance, and push the control switch downward to COOK. The cooker automatically switches to WARM when the rice is finished. For best results, the manual recommends letting the rice rest on WARM for 15 minutes before serving.
How much water should be used in a BLACK+DECKER rice cooker?
For white rice, water should be added to the numbered line in the cooking bowl that matches the number of supplied rice measures being cooked. Brown rice uses more water; for example, two supplied measures of brown rice use three standard cups of water.
Is the BLACK+DECKER rice cooker measuring cup the same as a normal cup?
No. The supplied rice measure holds 3/4 standard cup, or 6 fluid ounces. A normal U.S. measuring cup holds 8 fluid ounces. The supplied rice cup should be used when following the markings inside the cooker.
How much rice can the RC620 cook?
The RC620 models can cook up to 10 supplied measures of uncooked rice. The cooking chart lists that quantity as producing approximately 17.5 standard cups of cooked rice.
How much rice can the RC628 cook?
The RC628 can use up to 15 supplied measures of dry rice. According to the manual’s cooking chart, 15 measures can produce approximately 28 standard cups of cooked white rice.
Why does a BLACK+DECKER rice cooker switch to WARM?
When rice finishes cooking, the control switch automatically moves to WARM. The manual advises against trying to prevent this change. Rice should then rest on WARM for about 15 minutes before serving.
Why is rice boiling over in the BLACK+DECKER rice cooker?
The manual identifies two common causes: cooking too much rice or using too much water. Users should stay within the model’s maximum capacity and match the rice quantity to the correct water marking. A small amount of butter or oil can also help reduce foaming.
Can the BLACK+DECKER rice cooker be used for more than rice?
Yes. The manual provides directions for soups, stews, pasta, oatmeal, steamed vegetables, fish, dumplings, and other foods. Cooking should be monitored when preparing foods for which the automatic WARM change is not a reliable indication of doneness.