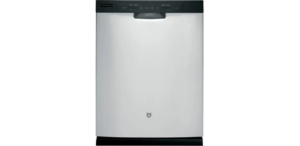
| Brand Name | GE Appliances |
| Product Name | Dishwasher |
| Model Number(s) | GDF 570-650 Series, GDT 655-695 Series, DDT 595 Series, PDF 820 Series, PDT 825-855 Series, CDT 835-865 Series |
| File Size | 6.90 MiB |
| Number of Pages | 78 |
| Languages | English, French, Spanish |
Dishwasher GDF570-650
This GE Appliances dishwasher owner’s manual covers the GDF 570-650, GDT 655-695, DDT 595, PDF 820, PDT 825-855, and CDT 835-865 series. The same manual also applies to selected GE, GE Profile, and GE Café dishwashers.
The model and serial numbers are found on a label on the tub wall just inside the dishwasher door.
Product Overview
The dishwasher series covered by this manual use automatic wash cycles, selectable temperature and drying options, adjustable loading systems, detergent and rinse-aid dispensers, and several model-dependent washing features.
Depending on the model, available equipment may include:
- AutoSense wash-cycle sensing
- Heated Dry or Power Dry
- Sanitize temperature control
- Steam prewash
- Pre Soak
- Upper or lower Wash Zones
- Bottle Jets
- Adjustable upper rack
- Fold-down rack tines
- Third rack
- Deep Clean Silverware Jets
- Leak detection
- Wi-Fi connectivity
- Delay Start
- Control Lock
- Cycle-status indicator lighting
The manual shows different control layouts for GDF570, GDF650, PDF820, DDT595, GDT655, GDT695, PDT825, PDT845, PDT855, CDT835, and CDT865 models.
Main Parts and Components
The exact rack design varies by dishwasher, but the manual describes the following main user-accessible components.
| Component | Purpose |
| Upper rack | Holds glasses, cups, saucers, plastics, smaller cookware, and other suitable items |
| Lower rack | Main location for plates, saucers, cookware, pans, and larger items |
| Third rack | Holds silverware, cooking utensils, and small items on supported models |
| Silverware basket | Holds flatware and small items |
| Detergent dispenser | Contains main-wash and pre-wash detergent compartments |
| Rinse-aid dispenser | Stores and dispenses rinse aid during the final rinse |
| Bottle Jets | Direct water into narrow bottles on supported models |
| Deep Clean Silverware Jets | Target food residue around the silverware basket |
| Ultra-Fine Filter | Captures fine food particles |
| Fine Filter | Mesh filter beneath the lower rack |
| Spray arms | Distribute wash water throughout the dishwasher |
| Control panel | Selects cycles, wash options, delay, drying, and other functions |
The upper and lower racks, Bottle Jets, silverware basket, filters, third rack, and related loading components are described throughout the loading and maintenance sections.
Technical Requirements and Specifications
The manual provides several operating and electrical requirements rather than a full appliance specification sheet.
| Specification | Requirement |
| Electrical supply | 120 V |
| Frequency | 60 Hz |
| Circuit | Individual, properly grounded branch circuit |
| Circuit protection | 15 or 20 amp circuit breaker or time-delay fuse |
| Recommended incoming water temperature | 120°F to 150°F / 49°C to 66°C |
| Normal water pressure | 20-120 psi |
| Rinse-aid dispenser capacity | 3.5 oz / 104 ml |
| Upper rack adjustment | Up to 2 inches on applicable models |
| eWash water use | About 2 gallons |
| eWash energy use | About 0.8 kWh |
The dishwasher requires a dedicated grounded circuit while in operation. GE-Appliances-Dishwasher-User-M… Incoming water should be at least 120°F but no more than 150°F for effective cleaning without damaging dishes.
Important Safety Instructions
The dishwasher must be installed and grounded correctly before use. If there is uncertainty about the grounding connection, the manual advises consulting a qualified electrician or service representative.
Power must be disconnected before maintenance. Simply turning the dishwasher off does not disconnect it from its electrical supply. Repairs not specifically described for the user should be performed by a qualified technician.
Important operating precautions include:
- Use the dishwasher only for its intended purpose.
- Use only detergents intended for automatic dishwashers.
- Keep dishwasher detergent and rinse products away from children.
- Position sharp objects so they cannot damage the door seal.
- Load sharp knives with their handles facing upward.
- Wash plastics only when they are marked dishwasher-safe or approved by their manufacturer.
- Do not touch the heating element during or immediately after operation.
- Do not operate the dishwasher with enclosure panels removed.
- Do not tamper with the controls.
- Do not sit or stand on the dishwasher door or racks.
- Do not allow children to play inside, on, or around the dishwasher.
- Do not store gasoline or other flammable liquids or vapors near the appliance.
- Keep removed clips, filter-retaining posts, and other small components away from children.
Water Heater Safety
Hydrogen gas may accumulate in a hot-water system that has not been used for two weeks or more. Because hydrogen gas is explosive, all hot-water faucets should be opened and allowed to run for several minutes before using an electrical appliance connected to such a system.
Smoking, open flames, and appliance operation should be avoided while accumulated gas is being released.
Child Entrapment Prevention
When discarding an old dishwasher, the washing-compartment door or its latch should be removed. Children should not be allowed to play on or inside a discarded appliance.
Before Using the Dishwasher
Before starting a wash cycle, the dishwasher should be properly powered and supplied with hot water.
Normal food residue does not have to be pre-rinsed. Hard debris such as bones, toothpicks, seeds, and skins should be removed. Leafy vegetables, meat trimmings, and excessive grease or oil should also be scraped away before loading.
The basic preparation sequence is:
- Load dishes correctly.
- Add automatic dishwasher detergent.
- Fill the rinse-aid dispenser when necessary.
- Choose a wash cycle.
- Select any required options.
- Press Start and close the door within four seconds.
How to Use the GE Dishwasher
Step 1: Load the Dishwasher
Food soil that is normally left after a meal can remain on the dishes. Only larger or hard debris needs to be removed.
Items should be arranged so they do not block:
- Spray arms
- Bottle Jets
- Detergent dispenser
- Third rack
- Door seal
Improper rack loading can cause noise and poor washing performance.
Step 2: Add Detergent
Place dishwasher detergent in the detergent dispenser.
Only detergent made for automatic dishwashers should be used. Hand dishwashing liquid creates excessive suds and can cause foam to escape through the dishwasher vents.
Step 3: Add Rinse Aid
Rinse aid helps improve drying and reduce spots and film on dishes, glasses, flatware, cookware, and plastics.
The dispenser holds approximately 3.5 oz. (104 ml) and normally lasts about one month, depending on use and adjustment.
Step 4: Select a Cycle
Press Select Cycle until the required cycle appears or its indicator illuminates.
A cycle may be selected while the door is open, but washing begins only after the Start button is pressed and the door is closed within four seconds.
Step 5: Select Options
Temperature, drying, Steam, Pre Soak, Bottle Jets, Wash Zones, Delay Hours, and other options can be selected when supported by the dishwasher.
Step 6: Start the Dishwasher
Press Start and close the door within four seconds.
The wash cycle begins shortly after the door closes. If the door remains open for two minutes, the display may turn off. Pressing a button or closing and reopening the door reactivates it.
GE Dishwasher Wash Cycles
Actual cycle duration depends on water temperature, soil level, and the options selected.
| Cycle | Use | Approximate Washing Time |
| AutoSense | Automatically detects soil and adjusts washing | 1 hr 50 min-2 hr 10 min |
| Heavy | Heavily soiled cookware, pots, pans, and baked-on food | 2 hr 31 min |
| Normal | Regular full loads of normally soiled dishes | 1 hr 15 min-1 hr 50 min |
| Light | Light to moderately soiled dishes | 55 min |
| Rinse | Rinses partial loads that will be washed later | 16 min |
| Express | Quickly washes lightly soiled dishes | 32 min |
| eWash | Reduced-water and energy wash on supported models | 1 hr 3 min |
The listed times refer to washing and do not include all drying time, Auto Hot Start, or additional options. If incoming water is too cool, Auto Hot Start may add up to 11 minutes.
AutoSense
AutoSense measures the soil level and adjusts the wash cycle automatically.
Heavy
Heavy is intended for cookware and heavily soiled dishes with dried or baked-on food.
Normal
Normal is intended for everyday loads of normally soiled dishes. This is also the cycle used for the dishwasher’s energy-efficiency rating.
Light
Light is intended for lightly to moderately soiled items. China and crystal may be washed using this cycle when additional options are not selected.
Rinse
Rinse is for partial loads that will be fully washed later.
Detergent should not be used with Rinse.
Express
Express provides a short 32-minute wash for lightly soiled dishes.
Selecting Heated Dry or Power Dry can add approximately 15-50 minutes.
eWash
On supported models, eWash uses about 2 gallons of water and 0.8 kWh. Power Dry can add an energy-efficient 50-90 minute drying period using a 2-watt fan.
GE Dishwasher Controls and Options
Normal Temp
Normal Temp is intended for normally soiled dishes and balances cleaning performance with energy conservation.
Wash Temp Boost / Boost Temp
This setting raises the wash-water temperature to improve cleaning of heavily soiled dishes.
It may add approximately 20-50 minutes to the selected cycle and can improve drying performance when used with the Normal cycle.
Wash Temp Sani / Sanitize Temp
This option raises the final-rinse water temperature for sanitizing.
It can increase cycle duration by approximately 60 minutes. If the cycle is interrupted or the incoming water is too cool, the required sanitizing conditions may not be reached. In that case, the Sanitized or Cycle Sanitized indicator will not illuminate.
The manual states that the option modifies the cycle to meet Section 6 of NSF 184 for soil removal and sanitization efficacy.
Heated Dry / Power Dry Off
Turning drying off allows dishes to air-dry naturally and reduces energy use. Opening the dishwasher door can speed natural drying.
Heated Dry / Power Dry On
This option speeds drying and may add up to 85 minutes.
Dishwashers equipped with the hidden-heater feature may heat the final rinse and then circulate air with a fan. That fan can operate for an additional 90 minutes after the wash cycle ends. Opening the door ends the extended fan operation.
Steam Prewash
Steam is intended for heavily soiled dishes or dried and baked-on food.
It must be selected before starting the cycle and can add up to 30 minutes. Steam is available with Heavy, AutoSense, and Normal cycles on applicable models.
Pre Soak
Pre Soak improves washing of heavy or dried-on soils and can add up to 30 minutes.
It is available with Heavy, AutoSense, and Normal on compatible models.
Wash Zones
Wash Zones allow only the upper or lower rack to be washed.
This feature is intended for loads located entirely in one rack and can shorten cycle time and reduce energy use.
Bottle Jets
Bottle Jets increase the amount of time dedicated jets operate.
They are intended for dishwasher-safe items with narrow openings, including:
- Baby bottles
- Sports bottles
- Tall coffee cups
Selecting Bottle Jets may add up to 23 minutes.
Delay Hours
Depending on the model, the dishwasher can delay the start of a wash cycle by up to approximately 8-12 hours.
To use the feature:
- Press Delay Hours.
- Select the required delay.
- Press Start once.
- Close the door.
The wash begins after the countdown reaches zero.
Control Lock
Control Lock prevents unwanted changes or accidental operation.
Depending on the model, locking may require holding one or two designated controls for three seconds. The manual identifies different combinations, including:
- Heated Dry
- Steam + Wash Temp
- Pre-Soak + Bottle Jets
The Control Lock indicator illuminates when locking is active. Repeat the same three-second control sequence to unlock it.
How to Pause, Resume, or Cancel a Cycle
Pause
Open the door slowly. Opening the dishwasher pauses the wash cycle.
The dishwasher may beep once every minute until the door is closed.
Resume
Press Start and close the door within four seconds.
Cancel
Press and hold Start for three seconds and close the door.
The dishwasher drains, sounds a beep, and switches off the wash-cycle indicator.
Indicator Lights and Sounds
| Indicator or Sound | Meaning |
| Sanitized / Cycle Sanitized | Required sanitizing conditions were achieved |
| Clean / Cycle Complete | Wash cycle has finished |
| Low Rinse Aid | Rinse-aid dispenser is low or empty |
| Amber Cycle Status | Dishwasher is washing |
| Green Cycle Status | Wash cycle is complete |
| Minute-by-minute beeping | Door is open while a cycle is paused |
| LEAK DETECTED | Leak detection has stopped the cycle |
The Clean indicator remains on after the cycle as a reminder that the dishes are clean and turns off when the door is opened.
How to Mute GE Dishwasher Sounds
On compatible models, press Heated Dry or Power Dry seven times within five seconds to switch control sounds on or off.
Sabbath / Door Wake Up Mode
On supported models, hold Start + Wash Temp for five seconds, close the door, and wait three minutes for the dishwasher to enter sleep mode.
When Door Wake Up is off, opening and closing the door will not activate the display, control sounds, or applicable interior lighting. Pressing a button activates the controls. GE-Appliances-Dishwasher-User-M…
Detergent Dispenser Instructions
The detergent dispenser is located in the center of the dishwasher door.
It contains:
- A main wash compartment
- A pre-wash compartment
The pre-wash area should mainly be used when the water is extremely hard or when the load is heavily soiled. It is not used with detergent tablets or packets.
The dishwasher accepts automatic dishwasher detergent in:
- Tablet form
- Packet form
- Powder
- Liquid
- Gel
Hand dishwashing detergent must not be used.
Where to Put a Dishwasher Tablet
A detergent tablet or packet belongs in the main wash compartment.
Putting it in the pre-wash compartment or tossing it into the dishwasher tub can cause the detergent to wash down the drain too early and result in poor cleaning.
Detergent Amount by Water Hardness
| Water Hardness | Detergent Amount |
| Less than 4 grains/gal | Fill main cup to about 1/3 |
| 4-8 grains/gal | Fill main cup to about 2/3 |
| 8-12 grains/gal | Fill main cup completely |
| More than 12 grains/gal | Fill both main-wash and pre-wash cups |
The appropriate amount also depends on water temperature and food-soil load.
Too much detergent combined with very soft or very hot water can cause permanent clouding, known as etching, on glassware.
Rinse Aid Instructions
Rinse aid is designed to improve drying and reduce spotting and film.
How to Fill the Rinse-Aid Dispenser
- Fully open the dishwasher door.
- Open the rinse-aid dispenser.
- Slowly fill it with rinse aid.
- Pause if necessary to allow the product to settle.
- Wipe away any spills with a damp cloth.
- Close the dispenser door.
Spilled rinse aid should be cleaned immediately because it may produce excessive foam.
Adjusting Rinse Aid
If water drops or hard-water spots remain after drying, the dispensing amount can be increased.
- Turn the adjuster clockwise to release more rinse aid.
- Turn it counterclockwise to release less rinse aid and reduce foaming.
How to Load the GE Dishwasher
Upper Rack
The upper rack is mainly intended for:
- Glasses
- Cups
- Saucers
- Dishwasher-safe plastics
- Smaller pans
- Bowls
- Plates
- Odd-shaped utensils
Cup and glass openings should face toward the center of the rack.
Bowls and similarly shaped items should generally be positioned face down.
Nothing should extend through the bottom far enough to block the middle spray arm.
Bottle Jets Loading
On supported models, Bottle Jets are intended for tall items with narrow openings.
The retaining clips hold bottles over dedicated water nozzles so water can be directed into hard-to-reach interiors.
Adjusting the Upper Rack
Applicable upper racks can be moved approximately 2 inches higher or lower.
Some models use release flaps at both sides. Others allow rack height to be changed by removing the rack and using a different set of rollers.
A loaded upper rack should not be raised or lowered because it may be unexpectedly heavy.
Some models also include:
- Stem-safe shelves
- Utility shelves
- Fold-down tines
These provide more space for wine glasses and large or irregularly shaped items.
Lower Rack
The lower rack is mainly intended for:
- Plates
- Saucers
- Cookware
- Broiler pans
- Baking racks
- Large glasses or mugs when needed
Large cookware should normally be positioned along the sides rather than directly below the detergent dispenser.
Items must not extend below the rack far enough to interfere with the lower spray arm, and tall items must not hit the middle spray arm.
Some models include adjustable fold-down tines and reversible tine blocks for different loading arrangements.
Third Rack
On models equipped with a third rack, it is intended primarily for:
- Silverware
- Large cooking utensils
- Small kitchen items
Different types of cutlery material should not be allowed to touch because discoloration may occur.
The rack should be fully pushed in before the dishwasher door is closed.
Removing the Third Rack
- Fully extend the third rack.
- Lift the front until its roller wheels clear the retaining hooks.
- Pull farther until the remaining rollers clear the hooks.
- To reinstall, align the wheels with the hooks and rack rails.
- Make sure all rollers sit on top of the rails.
Silverware Basket
Sharp items such as knives and forks can be placed with handles upward to protect hands.
For washing performance, spoons and other flatware can be placed with handles downward. Items should be spread out to reduce nesting.
The basket may also hold small objects such as:
- Measuring spoons
- Baby-bottle nipples
- Plastic lids
- Corn-cob holders
Large utensils should not block the detergent dispenser, spray arm, or door gasket.
Deep Clean Silverware Jets
Selected models include dedicated jets directed toward the silverware basket.
They are designed to help remove stuck-on food and separate nested spoons and forks. GE recommends using the silverware-basket lids for effective washing.
The Deep Clean Silverware Jet assembly should not be removed from the dishwasher rack.
Wi-Fi Connect
Selected models include a built-in GE Appliances WiFi Connect communication card.
Compatible dishwashers can communicate with a smartphone for:
- Remote monitoring
- Remote control
- Notifications
The manual directs users to GE Appliances’ connected-appliance service for compatible applications and setup information.
Cleaning and Maintenance
Cleaning the Control Panel
Use a lightly damp cloth and dry the panel thoroughly afterward.
Cleaning the Dishwasher Interior
Citric acid or an automatic dishwasher cleaning product may be used to clean and deodorize the interior.
The manual identifies GE Appliances citric-acid kit WD35X151 for removing mineral deposits and hard-water film.
Cleaning the Exterior Door
The correct cleaning procedure depends on the model-number suffix.
Painted Panels
Suffixes listed in the manual include:
- BB — Black
- CC — Bisque
- WW — White
- SA — Silver
- ES — Slate
- DS — Black Slate
- TS — Black Stainless Steel
Use a clean, soft, lightly damp cloth and dry thoroughly.
Stainless-Steel Panels
Models ending in SS have stainless-steel exterior panels.
For rust or tarnish, the manual allows an appropriate liquid oxalic-acid cleaner. The surface should be rubbed in the direction of the brushed finish.
Do not use:
- Appliance wax
- Appliance polish
- Bleach
- Chlorine-containing products
The manual identifies Stainless Steel Magic WX10X29 as an available cleaning product.
Integrated Panels
Models ending in II use a custom integrated panel. Cleaning should follow the cabinet manufacturer’s recommendations.
How to Clean the GE Dishwasher Filters
The filters should be inspected and cleaned approximately every other month, or more often depending on use.
Reduced wash performance or gritty dishes can indicate that the filters need cleaning.
Ultra-Fine Filter
- Remove the lower rack.
- Turn the Ultra-Fine Filter counterclockwise.
- Lift it out.
- Wash it with warm, soapy water.
- Use a sponge to remove stubborn particles.
- Reinstall the filter.
- Turn it clockwise to lock it.
Scouring pads and stiff brushes can damage the filter.
Fine Filter
- Remove the lower rack.
- Remove the Ultra-Fine Filter.
- Turn both retaining posts at the rear bottom of the tub counterclockwise.
- Remove the Fine Filter.
- Rinse it with warm, soapy water.
- Use a soft brush or sponge if necessary.
- Reinstall the Fine Filter.
- Reinstall the Ultra-Fine Filter.
- Turn both retaining posts clockwise to lock them.
Removed retaining posts must be kept away from small children because they present a choking hazard.
Air Gap Cleaning
An air gap helps prevent drain water from backing up into the dishwasher. It is part of the plumbing installation rather than part of the dishwasher itself.
If the dishwasher is not draining correctly:
- Turn off the dishwasher.
- Lift off the air-gap cover.
- Remove the plastic cap underneath.
- Clean the opening with a toothpick.
- Reinstall the cap and cover.
Protecting the Dishwasher From Freezing
If the dishwasher will remain in an unheated location during winter, the manual recommends having a service technician:
- Disconnect electrical power.
- Shut off the water supply.
- Disconnect the water inlet line.
- Drain water from the inlet line and water valve.
- Reconnect the inlet line afterward.
GE Dishwasher Troubleshooting Guide
| Problem | Possible Cause | Recommended Action |
| Start light flashing | Door opened or cycle interrupted | Press Start and close the door within 4 seconds |
| Beeping every minute | Door left open during operation | Press Start and close the door |
| LEAK DETECTED | Possible leak | Dishwasher stops and drains; contact service |
| Dishes not clean | Dirty filter, cool water, poor pressure, clogged drain, bad loading, unsuitable detergent | Clean filters and check water, drain, loading, and detergent |
| Spots or film | Hard water, low rinse aid, cool water, poor detergent | Refill rinse aid and check water temperature and detergent |
| Cloudy glassware | Soft water plus too much detergent or excessive water temperature | Reduce detergent and check hot-water temperature |
| Suds in tub | Wrong detergent or spilled rinse aid | Use automatic dishwasher detergent and clean spills |
| Detergent remains in cup | Dishes or utensils block dispenser | Rearrange load |
| Black or gray marks | Aluminum rubbed against dishes | Use a mild abrasive cleaner |
| Dishes remain wet | Cool water, no rinse aid, drying option off, insufficient drying time | Correct water temperature, refill rinse aid, select drying |
| Dishwasher does not fill | Door open, water valve off, flood float stuck | Close door, open valve, inspect float |
| Dishwasher will not run | Tripped breaker, no power, Control Lock, leak detection, incorrect start sequence | Restore power, unlock controls, follow Start sequence |
| Water remains in tub | Air gap or drain configuration issue | Clean air gap and check drain installation |
| Water will not drain | Drain, disposer, or sink blockage | Clear drain path |
| Rattling noise | Dishes or utensils contacting spray arms or door | Reload dishes |
| Sanitized light does not appear | Cycle interrupted or incoming water too cool | Do not interrupt cycle; check water temperature |
The official troubleshooting section specifies normal dishwasher water pressure as 20-120 psi.
GE Dishwasher Not Starting
If the dishwasher will not run, check:
- The circuit breaker or household fuse.
- Any wall switch supplying the dishwasher.
- Whether Control Lock is enabled.
- Whether the display shows LEAK DETECTED.
- Whether the correct Start sequence was followed.
The dishwasher requires Start to be pressed and the door to be closed within four seconds.
GE Dishwasher Not Filling With Water
If the control panel responds but the dishwasher does not fill:
- Make sure the door is firmly closed.
- Make sure the water valve, usually located under the sink, is open.
- Check whether the flood float is stuck.
The manual instructs the user to remove the Ultra-Fine Filter and lightly tap the component underneath that resembles a salt shaker if the flood float appears stuck. The filter should then be reinstalled.
GE Dishwasher Not Draining
If water will not pump out:
- Clean the air gap if present.
- Run the garbage disposer if the dishwasher drains through it.
- Make sure the kitchen sink drains properly.
- Contact a plumber if the household drain is blocked.
GE Dishwasher Dishes Not Drying
Possible causes include:
- Incoming water below 120°F
- Heated Dry not selected
- Rinse-aid dispenser empty
- More drying time needed
Recommended actions include:
- Raise the inlet temperature to at least 120°F.
- Select Heated Dry.
- Use Wash Temp Boost / Boost Temp when appropriate.
- Use a higher-temperature cycle such as Sanitize or Heavy.
- Refill the rinse-aid dispenser.
- Keep the door closed after the Clean indicator appears so applicable models can continue fan drying for up to another 90 minutes.
GE Dishwasher Has Suds
Excessive suds normally indicate the wrong detergent or spilled rinse aid.
Only automatic dishwasher detergent should be used.
To remove suds:
- Open the dishwasher and allow the foam to dissipate.
- Open the door.
- Hold Start for three seconds.
- Close the door so the dishwasher can drain.
Rinse-aid spills should always be wiped up immediately.
White Film on Dishes or Dishwasher Interior
The manual provides two cleaning approaches for white film.
Citric Acid Method
Use the GE citric-acid kit WD35X151.
Place citric acid in the detergent cup, load otherwise clean filmed glassware and dishes, leave silverware and other metal items out, and run a complete cycle without detergent.
Vinegar Alternative
One cup of vinegar may be poured into the dishwasher just after the detergent cup opens. Allow the dishwasher to finish the cycle.
Rinse aid and suitable dishwasher detergent can help reduce recurring film.
Normal Dishwasher Sounds
The following sounds can be normal:
- End-of-cycle beeping
- Detergent-cup opening
- Water entering
- Motor stopping and starting
- Spray arms starting and stopping
- Drain pump operation
- Drain pump starting and stopping several times
Rattling dishes, however, can indicate incorrect loading.
Replacement Parts and Accessories
The manual identifies several parts and accessories that may be ordered through GE Appliances.
| Part / Accessory | Part Number |
| Citric acid cleaning kit | WD35X151 |
| Water-hardness test strip | WD01X10295 |
| Stainless Steel Magic cleaner | WX10X29 |
| Electrical cord kit referenced by manual | WX09X70910 |
Parts and accessories can be ordered through GE Appliance Parts. Service work beyond the procedures intended for the owner should generally be performed by qualified service personnel.
Warranty Information
The manual provides a one-year limited warranty from the date of original purchase.
During this period, GE Appliances will replace any dishwasher part that fails because of a defect in materials or workmanship. The limited warranty includes labor and in-home service for replacement of the defective part according to the stated warranty terms.
Proof of the original purchase date is required for warranty service.
Examples of conditions not covered include:
- Service visits to teach the owner how to use the appliance
- Improper installation, delivery, or maintenance
- Misuse or commercial use
- Household fuse replacement or breaker resetting
- Damage from accident, fire, floods, or other specified events
- Certain damage occurring after delivery
- Cleaning or servicing of the plumbing air gap
Warranty rights and exclusions vary by country, state, and province.
GE Appliances Customer Support
United States
| Service | Contact |
| Main website | GEAppliances.com |
| Schedule service | 800-432-2737 |
| Extended warranty | 800-626-2224 |
| Remote connectivity | 800-220-6899 |
| Parts and accessories | 877-959-8688 |
| Parts website | GEApplianceparts.com |
| Customer Relations | GE Appliances, Appliance Park, Louisville, KY 40225 |
The model and serial numbers should be available when requesting service.
The manual also directs owners to GE Appliances’ online registration, repair scheduling, connected-appliance support, extended warranty, and parts services.
Canada
The multilingual manual also provides Canadian support resources, including GEAppliances.ca, repair-service resources, and 1-800-661-1616 for parts-related support.
Frequently Asked Questions
How does a GE dishwasher start?
After loading dishes and adding detergent, the required wash cycle and options should be selected. Press Start, then close the dishwasher door within four seconds.
Why is the Start light flashing on a GE dishwasher?
A flashing Start indicator normally means the door was opened or the cycle was interrupted. Press Start and close the door within four seconds to resume operation.
Why does the GE dishwasher keep beeping?
Beeping once every minute means the dishwasher door was left open while a cycle was running or paused. Press Start and close the door.
What does LEAK DETECTED mean on a GE dishwasher?
On models with leak detection, LEAK DETECTED means a possible leak has been identified. The dishwasher cancels the wash, drains the water, and requires service.
How often should a GE dishwasher filter be cleaned?
The filters should generally be inspected and cleaned every other month, or more often depending on dishwasher use. Gritty dishes or reduced wash performance are signs that filter cleaning may be needed.
What water temperature should a GE dishwasher use?
Incoming water should be between 120°F and 150°F (49°C-66°C). Water below this range may reduce cleaning performance, while excessively hot water can contribute to glassware etching.
Can regular dish soap be used in a GE dishwasher?
No. Only detergent designed for automatic dishwashers should be used. Hand dishwashing liquid can create excessive suds that may escape through the dishwasher vents and result in poor cleaning.
Why are dishes still wet after the dishwasher finishes?
Possible reasons include low incoming water temperature, an empty rinse-aid dispenser, the drying option being turned off, or insufficient drying time. Selecting Heated Dry and leaving the door closed after the Clean indicator appears can improve drying on supported models.