| Field | Details |
| Document Title | Honeywell Home RLV450 Programmable Thermostat User Guide |
| Document Type | User Guide |
| Brand Name | Honeywell Home |
| Product Name | Programmable Thermostat |
| Model Number | RLV450 |
| PDF File Size | 533 KB |
| Total Number of Pages | 8 |
| Languages Covered | English, French |
Honeywell Home Programmable Thermostat RLV450
The Honeywell Home RLV450 is a programmable line-voltage thermostat designed to control compatible electric heating systems. It provides automatic temperature scheduling, manual temperature adjustments, three temperature presets, and configurable heating cycles.
The thermostat can control electric baseboard heaters, radiant ceiling heaters, radiant floor heating systems, convectors, and fan-forced electric heaters within its supported electrical load range.
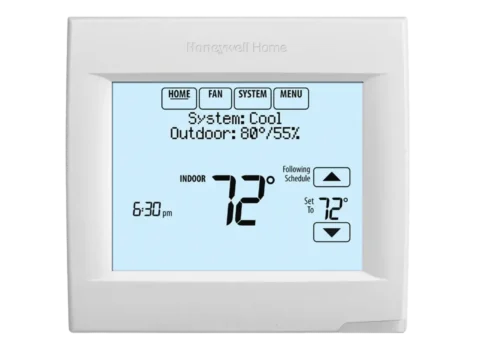
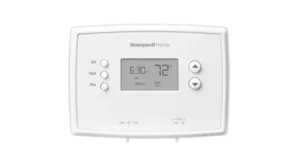
The RLV450 features a digital display that shows the room temperature, time, day, operating mode, and heating activity. Dedicated buttons allow the temperature and weekly heating schedule to be adjusted.
Three preset temperatures are available: Comfort, Economy, and Vacation. These presets allow different heating temperatures to be selected for occupied periods, sleeping hours, and extended absences.
The thermostat supports automatic scheduling with four daily periods: Wake, Leave, Return, and Sleep. Each day of the week can have its own schedule, and unnecessary periods can be skipped.
Additional functions include Early Start, automatic daylight saving time adjustment, keypad locking, and configurable heating cycle lengths for different electric heating systems.
Product Overview and Features
| Feature | Description |
| Product Type | Programmable electric heating thermostat |
| Temperature Control | Electronic temperature adjustment |
| Automatic Mode | Controls heating according to a programmed schedule |
| Manual Mode | Maintains a manually selected temperature |
| Daily Programming | Four heating periods per day |
| Weekly Programming | Individual schedules for each day |
| Comfort Preset | Temperature for occupied periods |
| Economy Preset | Temperature for sleeping or away periods |
| Vacation Preset | Temperature for extended absence |
| Early Start | Starts heating early to reach the scheduled temperature |
| Display Format | Celsius/24-hour or Fahrenheit/12-hour |
| Heating Cycle | Selectable 15-second or 15-minute cycle |
| Fan-Forced Heater Setting | Uses 15-minute heating cycles |
| Keypad Lock | Restricts changes to thermostat settings |
| Daylight Saving Time | Optional automatic clock adjustment |
| Power Outage Recovery | Stores settings and restores the previous operating mode |
| Error Indicators | LO, HI, LP, E1, and E2 |
Technical Specifications
| Specification | Details |
| Model Number | RLV450 |
| Product Type | Programmable Line-Voltage Thermostat |
| Power Supply | 120/240 VAC |
| Frequency | 50/60 Hz |
| Minimum Electrical Load | 2 A, resistive only |
| Maximum Electrical Load | 16.7 A, resistive only |
| Minimum Load at 120 VAC | 250 W |
| Maximum Load at 120 VAC | 2000 W |
| Minimum Load at 240 VAC | 500 W |
| Maximum Load at 240 VAC | 4000 W |
| Temperature Display Range | 0–60°C (32–140°F) |
| Display Resolution | 0.5°C (1°F) |
| Temperature Setpoint Range | 5–30°C (40–86°F) |
| Temperature Adjustment Interval | 0.5°C (1°F) |
| Heating Cycle Options | 15 seconds or 15 minutes |
| Programming | Four periods per day, seven days per week |
| Storage Temperature | -20°C to 50°C (-4°F to 120°F) |
| Certification | CSA / UL |
| Canadian Interference Compliance | ICES-003 Class B |
| Warranty | 1-year limited warranty |
Compatible Heating Systems
The RLV450 can control the following electric heating systems when their electrical load is within the supported range:
- Electric baseboard heaters
- Radiant ceiling heating systems
- Electric radiant floor heating
- Electric convectors
- Fan-forced electric heaters
Incompatible Heating Systems
The thermostat must not be used with:
- Resistive loads greater than 16.7 A
- Resistive loads lower than 2 A
- Systems controlled through contactors or relays (inductive loads)
- Central heating systems
The connected heating equipment must meet the thermostat’s electrical requirements.
What’s Included in the Box
The RLV450 is supplied with the following components:
| Item | Quantity |
| RLV450 Programmable Thermostat | 1 |
| 6-32 Mounting Screws | 2 |
| Solderless Connectors | 2 |
Parts and Control Panel
The RLV450 has a digital display and dedicated buttons for temperature adjustments, scheduling, preset temperatures, and operating mode selection.
Main Controls
| Control | Function |
| Hour | Sets the hour |
| Min | Sets the minutes |
| Day | Sets the day of the week |
| Pgm | Opens and changes schedule programming periods |
| Clear | Skips a selected programmed period |
| Mode | Selects the operating mode |
| Temperature Up (▲) | Increases the temperature or selected setting |
| Temperature Down (▼) | Decreases the temperature or selected setting |
| Comfort Preset (☀) | Selects the stored Comfort temperature |
| Economy Preset (☾) | Selects the stored Economy temperature |
| Comfort + Economy | Selects the Vacation preset when pressed together |
Hour and Minute Buttons
The Hour and Min buttons are used to configure the thermostat clock and the starting time of each programmed period.
Day Button
The Day button selects the day being programmed.
It is also used to access the daylight saving time configuration.
Pgm Button
The Pgm button opens the schedule programming menu.
It allows the user to move between the four daily program periods.
Clear Button
The Clear button removes a selected period from the active daily schedule.
A skipped period is displayed as –:–.
Mode Button
The Mode button changes the thermostat between Automatic and Manual operation.
It also exits clock and programming settings.
Temperature Adjustment Buttons
The ▲ and ▼ buttons change the desired temperature.
Holding either button allows faster adjustment.
Thermostat Display Guide
The display shows the information needed to operate and monitor the heating system.
Display Indicators and Symbols
| Indicator | Meaning |
| Time | Current clock time |
| Day | Current day of the week |
| Temperature | Measured room temperature or selected setpoint |
| Setpoint Indicator | The displayed temperature is the selected target |
| Lock Symbol | Thermostat settings are locked |
| Operating Mode | Shows Automatic or Manual mode |
| Comfort Symbol | Comfort preset selected |
| Economy Symbol | Economy preset selected |
| Vacation Symbol | Vacation preset selected |
| Heating Power Indicator | Shows heating power activity |
| Program Period | Current scheduled period in Automatic mode |
| FAN | Thermostat configured for fan-forced heating |
| LP | Low-power condition |
| LO | Measured temperature below the display range |
| HI | Measured temperature above the display range |
| E1/E2 | Temperature sensor error |
Room Temperature Display
During normal operation, the thermostat displays the measured room temperature.
Viewing the Selected Temperature
- Press ▲ or ▼ briefly.
- The selected temperature appears on the display.
- The setpoint remains visible for approximately five seconds.
- The display returns to the measured temperature.
Important Safety Instructions
WARNING: ELECTRICAL SHOCK HAZARD
The RLV450 operates with line-voltage electrical power.
Installation must be performed by a qualified electrician.
Before installation, the electrician must turn off power to the heating system at the main electrical panel.
Electrical Safety
- Turn off power before installing or servicing the thermostat.
- All wiring and connections must comply with local electrical codes.
- Use appropriate solderless connectors for copper conductors.
- Use special CO/ALR solderless connectors when connecting aluminum conductors.
- Do not exceed the thermostat’s maximum electrical load.
- Do not connect loads below the minimum supported rating.
- Do not use the thermostat with inductive loads controlled by contactors or relays.
- Do not use it with central heating systems.
Ventilation Safety
Keep the thermostat’s ventilation openings clean and unobstructed.
Blocked ventilation openings can affect thermostat operation.
Heater Clearance
Heating equipment should remain unobstructed.
Furniture or curtains blocking a baseboard heater may cause it to overheat and activate its thermal protection device.
Installation Instructions
The following installation instructions are intended for a qualified electrician.
The RLV450 is installed on an electrical box and connected to the electric heating system’s line and load conductors.
Choosing the Installation Location
Install the thermostat:
- Approximately 5 feet above the floor
- On an interior wall
- Facing the heater
Avoid installing it:
- Near drafts
- At the top of a staircase
- Near an air outlet
- Behind a door where air circulation is limited
- In direct sunlight
- On a wall concealing chimney or stove pipes
Selecting a suitable location helps the thermostat measure room temperature more accurately.
Step 1: Turn Off the Power and Remove the Front Component
- Turn off the heating system’s power at the main electrical panel.
- Release the thermostat’s front component from its mounting assembly as shown in the installation diagram.
- Separate the front component to access the wiring connections.
Step 2: Connect the Electrical Wiring
The thermostat supports the two-wire and four-wire installation arrangements illustrated in the guide.
The electrician must connect the thermostat conductors to the appropriate line and load conductors using suitable solderless connectors.
The thermostat wires are not polarized. Either thermostat wire can be connected to the load or power supply as shown by the approved wiring arrangement.
Two-Wire Installation
The two-wire diagram shows the thermostat connected between the incoming electrical supply and the heating load.
Connections must be made according to the installation diagram and applicable electrical codes.
Four-Wire Installation
The four-wire diagram shows the thermostat connected using the corresponding line and load conductors.
The electrician must verify that the wiring arrangement complies with local electrical requirements.
Step 3: Position the Wiring
Push excess wire carefully into the electrical box.
The wires must not interfere with the thermostat’s mounting assembly.
Step 4: Configure the Thermostat
Before reinstalling the front component, configure the switches located on the back of the thermostat if changes are needed.
The switches control Early Start, temperature and time format, cycle length, and keypad locking.
Step 5: Mount the Thermostat
- Position the thermostat on the electrical box.
- Secure the mounting assembly with the supplied screws.
- Reattach the thermostat’s front component.
Step 6: Restore Power
After installation and configuration are complete, restore power to the heating system.
The thermostat can then be configured for normal operation.
Configuration Switches
Four configuration switches are located on the back of the thermostat.
Each switch controls a specific function.
Configuration Settings
| Switch | Function | First Position | Second Position |
| SW1 | Early Start | Off | On |
| SW2 | Display Format | °C / 24-hour | °F / 12-hour |
| SW3 | Heating Cycle Length | 15 seconds | 15 minutes |
| SW4 | Keypad Lock | Off | On |
SW1 – Early Start
Early Start operates in Automatic mode only.
When enabled, the thermostat calculates when heating should begin so the programmed temperature is reached by the selected start time.
The thermostat reviews the previous day’s heating performance and adjusts the calculated starting time each day.
SW2 – Temperature and Clock Display Format
The display format switch selects between:
- Celsius with a 24-hour clock
- Fahrenheit with a 12-hour clock
SW3 – Heating Cycle Length
The thermostat supports two heating cycle lengths.
| Setting | Recommended Application |
| 15 seconds | Most compatible electric heating systems |
| 15 minutes | Fan-forced heaters |
The 15-second cycle generally provides better temperature control.
For fan-forced heaters, the cycle length must be set to 15 minutes.
The display shows FAN when 15-minute cycles are selected.
SW4 – Keypad Lock
The keypad lock prevents thermostat settings from being changed.
When locking is enabled, the temperature adjustment buttons can only be used to view the selected temperature.
Before First Use
After installation, the thermostat should be configured before normal heating operation.
The initial setup includes:
- Selecting the correct display format.
- Configuring the appropriate heating cycle.
- Setting the clock.
- Selecting the day of the week.
- Reviewing the Comfort, Economy, and Vacation temperature presets.
- Reviewing or modifying the heating schedule.
- Selecting Automatic or Manual operation.
Setting the Clock and Day
The thermostat uses the clock and day settings to control the heating schedule.
How to Set the Time
- Press Hour to adjust the hour.
- Press Min to adjust the minutes.
- Continue until the correct time appears.
How to Set the Day
- Press Day to select the current day of the week.
- Continue until the correct day appears.
- Press Mode to finish.
Daylight Saving Time Settings
The RLV450 can automatically adjust its clock for daylight saving time.
When enabled, the thermostat:
- Changes to daylight saving time on the second Sunday of March.
- Returns to standard time on the first Sunday of November.
How to Enable or Disable Daylight Saving Time
- Press and hold Day for approximately three seconds.
- Release the button when DLS appears.
- Press ▲ or ▼ to select On or Off.
- Press Day briefly to open the year setting.
- Use ▲ or ▼ to set the current year.
- Press Day to access the month.
- Adjust the month.
- Press Day to access the date.
- Adjust the date.
- Press Mode to finish.
Daylight Saving Time After a Power Failure
If the clock loses its setting, the daylight saving time function is disabled.
The clock and calendar settings must be configured again.
Temperature Settings
The thermostat normally displays the measured room temperature.
The target temperature can be viewed or changed using the temperature adjustment buttons.
Viewing the Temperature Setpoint
- Press ▲ or ▼ briefly.
- The selected temperature appears for five seconds.
- The display returns to the measured room temperature.
Changing the Temperature
- Press ▲ to increase the desired temperature.
- Press ▼ to decrease the desired temperature.
- Continue until the required setpoint appears.
For faster adjustment, hold the appropriate button.
Available Temperature Range
The setpoint can be adjusted between:
5°C and 30°C (40°F and 86°F).
The thermostat changes the setpoint in increments of 0.5°C or 1°F, depending on the selected display format.
Preset Temperature Settings
The RLV450 includes three preset temperatures.
These presets provide quick access to heating temperatures for different household situations.
Factory Preset Temperatures
| Preset | Intended Use | Factory Temperature |
| Comfort (☀) | When occupants are at home | 21°C (70°F) |
| Economy (☾) | When sleeping or away | 16.5°C (62°F) |
| Vacation | During an extended absence | 10°C (50°F) |
Comfort Temperature
The Comfort preset is intended for periods when occupants are at home.
To select it, press the Comfort (☀) button.
Economy Temperature
The Economy preset is intended for sleeping hours or periods when the home is unoccupied.
To select it, press the Economy (☾) button.
Vacation Temperature
The Vacation preset is intended for extended absences.
To select it, press the Comfort and Economy buttons simultaneously.
The corresponding Vacation icon appears on the display.
Changing the Preset Temperatures
The stored Comfort, Economy, and Vacation temperatures can be customized.
How to Change the Comfort Temperature
- Press ▲ or ▼ to select the desired temperature.
- Press and hold the Comfort (☀) button for approximately three seconds.
- Release the button when the corresponding icon appears.
The selected temperature is stored as the Comfort preset.
How to Change the Economy Temperature
- Use ▲ or ▼ to select the desired temperature.
- Press and hold the Economy (☾) button for approximately three seconds.
- Release the button when the Economy icon appears.
The selected temperature becomes the stored Economy preset.
How to Change the Vacation Temperature
- Adjust the temperature using ▲ or ▼.
- Press and hold the Comfort and Economy buttons simultaneously for approximately three seconds.
- Release the buttons when the Vacation icon appears.
The selected temperature is stored as the Vacation preset.
Thermostat Operating Modes
The RLV450 provides Automatic and Manual operating modes.
Automatic Mode
In Automatic mode, the thermostat follows the programmed heating schedule.
Each scheduled period uses its assigned temperature preset.
How to Enable Automatic Mode
- Press Mode until the Automatic mode icon appears.
- Confirm that the current program period is displayed.
The thermostat controls heating according to the schedule.
The display shows the active period and preset temperature icon.
Temporary Temperature Override
Automatic mode allows a temporary change to the programmed temperature.
- Make sure Automatic mode is active.
- Press ▲ or ▼ to change the selected temperature.
- The thermostat uses the new setting for the remainder of the current period.
When the next programmed period begins, the thermostat automatically returns to the temperature assigned to that period.
Cancelling a Temporary Override
Press Mode.
The temporary change is cancelled, and the thermostat returns to normal programmed operation.
Manual Mode
Manual mode disables scheduled temperature changes.
The thermostat maintains the temperature selected manually.
How to Enable Manual Mode
- Press Mode until the Manual mode icon appears.
- Adjust the temperature using ▲ or ▼.
- Alternatively, select a stored temperature preset.
The selected temperature remains active independently of the weekly schedule.
Understanding the Weekly Heating Schedule
The RLV450 supports four heating periods per day.
Each period can have a different start time.
Four Daily Program Periods
| Period | Description | Assigned Preset |
| Period 1 | Wake | Comfort |
| Period 2 | Leave | Economy |
| Period 3 | Return | Comfort |
| Period 4 | Sleep | Economy |
Period 1 – Wake
Wake begins the morning heating period.
It uses the Comfort preset.
Period 2 – Leave
Leave starts the period when the household is typically unoccupied.
It uses the Economy preset.
Period 3 – Return
Return begins the evening period when occupants come home.
It uses the Comfort preset.
Period 4 – Sleep
Sleep starts the overnight period.
It uses the Economy preset.
Factory-Programmed Heating Schedule
The thermostat includes a factory-programmed weekly schedule.
Default Weekly Schedule
| Period | Monday–Friday | Saturday | Sunday | Preset |
| Wake | 6:00 AM | 6:00 AM | 6:00 AM | Comfort |
| Leave | 8:00 AM | Skipped | Skipped | Economy |
| Return | 6:00 PM | Skipped | Skipped | Comfort |
| Sleep | 10:00 PM | 10:00 PM | 10:00 PM | Economy |
During weekdays, the thermostat follows all four periods.
On Saturday and Sunday, the factory schedule skips the Leave and Return periods.
Weekday Operation
Under the factory schedule:
- At 6:00 AM, the Comfort temperature becomes active.
- At 8:00 AM, the Economy temperature becomes active.
- At 6:00 PM, the Comfort temperature becomes active again.
- At 10:00 PM, the Economy temperature becomes active.
Weekend Operation
Under the factory weekend schedule:
- The Comfort period begins at 6:00 AM.
- The Leave and Return periods are skipped.
- The Economy period begins at 10:00 PM.
Each day’s schedule can be modified separately.
How to Program the Weekly Schedule
The RLV450 allows individual program start times to be changed.
Entering Programming Mode
- Press Pgm.
- The thermostat enters programming mode.
- Period 1 is selected.
Selecting the Day
- Press Day to select the day to configure.
- Continue until the required day appears.
To select the entire week, press and hold Day for approximately three seconds.
Changing a Program Period
- Select the required period using Pgm.
- Press Hour to adjust the period start hour.
- Press Min to adjust the minutes.
- Continue until the desired start time appears.
Programming Additional Periods
- Press Pgm to select another period.
- Use Hour and Min to configure its start time.
- Repeat for the remaining periods.
Programming Another Day
- Press Day to select another day.
- Use Pgm to choose the required period.
- Adjust the starting time.
- Repeat as required.
Saving the Schedule
Press Mode to exit programming.
If no button is pressed for 60 seconds, the thermostat automatically exits programming mode.
Skipping an Unnecessary Schedule Period
A programmed period can be skipped when it does not match the household routine.
For example, the Leave and Return periods can be skipped on weekends.
How to Skip a Program Period
- Press Pgm to enter programming mode.
- Select the day using Day.
- Select the period using Pgm.
- Press Clear.
- The period displays –:–.
- Continue programming or press Mode to exit.
The skipped period does not begin at a scheduled time.
Early Start Function
Early Start helps the thermostat reach the scheduled temperature at the selected time.
This function operates in Automatic mode only.
How Early Start Works
When enabled, the thermostat calculates when heating must begin to achieve the desired temperature by the start of a programmed period.
The thermostat uses the previous day’s heating performance to adjust the starting time.
Example
If the Wake period begins at 6:00 AM and the Comfort temperature is 21°C, Early Start can begin heating before 6:00 AM.
The objective is to reach 21°C by the programmed time.
Enabling Early Start
Early Start is controlled by configuration switch SW1 on the back of the thermostat.
| SW1 Setting | Function |
| Off | Early Start disabled |
| On | Early Start enabled |
Heating Cycle Settings
The thermostat provides two heating cycle lengths.
15-Second Heating Cycle
The 15-second cycle is recommended for most supported electric heating systems because it generally provides more precise temperature control.
15-Minute Heating Cycle
The 15-minute cycle must be selected for fan-forced heaters.
When this setting is active, the word FAN appears on the display.
Selecting the Heating Cycle
Heating cycle length is controlled by configuration switch SW3.
| SW3 Setting | Cycle Length |
| First Position | 15 seconds |
| Second Position | 15 minutes |
The correct cycle length must be selected for the connected heating equipment.
Keypad Lock Function
The RLV450 allows thermostat settings to be locked.
Enabling Keypad Lock
The lock function is controlled by configuration switch SW4.
| SW4 Setting | Function |
| Off | Keypad unlocked |
| On | Keypad locked |
What Happens When the Keypad Is Locked?
When the thermostat is locked:
- Settings cannot be changed.
- The lock indicator appears.
- Temperature adjustment buttons can still display the setpoint.
- Temperature settings cannot be modified using the keypad.
Power Outage and Memory Recovery
The RLV450 stores its settings in memory.
What Happens During a Power Outage?
When power is interrupted:
- LP appears briefly on the display.
- The display then becomes blank.
- The thermostat retains its stored settings.
Power Outage Backup Activation
After initial installation, the thermostat must remain connected to electrical power for at least two hours to activate its power outage backup function.
Power Outages Longer Than Four Hours
If the power interruption lasts more than four hours, the clock must be adjusted again.
Other thermostat settings remain stored.
Restoring Normal Operation
When electrical power returns, the thermostat resumes the operating mode that was active before the outage.
Troubleshooting Guide
The following table provides the operating problems, explanations, and corrective actions described for the RLV450.
| Problem | Possible Cause | Recommended Action |
| Thermostat feels hot | Normal heat generated during operation | Housing temperature may reach 35–40°C (95–104°F) |
| LO appears | Measured temperature is below the display range | Heating activates |
| HI appears | Measured temperature is above the display range | Check the temperature condition |
| Incorrect temperature reading | Air draft near thermostat | Eliminate the draft |
| Incorrect temperature reading | Protective screen sticker remains attached | Remove the sticker |
| Incorrect time | Power was interrupted for more than four hours | Reset the clock |
| Temperature does not follow schedule | Incorrect operating mode | Select Automatic mode |
| Temperature does not follow schedule | Incorrect clock or program settings | Check the schedule and clock |
| LP appears without a power outage | Heater thermal circuit breaker may be open | Check for an obstructed or overheated heater |
| Display is blank without a power outage | Heater thermal protection may have opened | Check the heater’s thermal protection condition |
| Display fades when heating is active | Heating system load is below the supported minimum | Check load compatibility |
| Settings cannot be changed | Keypad lock enabled | Check SW4 configuration |
| E1 or E2 appears | Temperature sensor error | Contact technical support |
Thermostat Feels Hot
The thermostat housing may become warm during normal operation.
The surface temperature can reach approximately 35–40°C (95–104°F).
LO Appears on the Display
The LO message indicates that the measured room temperature is below the thermostat’s display range.
Heating is activated.
HI Appears on the Display
The HI message indicates that the measured room temperature is above the thermostat’s display range.
Thermostat Shows the Wrong Temperature
An incorrect temperature reading may be caused by air drafts.
Check for airflow near the thermostat and eliminate the draft.
Also verify that the protective sticker has been removed from the display.
Thermostat Shows the Wrong Time
If the thermostat has been without power for more than four hours, the clock may need to be adjusted.
Reset the hour, minutes, and day settings.
Thermostat Does Not Follow the Programmed Schedule
- Confirm that Automatic mode is active.
- Check the clock.
- Verify the programmed start times.
- Review any skipped schedule periods.
LP Appears Without a Power Outage
The LP message may appear if the heater’s thermal circuit breaker opens.
This can happen when:
- Furniture blocks the heater.
- Curtains obstruct the heater.
- The heater overheats.
- The thermal circuit breaker is defective.
The heater and its protective device should be checked by a qualified professional.
Display Is Blank Despite Available Power
The heater’s thermal protection device may have opened.
Check for obstructions that could cause overheating and arrange appropriate servicing if necessary.
Display Looks Faded While Heating
A faded display during heating can indicate that the electrical heating load is below the thermostat’s minimum supported rating.
The RLV450 cannot be used with a resistive load below 2 A.
Thermostat Settings Cannot Be Changed
The keypad lock may be enabled.
Check configuration switch SW4.
When the lock is active, the temperature buttons only display the setpoint.
E1 or E2 Error Code Appears
E1 and E2 indicate temperature sensor errors.
These errors can reduce thermostat performance.
Contact technical support for assistance.
Error Codes and Display Messages
| Code or Message | Meaning | Action |
| LO | Room temperature below display range | Heating activates |
| HI | Room temperature above display range | Check room temperature conditions |
| LP | Low-power condition | Check power availability or heater thermal protection |
| E1 | Temperature sensor error | Contact technical support |
| E2 | Temperature sensor error | Contact technical support |
| FAN | 15-minute heating cycle selected | Normal when configured for fan-forced heating |
| Lock Symbol | Keypad lock active | Check SW4 |
| –:– | Program period skipped | Normal for a skipped period |
| DLS | Daylight saving time configuration | Select On or Off |
Cleaning and Maintenance
Keeping the Thermostat Vents Clear
The thermostat’s ventilation openings must remain clean and unobstructed.
Do not cover the vents with furniture, decorations, or other objects.
Checking the Installation Area
The thermostat should remain free from conditions that can affect temperature readings, including:
- Direct sunlight
- Strong air drafts
- Blocked airflow
- Nearby heating sources
Maintaining Compatible Heating Equipment
Keep electric heaters clear of furniture and curtains.
Obstructed heaters may overheat and activate their thermal protection devices.
Storage Instructions
The RLV450 has a specified storage temperature range of:
-20°C to 50°C (-4°F to 120°F).
The thermostat should not be stored outside this temperature range.
Warranty Information
The Honeywell Home RLV450 includes a one-year limited warranty from Resideo.
Warranty Coverage
| Warranty Detail | Information |
| Warranty Provider | Resideo |
| Warranty Period | 1 year |
| Warranty Begins | Date of first purchase by the original purchaser |
| Coverage | Defects in materials or workmanship under normal use and service |
| Remedy | Repair or replacement at Resideo’s discretion |
| Battery Coverage | Batteries excluded |
| Removal and Reinstallation Costs | Not covered |
How to Request Warranty Service
If the thermostat is found defective during the warranty period:
- Return the product to the original place of purchase with dated proof of purchase; or
- Contact Resideo Customer Care at 1-800-468-1502.
Customer Care will determine whether the thermostat should be returned for inspection or whether a replacement can be provided.
Warranty Return Address
Resideo Return Goods
1985 Douglas Dr. N.
Golden Valley, MN 55422
USA
Warranty Exclusions
The warranty does not cover:
- Removal or reinstallation costs
- Damage occurring while the product is in the consumer’s possession
- Incidental or consequential losses, subject to applicable law
The warranty provides specific legal rights. Additional rights may vary by jurisdiction.
Customer Support Information
| Support Detail | Information |
| Brand | Honeywell Home |
| Manufacturer | Resideo Technologies, Inc. |
| Official Website | www.resideo.com |
| Customer Care Phone | 1-800-468-1502 |
| Customer Care Address | 1985 Douglas Drive North, Golden Valley, MN 55422, USA |
| Product Model | RLV450 |
| Document Number | 69-2201EF-08 |
Environmental and Disposal Information
The thermostat must not be disposed of with ordinary household waste.
At the end of the product’s service life, take it to an authorized electronic waste collection or recycling facility.
Correct disposal helps reduce potential harm to human health and the environment.
Frequently Asked Questions
1. How do I program the Honeywell RLV450 thermostat?
Press Pgm to enter programming mode. Select the day with Day, then use Hour and Min to set the start time of the selected period. Press Pgm to move to another period or Day to select another day. Press Mode when programming is complete.
2. How do I switch the Honeywell RLV450 from Manual to Automatic mode?
Press the Mode button until the Automatic mode icon appears. The thermostat will begin following the programmed heating schedule and display the current program period.
3. What do the Comfort, Economy, and Vacation settings mean?
Comfort is intended for occupied periods and defaults to 21°C (70°F). Economy is intended for sleeping or away periods and defaults to 16.5°C (62°F). Vacation is intended for extended absences and defaults to 10°C (50°F).
4. How do I change the preset temperature on the RLV450?
Adjust the desired temperature using ▲ or ▼. Press and hold the relevant Comfort or Economy button for approximately three seconds to save it. To save the Vacation preset, hold both preset buttons together for approximately three seconds.
5. What does LP mean on the Honeywell RLV450 thermostat?
LP indicates a low-power condition. It may appear briefly during a power outage. If LP appears without a power outage, the heater’s thermal protection device may have opened because of overheating or a fault.
6. How do I fix an E1 or E2 error on the Honeywell RLV450?
E1 and E2 indicate temperature sensor errors that can reduce thermostat performance. Contact technical support for assistance.
7. Can the Honeywell RLV450 control a fan-forced electric heater?
Yes. The RLV450 supports compatible fan-forced electric heaters within its electrical load range. The heating cycle must be configured for 15 minutes using switch SW3. FAN appears on the display when this setting is selected.
8. Does the Honeywell RLV450 retain its settings during a power outage?
Yes. The thermostat stores its settings in memory and returns to the previous operating mode when power is restored. After initial installation, it must be powered for at least two hours to activate the backup function. If the outage exceeds four hours, the clock must be reset.