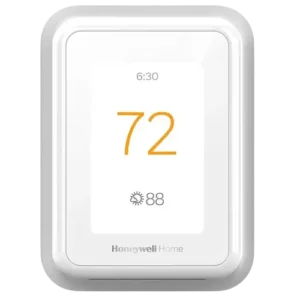
| Field | Details |
| Document Title | T9 Smart Thermostat with Smart Room Sensor User Guide |
| Document Type | User Guide |
| Brand Name | Honeywell Home |
| Product Name | T9 Smart Thermostat with Smart Room Sensor |
| Model Number(s) | RCHT9510WFW2001, RCHT9510WFW2003, RCHT9510WFW2017, RCHT9610WFSW2003, RCHT9610WFSW2019, RCHT9610WFW2004 |
| PDF File Size | 924.4 KB |
| Total Number of Pages | 36 |
| Languages Covered | English |
Honeywell Home T9 Smart Thermostat RCHT9510WFW2001
The Honeywell Home T9 Smart Thermostat is a WiFi-enabled programmable thermostat designed to control compatible home heating and cooling systems. It supports wireless Smart Room Sensors that measure temperature, humidity, and motion in different rooms, allowing the thermostat to manage comfort according to selected rooms or detected occupancy.
The T9 Smart Thermostat features a touchscreen display, indoor temperature and humidity readings, programmable heating and cooling schedules, smartphone control, and automatic heating and cooling changeover. Through the Resideo app, temperature settings and schedules can be managed remotely.
A key feature of the T9 is room priority control. Instead of relying only on the temperature measured at the thermostat, the system can use measurements from selected Smart Room Sensors. Rooms can be selected manually or prioritized automatically when motion is detected.
The thermostat supports up to 20 wireless indoor sensors. These sensors communicate directly with the thermostat through Honeywell Home RedLINK technology and provide temperature, humidity, and occupancy information.The T9 also supports location-based temperature control through geofencing, time-based programming, Smart Scheduling, Adaptive Intelligent Recovery, Apple HomeKit, maintenance reminders, and system alerts.
The thermostat operates using 24 VAC power supplied by the HVAC transformer through a C-wire. The wireless Smart Room Sensors use two AAA alkaline batteries each.
Product Overview and Technical Specifications
The T9 Smart Thermostat combines heating and cooling control with wireless temperature, humidity, and occupancy monitoring.
| Specification | Details |
| Brand | Honeywell Home |
| Manufacturer | Resideo Technologies, Inc. |
| Product | T9 Smart Thermostat |
| Product Type | WiFi Programmable Smart Thermostat |
| Power Supply | 24 VAC from HVAC transformer |
| C-Wire Requirement | Required |
| Thermostat Batteries | None |
| Power Consumption | 3 VA |
| Display | Color touchscreen |
| Built-in Temperature Sensor | Supported |
| Built-in Humidity Sensor | Supported |
| Built-in Motion Sensor | Not included |
| Wireless Smart Room Sensors | Up to 20 |
| Sensor Measurements | Temperature, humidity, motion |
| Sensor Communication | Honeywell Home RedLINK |
| Sensor Wireless Range | Up to 200 feet |
| Typical Motion Detection Range | Up to 20 feet |
| Smart Room Sensor Batteries | 2 AAA alkaline batteries per sensor |
| Mobile Application | Resideo app |
| WiFi Connectivity | Supported |
| Apple HomeKit | Supported |
| Scheduling | Time-Based, Location-Based, Smart, Manual |
| Daily Schedule Periods | Wake, Away, Home, Sleep |
| Heating Setpoint Range | 40–90°F (4.5–32°C) |
| Cooling Setpoint Range | 50–99°F (10–37°C) |
| System Modes | Heat, Cool, Off, Auto, Emergency Heat |
| Fan Modes | Auto, On, Circulate |
| Automatic Heat/Cool Changeover | Supported |
| Adaptive Intelligent Recovery | Supported |
| Compressor Protection | Supported |
| Touchscreen Lock | Unlocked, Partially Locked, Fully Locked |
| Temperature Units | Fahrenheit or Celsius |
| Display Languages | English, French, Spanish |
| Operating Ambient Temperature | 32–120°F (0–48.9°C) |
| Operating Relative Humidity | 5–90%, non-condensing |
| Warranty | 2-Year Limited Warranty |
T9 Smart Thermostat Models and Smart Room Sensor Packages
The T9 thermostat is available under several model numbers. Some packages include a Smart Room Sensor, while others contain the thermostat without an additional wireless sensor.
Thermostat Model Numbers
| Model Number | Region | Smart Room Sensor Included |
| RCHT9510WFW2001 | United States | No |
| RCHT9510WFW2003 | — | No |
| RCHT9510WFW2017 | Canada | No |
| RCHT9610WFSW2003 | United States | One |
| RCHT9610WFSW2019 | Canada | One |
| RCHT9610WFW2004 | — | No |
Smart Room Sensor Packages
| Model Number | Package |
| RCHTSENSOR-1PK | Single Smart Room Sensor |
| RCHTSENSOR-2PK/E | Two Smart Room Sensors |
Smart Room Sensors can be added to the thermostat according to the required room monitoring arrangement.
The T9 supports a maximum of 20 wireless sensors.
Main Features of the T9 Smart Thermostat
Room Priority Control
The thermostat can use the temperature of selected rooms rather than relying only on the temperature at the thermostat itself.
This allows different rooms to contribute to the temperature used for heating and cooling decisions.
Motion-Based Room Selection
Compatible Smart Room Sensors detect activity using passive infrared motion detection.
When Active Rooms priority is selected, rooms with detected motion contribute to the temperature average.
Remote Temperature Control
The Resideo app allows thermostat settings to be changed using a smartphone or tablet.
Flexible Scheduling
The thermostat supports time-based schedules, geofencing, Smart Scheduling, and manual operation without a schedule.
Smart Alerts
The thermostat can provide warnings about extreme indoor temperatures, wireless sensor problems, WiFi connection issues, and maintenance requirements.
Adaptive Intelligent Recovery
The thermostat learns how long the heating and cooling equipment takes to reach a programmed temperature.
It can activate the equipment early so the selected temperature is reached at the scheduled time.
Thermostat Parts, Controls, and Display
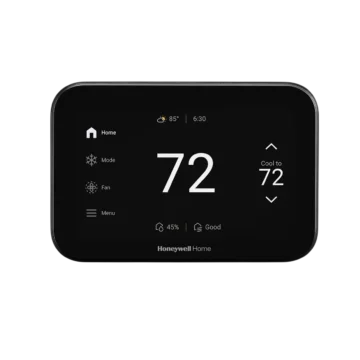
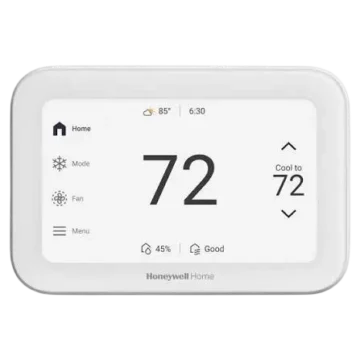
The T9 Smart Thermostat features a central touchscreen with temperature information, room priority status, humidity information, and menu controls.
Home Screen Components
| Display Element | Function |
| Indoor Temperature | Displays the current temperature used for control |
| Indoor Humidity | Shows the measured indoor relative humidity |
| Current Priority | Shows the selected room priority type and number of prioritized rooms |
| Desired Temperature | Displays the selected target temperature |
| Up Arrow | Increases the target temperature |
| Down Arrow | Decreases the target temperature |
| Menu Icon | Opens thermostat settings and operating functions |
| Schedule Status | Indicates scheduled operation when active |
| Room Priority Indicator | Shows information about selected or active rooms |
Waking the Thermostat Screen
Touch the center of the displayed temperature.
The screen wakes and displays the active controls.
Adjusting the Temperature
Use the Up and Down arrows to increase or decrease the selected target temperature.
In Auto Mode, select Heat To or Cool To before adjusting the corresponding target.
Opening the Main Menu
- Touch the screen to wake it.
- Select the Menu icon with three horizontal lines at the bottom.
- Choose the required operating or configuration option.
Main Thermostat Menu Options
The thermostat Menu provides access to heating and cooling controls, scheduling, wireless sensors, and system settings.
Operating Controls
| Menu | Function |
| System Mode | Selects Heat, Cool, Off, Auto, or Emergency Heat |
| Fan | Selects Auto, On, or Circulate |
| Priority | Selects which room sensors are used for temperature control |
| Schedule | Creates, disables, or resets heating and cooling schedules |
Management Controls
| Menu | Function |
| Devices and Sensors | Views, adds, identifies, or removes Smart Room Sensors |
| Thermostat Information | Displays device identification and software information |
| Equipment Status | Shows current heating, cooling, and fan operation |
Configuration Controls
| Menu | Function |
| WiFi | Configures wireless network connection |
| Connect App | Links the thermostat to the Resideo app |
| Security | Configures touchscreen locking and password protection |
| Preferences | Changes language, temperature units, display, clock, and reminders |
| Advanced Setup | Opens equipment and system configuration |
Thermostat Information
The information screen can display:
- MAC address.
- IP address.
- Date code.
- Model number.
- Build date.
- Collection version.
- WiFi bootloader version.
- WiFi application version.
Equipment Status
The equipment status screen provides information about:
- Current system mode.
- Heating stages.
- Cooling stages.
- Fan operation.
Using the Resideo App
The Resideo app allows the thermostat to be managed from a compatible mobile device.
Main App Controls
| Control | Function |
| Temperature | Displays the current thermostat temperature |
| Temperature Adjustment | Changes the desired setpoint |
| Mode | Changes the heating and cooling mode |
| Fan | Changes the fan setting |
| Priority | Selects room sensor priority |
| Schedule | Opens heating and cooling scheduling |
| Menu | Opens additional app settings |
Additional App Menu Options
The app provides access to functions such as:
- Geofencing.
- Vacation.
- Activity History.
- Add Users.
- Filter Reminders.
- Alerts.
- Edit Account.
- App information.
The available interface may change when the app is updated.
Understanding Smart Room Sensor Priority
Smart Room Sensors allow the T9 thermostat to control temperature using measurements from different rooms.
Two room priority arrangements are available:
- Selected Rooms.
- Active Rooms.
Selected Rooms
Selected Rooms allows specific rooms to be chosen manually.
The thermostat calculates an average temperature using the selected rooms.
Rooms that are not selected do not contribute to the average.
For example, if bedroom and living room sensors are selected, their temperature readings contribute to the effective indoor temperature.
Active Rooms
Active Rooms uses motion detection to determine which rooms should contribute to the temperature average.
When motion is detected in a room, that room becomes active.
The thermostat then includes its temperature reading in the calculated average.
Rooms without detected activity are excluded.
Comparing Priority Modes
| Priority Mode | How Rooms Are Selected |
| Selected Rooms | Rooms are chosen manually |
| Active Rooms | Rooms are selected according to motion detection |
When No Active Room Detects Motion
If Active Rooms priority is enabled but no wireless sensor detects motion, the thermostat uses its own built-in temperature sensor.
The remote sensors are excluded until active room information becomes available.
Motion Detection Timing
Smart Room Sensors use a dynamic occupancy algorithm.
If someone briefly walks through a room, the sensor normally treats that room as occupied for approximately 10 minutes.
If someone remains in a room longer, the occupancy timeout increases automatically.
Multiple Occupied Rooms
When multiple rooms detect motion, their temperature measurements are averaged.
The thermostat uses that average as the effective indoor temperature for heating and cooling control.
Selecting the System Mode
The T9 supports heating, cooling, automatic changeover, and emergency heating where compatible equipment is configured.
How to Change the System Mode
- Touch the home screen to wake the thermostat.
- Open Menu.
- Select System Mode.
- Choose the required mode.
- Touch Done.
System Mode Reference
| Mode | Function |
| Heat | Controls the heating system |
| Cool | Controls the cooling system |
| Off | Turns normal heating and cooling off |
| Auto | Automatically selects heating or cooling |
| Em Heat | Operates emergency or backup heating on compatible heat pump systems |
Available modes depend on the connected HVAC equipment and installer configuration.
Automatic Heat/Cool Changeover
Auto Changeover allows the thermostat to switch between heating and cooling according to the required indoor temperature.
Auto Mode Requirements
Auto Changeover is available when:
- The thermostat is configured with at least one heating stage.
- At least one cooling stage is configured.
- Automatic changeover is enabled by the installer.
Heat and Cool Setpoints
In Auto Mode, the home screen displays both Heat To and Cool To settings.
The heating and cooling targets can be adjusted separately.
The thermostat permits identical heat and cool setpoints, although a cooling target at least 3°F above the heating target is generally preferred in the guide.
A 1.5°F switching differential is applied internally to prevent immediate heating after cooling or cooling after heating.
Emergency Heat Mode
Emergency Heat is available on compatible heat pump systems with backup heating equipment.
How Emergency Heat Works
When Emergency Heat is selected:
- The heat pump is locked out.
- The backup heating equipment becomes the active heat source.
- The backup heat maintains the selected heating temperature.
Emergency Heat must be supported by the connected equipment and enabled through the thermostat’s configuration.
Selecting Emergency Heat
- Open Menu.
- Select System Mode.
- Choose Em Heat.
- Confirm the selection.
Setting the Fan Mode
The fan controls are available on compatible heating and cooling systems.
How to Change Fan Mode
- Touch the display to wake the thermostat.
- Open Menu.
- Select Fan.
- Choose Auto, On, or Circulate.
Fan Settings
| Mode | Operation |
| Auto | Fan runs when heating or cooling is requested |
| On | Fan runs continuously |
| Circulate | Fan runs intermittently for approximately 33% of the time |
Fan Scheduling
Fan settings can also be assigned to individual program periods during time-based scheduling or geofencing operation.
Setting the Time and Date
When the thermostat is connected to WiFi and registered through the Resideo app, its time and date update automatically.
If WiFi is not being used, the clock can be configured manually.
How to Open Time and Date Settings
- Wake the thermostat display.
- Open Menu.
- Select Preferences.
- Select Date and Time.
Setting the Date
- Select Date.
- Scroll the left column to select the month.
- Scroll the center column to select the day.
- Scroll the right column to select the year.
- Touch Done.
Setting the Time
- Select Time.
- Scroll the left column to select the hour.
- Scroll the center column to select the minutes.
- Scroll the right column to select AM or PM.
- Touch Done.
Clock Settings
The Preferences menu also allows:
- 12-hour or 24-hour clock selection.
- Daylight Saving Time configuration.
Connecting the T9 Thermostat to WiFi
The T9 connects to a home WiFi network using the thermostat’s configuration menu.
How to Connect to WiFi
- Open Menu.
- Scroll to WiFi.
- Select Choose Network.
- Choose the required WiFi network.
- Enter the network password.
Enabling WiFi
- Wake the thermostat display.
- Open Menu.
- Select WiFi.
- Make sure Enable WiFi is selected.
Disabling WiFi
- Open Menu.
- Select WiFi.
- Turn off the Enable WiFi setting.
Connecting to Another Network
- Open Menu.
- Select WiFi.
- Select Choose Network.
- Select the required network.
- Enter its password.
Connecting the Thermostat to the Resideo App
The Resideo app provides remote thermostat control and access to geofencing features.
How to Connect the App
- Open Menu on the thermostat.
- Select Connect App.
- Follow the instructions displayed on the thermostat.
- Open the Resideo app.
- Select the thermostat model.
- Choose the location where the thermostat is installed or create a new location.
- Complete the remaining app instructions.
After the thermostat has been connected, compatible app-based settings can be managed remotely.
Apple HomeKit Setup
The T9 Smart Thermostat supports Apple HomeKit.
How to Connect to Apple HomeKit
- Open Menu on the thermostat.
- Scroll down and select Connect HomeKit.
- Open the Apple Home app.
- Select Add Accessory.
- Scan the HomeKit setup code shown on the thermostat display.
- Follow the instructions on the phone.
Heating and Cooling Scheduling
The T9 supports multiple programming options.
Available Scheduling Types
| Schedule Type | Description |
| Time-Based | Heating and cooling temperatures change at scheduled times |
| Location-Based | Temperature settings change according to smartphone location |
| Smart Scheduling | Combines geofencing with a Sleep period |
| No Schedule | Temperature is adjusted manually |
Time-Based Schedule Periods
Each day can include four periods.
| Period | Function |
| Wake | Morning temperature settings |
| Away | Temperature settings while occupants are away |
| Home | Temperature settings while occupants are home |
| Sleep | Overnight temperature settings |
Day Grouping
The thermostat supports:
- The same schedule every day.
- Different weekday and weekend schedules.
- A separate schedule for each day.
Programming a Schedule on the Thermostat
The Schedule menu is used to configure heating and cooling periods.
Step 1: Open Schedule
- Wake the display.
- Open Menu.
- Select Schedule.
Step 2: Choose the Schedule Arrangement
Select Grouped Days when the same schedule should apply to the chosen group of days.
Select Single Days to program individual days separately.
Step 3: Select a Program Period
Choose:
- Wake.
- Away.
- Home.
- Sleep.
Step 4: Configure the Period
The period settings include:
| Setting | Function |
| Time | Sets the starting time |
| Priority | Selects the sensors used during the period |
| Temperature | Sets heating and cooling targets |
| Fan | Selects Auto, On, or Circulate |
Step 5: Save the Schedule
Complete the required settings for the selected periods and days.
Follow the touchscreen prompts to save the configuration.
Schedule Options
The Schedule menu provides options to:
- Create a new schedule.
- Disable the schedule.
- Reset to the default schedule.
Geofencing is configured through the Resideo app.
Scheduling Through the Resideo App
The Resideo app provides time-based scheduling and location-based temperature control.
How to Create a Schedule
- Open the Resideo app.
- Select the required thermostat.
- Touch the calendar icon.
- Choose Grouped Days or Single Day scheduling.
- Configure the required periods.
Schedule Options
The Options menu allows:
- Turning scheduling off.
- Creating a new time-based schedule.
- Switching to geofencing.
Sensor Priority for Each Period
The app allows the sensors used for temperature control to be selected for individual program periods.
For example, bedroom sensors can be prioritized during Sleep.
Geofencing and Smart Scheduling
Geofencing uses smartphone location information to determine whether the household is home or away.
Location-Based Temperature Control
When geofencing is active, the thermostat may display:
- Using Home Settings.
- Using Away Settings.
- Using Sleep Settings.
If an additional Sleep period has been configured through the Resideo app, the display can also show Following Schedule.
Manual Changes During Geofencing
If the set temperature is changed manually while geofencing is active, the new target remains in effect until the geofence boundary is crossed.
How to Change the Geofence Boundary
- Open the Resideo app.
- Open the app menu.
- Select Geofence.
- Select Geofence Radius.
- When the map appears, touch and hold the black boundary control.
- Drag it to adjust the geofence radius.
- Select SAVE.
Overriding a Heating or Cooling Schedule
A schedule override temporarily or permanently changes the selected temperature and associated comfort settings.
How to Activate an Override
- Set the thermostat to Heat, Cool, Auto, or Emergency Heat.
- Press Up or Down to change the temperature.
- In Auto Mode, select Heat To or Cool To before changing the corresponding setpoint.
- If scheduling is enabled, Hold Until appears.
- Touch Hold Until.
Hold Options
| Option | Function |
| Next Period | Maintains the override until the next scheduled period |
| A Specific Time | Maintains the override until a selected time |
| Permanently | Maintains the override continuously |
| Remove Hold | Cancels the override |
Saving the Hold
Choose the required option.
If A Specific Time is selected, enter the required end time.
Touch Done to return to the home screen.
Thermostat Preferences
The Preferences menu contains display, clock, reminder, and recovery settings.
How to Open Preferences
- Wake the display.
- Open Menu.
- Scroll down.
- Select Preferences.
Display Preferences
| Setting | Function |
| Temperature Units | Fahrenheit or Celsius |
| Language | English, French, or Spanish |
| Inactive Backlight | Adjustable from 0–100% |
| Inactive Sleep Backlight | Adjustable from 0–100% |
| Inactive Sleep Time | Controls when the sleep backlight setting applies |
| Indoor Temperature Offset | Adjusts displayed temperature |
| Indoor Humidity Offset | Adjusts displayed humidity |
| Clean Screen | Temporarily locks the touchscreen for cleaning |
The inactive sleep backlight time can be configured independently of the programmed heating and cooling Sleep period.
Date and Time Preferences
These settings include:
- Date.
- Time.
- Clock format.
- Daylight Saving Time.
Adaptive Recovery
Adaptive Recovery can be enabled or disabled.
Cleaning the Thermostat Screen
The T9 provides a Clean Screen function that temporarily disables touchscreen controls.
This prevents accidental changes while cleaning.
How to Activate Clean Screen
- Wake the thermostat.
- Open Menu.
- Select Preferences.
- Select Display.
- Select Clean Screen.
- Confirm Yes.
The touchscreen is disabled for 30 seconds.
A countdown appears before normal operation returns.
Cleaning Instructions
- Use water or household glass cleaner.
- Apply liquid to a cloth rather than directly onto the thermostat.
- Wipe the screen with the damp cloth.
- Avoid abrasive cleaning products.
Do not spray cleaning liquid directly onto the thermostat.
Security and Screen Lock Settings
The T9 includes security settings that restrict changes to thermostat operation.
How to Open Security Settings
- Wake the touchscreen.
- Open Menu.
- Select Security.
- Choose Change Lock Mode or Create Password.
Lock Modes
| Lock Mode | Function |
| Unlocked | Full access to thermostat settings |
| Partially Locked | Only temperature adjustments are allowed |
| Fully Locked | No setting changes are permitted |
Password Protection
A password can be created for additional security.
The password should be recorded and retained for future access.
Advanced Configuration Settings
The T9 includes advanced configuration settings for HVAC equipment, scheduling, temperature limits, reminders, and display behavior.
Configuring a New Thermostat
- Power on the thermostat.
- Select GET STARTED.
- Choose the required setting on each screen.
- Press NEXT to continue.
- Select Done to save the configuration.
Revising Existing Configuration
- Open Menu.
- Select Advanced Setup.
- Choose Modify Configuration.
- Review the available settings.
- Press NEXT to move through them.
- Select Done to save.
Language and Room Configuration
| Setting | Available Options |
| Language | English, French, Spanish |
| Room Type | Bedroom, Living Space, Other |
| Bedroom Names | Guest Bedroom, Master Bedroom, Custom |
| Living Space Names | Family Room, Living Room, Rec Room, Custom |
| Other Rooms | Dining Room, Kitchen, Basement, Hallway, Custom |
| Temperature Format | Fahrenheit, Celsius |
| Outdoor Temperature Source | None, Internet |
The selected room information helps organize thermostats and wireless sensors in the Resideo app.
HVAC System Configuration
| Configuration | Available Values |
| System Type | Conventional Forced Air Heat, Heat Pump, Radiant Heat, None (Cool Only) |
| Conventional Heating | Standard Gas, High Efficiency Gas, Oil, Electric, Hot Water Fan Coil |
| Heat Pump | Air to Air, Geothermal |
| Radiant Heat | Hot Water Radiant Heat, Steam |
| Reversing Valve | O on Cool, B on Heat |
| Cooling/Compressor Stages | 0, 1, 2 |
| Heating Stages | 0, 1, 2 |
| Backup Heat Stages | Up to one for heat pump applications |
| Changeover | Manual, Automatic |
ISU 2060: Reversing Valve
This setting determines whether the heat pump reversing valve is energized during heating or cooling.
| Setting | Function |
| O | O/B energized in cooling |
| B | O/B energized in heating |
The setting applies to heat pump configurations.
ISU 2070: Cooling and Heating Stages
The thermostat supports up to two conventional heating stages and up to two cooling or compressor stages.
Heat pump configurations can also support one backup heating stage.
The initial setup uses detected wiring information to determine available equipment settings.
ISU 3000: Changeover
| Setting | Function |
| Manual | Heating and cooling modes are selected manually |
| Automatic | Thermostat changes between heating and cooling automatically |
ISU 4090: Adaptive Intelligent Recovery
| Setting | Function |
| No | Heating or cooling recovery begins at the scheduled time |
| Yes | Recovery begins early to reach the scheduled temperature |
The default is Yes.
Heating and Cooling Temperature Limits
The T9 allows minimum and maximum temperature limits to be configured.
Cooling Setpoint Limits
| Setting | Range | Default |
| Minimum Cool Setpoint | 50–99°F (10–36.5°C) | 50°F (10°C) |
| Maximum Cool Setpoint | 50–99°F | 90°F (32°C) |
Heating Setpoint Limits
| Setting | Range | Default |
| Minimum Heat Setpoint | 40–90°F (4.5–32°C) | 50°F (10°C) |
| Maximum Heat Setpoint | 40–90°F (4.5–32°C) | 90°F (32°C) |
The minimum and maximum limits determine the available temperature adjustment range.
If the minimum and maximum values for a mode are the same, that setpoint cannot be adjusted from the home screen.
Additional Configuration Settings
Keypad Lockout
The configuration menu supports:
- Unlocked.
- Partially Locked.
- Fully Locked.
Air Filter Reminder
The thermostat can monitor filter maintenance using runtime or calendar intervals.
Supported runtime intervals include 10, 20, 30, 45, 60, 90, 120, and 150 days.
Calendar intervals include 30, 45, 60, and 75 days, or selected periods from 3 to 15 months.
Other Maintenance Reminders
The thermostat supports reminders for:
| Component | Reminder Options |
| Humidifier Pad | 60 or 90 runtime days; 6 or 12 calendar months |
| Dehumidification Filter | Selected calendar-day or monthly intervals |
| Ventilator Filter | 3, 6, 9, or 12 calendar months |
| UV Bulb 1 | 6, 12, or 24 calendar months |
| UV Bulb 2 | 6, 12, or 24 calendar months |
Clock Settings
| Setting | Options |
| Clock Format | 12-hour or 24-hour |
| Daylight Saving Time | Yes or No |
Indoor Temperature Display Offset
The temperature display can be adjusted from -3°F to +3°F in 1°F increments.
The corresponding Celsius adjustment range is -1.5°C to +1.5°C in 0.5°C increments.
Indoor Humidity Display Offset
The displayed humidity can be adjusted from -12% to +12% in 1% increments.
Adaptive Intelligent Recovery
Adaptive Intelligent Recovery allows the thermostat to begin heating or cooling before a scheduled period.
The thermostat learns from previous heating and cooling cycles and considers how far the current temperature is from the programmed target.
Recovery Example
If WAKE is scheduled for 6:00 AM with a heating target of 70°F, the thermostat may activate heating before 6:00 AM.
This allows the room to reach approximately 70°F at the programmed time.
Recovery Indicator
The thermostat displays In Recovery when heating or cooling begins before the scheduled time.
Compressor Protection
The T9 includes compressor protection to prevent rapid equipment cycling.
When compressor protection is active, the thermostat keeps the compressor off for several minutes before allowing it to restart.
The display shows:
Waiting for Equipment
Normal compressor operation resumes when the protection delay has ended.
Alerts and Notifications
The T9 provides alerts for thermostat, WiFi, equipment, and Smart Room Sensor conditions.
A red dot above the Menu icon indicates an active alert or notification.
How to View Notifications
- Open Menu.
- Select Notifications.
- Choose the required alert message.
- Read the displayed information.
An active alert or notification must be acknowledged before the Menu can be accessed normally.
Thermostat Alert Messages and Solutions
| Alert | Meaning | Action |
| SET DATE AND TIME | Time and date are required for scheduling | Set the time and date or register the thermostat |
| WIFI MODULE ERROR | Internal WiFi module failure | Replace the thermostat |
| NEED TO REGISTER ONLINE | Thermostat needs account registration | Register through the Resideo app |
| NO INTERNET CONNECTION | Connected to WiFi but cannot access internet | Check router and modem |
| WI-FI SIGNAL LOST | Wireless network connection lost | Reconnect or choose another network |
| WI-FI NOT CONFIGURED | WiFi setup is incomplete | Configure or disable WiFi |
| INTERNET REQUIRED FOR OUTDOOR TEMPERATURE | Internet is needed for the configured outdoor temperature function | Connect thermostat to internet |
| POWER RESTORED | Power interruption has ended | No action required |
| HEAT PUMP FAILURE | Heat pump equipment fault detected | Contact a qualified contractor |
| MEMORY ERROR | Internal memory failure | Replace the thermostat |
| INTERNAL SENSOR ERROR | Built-in sensor failure | Replace the thermostat |
| INTERNAL HUM TEMP FAILURE | Internal humidity/temperature sensor failure | Replace the thermostat |
| THERMOSTAT MEMORY ERROR | Thermostat memory problem | Replace the thermostat |
| THERMOSTAT UNKNOWN TIME | Time could not update after power loss | Set time or check WiFi |
| LOW SENSOR BATTERIES | Wireless sensor battery power is low | Replace sensor AAA batteries |
| INDOOR SENSOR ERROR | Wireless sensor fault detected | Replace the affected sensor |
| INDOOR SENSOR CONNECTION ERROR | Wireless sensor lost communication | Replace batteries and check sensor location |
Maintenance Reminders
The thermostat provides indoor air quality maintenance reminders for compatible equipment.
Available Reminders
- Air Filter 1.
- Humidifier Pad.
- Dehumidifier Filter.
- Ventilator Filter.
- UV Bulb 1.
- UV Bulb 2.
How to Configure a Reminder
- Wake the display.
- Open Menu.
- Select Preferences.
- Choose the required reminder.
- Use Up or Down to select the timer duration.
- Press Done.
Resetting a Reminder
After completing the required maintenance, select Reset Timer.
The reminder duration can also be extended to postpone the next notification.
Runtime-Based Reminders
When a runtime-based reminder is used, the thermostat measures fan operating time during forced-air heating, cooling, or fan operation.
Adding a Smart Room Sensor
Additional wireless sensors can be connected through the thermostat menu.
How to Pair a Sensor
- Wake the thermostat.
- Open Menu.
- Select Devices and Sensors.
- Touch Add.
- Follow the on-screen instructions to pair and name the sensor.
The thermostat supports up to 20 connected Smart Room Sensors.
Pairing Requirement
A Smart Room Sensor can be paired with only one T9 thermostat at a time.
A sensor previously paired with another T9 must be removed from that thermostat before connecting it to a different unit.
Removing a Smart Room Sensor
A wireless sensor can be removed through the thermostat or by using the sensor’s Connect button.
Removing a Sensor Through the Thermostat
- Open Menu.
- Select Devices and Sensors.
- Select the required sensor.
- Open Options.
- Select Delete.
Removing a Sensor Using Its Connect Button
- Remove the sensor cover.
- Confirm that batteries are installed.
- Press and hold the Connect button for 30 seconds.
- The sensor LED changes from steady green to red.
- Release the button.
The sensor is removed from the connected device list.
Viewing Smart Room Sensor Information
The Devices and Sensors menu provides information about paired wireless sensors.
How to View Sensor Status
- Wake the thermostat.
- Open Menu.
- Select Devices and Sensors.
- Choose the required sensor.
Available Sensor Information
The thermostat can display:
- Sensor name.
- Temperature.
- Battery status.
- Wireless signal strength.
- Motion settings.
- Sensor identification information.
Identifying a Smart Room Sensor
The Identify function helps determine which physical wireless sensor corresponds to a room name.
How to Identify a Sensor
- Open Devices and Sensors.
- Select Identify.
- Remove the cover from the sensor being identified.
- Press the button on the sensor.
- The thermostat displays the associated room name.
Blink Lights Function
Selecting Blink Lights causes the selected sensor’s LED to flash for approximately five seconds.
Motion Sensitivity Settings
Smart Room Sensors provide adjustable motion sensitivity.
The available options include:
| Sensitivity | Function |
| High | More sensitive motion detection |
| Medium | Moderate motion detection |
| Low | Reduced motion sensitivity |
Motion sensitivity is configured through the sensor’s Options menu.
Replacing Smart Room Sensor Batteries
The T9 thermostat itself does not use batteries.
It receives power through the HVAC system’s 24 VAC transformer and C-wire.
Wireless Smart Room Sensors use two AAA alkaline batteries.
Low Battery Warning
The thermostat displays a warning approximately 60 days before sensor battery power is expected to be depleted.
When the sensor LED begins flashing red, the remaining battery power is critically low.
The manufacturer indicates that batteries may be depleted within approximately two to three weeks after the red warning begins.
How to Replace the Batteries
- Remove the Smart Room Sensor cover.
- Remove the old batteries.
- Install two fresh AAA alkaline batteries.
- Check the sensor indicator.
- Replace the sensor cover.
Battery Indicator Meaning
| Indicator | Meaning |
| Green Flash | Batteries are functioning |
| Red Flash | Fresh batteries are required |
| LED Off During Normal Operation | Normal condition |
After installing fresh batteries, the sensor normally restores communication within a few seconds.
Thermostat Troubleshooting
Thermostat Display Is Blank
If the display does not turn on:
- Check the circuit breaker.
- Reset the breaker if required.
- Confirm that the heating and cooling system power switch is on.
- Check that the furnace door is closed securely.
- Confirm that the C-wire is connected.
- Check the R/Rc slider position against the wiring arrangement.
Heating System Does Not Respond
- Open Menu.
- Select System Mode.
- Choose Heat.
- Press Done.
- Set the heating temperature above the current indoor temperature.
- Check the circuit breaker and equipment power switch.
- Confirm that the furnace door is closed.
- Wait approximately five minutes for the system to respond.
Cooling System Does Not Respond
- Open Menu.
- Select System Mode.
- Choose Cool.
- Press Done.
- Set the cooling temperature below the current room temperature.
- Check power to the cooling equipment.
- Wait approximately five minutes.
Temperature Cannot Be Adjusted
Confirm that the selected temperature is within the supported operating range.
| Mode | Temperature Range |
| Heat | 40–90°F (4.5–32°C) |
| Cool | 50–99°F (10–37°C) |
Configured minimum and maximum setpoint limits may further restrict the available adjustment range.
Auxiliary Heating Operates During Cooling
For heat pump systems, verify that no wire is incorrectly connected to W on the UWP mounting system.
Cooling Operates When Heating Is Requested
For heat pump installations, check that no wire is incorrectly connected to W on the UWP.
Wireless Sensor Will Not Connect
- Press and hold Connect on the sensor for 15 seconds.
- Wait until the LED turns amber.
- Return to the thermostat.
- Open Menu.
- Select Devices and Sensors.
- Follow the on-screen instructions to add the sensor.
WiFi and Resideo App Troubleshooting
WiFi Connection Is Lost
The thermostat continues to allow manual temperature adjustment when WiFi is unavailable.
Location-based temperature control through the Resideo app will not operate during the disconnection.
The thermostat automatically reconnects when network service returns.
Improving WiFi Signal Strength
The available WiFi range depends on the home router.
Moving the router closer to the thermostat or using a router with stronger coverage may improve the connection.
WiFi Signal Lost Alert
When a WiFi Signal Lost message appears:
- Wait approximately five minutes.
- Check whether the thermostat reconnects.
- If necessary, select another available network.
- Troubleshoot the router if the connection remains unavailable.
Resideo App Changes Do Not Appear
There may be a short delay before changes made in the Resideo app appear on the thermostat.
If the changes remain missing, confirm the WiFi connection and restart the app.
Account Activation Email Not Received
The activation email is identified as coming from:
honeywellhomesupport@honeywell.com
If the email does not arrive:
- Wait approximately five minutes.
- Check the Spam folder.
- Select Resend.
- Contact technical support if the email is still unavailable.
Firmware Updates and Security
The thermostat receives firmware updates automatically while connected to WiFi.
These updates can provide new functions and security improvements.
WiFi Security
The manufacturer recommends changing the router’s default password.
A strong password should contain uppercase and lowercase letters and special characters.
Preparing the Thermostat for Removal
When replacing the T9 or leaving it in a property during a move, personal settings should be cleared.
The thermostat retains configuration and home router information even after power is disconnected.
The manufacturer recommends resetting previously configured WiFi and HomeKit settings before removing or transferring the thermostat.
Physical Dimensions and Electrical Specifications
Thermostat Dimensions
| Component | Height × Width × Depth |
| T9 Smart Thermostat | 4.9 × 3.7 × 0.93 inches |
| Metric Dimensions | 125.4 × 94.1 × 23.68 mm |
Environmental Specifications
| Specification | Value |
| Operating Temperature | 32–120°F (0–48.9°C) |
| Shipping Temperature | -20–120°F (-28.9–48.9°C) |
| Operating Relative Humidity | 5–90%, non-condensing |
| Power Consumption | 3 VA |
Electrical Ratings
| Terminal | Voltage | Running Current |
| W Heating | 20–30 VAC | 0.02–1.0 A |
| W2 Auxiliary Heating | 20–30 VAC | 0.02–1.0 A |
| E Emergency Heat | 20–30 VAC | 0.02–0.5 A |
| Y Compressor Stage 1 | 20–30 VAC | 0.02–1.0 A |
| Y2 Compressor Stage 2 | 20–30 VAC | 0.02–1.0 A |
| G Fan | 20–30 VAC | 0.02–0.5 A |
| O/B Changeover | 20–30 VAC | 0.02–0.5 A |
| L/A Input | 20–30 VAC | 0.02–0.5 A |
| U | Not Used | — |
The terminal voltage ratings refer to 50/60 Hz operation.
Regulatory Information
The T9 complies with applicable United States and Canadian radio regulations.
FCC Compliance
The product complies with Part 15 of the FCC Rules.
Its operation is subject to the following conditions:
- It must not cause harmful interference.
- It must accept received interference, including interference that may cause undesired operation.
Modifications not approved by the responsible party may void authorization to operate the equipment.
Canadian Regulatory Requirements
The product complies with applicable licence-exempt radio equipment requirements.
The device must not cause interference and must accept received interference.
Electronic Waste Disposal
The thermostat should not be disposed of with ordinary household waste.
Use an authorized electronic waste collection or recycling facility.
Warranty Information
The Honeywell Home T9 Smart Thermostat includes a 2-year limited warranty.
Resideo warrants the product, excluding batteries, against defects in materials and workmanship under normal use and service for two years from the original purchase date.
Warranty Coverage
If the product is determined to be defective during the warranty period, Resideo may repair or replace it.
Warranty Service
If the product becomes defective:
- Return it to the original retailer with a receipt or other dated proof of purchase; or
- Contact Resideo Customer Care at 1-800-633-3991.
Customer Care determines whether the product should be returned or replaced.
Warranty Exclusions
The warranty does not cover removal or reinstallation costs.
Damage that occurred while the product was in the consumer’s possession may also be excluded.
Other warranty limitations and applicable legal rights depend on local regulations.
Manufacturer and Customer Support
| Information | Details |
| Brand | Honeywell Home |
| Manufacturer | Resideo Technologies, Inc. |
| Product | T9 Smart Thermostat |
| Support Phone | 1-800-633-3991 |
| Official Website | https://www.honeywellhome.com |
| Manufacturer Website | https://www.resideo.com |
| Manufacturer Address | 1985 Douglas Drive North, Golden Valley, MN 55422, USA |
| Honeywell Home |
Frequently Asked Questions
1. Does the Honeywell T9 Smart Thermostat need a C-wire?
Yes. The T9 thermostat requires 24 VAC power supplied through the HVAC transformer and C-wire.
The thermostat does not use batteries.
The wireless Smart Room Sensors use two AAA alkaline batteries each.
2. How many Smart Room Sensors can connect to the T9?
The T9 supports up to 20 wireless Smart Room Sensors.
These sensors measure temperature, humidity, and motion and communicate with the thermostat through Honeywell Home RedLINK technology.
3. How does Honeywell T9 room priority work?
The thermostat supports Selected Rooms and Active Rooms priority.
Selected Rooms uses the average temperature from manually chosen sensors.
Active Rooms uses sensors in rooms where motion has been detected.
When no motion is detected in any active room, the thermostat uses its own built-in temperature sensor.
4. How is a Smart Room Sensor paired with the T9 thermostat?
Open Menu on the thermostat, select Devices and Sensors, and choose Add.
Follow the on-screen instructions to pair and name the wireless sensor.
If the sensor was previously connected to another T9, it must first be removed from that thermostat.
5. What batteries do Honeywell T9 Smart Room Sensors use?
Each Smart Room Sensor uses two AAA alkaline batteries.
Replace the batteries when the thermostat displays a low-battery warning.
When the sensor’s LED flashes red, battery power is critically low and may be depleted within approximately two to three weeks.
6. How is the Honeywell T9 thermostat connected to WiFi?
Open Menu, select WiFi, and verify that WiFi is enabled.
Choose Choose Network, select the home WiFi network, and enter its password.
To connect the thermostat to the Resideo app, open Menu and select Connect App.
7. Why does the Honeywell T9 display Waiting for Equipment?
Waiting for Equipment indicates that compressor protection is active.
The thermostat temporarily prevents the compressor from restarting too quickly.
After the protection delay ends, normal equipment operation can resume.
8. Can the Honeywell T9 work without WiFi?
Yes. The thermostat can still be controlled directly through its touchscreen when WiFi is unavailable.
However, app-dependent functions such as geofencing will not work during the disconnection.
The thermostat automatically reconnects when the WiFi network becomes available again.