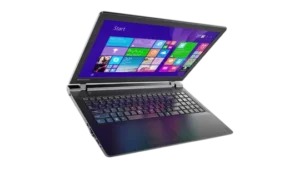
| Field | Details |
| Document Title | Lenovo ideapad 100 — ideapad 100-14IBD User Guide |
| Document Type | User Guide |
| Brand Name | Lenovo |
| Product Name | IdeaPad 100 Laptop |
| Model Number(s) | 100-14IBD |
| PDF File Size | 4.17 MB |
| Number of Pages | 34 |
| Languages Covered | English |
Lenovo ideapad 100-14IBD
The Lenovo ideapad 100-14IBD is a laptop computer designed for everyday computing, internet access, document management, multimedia playback, and communication. It features a built-in display, integrated camera, microphone, speakers, touchpad, wireless LAN connectivity, and several ports for connecting external devices.
The laptop includes a keyboard with function-key combinations and hotkeys for controlling audio, screen brightness, wireless communication, the touchpad, and external displays. Its built-in touchpad provides mouse-style navigation, while the Windows operating system supports application management, wireless networking, and desktop customization.
The ideapad 100-14IBD also includes an HDMI port, Ethernet connection, USB ports, an audio jack, and a memory card reader. Selected configurations include an optical drive for reading and writing compatible discs.
A dedicated Novo button provides access to the BIOS Setup Utility, boot menu, and Lenovo OneKey Recovery System. The recovery software can back up the system partition or restore Windows after certain operating system failures.
The computer includes power and battery status indicators that show charging progress, remaining battery level, and sleep status.
Technical Specifications
| Specification | Details |
| Brand | Lenovo |
| Product Name | ideapad 100 |
| Model Number | 100-14IBD |
| Product Type | Laptop Computer |
| Operating System Instructions | Windows 10 |
| Display | Built-In LCD Display |
| Integrated Camera | Yes |
| Built-In Microphone | Yes |
| Speakers | Integrated |
| Pointing Device | Touchpad with Left and Right Mouse Functions |
| Keyboard | Built-In Keyboard with Function Keys and Hotkeys |
| Wireless Connectivity | Wireless LAN |
| Wired Network Connection | RJ-45 Ethernet |
| External Display Connection | HDMI |
| USB Connections | 2 USB Ports |
| Audio Connection | Combo Audio Jack |
| Memory Card Reader | SD, SDHC, SDXC, MMC |
| Optical Drive | Available on Selected Models |
| Security Lock | Kensington Lock Slot |
| Recovery System | Lenovo OneKey Recovery System |
| BIOS Configuration | BIOS Setup Utility |
| Power Connection | AC Power Adapter Jack |
| Battery Indicator | White and Amber Status Lights |
| Customer Replaceable Components | AC Power Adapter, Keyboard, Optical Drive |
Some features depend on the specific configuration. The computer may contain hardware or functions that differ from the illustrations.
Parts and Components
The ideapad 100-14IBD includes hardware components on the top, left, right, front, and bottom of the computer.
Top Components
| Component | Function |
| Integrated Camera | Captures video for communication. |
| Wireless LAN Antennas | Transmit and receive wireless network signals. |
| Computer Display | Displays images, applications, and other visual information. |
| Speakers | Provide audio output. |
| Built-In Microphone | Captures audio for recording, voice narration, and communication. |
| Keyboard | Provides text input and keyboard shortcuts. |
| Touchpad | Controls the on-screen pointer and provides mouse-style input. |
Integrated Camera
The built-in camera supports video communication.
It can be used with compatible applications for video conferencing.
Wireless LAN Antennas
The antennas communicate with the wireless LAN adapter to transmit and receive wireless signals.
Built-In Microphone
The microphone captures sound for applications such as:
- Video conferencing
- Voice narration
- Audio recording
Touchpad
The touchpad functions like a conventional computer mouse.
Moving a fingertip across the touchpad moves the pointer in the corresponding direction.
The left and right portions of the touchpad provide the functions of conventional mouse buttons.
Press F6 to enable or disable the touchpad.
Display Protection
When closing the display, make sure that pens or other objects are not positioned between the screen and keyboard.
Objects left inside the closed laptop may damage the display panel.
Left-Side Ports and Connections
The left side of the laptop includes the ventilation openings, power connection, Novo button, networking ports, and other external connectors.
| Component | Function |
| Ventilation Slots | Release internal heat. |
| Novo Button | Opens recovery, BIOS setup, or boot selection options. |
| AC Power Adapter Jack | Connects the laptop to its power adapter. |
| RJ-45 Port | Connects an Ethernet network cable. |
| HDMI Port | Connects an external display or television. |
| USB Port | Connects compatible USB devices. |
| Combo Audio Jack | Connects compatible headsets. |
| Power Button | Turns on the computer. |
Ventilation Slots
The ventilation slots help release heat generated inside the laptop.
The openings must remain unobstructed to prevent overheating.
Novo Button
The Novo button provides access to:
- Lenovo OneKey Recovery System
- BIOS Setup Utility
- Boot Menu
It can be pressed gently using the tip of an unfolded paper clip or a similar object without a sharp point.
The computer must be turned off before the Novo button is used to open these startup options.
RJ-45 Ethernet Port
The RJ-45 connector allows a wired network cable to be connected.
Wired networking provides an alternative to wireless internet access.
HDMI Port
The HDMI port connects the computer to devices with HDMI input, including compatible televisions and external displays.
USB Ports
The laptop includes two USB ports for compatible external devices.
Windows normally detects newly connected devices and installs the necessary drivers.
Combo Audio Jack
The combo audio jack connects compatible headsets.
Important: The jack does not support conventional standalone microphones.
The recording function may also be unavailable with certain third-party headsets because of differences in industry standards.
Right-Side Components
The right side includes the optical drive on selected configurations and a Kensington security lock slot.
Optical Drive
Selected models include an optical drive capable of reading and writing compatible discs.
The availability of this drive depends on the laptop configuration.
Kensington Lock Slot
The Kensington lock slot provides a connection point for a compatible security cable.
A security lock can help prevent unauthorized removal of the laptop.
Before purchasing a lock, verify that it is compatible with the computer’s security slot.
Front Components and Status Indicators
The front of the laptop contains the memory card slot and system status indicators.
Power Indicator
| Indicator Status | Meaning |
| Solid White | Computer is powered on. |
| Blinking | Computer is in sleep mode. |
| Off | Computer is powered off. |
Battery Status Indicator
The battery indicator uses white and amber lights to display charging and battery conditions.
| Indicator Status | Charging Status | Meaning |
| Solid White | Charging | Battery has more than 80% charge. |
| Solid White | Discharging | Battery has more than 20% charge. |
| Solid Amber | Discharging | Battery has between 5% and 20% charge. |
| Slowly Blinking White | Charging | Battery has between 20% and 80% charge. |
| Slowly Blinking Amber | Charging | Battery has less than 20% charge. |
| Quickly Blinking Amber | Charging or Discharging | Battery has less than 5% charge. |
During charging, a slowly blinking amber light changes to white after the battery reaches 20%.
The slowly blinking white light stops blinking when the battery reaches 80%, but charging continues until the battery is fully charged.
Memory Card Reader
The laptop includes a memory card slot for transferring and storing data.
Supported Memory Cards
| Card Type | Supported |
| Secure Digital (SD) | Yes |
| Secure Digital High Capacity (SDHC) | Yes |
| Secure Digital eXtended Capacity (SDXC) | Yes |
| MultiMediaCard (MMC) | Yes |
| SDIO Devices | No |
Only one memory card should be inserted at a time.
How to Insert a Memory Card
Insert the compatible memory card into the slot until it reaches the bottom of the slot.
How to Remove a Memory Card
- Use the Windows Safely Remove Hardware and Eject Media function to disable the card.
- Gently pull the card out of the memory card slot.
This helps prevent data corruption.
Bottom Components
The underside of the ideapad 100-14IBD contains ventilation louvers.
These openings allow air to enter the laptop and cool the internal components.
The cooling openings must not be blocked during operation.
Keyboard Shortcuts and Function Keys
The keyboard includes function-key combinations and hotkeys that provide quick access to common computer settings.
Fn Key Combinations
To activate a function-key combination, hold Fn and press the corresponding key.
| Key Combination | Function |
| Fn + Home | Activates the Pause function. |
| Fn + End | Activates the Break function. |
Keyboard Hotkey Functions
| Hotkey Function | Description |
| Mute / Unmute | Turns sound on or off. |
| Volume Down | Decreases the volume level. |
| Volume Up | Increases the volume level. |
| Close Window | Closes the currently active window. |
| Refresh | Refreshes the desktop or active window. |
| Touchpad Control | Enables or disables the touchpad. |
| Airplane Mode | Enables or disables Airplane Mode. |
| Active Applications | Displays currently active applications. |
| LCD Backlight | Turns the display backlight on or off. |
| Display Switching | Switches between the laptop screen and an external display. |
| Brightness Down | Decreases display brightness. |
| Brightness Up | Increases display brightness. |
Important Function Keys
| Key | Function |
| F6 | Enable or disable the touchpad. |
| F7 | Enable or disable Airplane Mode. |
| F9 | Turn the LCD backlight on or off. |
| F12 | Increase display brightness. |
How to Change Hotkey Mode
By default, hotkey functions are activated by pressing the corresponding hotkey directly.
Hotkey Mode can be changed through the BIOS Setup Utility.
- Shut down the computer.
- Press the Novo button.
- Select BIOS Setup.
- Open the Configuration menu.
- Change HotKey Mode from Enabled to Disabled.
- Open the Exit menu.
- Select Exit Saving Changes.
When Hotkey Mode is disabled, hold Fn and press the corresponding hotkey to activate its function.
Connecting External Devices
The laptop supports compatible USB devices, wired networking, headsets, and external displays.
Connecting USB Devices
- Connect the USB device to an available USB port.
- Allow Windows to identify the device.
- Wait while Windows installs the required driver.
After the driver has been installed, the same device can generally be disconnected and reconnected without repeating setup.
Some USB devices require their drivers to be installed before the device is connected.
The device manufacturer’s instructions should be followed in those cases.
Safely Removing USB Storage Devices
Before disconnecting a USB storage device:
- Make sure data transfers have finished.
- Select Safely Remove Hardware and Eject Media in the Windows notification area.
- Eject the device.
- Disconnect it from the USB port.
USB devices with a separate power cord should be connected to their power source before being connected to the computer.
Connecting an Ethernet Cable
- Locate the RJ-45 port.
- Connect the Ethernet cable to the laptop.
- Connect the opposite end to the network equipment.
- Follow the network configuration instructions provided by the internet service provider.
Connecting an External Display
Connect a compatible display or television to the laptop’s HDMI port.
Use the keyboard display-switching hotkey to switch between the computer display and the connected external device.
Setting Up Windows 10 for the First Time
The user guide describes initial setup using Windows 10.
The operating system may require configuration before normal use.
Initial Windows Setup
The setup process can include:
- Accepting the end-user license agreement.
- Configuring the internet connection.
- Registering the operating system.
- Creating a user account.
Follow the on-screen instructions to complete the required configuration.
Windows 10 Start Menu
Windows 10 provides a Start menu for accessing installed applications and system settings.
How to Open the Start Menu
Use either method:
- Press the Windows key.
- Select Start in the lower-left corner of the desktop.
Main Start Menu Controls
| Control | Function |
| Get Started | Opens introductory Windows instructions. |
| Settings | Opens Windows system settings. |
| Power | Provides sleep and shutdown options. |
| All Apps | Displays installed applications. |
| Start Button | Opens the Start menu. |
| Search Box | Searches for applications, files, and settings. |
| Task View | Displays open applications and virtual desktops. |
How to Open Windows Settings
- Open the Start menu.
- Select Settings.
- Choose the required setting category.
Settings can also be found using the search box.
How to Pin an Application to Start
- Open Start.
- Select All Apps.
- Find the application.
- Right-click the application.
- Select Pin to Start.
Applications can also be dragged from the Most Used or All Apps list into the Start menu.
How to Put the Laptop into Sleep Mode
Sleep mode allows the computer to resume quickly without going through the complete startup process.
Entering Sleep Mode
Use any of the following methods:
- Close the display lid.
- Press the Power button.
- Open Start > Power > Sleep.
The power indicator blinks when the computer enters sleep mode.
Important: Wait for the blinking sleep indicator before moving the laptop. Moving the computer while its hard disk is operating may cause damage and data loss.
How to Wake the Laptop
Press any key on the keyboard or press the Power button.
How to Shut Down the Laptop
When the computer will not be used for an extended period, shut it down.
Shutdown Method 1
- Open the Start menu.
- Select Power.
- Select Shut down.
Shutdown Method 2
- Right-click the Start button.
- Select Shut down or sign out.
- Select Shut down.
Windows Task View and Virtual Desktops
Windows 10 supports Task View for managing open applications and virtual desktops.
How to Open Task View
Use either method:
- Select the Task View button on the taskbar.
- Press Windows + Tab.
Creating a Virtual Desktop
- Open Task View.
- Select New desktop.
Alternatively, press Windows + Ctrl + D.
Switching Between Virtual Desktops
Open Task View and select the required desktop.
The following keyboard shortcuts can also be used:
| Shortcut | Function |
| Windows + Ctrl + Left Arrow | Switch to the previous virtual desktop. |
| Windows + Ctrl + Right Arrow | Switch to the next virtual desktop. |
How to Connect to a Wireless Network
The ideapad 100-14IBD supports wireless networking through its wireless LAN adapter.
Enabling Wireless Connectivity
- Press F7 to disable Airplane Mode.
- Select the network icon in the lower-right corner of the Windows taskbar.
Connecting to WiFi
- Allow Windows to scan for available wireless networks.
- Select the required network from the list.
- Click Connect.
- Enter the network security key or passphrase if requested.
For the correct password or network credentials, contact the network administrator or internet service provider.
Windows 10 Get Started App
Windows 10 includes a Get Started application that introduces its operating system features.
Opening Get Started
Use either method:
- Open Start and select Get Started.
- Press Fn + F1, depending on the keyboard layout.
Lenovo Novo Button and BIOS Setup
The Novo button provides access to startup and recovery functions when the computer is turned off.
Novo Button Menu
| Option | Purpose |
| BIOS Setup | Opens the BIOS configuration utility. |
| Boot Menu | Allows selection of a startup device. |
| System Recovery | Opens Lenovo OneKey Recovery System. |
How to Enter BIOS
- Shut down the computer.
- Press the Novo button using an unfolded paper clip or similar blunt-tipped object.
- Select BIOS Setup.
The BIOS Setup Utility displays basic computer information and allows supported configuration changes.
BIOS Setup Functions
The BIOS Setup Utility provides settings for:
- Boot devices
- Security
- Hardware operating modes
- Other system preferences
Selecting a Boot Device
To start the computer from a specific device:
- Turn off the computer.
- Press the Novo button.
- Open the Boot Menu.
- Select the required startup device.
The selected device must be enabled and correctly recognized by the BIOS.
Lenovo OneKey Recovery System
Lenovo OneKey Recovery System is designed to back up and restore the computer’s system partition.
It can restore the system partition to its original factory condition or to an existing backup point.
Recovery Partition
The hard disk contains a hidden partition used to store the system image and OneKey Recovery program files.
This hidden partition occupies some of the drive’s capacity, so available disk space may appear smaller than the stated total capacity.
Lenovo OneKey Recovery System is not available on computers preinstalled with a GNU/Linux operating system.
How to Back Up Windows Using OneKey Recovery
OneKey Recovery can create an image of the system partition for later restoration.
Creating a System Backup
- Start Windows normally.
- Press the Novo button or double-click the OneKey Recovery icon.
- Select System Backup.
- Choose the backup location.
- Select Next.
- Wait for the backup process to finish.
Backup Locations
The backup image can be stored on:
- The local hard disk
- An external storage device
Before starting a backup, remove any removable hard disk drive as directed by Lenovo to avoid possible data loss.
System Backup is available only when Windows can start normally.
The process may take some time.
How to Restore Windows Using OneKey Recovery
The recovery system can restore Windows to the original factory condition or an existing backup point.
Important: Restoring the system partition is irreversible and may overwrite existing data. Important files must be backed up before recovery begins.
Restoring Windows When It Starts Normally
- Start Windows.
- Press the Novo button or open the OneKey Recovery application.
- Select System Recovery.
- Allow the computer to restart into the recovery environment.
- Follow the on-screen instructions.
- Select the required restoration option.
Keep the AC power adapter connected during recovery.
Restoring Windows When It Cannot Start
- Shut down the laptop.
- Press the Novo button.
- Select System Recovery from the Novo Button Menu.
- Press Enter.
- Follow the recovery instructions.
The restoration process can take some time to complete.
Troubleshooting Guide
The following troubleshooting instructions cover startup, display, battery, sound, sleep, storage, and recovery problems.
Startup and Display Problems
| Problem | Recommended Solution |
| Screen remains blank during startup | Confirm the AC adapter is connected to a working outlet and the computer is powered on. If the screen remains blank, have the computer serviced. |
| Only a white cursor appears | Restore backed-up files or use OneKey Recovery to restore the system. If the problem remains, request service. |
| Screen becomes blank during operation | Move a finger on the touchpad, press a keyboard key, or press Power to exit the screen saver or sleep mode. |
| LCD backlight is off | Press F9 to check whether the backlight has been disabled. |
| Display is too dim | Press F12 to increase screen brightness. |
| Display appears distorted or unreadable | Check the display driver, screen resolution, color quality, and monitor type. |
| Incorrect characters appear | Check that the operating system and applications are installed and configured correctly. If they are, have the computer serviced. |
Sleep and Power Problems
| Problem | Recommended Solution |
| Critical low-battery message appears and computer shuts down | Connect the AC power adapter. |
| Computer enters sleep immediately after startup | Confirm the battery is charged and the operating temperature is within the permitted range. |
| Computer does not wake from sleep | Connect the AC adapter, then press a key or the Power button. |
| Computer remains unresponsive | Press and hold the Power button for at least four seconds. If necessary, disconnect the AC adapter. Unsaved data may be lost. |
If the computer enters sleep immediately after startup despite a charged battery and acceptable operating temperature, qualified service is required.
Sound Problems
If the speakers produce no sound even when the volume is turned up, check the following:
- Mute is turned off.
- The combo audio jack is not being used.
- The built-in speakers are selected as the playback device.
Battery Problems
| Problem | Recommended Solution |
| Computer shuts down before the battery indicator shows empty | Discharge and recharge the battery pack. |
| Computer continues operating after the battery indicator shows empty | Discharge and recharge the battery pack. |
| Computer does not work with a fully charged battery | Turn off the computer for one minute to reset the battery pack’s surge protector, then turn it on again. |
Hard Disk Problems
If the hard disk does not work, open the BIOS Setup Utility and verify that the drive is correctly included in the Boot menu.
OneKey Recovery Problems
| Problem | Possible Cause or Solution |
| System backup cannot be created | Confirm Windows is being used and sufficient storage space is available on the backup destination. |
| Backup process fails | Close open programs, restart the backup, or choose another storage location if the destination media is damaged. |
| Factory recovery fails | The system partition size or drive capacity may have been modified. |
Other Operating Problems
| Problem | Recommended Solution |
| Computer stops responding | Hold Power for at least four seconds. If required, disconnect the AC adapter. |
| Computer starts from the wrong device | Check the BIOS Boot menu and select the correct startup device. |
| External device does not work | Check its connection and power requirements. High-power USB devices may require their own adapter. |
External Device Precautions
Do not connect or disconnect external device cables other than USB while the computer is powered on, as this may damage the computer.
For high-power external devices, such as certain USB optical drives, use the device’s external power adapter.
BIOS Password Problems
The BIOS may be configured with user, administrator, or hard disk passwords.
The following instructions apply if a password is forgotten.
Forgotten User Password
Contact the system administrator to clear the user password.
Forgotten Hard Disk Password
A Lenovo authorized service provider cannot reset a forgotten hard disk password or recover the protected data.
The hard disk drive must be replaced by an authorized service provider or Lenovo representative.
Proof of purchase is required, and parts and service charges apply.
Forgotten Administrator Password
A Lenovo authorized service provider cannot reset a forgotten administrator password.
The system board must be replaced through authorized service.
Proof of purchase is required, and replacement charges apply.
Customer Replaceable Units
The Lenovo ideapad 100-14IBD includes components classified as Customer Replaceable Units (CRUs).
CRU service applies only in certain countries.
CRU List
| Component | Replacement Instructions |
| AC Power Adapter | Safety, Warranty, and Setup Guide |
| Keyboard | User Guide |
| Optical Drive | User Guide |
How to Remove the Keyboard
The keyboard removal procedure is illustrated in the CRU section of the user guide.
Keyboard Removal Instructions
- Turn off the computer.
- Disconnect the AC power adapter and all connected cables.
- Close the display.
- Turn the laptop over.
- Remove the three screws securing the keyboard, as shown in the bottom-view illustration.
- Turn the laptop back over.
- Open the display.
- Use the tip of an unfolded paper clip or similar blunt-tipped object through the designated opening in the bottom cover to push the keyboard upward.
- Gently loosen the keyboard with the fingers.
- Lift the keyboard slightly.
- Disconnect the keyboard connector in the direction illustrated.
- Remove the keyboard.
The connector must be handled carefully during removal.
How to Remove the Optical Drive
The optical drive is present only on selected models.
Optical Drive Removal Instructions
- Remove the optical drive retaining screw shown in the removal illustration.
- Gently slide the optical drive out of the laptop.
- Remove the screw securing the optical drive bracket.
- Detach the bracket in the indicated direction.
- Carefully remove the optical drive bezel.
Replacement components must be suitable for the specific laptop configuration.
Warranty Information
Warranty coverage for the ideapad 100-14IBD depends on the applicable Lenovo warranty terms.
How to Check Warranty Status
The product’s warranty information can be checked through Lenovo Support:
https://support.lenovo.com/warrantystatus
The warranty status should be checked using the relevant device information.
The Lenovo Safety and General Information Guide provides additional warranty and service instructions.
Customer Support Information
Lenovo provides access to product documentation, drivers, regulatory information, warranty checks, and technical assistance.
Lenovo Support Resources
| Resource | Website |
| Lenovo Support | https://support.lenovo.com |
| Warranty Status | https://support.lenovo.com/warrantystatus |
| Regulatory Compliance | https://www.lenovo.com/compliance |
| Environmental Information | https://www.lenovo.com/ecodeclaration |
Finding Drivers and Preinstalled Software
Installation programs for Lenovo-preinstalled software may be stored on the D partition of the hard disk.
If required software cannot be found there, it may be available through Lenovo’s consumer support website.
Lenovo also provides hardware drivers on the D partition for supported Windows installations.
The latest available device drivers can be downloaded through Lenovo Support.
Before Contacting Support
The computer’s symptoms, displayed error messages, and the conditions under which the problem occurs should be identified before requesting assistance.
For repair or service involving forgotten firmware passwords, proof of purchase may be required.
Frequently Asked Questions
1. How do I enter BIOS on the Lenovo ideapad 100-14IBD?
Shut down the computer, press the Novo button, and select BIOS Setup from the displayed menu. The BIOS Setup Utility provides access to boot devices, security settings, hardware modes, and other supported configuration options.
2. What does the Novo button do on the Lenovo IdeaPad 100?
The Novo button provides access to the BIOS Setup Utility, Boot Menu, and Lenovo OneKey Recovery System when the computer is turned off. It can be pressed gently using an unfolded paper clip or similar blunt-tipped object.
3. How do I enable or disable the touchpad?
Press F6 to enable or disable the built-in touchpad. The touchpad controls the on-screen pointer and provides left and right mouse-button functions.
4. How do I connect the Lenovo ideapad 100-14IBD to WiFi?
Press F7 to disable Airplane Mode. Select the wireless network icon on the Windows taskbar, choose the desired WiFi network, and click Connect. Enter the network password or security key if required.
5. What do the white and amber battery indicator lights mean?
A solid white light indicates more than 80% charge while charging, or more than 20% while discharging. A solid amber light during discharge indicates 5–20% battery capacity. Slowly blinking lights indicate charging progress, while quickly blinking amber means the battery has less than 5% charge.
6. How do I restore Windows using Lenovo OneKey Recovery?
If Windows starts normally, open OneKey Recovery and select System Recovery. If Windows cannot start, turn off the computer, press the Novo button, and select System Recovery. Follow the instructions to restore the system partition. Important data should be backed up before recovery because restoration is irreversible.
7. What should I do if the Lenovo IdeaPad 100 screen is blank?
Check that the laptop is powered on and the AC adapter is connected. Press F9 to check whether the LCD backlight is disabled, and use F12 to increase brightness. If the screen remains blank after these checks, the computer may require service.
8. What should I do if the Lenovo ideapad 100-14IBD stops responding?
Press and hold the Power button for four seconds or longer to reset the computer. If it still does not respond, disconnect the AC power adapter. Unsaved data may be lost during this procedure.