| Field | Details |
| Document Title | IdeaPad U300/U300e/U300s/U400 User Guide V3.0 |
| Document Type | User Guide |
| Brand Name | Lenovo |
| Product Name | IdeaPad U300e Laptop |
| Model Number(s) | U300, U300e, U300s, U400 |
| PDF File Size | 7 MB |
| Number of Pages | 31 |
| Languages | English |
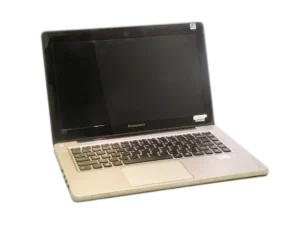
Lenovo IdeaPad U300e
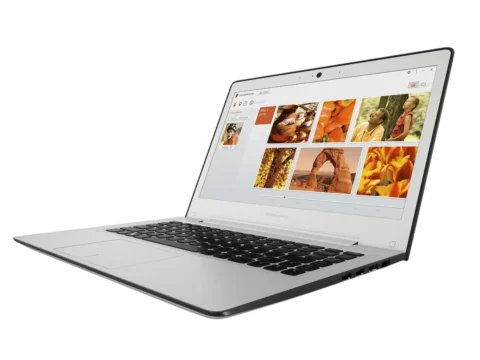
The Lenovo IdeaPad U300e is a portable laptop with a built-in rechargeable battery, keyboard, touchpad, USB connections, Ethernet networking, and support for external displays. It provides wired and wireless Internet access and includes Lenovo’s OneKey Rescue system for backup and recovery on supported installations.
The laptop features a Power button, system status indicators, ventilation openings, an AC adapter connector, and a combination headphone and microphone jack. Selected configurations also provide an integrated camera, Bluetooth connectivity, and other wireless functions.
Product Overview
The IdeaPad U300e is designed for conventional notebook operation. The built-in display provides visual output, while the keyboard and touchpad allow users to control applications and enter information.
The computer includes a built-in rechargeable battery that charges automatically when the laptop is connected to its AC adapter.
Main Features
- Built-in LCD display.
- Integrated touchpad for pointer control.
- Keyboard with function keys and system hotkeys.
- Integrated camera on selected configurations.
- Wireless antennas on supported configurations.
- Three USB connections.
- HDMI output on supported configurations.
- RJ-45 Ethernet port.
- Combination headphone and microphone jack.
- Wireless networking.
- Optional Bluetooth support.
- Battery protection technology.
- Rapid Boot on supported configurations.
- Lenovo OneKey Rescue system on supported installations.
- BIOS-based password protection.
- Power and battery status indicators.
Parts and Components
Top Components
| Component | Function |
| Integrated Camera | Provides video communication on selected models |
| Wireless Module Antennas | Receive and transmit wireless signals |
| LCD Display | Displays images, applications, and system information |
| Power Button | Turns on the laptop |
| System Status Indicators | Show operating conditions |
| Touchpad | Moves the pointer and performs mouse-style actions |
| Keyboard | Provides text input and function controls |
Integrated Camera
Selected configurations include a built-in camera for video communication.
The camera can be controlled using the keyboard’s camera hotkey.
Wireless Antennas
The computer includes integrated antennas for supported wireless communication functions.
Touchpad
The touchpad operates as a conventional mouse. Moving a fingertip across its surface moves the on-screen pointer.
Press F6 to enable or disable the touchpad.
Ports and Connectors
The IdeaPad U300e includes connections on both sides of the notebook.
Left-Side Components
| Component | Description |
| OneKey Rescue System Button | Opens recovery or startup functions |
| USB Port | Connects a compatible USB device |
| Headphone/Microphone Combo Jack | Connects a compatible headset |
| Fan Louvers | Release heat from internal components |
OneKey Rescue System Button
The OneKey Rescue button is located on the left side of the computer.
When the laptop is turned off, pressing this button opens the OneKey Rescue system if the recovery software is installed.
When Windows is running, the button opens Lenovo OneKey Recovery.
The button can also be used to access BIOS Setup through the startup options menu.
Headphone and Microphone Jack
The combination audio jack allows a compatible headset to be connected.
Caution: Listening through headphones at high volume for extended periods can damage hearing.
Fan Louvers
The cooling openings allow heat to escape from the computer.
Keep these openings clear during operation to prevent overheating.
Right-Side Components
| Component | Function |
| USB Ports | Connect compatible USB peripherals |
| HDMI Port | Connect a compatible TV or external display |
| RJ-45 Ethernet Port | Connect a wired network |
| AC Power Adapter Jack | Connect the laptop’s power adapter |
USB Ports
The IdeaPad U300e has three USB ports in total.
USB connections can be used with compatible external devices, including USB storage devices and other computer peripherals.
HDMI Port
The HDMI connector supports compatible external displays, such as monitors and televisions.
Ethernet Port
The RJ-45 connector is used for wired Internet or local area network connections.
AC Power Adapter Jack
The AC adapter jack supplies external power to the laptop and allows the built-in battery to charge.
Technical Specifications
General Specifications
| Specification | Details |
| Brand | Lenovo |
| Product Series | IdeaPad U Series |
| Product Name | IdeaPad U300e |
| Product Type | Laptop Computer |
| Display Type | LCD |
| Keyboard | Integrated Keyboard with Function Keys |
| Pointing Device | Touchpad |
| Camera | Selected Configurations |
| Wireless Communication | Supported Wireless Network Functions |
| Bluetooth | Selected Configurations |
| USB Ports | 3 |
| HDMI Output | Supported Configurations |
| Ethernet Connection | RJ-45 |
| Headphone/Microphone Connector | Combination Audio Jack |
| Battery | Built-In Rechargeable Battery |
| Charging Temperature | 10°C–30°C (50°F–86°F) |
| Operating System Used in Instructions | Windows 7 |
| Recovery System | Lenovo OneKey Rescue, when preinstalled |
| BIOS Access | Fn + F2 or OneKey Rescue Button |
Connectivity
| Connection | Function |
| USB | Connect external devices |
| HDMI | External video output |
| RJ-45 | Wired Ethernet networking |
| Audio Jack | Headset connection |
| Wi-Fi | Wireless local network access |
| Bluetooth | Short-range wireless communication on supported configurations |
Battery Charging Requirements
| Setting | Details |
| Charging Temperature | 10°C–30°C (50°F–86°F) |
| Charging Method | AC Adapter |
| Automatic Charging | While connected to AC power |
| Battery Protection | Sleep protection against excessive discharge |
| First-Use Requirement | Connect the AC adapter to activate the battery |
Safety Instructions
Read the supplied Lenovo Safety and General Information Guide before operating the computer.
Display Safety
Attention: Do not open the display beyond 130 degrees.
The display panel may be damaged if it is forced beyond its supported opening angle.
Before closing the laptop, check that pens or other objects have not been left between the display and keyboard.
Ventilation Safety
Keep the ventilation openings clear during operation.
Blocked fan louvers can prevent heat from escaping and may cause overheating.
Headphone Safety
Listening to audio at a high volume for a prolonged period may damage hearing.
Use a suitable volume level when wearing headphones or a headset.
External USB Device Safety
Some high-power USB devices, such as external optical drives, require their own power adapter.
Use the external device’s power adapter when required. Otherwise, the USB device might not be recognized and the computer may shut down.
Wireless Communication Safety
Read the Regulatory Notice before using wireless devices.
Wireless use may also be subject to local regulations and applicable restrictions.
Before First Use
The built-in battery is not fully charged when the laptop is purchased.
The battery protection system also places the battery into a sleep state by default. Therefore, the AC adapter must be connected before the computer can start for the first time.
Initial Setup
- Read the supplied safety and product instructions.
- Place the laptop on a stable surface.
- Check that the fan louvers are unobstructed.
- Connect the power cord to the AC adapter.
- Connect the AC adapter firmly to the laptop’s power jack.
- Plug the power cord into an electrical outlet.
- Press the Power button.
- Follow the operating system setup instructions.
Connecting the AC Adapter
The AC adapter supplies power to the computer and charges the built-in battery.
Connection Procedure
- Connect the power cord to the AC adapter.
- Connect the adapter to the computer’s power connector.
- Plug the power cord into an electrical outlet.
The battery begins charging automatically while the laptop operates using external power.
Configuring the Operating System
When Windows is started for the first time, initial configuration may be required.
The setup process can include:
- Accepting the end-user license agreement.
- Configuring an Internet connection.
- Registering the operating system.
- Creating a user account.
Follow the instructions displayed by Windows to complete the setup.
Turning the Computer On and Off
Turning On the Laptop
Press the Power button to start the computer.
If the computer has remained unused for an extended period and does not start from battery power, connect the AC adapter to activate the battery protection system.
Entering Sleep Mode
Sleep mode temporarily reduces power consumption while allowing the computer to resume without repeating the complete startup process.
To enter sleep mode:
- Open the Windows Start menu.
- Select Sleep.
- Allow the computer to enter the sleep state.
Important: Wait until the power indicator starts blinking before moving the laptop. Moving a computer while its hard disk is still spinning can damage the disk and cause data loss.
Waking the Computer
To resume from sleep mode:
- Press the Power button, or
- Press any key on the keyboard.
Shutting Down
When the computer will not be used for a day or two, Lenovo recommends shutting it down.
To shut down:
- Open the Windows Start menu.
- Select Shut down.
- Allow the computer to turn off completely.
Using the Touchpad
The touchpad provides mouse-style pointer control.
Moving the Pointer
- Place a fingertip on the touchpad.
- Slide the finger in the direction the pointer should move.
- Stop moving the finger when the pointer reaches the desired position.
Enabling or Disabling the Touchpad
Press F6 to switch the touchpad on or off.
If the pointer does not move when using the touchpad, check whether the touchpad has been disabled through this key.
Keyboard Shortcuts
The IdeaPad U300e keyboard includes function keys for system controls and Windows operations.
Function Key Combinations
Hold the Fn key while pressing the corresponding key to activate these functions.
| Shortcut | Function |
| Fn + Home | Activates Pause |
| Fn + End | Activates Break |
| Fn + PgUp | Enables or disables Scroll Lock |
| Fn + PgDn | Activates Insert |
Keyboard Hotkeys
The function key row provides shortcuts to common computer settings.
| Key | Function |
| F1 | Mutes or unmutes sound |
| F2 | Decreases volume |
| F3 | Increases volume |
| F4 | Closes the current function or application |
| F5 | Refreshes |
| F6 | Enables or disables the touchpad |
| F7 | Opens wireless device settings |
| F8 | Enables or disables the microphone |
| F9 | Turns the integrated camera on or off |
| F10 | Opens display selection settings |
| F11 | Decreases screen brightness |
| F12 | Increases screen brightness |
Hotkey Mode
By default, hotkey functions are accessible by pressing their corresponding function keys directly.
To use standard F1–F12 functions while Hotkey Mode is enabled, hold Fn while pressing the function key.
Changing Hotkey Mode in BIOS
- Restart the laptop.
- Press Fn + F2 when the Lenovo logo appears.
- Open the Configuration menu.
- Find Hotkey mode.
- Change the setting from Enable to Disable.
When Hotkey Mode is disabled, the special functions can be activated by holding Fn while pressing the corresponding key.
If Fast Boot prevents BIOS access through Fn + F2, use the OneKey Rescue button instead.
Rapid Boot
Rapid Boot reduces the time required for the computer to start.
This feature is available on selected configurations.
Enabling Rapid Boot
- Turn off the computer.
- Press the OneKey Rescue button.
- Select Enter Setup.
- Open the Configuration menu.
- Locate Boot Speed.
- Select Fast to enable Rapid Boot.
Disabling Rapid Boot
Follow the same procedure and change Boot Speed to Normal.
Entering BIOS When Rapid Boot Is Enabled
- Turn off the computer.
- Press the OneKey Rescue button.
- Select Enter Setup.
Intel Rapid Start Technology
Selected configurations with solid-state storage support Intel Rapid Start Technology.
This feature allows the computer to resume more quickly from hibernation.
How It Works
- Put the computer into sleep mode through the Windows Start menu.
- Allow the computer to remain in sleep mode.
- After approximately 75 minutes, a supported system enters hibernation.
When Intel Rapid Start Technology is active, hibernation is managed through this process rather than by selecting Hibernation directly from the Start menu.
Battery Charging and Power Management
Checking Battery Status
The Windows notification area contains a battery icon displaying the remaining battery percentage.
Battery operating time depends on the energy stored in the battery and the way the computer is being used.
Factors affecting battery runtime include:
- How often the hard disk is accessed.
- Screen brightness.
- Computer activity.
Charging the Battery
Charge the battery when:
- The computer is first used.
- The battery status indicator begins blinking.
- The battery level becomes low.
- The battery has not been used for a long period.
Connect the AC adapter and allow the battery to charge.
Battery Charging Temperature
Charge the battery between 10°C and 30°C (50°F–86°F).
The computer does not automatically begin recharging immediately after the battery level drops from a fully charged state. This is intended to support battery life.
A complete charging or discharging cycle is not required.
Battery Protection Mode
The IdeaPad U series includes battery protection technology designed to reduce battery degradation during extended periods of inactivity.
When the computer remains unused for a long time, the battery may enter a protective sleep state to prevent overdischarge.
Reactivating the Battery
If the laptop does not turn on because the battery is in its protective sleep state:
- Connect the AC adapter to the computer.
- Connect the adapter to an electrical outlet.
- Allow the power connection to activate the battery.
- Press the Power button.
The built-in battery is in this protective state by default before first use.
Connecting USB Devices
The IdeaPad U300e has three USB ports.
Compatible USB devices can be connected directly to the computer.
Connection Instructions
- Locate an available USB port.
- Connect the USB device.
- Follow any device-specific instructions.
High-Power USB Devices
A USB device with high power requirements, such as an external optical drive, may require its own power adapter.
If such a device is used without an appropriate adapter, it may not be recognized and the computer may shut down.
Connecting Bluetooth Devices
On configurations with an integrated Bluetooth adapter, the computer can communicate wirelessly with compatible devices.
Examples include:
- Other computers.
- Mobile phones.
- Personal digital assistants.
- Compatible Bluetooth peripherals.
Bluetooth Operating Range
The guide specifies a wireless range of up to approximately 10 meters in open space.
Actual range depends on interference and physical barriers.
Enabling Bluetooth
- Press F7.
- Open the integrated wireless device settings.
- Enable the required Bluetooth function.
- Pair the Bluetooth device according to the instructions supplied with that device.
Bluetooth Connection Tips
- Move connected devices closer together when signal quality is poor.
- Avoid unnecessary physical barriers between devices.
- Pair the devices before transferring data.
- Turn Bluetooth off when not needed to conserve battery power.
Connecting an External Display
Supported IdeaPad U300e configurations include an HDMI output for connecting compatible displays.
HDMI Connection
- Locate the HDMI connector on the right side of the laptop.
- Connect a compatible HDMI cable.
- Connect the other end to the monitor or television.
- Use the display selection hotkey to open the display output settings.
Press F10 to access the display device selection function.
Connecting to the Internet
The IdeaPad U300e supports wired Internet connections and compatible wireless networking.
Wired Internet Connection
The RJ-45 Ethernet connector can be used with suitable network equipment.
The guide describes cable and DSL Internet connections.
Cable Internet
Cable Internet service uses a cable modem connected to a cable television line.
DSL Internet
DSL service provides network access using supported telephone-line infrastructure and suitable DSL equipment.
Connecting Through Ethernet
- Connect an Ethernet cable to the computer’s RJ-45 port.
- Connect the other end to the appropriate network equipment.
- Follow the network configuration instructions supplied by the Internet service provider.
The required modem, splitter, cables, and service settings depend on the Internet connection.
Wireless Internet Connection
Supported wireless connection methods include Wi-Fi and, on applicable configurations, WiMAX.
Wireless Network Types
| Network Type | Description |
| Wi-Fi | Wireless networking across a limited area, such as a home, office, or group of buildings |
| WiMAX | Wireless broadband networking across a larger metropolitan area |
Enabling Wireless Communication
- Press F7.
- Open the integrated wireless device settings.
- Turn on the required wireless communication function.
- Configure the connection through Windows or the Internet service provider’s instructions.
The laptop may not support every wireless technology described in the multi-model guide.
BIOS Setup Instructions
The BIOS Setup utility provides access to supported startup, configuration, and password settings.
Entering BIOS
- Start or restart the computer.
- Watch for the Lenovo logo.
- Press Fn + F2.
- Open the BIOS Setup utility.
Entering BIOS Through OneKey Rescue
When Rapid Boot is enabled or Fn + F2 cannot be used:
- Shut down the laptop.
- Press the OneKey Rescue button.
- Wait for the startup menu.
- Select Enter Setup.
Boot Speed Settings
| Setting | Function |
| Fast | Enables Rapid Boot |
| Normal | Disables Rapid Boot |
Hotkey Settings
| Setting | Function |
| Enable | Uses hotkeys directly |
| Disable | Uses Fn with the hotkeys |
Password Security
The IdeaPad U300e supports BIOS-based password protection.
Once a power-on password has been configured and enabled, the computer requests the password during startup.
The computer cannot be used until the correct password is entered.
Password Length
The supported password length is 1–7 alphanumeric characters.
Configuring a Password
- Enter the BIOS Setup utility using Fn + F2 or the OneKey Rescue button.
- Open the password-related configuration.
- Follow the instructions displayed in BIOS.
- Enter and confirm the required password.
Lenovo OneKey Rescue System
Lenovo OneKey Rescue provides backup and recovery functions for supported installations.
It can be used to back up the system partition and restore Windows when necessary.
The system uses a hidden disk partition that stores recovery files and system images.
Because this partition occupies storage space, the usable drive capacity shown in Windows may be lower than the total physical storage capacity.
Opening Lenovo OneKey Recovery in Windows
- Start Windows.
- Double-click the OneKey Recovery desktop icon.
- Open the available backup or recovery functions.
Within the program, the system partition can be backed up to supported storage locations or recovery discs.
Opening OneKey Rescue Without Windows
If Windows cannot start:
- Shut down the computer.
- Press the OneKey Rescue button.
- Enter the OneKey Rescue environment.
- Select an available recovery function.
Recovery Options
| Option | Function |
| Restore Factory Status | Returns the system partition to its original factory state |
| Restore from Backup | Restores a previously created system backup |
| System Partition Backup | Creates a backup of the system partition |
| Recovery Discs | Creates recovery media using suitable equipment |
Recovery Precautions
Warning: The recovery process is irreversible. Back up important data before restoring the system.
For recovery disc creation:
- Keep the laptop connected to the AC adapter.
- Allow enough time for backup and disc creation.
- Number recovery discs after creation.
- Use a compatible external optical drive when the laptop does not have an integrated optical drive.
Troubleshooting Guide
Common Problems and Solutions
| Problem | Possible Cause | Recommended Action |
| Laptop does not turn on during first use | Battery is in protective sleep mode | Connect the AC adapter to activate the battery |
| Laptop does not start after long storage | Battery may have entered protection mode | Connect external power |
| Touchpad does not respond | Touchpad may be disabled | Press F6 |
| Wireless connection is unavailable | Wireless function may be turned off | Press F7 and check wireless settings |
| Bluetooth device cannot transfer data | Devices may not be paired | Pair the devices using their supplied instructions |
| Bluetooth connection is weak | Distance, interference, or barriers | Move devices closer together |
| USB device is not recognized | High-power device may require external power | Use the device’s power adapter |
| Computer shuts down when using a USB accessory | USB device may have high power requirements | Connect the appropriate external adapter |
| Laptop overheats | Ventilation openings may be blocked | Clear the fan louvers |
| BIOS cannot be opened with Fn + F2 | Rapid Boot may be enabled | Open BIOS using the OneKey Rescue button |
| Battery does not immediately resume charging | Battery charging protection | Check the battery status and charging behavior |
| Windows cannot load | Operating system recovery may be needed | Use OneKey Rescue if preinstalled |
| External display is not selected | Display output may need to be changed | Press F10 and select the display device |
Laptop Does Not Turn On
If the laptop has been stored or is being used for the first time, the battery may be in its protection state.
- Connect the AC power adapter.
- Connect it to an electrical outlet.
- Press the Power button.
The external power connection activates the battery when it is in protective sleep mode.
Touchpad Is Not Working
Press F6 to enable or disable the touchpad.
Wi-Fi Is Not Working
- Press F7.
- Check the wireless settings.
- Enable the required wireless function.
- Follow Windows and Internet service provider instructions for network configuration.
Bluetooth Device Does Not Connect
- Press F7 to access wireless device settings.
- Check whether Bluetooth is enabled.
- Confirm that the devices have been paired according to their instructions.
- Move the devices closer if the connection is weak.
USB Device Is Not Recognized
High-power USB accessories may need their own external power supply.
Use the external adapter intended for the connected accessory.
Laptop Becomes Too Hot
Check the ventilation openings.
Make sure the fan louvers are not blocked and that the computer has sufficient airflow.
Cannot Enter BIOS During Startup
When Rapid Boot is enabled, the usual Fn + F2 startup method may not work.
Turn off the laptop, press the OneKey Rescue button, and select Enter Setup.
Windows Cannot Start
The OneKey Rescue system can be used without starting Windows when it is installed.
Turn off the laptop and press the OneKey Rescue button to access available recovery options.
Back up critical data before restoring the system.
Maintenance and Care
Ventilation Maintenance
Keep the cooling openings clear.
Do not cover the fan louvers while the computer is operating.
Battery Care
- Charge the battery between 10°C and 30°C.
- Connect the AC adapter when the battery is low.
- Use the battery protection function during long periods of inactivity.
- Reconnect external power when the battery enters its protective sleep state.
- A complete charge or discharge cycle is not required for normal charging.
Display Care
Do not open the display farther than 130 degrees.
Before closing the display, remove any pens or other objects resting on the keyboard.
External Device Care
Use suitable power adapters with USB devices that require more power than the USB connection can provide.
Customer Support Information
Lenovo provides technical assistance, product support, and service information.
United States Support
| Detail | Information |
| Manufacturer | Lenovo |
| Support Phone | 1-877-4-LENOVO |
| Telephone Number | 1-877-453-6686 |
| Support Availability Stated in Guide | 24 hours a day |
| Website Listed in Guide | https://consumersupport.lenovo.com |
| Lenovo Website | https://www.lenovo.com |
The telephone number and support availability are the U.S. contact details printed in the May 2011 guide and may have changed since publication.
Regulatory Information
The Regulatory Notice contains information about radio-frequency and safety requirements.
Lenovo directs users to its website for the applicable regulatory documents.
Frequently Asked Questions
1. How do I turn on the Lenovo IdeaPad U300e for the first time?
Connect the supplied AC adapter to the laptop and an electrical outlet, then press the Power button. The battery is initially in a protective sleep state and requires external power for activation.
2. How do I enter BIOS on the IdeaPad U300e?
Press Fn + F2 when the Lenovo logo appears during startup. If Rapid Boot is enabled, turn off the computer, press the OneKey Rescue button, and select Enter Setup.
3. How do I enable the touchpad on the IdeaPad U300e?
Press F6 to enable or disable the touchpad.
4. How do I turn on Wi-Fi on the Lenovo IdeaPad U300e?
Press F7 to open wireless device settings. Enable the required wireless function, then configure the network using the operating system or Internet service provider’s instructions.
5. Why won’t my IdeaPad U300e turn on after being stored?
The battery may have entered its protection mode to prevent overdischarge. Connect the AC adapter to activate the battery, then press the Power button.
6. How do I use OneKey Recovery on the IdeaPad U300e?
In Windows, open the OneKey Recovery desktop application. If Windows cannot start, turn off the laptop and press the OneKey Rescue button to access the recovery system, provided it is installed.
7. How do I disable Rapid Boot on the IdeaPad U300e?
Turn off the computer and press the OneKey Rescue button. Select Enter Setup, open Configuration > Boot Speed, and change the setting from Fast to Normal.