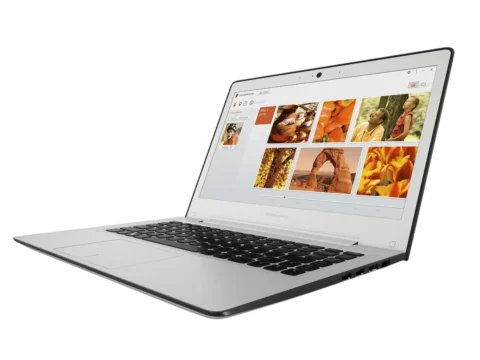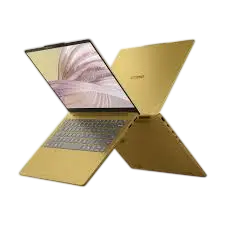
| Field | Details |
| Document Title | IdeaPad Vibe (14″, 12), IdeaPad Vibe (15″, 12) User Guide |
| Document Type | User Guide |
| Brand Name | Lenovo |
| Product Name | IdeaPad Vibe 14AGP12 |
| Model Number(s) | 14AGP12, 15AGP12, 14AHP12, 15AHP12, 14AKP12, 15AKP12 |
| PDF File Size | 8 MB |
| Number of Pages | 69 |
| Languages | English |
Lenovo IdeaPad Vibe 14AGP12
The Lenovo IdeaPad Vibe 14AGP12 is a 14-inch notebook computer with Windows 11, DDR5 memory, M.2 PCIe Gen4 solid-state storage, and USB Type-C connectivity. It includes an integrated keyboard, touchpad, camera, microphones, speakers, and wireless networking capabilities.
The computer supports different display configurations, including LCD and OLED panels, with resolutions up to 2560 × 1600 pixels on selected models. It also features USB Power Delivery charging, HDMI output, two USB Type-C connectors, two USB Type-A connectors, and a microSD card reader.
Additional functions include adjustable system performance modes, battery conservation settings, Windows Hello facial recognition on supported configurations, Lenovo Vantage, Smart Connect, and Lenovo Qira where available.
Certain features depend on the installed hardware, product configuration, region, and software availability.
Product Overview
The IdeaPad Vibe 14AGP12 provides notebook computing functions through its built-in display, keyboard, touchpad, and Windows 11 operating system.
The computer supports common tasks such as document editing, online communication, video conferencing, media playback, and connecting external devices.
Its multi-purpose USB Type-C connections support data transfer, compatible display output, and USB Power Delivery. Users can connect external monitors, storage devices, headsets, and other supported accessories.
Main Features
- 14-inch display.
- LCD or OLED screen configurations.
- Display resolution up to 2560 × 1600 pixels on selected models.
- Up to 120 Hz display refresh rate on supported configurations.
- DDR5 SO-DIMM memory.
- Two M.2 storage slots with PCIe Gen4 interface.
- Integrated camera with physical privacy shutter.
- Infrared camera functionality on selected models.
- Built-in microphones and stereo speakers.
- Keyboard with function keys and hotkeys.
- Optional white keyboard backlighting.
- Multi-touch touchpad.
- HDMI output.
- Two multi-purpose USB Type-C connectors.
- Two USB Type-A connectors.
- microSD memory card reader.
- 3.5 mm combination audio jack.
- USB Power Delivery charging.
- Wi-Fi 6 or Wi-Fi 7 support, depending on configuration.
- Bluetooth 5.3 or 5.4.
- Windows 11.
- Adjustable battery charging modes.
- Performance mode selection using Fn + Q.
- Lenovo Vantage or Lenovo PC Manager.
- Lenovo Qira and Smart Connect features where available.
- UEFI/BIOS security and password protection.
Technical Specifications
General Specifications
| Specification | Details |
| Brand | Lenovo |
| Product Name | IdeaPad Vibe 14AGP12 |
| Machine Type | 83XK |
| Product Type | Notebook Computer |
| Operating System | Windows 11 |
| Display Size | 14 inches (355.6 mm) |
| Display Types | LCD, OLED |
| Display Resolution Options | 1920 × 1200, 2160 × 1352, 2560 × 1600 |
| Refresh Rate Options | 60 Hz, 120 Hz |
| Memory Type | DDR5 |
| Memory Module Type | SO-DIMM |
| Memory Installation | Slot-Mounted |
| Physical Memory Slots | 1 or 2, depending on configuration |
| Storage Type | Solid-State Drive |
| Storage Form Factor | M.2 |
| Storage Slots | 2 |
| Storage Interface | PCIe Gen4 |
| Keyboard | Integrated Keyboard |
| Keyboard Backlight | White, selected models |
| Pointing Device | Multi-Touch Touchpad |
| Camera | Integrated with Privacy Shutter |
| Infrared Camera Function | Selected Models |
| Microphones | Built-In |
| Speakers | Built-In |
| Wireless Networking | Wi-Fi |
| Bluetooth | Bluetooth 5.3 or 5.4 |
| Video Connections | HDMI, USB-C DisplayPort |
| Memory Card Reader | microSD, microSDHC, microSDXC |
| USB Type-A Connectors | 2 |
| USB Type-C Connectors | 2 |
| Audio Connection | 3.5 mm Combo Audio Jack |
The display resolutions, refresh rates, memory-slot configurations, and other selectable specifications describe supported configurations. The installed hardware determines which options are available on an individual computer.
Dimensions
| Dimension | Measurement |
| Width | 313.6 mm (12.35 inches) |
| Depth | 222.3 mm (8.8 inches) |
| Metal Model — Minimum Thickness | 14.9 mm (0.59 inches) |
| Metal Model — Maximum Thickness | 15.8 mm (0.62 inches) |
| Plastic Model Thickness | 16.8 mm (0.66 inches) |
AC Power Adapter Specifications
| Specification | Details |
| AC Input | 100–240 V AC |
| Input Frequency | 50–60 Hz |
| Output Voltage | 20 V |
| Maximum Output Current | 3.25 A |
| Maximum Power | 65 W |
| Power Connection | USB Type-C |
Some configurations may be sold without an AC power adapter.
Battery Specifications
| Specification | Details |
| Battery Type | Rechargeable Lithium-Ion |
| Battery Capacity | 50 Wh or 65 Wh |
| 50 Wh Battery | 3 Cells |
| 65 Wh Battery | 4 Cells |
| Charging Temperature | 10°C–35°C (50°F–95°F) |
| Normal Charging Time | Approximately 2–4 Hours |
| Conservation Mode Charging Level | Approximately 75%–80% |
HDMI Specifications
| Specification | Details |
| Connector | HDMI |
| Signaling Protocol | TMDS |
| Maximum Output Resolution | 4096 × 2160 |
| Maximum Refresh Rate at Listed Resolution | 30 Hz |
USB Type-A Specifications
| Specification | Details |
| Connector Quantity | 2 |
| Output Voltage | 5 V |
| Maximum Output Current | 0.9 A |
| USB 2.0 Data Rate | 480 Mbps |
| SuperSpeed USB Data Rate | 5 Gbps |
USB Type-C Specifications
| Specification | Details |
| Connector Quantity | 2 |
| USB-C Power Output | 5 V, Up to 3 A |
| Minimum USB PD Input | 45 W (20 V, 2.25 A) |
| Maximum USB PD Input | 65 W (20 V, 3.25 A) |
| USB 2.0 Data Rate | 480 Mbps |
| SuperSpeed USB Data Rate | 5 Gbps |
| DisplayPort Version | DisplayPort 1.2 |
| DisplayPort Maximum Data Rate | 21.6 Gbps |
| Maximum USB-C Display Resolution | 3840 × 2160 at 60 Hz |
Actual USB transfer speeds vary depending on the connected device, cable, file type, and operating conditions.
Wireless Connectivity Specifications
| Feature | Details |
| Wi-Fi Standards | 802.11a/b/g, 802.11n, 802.11ac, 802.11ax, 802.11be |
| Wi-Fi Generations | Wi-Fi 6, Wi-Fi 7 |
| Bluetooth Versions | 5.3 or 5.4 |
Wireless support and available frequency bands depend on the installed adapter and regional regulations.
Wi-Fi 6E and Wi-Fi 7 functions may be disabled in certain countries or regions.
Parts and Components
Front Components
| Component | Function |
| Microphones | Capture voice and surrounding sounds |
| Infrared LED | Supports facial recognition on selected models |
| Camera Shutter | Physically covers the camera lens |
| Camera | Captures photographs and videos |
| Camera Light | Indicates camera activity |
| Screen | Displays text, images, applications, and video |
| Wireless Antennas | Provide Wi-Fi and Bluetooth communication |
Integrated Microphones
The built-in microphones convert voice and surrounding sounds into digital audio.
They support activities such as voice recording, video conferencing, and communication applications.
Infrared LED
Selected configurations include an infrared LED that works with a compatible camera for facial recognition.
Camera Privacy Shutter
The camera shutter is a sliding cover that blocks the camera lens.
When the shutter covers the lens, the camera cannot capture images.
Camera Activity Light
| Indicator | Meaning |
| On | Camera is active |
| Off | Camera is inactive |
Display
The built-in display presents operating system interfaces, applications, videos, and other visual content.
Selected configurations include touchscreen functionality.
Keyboard and Touchpad Components
The IdeaPad Vibe 14AGP12 includes an integrated keyboard, speakers, touchpad, and hidden wireless antennas.
Keyboard
The keyboard is the main text-input device. It includes standard typing keys, modifier keys, function keys, and Lenovo hotkeys.
Keyboard layouts may vary by language and region.
Speakers
The integrated speakers provide sound output from applications, system notifications, recordings, and multimedia content.
Touchpad
The touchpad controls the on-screen pointer.
To use it:
- Place a fingertip on the touchpad.
- Slide the finger to move the pointer.
- Tap to select an item.
- Double-tap to open a supported item.
The touchpad also supports multi-finger gestures.
Left-Side Ports and Connectors
| Component | Function |
| HDMI Connector | Connects an external display |
| USB Type-C Connector | Provides USB Power Delivery input, data transfer, and display connectivity |
| Charging Light | Indicates AC power and battery charging status |
| Second USB Type-C Connector | Supports compatible USB data and display devices |
| Combo Audio Jack | Connects headphones, headsets, or external speakers |
| microSD Card Slot | Accepts compatible microSD memory cards |
HDMI Connector
The HDMI connector supports compatible monitors, projectors, and televisions.
USB Type-C Power Connector
The designated USB Type-C power connector is used to supply power to the computer.
When not being used for charging, it can also support compatible data devices and external displays.
Second USB Type-C Connector
The additional USB Type-C connector supports compatible USB storage devices, peripherals, and external monitors.
Both USB-C connectors support DisplayPort Alternate Mode.
Combination Audio Jack
The 3.5 mm audio connector supports:
- Three-pole TRS plugs.
- Four-pole TRRS plugs.
- CTIA and OMTP headset standards.
It can be used with compatible headphones, single-plug headsets, and external speakers.
microSD Card Reader
The memory card slot accepts:
- microSD.
- microSDHC.
- microSDXC.
These cards can transfer data between the notebook and removable storage.
Right-Side Ports and Connectors
| Component | Function |
| Novo Button Hole | Opens firmware, startup, and recovery options |
| Power Light | Displays operating and battery status |
| Power Button | Turns the computer on |
| USB Type-A Connectors | Connect USB-compatible peripherals |
Novo Button
The Novo button is located inside a recessed hole.
When the computer is turned off, pressing the button opens a menu containing firmware and startup options.
The recessed design helps prevent accidental activation.
Power Button
Press the Power button to turn on the notebook.
When Windows is running, pressing the Power button puts the computer into sleep mode by default.
Bottom Components
The bottom panel contains ventilation openings that allow cooling air to enter the computer.
Metal and plastic models have different bottom ventilation layouts.
Important: Keep the notebook on a firm, flat surface during operation. Beds, sofas, carpets, and other soft materials can block the air intakes and cause overheating, reduced performance, freezing, or shutdown.
Power and Charging Indicator Lights
Charging Light
| Light Status | AC Power Connected | Battery Charge |
| Off | No | — |
| Solid Amber | Yes | 1%–90% |
| Solid White | Yes | 91%–100% |
Power Light
| Light Status | Computer State | Battery Charge |
| Solid White | Powered On | 21%–100% |
| Rapidly Blinking White | Powered On | 1%–20% |
| Slowly Blinking White | Sleep Mode | — |
| Off | Powered Off or Hibernating | — |
Safety Instructions
Power Adapter Safety
The notebook supports USB Power Delivery charging.
Use the supplied adapter or a compatible, safety-approved USB-C charger.
Attention: An uncertified charger may damage the computer or create an electrical hazard.
USB-C Charger Requirements
The computer supports USB Power Delivery input between 45 W and 65 W.
| Charging Level | Requirement |
| Minimum Accepted Power | 45 W |
| Maximum Negotiated Power | 65 W |
A 45 W USB PD supply provides the minimum negotiated power needed for operation and starting battery charging.
The 65 W level permits the fastest supported charging speed.
Charger Certification
Lenovo recommends selecting a charger certified or approved for electrical safety.
Examples of recognized markings include:
- CCC in mainland China.
- CE in many European countries.
- UL Listed or other recognized testing laboratory markings in the United States and Canada.
Heat Safety
The bottom surface can become warm during normal operation.
Avoid prolonged contact between the bottom of the notebook and bare skin, particularly for periods exceeding one minute.
Ventilation Safety
Do not operate the laptop on soft surfaces that obstruct the air intakes.
Maintain unobstructed ventilation to prevent excessive internal temperature.
Liquid Spills
If liquid is spilled on the notebook:
- Carefully disconnect the AC power adapter.
- Turn off the computer immediately.
- Allow the liquid to dry completely before restarting.
Caution: Do not turn the computer upside down to drain liquid.
Operating Environment
| Condition | Specification |
| Maximum Altitude Without Pressurization | 3048 m (10,000 ft) |
| Operating Temperature Up to 2438 m | 5°C–35°C (41°F–95°F) |
| Storage Temperature | 5°C–43°C (41°F–109°F) |
| Maximum Operating Temperature Above 2438 m | 31.3°C (88°F) |
| Minimum Battery Charging Temperature | 10°C (50°F) |
| Operating Humidity | 8%–95% |
| Storage Humidity | 5%–95% |
Initial Setup Instructions
Connecting the Power Adapter
- Place the notebook on a hard, flat surface.
- Locate the USB Type-C power input connector.
- Connect the supplied or compatible USB Power Delivery charger.
- Connect the charger to an electrical outlet.
- Check the charging indicator.
- Press the Power button to start the computer.
Setting Up Windows 11
When the notebook starts for the first time, Windows guides the user through initial configuration.
The process includes:
- Creating a user account.
- Connecting to a wireless network.
- Selecting language preferences.
For personal Windows setup, a Microsoft account is required during the initial process. A local account can be selected afterward.
Windows 11 Updates
Windows Update provides security updates, device drivers, and new operating system functions.
To check for updates:
- Open Settings.
- Select Windows Update.
- Review available updates.
- Follow the installation instructions.
Security updates may download automatically, while other updates can be installed manually.
Facial Recognition Setup
Selected configurations support Windows Hello facial recognition.
The computer must include the required infrared camera hardware.
Registering Facial Recognition
- Open Start > Settings > Accounts > Sign-in options.
- Select Facial recognition.
- Click Set up.
- Select Get started.
- Follow the prompts to register a face.
If Windows uses a local account, an account password must be configured before facial recognition can be enabled.
Battery Charging and Power Management
The IdeaPad Vibe uses a built-in rechargeable lithium-ion battery.
Charging the Battery
- Connect the computer to a compatible USB-C power supply.
- Allow the battery to charge.
- Check battery status in Windows or the charging indicator.
In Normal Mode, charging from 0% to 100% typically takes approximately two to four hours.
Charging Temperature
Charge the battery at temperatures between 10°C and 35°C.
To support battery life, charging does not resume after a full charge until battery capacity falls to 94% or below.
Battery Charging Modes
Charging behavior can be adjusted using Lenovo Vantage or Lenovo PC Manager.
Normal Mode
Normal Mode supports charging the battery to 100%.
The typical full charging time is two to four hours.
Conservation Mode
Conservation Mode maintains the battery charge at approximately 75%–80%.
This mode is useful when the notebook remains connected to external power for extended periods.
To charge the battery fully before traveling, change from Conservation Mode to Normal Mode or an available rapid charging mode.
Overnight Charge Optimization
Supported configurations can adjust overnight charging based on regular charging and unplugging times.
The system maintains the battery within a selected range for part of the night before completing charging closer to the expected unplugging time.
If the computer is disconnected earlier than usual, the battery may not yet be fully charged.
Restoring Full Battery Charging Capacity
If the notebook stays connected to AC power for long periods, the battery might not reach its full charging potential.
To recover the available capacity:
- Disconnect the charger.
- Use the computer until the battery level falls below 20%.
- Reconnect the charger.
- Charge the battery to 100%.
System Performance Modes
The notebook supports different operating modes that affect performance, power consumption, and cooling fan behavior.
Press Fn + Q to cycle through the available modes.
| Mode | Recommended Usage |
| High Performance | When connected to AC power and maximum performance is required |
| Auto (Balance) | For changing workloads and everyday use |
| Power Saving (Quiet) | For battery operation or quieter use |
In Auto Mode, the system adjusts performance and power consumption according to the active tasks.
Sleep and Shutdown Instructions
Shutting Down
- Open Start.
- Select Power.
- Click Shut down.
Entering Sleep Mode
- Open Start.
- Select Power.
- Click Sleep.
Waking from Sleep
Press the Power button or any key on the keyboard.
Changing Power Timeouts
- Open Settings > System > Power & battery.
- Select Screen, sleep, & hibernation timeouts.
- Adjust the settings.
Default Power-Saving Timeouts
| Action | Connected to Power | On Battery |
| Turn Off Screen | 5 Minutes | 3 Minutes |
| Enter Sleep Mode | 5 Minutes | 3 Minutes |
Using the Keyboard
The keyboard provides standard typing controls, function keys, and shortcut keys.
Keyboard Hotkeys
| Hotkey Function | Description |
| Speaker Mute | Mutes or unmutes audio |
| Volume Down | Decreases volume |
| Volume Up | Increases volume |
| Microphone Mute | Enables or disables the microphone |
| Brightness Down | Reduces display brightness |
| Brightness Up | Increases display brightness |
| Display Selection | Opens display device settings |
| Airplane Mode | Enables or disables Airplane Mode |
| Settings | Opens Windows Settings |
| Screen Lock | Locks Windows |
| Smart Connect | Opens Smart Connect |
| Calculator | Opens Calculator |
| AI/Application Key | Opens an available AI function or Lenovo application |
| Screenshot | Captures a screenshot |
FnLock
Press Fn + Esc to enable or disable FnLock.
| FnLock Status | Hotkey Alone | Fn + Hotkey |
| Off | Primary Function | Secondary Function |
| On | Secondary Function | Primary Function |
The indicator on the Esc key shows the FnLock status.
Additional Fn Combinations
| Shortcut | Function |
| Fn + Q | Changes performance mode |
| Fn + R | Changes display refresh rate on selected models |
| Fn + M | Enables or disables the touchpad |
| Fn + N | Displays key device information |
| Fn + Space | Adjusts keyboard backlighting on selected models |
| Fn + B | Break |
| Fn + P | Pause |
| Fn + S | SysRq |
| Fn + K | Scroll Lock |
| Fn + I | Insert |
| Fn + T | Print Screen |
| Fn + Left Arrow | Home |
| Fn + Right Arrow | End |
| Fn + Up Arrow | Page Up |
| Fn + Down Arrow | Page Down |
Windows Keyboard Shortcuts
| Shortcut | Function |
| Windows + A | Opens Quick Settings |
| Windows + D | Shows Desktop |
| Windows + E | Opens File Explorer |
| Windows + I | Opens Settings |
| Windows + L | Locks the Screen |
| Windows + M | Minimizes Open Windows |
| Windows + N | Opens Notifications |
| Windows + P | Switches Display Modes |
| Windows + W | Opens Widgets |
| Windows + Tab | Opens Task View |
| Windows + PrtSc | Saves a Full-Screen Screenshot |
Copilot Key
The keyboard includes a Copilot key on supported configurations.
When Copilot in Windows is available and enabled, the key opens Copilot.
Otherwise, it opens Windows Search.
Copilot availability depends on the region, installed Windows version, and software configuration.
Using the Touchpad
The touchpad supports Windows multi-finger gestures.
Touchpad Gesture Guide
| Gesture | Function |
| One-Finger Movement | Moves the Pointer |
| Two-Finger Vertical Swipe | Scrolls Pages |
| Two-Finger Pinch or Spread | Zooms Out or In |
| Two-Finger Tap | Opens Context Menu |
| Three-Finger Swipe Up | Shows Open Windows |
| Three-Finger Swipe Down | Returns to Desktop |
| Three-Finger Swipe Left or Right | Switches Apps |
| Three-Finger Tap | Opens Windows Search |
Changing Touchpad Gestures
- Open Settings > Bluetooth & devices > Touchpad.
- Find Three-finger gestures.
- Select the required swipe or tap behavior.
Enabling or Disabling the Touchpad
Press Fn + M, or use the Touchpad switch under Windows Settings.
Touchscreen Instructions
Selected configurations include a touch-sensitive display.
Touchscreen Gestures
| Gesture | Function |
| Swipe from Left Edge | Opens Widgets |
| Swipe from Right Edge | Opens Notification Center |
| Swipe from Bottom Edge | Opens Start Menu |
| Two-Finger Vertical Swipe | Scrolls |
| Two-Finger Pinch or Spread | Zooms |
| Three-Finger Swipe Up | Shows Open Windows |
| Three-Finger Swipe Down | Returns to Desktop |
Display Settings
Changing Display Refresh Rate
Selected configurations support both 60 Hz and 120 Hz refresh rates.
Use Fn + R to switch between supported refresh rates.
The available refresh rates depend on the installed display.
Enabling Night Light
- Open Quick Settings using Windows + A.
- Select Night light.
- Turn the function on or off.
Adjusting Night Light Color
- Open Start > Settings.
- Select System > Display > Night light.
- Adjust the color temperature slider.
Connecting External Displays
The notebook can connect to external monitors using HDMI or either USB Type-C connector.
Both USB-C connectors support DisplayPort Alternate Mode.
USB-C Display Connection
- Connect a compatible USB-C display cable.
- Connect the other end to the monitor.
- Configure the display through Windows.
A USB-C monitor that supports USB Power Delivery may also provide power to the notebook through the same connection.
HDMI Display Connection
- Connect an HDMI cable to the notebook.
- Connect the cable to the external display.
- Turn on the monitor.
- Select the desired display configuration in Windows.
Using USB-C to DisplayPort or HDMI
A compatible USB-C-to-DisplayPort or USB-C-to-HDMI cable can be used with suitable external displays.
Maximum resolution may vary depending on the cable, adapter, and display hardware.
Connecting to Wi-Fi
Wireless Network Setup
- Open Quick Settings from the Windows taskbar.
- Select the arrow next to the network icon.
- Choose the required Wi-Fi network.
- Click Connect.
- Enter the network security key.
Lenovo Vantage
Lenovo Vantage provides controls for supported computer hardware and system functions.
Main Settings
| Feature | Function |
| Power Modes | Changes performance behavior |
| Flip to Start | Automatically starts the computer when the lid opens |
| Conservation Mode | Limits battery charging |
| Overnight Battery Charging | Adjusts overnight charging behavior |
| Presence Detection | Supports automatic screen dimming, locking, and sign-in where available |
| Eye Care Mode | Changes display color temperature |
| Color Management | Switches supported color profiles |
| OLED Power | Controls display power-saving functions |
| Dolby Atmos | Provides supported audio profiles |
| Smart Noise Cancelling | Adjusts microphone and speaker noise processing |
Lenovo PC Manager may be supplied instead of Lenovo Vantage in mainland China.
Lenovo Qira
Lenovo Qira is an AI-based assistant that supports text and voice interaction, content generation, summaries, transcription, and other functions.
Availability depends on software installation, device capabilities, and region.
Opening Lenovo Qira
- Search Windows for Qira.
- Press the dedicated AI key.
Some computers may require online installation before Lenovo Qira becomes available.
Setting Up Qira
- Open Lenovo Qira.
- Sign in using a Lenovo ID.
- Open Settings.
- Configure the preferred options.
Qira Settings
| Setting | Function |
| Language | Selects response language |
| Launch Options | Controls wake-word activation |
| Voice | Configures voice identification and response output |
| Sync Data | Enables or disables data synchronization |
| Processing Mode | Selects Local or Hybrid processing |
| Personalized Answers | Controls access to permitted personal data |
| Connectors | Manages connected apps and services |
| Close Behavior | Controls background operation |
| Catch Me Up | Selects notifications for summaries |
Qira Processing Modes
| Mode | Function |
| Local Mode | Processes supported requests on the device |
| Hybrid Mode | Uses both on-device and cloud-based services |
Using the Wake Word
When enabled, users can invoke the assistant by saying Hey, Qira.
Microphone permission must be granted through Windows Privacy & Security settings.
Qira Functions
- Question answering.
- Content writing and editing.
- Notification summaries.
- Meeting transcription.
- Live voice interaction.
- AI image generation.
- Personal knowledge storage.
- Contextual suggestions.
AI-generated results may be inaccurate or incomplete and should be reviewed before use.
Smart Connect
Smart Connect allows compatible Lenovo and Motorola devices to communicate with the notebook.
Supported Functions
- Access mobile applications on the PC.
- Share files and content between connected devices.
- Mirror a smartphone screen.
- Copy and paste across devices.
- Use a smartphone or tablet camera as a PC webcam.
- Control compatible devices using the notebook keyboard and mouse.
- Extend or mirror the PC display on a supported tablet.
Opening Smart Connect
Search for Smart Connect in Windows or press the corresponding keyboard hotkey.
UEFI/BIOS Setup Instructions
Opening Firmware Setup
The firmware utility can be opened using:
- Windows Advanced Startup.
- Novo Button Menu.
- F1 or F2 during startup.
Opening Through the Novo Button
- Turn off the notebook.
- Press the recessed Novo button.
- Select the firmware setup option.
Firmware Functions
The setup utility allows users to:
- View device information.
- Change supported hardware settings.
- Configure boot-device order.
- Set firmware passwords.
- Set storage-device passwords.
BIOS Password Security
Supported Password Types
| Password | Function |
| Administrator Password | Restricts firmware setup access |
| User Password | Provides limited firmware setup access |
| Master Hard Disk Password | Protects storage access |
| User Hard Disk Password | Provides storage access using the assigned password |
Setting an Administrator Password
- Open Firmware Setup.
- Select Security > Set Administrator Password.
- Enter an alphanumeric password.
- Confirm the password.
- Select Exit > Exit Saving Changes.
Important: A forgotten administrator password cannot be reset by Lenovo service personnel. System board replacement may be required, with proof of purchase and service charges.
Changing an Administrator Password
- Open Firmware Setup using the administrator password.
- Select Security > Set Administrator Password.
- Enter the current password.
- Enter and confirm the new password.
- Save the changes.
To remove the password, leave the new password fields empty.
Enabling a Power-On Password
- Open Firmware Setup.
- Select Security > Power on Password.
- Change the setting to Enabled.
- Save the changes.
When enabled, the computer requests the administrator or user password during startup.
Setting Hard Disk Passwords
- Open Firmware Setup.
- Select Security > Set Hard Disk Password.
- Follow the instructions to configure both master and user passwords.
- Save the changes.
Warning: Forgotten hard disk passwords cannot be reset by Lenovo. Protected data may become inaccessible, and storage replacement may be necessary.
Windows Recovery Instructions
Windows 11 provides recovery options for system problems.
Recovery Options
| Situation | Recommended Recovery Method |
| Windows becomes slow after installing an application | Restore from a system restore point |
| Windows has ongoing software problems | Reset Windows |
| Computer does not start | Use Startup Repair |
| Startup Repair fails | Restore using a recovery USB drive |
Resetting Windows 11
- Open Settings > System > Recovery.
- Select Reset PC.
- Choose Keep my files or Remove everything.
- Follow the instructions.
Creating a Recovery USB
Use an empty USB drive with at least 32 GB capacity.
- Search Windows for Create a recovery drive.
- Open the matching application.
- Select Back up system files to the recovery drive.
- Click Next.
- Connect the USB drive.
- Select the drive.
- Click Create.
Restoring Windows from USB
- Shut down the computer.
- Connect the recovery USB drive.
- Open the Novo Button Menu.
- Select Boot Menu.
- Choose the USB drive.
- Follow the Windows Recovery Environment instructions.
Accessibility Features
Keyboard Accessibility
The keyboard includes tactile markings on the F and J keys.
These markings help users position their fingers without looking at the keyboard.
Windows Accessibility Settings
Open Start > Settings > Accessibility or press Windows + U.
Narrator
Press Windows + Ctrl + Enter to start or stop Narrator.
Magnifier
| Shortcut | Function |
| Windows + Plus | Enables Magnifier or Zooms In |
| Windows + Minus | Zooms Out |
| Windows + Esc | Exits Magnifier |
Sticky Keys
Press Shift five times to open the Sticky Keys confirmation.
High-Contrast Themes
Open Settings > Accessibility > Contrast themes to select a suitable theme.
Troubleshooting Guide
Common Problems and Solutions
| Problem | Recommended Action |
| Computer does not start | Disconnect peripherals and check the power adapter |
| Computer freezes | Hold the Power button until it shuts down |
| Computer will not wake from sleep | Restart and review power settings |
| Battery does not charge | Check charging mode, adapter wattage, and power connection |
| Battery drains quickly | Reduce background activity and power consumption |
| Computer runs slowly | Remove unnecessary software and temporary files |
| Screen flickers | Check display drivers and incompatible applications |
| Camera does not work | Check shutter, permissions, and camera driver |
| No sound | Check audio output, input, and volume settings |
| Keyboard types wrong characters | Check keyboard language and driver |
| Touchpad does not respond | Enable touchpad and check driver |
| Fan is unusually loud | Reduce workload and change power mode |
| Wi-Fi does not connect | Check Wi-Fi, Airplane Mode, and network settings |
| Bluetooth does not connect | Check Bluetooth settings and reconnect the device |
| Qira wake word does not work | Check microphone permissions and wake-word settings |
Computer Does Not Start
- Disconnect unnecessary external devices.
- Connect a suitable power adapter to a working outlet.
- Attempt startup.
- If Windows begins loading but fails, use Windows Startup Repair.
Computer Is Stuck in Sleep Mode
- Press Windows + Ctrl + Shift + B to reset the graphics driver.
- If necessary, hold the Power button until the computer turns off.
- Wait approximately 15 seconds.
- Restart the computer.
Battery Plugged In but Not Charging
- Check the charger connection.
- Try another electrical outlet.
- Confirm the charger meets the required wattage.
- Restart the computer.
- Review battery charging mode in Lenovo Vantage.
- Check the battery driver through Device Manager.
Battery Drains Quickly
- Disconnect unnecessary peripherals.
- Reduce background application activity.
- Disable unnecessary startup applications.
- Select an energy-saving power mode.
- Reduce display brightness.
- Reduce or disable keyboard backlighting.
- Avoid extreme temperatures.
Screen Flickering
- Restart the computer.
- Press Windows + Ctrl + Shift + B.
- Open Task Manager.
- Check whether Task Manager flickers.
- If it does, review the display driver.
- If it does not, check incompatible applications.
Camera Not Working
- Open the camera privacy shutter.
- Open Settings > Bluetooth & devices > Cameras.
- Check whether the camera is enabled.
- Open Settings > Privacy & security > Camera.
- Allow camera access.
- Update the camera driver through Device Manager if required.
No Audio
- Open Settings > System > Sound.
- Check the selected audio output device.
- Confirm that volume is not muted.
- Run the appropriate audio troubleshooter.
Touchpad Not Responding
- Open Settings > Bluetooth & devices > Touchpad.
- Turn on the Touchpad setting.
- Alternatively, press Fn + M.
- Update the touchpad driver if necessary.
Wi-Fi Not Connecting
- Confirm Wi-Fi is enabled.
- Turn off Airplane Mode.
- Select the correct network.
- Enter the network password.
- Run network diagnostics.
- Forget and reconnect to the network if necessary.
- Restart the modem or wireless router.
Bluetooth Not Connecting
- Confirm Bluetooth is enabled.
- Restart the Bluetooth accessory.
- Check its battery level.
- Move the accessory within connection range.
- Confirm Airplane Mode is off.
- Remove and pair the device again.
- Run the Bluetooth troubleshooter if necessary.
Lenovo Qira Not Responding
- Open Lenovo Qira Settings.
- Confirm that wake-word activation is enabled.
- Check microphone permissions.
- Confirm that the microphone is working.
- Restart Qira.
- Update Qira if necessary.
Cleaning and Maintenance
Cleaning the Touchpad
If the pointer responds slowly or inaccurately, gently clean the touchpad with a soft, lint-free cloth.
The surface should be clean, dry, and free from oils or dirt.
Ventilation Maintenance
Keep the bottom air vents clear.
Avoid operating the computer on beds, carpets, or similar flexible surfaces.
System Maintenance
- Restart the computer when necessary.
- Keep Windows updated.
- Review installed applications.
- Remove unnecessary startup programs.
- Run antivirus scans.
- Maintain suitable free storage space.
- Check device driver updates.
- Use compatible power accessories.
Replacement Parts
Lenovo identifies certain accessories as Customer Replaceable Units.
Customer Replaceable Units
| Component | Classification |
| Power Cord | Self-Service CRU |
| AC Power Adapter | Self-Service CRU |
Availability depends on the computer configuration.
The built-in rechargeable battery and other internal components should be serviced by a qualified repair technician or replaced only by carefully following Lenovo’s applicable service instructions.
Authorized Repair Locations
https://support.lenovo.com/partnerlocation
Warranty Information
The IdeaPad Vibe 14AGP12 is covered by the applicable Lenovo Limited Warranty.
Warranty services depend on the purchased product, location, and warranty coverage.
Warranty Service Types
- Customer Replaceable Unit Service.
- On-Site Service.
- Courier or Depot Service.
- Customer Carry-In Service.
- Mail-In Service.
- Customer Two-Way Mail-In Service.
If a defective CRU must be returned, Lenovo may require its return within 30 days of receiving the replacement.
Services Not Covered by Standard Warranty
Examples include:
- Replacement or use of nonwarranted parts.
- Identifying software problem sources.
- BIOS configuration during installations or upgrades.
- Driver changes or upgrades.
- Installation and maintenance of network operating systems.
- Installation and maintenance of applications.
Customer Support Information
Lenovo provides drivers, troubleshooting resources, warranty information, and repair assistance through its support services.
Support Resources
| Resource | Website |
| Lenovo Support | https://support.lenovo.com |
| Lenovo PC Support | https://pcsupport.lenovo.com |
| Support Telephone Numbers | https://pcsupport.lenovo.com/supportphonelist |
| Authorized Repair Locations | https://support.lenovo.com/partnerlocation |
| Warranty Upgrades | https://pcsupport.lenovo.com/warrantyupgrade |
Before Contacting Lenovo
Prepare:
- Product name.
- Machine type.
- Serial number.
- Operating system version.
- Error messages or codes.
- Description of the problem.
- Relevant applications.
- Steps to reproduce the issue.
The product identification information is usually printed on a label or etched into the underside of the notebook.
Frequently Asked Questions
1. What are the specifications of the Lenovo IdeaPad Vibe 14AGP12?
The IdeaPad Vibe 14AGP12 is a 14-inch Windows 11 notebook with DDR5 SO-DIMM memory, M.2 PCIe Gen4 SSD storage, USB-C Power Delivery, HDMI, Wi-Fi, Bluetooth, and a rechargeable battery. Display, memory, and battery specifications vary by configuration.
2. How do I enter BIOS on the IdeaPad Vibe 14AGP12?
Turn off the computer and press the recessed Novo button to open the firmware setup option. Firmware Setup can also be accessed through Windows Advanced Startup or the supported F1/F2 startup key.
3. How do I change performance modes on the IdeaPad Vibe?
Press Fn + Q to cycle through supported operating modes. Performance modes can also be selected through Lenovo Vantage or Lenovo PC Manager.
4. What charger does the IdeaPad Vibe 14AGP12 use?
The computer supports USB Power Delivery charging with a minimum negotiated input of 45 W and a maximum of 65 W. Use the supplied adapter or a compatible safety-certified USB-C charger.
5. How do I enable the keyboard backlight?
On configurations with a backlit keyboard, press Fn + Space to adjust keyboard illumination.
6. Why is my Lenovo IdeaPad Vibe not charging above 80%?
Conservation Mode may be enabled. This battery management mode keeps the charge near 75%–80%. Change to Normal Mode in Lenovo Vantage or Lenovo PC Manager when a full charge is required.
7. How do I reset Windows on the IdeaPad Vibe 14AGP12?
Open Settings > System > Recovery, select Reset PC, and choose whether to keep personal files or remove everything. Follow the displayed instructions.