| Field | Details |
| Document Title | ThinkPad S230u User Guide |
| Document Type | User Guide |
| Brand Name | Lenovo |
| Product Name | ThinkPad S230u |
| Model Number(s) | S230u, 3347 |
| PDF File Size | 3463 KB |
| Number of Pages | 140 |
| Languages | English |
Lenovo ThinkPad S230u 3347
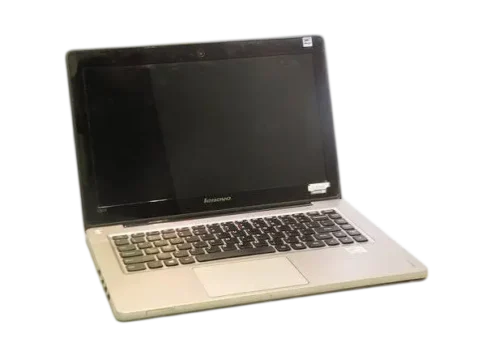
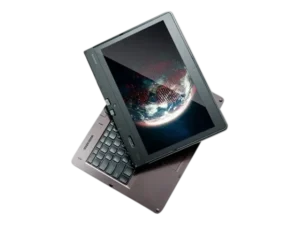
The Lenovo ThinkPad S230u is a convertible notebook computer with a 12.5-inch multi-touch display that rotates to support traditional laptop and tablet operation. Its display can rotate 180 degrees, allowing the computer to switch between notebook, picture frame, and tablet modes.
The computer includes a six-row keyboard, TrackPoint pointing device, multi-touch touchpad, integrated camera, stereo speakers, and built-in microphones. Depending on the configuration, storage is provided by a hard disk drive or solid-state drive, while wireless networking includes integrated wireless LAN and optional wireless WAN.
The ThinkPad S230u features USB 3.0 connectors, Mini HDMI, an Ethernet port, a combination audio jack, a media-card reader, and a Mini DisplayPort connector on selected models. It also supports BIOS security settings, power management, system recovery, and selected customer-replaceable components.
Product Overview
The ThinkPad S230u combines notebook computing with a rotating touchscreen display. In notebook mode, the keyboard and UltraNav pointing device provide conventional computer controls. In tablet mode, the touchscreen and dedicated buttons allow operation without using the keyboard.
The computer uses a built-in lithium-ion battery for portable operation and an AC power adapter for external power and charging.
Main Features
- 12.5-inch TFT color display.
- 1366 × 768 screen resolution.
- Multi-touch touchscreen.
- Convertible display with 180-degree rotation.
- Notebook, picture frame, and tablet operating modes.
- Six-row keyboard with function keys.
- TrackPoint pointing stick and dedicated buttons.
- Multi-touch touchpad.
- Integrated camera and microphones.
- Built-in stereo speakers.
- Ambient light sensor for automatic screen brightness adjustment.
- Two USB 3.0 connectors.
- Mini HDMI digital audio/video output.
- Mini DisplayPort on selected models.
- Ethernet network connection.
- Integrated wireless LAN.
- Optional wireless WAN and SIM-card support.
- Four-in-one media-card reader.
- Integrated lithium-ion battery.
- Hard disk drive or solid-state drive, depending on configuration.
- ThinkPad Setup for UEFI BIOS configuration.
- Lenovo system diagnostics and recovery programs.
Technical Specifications
Hardware Specifications
| Specification | Details |
| Brand | Lenovo |
| Product | ThinkPad S230u |
| Machine Type | 3347 |
| Product Category | Convertible Notebook Computer |
| Display Size | 12.5 inches (317.5 mm) |
| Display Technology | TFT |
| Display Resolution | 1366 × 768 |
| Maximum External Display Resolution | 2560 × 1600 |
| Touch Input | Multi-Touch |
| Memory Type | DDR3 SDRAM |
| Storage Type | Hard Disk Drive or Solid-State Drive |
| Storage Form Factor | 2.5 inches, 7 mm height |
| Keyboard | Six-Row Keyboard |
| Pointing Device | UltraNav (TrackPoint and Touchpad) |
| Camera | Integrated Camera |
| Microphones | Built-In |
| Speakers | Stereo |
| Wireless LAN | Integrated |
| Wireless WAN | Selected Models |
| Audio Connector | 3.5 mm Combo Audio Jack |
| USB Ports | USB 3.0 |
| Display Connectors | Mini HDMI, Mini DisplayPort on Selected Models |
| Wired Networking | RJ45 Ethernet |
| Media Reader | Four-in-One |
| SIM Slot | Included |
| Battery | Integrated Lithium-Ion |
| Operating System Covered | Windows 8 |
Dimensions
| Dimension | Measurement |
| Width | 313 mm (12.32 inches) |
| Depth | 238 mm (9.37 inches) |
| Height | 20.4 mm (0.80 inches) |
Electrical Specifications
| Specification | Details |
| AC Adapter Input Voltage | 100–240 V AC |
| Input Frequency | 50–60 Hz |
| Maximum Heat Output | 65 W or 90 W, depending on model |
| Battery Type | Integrated Lithium-Ion |
| Approximate Full Charging Time | 6 hours |
| Minimum Battery Charging Temperature | 10°C (50°F) |
Operating Environment
| Condition | Requirement |
| Maximum Altitude Without Pressurization | 3048 m (10,000 ft) |
| Operating Temperature Up to 2438 m Altitude | 5°C–35°C (41°F–95°F) |
| Storage Temperature | 5°C–43°C (41°F–109°F) |
| Maximum Operating Temperature Above 2438 m | 31.3°C (88°F) |
| Operating Humidity | 8%–80% |
| Storage Humidity | 5%–95% |
Keep the computer in a dry, ventilated location away from direct sunlight, moisture, and strong magnetic fields.
Parts and Components
Front Components
| Component | Function |
| Integrated Camera | Captures photographs and video |
| Built-In Microphones | Record voice and other sounds |
| Ambient Light Sensor | Detects surrounding light and adjusts display brightness |
| Volume Control Buttons | Adjust speaker volume in tablet mode |
| Stereo Speakers | Provide audio output |
| ThinkPad Logo Indicator | Shows computer operating status |
| TrackPoint Buttons | Provide clicking and scrolling controls |
| Touchpad | Controls pointer movement and supports gestures |
| TrackPoint Pointing Stick | Moves the on-screen pointer |
| Windows Button | Switches between the current workspace and the Windows Start screen |
Right-Side Components
| Component | Function |
| Hard Disk or SSD Bay | Houses the storage drive |
| Fan Louvers | Allow cooling airflow |
| USB 3.0 Connector | Connects compatible USB devices |
| Mini DisplayPort | Connects compatible external displays on supported models |
| Power Status Indicator | Shows AC power connection |
| AC Power Connector | Connects the AC adapter |
| Power Button | Turns the computer on and controls power functions |
| Screen Rotation Lock Button | Locks screen rotation |
Left-Side Components
| Component | Function |
| Combo Audio Jack | Connects compatible headphones or headsets |
| USB 3.0 Connector | Connects USB peripherals |
| Mini HDMI Connector | Connects external digital audio/video devices |
| Ethernet Connector | Connects a wired local area network |
| Media-Card Reader | Accepts supported memory cards |
| SIM-Card Slot | Holds a SIM card for supported wireless WAN configurations |
| Security Keyhole | Accepts a compatible mechanical lock |
Bottom Components
| Component | Function |
| Fan Louvers | Maintain airflow and cooling |
| Integrated Battery | Supplies power when AC power is unavailable |
| HDD or SSD | Stores the operating system, applications, and files |
The storage device may contain a hidden service partition, which can reduce the available storage capacity shown in Windows.
Buttons and Status Indicators
Power Button
The Power button turns on the computer and can perform configured sleep, hibernation, or shutdown functions.
To shut down using the Windows 8 interface:
- Move the pointer to the upper-right or lower-right corner of the screen.
- Open Settings.
- Select Power > Shut down.
If the computer stops responding, press and hold the Power button for at least four seconds.
Tablet Control Buttons
| Button | Function |
| Screen Rotation Lock | Locks the current screen orientation |
| Power | Turns the computer on |
| Volume Up | Increases speaker volume |
| Volume Down | Decreases speaker volume |
| Windows | Switches between the current workspace and Start screen |
System Status Indicator
The illuminated ThinkPad logo on the computer lid and palm rest displays the system status.
| Indicator | Meaning |
| Solid Red | Computer is turned on |
| Fast Blinking Red | Computer is turning off |
| Slow Blinking Red | Computer is in sleep mode |
| Off | Computer is turned off |
AC Power Indicator
| Indicator | Meaning |
| Green | AC adapter is connected |
| Off | AC adapter is disconnected |
Safety Instructions
Electrical Safety
- Use the manufacturer-supplied power cords and AC adapters.
- Connect the computer to a properly wired and grounded electrical outlet.
- Do not use damaged power cords, plugs, or adapters.
- Keep electrical connections away from water and other liquids.
- Avoid overloading power outlets and extension cords.
- Do not connect or disconnect cables during electrical storms.
- Never open the cover of a power supply.
- Disconnect power before opening accessible device covers unless the applicable procedure states otherwise.
- Do not operate the computer while internal components are exposed.
Battery Safety
The ThinkPad S230u contains an integrated rechargeable lithium-ion battery.
- Do not disassemble, crush, puncture, or short-circuit a battery.
- Keep batteries away from water, fire, and excessive heat.
- Stop using the computer if the battery shows swelling, leakage, corrosion, or other damage.
- Do not store rechargeable lithium-ion batteries in a completely discharged condition.
- Recharge batteries only according to the specified instructions.
- Follow local requirements when disposing of batteries.
Danger: Do not attempt to remove or replace the integrated rechargeable lithium-ion battery. Contact Lenovo Support for factory replacement.
Heat and Ventilation
The notebook and power adapter generate heat during operation.
- Keep the ventilation openings unobstructed.
- Do not place the operating computer on soft surfaces that block airflow.
- Avoid extended contact between hot computer surfaces and the body.
- Keep the AC adapter away from direct body contact during use.
- Do not cover the AC adapter with clothing or other objects.
- Do not operate or charge the computer near flammable materials.
- Keep incoming airflow temperature at or below 35°C (95°F).
Display Safety
The LCD contains glass that can break if the computer is dropped or handled roughly.
If liquid from a broken display contacts the skin or eyes, wash the affected area with water for at least 15 minutes. Obtain medical care if symptoms remain.
Conditions Requiring Immediate Action
Stop using the computer and disconnect it from power when safe if any of the following occurs:
- Smoke, sparks, or signs of fire.
- Unusual odors or sounds.
- Damaged electrical cables or power adapters.
- Battery leakage or physical damage.
- Water exposure.
- Major physical damage.
- Abnormal operation despite following the instructions.
Contact Lenovo Support before continuing to use a potentially damaged computer.
Initial Setup Instructions
Connecting the AC Power Adapter
The AC adapter provides external power and charges the integrated battery.
Follow this connection sequence:
- Connect the AC power adapter to an electrical outlet.
- Connect the power cord to the adapter transformer.
- Insert the adapter power connector into the computer.
The AC power indicator turns green when the adapter is connected.
Starting the Computer
- Place the computer on a stable, ventilated surface.
- Open the display.
- Press the Power button.
- Allow the operating system to start.
- Complete any displayed Windows setup instructions.
Registering the Computer
Registration helps Lenovo identify the device when providing support and may provide information about product updates or service notices.
To register using the provided software:
- Connect the computer to the Internet.
- Open Lenovo Support.
- Select Registration.
- Follow the displayed instructions.
Registration is also available through Lenovo’s website at https://www.lenovo.com/register.
Using Notebook and Tablet Modes
The ThinkPad S230u has a rotating display that allows operation in several positions.
Notebook Mode
Notebook mode provides normal laptop operation with the display facing the keyboard.
The keyboard, TrackPoint, touchpad, and touchscreen can be used for input.
Switching to Tablet Mode
- Open the display slowly while holding its upper-left and upper-right sides.
- Open the display at least 45 degrees, preferably about 90 degrees.
- Hold the center of one side of the display while supporting the keyboard bezel with the other hand.
- Slowly rotate the display clockwise by 180 degrees until the back of the display faces the keyboard.
- Carefully lower the display over the keyboard.
The computer is now in tablet mode.
Important: Do not press against the upper edges of the display while rotating it. Rotate the display gently and avoid excessive force.
Picture Frame Mode
Picture frame mode is reached after rotating the display so that its back faces the keyboard while it remains raised.
The touchscreen can be used in this position.
Returning to Notebook Mode
- Raise the display to at least 45 degrees, preferably 90 degrees.
- Rotate the display slowly counterclockwise.
- Continue until the screen faces the keyboard.
- Position the display for normal notebook operation.
Tablet Mode Precautions
- Do not lift or carry the computer by the display alone.
- Avoid shocks, excessive vibration, or sudden rotation.
- Keep ventilation openings clear.
- Protect the computer from rain and moisture when used outdoors.
- Return the computer to notebook mode before placing it in a carrying case.
Multi-Touch Screen Instructions
The touchscreen accepts finger gestures for selecting, scrolling, moving, and interacting with compatible applications.
Touchscreen Gesture Guide
| Gesture | Function |
| Tap | Selects or opens an item |
| Press and Hold | Opens information or a context menu |
| Pinch | Zooms in or out |
| Two-Finger Rotation | Rotates supported items |
| Slide | Scrolls through content |
| Drag | Rearranges supported items |
| Short Swipe | Selects items |
| Swipe from Right Edge | Opens Windows charms |
| Swipe from Left Edge | Switches or manages open applications |
| Swipe from Top or Bottom Edge | Opens application commands |
Opening Windows Charms
Swipe inward from the right edge of the screen.
The charms provide access to Windows functions such as Search, Settings, and other system controls.
Working with Open Applications
Swipe from the left edge to display an open program.
A swipe that moves inward and then back toward the left edge can display recently opened applications.
Cleaning the Multi-Touch Screen
- Use a dry, soft, lint-free cloth or absorbent cotton.
- Gently remove dust and foreign particles with one side of the cloth.
- Use another clean section of the cloth to remove fingerprints.
- Wash the cleaning cloth afterward using a neutral detergent.
Do not use solvents on the touchscreen or press hard objects against it.
Keyboard Shortcuts
The ThinkPad S230u uses function keys and Fn combinations for system controls.
Function Keys
| Key | Function |
| F1 | Mutes or unmutes speakers |
| F2 | Decreases speaker volume |
| F3 | Increases speaker volume |
| F4 | Mutes or unmutes microphones |
| F5 | Decreases display brightness |
| F6 | Increases display brightness |
| F7 | Switches display output |
| F8 | Enables or disables Airplane Mode |
| F9 | Opens the Settings charm |
| F10 | Opens the Search charm |
| F11 | Displays opened applications |
| F12 | Displays all applications |
Additional Fn Key Combinations
| Shortcut | Function |
| Fn + B | Break |
| Fn + P | Pause |
| Fn + S | SysRq |
| Fn + K | Scroll Lock |
| Fn + F10 | Saves settings and exits ThinkPad Setup |
| Fn + F9 | Loads default BIOS settings in ThinkPad Setup |
Changing Function Key Behavior
The keyboard supports Default and Legacy function key modes.
In Default mode, special functions are activated directly using the corresponding keys.
In Legacy mode, the Fn key is held while pressing the desired function key.
To change the behavior through Windows:
- Press the Fn Lock key.
- Open the ThinkPad Keyboard Properties window.
- Configure the function key mode.
The setting can also be changed through:
ThinkPad Setup > Config > Keyboard/Mouse > Change to F1-F12 keys
Using the UltraNav Pointing Device
The UltraNav system includes the TrackPoint pointing stick and multi-touch touchpad.
Both devices can be configured independently.
TrackPoint Controls
| Component | Function |
| Pointing Stick | Moves the pointer |
| Left Button | Performs left-click actions |
| Right Button | Performs right-click actions |
| Center Button | Scrolls through documents and pages |
Moving the Pointer with TrackPoint
- Place the hands in a normal typing position.
- Apply gentle pressure to the pointing stick in the desired direction.
- Adjust pressure to control pointer speed.
- Use the dedicated buttons for clicking.
The pointing stick itself does not move.
Temporary pointer drifting can occur and is not necessarily a defect. Stop applying pressure for a few seconds to allow the pointer to settle.
TrackPoint Scrolling
Press the center TrackPoint button while moving the pointing stick to scroll through supported content.
Using the Touchpad
Move a fingertip across the touchpad to control the pointer.
The touchpad supports multi-touch operations such as scrolling, zooming, and rotating supported content.
Changing UltraNav Settings
- Open Windows charms.
- Select Settings > Control Panel.
- Open Hardware and Sound > Mouse > UltraNav.
- Configure the TrackPoint or touchpad settings.
Disabling TrackPoint or Touchpad
- Open the UltraNav settings.
- Clear Enable TrackPoint or Enable TouchPad as appropriate.
- Click OK.
Showing the UltraNav Icon
- Open Control Panel > Hardware and Sound > Mouse > UltraNav.
- Select Show UltraNav icon on the system tray.
- Click OK.
Battery Charging and Power Management
The ThinkPad S230u operates using its integrated battery or an external AC adapter.
Checking Battery Status
The battery icon in the Windows notification area displays the remaining battery charge.
Detailed battery information can also be accessed through Lenovo Support or Lenovo Settings.
Charging the Battery
- Connect the AC adapter to the notebook.
- Connect it to an electrical outlet.
- Allow the battery to charge.
- Check the battery status indicator or Windows battery icon.
A full charge takes approximately six hours, depending on the environment and battery condition.
The battery temperature must be at least 10°C (50°F) before charging.
Battery Charging Threshold
To support battery life, the computer does not start recharging when the remaining battery capacity is greater than 95%.
Power-Saving Modes
| Mode or Function | Description |
| Sleep | Saves the working session in memory and reduces power consumption |
| 30 Day Standby | Reduces power consumption during sleep on supported configurations |
| Always On USB Off | Reduces battery consumption when the function is not needed |
| Wireless Off | Disables unused wireless connections to save power |
Changing the Power Plan
- Click the battery icon in the Windows notification area.
- Select More power options.
- Choose the preferred power plan.
- Adjust the available settings.
Configuring Low-Battery Actions
- Open More power options.
- Select Change plan settings.
- Click Change advanced power settings.
- Expand Battery.
- Configure low-battery and critical-battery actions.
ENERGY STAR Power Settings
For qualifying machine type 3347 systems, the Energy Saver plan includes these default AC-powered settings:
| Setting | Default |
| Turn Off Display | 10 minutes |
| Sleep Mode | 20 minutes |
| Turn Off Hard Disk | 15 minutes |
| Hibernate | Never |
Connecting to Networks
Ethernet Connection
The computer includes an Ethernet connector for wired local area networking.
- Connect an Ethernet cable to the notebook.
- Connect the other end to compatible network equipment.
- Check the network connection through Windows.
Warning: Do not connect a telephone cable to the Ethernet connector.
Wireless LAN
The integrated wireless LAN card supports wireless networking through compatible access points.
To control wireless connections, press F8 and select the required wireless settings.
Wireless WAN
Selected configurations include a wireless WAN card for mobile broadband connectivity.
A compatible SIM card and service from an authorized network provider may be required.
Bluetooth
Bluetooth supports communication with nearby compatible devices.
To send a file using the Windows 8 interface:
- Right-click the file.
- Select Send To > Bluetooth Devices.
- Follow the connection instructions.
To receive a file:
- Click the Bluetooth icon in the Windows notification area.
- Select Receive a File.
Wireless Connection Tips
- Keep obstacles between the notebook and access point to a minimum.
- Open the display slightly beyond 90 degrees for better wireless reception.
- Disable wireless functions when required by airline rules.
- Simultaneous Bluetooth and wireless LAN use may affect data transfer performance.
Connecting an External Monitor
The ThinkPad S230u supports external video output through Mini HDMI and, on supported configurations, Mini DisplayPort.
Connecting a Monitor
- Connect a compatible video cable to the external monitor.
- Connect the cable to the notebook’s supported display connector.
- Connect the external monitor to power.
- Turn on the monitor.
- Press F7 to change the display output.
Supported display configurations include using the internal screen, an external screen, or both.
Changing Display Settings
- Open Windows charms.
- Select Settings > Control Panel.
- Open Appearance and Personalization > Display.
- Select the display.
- Change the required resolution or display settings.
The maximum listed external display resolution is 2560 × 1600, provided the connected monitor supports it.
External Monitor Not Detected
Right-click the Windows desktop, select Screen resolution, and click Detect.
Check the monitor cable, supported resolution, and installed display driver if the problem continues.
Audio and Camera Instructions
Audio Features
The ThinkPad S230u includes:
- Built-in stereo speakers.
- Integrated digital microphones.
- A 3.5 mm combination audio jack.
- Intel High Definition Audio support.
- PCM and WAV recording and playback.
- MP3 playback through compatible applications.
Headphone and Headset Compatibility
| Audio Device | Supported Function |
| 3.5 mm Four-Pole Headset | Headphone and microphone |
| Conventional Headphones | Headphone output |
| Conventional Standalone Microphone | Not supported through the combo jack |
Configuring Audio Recording
- Open Windows charms.
- Select Settings > Control Panel.
- Open Hardware and Sound > Realtek HD Audio Manager.
- Configure the recording settings.
Using the Integrated Camera
The camera supports photographs, video capture, and video conferencing through compatible applications.
To open it through Lenovo Settings:
- Open Lenovo Settings.
- Select Camera.
- Use the available camera functions.
The camera indicator turns green when the camera is operating.
Using Memory Cards
The four-in-one media-card reader supports the following cards:
| Card Type | Supported |
| Secure Digital (SD) | Yes |
| Secure Digital High-Capacity (SDHC) | Yes |
| Secure Digital eXtended-Capacity (SDXC) | Yes |
| MultiMediaCard (MMC) | Yes |
Inserting a Memory Card
- Check the card orientation.
- Insert the card into the media-card slot.
- Press it firmly into place.
Removing a Memory Card
- Stop any activity involving the card.
- Open the hidden icons area in the Windows notification section.
- Select Safely Remove Hardware and Eject Media.
- Eject the corresponding device.
- Press the card to release it.
- Remove the card carefully.
Do not remove a memory card during data transfer or while the computer is sleeping.
Lenovo Software and System Utilities
Depending on configuration, the computer may include Lenovo utilities for hardware protection, settings, updates, and support.
| Program | Function |
| Active Protection System | Protects supported hard drives against movement and shock |
| Lenovo Settings | Configures supported hardware and network settings |
| Lenovo Solution Center | Runs diagnostics and collects system information |
| Lenovo Support | Provides product information, registration, and warranty resources |
| System Update | Downloads Lenovo software and driver updates |
| Lenovo Companion | Provides product information and recommendations |
| Lenovo Cloud Storage | Supports remote file storage |
| Lenovo Mobile Access | Manages supported mobile broadband services |
| Password Manager | Manages authentication information |
ThinkPad Setup and BIOS Instructions
ThinkPad Setup provides access to UEFI BIOS settings.
Entering ThinkPad Setup
- Turn on or restart the computer.
- Press F1 when the ThinkPad logo appears.
- Use the arrow keys to choose a menu.
- Press Enter to open the selected option.
BIOS Menu Guide
| Menu | Function |
| Main | Displays system information |
| Config | Changes hardware configuration |
| Date/Time | Sets the system date and time |
| Security | Configures passwords and security settings |
| Startup | Changes boot devices and startup behavior |
| Restart | Saves, discards, or resets configuration changes |
BIOS Navigation
| Key | Function |
| F1 During Startup | Opens ThinkPad Setup |
| Enter | Opens a selected menu or option |
| Esc | Returns to the previous menu |
| Plus/Minus Keys | Changes applicable values |
| Fn + F9 | Loads default settings |
| Fn + F10 | Saves changes and exits |
Restoring default settings through Fn + F9 does not restore settings under the Security menu.
Changing Boot Order
- Open ThinkPad Setup.
- Select Startup > Boot.
- Locate the startup device list.
- Move the required device into the preferred position.
- Save the changes and restart.
Configuring USB Boot Support
The USB UEFI BIOS Support setting controls startup support for USB storage devices.
It can be changed through the Config menu.
Disabling the Built-In Battery
Before replacing approved components:
- Turn off the computer and disconnect cables.
- Turn on the computer.
- Press F1 during startup.
- Select Config > Power.
- Choose Disable Built-in Battery.
- Confirm the warning.
- Allow the notebook to turn off automatically.
- Wait three to five minutes before performing the approved replacement procedure.
Password and Security Settings
The ThinkPad S230u supports several password types.
Password Types
| Password | Purpose |
| Power-On Password | Restricts startup access |
| User Hard Disk Password | Protects access to the storage drive |
| Master Hard Disk Password | Provides administrator-level drive access |
| Supervisor Password | Restricts changes to BIOS configuration |
Setting a Power-On Password
- Restart the notebook.
- Press F1 during startup.
- Select Security > Password > Power-on Password.
- Enter the desired password.
- Confirm the password.
- Save the changes with Fn + F10.
Setting a Hard Disk Password
- Open ThinkPad Setup.
- Select Security > Password > Hard Disk 1 Password.
- Choose either User or User + Master.
- Follow the password setup instructions.
- Confirm the entered password.
- Save and exit.
Important: If the required hard disk password is forgotten, Lenovo cannot reset it or recover the protected data. Storage replacement may be necessary.
Setting a Supervisor Password
- Enter ThinkPad Setup.
- Select Security > Password > Supervisor Password.
- Enter the required password.
- Confirm the password.
- Save the changes.
A forgotten supervisor password cannot be reset by Lenovo. System board replacement may be required.
Security Chip
Supported configurations provide a security chip for system protection and access controls.
Settings are available through:
ThinkPad Setup > Security > Security Chip
The menu allows supported security chip settings to be activated, disabled, or configured.
Clearing the security chip removes its encryption key and should be performed only when appropriate.
BitLocker Drive Encryption
Windows 8 Pro and Enterprise editions support BitLocker Drive Encryption for compatible configurations.
BitLocker status can be checked through:
Control Panel > System and Security > BitLocker Drive Encryption
Securely Deleting Storage Data
Deleting files, formatting a drive, or restoring factory settings does not necessarily remove all recoverable data.
Before selling or disposing of a computer, use an appropriate secure data disposal method.
Lenovo identifies its Secure Data Disposal tool as a resource for this purpose.
Windows Recovery Instructions
The guide provides Windows 8 recovery procedures.
Refreshing the Computer
Refresh can reinstall Windows components while retaining personal files and settings.
Applications installed outside the Windows Store may be removed.
To refresh Windows:
- Open Windows charms.
- Select Settings > Change PC settings > General.
- Find Refresh your PC without affecting your files.
- Click Get started.
- Follow the instructions.
Resetting the Computer
Reset reinstalls Windows and restores factory-default software and settings.
Warning: This process deletes personal files and settings. Back up important data before proceeding.
To reset:
- Open Settings > Change PC settings > General.
- Find Remove everything and reinstall Windows.
- Click Get started.
- Follow the instructions.
Advanced Startup
- Open Settings > Change PC settings > General.
- Locate Advanced startup.
- Click Restart now.
- Select Troubleshoot > Advanced options.
- Choose the required recovery function.
Advanced startup can be used to change startup options, boot from external devices, and restore the system from an image.
Replacement Parts and Hardware Service
The ThinkPad S230u user guide contains replacement procedures for several internal components.
These procedures require the built-in battery to be disabled and power to be disconnected before servicing.
Replacing a SIM Card
- Disable the built-in battery.
- Close the display and turn the computer over.
- Open the SIM-card door.
- Gently push the existing SIM card to release it.
- Remove the card.
- Insert the replacement card with its metal contacts facing downward until it clicks.
- Close the SIM-card door.
- Reconnect power and cables.
Replacing the Hard Disk Drive or SSD
The computer uses a 2.5-inch, 7 mm hard disk drive or solid-state drive.
Before replacement, back up important files.
- Disable the built-in battery.
- Close the display and turn over the computer.
- Loosen the storage-bay cover screw.
- Remove the storage-bay cover.
- Pull the drive out using the attached tab.
- Insert the compatible replacement drive.
- Slide the drive firmly into position.
- Reinstall the cover.
- Tighten the retaining screw.
- Reconnect the AC adapter and cables.
Do not remove or replace the storage device while the computer is operating or sleeping.
Replacing the Keyboard
The keyboard replacement procedure involves:
- Disabling the built-in battery.
- Disconnecting power and cables.
- Removing the two keyboard-retaining screws from the bottom.
- Opening the display and releasing the keyboard.
- Carefully disconnecting its ribbon cables.
- Connecting the replacement keyboard cables.
- Locking the cable connectors.
- Positioning the keyboard beneath the frame.
- Sliding it into the correct position.
- Reinstalling the bottom screws.
The keyboard cables and connectors are delicate and must be handled carefully.
Replacing Wireless LAN and WAN Cards
The computer uses PCI Express Mini Cards for supported wireless communication functions.
Only Lenovo-authorized wireless cards should be installed.
The replacement procedure includes disabling the built-in battery, removing the keyboard, disconnecting antenna cables, replacing the card, and restoring the connections.
For wireless LAN cards, the guide identifies:
| Antenna Cable | Connector |
| Gray | MAIN or M |
| Black | AUX or A |
For wireless WAN cards:
| Antenna Cable | Connector |
| Red | MAIN or M |
| Blue | AUX or A |
An unauthorized wireless card can prevent startup and produce an error message and audible beeps.
Component replacement should be performed only in accordance with the applicable service instructions. Users unfamiliar with internal electronics should contact an authorized technician.
Cleaning Instructions
Cleaning the Computer Cover
- Mix five parts water with one part mild kitchen detergent.
- Dampen a sponge with the mixture.
- Squeeze out excess liquid.
- Wipe the cover using a circular motion.
- Remove any remaining detergent.
- Rinse the sponge with clean water.
- Wipe the cover again.
- Dry the surface with a soft, lint-free cloth.
- Allow the cover to dry completely.
Avoid cleaners containing abrasive powders, strong acids, or alkalis.
Cleaning the Keyboard
- Apply a small amount of isopropyl rubbing alcohol to a soft, dust-free cloth.
- Wipe each key individually.
- Avoid allowing liquid to enter between the keys.
- Let the keyboard dry.
- Remove dust or crumbs using a camera blower or cool air from a hair dryer.
Do not spray cleaning products directly onto the keyboard.
Cleaning the Display
- Gently wipe the display with a soft, dry, lint-free cloth.
- Remove visible smudges carefully.
- If needed, moisten the cloth with water or a 50/50 mixture of isopropyl alcohol and water without impurities.
- Wring out excess liquid.
- Wipe the display without allowing liquid to drip into the computer.
- Dry the screen completely before closing it.
Maintenance Instructions
Regular maintenance helps reduce common performance and reliability problems.
Recommended Maintenance Tasks
| Task | Instructions |
| Check Storage Space | Monitor available drive capacity |
| Remove Unused Applications | Uninstall unnecessary software |
| Empty Recycle Bin | Remove unwanted deleted files |
| Back Up Important Data | Perform regular backups |
| Check System Updates | Review available Lenovo updates |
| Inspect Ventilation | Remove dust and prevent blocked airflow |
| Check Power Cables | Look for damage or overheating |
| Clean Display and Keyboard | Follow approved cleaning methods |
| Run Diagnostics | Use Lenovo Solution Center when problems occur |
Maintaining Storage Performance
The manual recommends monitoring drive capacity and avoiding unnecessarily full storage.
For conventional hard disk drives, Windows disk defragmentation can help improve file access performance.
Updating Drivers
Lenovo provides system drivers and software updates through its support resources.
Download drivers intended for the correct product configuration.
Active Protection System
On supported hard-disk configurations, Active Protection System uses motion detection to protect the drive during shock, vibration, or movement.
The system temporarily stops the hard drive when potentially damaging motion is detected and resumes operation when conditions become stable.
Troubleshooting Guide
The ThinkPad S230u provides diagnostic functions and startup error messages that can help identify computer problems.
Common Problems and Solutions
| Problem | Recommended Action |
| Computer is unresponsive | Hold the Power button for at least four seconds |
| Computer does not start | Check AC power, battery condition, and startup messages |
| Screen is blank | Check brightness, display output, and power state |
| External monitor is blank | Press F7 and check display connection |
| TrackPoint pointer drifts | Stop using it briefly and allow the pointer to settle |
| Touchpad does not work | Check the UltraNav settings |
| Keyboard keys do not respond | Check external keypad connections and keyboard status |
| Wireless LAN does not connect | Check driver, signal range, SSID, and Airplane Mode |
| Bluetooth headset has no sound | Select the correct Bluetooth playback device |
| Battery does not charge | Check adapter connection and charging status |
| Computer does not wake from sleep | Connect AC power and press Fn |
| Hard disk does not appear in boot order | Check ThinkPad Setup startup configuration |
| USB device does not work | Check USB settings and device driver |
| Application does not run | Check application compatibility and required drivers |
Computer Stops Responding
If both the keyboard and pointing devices stop responding:
- Hold the Power button until the computer turns off.
- Attempt to restart.
- If the computer remains unresponsive, disconnect external power.
- Use the emergency-reset hole with a straightened paper clip.
- Hold the Power button for ten seconds.
- Reconnect the AC adapter.
- Attempt startup again.
If the problem remains, Lenovo recommends further diagnosis or contacting the Customer Support Center.
Liquid Spilled on the Keyboard
- Carefully unplug the AC adapter.
- Turn off the computer immediately.
- Allow all liquid to dry before restarting.
Keeping the computer powered on after a spill can cause electrical short circuits and permanent damage.
TrackPoint or Touchpad Not Working
- Open Control Panel.
- Select Hardware and Sound > Mouse > UltraNav.
- Check whether the required device is enabled.
- Change the setting if needed.
Wireless LAN Not Connecting
Check the following:
- Wireless LAN is enabled.
- Airplane Mode is turned off.
- The computer is within range of the access point.
- The correct network name and security information are used.
- The wireless LAN driver is installed correctly.
Bluetooth Headset Connected but No Sound
- Close the application using the audio device.
- Open Control Panel > Hardware and Sound > Sound > Playback.
- Select the appropriate Bluetooth audio device.
- Choose Set Default.
- Click OK.
Blank Internal Display
- Press F7 to switch the display output.
- Press F6 to increase brightness.
- If the computer is sleeping, press Fn to resume.
- Check the power status.
- Request service if the problem continues.
Hard Disk Not Available as a Boot Device
- Open ThinkPad Setup.
- Select the Boot menu.
- Check whether the storage device is in the boot priority list.
- If it appears in the excluded list, select it.
- Press Shift + 1 to move it to the boot priority list.
Startup Error Codes
The ThinkPad S230u displays POST error codes when firmware or hardware problems occur during startup.
| Code | Meaning | Recommended Action |
| 0177 | Invalid supervisor password data | Obtain system board service |
| 0183 | Security settings checksum error | Check security settings in ThinkPad Setup |
| 0187 | EAIA data access error | Check security settings in ThinkPad Setup |
| 0188 | Invalid RFID serialization information | Obtain service for the affected identification data |
| 0189 | Invalid RFID configuration information | Obtain service for the affected configuration data |
| 0190 | Critical low-battery condition | Connect the AC adapter and charge the battery |
| 0191 | Invalid remote security configuration request | Enter ThinkPad Setup |
| 0199 | Supervisor password retry limit exceeded | Confirm the password and enter ThinkPad Setup |
| 0251 | System CMOS checksum error | Reconfigure settings in ThinkPad Setup; request service if repeated |
| 0253 | EFI variable block data damaged | Seek technical support |
| 0271 | System date and time error | Set date and time in ThinkPad Setup |
| 1802 | Unauthorized network card | Remove the unsupported card |
| 1820 | Multiple external fingerprint readers | Disconnect extra readers |
| 2100 | Main HDD initialization failure | Obtain storage service |
| 2101 | Ultrabay HDD detection failure | Obtain service for the affected device |
| 2102 | Mini SATA detection failure | Obtain service for the affected device |
| 2110 | Main HDD read error | Obtain storage service |
| 2111 | Ultrabay HDD read error | Obtain service for the affected device |
| 2112 | Mini SATA read error | Obtain service for the affected device |
| 2200 | Invalid machine type or serial number | Obtain authorized service |
| 2201 | Invalid machine UUID | Obtain authorized service |
| Fan Error | Cooling fan failure | Obtain authorized service |
| Thermal Sensing Error | Thermal sensor failure | Shut down immediately and obtain service |
Certain startup messages refer to hardware interfaces or devices that may not be installed in every S230u configuration.
Beep Error Codes
The computer can also report startup problems through beep patterns.
| Beep Pattern | Meaning or Action |
| 1 short, pause, 3 short, pause, 3 short, 1 short | Check memory installation; seek service if the pattern continues |
| 3 short, pause, 1 short, pause, 1 short, 3 short | PCI resource allocation failure |
| 1 long and 2 short | Video function problem; obtain service |
| Four cycles of four short beeps | Security chip problem; obtain service |
| Five short beeps | System board problem; obtain service |
| Five short, pause, five short, pause | Continue startup when the error is detected, as directed by the system |
Lenovo Diagnostics
Lenovo Solution Center provides diagnostic testing and system information.
Running a Diagnostic Test
- Open Lenovo Solution Center.
- Select the required hardware diagnostic function.
- Run the available tests.
- Review the results.
- Save or print diagnostic logs if the problem cannot be resolved.
Diagnostic logs can help Lenovo Support identify hardware problems.
Storage and Travel Instructions
Storing the Computer
- Keep the computer in a dry, ventilated area.
- Avoid extreme temperatures and moisture.
- Protect it from strong magnetic fields.
- Avoid storing the lithium-ion battery in a completely discharged condition.
- Disconnect unnecessary accessories before storage.
Traveling with the Computer
- Use a protective carrying case.
- Return the computer to notebook mode before packing.
- Disconnect power cables and external devices.
- Follow airline rules for wireless communication.
- Protect the display from pressure and physical damage.
- Carry suitable power accessories for the destination.
Warranty Information
The ThinkPad S230u is subject to the applicable Lenovo Limited Warranty.
Warranty terms and service coverage are provided in the Safety, Warranty, and Setup Guide supplied with the computer.
Warranty Services
Eligible services can include:
- Hardware problem determination.
- Repair of covered Lenovo hardware.
- Applicable engineering changes.
Services Not Covered
The manual identifies exclusions such as:
- Replacement or use of nonwarranted parts.
- Identification of software problem sources.
- BIOS configuration during installation or upgrades.
- Changes or upgrades to device drivers.
- Network operating system installation or maintenance.
- Application installation and maintenance.
Additional Services
Lenovo may offer additional hardware, software, installation, and repair services during or after the warranty period.
Availability depends on location.
Lenovo Customer Support
Lenovo provides troubleshooting resources, device drivers, support documentation, and technical assistance.
Support Resources
| Resource | Website |
| Lenovo Support | https://www.lenovo.com/support |
| Lenovo Product Registration | https://www.lenovo.com/register |
| Lenovo Drivers | https://www.lenovo.com/Drivers |
| Lenovo Support Phone Numbers | https://www.lenovo.com/support/phone |
| Lenovo Accessories | https://www.lenovo.com/accessories |
| Microsoft Support | https://support.microsoft.com |
Before Contacting Support
Prepare the following information:
- Product name: ThinkPad S230u.
- Machine type: 3347.
- Serial number from the bottom label.
- Operating system and version.
- Description of the problem.
- Exact error code or message.
- Hardware and software configuration.
- Diagnostic results.
- Whether the problem can be reproduced.
Frequently Asked Questions
1. What are the specifications of the Lenovo ThinkPad S230u?
The ThinkPad S230u features a 12.5-inch 1366 × 768 multi-touch display, DDR3 memory, a 2.5-inch hard disk or SSD, six-row keyboard, TrackPoint, touchpad, USB 3.0, Mini HDMI, Ethernet, wireless LAN, and an integrated lithium-ion battery.
2. How do I switch the ThinkPad S230u to tablet mode?
Open the display at least 45 degrees, preferably 90 degrees. Rotate it clockwise by 180 degrees until its back faces the keyboard, then carefully lower it over the keyboard.
3. How do I enter BIOS on the ThinkPad S230u?
Turn on or restart the computer and press F1 when the ThinkPad logo appears. The ThinkPad Setup utility provides hardware, startup, and security settings.
4. How long does the ThinkPad S230u battery take to charge?
A full battery charge takes approximately six hours. Charging time depends on the battery condition and operating environment. The battery temperature must be at least 10°C (50°F) before charging.
5. How do I reset a frozen ThinkPad S230u?
Hold the Power button for at least four seconds. If the computer remains unresponsive, disconnect external power, use the emergency-reset hole, hold the Power button for ten seconds, reconnect power, and restart.
6. What should I do if the ThinkPad S230u touchscreen is not working correctly?
The manual recommends calibrating touch input regularly to maintain accuracy. Avoid excessive pressure or metal objects on the screen and clean the touchscreen with a soft, dry, lint-free cloth.
7. How do I replace the ThinkPad S230u hard drive or SSD?
Disable the built-in battery through ThinkPad Setup, turn off and disconnect the notebook, open the storage-bay cover, remove the drive using its tab, insert the compatible replacement, and secure the cover.