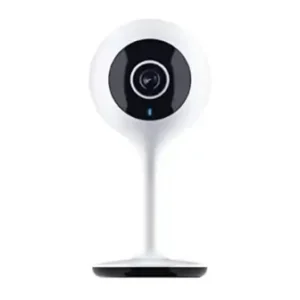
| Brand Name | Merkury |
| Product Name | Smart Wi-Fi Camera |
| PDF File Size | 615 KB |
| Total Number of Pages | 20 |
| Languages Covered | English |
| Companion App | Geeni |
Merkury Smart Wi-Fi Camera Manual
The Merkury Smart Wi-Fi Camera connects to the Geeni app so the camera can be viewed and managed from a compatible phone or tablet. The camera connects to a 2.4GHz Wi-Fi network and does not support 5GHz Wi-Fi for setup. The official guide covers app registration, Easy Mode and QR Code pairing, camera settings, microSD recording, troubleshooting, and integration with Google Assistant and Amazon Alexa.
A microSD card is optional. Without one, the camera can still provide live video through the app and allow screenshots or videos from the camera stream to be saved to the phone. Installing a supported microSD card adds continuous recording and playback functions.
Product Overview
The Merkury Smart Wi-Fi Camera is designed to work with the Geeni mobile app. After the camera is connected to Wi-Fi and added to a Geeni account, the app provides access to the live camera view, settings, motion notifications, device sharing, recordings and other supported functions.
The camera also supports video streaming through compatible Google Assistant and Amazon Alexa displays after the Geeni account has been linked to the appropriate smart-home platform.
Quick Facts
| Feature | Official Manual Information |
| Video resolution | Up to 1080p, 1920 × 1080 |
| Frame rate | Up to 25 frames per second |
| Video encoding | H.264 |
| Field of view | 115° diagonal |
| Audio | Internal speaker and microphone |
| Wi-Fi | 2.4GHz network required |
| 5GHz Wi-Fi | Not supported |
| Mobile requirements | iOS 9+ or Android 5.0+ |
| Storage | microSD up to 128GB |
| microSD included | No |
| Mobile app | Geeni |
| Voice assistants | Google Assistant and Amazon Alexa |
| Reset method | Hold Reset button for 3–4 seconds |
The technical specifications listed above come directly from the Merkury guide.
What’s Included in the Box
According to the product guide, the package includes:
- Merkury Smart Wi-Fi Camera
- Power adapter
- USB cable
- Mounting adhesive
- User manual
A microSD card is not required for basic setup and is not listed as an included accessory. It can be added separately for expanded recording capability.
System and Wi-Fi Requirements
Before beginning the Merkury camera setup, the following should be available:
- Home Wi-Fi network name
- Wi-Fi password
- A 2.4GHz Wi-Fi network
- A phone or tablet running iOS 9 or later or Android 5.0 or later
- Geeni app
- Geeni account
The camera cannot connect to a 5GHz Wi-Fi network.
Does the Merkury camera work with 5GHz Wi-Fi?
No. The official instructions specifically state that Geeni cannot connect the camera to a 5GHz network.
The camera should be paired through a 2.4GHz Wi-Fi network.
Camera Parts and Controls
The setup diagrams identify several important physical controls and connection points on the camera.
| Part | Purpose |
| Indicator light | Shows startup, pairing and connection status |
| Reset button | Resets the camera for pairing |
| microSD card slot | Accepts an optional microSD card for recording |
| Internal microphone | Supports camera audio |
| Internal speaker | Supports audio output |
| USB power connection | Powers the camera using the included cable |
The diagrams on pages 2 and 4 of the Start Guide show the microSD card slot and Reset control on the camera body, while the front indicator identifies the camera’s current connection state.
Indicator Lights and Their Meanings
The indicator light is particularly useful when setting up or troubleshooting the Merkury camera.
| Indicator State | Meaning |
| Solid red | Camera is starting up |
| Blinking red | Camera is ready to connect |
| Solid blue | Camera is successfully connected |
These status meanings are explicitly shown in the camera reset and connection diagram.
What does a blinking red light mean on a Merkury camera?
A blinking red light means the camera is ready to connect.
During initial startup, the light remains solid red. Once the camera reaches pairing mode, the light begins blinking red. A solid blue light indicates a successful connection.
What does a solid red light mean?
A solid red indicator means the camera is starting up.
If the camera is being prepared for setup, the indicator should eventually begin blinking red. If it does not begin blinking, the guide instructs the user to reset the camera.
What does a solid blue light mean?
A solid blue indicator means the Merkury camera has successfully connected.
Before Setting Up the Merkury Camera
Before pairing the camera:
- Confirm the Wi-Fi network operates at 2.4GHz.
- Have the Wi-Fi network name and password available.
- Confirm the phone or tablet meets the minimum mobile operating-system requirements.
- Download the Geeni app.
- Create or sign in to a Geeni account.
- Connect the camera to power using the included USB cable and power source.
- Wait for the indicator to blink red.
Download and Register the Geeni App
The Merkury Smart Wi-Fi Camera is set up through the Geeni app.
Download the app
Download Geeni from:
- Apple App Store
- Google Play
Create a Geeni account
The registration process shown in the guide is:
- Open the Geeni app.
- Enter a mobile phone number or email address.
- Enter the verification code.
- Create a password.
- Log in to the app.
Powering On the Merkury Camera
Connect the camera to a power source using the included USB cable.
During startup:
- The indicator initially remains solid red.
- The light should then begin blinking red.
- Blinking red indicates that the camera is ready for connection.
If the indicator does not begin blinking red, the camera should be reset using the procedure in the Reset section below.
How to Set Up the Merkury Camera in Easy Mode
Easy Mode is the primary pairing method described in the manual.
Step 1: Open the Geeni device screen
Open the Geeni app and go to the Devices screen.
Select the + control in the upper corner.
Step 2: Select Wi-Fi Camera
Choose Wi-Fi Camera from the device options.
Step 3: Confirm the blinking red light
The indicator on the camera should be blinking red.
This means the camera is ready for pairing.
Select Next Step in the app.
Step 4: Enter Wi-Fi information
Enter the:
- Wi-Fi network
- Wi-Fi password
The network must be 2.4GHz.
Step 5: Wait for the camera to connect
The Geeni app will attempt to connect to the camera.
This may take a few moments.
When pairing is successful, the previously blinking indicator changes to solid blue.
What should happen after successful setup?
A successful Merkury camera setup produces a solid blue indicator light.
The camera should then appear in the Geeni app and can be opened from the device list.
If Easy Mode fails, Merkury recommends trying QR Code Mode.
How to Set Up the Merkury Camera Using QR Code Mode
QR Code Mode provides an alternative when the normal Easy Mode connection fails.
Step 1: Reset the camera
Press and hold the Reset button for 3–4 seconds.
Step 2: Select the camera in Geeni
In the Geeni app:
- Open the Devices screen.
- Select the + button.
- Choose Wi-Fi Camera.
- Select QR Code in the upper corner.
Step 3: Enter the Wi-Fi details
Select Next, then enter the 2.4GHz Wi-Fi network information.
Step 4: Scan the QR code with the camera
The Geeni app displays a QR code.
Present the QR code to the camera.
When the camera successfully reads it, the camera produces a beep.
Select I heard the beep in the app.
Step 5: Confirm the connection
When pairing is complete, the indicator turns solid blue.
A solid blue light confirms a successful connection.
How to Connect a Merkury Camera to a Phone
The camera connects to a phone through the Geeni app rather than through a direct phone connection.
The basic process is:
- Install Geeni on the compatible phone.
- Register or log in to a Geeni account.
- Connect the camera to power.
- Wait for the camera to blink red.
- Select Wi-Fi Camera in Geeni.
- Enter the 2.4GHz Wi-Fi network and password.
- Wait for the indicator to become solid blue.
Once paired, the camera becomes available from the Geeni device list.
How to Reset a Merkury Smart Wi-Fi Camera
The camera can be reset by holding the Reset button for 3–4 seconds.
The diagram in the official guide shows the Reset button on the camera body near the microSD area.
Where is the Reset button on a Merkury camera?
The manual’s diagram identifies the Reset control on the rear/side area of the camera body, beside the microSD section.
When should the camera be reset?
The guide specifically calls for resetting the camera:
- Before beginning QR Code Mode.
- If the camera does not enter the expected blinking-red pairing state.
- As part of Wi-Fi connection troubleshooting.
The document does not provide an additional factory-reset sequence beyond holding the Reset button for 3–4 seconds.
Camera Settings in the Geeni App
Advanced camera settings can be opened from the device list.
Select the camera, then open the advanced settings control in the upper-right area of the camera screen.
Device Name
The camera can be renamed to a more useful name such as:
- Bedroom
- Kids’ Room
- Living Room Camera
The selected device name is also useful when integrating the camera with voice assistants.
Device Sharing
Device Sharing allows another person to access the camera.
Merkury gives examples including:
- Family members
- Friends
- Spouse
- Roommates
The camera owner can control who receives access and notifications.
Remove Device
The Remove Device option deletes the camera from the Geeni account.
Until the camera is removed, it remains linked to that account.
Indicator Light
The camera’s indicator light is enabled by default.
The Indicator Light setting can be switched off if the visible status light is not wanted.
Flip
If the camera is mounted upside down, the Flip setting rotates the displayed image to the correct orientation.
Time Watermark
The Time Watermark option adds a visible timestamp to the video.
When enabled, the camera view displays the time associated with the video.
Motion Detection
When Motion Detection is enabled, the app can send notifications when the camera detects motion.
The setting also allows motion sensitivity to be adjusted.
Format SD Card
The Format SD Card option erases the installed microSD card.
Formatting removes stored data, so recordings that need to be retained should be considered before this option is used.
Merkury Camera microSD Card Installation and Recording
A microSD card is optional and sold separately.
The setup diagram shows the microSD slot on the camera body and indicates where the card is inserted.
Maximum supported microSD card size
The camera supports a microSD card of up to 128GB.
What works without a microSD card?
Without a microSD card, the camera can:
- Display live camera video.
- Save screenshots to the phone.
- Save videos from the live camera stream to the phone.
- Record still snapshots associated with motion alerts when notifications are enabled.
What does adding a microSD card do?
With a microSD card installed, the camera can:
- Record video continuously.
- Provide recorded-video playback through the phone.
- Store recordings on the card.
- Automatically replace older footage with newer footage when storage becomes full.
How much video can the camera store?
Storage use depends on video quality.
Merkury states that the camera uses approximately 1GB of storage per day, depending on video quality. The guide says a 32GB card can provide weeks of continuous recording.
When the card becomes full, the oldest footage is automatically replaced by newer video.
Can the microSD card be removed and viewed directly?
The guide states that recorded video is encrypted and is intended to be viewed through the Geeni app.
It specifically advises against removing the card for the purpose of viewing video independently.
How to Share a Merkury Camera
Camera access can be shared with family or friends through the Geeni app.
To share a device:
- Open the Geeni app.
- Select Profile.
- Open Device Sharing.
- Grant the required sharing permission.
The person receiving access should already have:
- The Geeni app installed.
- A registered Geeni account.
Sharing permission can also be revoked later.
How to Rename a Merkury Camera
To change an unusual or generic camera name:
- Open the main device list.
- Select the camera.
- Open the advanced settings menu.
- Select Modify Device Name.
- Enter the preferred name.
Names such as Living Room Camera can make the device easier to identify and use with voice assistants.
How Many Merkury Devices Can Geeni Control?
According to the guide, the Geeni app itself can control an unlimited number of devices in an unlimited number of locations.
However, the Wi-Fi router may place its own limit on the number of devices that can be connected to that router.
Merkury Camera Wi-Fi Range
The manual does not give a fixed wireless-distance specification.
Wi-Fi range depends heavily on:
- The home router
- Room conditions
- The surrounding network environment
Merkury recommends checking the router specifications for exact range information.
Can the Merkury Camera Work Without Wi-Fi?
Merkury states that its products need a Wi-Fi connection for remote use.
The document does not describe a supported fully offline operating mode for the camera, so offline behavior should not be assumed beyond what the guide states.
Motion Detection
The camera can send phone notifications when motion is detected.
To use this feature:
- Open the camera’s settings.
- Open Motion Detection.
- Turn motion detection on.
- Select the desired sensitivity.
The manual shows selectable sensitivity levels in the Geeni app and states that the feature can be switched off when it is not needed.
What if a Merkury camera is not detecting motion?
The official guide does not provide a dedicated motion-detection troubleshooting procedure.
It does confirm that Motion Detection must be enabled and that sensitivity can be adjusted. Those settings should therefore be checked before additional support is requested.
Google Assistant Setup
The camera can stream video to compatible Google Assistant displays after it has already been configured in the Geeni app.
Supported examples listed in the guide include:
- Google Home Hub
- Google Assistant smart displays
- Google Nest Hub
- Chromecast-enabled TVs, screens or PCs
Some commands require compatible devices.
How to link Geeni with Google Assistant
- Make sure the camera is already working in the Geeni app.
- Open the Google Home app.
- Go to Home Control.
- Select the + button.
- Choose Geeni from the Home Control partners.
- Authorize the account using the Geeni username and password.
Once linked, the camera can be controlled using its assigned device name.
Examples provided in the manual include requests to show a named camera such as the Living Room Camera.
Renaming cameras for Google Assistant
The device can be renamed in the Geeni app.
Google Assistant uses that same name, although a separate nickname can also be assigned in Google Home.
Devices can also be organized by room.
Amazon Alexa Setup
The Merkury camera can also stream to compatible Alexa devices.
The guide lists examples including:
- Amazon Echo Show
- Amazon Fire TV
- Alexa-enabled TVs or screens
How to connect the Merkury camera to Alexa
- Set up the camera in Geeni first.
- Open the Alexa app.
- Go to Skills.
- Search for Geeni.
- Select Enable.
- Authorize the Geeni account using its username and password.
- Select Discover Devices.
- Wait for Merkury devices to appear under Smart Home.
Alexa can use the device name assigned in Geeni.
The camera can also be added to Alexa groups such as Bedroom or Downstairs.
Merkury Smart Wi-Fi Camera Troubleshooting
Merkury camera won’t connect to Wi-Fi
If the camera cannot connect, the official troubleshooting section recommends checking the following:
- Confirm that the correct Wi-Fi password was entered.
- Check whether the internet connection is working.
- Check whether the Wi-Fi signal is too weak.
- If necessary, reset the Wi-Fi router and try again.
- Reset the camera by holding its Reset button for 3–4 seconds.
The network must also be 2.4GHz, because the camera is not compatible with 5GHz Wi-Fi networks.
Merkury camera won’t pair in Easy Mode
If Easy Mode fails:
- Confirm the camera is blinking red.
- Confirm the Wi-Fi network is 2.4GHz.
- Verify the Wi-Fi password.
- Reset the camera for 3–4 seconds if necessary.
- Try the QR Code Mode setup method.
Merkury specifically recommends QR Mode when the normal connection attempt fails.
Camera is blinking red
A blinking red indicator is normally not an error.
It means the camera is ready to connect.
Camera stays solid red
Solid red means the camera is starting up.
During normal setup, it should progress to blinking red when it is ready for pairing. If it does not begin blinking, the manual instructs the user to reset the camera.
Merkury camera microSD card is not detected
The manual does not provide a dedicated procedure for an SD-card detection error.
It does confirm that:
- The card is optional.
- Cards up to 128GB are supported.
- The Geeni settings include a Format SD Card option.
- The card is inserted into the microSD slot shown in the camera diagram.
No additional SD-card repair or compatibility steps are stated in the guide.
Merkury camera won’t reset
The only reset procedure given by Merkury is to press and hold the Reset button for 3–4 seconds.
The document does not provide a second reset method or deeper repair procedure if that action fails. In that situation, official Merkury/Geeni support should be contacted.
Merkury camera won’t turn on
The guide instructs the camera to be connected to a power source using the included USB cable.
It does not provide a dedicated no-power troubleshooting sequence beyond the normal power connection instructions.
If the camera does not start after being connected as instructed, Merkury support is the appropriate next source for product-specific assistance.
Technical Specifications
| Specification | Value |
| Product | Merkury Smart Wi-Fi Camera |
| Video resolution | Up to 1920 × 1080 (1080p) |
| Maximum frame rate | 25 frames per second |
| Video encoding | H.264 |
| Field of view | 115° diagonal |
| Audio | Internal speaker and microphone |
| Wireless network | 2.4GHz Wi-Fi |
| 5GHz compatibility | No |
| microSD support | Up to 128GB |
| microSD card included | No |
| Mobile OS | iOS 9+ or Android 5.0+ |
| App | Geeni |
| Reset duration | 3–4 seconds |
| Google Assistant support | Yes |
| Amazon Alexa support | Yes |
These are the technical values listed in the official Merkury documentation.
Mounting the Camera
The box includes mounting adhesive, and the setup illustration shows an easy-mounting arrangement for positioning the camera.
The manual does not provide:
- Mounting height requirements
- Screw specifications
- Wall-anchor instructions
- Outdoor mounting guidance
- Detailed surface-preparation instructions
Those details should therefore not be inferred from other Merkury camera models.
If the camera is mounted upside down, the Flip setting can rotate the image so that it appears upright.
Cleaning, Maintenance and Storage
The Merkury Start Guide does not provide specific cleaning, routine maintenance or long-term storage procedures for this camera.
No unsupported instructions about cleaning solutions, water exposure, operating temperatures or disassembly should be added to this manual page.
For product-specific maintenance questions not covered in the document, Merkury/Geeni support should be used.
Replacement Parts and Accessories
The guide identifies the following accessories:
- Power adapter
- USB cable
- Mounting adhesive
- Optional microSD card
It does not provide replacement-part numbers, accessory ordering codes or a replacement-parts catalog.
A microSD card is purchased separately and may have a capacity of up to 128GB.
Safety and Regulatory Information
The camera complies with Part 15 of the FCC Rules.
Its operation is subject to two conditions:
- The device may not cause harmful interference.
- The device must accept interference received, including interference that may cause undesired operation.
If the camera causes radio or television interference, the FCC notice suggests measures such as:
- Reorienting or relocating the receiving antenna.
- Increasing separation between the equipment and receiver.
- Connecting the equipment to a different electrical circuit.
- Consulting a dealer or experienced radio/TV technician.
Changes or modifications that are not explicitly approved by the manufacturer may void the user’s authority to operate the equipment.
Warranty Information
The Start Guide does not state a warranty duration or detailed warranty terms.
A warranty period should therefore not be added to this page without a separate official Merkury warranty document that applies to this exact product.
For warranty or product-service questions, the support channels listed in the guide should be used.
Merkury Customer Support
Merkury directs users experiencing problems to Geeni support.
| Support Method | Details |
| Online support | support.mygeeni.com |
| Toll-free phone | (888) 232-3143 |
| In-app help | Tap Support in the Geeni app |
| Product website | www.mygeeni.com |
The guide specifically tells customers who cannot connect or need help not to return the product to the store, but to contact support instead.
Subscription or account questions
The camera manual does not contain instructions for cancelling a Merkury/Geeni subscription or managing a paid service plan.
Questions about subscription management should therefore be handled through the current official Geeni support channels rather than adding unsupported cancellation steps to the camera manual.
Frequently Asked Questions
How do I set up a Merkury Smart Wi-Fi Camera?
The camera should first be powered using the included USB cable. Once its indicator is blinking red, open the Geeni app, select +, choose Wi-Fi Camera, enter the 2.4GHz Wi-Fi details and wait for the light to turn solid blue. If Easy Mode fails, QR Code Mode can be used.
How do I connect a Merkury camera to my phone?
Install and sign in to the Geeni app on a compatible iOS or Android device. Add a Wi-Fi Camera from the Devices screen, enter the 2.4GHz network credentials and complete pairing. A solid blue light confirms a successful connection.
Why won’t my Merkury camera connect to Wi-Fi?
Check that the Wi-Fi password is correct, the internet connection is working and the Wi-Fi signal is strong enough. The network must be 2.4GHz rather than 5GHz. The camera can also be reset by holding the Reset button for 3–4 seconds, and QR Mode can be tried if Easy Mode fails.
What does a blinking red light on a Merkury camera mean?
A blinking red light means the camera is ready to connect. Solid red means it is starting up, while solid blue means the camera has successfully connected.
Where is the Reset button on a Merkury camera?
The official diagram shows the Reset control on the camera body near the microSD area. Hold the Reset button for 3–4 seconds to reset the camera.
What size microSD card does the Merkury camera support?
The camera supports microSD cards up to 128GB. A card is optional and is not included. Installing one adds continuous video recording and playback through the Geeni app.
How can a Merkury camera be shared with another person?
Open the Geeni app, select Profile, then Device Sharing and grant access to the other user. The person receiving access must already have the Geeni app and a registered account.
Can a Merkury camera work without Wi-Fi?
The manual states that Merkury devices require Wi-Fi for remote use. It does not describe a supported fully offline operating mode for this camera.