| Field | Details |
| Document Title | Oster 1.5L Deep Fryer / Freidora 1.5L |
| Document Type | User Manual / Manual de Instrucciones |
| Brand Name | Oster |
| Product Name | 1.5L Deep Fryer |
| Model Number | CKSTDF102-SS |
| PDF File Size | 2.83 MB |
| Number of Pages | 15 |
| Languages Covered | English and Spanish |
Oster 1.5L Deep Fryer CKSTDF102-SS
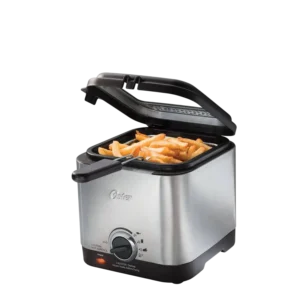
The Oster 1.5L Deep Fryer CKSTDF102-SS is a household electric deep fryer designed for preparing fried foods using cooking oil. It features an adjustable thermostat, a metal frying basket, a hinged lid with a viewing window, and a detachable magnetic power cord.
The fryer has a 1.5-liter labeled capacity and uses a 120-volt AC electrical supply. Its thermostat allows the cooking temperature to be adjusted for different foods, including chicken, fish, french fries, onion rings, and fritters.
Proper preparation, safe oil handling, and regular cleaning are important for dependable operation. The following instructions cover the fryer’s components, basket assembly, electrical connections, frying procedures, recommended cooking temperatures, oil maintenance, overheat protection, and warranty information.
Product Specifications
| Specification | Details |
| Brand | Oster |
| Model | CKSTDF102-SS |
| Product Type | Electric Deep Fryer |
| Labeled Capacity | 1.5 Liters |
| Electrical Supply | 120V AC |
| Temperature Control | Adjustable Thermostat |
| Frying Basket | Metal Fry Basket |
| Lid | Hinged Lid with Viewing Window |
| Power Connection | Detachable Magnetic Power Cord |
| Power Indicator | Yes |
| Overheat Protection | Resettable Protection Button |
| Electrical Plug | Polarized Plug |
| Intended Use | Household Use Only |
| Warranty | 1-Year Limited Warranty |
The oil reservoir has minimum (MIN) and maximum (MAX) fill markings. The cooking oil must remain between these markings rather than being measured solely by the fryer’s labeled capacity.
Important Safety Instructions
The Oster deep fryer uses hot cooking oil and electrical power. These safety precautions must be followed to reduce the risk of burns, fire, electric shock, and personal injury.
General Safety Precautions
- All operating and safety instructions must be read before using the appliance.
- Hot surfaces must not be touched during operation. Handles and control knobs must be used instead.
- The fryer, power cord, and electrical plugs must never be immersed in water or other liquids.
- The appliance must not be operated by children. Close supervision is necessary whenever it is used near children.
- The appliance must be unplugged when not in use and before cleaning.
- The fryer must be allowed to cool before parts are attached, removed, or cleaned.
- An appliance with a damaged power cord, damaged plug, improper operation, or other damage must not be used. Customer Service should be contacted for inspection or repair.
- Attachments not recommended by the manufacturer must not be used.
- The fryer is intended for indoor household operation only.
- The appliance must be used only for its intended purpose.
Electrical Safety
The fryer uses a polarized electrical plug and a detachable magnetic cord connection.
The following precautions apply:
- The power cord must not hang over the edge of a table or countertop.
- The cord must be kept away from heated surfaces.
- The fryer must not be placed on or near a hot gas burner, electric burner, or heated oven.
- An extension cord must not be used.
- The magnetic end of the power cord must be connected to the fryer before the wall plug is inserted into an outlet.
- To disconnect the appliance, the thermostat must first be turned to OFF, followed by unplugging the cord from the wall outlet.
- The magnetic cord connection must not be permanently attached or modified.
Warning: The detachable magnetic cord must never be used as the normal method of disconnecting the fryer. The wall plug must always be removed first.
Polarized Plug Safety
The polarized plug has one blade wider than the other and is designed to fit a polarized outlet in only one orientation.
If the plug does not fit completely:
- Remove the plug from the outlet.
- Reverse its orientation.
- Attempt to insert it again.
- If it still does not fit, contact a qualified electrician.
The plug must not be modified.
An electrical outlet must not be used if the plug fits loosely or if the outlet becomes warm.
Hot Oil and Frying Safety
Hot cooking oil can cause serious burns. Special care is required when filling, operating, moving, or emptying the fryer.
- The fryer must never be turned on when the oil reservoir is empty.
- Cooking oil must remain between the MIN and MAX fill lines.
- Food must be dried before frying.
- Ice crystals and excess moisture must be removed from frozen foods before they enter hot oil.
- The frying basket must not be overloaded.
- Basket handles must be correctly assembled and securely locked before use.
- Extreme caution is required when moving an appliance containing hot oil.
- Oven mitts or heat-resistant pads must be used when moving the fryer.
- The appliance must cool completely before the cooking oil is emptied or the fryer is cleaned.
Important: Excess water or ice on food can cause hot oil to splatter or overflow.
Parts and Components
The Oster CKSTDF102-SS deep fryer includes several components used for frying, temperature control, and safe handling.
| Component | Description and Function |
| Hinged Lid with Window | Covers the frying area and provides a window for observing food during cooking. |
| Fryer Basket | Metal basket used to hold food, lower it into the oil, and lift it out for draining. |
| Basket Handle | Attaches to the frying basket and provides a way to handle the basket. |
| Fryer Housing | Main body of the appliance containing the oil reservoir and heating system. |
| Oil Reservoir | Interior area that holds the cooking oil between the marked fill levels. |
| Adjustable Thermostat | Control knob used to select the desired frying temperature or turn the fryer OFF. |
| Power Indicator | Illuminates when the fryer is switched to a temperature setting. |
| Detachable Power Cord | Magnetic electrical cord that connects the fryer to the wall outlet. |
| Overheat Protection Reset Button | Recessed button on the underside of the fryer used to reset overheat protection. |
The original manual includes diagrams identifying the main fryer components and the location of the reset button.
Before First Use
Before operating the Oster deep fryer for the first time, all packaging must be removed and the appliance must be cleaned.
Initial Preparation
- Remove all packaging materials from the outside of the fryer.
- Open the hinged lid.
- Remove any packaging materials from inside the appliance.
- Make sure the fryer is unplugged from the electrical outlet.
- Clean the frying basket, lid, and oil reservoir.
- Wipe the interior and exterior surfaces using a damp cloth with soapy water.
- Dry all cleaned parts thoroughly with a towel.
The fryer must be completely dry before cooking oil is added and the appliance is connected to power.
Caution: Neither the fryer housing nor the electrical cord or plug may be submerged in water or another liquid.
Frying Basket Handle Assembly
The basket handle must be attached correctly before frying.
Follow these steps:
- Remove the frying basket and its handle from inside the fryer.
- Locate the two eyelets on the inner side of the frying basket.
- Squeeze the handle prongs together near their center.
- Position the handle prongs inside the basket eyelets.
- Release the prongs so they engage with the eyelets.
- Press the handle firmly downward until it locks into position.
The basket handle must be securely fitted before the basket is used.
Setting Up the Deep Fryer
The appliance must be positioned on a flat, heat-resistant surface before use.
Connecting the Magnetic Power Cord
The fryer uses a detachable magnetic electrical cord designed to separate from the appliance when a certain amount of force is applied.
The cord must be connected in the correct order.
- Make sure the thermostat is in the OFF position.
- Locate the magnetic power connection on the fryer.
- Position the magnetic end of the power cord against the fryer connection.
- Check that the side marked THIS SIDE UP faces upward.
- Attach the magnetic connector directly to the fryer.
The magnetic connector is designed to fit in one orientation.
The cord must be attached to the fryer before its plug is inserted into the wall outlet.
Adding Cooking Oil
- Open the hinged fryer lid.
- Locate the MIN and MAX oil-level markings inside the reservoir.
- Pour the selected cooking oil into the reservoir.
- Stop filling when the oil level is between the two markings.
- Check that the oil does not exceed the maximum level or fall below the minimum level.
The fryer must never be operated without cooking oil.
Connecting to the Electrical Outlet
Once the magnetic power cord is attached and the reservoir contains the correct amount of oil:
- Confirm that the thermostat remains in the OFF position.
- Insert the power plug into a 120V AC wall outlet.
- Turn the thermostat to the required cooking temperature.
- Check that the power indicator illuminates.
The fryer can then heat the cooking oil to the selected setting.
How to Use the Oster 1.5L Deep Fryer
The fryer uses an adjustable temperature control to prepare different types of food.
The correct cooking temperature and time depend on the type of food being prepared, its quantity, and its thickness.
Step 1: Select the Frying Temperature
Turn the adjustable thermostat to the desired temperature.
The power indicator illuminates when a cooking temperature is selected.
Allow the oil to heat to the required cooking temperature before frying.
Step 2: Place Food in the Frying Basket
Place the food inside the supplied metal frying basket.
The basket must not be overloaded or filled with excessively stacked food.
Too much food causes the oil temperature to fall, which can result in greasy or improperly cooked food.
Step 3: Lower the Basket into the Oil
Carefully place the food-filled basket into the fryer.
Close the hinged lid after placing the basket inside the frying area.
The lid includes a viewing window for observing the food.
Step 4: Allow the Food to Fry
Use the recommended frying time from the cooking chart or an applicable recipe.
Cooking times may need to be adjusted depending on the amount and thickness of the food.
During frying:
- Carefully open the lid when necessary.
- Use a heat-resistant utensil to stir the food slowly.
- Separate pieces that begin sticking together.
- Continue cooking until the desired browning and cooking result is reached.
Care is required whenever the lid is opened because the fryer contains hot oil.
Step 5: Remove and Drain the Food
When frying is complete:
- Lift the frying basket from the oil.
- Allow excess oil to drain from the food.
- Transfer the cooked food onto several layers of paper towels.
- Allow the towels to absorb additional oil.
- Add seasoning if desired.
For additional servings, the frying procedure can be repeated using the appropriate thermostat setting and cooking time.
Step 6: Turn Off the Fryer
After cooking:
- Turn the adjustable thermostat to OFF.
- Unplug the power cord from the wall outlet.
- Allow the fryer and cooking oil to cool.
- Disconnect the magnetic cord from the appliance after the wall plug has been removed.
The magnetic connection must not be pulled away from the fryer while the wall plug remains connected.
If the Magnetic Cord Disconnects Accidentally
The magnetic connection is intended for accidental separation, not routine shutdown.
If the cord separates from the fryer during operation:
- Immediately unplug the power cord from the wall outlet.
- Reconnect the magnetic end to the fryer.
- Reconnect the wall plug.
The wall plug must always be disconnected before the magnetic connector is reattached.
Frying Time and Temperature Chart
The Oster 1.5L Deep Fryer manual provides recommended temperatures and cooking times for common fried foods.
These values are guidelines and may require adjustment for different food quantities, thicknesses, or desired results.
| Food | Temperature Setting | Cooking Time |
| Chicken Strips | 375°F | 5–8 minutes |
| Chicken Pieces, Bone-In | 360°F | 18–20 minutes |
| Fresh Battered Fish | 320–340°F | 8–12 minutes |
| Frozen French Fries | 375°F | 5–8 minutes |
| Fritters | 375°F | 2–4 minutes |
| Onion Rings | 375°F | 4–5 minutes |
| Breaded Shrimp | 375°F | 4–5 minutes |
The recommended time depends on the food’s quantity and thickness. Cooking times should be adjusted as necessary rather than treated as fixed values.
Deep Frying Tips and Best Practices
Correct oil levels, food preparation, and temperature selection help produce properly fried food.
Avoid Overfilling the Frying Basket
Food needs enough surrounding cooking oil to fry evenly.
When too much food is placed in the fryer, the oil temperature decreases.
This can cause the food to absorb more oil and produce a soft or greasy texture instead of a crisp result.
Remove Excess Moisture Before Frying
Water and ice must be removed from food before deep frying.
For frozen foods:
- Remove visible ice crystals.
- Blot excess moisture with a towel.
- Prepare the food for frying using the appropriate temperature setting.
The manual recommends defrosting frozen foods for approximately 20 minutes before frying to produce a crispier result.
Excess water and ice can cause the hot cooking oil to splatter or overflow.
Use Coated Foods for Crispier Results
Foods covered in batter or breadcrumbs are particularly suitable for deep frying.
The coating forms a protective layer that helps keep moisture inside while allowing the outside to become crisp.
Examples include battered fish, breaded shrimp, and onion rings.
Use the Correct Frying Temperature
The correct temperature helps food cook evenly and develop a consistent golden appearance.
If the oil temperature is too low because the basket is overloaded, the food may absorb excessive oil.
Packaged frozen, precooked chicken may cook faster than uncooked chicken.
Recommended Cooking Oils
The manufacturer recommends cooking oils with relatively high smoke points.
Suitable oils identified in the manual include:
- Blended vegetable oil
- Pure corn oil
- Sunflower oil
- Soybean oil
- Canola oil
The manual advises against using seasoned or flavored oils with lower smoke points, including walnut oil, olive oil, lard, and cooking drippings.
Peanut oil is also discouraged because it can strongly affect the flavor of fried food.
Do Not Mix Cooking Oils
Different cooking oils must not be mixed during deep frying.
The manufacturer also notes that excessive heat, moisture, and burned food particles can lower the effectiveness of cooking oil.
Cooking Oil Maintenance and Storage
Cooking oil changes with continued heating and repeated exposure to food particles and moisture.
Proper handling is necessary to maintain suitable frying performance.
When to Replace Frying Oil
The cooking oil should be replaced if any of the following conditions occur:
| Oil Condition | Recommended Action |
| Excessive smoking at normal cooking temperatures | Replace the oil. |
| Strong discoloration | Discard the oil. |
| Rancid or unpleasant smell | Replace the oil. |
| Excessive foaming around frying food | Discard the oil. |
| Smoke appearing before the oil reaches 375°F | Replace the oil because it is no longer suitable for effective frying. |
Oil becomes darker with use as the oil and food particles are exposed to high heat.
Repeated heating can also change the oil’s thickness and cause it to pour more slowly.
Oil Use After Frying Chicken or Fish
The manual recommends using cooking oil only once when frying fish or chicken.
Chicken, particularly fresh or frozen chicken, releases considerable moisture into the oil.
That moisture can speed up oil breakdown, increase foaming, and lower the oil’s smoke point.
Filtering Used Cooking Oil
Used oil may be filtered to remove food particles.
The manufacturer identifies two filtering options:
- A cooking oil filter.
- A fine-mesh strainer.
Filtering can help maintain the oil’s condition, but it does not make deteriorated oil suitable for reuse.
How to Store Cooking Oil
For oil that remains suitable for reuse:
- Allow the fryer and oil to cool.
- Filter the oil when appropriate.
- Keep the oil covered.
- Store it in a cool, dark location.
- Use the stored oil within the manufacturer’s recommended period of up to three months.
- Check its color, smell, and foaming characteristics before reuse.
Oil showing discoloration, an unpleasant smell, or excessive foaming must be discarded.
Important: The manual instructs against refrigerating frying oil. Chilling oil and later allowing it to return to room temperature can cause excessive splattering during heating.
Overheat Protection Reset Instructions
The Oster CKSTDF102-SS deep fryer includes an overheat protection reset button.
Resetting this protection may be necessary if the fryer does not turn on or appears to stop operating during use.
How to Reset the Oster Deep Fryer
The fryer must be unplugged, cooled, and emptied of oil before the reset button is pressed.
- Unplug the fryer from the wall outlet.
- Allow the appliance to cool completely.
- Remove all cooking oil from the fryer.
- Carefully position the appliance so its underside can be accessed.
- Locate the recessed reset button near the center of the bottom of the fryer, identified by an arrow.
- Using a narrow slotted screwdriver or a pen, gently press the recessed reset button.
The reset button is illustrated in Figure 2 on printed page 8 of the original manual.
If the fryer continues to malfunction after resetting, the appliance must not be disassembled or repaired by the user. Oster Customer Service should be contacted.
Troubleshooting Guide
The following troubleshooting information covers operating problems and conditions addressed in the manufacturer’s instructions.
| Problem | Possible Cause | Recommended Action |
| Deep fryer will not turn on | Overheat protection may need resetting. | Unplug the fryer, allow it to cool, remove the oil, and gently press the reset button underneath the unit. |
| Fryer stops operating during use | Overheat protection may have activated. | Follow the manufacturer’s overheat protection reset procedure. |
| Food becomes greasy or soggy | Excessive food has lowered the cooking oil temperature. | Avoid overloading the basket and use the recommended temperature. |
| Cooking oil splatters excessively | Food contains excess moisture or ice crystals. | Remove ice crystals and dry food before frying. |
| Cooking oil overflows | Excess moisture, ice, or incorrect oil filling may contribute. | Keep the oil between the MIN and MAX markings and remove moisture from food. |
| Food sticks together during frying | Food pieces are sticking while cooking. | Carefully stir the food with a heat-resistant utensil as directed in the operating instructions. |
| Oil produces excessive smoke | The cooking oil may have deteriorated. | Replace the oil if it smokes excessively at normal frying temperatures. |
| Oil foams excessively | Moisture or oil deterioration may be contributing. | Replace oil showing excessive foaming. |
| Magnetic cord becomes disconnected | The detachable connection has separated. | Unplug the wall plug first, reconnect the magnetic cord to the fryer, then reconnect the wall plug. |
When to Contact Customer Service
The appliance must not be operated if it has a damaged cord or plug, has been damaged in another way, or continues to malfunction.
The fryer contains no user-serviceable internal parts. Electrical or mechanical repairs must not be attempted by the owner.
Cleaning and Maintenance
Regular cleaning removes accumulated grease and food residue from the fryer.
The appliance must be switched off, unplugged, and completely cooled before cleaning begins.
How to Clean the Oster Deep Fryer
- Turn the thermostat control to OFF.
- Unplug the power cord from the wall outlet.
- Allow the fryer to cool completely.
- Remove the magnetic cord from the fryer connection.
- Empty the cooking oil after the appliance has cooled.
- Open the hinged lid.
- Use paper towels to wipe excess grease from the interior.
- Wash the fryer’s interior and frying basket with hot, soapy water.
- Rinse the cleaned areas carefully.
- Dry all cleaned surfaces and components thoroughly.
The fryer housing and electrical components must never be immersed in water or another liquid.
Cleaning Precautions
The following precautions must be observed:
- Do not immerse the fryer or power cord in water.
- Do not use scouring pads or abrasive kitchen cleaners.
- Do not use steel wool on the magnetic electrical contacts.
- Do not insert pins or other sharp objects into the magnetic cord openings.
- Do not attempt to permanently attach the detachable magnetic cord.
- Allow the appliance to cool fully before cleaning or removing oil.
Cleaning the Frying Basket
The frying basket can be cleaned when the fryer has cooled.
- Remove the basket from the fryer.
- Wash it using hot, soapy water.
- Remove any accumulated grease or food particles.
- Rinse thoroughly.
- Dry the basket before returning it to the fryer.
The basket handle must be correctly assembled and locked before the basket is used again.
Cleaning the Oil Reservoir
The reservoir should be cleaned whenever the cooking oil is changed.
- Turn off and unplug the fryer.
- Allow the oil to cool completely.
- Carefully empty the reservoir.
- Wipe the interior with paper towels to absorb excess grease.
- Clean the interior using hot, soapy water without immersing the appliance.
- Carefully rinse and dry the interior.
Abrasive cleaners and scouring pads must not be used.
Storage Instructions
Before storing the deep fryer:
- Turn the thermostat to OFF.
- Unplug the power cord from the electrical outlet.
- Allow the appliance to cool completely.
- Disconnect the magnetic cord.
- Clean the fryer when necessary.
- Make sure the appliance and its components are dry.
If the cooking oil will be reused, the manual instructs that the fryer be stored with its lid closed.
Reusable oil must be kept covered in a cool, dark place and checked for deterioration before further use.
Replacement Parts and Accessories
Magnetic Power Cord
The fryer requires the manufacturer’s specified detachable magnetic power cord.
The bilingual manual contains different replacement cord references:
| Manual Section | Magnetic Cord Model |
| English Instructions | 189115 |
| Spanish Instructions | 500560-001 |
Because the two language sections identify different cord models, the correct replacement must be confirmed with Oster Customer Service before a replacement cord is purchased or used.
Using an incompatible magnetic cord may cause fire, electric shock, or injury.
The magnetic cord must not be modified, bypassed, or permanently attached to the appliance.
Recipes for the Oster 1.5L Deep Fryer
The manufacturer’s manual includes several recipes for preparing fried foods with the Oster deep fryer.
The recommended temperatures and preparation methods are provided below.
Apple Fritters
Frying Temperature: 375°F
Ingredients
- 3 cups all-purpose flour
- 2 teaspoons baking powder
- ½ teaspoon salt
- 1 cup sugar
- 1 egg, lightly beaten
- 4 tablespoons cooking oil
- 1 teaspoon vanilla extract
- Juice of 1 orange, approximately ⅓ cup
- 1 cup chopped apple
Preparation Instructions
- Preheat the cooking oil to 375°F.
- Mix the flour, baking powder, salt, and sugar in a bowl.
- In a separate bowl, combine the beaten egg, cooking oil, and vanilla.
- Add the liquid mixture to the dry ingredients and mix thoroughly.
- Stir in the orange juice and chopped apple.
- Drop small portions of batter into the hot oil using a teaspoon.
- Fry for approximately 2 minutes, or until the fritters are crisp and deeply browned.
- Remove the fritters and allow excess oil to drain.
- Sprinkle with powdered sugar or a mixture of granulated sugar and cinnamon.
Serve immediately.
Beer Batter for Fish or Chicken
Frying Temperature: Fish 320°F; Chicken 375°F
Ingredients
- 2 eggs, separated
- 1 tablespoon cooking oil or butter
- 1 teaspoon salt
- ¼ teaspoon ground black pepper
- 1⅓ cups all-purpose flour
- ¾ cup flat beer
Preparation Instructions
- For fresh fish, preheat the fryer to 320°F. For boneless chicken breasts, use 375°F.
- Beat the egg yolks with the cooking oil or butter, salt, and black pepper.
- Gradually add the flour and beer, alternating between the two ingredients.
- Beat the mixture thoroughly.
- Refrigerate the batter for 3–12 hours.
- When ready to use, beat the egg whites until stiff.
- Carefully fold the beaten egg whites into the batter.
- Pat the fish or chicken and coat lightly with flour.
- Dip the food into the prepared beer batter.
Cooking Instructions
For fish, place the battered pieces in hot oil and fry for approximately 10 minutes or until golden brown.
For boneless chicken breasts, fry for approximately 8 minutes or until golden brown.
Deep-Fried Chicken
Frying Temperature: 360°F
Ingredients
- 1 frying chicken, approximately 2½ pounds, cut into pieces
- 1½ cups all-purpose flour
- 1 teaspoon seasoned salt
- ¼ teaspoon salt
- 1¼ cups milk
Preparation Instructions
- Preheat the cooking oil to 360°F.
- Combine the flour, seasoned salt, and regular salt.
- Coat each chicken piece in the seasoned flour.
- Dip the floured chicken into the milk.
- Coat the chicken in flour once more.
- Place the prepared chicken into the frying basket.
- Fry for approximately 20 minutes, or until golden brown and fully cooked.
Chicken Kiev
Frying Temperature: 375°F
Ingredients
- 4 whole boneless, skinless chicken breasts
- 1 tablespoon chopped onion
- 1 tablespoon chopped parsley
- 1½ teaspoons salt
- 1 stick butter or margarine
- ½ cup flour
- 1 egg, beaten
- 1 cup fine, dry breadcrumbs
Preparation Instructions
- Preheat the cooking oil to 375°F.
- Place the chicken breasts between two pieces of plastic wrap.
- Flatten the chicken with a wooden mallet until approximately ¼ inch thick.
- Remove the plastic wrap.
- Mix the chopped onion, parsley, and salt.
- Sprinkle the seasoning mixture over the chicken.
- Cut the butter into eight pieces.
- Place a piece of butter near one end of each seasoned chicken breast.
- Roll the chicken around the butter, folding the sides inward.
- Press the edges together and secure the rolls with toothpicks.
- Lightly coat each roll with flour.
- Dip the chicken into the beaten egg.
- Coat it with breadcrumbs.
- Refrigerate the prepared chicken rolls for at least one hour.
- Arrange the rolls in a single layer in the frying basket.
- Lower the basket into the hot oil.
- Fry for approximately 5–8 minutes, or until browned and cooked.
The manufacturer’s recipe describes checking doneness by removing a piece and testing whether a fork enters easily.
Hush Puppies
Frying Temperature: 375°F
Ingredients
- 1¾ cups cornmeal
- ½ cup all-purpose flour
- ¾ teaspoon baking soda
- ½ teaspoon salt
- 1 teaspoon sugar
- ½ teaspoon garlic salt
- ½ cup chopped onion
- 1 cup buttermilk
- 1 egg
Preparation Instructions
- Preheat the oil to 375°F.
- Sift together the cornmeal, flour, baking soda, salt, sugar, and garlic salt.
- Add the chopped onion.
- Beat the egg with the buttermilk in a separate bowl.
- Add the liquid mixture to the dry ingredients.
- Stir until the ingredients are moistened.
- Drop small portions of batter into the hot oil using a teaspoon.
- Fry only a few hush puppies at a time.
- Turn each hush puppy once while frying.
- Continue cooking until golden brown.
- Remove from the fryer and drain on paper towels.
Quick and Easy Doughnuts
Frying Temperature: 375°F
Ingredients
– 1 can refrigerated buttermilk biscuit dough
Preparation Instructions
- Preheat the cooking oil to 375°F.
- Remove the biscuit dough from its packaging.
- Flatten each biscuit slightly with the palm of the hand.
- Make a hole in the center of each biscuit to form a doughnut.
- For smaller doughnut rounds, divide the biscuits into pieces and roll them into balls.
- Place each doughnut on a slotted spoon.
- Carefully lower the dough into the hot oil.
- Fry for approximately 2 minutes, turning once.
- Remove the doughnuts with the spoon.
- Transfer them to a plate lined with paper towels.
Doughnut Topping Variations
Powdered Sugar
Sprinkle the warm doughnuts with confectioners’ sugar.
Glazed Doughnuts
Combine:
- ½ cup confectioners’ sugar
- 2 teaspoons hot milk
- ½ teaspoon vanilla
Mix the ingredients and drizzle the glaze over cooled doughnuts.
Cinnamon and Sugar
Combine:
- 2 tablespoons ground cinnamon
- ½ cup sugar
Coat the warm doughnuts with the mixture.
Jelly Doughnut Rounds
- Stir ½ cup of the preferred jelly until smooth.
- Transfer the jelly into a plastic bag.
- Cut off a small corner of the bag.
- Make a small opening in a cooked doughnut round using the tip of a pointed knife.
- Squeeze jelly into the opening.
Warranty Information
The Oster 1.5L Deep Fryer is covered by a 1-year limited warranty under the terms printed in its manufacturer manual.
Warranty Coverage
The manufacturer warrants the product against defects in materials and workmanship for one year from the original purchase date.
During the warranty period, Jarden Consumer Solutions (JCS), at its discretion, may:
- Repair the defective product or component.
- Replace it with a new or remanufactured product or component.
- Provide a comparable product of equal or greater value if the original product is unavailable.
Warranty Eligibility
The warranty applies to the original retail purchaser and begins on the date of the initial retail purchase.
The warranty is not transferable.
The original sales receipt must be retained because proof of purchase is required for warranty service.
Warranty Exclusions
The limited warranty does not cover normal wear of parts or damage resulting from:
- Negligent operation or product misuse
- Incorrect electrical voltage or current
- Operation that does not follow the manufacturer’s instructions
- Disassembly, modification, or repair by an unauthorized person
- Events such as fires, floods, hurricanes, or tornadoes
Attempting to repair or adjust the appliance’s electrical or mechanical functions can void the warranty.
Warranty Limitations
The warranty includes limitations concerning incidental, consequential, and other types of damages, as well as implied warranty duration.
Certain limitations or exclusions may not apply in every state, province, or jurisdiction.
Warranty rights can vary depending on the applicable location and law. The complete legal conditions are provided in the original warranty document.
Customer Support Information
For product questions, repairs, or warranty service, the manufacturer manual provides the following contact information.
| Support Region | Contact Number |
| United States | 1-800-334-0759 |
| Canada | 1-800-667-8623 |
| Manufacturer Website | www.oster.com |
United States
Sunbeam Products, Inc., doing business as Jarden Consumer Solutions
Boca Raton, Florida 33431
Canada
Sunbeam Corporation (Canada) Limited, doing business as Jarden Consumer Solutions
20B Hereford Street
Brampton, Ontario L6Y 0M1
The manufacturer instructs customers seeking warranty service to call the appropriate service number to obtain a convenient authorized service center address.
The product must not be mailed directly to the corporate addresses listed above or returned to the place of purchase for warranty service under the manual’s instructions.
Frequently Asked Questions
1. How much oil does the Oster CKSTDF102-SS deep fryer need?
The cooking oil must be filled to a level between the MIN and MAX markings inside the oil reservoir. The fryer is identified as a 1.5L model, but the marked oil levels determine the proper filling amount. The reservoir must never be overfilled or underfilled.
2. How do I reset the Oster 1.5L deep fryer?
Unplug the appliance, allow it to cool completely, and remove the cooking oil. Locate the recessed reset button near the center of the fryer’s underside. Gently press it using a narrow slotted screwdriver or pen. The procedure is intended for situations where the fryer does not start or stops working during operation.
3. What temperature should be used for frozen french fries?
The manufacturer recommends 375°F for 5–8 minutes when frying frozen french fries. Cooking times may be adjusted according to food quantity, thickness, and the desired result.
4. Can the Oster 1.5L deep fryer be used without oil?
No. The manufacturer specifically prohibits operating the fryer with an empty oil reservoir. Cooking oil must be added between the designated MIN and MAX markings before the appliance is turned on.
5. Can an extension cord be used with this deep fryer?
No. The manufacturer’s safety instructions state that an extension cord must not be used. The fryer also has a polarized electrical plug designed for connection to an appropriate outlet.
6. How should the magnetic power cord be disconnected?
The adjustable thermostat must first be turned to OFF. The power plug must then be removed from the wall outlet before the magnetic connector is detached from the fryer. The magnetic connection must not be used as the regular disconnection method.
7. Can cooking oil be reused in the Oster deep fryer?
Oil that remains in suitable condition may be filtered and stored covered in a cool, dark location for up to three months. The manufacturer recommends using oil only once after frying chicken or fish. Oil must be discarded if it has an unpleasant smell, excessive foaming, strong discoloration, or excessive smoking.
8. How do I clean the Oster CKSTDF102-SS deep fryer?
Turn the thermostat to OFF, unplug the appliance, and allow it to cool completely. Disconnect the magnetic cord, empty the oil, and wipe excess grease from the reservoir. Wash the fryer interior and basket with hot, soapy water, then carefully rinse and dry them. The fryer housing and electrical parts must never be immersed in water.