| Field | Details |
| Document Title | 2LB. EXPRESSBAKE® BREADMAKER — User Guide & Recipes |
| Document Type | User Guide and Recipe Book |
| Brand Name | Oster |
| Product Name | 2 lb. ExpressBake Breadmaker |
| Model Number(s) | CKSTBRTW21 |
| PDF File Size | 4.33 MB |
| Number of Pages | 34 |
| Languages Covered | English and Spanish |
Oster 2 lb. ExpressBake Breadmaker CKSTBRTW21
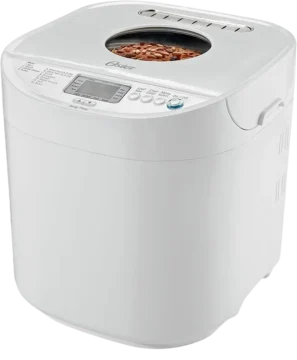
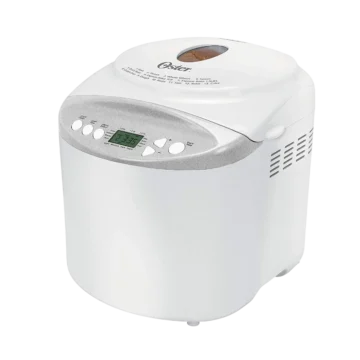
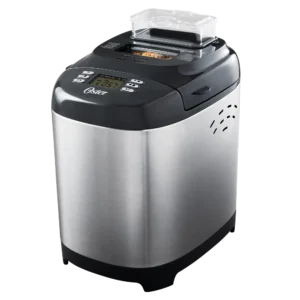
The Oster 2 lb. ExpressBake Breadmaker CKSTBRTW21 is an automatic household bread machine designed to mix, knead, rise, and bake bread with minimal manual preparation. The appliance features 12 preset programs, selectable 1.5 lb. and 2 lb. loaf sizes, three crust color options, and an ExpressBake setting that prepares bread in approximately 59 minutes.
The breadmaker can prepare traditional white bread, whole grain bread, French bread, sweet bread, oatmeal bread, and gluten-free bread. It also includes dedicated programs for homemade yogurt, dough, cakes, jams, and baking prepared dough.
An automatic fruit and nut dispenser adds ingredients during supported breadmaking cycles. This allows ingredients such as raisins and chopped nuts to be incorporated into the dough at the appropriate stage without manually opening the breadmaker.
The digital LCD control panel displays the selected program, loaf size, crust color, and remaining baking time. Other functions include a delay start timer, a pause function, automatic Keep Warm mode for up to 60 minutes, and a memory feature for short electrical power interruptions.
The removable bread basket has a nonstick surface and contains a kneading blade that mixes ingredients automatically. The included measuring accessories assist with ingredient preparation, while the kneading blade removal hook helps remove the blade if it remains inside a finished loaf.
The breadmaker is intended for household countertop use. Correct ingredient measurements, loading order, program selection, and appliance maintenance are important for consistent baking results.
Technical Specifications
| Specification | Details |
| Brand | Oster |
| Model Number | CKSTBRTW21 |
| Product Type | Automatic Breadmaker |
| Maximum Loaf Capacity | 2 lb. |
| Selectable Loaf Sizes | 1.5 lb. and 2 lb. |
| Number of Programs | 12 |
| ExpressBake Duration | Approximately 59 minutes |
| Basic Bread Program | Approximately 3 hours |
| Whole Grain Program | Approximately 3 hours 40 minutes |
| Gluten Free Program | Approximately 2 hours 55 minutes |
| Crust Color Settings | Light, Medium, Dark |
| Delay Start | Up to 10 hours of delay described in the operating instructions |
| Timer Adjustment | 10-minute increments |
| Automatic Keep Warm | Up to 60 minutes |
| Power Interruption Memory | Up to 10 minutes |
| Pause Function | Yes |
| Automatic Fruit and Nut Dispenser | Yes |
| LCD Display | Digital |
| Bread Basket | Removable, nonstick |
| Kneading Blade | Removable |
| Yogurt Program | 8 hours at 110°F |
| Electrical Connection | Polarized plug for North American models |
| Recommended Countertop Clearance | 6 inches (152 mm) on all sides |
| Intended Use | Household countertop use |
| Warranty | 1-year limited warranty |
Program durations are approximate and may vary depending on the selected loaf size and operating settings.
What’s Included in the Box
The Oster CKSTBRTW21 includes the appliance and the removable components required for preparing bread.
| Included Component | Purpose |
| Breadmaker | Main appliance containing the heating, mixing, and control systems. |
| Removable Bread Basket | Holds ingredients during mixing, kneading, rising, and baking. |
| Kneading Blade | Mixes ingredients and kneads the dough automatically. |
| Automatic Fruit and Nut Dispenser | Holds additional ingredients and releases them during supported programs. |
| Measuring Cup | Measures recipe ingredients. |
| Measuring Spoon | Measures smaller ingredient quantities. |
| Kneading Blade Removal Hook | Assists with removing the kneading blade from finished bread. |
The kneading blade is packed inside the included measuring cup and must be installed before the appliance is used.
Parts and Components
The breadmaker has 11 main components identified in the product diagram.
| Part Number | Component | Description |
| 1 | Lid | Covers the bread basket and baking chamber. |
| 2 | Viewing Window | Allows the breadmaking process to be observed without opening the lid. |
| 3 | Ingredient Compartment | Holds the automatic fruit and nut dispenser. |
| 4 | Bread Basket | Removable container used for mixing, rising, and baking. |
| 5 | Kneading Blade | Mixes and kneads dough inside the bread basket. |
| 6 | Control Panel | Contains the display and operating buttons. |
| 7 | Housing | Outer body of the breadmaker. |
| 8 | Fruit and Nut Dispenser | Automatically adds selected ingredients during applicable programs. |
| 9 | Measuring Cup | Used for measuring recipe ingredients. |
| 10 | Hook | Removes the kneading blade from a finished loaf. |
| 11 | Measuring Spoon | Measures smaller quantities of ingredients. |
Lid and Viewing Window
The lid covers the baking chamber while the breadmaker operates.
The viewing window allows the mixing, rising, and baking processes to be observed without opening the lid.
The lid should remain closed while bread is baking. Opening it repeatedly can affect the dough’s rise and the final crust color.
The ExpressBake program must be operated without opening the lid.
Removable Bread Basket
The bread basket holds the ingredients throughout the breadmaking cycle.
It must be secured before operation.
To install the basket, lower it into the breadmaker and turn it clockwise until locked.
To remove it, grasp the handle and turn it counterclockwise before lifting it out.
Oven mitts must be used when removing the basket after baking.
Kneading Blade
The kneading blade attaches to the shaft inside the bread basket.
It automatically mixes and kneads the ingredients during supported programs.
The blade must be properly installed before the ingredients are added.
Automatic Fruit and Nut Dispenser
The automatic dispenser is designed to add ingredients such as fruit and nuts during the breadmaking process.
Before starting a suitable program, the additional ingredients are placed in the dispenser.
The dispenser releases the ingredients automatically at the programmed stage.
Kneading Blade Removal Hook
The supplied hook is used when the kneading blade remains inside a finished loaf.
The hook must be used carefully because the blade and bread may still be hot immediately after baking.
Control Panel, Buttons, and LCD Display
The Oster CKSTBRTW21 has a digital control panel for selecting programs, loaf sizes, crust colors, and baking times.
Control Panel Button Functions
| Button | Function |
| Menu | Selects one of the 12 operating programs. |
| Color / Crust | Selects Light, Medium, or Dark crust color where supported. |
| Loaf | Selects a 1.5 lb. or 2 lb. loaf size where applicable. |
| TIME Up | Increases the selected delay or adjustable baking time. |
| TIME Down | Decreases the selected delay or adjustable baking time. |
| START/STOP | Starts, pauses, resumes, or cancels a program. |
| LCD Display | Shows the current menu, cycle, loaf size, crust color, and time remaining. |
Menu Button
Pressing Menu moves through the available programs.
Each program is identified by a number from 1 to 12.
The numbers shown on the LCD correspond to the program names printed on the appliance.
Color / Crust Button
The Color button selects one of three crust settings:
- Light
- Medium
- Dark
An indicator arrow appears above the selected crust color.
Some programs use fixed settings and do not permit crust color changes.
The ExpressBake program does not allow crust color adjustment.
Loaf Button
The Loaf button selects the required bread size.
Two sizes are available on supported programs: 1.5 lb. and 2 lb.
The selected loaf size is indicated by an arrow on the display.
The Loaf button does not apply to Dough, Jam, Yogurt, Cake, and Bake.
TIME Buttons
The TIME Up and TIME Down buttons are used to adjust the delay start timer.
They are also used to change the baking duration on the Bake program.
For delayed baking, the time is adjusted in 10-minute increments.
Holding an adjustment button advances or reduces the timer more quickly.
START/STOP Button
The START/STOP button performs different functions depending on how long it is pressed.
Starting a program
Press START/STOP once.
A short beep sounds, the two dots on the LCD begin flashing, and the working indicator illuminates.
Pausing a program
Press START/STOP once during operation.
The appliance pauses and the remaining time flashes on the display.
Resuming a program
Press START/STOP again to continue the paused program.
Canceling a program
Press and hold START/STOP for approximately two seconds.
A beep sounds to confirm that the program has been canceled.
LCD Display
The LCD shows:
- Selected program number
- Current baking cycle
- Selected loaf size
- Selected crust color
- Remaining operating time
- Program completion and warming status
When the appliance is first connected to electrical power, the display shows:
MENU 1 TIMER 3:00
This is the default Basic program with a three-hour operating time.
Important Safety Instructions
The breadmaker produces heat and contains electrical and moving components. All safety instructions must be followed before and during operation.
General Safety Precautions
- Read all operating instructions before using the breadmaker.
- Do not touch hot surfaces while the appliance is operating.
- Use the handles, knobs, and oven mitts when handling hot components.
- Never immerse the appliance, power cord, or plug in water or another liquid.
- Keep the breadmaker and its power cord out of reach of children.
- Children must not play with the appliance.
- Close supervision is necessary when the appliance is operated near children.
- Unplug the breadmaker when it is not in use.
- Disconnect electrical power before cleaning or removing components.
- Allow the appliance to cool before installing or removing parts.
- Do not operate the appliance with a damaged cord or plug.
- Do not operate a malfunctioning, dropped, or damaged breadmaker.
- Do not attempt to repair or splice a damaged power cord.
- Do not use attachments that are not recommended by the manufacturer.
- Keep hands and utensils away from moving components.
- Do not use the appliance outdoors or for commercial purposes.
- Do not place the breadmaker on wet surfaces.
- Do not position the breadmaker near a hot gas burner, electric burner, or heated oven.
- Do not allow the power cord to hang over a counter or touch hot surfaces.
- Use extreme caution when moving an appliance containing hot oil or other hot liquids.
- Do not use the breadmaker for purposes other than its intended household use.
Countertop Placement and Clearance
The appliance must be placed on a dry, stable, level countertop.
A clearance of at least 6 inches (152 mm) must be maintained between the breadmaker and surrounding walls or objects on all sides.
The machine must not be operated on unstable surfaces.
A hot pad or trivet is recommended beneath the breadmaker to protect countertop surfaces that may be damaged by prolonged exposure to heat.
Hot Surface and Steam Safety
The bread basket, heating base, and other internal components become hot during operation.
The heating base retains residual heat after the baking cycle has finished.
It must not be touched until it has cooled.
When opening the lid during or after a cooking cycle, caution must be used because escaping steam can cause burns.
Oven mitts must be used when removing the hot bread basket.
Electrical Safety
North American versions of the appliance use a polarized plug with one blade wider than the other.
The plug is designed to fit a polarized outlet in only one direction.
If the plug does not fit:
- Remove it from the outlet.
- Reverse its orientation.
- Try inserting it again.
- If it still does not fit, contact a qualified electrician.
The plug must not be modified.
An electrical outlet must not be used if the plug fits loosely or the outlet becomes warm.
Power Cord and Extension Cord Safety
The breadmaker is supplied with a short power cord to reduce the risk of entanglement or tripping.
If a longer detachable power cord or extension cord is used:
- Its electrical rating must be at least as great as the rating of the appliance.
- It must not hang over a countertop where children can pull it.
- It must be positioned to prevent accidental tripping.
- For grounded appliances, a grounding-type three-wire extension cord must be used.
The cord must not be pulled, twisted, or otherwise misused.
Electrical Circuit Requirements
The breadmaker should be operated on a separate electrical circuit from other operating appliances.
An overloaded circuit may prevent the breadmaker from operating correctly.
Initial Smoke or Odor
A small amount of smoke or odor may occur during the first few uses.
The manufacturer identifies this as a normal condition that should disappear after several uses.
Smoke caused by ingredients spilling inside the appliance requires the machine to be stopped, cooled, and cleaned.
Before First Use
The breadmaker must be unpacked, cleaned, and assembled before the first baking cycle.
Step 1: Position the Breadmaker
Place the appliance on a countertop near an electrical outlet.
Do not plug it in yet.
Make sure there is enough space above the breadmaker to open the lid without hitting kitchen cabinets.
Step 2: Remove the Bread Basket
- Open the breadmaker lid.
- Grasp the handle of the bread basket.
- Turn the basket counterclockwise.
- Lift the basket out of the appliance.
Step 3: Wash the Bread Basket
Clean the bread basket using a mild, non-abrasive soap.
Rinse thoroughly and dry completely.
The bread basket must not be washed in a dishwasher.
Step 4: Install the Kneading Blade
Locate the kneading blade inside the supplied measuring cup.
Remove the blade and fit it onto the shaft at the bottom of the bread basket.
Make sure it is properly seated.
Step 5: Remove the Protective Packaging
Remove the polyfoam packaging located beside the heating element.
The packaging must be removed before the breadmaker is operated.
Step 6: Install the Automatic Fruit and Nut Dispenser
Position the fruit and nut dispenser over the ingredient compartment.
Push it straight downward until installed.
Step 7: Prepare the Ingredients
Measure the ingredients required for the selected recipe.
Keep the bread basket outside the machine while adding ingredients.
The breadmaker is now ready for operation.
Measuring Ingredients Correctly
Accurate ingredient measurements are important for bread texture, rising, and baking.
Measuring Liquid Ingredients
A liquid measuring cup with clearly marked measurements must be used.
- Pour the required liquid into the measuring cup.
- Place the cup on a flat surface.
- View the measurement at eye level.
- Confirm that the correct quantity has been measured.
Measuring Dry Ingredients
Dry ingredients must be measured without compressing them.
- Use a spoon to fill the measuring cup.
- Level the ingredient using the back of a knife or spatula.
- Add the measured amount to the bread basket.
Flour should not be scooped directly from its container with the measuring cup because this can result in an excessive amount.
Correct Ingredient Loading Order
Ingredients must be placed into the bread basket in the following order:
- Liquid ingredients first
- Dry ingredients second
- Yeast last
The yeast must not come into contact with liquid ingredients while ingredients are being loaded.
A small well should be formed in the flour before the yeast is added.
Ingredient Temperature
Unless otherwise specified in a recipe, ingredients should be at room temperature, approximately 77–85°F.
Ingredients that are too hot or too cold can affect rising and baking.
ExpressBake recipes require water heated to 115–125°F.
Fresh flour and yeast should be used for consistent results.
How to Use the Oster CKSTBRTW21 Breadmaker
The following instructions describe the standard breadmaking process.
Step 1: Install the Kneading Blade
Place the kneading blade onto the shaft inside the bread basket.
Make sure the blade is installed correctly.
Step 2: Add the Ingredients
Measure the ingredients according to the selected recipe.
Place them in the basket in this order:
- Liquid ingredients
- Dry ingredients, except yeast
- Yeast
Make a well in the flour to keep the yeast separate from the liquids.
Step 3: Install the Bread Basket
- Place the filled bread basket into the breadmaker.
- Turn it clockwise to lock it into position.
- Close the lid gently.
Step 4: Connect Electrical Power
- Plug the breadmaker into the electrical outlet.
- The LCD will show:
- MENU 1 TIMER 3:00
Step 5: Select the Program
- Press Menu until the required program number appears on the display.
- There are 12 available programs.
Step 6: Select the Crust Color
- Press Color to select Light, Medium, or Dark.
- The selected color will be indicated by an arrow on the LCD.
- Some programs use fixed settings.
Step 7: Select the Loaf Size
Press Loaf to select either 1.5 lb. or 2 lb. The selected size will appear on the display. This adjustment is only available on applicable programs.
Step 8: Set the Delay Timer if Required
Use the TIME Up and TIME Down buttons if delayed operation is needed. The selected timer setting must include the program’s full baking duration.
Step 9: Start the Baking Program
Press START/STOP once. The machine will beep, the working indicator will illuminate, and the remaining time will begin counting down.
Step 10: Allow the Breadmaker to Operate
The appliance automatically performs the required mixing, kneading, rising, and baking stages. The lid should remain closed during the baking process. The automatic fruit and nut dispenser will release additional ingredients during supported programs.
Step 11: Wait for Program Completion
When a standard breadmaking program finishes:
- The LCD displays 0:00.
- The appliance sounds 10 beeps.
- Keep Warm mode begins automatically.
- The 0:00 display flashes.
Keep Warm mode operates for up to one hour.
Step 12: Remove the Finished Bread
- Wear oven mitts.
- Open the lid carefully.
- Grasp the bread basket handle.
- Turn the basket counterclockwise.
- Lift the basket out.
- Turn the basket upside down.
- Gently shake until the bread comes out.
- Remove the kneading blade from the bottom of the loaf using the included hook if necessary.
The bread should be allowed to cool before slicing.
Breadmaker Programs and Settings
The Oster CKSTBRTW21 has 12 programs for preparing bread and other foods.
Complete 12-Program Chart
| Menu | Program | Approximate Duration | Function |
| 1 | Basic | 3 hours | Standard bread recipes |
| 2 | Whole Grain | 3 hours 40 minutes | Bread containing more than 50% whole wheat flour |
| 3 | ExpressBake | 59 minutes | Rapid breadmaking |
| 4 | Gluten Free | 2 hours 55 minutes | Gluten-free bread recipes |
| 5 | French | 3 hours 50 minutes | French-style bread with a heartier crust |
| 6 | Sweet | 2 hours 55 minutes | Sweet bread containing additional sugar, fats, or proteins |
| 7 | Oatmeal | 3 hours | Bread prepared using oatmeal or rolled oats |
| 8 | Yogurt | 8 hours | Homemade yogurt |
| 9 | Dough | 1 hour 30 minutes | Mixing, kneading, and rising dough without baking |
| 10 | Bake | 1 hour default | Baking prepared dough |
| 11 | Cake | 1 hour 50 minutes | Cake preparation and baking |
| 12 | Jam | 1 hour 20 minutes | Jams and marmalades |
Program times are approximate and may vary with loaf size.
Menu 1: Basic
The Basic program is intended for standard bread recipes.
It provides automatic kneading, rising, and baking.
Recipes using this setting include traditional white bread and raisin bread.
The approximate duration for a 2 lb. loaf is three hours.
Menu 2: Whole Grain
The Whole Grain program is designed for bread containing more than 50% whole wheat flour.
It provides a longer rising period than the Basic program.
The recipe collection includes 100% whole grain bread, honey grain bread, and buttermilk bread.
The approximate duration for a 2 lb. loaf is 3 hours and 40 minutes.
Menu 3: ExpressBake
The ExpressBake setting prepares bread in approximately 59 minutes.
It uses a shorter rising period and higher baking temperatures.
The program is suitable for the ExpressBake white bread and cheese and rye bread recipes.
Fast-rising yeast and water heated to 115–125°F are required.
The Delay Timer and Crust Color controls cannot be used with this program.
Menu 4: Gluten Free
The Gluten Free program prepares bread using gluten-free ingredients.
Its approximate duration is 2 hours and 55 minutes.
All ingredients must be checked to confirm that they are labeled gluten-free.
The appliance must be thoroughly cleaned before and after preparing gluten-free bread to prevent gluten cross-contamination.
Menu 5: French
The French setting provides a longer kneading, rising, and baking process.
It is intended for bread with a heartier crust.
The French countryside bread recipe uses this program.
The approximate duration for a 2 lb. loaf is 3 hours and 50 minutes.
Menu 6: Sweet
The Sweet program is designed for bread containing larger amounts of sugar, fats, and proteins.
These ingredients can increase browning during baking.
Recipes include springtime favorite bread and apple walnut bread.
The approximate duration is 2 hours and 55 minutes.
Menu 7: Oatmeal
The Oatmeal program prepares bread containing oatmeal or rolled oats.
The approximate duration is three hours.
The program includes automatic kneading, rising, and baking.
Menu 8: Yogurt
The Yogurt program is used to prepare homemade yogurt.
The program is automatically set to:
- Temperature: 110°F
- Duration: 8 hours
The breadmaker heats the ingredients and maintains the temperature required for fermentation.
Menu 9: Dough
The Dough program mixes, kneads, and raises dough without baking it.
The prepared dough can be removed, shaped by hand, allowed to rise, and baked in a conventional oven.
It is suitable for rolls, specialty bread, pretzels, pizza dough, and other dough preparations.
The program takes approximately 1 hour and 30 minutes.
Menu 10: Bake
The Bake program is intended for baking prepared dough.
Its default duration is 60 minutes.
The baking time can be adjusted using the TIME Up and TIME Down buttons according to the recipe.
Menu 11: Cake
The Cake program performs kneading, rising, and baking stages.
It is designed for recipes that use baking powder or baking soda.
The approximate program duration is 1 hour and 50 minutes.
Menu 12: Jam
The Jam setting prepares jams and marmalades.
It heats and mixes the ingredients automatically.
The approximate program duration is 1 hour and 20 minutes.
Breadmaking Cycle Stages
The breadmaker automatically performs the stages required by the selected program.
Basic Bread Cycle — 1.5 lb. Loaf
| Countdown Time | Operation |
| Start | First kneading for 11 minutes |
| 2:42 | Dough rests for 20 minutes |
| 2:22 | Second kneading for 17 minutes |
| 2:10 | Fruit and nut dispenser releases ingredients |
| 2:05 | Dough begins rising for 25 minutes |
| 1:40 | Dough is punched down for approximately 10 seconds |
| 1:40 | Dough continues rising for 40 minutes |
| 1:00 | Baking begins for 60 minutes |
| 0:00 | Bread is finished |
Whole Grain Cycle — 1.5 lb. Loaf
| Countdown Time | Operation |
| Start | First kneading for 11 minutes |
| 3:21 | Dough rests for 25 minutes |
| 2:56 | Second kneading for 21 minutes |
| 2:45 | Fruit and nut dispenser releases ingredients |
| 2:35 | Dough rises for 35 minutes |
| 2:00 | Dough is punched down for approximately 10 seconds |
| 2:00 | Dough continues rising for 60 minutes |
| 1:00 | Baking begins for 60 minutes |
| 0:00 | Bread is finished |
ExpressBake Cycle
| Stage | Duration |
| Kneading | 12 minutes |
| Rising | 14 minutes |
| Baking | 33 minutes |
| Total | 59 minutes |
Gluten Free Cycle — 1.5 lb. Loaf
| Countdown Time | Operation |
| Start | First kneading for 12 minutes |
| 2:38 | Dough rises for 5 minutes |
| 2:33 | Second kneading for 13 minutes |
| 2:28 | Fruit and nut dispenser releases ingredients |
| 2:20 | Dough rises for 70 minutes |
| 1:10 | Baking begins for 70 minutes |
| 0:00 | Bread is finished |
French Bread Cycle — 1.5 lb. Loaf
| Countdown Time | Operation |
| Start | First kneading for 18 minutes |
| 3:22 | Dough rests for 40 minutes |
| 2:42 | Second kneading for 22 minutes |
| 2:30 | Fruit and nut dispenser releases ingredients |
| 2:20 | Dough rises for 30 minutes |
| 1:50 | Dough is punched down for approximately 10 seconds |
| 1:50 | Dough continues rising for approximately 44 minutes and 50 seconds |
| 1:05 | Baking begins for 65 minutes |
| 0:00 | Bread is finished |
Sweet Bread Cycle — 1.5 lb. Loaf
| Countdown Time | Operation |
| Start | First kneading for 12 minutes |
| 2:38 | Dough rests for 5 minutes |
| 2:33 | Second kneading for 23 minutes |
| 2:20 | Fruit and nut dispenser releases ingredients |
| 2:10 | Dough begins rising |
| 1:40 | Dough continues rising for 40 minutes |
| 1:00 | Baking begins for 60 minutes |
| 0:00 | Bread is finished |
Oatmeal Bread Cycle — 1.5 lb. Loaf
| Countdown Time | Operation |
| Start | First kneading for 11 minutes |
| 2:42 | Dough enters a 20-minute rising stage |
| 2:22 | Second kneading for 17 minutes |
| 2:10 | Fruit and nut dispenser releases ingredients |
| 2:05 | Dough continues rising for 25 minutes |
| 1:40 | Dough is briefly shaped |
| 1:40 | Final rising stage for 40 minutes |
| 1:00 | Baking begins for 60 minutes |
| 0:00 | Bread is finished |
Dough Cycle
The Dough program takes approximately 90 minutes and includes kneading, resting, and rising stages.
The prepared dough must be removed and baked separately.
Cake Cycle
| Countdown Time | Operation |
| Start | First kneading for 7 minutes |
| 1:43 | Rising for 4 minutes |
| 1:39 | Second kneading for 10 minutes |
| 1:34 | Fruit and nut dispenser releases ingredients |
| 1:29 | Rising for 9 minutes |
| 1:20 | Baking begins for 80 minutes |
| 0:00 | Cake is finished |
Jam Cycle
The Jam program lasts approximately 80 minutes.
The first 60 minutes involve heating and intermittent mixing.
The remaining 20 minutes are used for setting.
How to Use the Automatic Fruit and Nut Dispenser
The CKSTBRTW21 includes a dispenser that automatically adds fruit or nuts to the bread mixture.
How to Fill the Dispenser
- Prepare the fruit or nuts required by the recipe.
- Open the ingredient compartment.
- Place the ingredients into the dispenser.
- Confirm that the dispenser is correctly positioned.
- Close the compartment.
- Select the required program.
- Press START/STOP.
The ingredients will be released automatically at the programmed time.
Automatic Dispenser Release Times
| Program | Countdown Time for Release |
| Basic | 2:10 |
| Whole Grain | 2:45 |
| Gluten Free | 2:28 |
| French | 2:30 |
| Sweet | 2:20 |
| Oatmeal | 2:10 |
| Cake | 1:34 |
These are the release times identified in the program descriptions.
The countdown time depends on the selected operating cycle.
How to Use the Pause Function
The pause function temporarily interrupts the breadmaker without immediately canceling its program.
Pausing a Program
- Press START/STOP once during operation.
- The machine pauses.
- The remaining working time flashes on the LCD.
- The current program settings remain stored.
Resuming a Program
Press START/STOP again to resume the paused cycle.
If no button is pressed, the machine resumes automatically within 10 minutes.
Canceling Instead of Pausing
To cancel a program, press and hold START/STOP for approximately two seconds.
A beep confirms cancellation.
The selected baking process must then be started again.
How to Use the Delay Start Timer
The Delay Start function allows the breadmaker to prepare fresh bread for a selected later time.
The selected time includes both the waiting period and the complete breadmaking cycle.
Delay Timer Requirements
Before activating the timer:
- Add the recipe ingredients to the bread basket.
- Install the basket.
- Select the required baking program.
- Select the desired crust color.
- Calculate the required completion time.
The operating instructions describe a delay of up to 10 hours and use an example of a 13-hour total setting consisting of 10 hours of waiting and a three-hour Basic cycle.
Setting the Timer
- Determine how much time remains until the bread should be ready.
- Press TIME Up to increase the setting.
- Press TIME Down if the setting must be reduced.
- Use 10-minute increments to select the required completion time.
- Press START/STOP to activate the delayed operation.
The colon on the LCD begins flashing.
Delay Timer Example
If the current time is 8:00 AM and bread is needed at 6:00 PM, the total time until completion is 10 hours.
| Timer Component | Duration |
| Total Time Until Bread Is Ready | 10 hours |
| Basic Program | 3 hours |
| Waiting Period | 7 hours |
The timer should therefore be set to 10:00.
Canceling the Delay Timer
- Press and hold START/STOP until a beep is heard.
- Press START/STOP again.
- The display returns to the original program setting.
- The delayed operation is canceled.
Delay Timer Restrictions
The Delay Timer cannot be used with ExpressBake.
It must also not be used for recipes containing ingredients that can spoil, such as eggs or milk.
Delayed Baking in Hot Weather
During hot weather, adjustments may be necessary to prevent dough from rising excessively.
The manufacturer recommends considering:
- Reducing liquid by 1–2 tablespoons.
- Reducing salt by ⅛–¼ teaspoon.
- Reducing sugar gradually by ¼ teaspoon at a time.
How to Use the ExpressBake Program
The ExpressBake program prepares bread in approximately 59 minutes.
Bread prepared using this program may have a darker, thicker crust and a denser texture than bread prepared using standard programs.
A small crack may also appear on top of the crust.
ExpressBake Requirements
| Requirement | Instruction |
| Water Temperature | 115–125°F |
| Yeast | Fast-rising yeast |
| Flour | Bread machine flour |
| Delay Timer | Cannot be used |
| Crust Color Adjustment | Cannot be used |
| Lid | Must remain closed during baking |
| Duration | 59 minutes |
| Cooling Before Another Loaf | 20 minutes with the lid open |
Water Temperature
The water must be heated to between 115°F and 125°F.
A cooking thermometer must be used to check the temperature.
Water that is too hot can kill yeast, while water that is too cool may not activate it properly.
Fast-Rising Yeast
Fast-rising yeast is required for ExpressBake recipes.
Regular active dry yeast must not be substituted because the finished loaf may be much shorter.
How to Prepare ExpressBake Bread
- Install the kneading blade.
- Measure the required hot water.
- Add the hot water and other liquid ingredients to the bread basket.
- Add the dry ingredients except yeast.
- Make a well in the flour.
- Add the fast-rising yeast.
- Install the bread basket.
- Close the lid.
- Select Menu 3, ExpressBake.
- Select the required loaf size where applicable.
- Press START/STOP.
- Allow the 59-minute program to finish.
Removing ExpressBake Bread
If the loaf is difficult to remove:
- Allow it to cool in the basket for approximately five minutes.
- Turn the basket upside down.
- Gently shake until the loaf releases.
- Allow the bread to cool for approximately 15 minutes before slicing.
Before preparing another ExpressBake loaf, allow the breadmaker to cool for 20 minutes with the lid open.
How to Use the Gluten Free Program
Menu 4 is designed for preparing bread using gluten-free ingredients.
The approximate duration is 2 hours and 55 minutes.
Gluten-Free Preparation Requirements
All ingredients must be checked before use.
Products labeled wheat-free are not necessarily gluten-free.
The breadmaker must be cleaned thoroughly before and after using the Gluten Free setting to prevent gluten cross-contamination.
Gluten-Free Bread Preparation
- Install the kneading blade.
- Measure the ingredients required by the recipe.
- Add liquids first.
- Add dry ingredients except yeast.
- Form a small well in the flour.
- Add yeast.
- Install the bread basket.
- Close the lid.
- Select Menu 4, Gluten Free.
- Press START/STOP.
- Allow the program to finish.
The manufacturer’s gluten-free bread recipe is provided below.
How to Make Homemade Yogurt
Menu 8 is designed for preparing homemade yogurt.
The program operates for eight hours at a temperature of 110°F.
Yogurt Ingredients
| Ingredient | Quantity |
| Milk | ½ gallon |
| Yogurt Containing Live Active Cultures | ½ cup |
Step-by-Step Yogurt Instructions
- Measure the milk and yogurt.
- Add both ingredients to the bread basket.
- Mix the ingredients thoroughly.
- Install the basket in the breadmaker.
- Close the lid.
- Press Menu until Yogurt is selected.
- Press START/STOP.
The appliance heats the mixture and maintains the temperature required for fermentation during the eight-hour cycle.
How to Use the Dough Program
The Dough program is used to prepare dough for rolls, pizza, pretzels, and specialty breads.
It mixes, kneads, and raises the dough but does not bake it.
Dough Program Instructions
- Install the kneading blade.
- Add the required recipe ingredients.
- Install the bread basket.
- Close the lid.
- Select Menu 9, Dough.
- Press START/STOP.
- Allow the program to finish.
- Remove the dough.
- Shape and bake according to the selected recipe.
Preparing Dough for Conventional Baking
- Sprinkle a small amount of flour onto a pastry mat or board.
- Use a rubber spatula or wooden spoon to remove the dough from the basket.
- Knead the dough by hand two or three times to release trapped air.
- Shape the dough into the desired form.
- Place the shaped dough onto a greased baking pan.
- Cover with a clean cloth.
- Allow it to rise until nearly doubled, approximately one hour.
- Bake according to the recipe.
Reducing Dough Rising Time
The manufacturer provides an alternative method for shortening the rising period:
- Preheat a conventional oven to 200°F for five minutes.
- Turn off the oven.
- Shape the dough and place it on a baking pan.
- Cover with a clean kitchen towel.
- Place the dough in the switched-off oven until doubled.
This method may reduce the rising time by approximately half.
How to Use the Bake Program
Menu 10 is used for baking prepared dough.
The default baking time is 60 minutes.
Bake Program Instructions
- Add the prepared dough or recipe ingredients to the bread basket.
- Install the basket.
- Close the lid.
- Select Menu 10, Bake.
- Adjust the baking time using TIME Up or TIME Down.
- Press START/STOP.
The machine begins heating and displays the remaining baking time.
How to Use the Cake Program
Menu 11 is designed for preparing cakes.
The program includes mixing, rising, and baking stages.
Cake Program Instructions
- Measure the ingredients required by the recipe.
- Add wet ingredients to the bread basket first.
- Add the dry ingredients.
- Install the bread basket.
- Close the lid.
- Select Menu 11, Cake.
- Select the required crust color using Color.
- Press START/STOP.
- Allow the 1-hour, 50-minute program to finish.
How to Use the Jam Program
Menu 12 is used for preparing jams and marmalades.
The program runs for approximately 1 hour and 20 minutes.
Jam Preparation Instructions
- Measure the ingredients specified in the selected jam recipe.
- Add them to the bread basket.
- Install the basket and close the lid.
- Select Menu 12, Jam.
- Press START/STOP.
- Allow the program to finish.
- Wait until the display shows 0:00.
- Use oven mitts or hot pads to remove the basket.
- Transfer the prepared jam to suitable containers.
- Cover and refrigerate until set.
The jam recipes must not be prepared using the Delay Timer.
Oster CKSTBRTW21 Breadmaker Recipes
The following recipes use the ingredients, quantities, and program selections provided for the CKSTBRTW21.
General Instructions for Bread Recipes
Unless a recipe specifies another procedure:
- Install the kneading blade.
- Measure all ingredients.
- Add liquid ingredients first.
- Add dry ingredients, excluding yeast.
- Form a small well in the flour.
- Place the yeast in the well.
- Install and lock the bread basket.
- Close the lid.
- Select the specified program.
- Select the loaf size and crust color where applicable.
- Press START/STOP.
- Remove the finished bread using oven mitts.
Traditional White Bread — Menu 1
Program: Basic
| Ingredient | 1.5 lb. Loaf | 2 lb. Loaf |
| Water | 1 cup | 1⅜ cups |
| Butter or Margarine | 2 tablespoons | 2 tablespoons |
| Salt | 1½ teaspoons | 1¾ teaspoons |
| Bread Flour | 3 cups | 4 cups |
| Dry Milk | 2 tablespoons | 2 tablespoons |
| Sugar | 1 tablespoon | 2 tablespoons |
| Active Dry Yeast | 1¾ teaspoons | 2 teaspoons |
Preparation
- Add the water and butter or margarine to the bread basket.
- Add salt, flour, dry milk, and sugar.
- Make a well in the flour and add the yeast.
- Install the basket and close the lid.
- Select Basic.
- Choose the correct loaf size and desired crust color.
- Press START/STOP.
Raisin Bread — Menu 1
Program: Basic
| Ingredient | 1.5 lb. Loaf | 2 lb. Loaf |
| Water | ⅞ cup | 1¼ cups |
| Butter or Margarine | 1½ tablespoons | 2 tablespoons |
| Salt | 1 teaspoon | 1½ teaspoons |
| Bread Flour | 3 cups | 4 cups |
| Sugar | 2 tablespoons | 3 tablespoons |
| Dry Milk | 1½ tablespoons | 2 tablespoons |
| Cinnamon | 1 teaspoon | 1½ teaspoons |
| Active Dry Yeast | 1½ teaspoons | 2 teaspoons |
| Raisins | ¾ cup | 1 cup |
Preparation
- Add the liquids to the basket.
- Add dry ingredients except yeast and raisins.
- Make a well and add the yeast.
- Place the raisins in the automatic fruit and nut dispenser.
- Install the basket and close the lid.
- Select Basic and the required loaf size.
- Select the crust color.
- Press START/STOP.
The automatic dispenser releases the raisins during the programmed kneading stage.
The Delay Timer must not be used for this recipe.
100% Whole Grain Bread — Menu 2
Program: Whole Grain
Loaf Size: 2 lb.
| Ingredient | Quantity |
| Water | 1⅝ cups |
| Packed Brown Sugar | ⅓ cup |
| Salt | 2 teaspoons |
| Whole Wheat Flour | 4⅔ cups |
| Active Dry Yeast | 3 teaspoons |
Preparation
- Add water to the bread basket.
- Add brown sugar, salt, and whole wheat flour.
- Make a well in the flour and add the yeast.
- Install the basket.
- Select Whole Grain.
- Select the 2 lb. loaf size.
- Select the preferred crust color.
- Press START/STOP.
Honey Grain Bread — Menu 2
Program: Whole Grain
| Ingredient | 1.5 lb. Loaf | 2 lb. Loaf |
| Water | 1 cup | 1⅜ cups |
| Butter or Margarine | 2 tablespoons | 2½ tablespoons |
| Honey | 1½ tablespoons | 2 tablespoons |
| Salt | 1 teaspoon | 1¾ teaspoons |
| Bread Flour | 2¼ cups | 2½ cups |
| Whole Wheat Flour | 1 cup | 1¼ cups |
| Quick-Cook Oats | ½ cup | ⅔ cup |
| Active Dry Yeast | 1¾ teaspoons | 2 teaspoons |
Preparation
- Add the water, butter or margarine, and honey.
- Add salt, flours, and oats.
- Place yeast in a well in the flour.
- Install the bread basket.
- Select Whole Grain.
- Choose the appropriate loaf size and crust setting.
- Press START/STOP.
Buttermilk Bread — Menu 2
Program: Whole Grain
Loaf Size: 1.5 lb.
| Ingredient | Quantity |
| Water | 1¼ cups |
| Butter or Margarine | 1½ tablespoons |
| White Vinegar | 1 teaspoon |
| Packed Brown Sugar | 2 tablespoons |
| Bread Flour | 2 cups |
| Whole Wheat Flour | 1 cup |
| Rye Flour | 1 cup |
| Powdered Buttermilk | 2 tablespoons |
| Vital Gluten | 1 tablespoon |
| Caraway Seeds | 1½ teaspoons |
| Active Dry Yeast | 1¾ teaspoons |
Preparation
- Add water, butter or margarine, and vinegar.
- Add the dry ingredients except yeast.
- Place yeast in a well in the flour.
- Install the basket.
- Select Whole Grain.
- Choose the appropriate loaf size and crust color.
- Press START/STOP.
ExpressBake White Bread — Menu 3
Program: ExpressBake
| Ingredient | 1.5 lb. Loaf | 2 lb. Loaf |
| Hot Water, 115–125°F | 1 cup + 2 tablespoons | 1½ cups |
| Oil | 2 tablespoons | 3 tablespoons |
| Sugar | 2 tablespoons | 3 tablespoons |
| Salt | 1 teaspoon | 1½ teaspoons |
| Bread Flour | 3 cups | 4 cups |
| Fast-Rising Yeast | 4 teaspoons | 5 teaspoons |
Preparation
- Measure the water using a cooking thermometer.
- Make sure its temperature is between 115°F and 125°F.
- Add the water and oil to the bread basket.
- Add sugar, salt, and bread flour.
- Make a well in the flour and add fast-rising yeast.
- Install the bread basket.
- Select ExpressBake.
- Choose the required loaf size.
- Press START/STOP.
- Allow the 59-minute program to finish without opening the lid.
The Delay Timer cannot be used, and the crust color cannot be changed.
Cheese and Rye ExpressBake Bread — Menu 3
Program: ExpressBake
| Ingredient | 1.5 lb. Loaf | 2 lb. Loaf |
| Hot Water, 115–125°F | 1 cup + 2 tablespoons | 1½ cups |
| Oil | 1 tablespoon | 4 teaspoons |
| Sugar | 1 tablespoon | 2 tablespoons |
| Salt | 1 teaspoon | 1½ teaspoons |
| Bread Flour | 2½ cups | 3¼ cups |
| Rye Flour | ½ cup | ⅔ cup |
| Grated Parmesan Cheese | 1 tablespoon | 2 tablespoons |
| Shredded Cheddar Cheese | 1 cup | 1¼ cups |
| Fast-Rising Yeast | 4 teaspoons | 5 teaspoons |
Preparation
- Measure water at 115–125°F.
- Add water and oil to the bread basket.
- Add the dry ingredients except yeast.
- Make a well in the flour and add yeast.
- Install the basket and close the lid.
- Select ExpressBake.
- Select the required loaf size.
- Press START/STOP.
Traditional Gluten-Free Bread — Menu 4
Program: Gluten Free
| Ingredient | 1.5 lb. Loaf | 2 lb. Loaf |
| Water | 1 cup + 3 tablespoons | 1 cup + 7 tablespoons |
| Oil | 2 tablespoons | 3 tablespoons |
| Salt | 1 teaspoon | 1½ teaspoons |
| Gluten-Free Flour | 3 cups | 4 cups |
| Sugar | 2 tablespoons | 2 tablespoons |
| Yeast | 1½ teaspoons | 1½ teaspoons |
Preparation
- Confirm that all ingredients are gluten-free.
- Add water and oil to the bread basket.
- Add salt, gluten-free flour, and sugar.
- Form a well in the flour and add the yeast.
- Install the bread basket.
- Close the lid.
- Select Gluten Free.
- Press START/STOP.
The breadmaker must be thoroughly cleaned before and after gluten-free preparation to avoid cross-contamination.
French Countryside Bread — Menu 5
Program: French
Loaf Size: 2 lb.
| Ingredient | Quantity |
| Water | 1⅜ cups |
| Vegetable or Olive Oil | 1½ tablespoons |
| Salt | 1½ teaspoons |
| Bread Flour | 4 cups |
| Sugar | 1 tablespoon |
| Active Dry Yeast | 1¾ teaspoons |
Preparation
- Add water and oil to the bread basket.
- Add salt, flour, and sugar.
- Place yeast in a well in the flour.
- Install the basket.
- Select French.
- Select the 2 lb. loaf size.
- Choose the desired crust color.
- Press START/STOP.
Springtime Favorite Bread — Menu 6
Program: Sweet
Loaf Size: 1.5 lb.
| Ingredient | Quantity |
| Water | 1 cup |
| Butter or Margarine | ¼ cup |
| Large Egg | 1 |
| Vanilla Extract | 1½ teaspoons |
| Almond Extract | 1¼ teaspoons |
| Salt | 1 teaspoon |
| Bread Flour | 3¾ cups |
| Sugar | ½ cup |
| Dry Milk | 3 tablespoons |
| Active Dry Yeast | 1¾ teaspoons |
| Raisins | ¾ cup |
| Shredded Orange Peel | 1½ teaspoons |
Preparation
- Add liquid ingredients to the bread basket.
- Add dry ingredients except yeast.
- Make a well in the flour and add yeast.
- Place the raisins in the automatic dispenser for release during the cycle.
- Install the basket and close the lid.
- Select Sweet.
- Select the 1.5 lb. loaf size.
- Press START/STOP.
The Delay Timer must not be used.
Apple Walnut Bread — Menu 6
Program: Sweet
Loaf Size: 1.5 lb.
| Ingredient | Quantity |
| Unsweetened Applesauce | ¾ cup |
| Apple Juice | ⅜ cup |
| Butter or Margarine | 3 tablespoons |
| Large Egg | 1 |
| Salt | 1 teaspoon |
| Bread Flour | 4 cups |
| Packed Brown Sugar | ¼ cup |
| Cinnamon | 1¼ teaspoons |
| Baking Soda | ½ teaspoon |
| Active Dry Yeast | 2 teaspoons |
| Chopped Walnuts | ½ cup |
Preparation
- Add the applesauce, juice, butter or margarine, and egg to the bread basket.
- Add the dry ingredients except yeast.
- Make a well in the flour and add yeast.
- Place the chopped walnuts in the automatic dispenser.
- Install the bread basket.
- Select Sweet.
- Select the 1.5 lb. loaf size.
- Press START/STOP.
Oatmeal Bread — Menu 7
Program: Oatmeal
| Ingredient | Quantity |
| Water | 1¼ cups |
| Honey | 3 tablespoons |
| Butter or Margarine | 2 tablespoons |
| Quick-Cook Oats | ¾ cup |
| Salt | 1¾ teaspoons |
| Bread Flour | 3¾ cups |
| Oat Bran | 2 tablespoons |
| Dry Milk | 2 tablespoons |
| Active Dry Yeast | 1¾ teaspoons |
Preparation
- Add water, honey, and butter or margarine to the bread basket.
- Add the dry ingredients except yeast.
- Form a well in the flour and add yeast.
- Install the basket.
- Select Oatmeal.
- Select the loaf size and desired crust color.
- Press START/STOP.
Homemade Yogurt — Menu 8
Program: Yogurt
| Ingredient | Quantity |
| Milk | ½ gallon |
| Yogurt Containing Live Active Cultures | ½ cup |
Preparation
- Measure the ingredients.
- Add them to the bread basket.
- Mix thoroughly.
- Install the basket.
- Close the lid.
- Select Yogurt.
- Press START/STOP.
The program operates at 110°F for eight hours.
Basic Dough — Menu 9
Program: Dough
Recipe Size: 2 lb.
| Ingredient | Quantity |
| Oil | 2 teaspoons |
| Salt | 2 teaspoons |
| Dry Milk | 2 teaspoons |
| Sugar | 1 teaspoon |
| Flour | 4½ cups |
| Water | 1¾ cups |
| Active Dry Yeast | 1 teaspoon |
Preparation
- Add liquid ingredients to the basket.
- Add dry ingredients except yeast.
- Place yeast in a well in the flour.
- Install the basket and close the lid.
- Select Dough.
- Press START/STOP.
- Allow the program to finish.
- Remove the dough and shape as required.
Bread Pretzel Dough — Menu 9
Program: Dough
Ingredients should be at room temperature, approximately 70–80°F.
| Ingredient | Quantity |
| Bread Flour | 2 cups |
| Active Dry Yeast | 1½ teaspoons |
| Salt | ¼ teaspoon |
| Sugar | ½ teaspoon |
| Water | ⅞ cup |
| Coarse Kosher Salt | 1–2 tablespoons |
| Egg, Slightly Beaten | 1 |
Preparation
- Add all ingredients except the egg and coarse salt to the bread basket.
- Select Dough.
- Press START/STOP.
- Allow the dough cycle to finish.
- Remove the prepared dough.
- Preheat a conventional oven to 450°F.
- Divide the dough into 12 pieces.
- Roll each piece into an approximately 8-inch rope.
- Shape the ropes into pretzels or leave them straight.
- Place on a greased cookie sheet.
- Brush with beaten egg.
- Sprinkle with coarse salt.
- Bake for 12–15 minutes.
Butter Rolls — Menu 9
Program: Dough
| Ingredient | Quantity |
| Sugar | 2 tablespoons |
| Salt | 1 teaspoon |
| Bread Flour | 2¾ cups |
| Active Dry Yeast | 2 teaspoons |
| Water | ¼ cup |
| Egg | 1 |
| Milk | ¾–⅞ cup |
| Butter | ¼ cup |
Preparation
- Add the ingredients to the bread basket.
- Select Dough.
- Press START/STOP.
- Allow the program to finish.
- Remove the bread basket.
- Shape the dough into rolls.
- Bake in a conventional oven at 350°F for 25–30 minutes.
The recipe makes approximately 12 rolls.
The Delay Timer must not be used.
Pizza Crust Dough — Menu 9
Program: Dough
| Ingredient | 1.5 lb. Recipe | 2 lb. Recipe |
| Salt | ½ teaspoon | ¾ teaspoon |
| All-Purpose Flour | 3 cups | 4 cups |
| Active Dry Yeast | 1½ teaspoons | 2 teaspoons |
| Water | 1 cup | 1⅜ cups |
| Olive or Vegetable Oil | 2 tablespoons | 3 tablespoons |
Preparation
- Add the ingredients to the bread basket.
- Select Dough.
- Press START/STOP.
- Wait until the program finishes and the display reads 0:00.
- Remove the dough.
- For the 1.5 lb. recipe, shape into a 12-inch round pizza pan or a 12 × 15-inch jelly-roll pan.
- For the 2 lb. recipe, shape into a 14-inch round pizza pan.
- Preheat a conventional oven to 400°F.
- Spread pizza sauce over the dough.
- Add the preferred toppings.
- Bake for 15–20 minutes or until the crust becomes golden brown.
The recipe provides the following optional toppings.
| Optional Topping | Quantity |
| Prepared Pizza Sauce | 1 cup (8 oz) |
| Bulk Pork Sausage, Browned and Drained | ½ lb. |
| Chopped Onions | ⅓ cup |
| Sliced Pepperoni | One 3–4 oz package |
| Mushroom Stems and Pieces, Drained | One 4 oz can |
| Chopped Green Peppers | 1 cup |
Vanilla Pound Cake — Menu 11
Program: Cake
| Ingredient | Quantity |
| Large Eggs, Beaten | 3 |
| Milk | ⅓ cup |
| Bread Flour | 2 cups |
| Baking Powder | 3 teaspoons |
| Butter, Melted | ½ cup |
| Sugar | 1 cup |
| Vanilla Extract | 1 teaspoon |
Preparation
- Measure all ingredients.
- Add the wet ingredients to the bread basket first.
- Add the dry ingredients.
- Install the bread basket.
- Close the lid.
- Select Cake.
- Choose the crust color using Color.
- Press START/STOP.
- Allow the program to finish.
Strawberry Jam — Menu 12
Program: Jam
| Ingredient | Quantity |
| Sugar | 1 cup |
| Powdered Low-Sugar Fruit Pectin | 1 tablespoon |
| Fresh Strawberries, Sliced | 1½ cups |
| Lemon Juice | 2 teaspoons |
Preparation
- Add all ingredients to the bread basket.
- Select Jam.
- Press START/STOP.
- Allow the program to finish.
- Remove the basket using hot pads.
- Pour the jam into containers.
- Cover and refrigerate until set.
Yield: Approximately 3 cups.
Orange Marmalade — Menu 12
Program: Jam
| Ingredient | Quantity |
| Sugar | 1¼ cups |
| Powdered Low-Sugar Fruit Pectin | 2 tablespoons |
| Large Oranges | 3 |
| Lemon | 1 |
Preparation
- Use a vegetable peeler to remove the brightly colored outer peel from one orange and the lemon.
- Chop the removed peel finely.
- Remove and discard the remaining white peel.
- Peel the remaining oranges.
- Cut the fruit into approximately ½-inch pieces.
- Add the prepared fruit, chopped peel, sugar, and pectin to the bread basket.
- Select Jam.
- Press START/STOP.
- Allow the program to finish.
- Remove the basket using hot pads.
- Transfer the marmalade into containers.
- Cover and refrigerate until set.
Yield: Approximately 3 cups.
Frozen Berry Jam — Menu 12
Program: Jam
| Ingredient | Quantity |
| Sugar | 1¾ cups |
| Frozen Berries | One 10–12 oz package |
| Liquid Fruit Pectin | One 3 oz pouch |
| Lemon Juice | 1 tablespoon |
Strawberries and raspberries are recommended.
Preparation
- Measure and add all ingredients to the bread basket.
- Select Jam.
- Press START/STOP.
- Allow the program to finish.
- Use hot pads to remove the basket.
- Pour the jam into containers.
- Cover and refrigerate until set.
Yield: Approximately 3 cups.
Shaping Dough for Conventional Baking
Prepared dough from Menu 9 can be shaped in several ways.
Easy Dinner Rolls
- Divide the prepared dough into 12 equal pieces.
- Shape each piece into a ball.
- Place the pieces into greased muffin cups.
- Cover and allow the dough to rise.
- Bake according to the selected recipe.
This method makes 12 rolls.
Swirl Rolls
- Grease a baking sheet.
- Divide the dough into 10 equal pieces.
- Roll each piece into a strand approximately 10 inches long.
- Wrap each strand around itself to form a swirl.
- Place the shaped rolls 2–3 inches apart.
- Cover and allow the dough to rise.
- Bake according to the recipe.
This method makes 10 rolls.
Butterhorns
- Grease a baking sheet.
- Roll the dough into a 12-inch circle on a lightly floured surface.
- Brush the dough with melted butter.
- Divide the circle into 12 wedges.
- Roll each wedge from its wide end toward the point.
- Place the pieces point-side down, approximately 2–3 inches apart.
- Cover and allow the dough to rise.
- Bake according to the recipe.
This method makes 12 butterhorns.
Breadmaking Tips and Ingredient Guidance
Use Fresh Flour and Yeast
Fresh flour and yeast are important for bread texture and rising.
Flour stored for an extended period may absorb moisture or become excessively dry.
Old yeast may not activate properly.
How to Test Yeast Freshness
- Fill a cup with warm water.
- Add 2 teaspoons of sugar and stir.
- Sprinkle a few teaspoons of yeast onto the water.
- Allow the mixture to stand for 15 minutes.
Fresh yeast should form foam and produce a noticeable yeast aroma.
If neither reaction occurs, the yeast should be discarded.
Baking Bread at High Altitudes
At elevations above approximately 3,000 feet, dough may rise more rapidly and flour may become drier.
The manufacturer recommends adjusting recipes gradually.
| Condition | Recommended Adjustment |
| Dough is too dry | Increase water, sometimes by 2–4 tablespoons per cup. |
| Bread rises too high | Reduce yeast by ⅛–¼ teaspoon for each teaspoon used. |
| Bread rises too high | Reduce sugar by 1–2 teaspoons for each tablespoon used. |
Measurement Equivalency Chart
| Fluid Ounces | Cups | Tablespoons | Teaspoons |
| 8 | 1 | 16 | 48 |
| 7 | ⅞ | 14 | 42 |
| 6 | ¾ | 12 | 36 |
| 5 | ⅝ | 10 | 30 |
| 4 | ½ | 8 | 24 |
| 3 | ⅜ | 6 | 18 |
| 2 | ¼ | 4 | 12 |
| 1 | ⅛ | 2 | 6 |
One tablespoon equals three teaspoons.
Half a tablespoon equals 1½ teaspoons.
Cleaning and Maintenance Instructions
The breadmaker must be unplugged and allowed to cool before cleaning.
Only mild, non-abrasive cleaning products should be used.
General Cleaning Instructions
- Press START/STOP to turn off the appliance.
- Unplug the power cord from the electrical outlet.
- Allow the breadmaker to cool completely.
- Remove the bread basket.
- Wipe bread crumbs from the interior using a slightly damp cloth.
- Clean the bread basket and kneading blade separately.
- Dry all components thoroughly before storage or reuse.
The heating element inside the breadmaker must not be bent or damaged.
How to Clean the Bread Basket
- Remove the cooled bread basket from the appliance.
- Wipe the basket using a damp cloth.
- Remove any remaining dough or bread residue.
- Dry the basket completely.
The bread basket must not be placed in a dishwasher.
Dishwasher cleaning can damage its nonstick finish.
How to Clean the Kneading Blade
- Allow the blade to cool.
- Remove it from the bread basket.
- Wipe it with a damp cloth.
- Remove any remaining dough.
- Dry the blade thoroughly.
How to Remove a Stuck Kneading Blade
If the kneading blade becomes difficult to remove:
- Allow the bread basket to cool.
- Place warm water inside the basket.
- Allow the blade to soak for approximately 10–15 minutes.
- Remove the loosened blade.
- Clean and dry the components.
Cleaning Restrictions
The following cleaning methods must be avoided:
- Immersing the breadmaker in water or another liquid.
- Washing the appliance or its removable components in a dishwasher.
- Using benzene or strong chemical cleaners.
- Using abrasive scrubbing brushes.
- Using metal utensils on the nonstick bread basket.
- Bending the internal heating element.
Bread Basket Discoloration
The bread basket may change color after repeated use. This discoloration can result from exposure to steam and moisture.
The manufacturer states that this change does not affect the performance of the breadmaker.
Appliance Maintenance
The breadmaker must be kept clean and dry. The appliance contains no user-serviceable internal parts.
Any servicing beyond the cleaning procedures must be performed by an authorized service representative. Electrical or mechanical components must not be disassembled or repaired by the owner.
Storage Instructions
How to Store the Breadmaker
Before storing the appliance:
- Turn off the breadmaker.
- Disconnect the power cord.
- Allow the machine to cool completely.
- Clean the appliance and removable components.
- Make sure every component is dry.
- Remove the kneading blade and place it inside the bread basket.
- Close the breadmaker lid.
- Store the appliance without placing heavy objects on top.
How to Store Homemade Bread
Homemade bread should be allowed to cool before storage. The manufacturer recommends placing a cooled loaf inside a lightly sealed plastic bag. A stalk of celery may be placed inside the bag to help keep the bread fresh longer.
The manufacturer advises against storing homemade bread in the refrigerator because it may dry out more quickly.
LCD Display Messages and Indicator Lights
The LCD shows operating information, program status, countdown times, and error codes.
Display and Indicator Guide
| Display or Indicator | Meaning |
| MENU 1 TIMER 3:00 | Initial Basic program selection and operating time. |
| Flashing Colon : | Program is operating or the Delay Timer is active. |
| Illuminated Working Light | A selected program has started. |
| Flashing Countdown Time | The current program is paused. |
| 0:00 | Selected program has finished. |
| Flashing 0:00 | Automatic Keep Warm mode is active. |
| 10 Beeps at Completion | The breadmaking cycle has finished. |
| 10 Beeps After Keep Warm | The one-hour warming period has ended. |
| Continuous Beeping with Error Code | Temperature-related or sensor problem. |
Automatic Keep Warm Function
After a standard breadmaking program finishes, the appliance automatically activates Keep Warm mode. The machine sounds 10 beeps and the display begins flashing 0:00. The warming function operates for up to 60 minutes.
After one hour, the appliance sounds another 10 beeps and returns to its initial status.
Press START/STOP to turn off the warming function before removing the bread.
Breadmaker Error Codes
The Oster CKSTBRTW21 displays error messages when the baking chamber temperature is outside the permitted operating range or the temperature sensor develops a fault.
Error Code Chart
| Error Code | Meaning | Recommended Action |
| HHH | Baking chamber temperature is too high. | Allow the appliance to return to room temperature. Contact service if the error remains. |
| LLL | Baking chamber temperature is too low. | Allow the appliance to return to room temperature. Contact service if the error remains. |
| EE0 | Temperature sensor circuit is broken. | Contact an authorized service center. |
| EE1 | Temperature sensor circuit is bypassed. | Contact an authorized service center. |
HHH Error Code
The HHH message indicates that the internal baking chamber is too hot for normal operation.
Recommended Action
- Stop using the breadmaker.
- Allow it to return to room temperature.
- Check whether the appliance can operate again.
- Contact an authorized service center if the error continues.
LLL Error Code
The LLL message indicates that the internal baking chamber temperature is too low.
Recommended Action
- Allow the appliance to reach room temperature.
- Check whether normal operation is possible.
- Contact an authorized service center if the error remains.
EE0 Error Code
The EE0 message indicates a broken temperature sensor circuit.
The appliance requires authorized servicing.
EE1 Error Code
The EE1 message indicates a bypassed temperature sensor circuit. An authorized service center must be contacted for repair.
The appliance must not be disassembled or repaired by the owner.
Power Failure and Memory Function
The CKSTBRTW21 includes a memory function that responds to short electrical power interruptions.
Power Interruption Under 10 Minutes
If the electrical power supply is interrupted for less than 10 minutes, the breadmaker automatically resumes the interrupted program when power is restored. The owner does not need to press START/STOP again.
Power Interruption Over 10 Minutes
If the power interruption lasts longer than 10 minutes, the stored program information cannot be maintained automatically.
The manufacturer provides the following recovery instructions:
- Press and hold START/STOP for at least three seconds.
- Check whether the display returns to the previous time setting.
- If the display does not return, unplug the breadmaker.
- Reconnect the appliance to electrical power.
- Press and hold START/STOP again for approximately three seconds.
- Follow the reset procedure as described until the previous cycle-time display is restored.
If normal operation cannot be restored, contact customer support.
Troubleshooting Guide
The following troubleshooting information covers common operating problems and baking results.
Breadmaker Operating Problems
| Problem | Possible Cause | Recommended Solution |
| LCD does not illuminate | Appliance may not be connected to electrical power. | Confirm that the breadmaker is plugged in. |
| Display flashes 0:00 | Keep Warm mode is operating. | Press START/STOP to turn off Keep Warm mode. |
| HHH appears with continuous beeping | Baking chamber is too hot. | Allow the appliance to cool to room temperature. Contact service if the problem continues. |
| LLL appears with continuous beeping | Baking chamber is too cold. | Allow the appliance to reach room temperature. Contact service if necessary. |
| EE0 appears | Temperature sensor circuit is broken. | Contact an authorized service center. |
| EE1 appears | Temperature sensor circuit is bypassed. | Contact an authorized service center. |
| Smoke or burning odor comes from the rear | Ingredients may have spilled outside the bread basket. | Stop the machine, allow it to cool, and clean it before reuse. |
| Dough does not mix | Bread basket or kneading blade may be improperly installed. | Check the installation of both components. |
| Program does not resume after a power failure | Power interruption may have exceeded 10 minutes. | Follow the power failure recovery instructions. |
Bread Sides Collapse and Bottom Is Damp
Possible causes include leaving the finished bread in the basket too long or using incorrect ingredient quantities.
Recommended adjustments include:
- Remove the bread from the basket sooner.
- Increase flour by approximately one teaspoon at a time.
- Reduce yeast by approximately ¼ teaspoon at a time.
- Reduce liquid by approximately one teaspoon at a time.
- Confirm that salt was included in the recipe.
Bread Has a Heavy or Thick Texture
A dense loaf may result from excessive flour, insufficient yeast, or unsuitable ingredients.
Recommended Action
- Reduce flour by approximately one teaspoon at a time.
- Increase yeast by approximately ¼ teaspoon at a time.
- Check that the correct flour type is being used.
- Use fresh flour and yeast.
Bread Is Not Fully Baked in the Center
The manufacturer recommends:
- Increasing flour by approximately one teaspoon at a time.
- Reducing water or another liquid by approximately one teaspoon at a time.
- Keeping the lid closed during baking.
Bread Has a Coarse or Holey Texture
A coarse or holey texture may result from forgetting to add salt. The salt quantity must be checked before beginning another recipe.
Bread Rises Too Much
Possible causes include excessive yeast, missing salt, or improper installation of the kneading blade.
Recommended actions include:
- Reduce yeast by approximately ¼ teaspoon at a time.
- Confirm that the required amount of salt was added.
- Make sure the kneading blade was installed before starting.
Bread Does Not Rise Enough
Possible causes include:
- Excessive flour
- Insufficient yeast
- Old flour
- Incorrect flour type
- Old yeast
- Incorrect ingredient quantities
Recommended adjustments include reducing flour by approximately one teaspoon at a time or increasing yeast by approximately ¼ teaspoon at a time. The freshness and measurements of all ingredients must be checked.
Bread Has a Flour-Covered Top
A flour-covered top is usually caused by excessive flour or insufficient water. The manufacturer recommends reducing flour in small amounts and checking the recipe’s ingredient measurements.
Bread Is Too Brown
Excessive browning may result from adding too much sugar.
Recommended actions include:
- Reduce sugar gradually.
- Select a lighter crust color if the selected program supports it.
Bread Is Not Brown Enough
Insufficient browning may occur when the lid is opened repeatedly during baking. The lid must remain closed while the breadmaker is operating.
Warranty Information
The Oster CKSTBRTW21 is covered by a 1-year limited warranty provided by Sunbeam Products, Inc., or Newell Brands Canada ULC in Canada.
Warranty Coverage
The manufacturer warrants that the product will be free from defects in materials and workmanship for one year from the original purchase date.
During the warranty period, the manufacturer may:
- Repair a defective product or component.
- Replace it with a new or remanufactured product or component.
- Provide a similar product of equal or greater value if the original product is unavailable.
The manufacturer determines whether repair or replacement is appropriate.
Warranty Eligibility
The warranty applies to the original retail purchaser. It begins on the original purchase date and is not transferable.
The original sales receipt must be retained because proof of purchase is required for warranty service.
Warranty Exclusions
The warranty does not cover normal wear or damage caused by:
- Negligent use
- Product misuse
- Incorrect electrical voltage or current
- Operation contrary to the instructions
- Unauthorized disassembly
- Unauthorized repair or modification
- Fire, floods, hurricanes, tornadoes, or other natural events
Attempting to repair or adjust the electrical or mechanical components may void the warranty.
Warranty Limitations
The warranty includes limitations on implied warranties and liability for certain incidental or consequential damages. These limitations may vary according to the applicable state, province, or jurisdiction.
How to Obtain Warranty Service
Customers in the United States should contact Sunbeam Consumer Service at 1-800-334-0759. A convenient authorized service center address will be provided.
The product must not be returned to the corporate address or place of purchase for warranty service.
Customer Support Information
For operating questions, product assistance, troubleshooting, and warranty service, contact Oster customer support.
| Contact Information | Details |
| Brand | Oster |
| Customer Service | Sunbeam Consumer Service |
| United States Phone | 1-800-334-0759 |
| Official Website | www.oster.com |
| Manufacturer | Sunbeam Products, Inc. |
| United States Address | Boca Raton, Florida 33431 |
Technical Service and Repairs
If the breadmaker develops an electrical or mechanical fault, an authorized service representative must examine the appliance. Internal parts must not be repaired or adjusted by the owner.
For assistance, contact Sunbeam Consumer Service using the contact details above.
Frequently Asked Questions
1. How do I use the Oster CKSTBRTW21 Breadmaker?
The kneading blade must first be installed inside the bread basket. Recipe ingredients are then added with liquids first, dry ingredients second, and yeast last.
The basket must be installed and locked clockwise before closing the lid. Select the required program, loaf size, and crust color, then press START/STOP. The breadmaker automatically mixes, kneads, raises, and bakes the bread according to the selected program.
2. How many programs does the Oster CKSTBRTW21 have?
The breadmaker has 12 programs: Basic, Whole Grain, ExpressBake, Gluten Free, French, Sweet, Oatmeal, Yogurt, Dough, Bake, Cake, and Jam. These programs are designed for preparing different bread varieties, homemade yogurt, dough, cakes, and jams.
3. How long does the Oster ExpressBake program take?
The ExpressBake program takes approximately 59 minutes. It includes 12 minutes of kneading, 14 minutes of rising, and 33 minutes of baking. The program requires fast-rising yeast and water heated to 115–125°F. The Delay Timer and crust color controls cannot be used with ExpressBake.
4. How do I use the automatic fruit and nut dispenser?
Before starting a supported baking program, place the required fruit or nuts into the dispenser inside the ingredient compartment. Install the dispenser and close the compartment. During the baking cycle, the dispenser automatically releases the ingredients at the programmed time.
5. Can the Oster CKSTBRTW21 make gluten-free bread?
Yes. Menu 4 is the Gluten Free program, which takes approximately 2 hours and 55 minutes. All ingredients must be labeled gluten-free. The breadmaker must also be thoroughly cleaned before and after gluten-free preparation to prevent cross-contamination.
Products labeled wheat-free are not necessarily gluten-free.
6. Can the Oster CKSTBRTW21 make homemade yogurt?
Yes. Menu 8 is the Yogurt program. The recipe uses ½ gallon of milk and ½ cup of yogurt containing live active cultures. The ingredients are mixed in the bread basket before the program begins. The breadmaker maintains approximately 110°F for eight hours during fermentation.
7. What do HHH, LLL, EE0, and EE1 mean on the Oster Breadmaker?
HHH indicates that the baking chamber is too hot, while LLL indicates that it is too cold. The appliance should be allowed to return to room temperature. EE0 indicates a broken temperature sensor circuit, and EE1 indicates a bypassed temperature sensor circuit. Sensor errors require authorized servicing.
8. How do I clean the Oster CKSTBRTW21 Breadmaker?
The appliance must be unplugged and allowed to cool completely before cleaning. Bread crumbs can be wiped away using a slightly damp cloth. The bread basket and kneading blade must be wiped clean and dried thoroughly.
If the kneading blade becomes stuck, warm water can be placed in the basket for 10–15 minutes to loosen it. The breadmaker and its removable components must not be washed in a dishwasher or immersed in water.