| Field | Details |
| Document Title | Oster 4 L Cool Zone Deep Fryer / Freidora de 4 L Zona Fría |
| Document Type | User Manual / Manual de Instrucciones |
| Brand Name | Oster |
| Product Name | 4 L Cool Zone Deep Fryer |
| Model Number | CKSTDFZM70 |
| PDF File Size | 377 KiB |
| Number of Pages | 12 |
| Languages | English and Spanish |
Oster 4 L Cool Zone Deep Fryer CKSTDFZM70
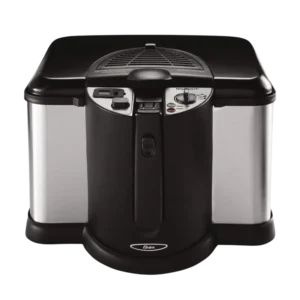
The Oster 4 L Cool Zone Deep Fryer CKSTDFZM70 is a household electric deep fryer designed for preparing foods in hot cooking oil. It features a Cool Zone heating element, an adjustable thermostat, a digital cooking timer, a removable oil reservoir, and a frying basket with a folding handle.
The fryer includes a detachable Sure Release magnetic power cord, a removable lid with grease and odor filters, and a condensation trap that collects moisture from the lid. Red and green indicator lights show the fryer’s operating and preheating status.
The appliance operates from a 120-volt AC electrical outlet. Its adjustable temperature control allows different foods to be prepared at their recommended frying temperatures, including chicken, fish, french fries, onion rings, shrimp, fritters, and doughnuts.
Proper installation, oil filling, temperature selection, cleaning, and maintenance are necessary for safe operation. The following instructions explain how to assemble, operate, clean, maintain, and troubleshoot the Oster CKSTDFZM70 deep fryer.
Technical Specifications
| Specification | Details |
| Brand | Oster |
| Model Number | CKSTDFZM70 |
| Product Type | Electric Deep Fryer |
| Labeled Capacity | 4 Liters |
| Electrical Supply | 120V AC |
| Heating System | Cool Zone Heating Element |
| Temperature Control | Adjustable Thermostat |
| Cooking Timer | Digital Timer |
| Timer Range | Up to 60 Minutes |
| Timer Adjustment | 1-Minute Increments |
| Timer Battery | LR44 |
| Preheating Time | Approximately 7–10 Minutes |
| Power Indicator | Red |
| Ready Indicator | Green |
| Frying Basket | Removable Basket with Folding Handle |
| Oil Reservoir | Removable, Dishwasher Safe |
| Lid | Removable Lid with Filter Cover |
| Filters | White Grease Filter and Charcoal Odor Filter |
| Condensation Trap | Removable |
| Power Cord | Sure Release Magnetic Cord |
| Replacement Power Cord Model | MC-316 |
| Electrical Plug | Polarized Plug |
| Intended Use | Household Use Only |
| Warranty | 1-Year Limited Warranty |
The cooking oil must be filled between the MIN and MAX markings inside the removable reservoir. These markings determine the correct oil level.
Important Safety Instructions
The Oster CKSTDFZM70 deep fryer uses electrical power and hot cooking oil. All safety precautions must be followed to reduce the risk of fire, electric shock, burns, and personal injury.
General Safety Precautions
- All operating and safety instructions must be read before using the appliance.
- Hot surfaces must not be touched during operation. The handles and control knobs must be used instead.
- The control panel assembly, electrical cord, and plugs must never be immersed in water or other liquids.
- Children must not operate the appliance. Close supervision is required whenever the fryer is used near children.
- The fryer must be unplugged when not in use, before cleaning, and before parts are attached or removed.
- The appliance must cool before cleaning or handling its removable components.
- A fryer with a damaged cord or plug must not be operated.
- If the appliance malfunctions, falls, or becomes damaged, Customer Service must be contacted for inspection or repair.
- Accessories not recommended by Oster must not be used.
- The fryer must not be operated outdoors.
- The power cord must not hang over a countertop or table edge or come into contact with hot surfaces.
- The fryer must not be placed on or near a heated gas burner, electric burner, or inside a heated oven.
- The appliance must be used only for its intended household purpose.
Hot Oil Safety
Hot cooking oil can cause serious burns if the fryer is handled incorrectly.
The following precautions apply:
- Never turn on the fryer when the oil reservoir is empty.
- Always place the fryer on a flat, heat-resistant surface.
- Fill the reservoir only between the MIN and MAX oil-level markings.
- Do not place excessively wet or ice-covered foods into hot cooking oil.
- Avoid overloading the frying basket.
- The food must not extend above the top of the frying basket.
- Keep the lid closed when lowering food into the oil or raising food to drain.
- Use oven mitts or heat-resistant pads when moving a fryer containing hot oil.
- Allow the appliance to cool completely before removing the oil reservoir.
Warning: The lid must always be attached and closed before food is lowered into hot oil. Food must not be immersed or drained with the lid removed or open.
Electrical Safety
The fryer must be connected to a suitable 120V AC electrical outlet.
The manufacturer specifies the following electrical precautions:
- The detachable magnetic cord must be attached to the appliance before the plug is inserted into the wall outlet.
- The fryer must be turned OFF before the power cord is disconnected.
- The wall plug must always be disconnected before the magnetic cord is removed.
- An extension cord must not be used.
- The electrical cord must remain clear of hot surfaces.
- The magnetic cord must not be modified or permanently attached to the fryer.
The appliance has no internal parts intended for user servicing. Electrical or mechanical repairs must not be attempted.
Polarized Plug Instructions
The fryer uses a polarized electrical plug with one blade wider than the other.
The plug is designed to fit a polarized outlet in only one direction.
If the plug does not fit:
- Remove it from the outlet.
- Reverse its orientation.
- Attempt to insert it again.
- If it still does not fit, contact a qualified electrician.
The plug must not be modified.
An electrical outlet must not be used if the plug fits loosely or the outlet becomes warm.
Basket Handle Safety
The frying basket handle must be checked periodically for looseness.
If the handle becomes loose, its screws may be tightened using a Phillips screwdriver.
Caution: The screws must not be overtightened because excessive tightening can strip the screws or crack the handle.
Parts and Components
The Oster 4 L Cool Zone Deep Fryer has removable components that support food preparation, cooking, cleaning, and maintenance.
Main Fryer Components
| Component | Description and Function |
| Frying Basket | Holds food during frying and allows excess oil to drain after cooking. |
| Folding Handle | Raises, lowers, and supports the frying basket. |
| Handle Release Button | Releases the basket handle to lower the basket into the oil. |
| Lid | Covers the fryer during cooking and can be removed for cleaning. |
| Lid Release Button | Opens the fryer lid. |
| Removable Filter Cover | Covers and holds the grease and odor filters inside the lid. |
| White Grease Filter | Filter component designed to collect grease. |
| Charcoal Odor Filter | Filter component designed to help control cooking odors. |
| Removable Oil Reservoir | Holds the cooking oil and can be removed for cleaning. |
| Oil Pour Spout | Built-in feature of the reservoir used to pour out cooking oil. |
| Condensation Trap | Collects water condensed inside the lid when the lid is opened. |
| Cool Zone Heating Element | Heating component located within the oil reservoir during operation. |
| Control Panel Assembly | Houses the fryer’s operating controls and heating element assembly. |
| Fryer Housing | Main body supporting the reservoir and control panel. |
| Sure Release Power Cord | Detachable magnetic cord supplying electrical power to the fryer. |
The condensation trap is positioned at the back of the fryer.
Control Panel and Indicator Lights
The control panel includes temperature adjustment, timer controls, and operating indicators.
| Control or Indicator | Function |
| Adjustable Thermostat | Selects the desired frying temperature. |
| Digital Timer | Provides a countdown for a selected cooking period. |
| Timer Button | Sets the electronic countdown and resets it when held for 2 seconds during countdown. |
| Power Indicator (Red) | Illuminates when the fryer is switched on. |
| Ready Indicator (Green) | Illuminates when the cooking oil has reached the selected temperature. |
| STAY ON Setting | Keeps the fryer operating until it is manually switched off. |
The digital timer operates from its own battery and does not automatically turn off the fryer when the countdown ends.
Control Panel and Heating Element Installation
The Cool Zone heating element cannot operate unless the control panel assembly is correctly inserted into its mounting position.
The control panel must fit into the locating slots of the connecting plate on the exterior of the fryer.
If it is not installed correctly, the fryer will not operate.
Attaching the Removable Lid
The lid attaches to the fryer through a rear hinge.
The hinge is designed to fit securely while allowing the lid to open and close properly.
To attach the lid:
- Locate the hinge connection on the rear of the fryer.
- Position the rib-shaped hinge on the lid over the slot-shaped hinge on the fryer base.
- Insert the lid hinge into the corresponding slot.
- Check that the lid opens and closes correctly.
Before First Use
Before operating the Oster CKSTDFZM70 deep fryer for the first time, all packaging must be removed and the washable components must be cleaned.
Initial Preparation
- Remove all packaging materials from the exterior of the appliance.
- Open the lid and remove any packaging inside the fryer.
- Make sure the appliance is disconnected from the electrical outlet.
- Remove the frying basket, lid, oil reservoir, and condensation trap.
- Clean these removable components.
- Gently wipe the Cool Zone heating element with a damp cloth.
- Dry all components thoroughly before assembly.
The frying basket, lid, oil reservoir, and condensation trap are dishwasher safe.
Important: The electrical cord, power strip, and control panel assembly must never be immersed in water or any other liquid.
Preparing the Fryer for Operation
Before the fryer is connected to electrical power:
- The oil reservoir must be correctly positioned inside the housing.
- The control panel assembly must be properly installed.
- The heating element must be positioned correctly.
- The lid must be fitted securely.
- The basket handle must operate correctly.
- The reservoir must contain cooking oil between the MIN and MAX marks.
Setup and Installation Instructions
The following procedure prepares the Oster Cool Zone Deep Fryer for cooking.
Step 1: Position the Fryer
Place the fryer on a flat, heat-resistant surface.
The appliance must remain away from hot burners, heated ovens, and surfaces that could damage the power cord.
Step 2: Attach the Magnetic Power Cord
- Make sure the fryer is switched OFF.
- Locate the magnetic power connection.
- Position the Sure Release magnetic connector against the fryer.
- Check that the side labeled THIS SIDE UP faces upward.
- Attach the magnetic connector directly to the appliance.
The connector is designed to attach in only one orientation.
The wall plug must remain disconnected during this step.
Step 3: Open the Lid
Press the Open Lid Button to release the lid.
The lid can then be opened to access the frying basket and oil reservoir.
Step 4: Remove the Frying Basket
Lift the frying basket handle upward until it locks into its horizontal position.
Remove the basket from the fryer.
Step 5: Fill the Oil Reservoir
Pour cooking oil into the removable oil reservoir.
The oil level must remain between the MIN and MAX markings inside the reservoir.
Caution: The reservoir must not be overfilled or underfilled. The fryer must never be switched on without oil.
Step 6: Replace and Lower the Basket
- Place the frying basket back inside the fryer.
- Close the lid.
- Press the Handle Release Button.
- Lower the basket into the cooking oil.
Step 7: Connect Electrical Power
Make sure the fryer remains OFF.
Insert the electrical plug into a 120V AC outlet.
Step 8: Select the Cooking Temperature
Turn the adjustable thermostat to the desired frying temperature.
The temperature should be selected according to the type of food being prepared.
Step 9: Set the Fryer to STAY ON
Turn the timer knob to the STAY ON position.
The red power indicator will illuminate.
The fryer will begin heating the cooking oil.
Step 10: Wait for the Ready Indicator
Allow the fryer to preheat.
The recommended preheating time is approximately 7–10 minutes.
The green Ready Indicator illuminates when the oil reaches the selected temperature.
During frying, the Ready Indicator may cycle on and off as the temperature changes because of the amount of food in the oil.
How to Use the Oster 4 L Cool Zone Deep Fryer
Once the cooking oil has reached the selected temperature, the fryer is ready for food.
Step 1: Raise the Frying Basket
- Press the Open Lid Button.
- Lift the frying basket handle upward.
- Continue lifting until the handle clicks into its horizontal position.
The basket will be positioned above the cooking oil.
Step 2: Add Food to the Basket
Place the prepared food inside the frying basket.
The food must not be stacked excessively or extend above the top of the basket.
Overloading the basket can lower the temperature of the oil, causing uneven cooking and greasy food.
Step 3: Close the Lid and Lower the Basket
- Close the fryer lid.
- Press and slide the Handle Release Button downward.
- Lower the frying basket into the hot oil.
Warning: The lid must be closed before lowering the food into the oil. Food must not be immersed or drained while the lid is open or removed.
Step 4: Set the Digital Cooking Timer
Use the electronic timer to select the required cooking period.
The timer supports 1-minute adjustments up to 60 minutes.
After the desired time is selected, the timer begins its countdown automatically.
Step 5: Monitor the Frying Process
Allow the food to cook for the recommended period.
For even cooking, the manufacturer recommends shaking the frying basket halfway through the cooking time.
Correct temperature selection and properly sized food batches help the food cook evenly.
Step 6: Raise and Drain the Basket
When the selected cooking time is complete:
- Raise the frying basket out of the oil.
- Allow the food to drain in the basket for at least 10–20 seconds.
- Open the lid after the food has been raised and drained.
- Remove the basket using its handle.
- Transfer the cooked food onto a plate lined with paper towels.
Draining removes excess cooking oil and helps maintain the food’s crisp texture.
Step 7: Turn Off the Fryer
When cooking is finished:
- Turn the fryer to OFF.
- Disconnect the electrical plug from the wall outlet.
- Allow the appliance and oil to cool.
- Disconnect the magnetic power cord after the wall plug has been removed.
Important: The digital cooking timer does not switch off the fryer. The appliance must always be turned OFF manually.
Digital Timer Instructions
The Oster CKSTDFZM70 includes a battery-powered digital timer for monitoring cooking time.
The timer can be set for up to 60 minutes in 1-minute increments.
How to Set the Digital Timer
- Press the timer button until the desired cooking time is displayed.
- Wait approximately 2 seconds.
- The display will flash twice.
- The displayed time will become steady.
- The countdown will begin automatically.
When one minute remains, the timer changes to displaying the remaining seconds.
Timer Beeps and Countdown Completion
The digital timer uses audible signals to indicate the end of a cooking period.
| Timer Event | Indicator or Action |
| Cooking time selected | Timer displays the selected duration. |
| After approximately 2 seconds | Display flashes twice. |
| Countdown begins | Display becomes steady and counts down. |
| One minute remaining | Remaining time appears in seconds. |
| Countdown completed | Timer sounds 10 beeps. |
| Approximately 20 seconds later | Timer sounds another 10 beeps. |
| After completion | Timer enters an energy-saving state. |
The timer does not automatically disconnect electrical power or stop the heating element.
How to Reset the Digital Timer
To reset the timer while it is counting down:
- Press and hold the timer button.
- Continue holding for approximately 2 seconds.
- Release the button after resetting the countdown.
Replacing the Digital Timer Battery
The electronic timer uses a replaceable LR44 battery.
Battery replacement may be necessary when the timer’s battery becomes depleted.
- Locate the slot next to the digital timer display.
- Insert a small screwdriver into the slot.
- Carefully lift the entire timer assembly out of the housing.
- Remove the existing battery.
- Install a replacement LR44 battery.
- Align the timer assembly with its opening.
- Press the timer back into the housing until it snaps into place.
Frying Time and Temperature Chart
The Oster CKSTDFZM70 manual includes a cooking chart with recommended temperatures and frying times.
The recommended preheating time is 7–10 minutes. Cooking times may vary according to the amount and thickness of the food.
| Food | Temperature Setting | Frying Time |
| Chicken Strips | 375°F | 5–8 minutes |
| Chicken Pieces, Bone-In | 360°F | 15–20 minutes |
| Battered Fish | 340°F | 8–10 minutes |
| Frozen French Fries | 375°F | 3–5 minutes |
| Fritters | 375°F | 2–4 minutes |
| Onion Rings | 375°F | 3–5 minutes |
| Breaded Shrimp | 375°F | 2–4 minutes |
Prepackaged frozen cooked chicken may require less cooking time than uncooked chicken.
Tips for Better Deep Frying Results
Correct food preparation, oil selection, and frying temperature help produce properly cooked food.
Avoid Overloading the Basket
Food must be surrounded by cooking oil to fry correctly.
Too much food causes the oil temperature to drop, resulting in food that may become soggy or greasy.
The food level must remain below the top edge of the basket.
Remove Water and Ice from Food
Food must be thoroughly dried before frying.
Ice crystals should be removed from frozen food before it is lowered into the oil.
Excess water and ice can cause hot oil to splatter or overflow.
The manufacturer recommends allowing frozen foods to defrost for approximately 20 minutes before frying for improved crispness.
Use Battered or Breaded Foods
Foods coated with breadcrumbs or batter are suitable for deep frying.
The coating forms a protective layer that helps retain moisture inside the food while allowing the outside to become crisp.
Shake the Basket During Cooking
For more even cooking, the frying basket should be shaken halfway through the cooking time.
The lid must remain closed when food is immersed in or draining above hot oil.
Select the Correct Temperature
Using the recommended frying temperature helps produce evenly cooked food with consistent browning.
Oil temperatures that are too low can contribute to greasy food, while incorrect temperature selection can affect the cooking result.
Recommended Cooking Oils
The manufacturer recommends cooking oils with higher smoke points.
Suitable oils identified in the manual include:
- Blended vegetable oil
- Pure corn oil
- Sunflower oil
- Soybean oil
- Grape seed oil
- Canola oil
The manual advises against using seasoned or flavored oils with lower smoke points, including walnut oil, olive oil, lard, and drippings.
Peanut oil is also discouraged because it can significantly affect the flavor of fried food.
Do Not Mix Cooking Oils
Different cooking oils must not be mixed during deep frying.
High temperatures, water, and burned food particles can lower the oil’s smoke point and reduce its frying effectiveness.
Cooking Oil Maintenance and Storage
Cooking oil deteriorates with repeated heating, moisture exposure, and food residue.
Oil condition must be checked before reuse.
When to Replace Cooking Oil
The oil should be replaced if any of the following conditions appear:
| Oil Condition | Recommended Action |
| Excessive smoke at normal frying temperatures | Replace the oil. |
| Strong discoloration | Discard the oil. |
| Rancid or unpleasant smell | Replace the oil. |
| Excessive foaming around food | Discard the oil. |
| Smoke appearing before the oil reaches 375°F | Replace the oil because its frying performance has deteriorated. |
Cooking oil may become darker and thicker after repeated use.
The manufacturer explains that oil changes occur because oil and food molecules are exposed to prolonged high temperatures.
Oil Use After Frying Chicken or Fish
The manufacturer recommends using oil only once when cooking foods with strong flavors or aromas, such as fish and chicken.
Repeatedly using such oil can affect later frying results.
Filtering Used Oil
Cooking oil may be filtered using a cooking oil filter or a fine-mesh strainer.
Filtering removes food particles and can help the oil remain suitable for further use.
Oil that already shows signs of deterioration must be discarded rather than reused.
How to Store Cooking Oil
- Allow the cooking oil to cool.
- Filter it when appropriate.
- Transfer it into an airtight container.
- Keep the covered oil in a cool, dark location.
- Store it for no longer than the recommended period of up to three months.
- Check the oil’s color, smell, and tendency to foam before using it again.
The manufacturer instructs against refrigerating cooking oil.
Chilling the oil and then returning it to room temperature can result in excessive splattering during the next heating cycle.
Cleaning and Maintenance Instructions
The Oster CKSTDFZM70 deep fryer has removable components that can be cleaned separately.
The appliance must be switched off, unplugged, and allowed to cool completely before cleaning.
How to Clean the Oster Cool Zone Deep Fryer
- Turn the fryer control to OFF.
- Remove the electrical plug from the wall outlet.
- Allow the fryer and cooking oil to cool completely.
- Disconnect the Sure Release magnetic power cord from the appliance.
- Remove the fryer lid.
- Open the filter cover and remove the grease and charcoal filters.
- Remove the frying basket.
- Lift the control panel assembly upward from the front of the fryer.
- Carefully lift the removable oil reservoir straight upward out of the housing, holding it by the rim.
- Use the built-in oil pour spout to transfer the cooled cooking oil into an appropriate storage container if it will be reused.
- Remove the condensation trap from the back of the fryer.
- Clean the removable components.
- Dry all parts thoroughly before reassembly.
Warning: The oil reservoir must not be removed until the fryer is unplugged and has cooled completely.
Dishwasher-Safe Components
The following components are dishwasher safe:
| Component | Dishwasher Safe |
| Frying Basket | Yes |
| Removable Lid | Yes |
| Removable Oil Reservoir | Yes |
| Condensation Trap | Yes |
All washed components must be dried thoroughly before being returned to the appliance.
The lid and oil reservoir must be completely dry before the fryer is used again.
Cleaning the Control Panel Assembly
The control panel assembly and power strip must never be submerged in water or another liquid.
To clean the control panel:
- Make sure the appliance is unplugged.
- Remove the control panel assembly as described in the cleaning procedure.
- Gently wipe its exterior using a damp cloth with mild soapy water or plain water.
- Dry the exterior thoroughly.
The Cool Zone heating element may also be gently wiped with a damp cloth during cleaning.
Cleaning the Condensation Trap
The condensation trap is positioned at the rear of the fryer.
It collects water that condenses inside the lid and drains when the lid is opened after frying.
The condensation trap must be emptied and cleaned after each use.
- Allow the fryer to cool completely.
- Remove the condensation trap from the back of the unit.
- Empty the collected water.
- Clean the trap.
- Dry it thoroughly.
- Return it to its original position.
Magnetic Power Cord Cleaning Precautions
The magnetic electrical connection must be handled carefully.
The manufacturer prohibits the following:
- Immersing the electrical cord in water or any other liquid.
- Permanently attaching the detachable magnetic cord to the fryer.
- Inserting pins or sharp objects into the magnetic cord openings.
- Cleaning the magnetic electrical contacts with steel wool.
Reassembling the Fryer After Cleaning
Once all components have been cleaned and thoroughly dried:
- Insert the removable oil reservoir into the fryer housing.
- Position the control panel assembly at the front of the appliance.
- Slide the control panel assembly into its locating slots until properly fitted.
- Return the frying basket to the oil reservoir.
- Reinstall the grease and charcoal filters in the lid.
- Replace the removable filter cover.
- Reattach the fryer lid.
- Close the lid.
The control panel assembly must be installed correctly. If it is not seated properly, the fryer will not operate.
Replacing and Cleaning the Fryer Filters
The fryer lid contains two separate filters:
- White Grease Filter
- Black Charcoal Odor Filter
The manufacturer gives a filter maintenance interval of every three months or after 12 uses.
Cleaning the White Grease Filter
The white foam grease filter can be washed using hot, soapy water.
- Open the filter cover on the fryer lid.
- Remove the grease and charcoal filters.
- Wash the white grease filter in hot, soapy water.
- Allow the grease filter to air-dry completely.
- Clean the inside of the filter cover using a damp, soapy sponge.
- Rinse and dry the cover thoroughly.
The grease filter must be dry before reinstallation.
Replacing the Charcoal Odor Filter
The charcoal odor filter is not washable.
It should be replaced every three months or after 12 uses, according to the manufacturer’s maintenance instructions.
To replace the filter:
- Open the filter cover.
- Remove the existing filters.
- Remove the used charcoal odor filter.
- Position the clean white grease filter in the lid first.
- Place the black charcoal odor filter over the white grease filter.
- Reattach the filter cover.
Replacement Filter Information
Replacement charcoal odor filters and grease filters are identified as available through Oster customer support.
The original manual directs owners to:
- Website: www.oster.com
- United States: 1-800-334-0759
Resetting the Overheat Protection Button
The Oster CKSTDFZM70 includes an overheat protection reset button.
A reset may be required when the fryer does not begin heating even though the power indicator is illuminated and a temperature has been selected, or when the appliance appears to stop working during operation.
How to Reset the Oster CKSTDFZM70 Deep Fryer
- Disconnect the electrical plug from the wall outlet.
- Allow the fryer to cool.
- Check the oil level inside the reservoir.
- If the oil is below the MIN marking, add cooking oil before resetting the appliance and resuming cooking.
- Remove the control box assembly together with the heating element.
- Locate the recessed reset button on the rear of the control box, toward the lower-right side.
- Using a narrow slotted screwdriver or a pen, gently press the reset button.
- Reinstall the control box and heating element onto the main fryer housing.
- Reconnect the appliance to the electrical outlet for continued operation.
The reset button is positioned on the back of the removable control box assembly, as illustrated in Figure 3 of the manufacturer’s instructions.
If the fryer continues to malfunction, the appliance must not be disassembled for unauthorized electrical or mechanical repairs.
Troubleshooting Guide
The following troubleshooting procedures cover the operating problems identified in the Oster CKSTDFZM70 manual.
Fryer Not Operating
| Possible Cause | Recommended Solution |
| Control panel assembly is not seated correctly. | Reinstall the control panel assembly. |
| Power strip is not correctly installed. | Reinstall the power strip. |
| Fryer has not been switched on. | Turn the fryer on using its operating controls. |
| Electrical plug is disconnected. | Insert the power plug into the electrical outlet. |
| Electrical outlet has no power. | Check the fuses or circuit breaker. |
| Overheat protection requires resetting. | Follow the overheat protection reset procedure. |
The control panel assembly must fit properly into the locating slots on the fryer housing.
Cooking Oil Spills Over
| Possible Cause | Recommended Solution |
| Oil reservoir contains too much oil. | Allow the fryer to cool and remove excess oil. |
| Food contains excessive water or moisture. | Dry the food thoroughly with a towel before frying. |
The oil level must remain between the MIN and MAX markings.
Frozen food must be checked for excess ice crystals before frying.
Food Is Greasy or Not Crisp
| Possible Cause | Recommended Solution |
| Food portions are too large. | Reduce the amount of food placed in the basket. |
| Cooking oil temperature is too low. | Increase the temperature to the appropriate frying setting. |
| Unsuitable cooking oil is being used. | Use a suitable vegetable oil recommended in the frying instructions. |
Overloading the basket can cause the oil temperature to drop, resulting in food that absorbs too much oil.
Unpleasant Smell During Frying
| Possible Cause | Recommended Solution |
| Cooking oil is no longer fresh. | Replace the cooking oil. |
Oil should also be replaced if it produces excessive smoke, shows strong discoloration, or develops excessive foam.
Replacement Parts and Accessories
The Oster CKSTDFZM70 uses several removable or replaceable components for maintenance and operation.
| Part or Accessory | Replacement Information |
| Sure Release Magnetic Power Cord | Model MC-316 |
| Charcoal Odor Filter | Replace every three months or after 12 uses. |
| White Grease Filter | Washable filter; follow the manufacturer’s filter maintenance interval. |
| Digital Timer Battery | LR44 battery |
Magnetic Power Cord Replacement
Only the manufacturer’s specified MC-316 magnetic power cord set must be used with this fryer.
Using a different magnetic cord may cause electrical shock, fire, or personal injury.
The Sure Release connection is designed for accidental separation and must not be used as the normal method of disconnecting the fryer.
What to Do if the Magnetic Cord Disconnects
If the magnetic cord becomes disconnected during operation:
- Immediately unplug the power cord from the wall outlet.
- Reattach the magnetic connector to the fryer, with the marked side facing upward.
- Reconnect the power cord to the wall outlet when the connection has been correctly restored.
The magnetic cord must not be permanently attached or modified.
Recipes for the Oster 4 L Cool Zone Deep Fryer
The manufacturer includes several recipes designed for preparation with the fryer.
Apple Fritters
Frying Temperature: 375°F
Ingredients
| Ingredient | Quantity |
| All-purpose flour | 3 cups |
| Baking powder | 2 teaspoons |
| Salt | ½ teaspoon |
| Sugar | 1 cup |
| Large egg, lightly beaten | 1 |
| Cooking oil | 4 tablespoons |
| Pure vanilla extract | 1 teaspoon |
| Orange juice | ⅓ cup, from 1 orange |
| Chopped apple | 1 cup |
Preparation Instructions
- Preheat the fryer oil to 375°F.
- Combine the flour, baking powder, salt, and sugar in a bowl.
- In a separate bowl, mix the beaten egg, cooking oil, and vanilla extract.
- Add the liquid ingredients to the dry ingredients.
- Stir until the mixture is evenly combined.
- Add the orange juice and chopped apple.
- Mix thoroughly.
- The manufacturer’s recipe calls for placing small spoonfuls of batter into the hot oil with the frying basket already lowered.
- Fry for approximately 2 minutes, or until the fritters are crisp and deeply browned.
- Remove the fritters and allow excess oil to drain.
- Sprinkle with powdered sugar or a mixture of granulated sugar and cinnamon.
Serve immediately.
Beer Batter for Fish or Chicken
Frying Temperature: 375°F
Ingredients
| Ingredient | Quantity |
| Large eggs, separated | 2 |
| Cooking oil or butter | 1 tablespoon |
| Salt | 1 teaspoon |
| Ground black pepper | ¼ teaspoon |
| All-purpose flour | 1⅓ cups |
| Flat beer | ¾ cup |
Preparation Instructions
- Preheat the fryer oil to 375°F.
- Separate the egg yolks from the egg whites.
- Beat the egg yolks with the cooking oil or butter, salt, and black pepper.
- Alternately add small portions of beer and flour to the mixture.
- Beat until the batter is thoroughly combined.
- Refrigerate the batter for 3–12 hours.
- When ready to fry, beat the egg whites until stiff.
- Carefully fold the beaten egg whites into the batter.
- Pat the fish or boneless chicken breasts.
- Lightly coat the food with flour.
- Dip the food into the prepared beer batter.
Cooking Instructions
For fish, the recipe calls for placing the battered pieces into hot oil with the basket already lowered. Fry for approximately 3 minutes or until golden brown.
For chicken, fry for approximately 5–8 minutes or until browned and fully cooked.
Deep-Fried Chicken
Frying Temperature: 375°F
Ingredients
| Ingredient | Quantity |
| Frying chicken, cut into pieces | Approximately 2½ pounds |
| All-purpose flour | 1½ cups |
| Seasoned salt | 1 teaspoon |
| Salt | ¼ teaspoon |
| Milk | 1¼ cups |
Preparation Instructions
- Preheat the cooking oil to 375°F.
- Combine the flour and both seasonings.
- Coat each chicken piece in the seasoned flour.
- Dip the coated chicken into the milk.
- Coat the chicken in flour once more.
- Fry for approximately 20 minutes, or until golden brown and fully cooked.
Chicken Kiev
Frying Temperature: 375°F
Ingredients
| Ingredient | Quantity |
| Whole boneless, skinless chicken breasts | 4 |
| Chopped onion | 1 tablespoon |
| Chopped parsley | 1 tablespoon |
| Salt | 1⅓ teaspoons |
| Butter or margarine | 1 stick |
| All-purpose flour | ½ cup |
| Large egg, beaten | 1 |
| Fine, dry breadcrumbs | 1 cup |
Preparation Instructions
- Preheat the fryer oil to 375°F.
- Place the chicken breasts between two pieces of plastic wrap.
- Flatten the chicken with a wooden mallet until approximately ¼ inch thick.
- Remove the plastic wrap.
- Combine the onion, parsley, and salt.
- Sprinkle the seasoning mixture over the chicken breasts.
- Cut the butter or margarine into eight pieces.
- Place a piece of butter near one end of each chicken breast.
- Roll the chicken around the butter, folding the sides inward.
- Press the edges together and secure with toothpicks.
- Lightly coat each chicken roll in flour.
- Dip the chicken into the beaten egg.
- Coat the chicken in breadcrumbs.
- Refrigerate the prepared chicken rolls for at least one hour.
- Arrange the rolls in a single layer in the frying basket.
- Lower the basket into the hot oil.
- Cook for approximately 5 minutes or until browned.
The manufacturer’s recipe describes checking doneness by removing a piece and testing whether a fork enters easily.
Quick Doughnuts
Frying Temperature: 375°F
Ingredients
| Ingredient | Quantity |
| Refrigerated biscuit dough | 1 can |
| Sugar | ½ cup |
| Ground cinnamon | 2 tablespoons |
Preparation Instructions
- Preheat the fryer oil to 375°F.
- Remove the refrigerated biscuit dough from its packaging.
- Flatten each biscuit slightly using the palm of the hand.
- Make a hole in the center of each biscuit to create a doughnut shape.
- Fry the doughnuts for approximately 2 minutes, turning once.
- Remove the cooked doughnuts and drain on paper towels.
- Combine the sugar and ground cinnamon.
- Sprinkle the cinnamon-sugar mixture over the warm doughnuts.
Serve warm.
Warranty Information
The Oster CKSTDFZM70 4 L Cool Zone Deep Fryer is covered by a 1-year limited warranty under the conditions printed in the manufacturer’s manual.
Warranty Coverage
Sunbeam Products, Inc., operating as Jarden Consumer Solutions, or its Canadian affiliate, warrants the product against defects in materials and workmanship for one year from the original purchase date.
During the warranty period, the manufacturer may:
- Repair a defective product or component.
- Replace the defective product or component with a new or remanufactured replacement.
- Provide a similar product of equal or greater value if the original model is unavailable.
The decision to repair or replace a defective product rests with the manufacturer.
Warranty Eligibility
The warranty applies to the original retail purchaser.
It begins on the initial purchase date and is not transferable.
The original sales receipt must be retained as proof of purchase for warranty service.
Warranty Exclusions
The warranty does not cover normal wear or damage resulting from:
- Negligent operation
- Product misuse
- Incorrect electrical voltage or current
- Operation contrary to the manufacturer’s instructions
- Unauthorized disassembly
- Repairs or alterations performed by someone other than the manufacturer or an authorized service center
- Events such as fire, flooding, hurricanes, or tornadoes
Attempting to repair or adjust electrical or mechanical functions may void the warranty.
Warranty Limitations
The manufacturer’s warranty includes limitations concerning implied warranties, incidental or consequential damages, and other liabilities.
Some limitations may not apply in certain states, provinces, or jurisdictions.
The warranty grants specific legal rights, and additional rights may vary by location.
Customer Support Information
For product questions, warranty service, or assistance with replacement filters and accessories, the manufacturer provides the following contact details.
| Region | Contact Information |
| United States | 1-800-334-0759 |
| Canada | 1-800-667-8623 |
| Manufacturer Website | www.oster.com |
United States Support
Sunbeam Products, Inc., doing business as Jarden Consumer Solutions
Boca Raton, Florida 33431
Canada Support
Sunbeam Corporation (Canada) Limited, doing business as Jarden Consumer Solutions
20 B Hereford Street
Brampton, Ontario L6Y 0M1
How to Request Warranty Service
Customers seeking warranty service should contact the appropriate customer support number.
The manufacturer will provide information about a convenient service center.
The product must not be mailed directly to the corporate addresses listed above or returned to the original place of purchase for warranty service under the manual’s instructions.
Frequently Asked Questions
1. How much oil does the Oster CKSTDFZM70 deep fryer need?
The cooking oil must be filled between the MIN and MAX markings inside the removable oil reservoir. Although the appliance is identified as a 4 L deep fryer, the reservoir markings determine the correct operating oil level. The fryer must not be overfilled, underfilled, or operated with an empty reservoir.
2. How long does the Oster 4 L Cool Zone Deep Fryer take to preheat?
The manufacturer recommends allowing approximately 7–10 minutes for preheating. The green Ready Indicator illuminates when the cooking oil reaches the selected temperature. The light may turn on and off during frying as the temperature fluctuates.
3. How do I reset the Oster CKSTDFZM70 deep fryer?
Unplug the fryer and allow it to cool. Check the oil level and add oil if it is below the minimum marking. Remove the control box with its heating element, then gently press the recessed reset button near the lower-right side of the control box’s rear using a narrow slotted screwdriver or pen. Reinstall the control assembly before reconnecting power.
4. Does the digital timer automatically turn off the fryer?
No. The digital timer provides a countdown and audible alerts but does not switch off the heating system. When the timer reaches zero, it sounds 10 beeps followed by another 10 beeps approximately 20 seconds later. The fryer must be turned OFF manually.
5. What battery does the Oster CKSTDFZM70 digital timer use?
The digital timer uses an LR44 battery. To replace it, a small screwdriver is inserted into the slot beside the timer display, allowing the timer assembly to be removed. The battery is then replaced, and the timer is pressed back into its opening until it snaps into position.
6. Can the Oster CKSTDFZM70 deep fryer parts go in the dishwasher?
Yes. The frying basket, removable lid, oil reservoir, and condensation trap are dishwasher safe. These components must be dried thoroughly before reassembly. The control panel assembly, power strip, and electrical cord must never be immersed in water.
7. How often should the Oster deep fryer filters be replaced?
The manufacturer’s filter maintenance interval is every three months or after 12 uses. The white foam grease filter can be washed in hot, soapy water and air-dried. The charcoal odor filter must not be washed and should be replaced according to the recommended interval.
8. Why is the Oster CKSTDFZM70 deep fryer not working?
Possible causes include an incorrectly installed control panel assembly, an improperly connected power strip, disconnected electrical power, a de-energized outlet, or overheat protection requiring a reset. The manufacturer’s troubleshooting instructions recommend checking these conditions and following the applicable correction or reset procedure.