
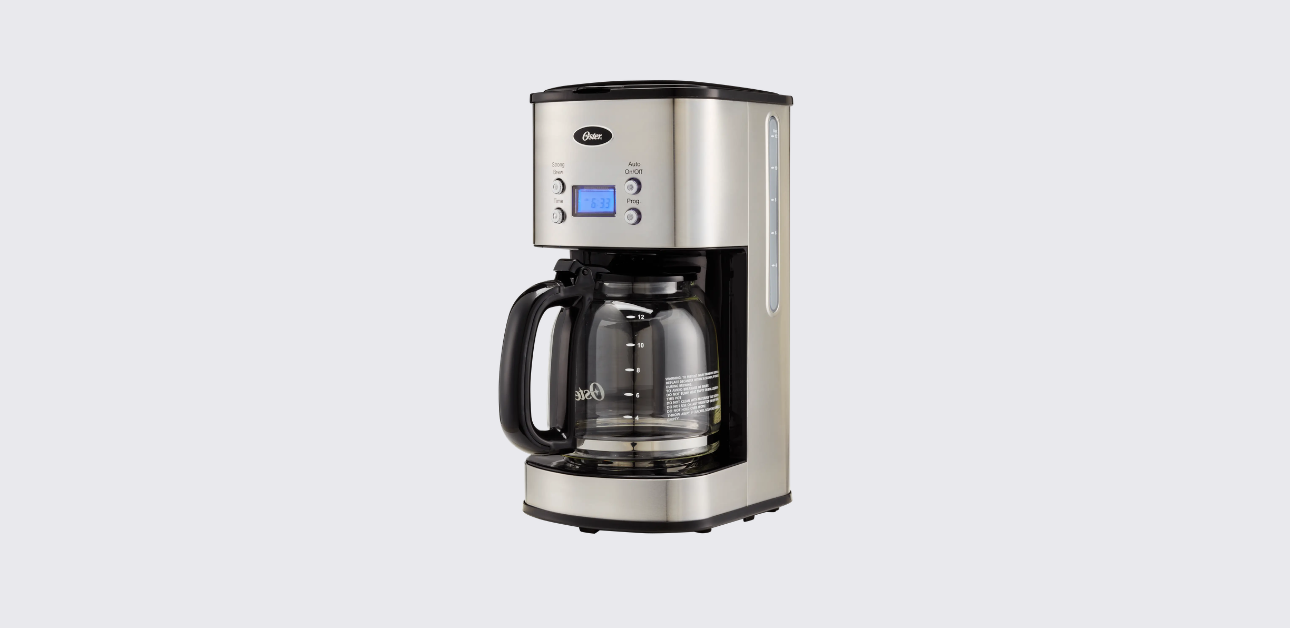
The Oster BVST-JBX Series 12-Cup Coffeemaker is a programmable drip coffee maker designed for household use. The official user manual covers safety instructions, parts, features, clock setup, delay brew programming, coffee measurement, brewing steps, cleaning, descaling, troubleshooting, replacement parts, service, and warranty information.
Product Overview
The Oster BVST-JBX Series is a 12-cup programmable coffeemaker with a glass decanter, removable filter basket, permanent filter, non-stick warming plate, digital clock, Delay Brew function, Strong Brew option, Pause ’n Serve feature, and 2-hour automatic shut-off.
It is designed for everyday home coffee brewing. The machine can brew coffee immediately or be programmed up to 24 hours in advance so coffee starts automatically at a selected time.
Key Features of the Oster BVST-JBX Coffeemaker
| Feature | Details |
| Brewing capacity | Up to 12 cups |
| Decanter type | Glass decanter |
| Filter system | Removable filter basket and permanent filter |
| Pause ’n Serve | Allows up to 30 seconds to pour coffee during brewing |
| Warming plate | Non-stick plate keeps coffee warm |
| Auto/On/Off button | Starts brewing and controls power |
| Strong Brew | Extends brewing time for fuller flavor |
| Programmable clock | Works as a kitchen clock and supports delayed brewing |
| Delay Brew | Programs brewing up to 24 hours ahead |
| Auto shut-off | Keeps coffee warm for 2 hours, then shuts off |
| Water window | Shows water level in the reservoir |
Main Parts and Controls
The parts diagram in the manual identifies these main components:
| Part | Purpose |
| Filter basket lid | Covers the brewing area |
| Pause ’n Serve | Temporarily stops coffee flow when decanter is removed |
| Warming plate | Keeps brewed coffee hot |
| Glass decanter | Holds brewed coffee |
| Control panel | Used for brewing and programming |
| Digital LCD clock | Displays time and programmed brew settings |
| Removable filter basket | Holds the coffee filter and grounds |
| Shower head | Distributes water over coffee grounds |
| Water level window | Shows water level in the reservoir |
The control panel includes:
| Control | Function |
| Strong Brew button | Selects stronger coffee |
| Clock display | Shows current time or timer |
| Auto/On/Off button | Starts, stops, or activates automatic brewing |
| Delay Brew / Program button | Sets clock and delayed brewing |
| AM/PM indicator | Shows time period |
| Time button | Adjusts clock and brew time |
Important Safety Instructions
The manual lists several safety rules for proper use:
- Read all instructions before using the coffeemaker.
- Do not touch hot surfaces. Use handles or knobs.
- Do not immerse the cord, plug, or coffeemaker in water or any liquid.
- Close adult supervision is required when used near children.
- Turn the appliance off and unplug it when not in use and before cleaning.
- Allow parts to cool before removing, installing, or cleaning them.
- Do not use the unit with a damaged cord, damaged plug, malfunction, or physical damage.
- Do not use outdoors.
- Keep the cord away from table edges, counters, and hot surfaces.
- Do not place the coffeemaker near a hot gas burner, electric burner, or heated oven.
- Place it on a hard, flat, level surface to maintain airflow underneath.
- Do not use it for anything other than its intended household use.
The manual warns that scalding may occur if the lid is removed during the brewing cycle.
Decanter Use and Care
The glass decanter is designed only for this Oster coffeemaker. To reduce the risk of breakage:
- Do not use the decanter on a stovetop.
- Do not place it in an oven or microwave.
- Do not set a hot decanter on a wet or cold surface.
- Do not use a cracked decanter.
- Do not use a decanter with a loose or weakened handle.
- Do not clean it with steel wool, abrasive cleaners, or harsh pads.
- Discard the decanter if it ever boils dry.
- Protect it from scratches, sharp blows, and rough handling.
Power Cord and Plug Instructions
The coffeemaker comes with a short power cord to reduce tripping or tangling risks. An extension cord may be used carefully if needed.
If using an extension cord:
| Requirement | Details |
| Minimum rating | At least 10 amps and 120 volts |
| Placement | Must not hang over a counter or table |
| Safety | Keep away from children and accidental tripping |
The coffeemaker uses a polarized plug. If the plug does not fit fully into an outlet, reverse it. If it still does not fit, contact a qualified electrician. Do not modify the plug.
The manual also explains that the cord length can be adjusted by gently pulling out more cord or feeding extra cord back into the coffeemaker slot.
Before First Use
Before brewing the first pot of coffee, clean the coffeemaker.
Steps:
- Wash the decanter, decanter lid, filter basket, and permanent filter with mild detergent and water.
- Rinse all parts thoroughly.
- Replace all parts and close the lid.
- Run one brew cycle using water only.
- Do not add coffee during this cleaning cycle.
- When brewing is complete, turn the coffeemaker off.
- Discard the water.
- Rinse the decanter, lid, and filter basket.
After this process, the coffeemaker is ready for normal use.
How to Set the Clock
This applies to programmable models.
- Plug the power cord into a standard electrical outlet.
- Press the PROG button.
- The word “CLOCK” appears on the display.
- Press and hold the TIME button until the correct current time appears.
- Check the AM/PM indicator on the left side of the display.
Holding the TIME button for 3 seconds speeds up time adjustment. Holding it for 10 seconds speeds it up further.
How to Set Delay Brew Time
After setting the clock:
- Press the PROG button twice.
- “TIMER” appears on the display.
- Press and hold the TIME button to choose the brew time.
- Confirm the AM/PM indicator.
- After about 10 seconds, the display returns to normal clock time.
To check the programmed brew time, press the PROGRAM button until “TIMER” appears.
Coffee Measurement Guide
The manual recommends using one level tablespoon of ground coffee per cup. Use medium grind coffee for best results.
| Cups to Brew | Ground Coffee |
| 12 cups | 12 tbsp |
| 10 cups | 10 tbsp |
| 8 cups | 8 tbsp |
| 6 cups | 6 tbsp |
| 4 cups | 4 tbsp |
| 2 cups | 2 tbsp |
One level tablespoon equals about 5 g / 0.17 oz / 15 ml. One cup equals 5 fl. oz. of brewed coffee. Users may adjust the amount based on taste.
How to Add Water and Coffee
- Open the filter basket lid.
- Remove the filter basket if needed.
- Place a 10–12 cup paper cone-style filter or the permanent filter into the filter basket.
- If using a paper filter, make sure it fits flush against the basket sides.
- Add the desired amount of ground coffee.
- Shake gently to level the coffee.
- Fill the decanter with fresh cold water to the desired number of cups.
- Pour water into the reservoir.
- Do not fill past the MAX line.
- Close the lid.
- Place the empty decanter fully on the warming plate.
The manual warns that if the decanter is not properly positioned, water and coffee grounds may overflow from the filter basket.
How to Brew Coffee Now
- Add water and coffee as directed.
- Make sure the decanter and filter basket are properly in place.
- Press the AUTO/ON/OFF button.
- The red indicator light turns on, showing that brewing has started.
- When brewing is complete, the coffeemaker switches to warming mode.
- Coffee stays warm for up to 2 hours.
- The coffeemaker shuts off automatically after 2 hours.
To turn the coffeemaker off manually, press the AUTO/ON/OFF button until the light turns off.
How to Use Pause ’n Serve
The Pause ’n Serve feature allows a cup of coffee to be poured before the full brew cycle finishes.
Important rule:
- Replace the decanter on the warming plate within 30 seconds.
If the decanter is removed for more than 30 seconds, coffee may overflow from the filter basket and cause burns or property damage.
How to Use Strong Brew
For a fuller-flavored cup:
- Press the STRONG BREW button once.
- The blue Strong Brew light turns on.
- The coffeemaker uses the selected Strong Brew setting.
- Press STRONG BREW again to return to regular strength.
The machine remains in the selected brew strength until changed or unplugged.
How to Brew Coffee Later
To use Delay Brew:
- Set the current time.
- Add a new filter, coffee, and water.
- Press PROG twice until “TIMER” appears.
- Press TIME to set the desired brew time.
- Press PROG once or wait 10 seconds.
- Press AUTO twice to activate Delay Brew.
- The Auto light flashes until the programmed time is reached.
- At the selected time, the light turns red and brewing starts automatically.
- Select Strong Brew if desired.
For safety, the coffeemaker will not automatically start again the next day unless Delay Brew is set again with fresh coffee, water, and filter.
Daily Cleaning
Always turn the appliance off, unplug it, and let it cool before cleaning.
Daily cleaning steps:
- Remove the filter basket.
- Remove the permanent filter, if included.
- Remove the decanter and lid.
- Wash parts in hot water with mild liquid soap.
- Rinse thoroughly.
- Dry before reassembly.
Dishwasher top-rack safe parts include:
- Glass decanter
- Decanter lid
- Filter basket
- Permanent filter
Never immerse the coffeemaker body in water or place it in a dishwasher.
Regular Cleaning and Descaling
Minerals in water can leave calcium deposits inside the coffeemaker and affect brewing performance. The manual recommends cleaning with white household vinegar.
Descaling steps:
- Pour 4 cups / 20 fl. oz. of undiluted white vinegar into the water reservoir.
- Place an empty 10–12 cup basket-style paper filter or permanent filter in the filter basket.
- Close the reservoir lid.
- Place the empty decanter on the warming plate.
- Brew 3 cups of cleaning solution through the coffeemaker.
- Turn the coffeemaker off.
- Let it stand for 30 minutes.
- Run the rest of the vinegar solution through the coffeemaker.
- Discard the cleaning solution.
- Rinse the decanter thoroughly.
- Fill the reservoir with clean water.
- Run a full brew cycle.
- Repeat the clean-water cycle one more time.
Recommended descaling frequency:
| Water Type | Cleaning Frequency |
| Soft water | Every 80 brew cycles |
| Hard water | Every 40 brew cycles |
Cleaning the Decanter
Hard water can leave a white stain on the decanter. Coffee may turn this stain brown.
To clean decanter stains:
- Fill the decanter with equal parts water and vinegar.
- Let the solution stand for about 20 minutes.
- Discard the solution.
- Wash and rinse the decanter.
Do not use abrasive cleaners because scratches may cause the decanter to break.
Troubleshooting Guide
| Problem | Possible Cause | Solution |
| On light does not turn on | Appliance unplugged | Plug unit in |
| On light does not turn on | Power outage | Wait for power to return |
| Coffee is not brewing | Appliance unplugged | Plug unit in |
| Coffee is not brewing | Water reservoir empty | Check water level |
| Coffee is not brewing | Filter basket not inserted correctly | Insert filter basket properly |
| Coffee is not brewing | Decanter not seated correctly | Place decanter fully on warming plate |
| Coffeemaker only brews water | No coffee grounds in basket | Add desired amount of coffee |
| Coffeemaker brews slowly | Unit needs cleaning | Clean and descale the coffeemaker |
| Filter basket overflows | Basket not inserted correctly | Insert basket properly |
| Filter basket overflows | Decanter not seated properly | Place decanter correctly |
| Filter basket overflows | Decanter lid missing | Put lid on decanter |
| Filter basket overflows | Too much coffee | Remove filter, discard grounds, and restart |
| Filter basket overflows | Decanter removed too long | Turn off, unplug, cool, and clean spill |
| Coffee is not hot | Power outage | Wait for power to return |
| Coffee is not hot | Auto shut-off activated | Brew a fresh pot |
| Coffee tastes bad | Wrong coffee grind | Use coffee for automatic drip coffeemakers |
| Coffee tastes bad | Wrong coffee-to-water ratio | Use correct measurement |
| Coffee tastes bad | Unit needs cleaning | Clean and descale |
| Grounds in coffee | Filter not seated properly | Seat filter correctly |
| Grounds in coffee | Filter collapsed | Remove and replace filter |
Replacement Parts and Service
Replacement decanters are usually available from the store where the coffeemaker was purchased. If not available, the manual lists these support options:
| Need | Contact |
| Replacement decanter in Canada | 1-800-667-8623 |
| Replacement decanter in the U.S. | 1-800-672-6333 |
| Repairs in the U.S. | 1-800-458-8407 |
| Repairs in Canada | 1-800-667-8623 |
| Website | www.oster.com |
The model number is located on the bottom of the coffeemaker. Users should have the model number and purchase date ready when contacting service.
Warranty Information
The Oster BVST-JBX Series 12-Cup Coffeemaker includes a 1-year limited warranty from Sunbeam Products, Inc. doing business as Jarden Consumer Solutions.
The warranty covers defects in materials and workmanship for one year from the purchase date. JCS may repair or replace the product or defective component during the warranty period.
The warranty does not cover:
- Normal wear of parts
- Negligent use
- Misuse
- Improper voltage or current
- Use against the operating instructions
- Disassembly
- Unauthorized repair or alteration
- Damage from events such as fire, flood, hurricanes, and tornadoes
Proof of purchase is required for warranty service.