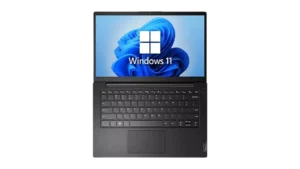
| Field | Details |
| Document Title | Lenovo K14 Gen 1 User Guide |
| Document Type | User Guide |
| Brand Name | Lenovo |
| Product Name | K14 Gen 1 Notebook |
| Model Number(s) | 21CS, 21CT, 21CU, 21CV |
| PDF File Size | 10 MB |
| Number of Pages | 38 |
| Languages | English |
Lenovo K14 Gen 1 Notebook
The Lenovo K14 Gen 1 is a notebook computer available in Intel and AMD configurations. It features a Full HD display, DDR4 memory, built-in wireless connectivity, USB ports, an HDMI connector, and security features designed for everyday computing.
The Lenovo K14 Gen 1 supports Wi-Fi and Ethernet networking, Bluetooth accessories, external displays, and Windows-based system management. Selected configurations also include a fingerprint reader and Trusted Platform Module (TPM).
This Lenovo K14 Gen 1 user guide provides instructions for identifying hardware components, connecting devices, using keyboard shortcuts, charging the battery, configuring power settings, managing UEFI BIOS, installing Windows and device drivers, maintaining the computer, and resolving common problems.
The supported machine types are:
- Intel models: 21CS, 21CT
- AMD models: 21CU, 21CV
Available hardware features, software options, and accessories may vary depending on the specific configuration.
Technical Specifications
The Lenovo K14 Gen 1 is available with different hardware configurations. The following specifications describe the features and supported options identified for this notebook series.
| Specification | Details |
| Brand | Lenovo |
| Product | K14 Gen 1 |
| Product Type | Notebook Computer |
| Intel Machine Types | 21CS, 21CT |
| AMD Machine Types | 21CU, 21CV |
| Memory Type | DDR4 |
| Maximum Memory | Up to 32 GB |
| Solid-State Storage | M.2 2242 SSD, up to 1 TB |
| Hard Disk Storage | 2.5-inch, 7 mm HDD, up to 1 TB (selected models) |
| Display Technology | IPS or TN |
| Display Resolution | 1920 × 1080 pixels |
| Display Aspect Ratio | 16:9 |
| Audio | Dolby Audio |
| Wireless Connectivity | Wireless LAN, Bluetooth |
| Wired Networking | Ethernet |
| Security | Nano security-lock slot |
| TPM | Available on selected models |
| Fingerprint Reader | Available on selected models |
| AC Power Adapter | 65 W |
| Adapter Input | 100–240 V AC, 50–60 Hz |
| USB Connectivity | USB 2.0, USB 3.0 and USB-C connectors as identified for the configuration |
| HDMI Output | Up to 3840 × 2160 pixels at 30 Hz |
| USB-C Display Output | Up to 3840 × 2160 pixels at 60 Hz through a display-capable connector |
Checking the Processor and Hardware Configuration
To view processor information in Windows:
- Right-click the Start button.
- Select System.
- Review the processor and system information displayed by Windows.
For detailed specifications corresponding to a particular machine type or configuration, use the Lenovo Product Specifications Reference at https://psref.lenovo.com.
Parts and Components
The Lenovo K14 Gen 1 includes hardware components and connection ports arranged around the display, keyboard, and sides of the notebook.
Front Components
| Component | Function |
| Microphone | Captures audio for supported applications and communications. |
| Camera | Provides video input for supported applications. |
| Webcam Privacy Shutter | Covers or uncovers the camera lens for privacy. |
Using the Webcam Privacy Shutter
The built-in webcam privacy shutter provides a physical way to cover the camera lens.
To use the shutter:
- Locate the privacy shutter near the camera.
- Slide the shutter to uncover the camera when camera access is required.
- Slide it back to cover the camera when it is not being used.
Base Components
| Component | Function |
| Power Button | Controls computer power. |
| Fingerprint Reader Power Button | Combines the power button and fingerprint reader on selected models. |
| Trackpad | Controls the pointer and supports interaction with Windows. |
| Keyboard | Provides standard typing and keyboard shortcut functions. |
The fingerprint reader is a configuration-dependent feature.
Left-Side Ports
The left side contains the following connectors, depending on the computer configuration.
| Connector | Function |
| Power Connector / USB-C Connector | Provides the applicable power connection or USB-C connection for the configuration. |
| HDMI Connector | Connects a compatible external display. |
| Audio Connector | Connects compatible audio equipment. |
| Always On USB 3.0 Connector | Connects compatible USB devices. |
| USB-C Connector | Supports USB data transfer. |
Important: The USB-C connector specifically identified for data transfer only does not support USB Power Delivery. Its presence should not be taken to mean that it can charge the notebook or provide display output.
Right-Side Ports
| Connector | Function |
| USB 2.0 Connector | Connects compatible USB devices. |
| Ethernet Connector | Provides a wired network connection. |
| Nano Security-Lock Slot | Accepts a compatible security cable lock. |
Bottom Components
The bottom of the notebook contains the speakers.
The bottom surface may become warm during operation. Place the computer on a hard, flat surface and avoid prolonged direct contact between the bottom cover and bare skin.
USB Connector Specifications
The USB ports can connect compatible accessories, including keyboards, mice, storage devices, and printers.
The USB specifications section provides the following reference data rates for different connector standards.
| USB Standard | Reference Data Rate |
| USB 3.2 Gen 1 / USB 3.1 Gen 1 | 5 Gbit/s |
| USB 3.2 Gen 2 / USB 3.1 Gen 2 | 10 Gbit/s |
| USB 3.2 Gen 2 × 2 | 20 Gbit/s |
| Thunderbolt 3 | 40 Gbit/s |
| Thunderbolt 4 | 40 Gbit/s |
These are general interface reference rates, not confirmation that every listed connector standard is installed on the Lenovo K14 Gen 1.
Actual transfer speeds depend on the computer configuration, connected devices, file characteristics, and operating conditions. Transfer performance is normally lower than the theoretical interface data rate.
For USB-C connector types that support device charging, the guide lists these output ratings:
| Operating Condition | Output |
| AC power mode | 5 V, 3 A |
| DC mode with 45 W built-in battery | 5 V, 1.5 A |
| DC mode with 38 W built-in battery | 5 V, 1.0 A |
These ratings apply to supported USB-C charging functions and should not be applied to a connector identified as data-transfer-only.
Safety Instructions
Read the Safety and Warranty Guide, Setup Guide, and Generic Safety and Compliance Notices before operating the computer.
Heat and Surface Contact
- Operate the computer on a hard, flat surface.
- Keep the bottom surface from resting directly against bare skin during use.
- Avoid prolonged contact with the underside of the notebook.
- The bottom surface can become warm enough to cause discomfort or harm during extended contact, even under normal operating conditions.
Battery and Charging Safety
- Charge the battery using the applicable AC power connection.
- Follow the specified AC adapter input requirements.
- Charge the battery only when its temperature is at least 10°C (50°F).
- Battery charging time depends on battery size, environmental conditions, and whether the notebook is being used.
The built-in rechargeable battery must be replaced by a Lenovo-authorized repair facility or technician.
Liquid Exposure
If liquid is spilled on the notebook:
- Carefully unplug the AC power adapter.
- Turn off the computer immediately.
- Do not attempt to drain the liquid by turning the computer upside down.
- Wait until all liquid is dry before turning the computer on again.
Attention: Immediate shutdown can result in lost work, but leaving a liquid-exposed computer running can cause further damage.
Storage and Operating Conditions
Keep the notebook within the environmental limits stated in the specifications.
Do not expose the computer to operating or storage conditions beyond those limits.
Getting Started with the Lenovo K14 Gen 1
Connecting the AC Power Adapter
The Lenovo K14 Gen 1 uses a 65 W AC power adapter with an input rating of 100–240 V AC at 50–60 Hz.
To charge the notebook:
- Locate the applicable power connector.
- Connect the AC power adapter to the computer.
- Connect the adapter to AC power.
- Allow the battery to charge.
With the computer turned off, the 65 W adapter supports rapid charging to approximately 80% battery capacity in about one hour.
Connecting to a Wi-Fi Network
The Lenovo K14 Gen 1 includes wireless LAN connectivity.
To connect to Wi-Fi:
- Open Windows.
- Click the network icon in the Windows notification area.
- Select the wireless network.
- Enter the requested network information, if required.
- Complete the connection using the on-screen instructions.
Connecting to a Wired Ethernet Network
The notebook also supports a wired network connection through its Ethernet port.
To connect:
- Locate the Ethernet connector on the right side of the notebook.
- Connect an Ethernet cable to the computer.
- Connect the other end to the applicable local network connection.
The Ethernet port provides an alternative to wireless network access.
Connecting Bluetooth Devices
Bluetooth connectivity allows the notebook to communicate with compatible keyboards, mice, smartphones, speakers, and other supported devices.
To establish a Bluetooth connection:
- Place the Bluetooth device within 10 meters (33 feet) of the notebook.
- Type Bluetooth in the Windows search box.
- Press Enter.
- Turn on Bluetooth if it is disabled.
- Select the device to connect.
- Follow the on-screen instructions.
The recommended distance between devices is no more than 10 meters during connection.
Keyboard Controls and Hotkeys
The Lenovo K14 Gen 1 keyboard includes hotkeys that provide quick access to commonly used functions.
Hotkeys are identified by icons printed on the keyboard. Depending on the FnLock setting, the functions can be accessed by pressing the relevant key alone or with the Fn key.
Keyboard Hotkey Functions
| Hotkey Function | Description |
| Speaker Mute | Mutes or unmutes the speakers. |
| Volume Down | Reduces speaker volume. |
| Volume Up | Increases speaker volume. |
| Microphone Mute | Mutes or unmutes the microphone. |
| Brightness Down | Decreases display brightness. |
| Brightness Up | Increases display brightness. |
| External Display | Opens external display management options. |
| Airplane Mode | Turns airplane mode on or off. |
| Windows Settings | Opens Windows Settings. |
| Microsoft Teams Answer | Answers incoming Microsoft Teams calls. |
| Microsoft Teams Decline | Declines incoming Microsoft Teams calls. |
| Calculator | Opens Windows Calculator. |
| Lenovo Application | Opens Lenovo Vantage, Lenovo PC Manager, or an application launch bar. |
| Screen Capture | Opens the Windows Snipping Tool. |
Note: Muting the speakers and then shutting down the computer does not automatically restore the speaker volume. The speakers remain muted when the computer is turned on again.
Using FnLock
FnLock changes how the function keys operate.
To switch between hotkey functions and standard F1–F12 functions, press Fn + Esc (FnLock).
| FnLock Indicator | Keyboard Behavior |
| On | Standard F1–F12 functions |
| Off | Special functions printed on the keys |
Connecting External Displays
The Lenovo K14 Gen 1 can connect to a compatible monitor or projector to display content on a larger screen or extend the Windows desktop.
Connecting a Wired Monitor
A compatible external display can be connected through HDMI or a supported display-capable USB-C connection.
The supported maximum display resolutions are:
| Connection | Maximum Resolution |
| USB-C display output | 3840 × 2160 at 60 Hz |
| HDMI | 3840 × 2160 at 30 Hz |
These limits apply to the corresponding supported display outputs. The separate USB-C data-transfer-only port is not identified as supporting display output.
If the external monitor is not detected:
- Right-click an empty area on the Windows desktop.
- Select Display settings.
- Follow the on-screen instructions to detect the external monitor.
Connecting a Wireless Display
The notebook supports wireless display connections using Miracast when both the computer and external display support the feature.
To connect:
- Confirm that the external display supports Miracast.
- Press Windows logo key + K.
- Select the wireless display.
- Complete the connection.
Changing the Display Mode
To change the active display arrangement:
- Press the external-display hotkey, using Fn if required by the keyboard setting.
- Select the preferred display mode.
Adjusting Display Settings
Windows allows configuration of connected displays.
- Right-click an empty area on the desktop.
- Select Display settings.
- Select the display to configure.
- Change the available settings.
The display settings can be used to select the main and secondary displays and change the resolution or orientation.
Battery Charging and Power Management
The Lenovo K14 Gen 1 includes a rechargeable battery and supports power management through Windows and Lenovo Vantage.
Checking Battery Status
To review battery information:
- Locate the battery icon in the Windows notification area.
- Click the battery icon.
- Review the battery status and available power options.
The battery menu provides access to the current power plan, power mode, and battery settings.
Additional battery information is available through the Lenovo Vantage application.
Charging the Battery
The notebook uses the following AC adapter ratings.
| Adapter Specification | Value |
| Power | 65 W |
| Input Voltage | 100–240 V AC |
| Input Frequency | 50–60 Hz |
| Rapid Charge | Approximately 80% in one hour with the computer turned off |
Charging performance depends on the battery capacity, operating environment, and computer activity.
Battery Charging Behavior
The notebook uses battery charging controls intended to manage charging behavior.
The guide provides these details:
- After the battery becomes fully charged, charging will not begin again until its level drops to 94% or lower.
- Lenovo’s battery care instructions describe fully discharging and then fully charging the battery.
- After prolonged periods of limited battery use, the available full-charge capacity may be reduced.
- In that condition, the guide describes discharging the battery to as low as 20% and then charging it completely.
Battery-related information and settings are available in the power section of Lenovo Vantage.
Changing the Windows Power Plan
For ENERGY STAR-compliant configurations, the guide lists the following default idle behavior.
| Power Setting | Default Behavior |
| Turn Off Display | After 10 minutes |
| Sleep Mode — Intel Models | After 10 minutes |
| Sleep Mode — AMD Models | After 30 minutes |
To change the power plan:
- Right-click the battery status icon.
- Select Power Options.
- Choose a power plan or customize the settings.
Changing the Power Button Function
To configure the power button:
- Right-click the battery status icon.
- Select Power Options.
- Click Change what the power buttons do.
- Change the available options as required.
Lenovo Vantage Application
Lenovo Vantage provides access to device settings, maintenance features, system updates, and support tools.
Opening Lenovo Vantage
- Open the Windows search box.
- Type Vantage.
- Select the Vantage application.
Lenovo Vantage Features
Depending on the computer configuration, Lenovo Vantage can:
- Display system and device status.
- Change supported hardware settings.
- Download UEFI BIOS updates.
- Install firmware and device driver updates.
- Monitor system health.
- Run hardware diagnostics.
- Provide security-related features.
- Display warranty status through an online connection.
- Provide access to the user guide and support articles.
Available options can differ between configurations and application versions.
Computer Security Features
The Lenovo K14 Gen 1 provides physical and firmware-based security options.
Using the Nano Security-Lock Slot
The security-lock slot supports compatible cable locks that conform to the Kensington NanoSaver standard with Cleat locking technology.
To secure the notebook:
- Obtain a compatible security cable lock.
- Attach the lock through the Nano security-lock slot.
- Secure the cable to a suitable fixed object.
Compatible security accessories can be located through https://smartfind.lenovo.com.
Fingerprint Reader
Selected Lenovo K14 Gen 1 configurations include a fingerprint reader integrated with the power button.
Trusted Platform Module
A Trusted Platform Module is available on selected configurations.
TPM-related settings can be accessed through UEFI BIOS where the hardware feature is supported.
UEFI BIOS Settings
UEFI BIOS is the firmware interface that initializes the computer and performs a startup self-test.
It also provides access to system configuration, startup device priorities, and security settings.
How to Enter BIOS on Lenovo K14 Gen 1
To open the UEFI BIOS menu:
- Restart the computer.
- Watch for the Lenovo logo screen.
- Press F1 when the logo appears.
The UEFI BIOS interface will open.
UEFI BIOS Keyboard Controls
| Key | Function |
| F1 | General Help |
| F9 | Setup Defaults |
| F10 | Save and Exit |
| F5 / F6 | Change boot priority |
| Up / Down Arrows | Select an item |
| Page Up / Page Down | Scroll |
| Left / Right Arrows | Move keyboard focus |
| Enter | Select an item or open a submenu |
| Esc | Return or close a dialog |
Changing the System Date and Time
- Restart the computer.
- Press F1 at the Lenovo logo.
- Select Date/Time.
- Change the system date and time.
- Press F10 to save and exit.
Changing the Boot Order
The startup sequence determines which device the computer attempts to start from.
To change the startup order:
- Restart the notebook.
- Press F1 at the logo screen.
- Select Startup > Boot.
- Press Enter.
- Review the displayed device order.
- Arrange the devices in the preferred sequence.
- Press F10 to save changes and exit.
If the computer cannot start from an available device or the operating system cannot be found, the bootable device list may be empty.
Selecting a Temporary Boot Device
To choose a startup device without changing the saved boot order:
- Restart the computer.
- Press F12 when the logo appears.
- Select the desired startup device.
- Press Enter.
Updating UEFI BIOS
UEFI BIOS updates may be required when installing certain programs, drivers, or hardware components.
The notebook supports BIOS updates through Lenovo Vantage or Lenovo Support.
Using Lenovo Vantage:
- Open Lenovo Vantage.
- Check the available update packages.
- Select an available UEFI BIOS update.
- Follow the on-screen installation instructions.
Using Lenovo Support:
- Visit https://pcsupport.lenovo.com.
- Select the appropriate computer model.
- Locate the available UEFI BIOS update.
- Follow Lenovo’s download and installation instructions.
UEFI BIOS Passwords
The Lenovo K14 Gen 1 supports several firmware password types designed to restrict access to the computer, BIOS settings, or stored data.
Available BIOS Password Types
| Password Type | Purpose |
| Power-On Password | Requires a password when starting the computer. |
| Supervisor Password | Protects system configuration information and restricts changes in UEFI BIOS. |
| System Management Password | Protects BIOS configuration information with management authority that is lower than the supervisor password by default. |
| Hard Disk Password | Restricts unauthorized access to the storage drive. |
BIOS passwords are not requested when the computer resumes from sleep mode.
Power-On Password
When a power-on password is configured, the notebook displays a password prompt during startup.
The correct password must be entered to use the computer.
If both a supervisor password and a power-on password are configured, the supervisor password can also provide access during startup.
Supervisor Password
The supervisor password protects BIOS configuration settings.
A person can skip the supervisor password prompt by pressing Enter, but most protected BIOS configuration options will not be available for modification.
System Management Password
The system management password provides administrative protection with lower authority than the supervisor password by default.
It can be configured through UEFI BIOS or through supported Windows Management Instrumentation tools using Lenovo’s client-management interface.
To configure its access authority:
- Restart the computer.
- Press F1 at the logo screen.
- Open Security > Password > System Management Password Access Control.
- Follow the on-screen instructions.
The supervisor password overrides the system management password. The system management password overrides the power-on password when both are configured.
Hard Disk Password
The hard disk password restricts access to information stored on the internal storage device.
Two configurations are supported:
- User hard disk password only: The user must enter the password to access the storage device.
- Master and user hard disk passwords: A system administrator controls the master password and can assign user passwords.
At the hard disk password prompt, F1 switches between the master and user password options.
Hard disk password functionality is unavailable in certain configurations using activated TCG Opal management software or an eDrive installed with Windows.
Setting, Changing, or Removing a BIOS Password
- Restart the computer.
- Press F1 at the logo screen.
- Open Security > Password.
- Select the required password type.
- Follow the on-screen instructions to create, modify, or remove the password.
Important: Record configured passwords and keep them in a secure location. Service actions needed because a password has been forgotten are not covered under warranty.
Removing a Forgotten Power-On Password
If a supervisor password or system management password has been set and is still known, the forgotten power-on password can be removed.
- Restart the computer and press F1.
- Enter the supervisor or system management password.
- Open Security > Password > Power-On Password.
- Enter the known supervisor or system management password in Enter Current Password.
- Leave Enter New Password blank.
- Press Enter twice.
- Press Enter in the confirmation window.
- Press F10 to save and exit.
If neither administrative password is available, contact a Lenovo-authorized service provider.
Removing a Forgotten System Management Password
If the supervisor password is known:
- Restart the notebook and press F1.
- Enter the supervisor password.
- Open Security > Password > System Management Password.
- Enter the supervisor password in Enter Current Password.
- Leave Enter New Password blank.
- Press Enter twice.
- Confirm the saved changes.
- Press F10 to save and exit.
If the supervisor password is unavailable, contact a Lenovo-authorized service provider.
Forgotten Hard Disk Password
If the user hard disk password or both the user and master hard disk passwords are forgotten, Lenovo does not provide a service procedure for removing the password or recovering the stored data.
A Lenovo-authorized service provider can replace the storage drive. Charges for parts and service apply.
Forgotten Supervisor Password
Lenovo does not provide a service procedure to remove a forgotten supervisor password.
A Lenovo-authorized service provider must replace the system board, and charges for parts and service apply.
Installing Windows and Device Drivers
The Lenovo K14 Gen 1 supports Windows operating system installation procedures using UEFI BIOS and the appropriate installation media.
Before installing a Windows version, check its compatibility with the computer through Lenovo’s Windows support information.
Attention: Installing a new operating system deletes all data from the internal storage drive, including data stored in hidden folders. Important information should be preserved before beginning.
Use official operating system update and installation sources. Unofficial updates may introduce security risks.
Windows Installation Procedure
- If BitLocker Drive Encryption is enabled and the computer has a TPM, disable BitLocker before starting the procedure.
- Restart the computer and press F1 to enter UEFI BIOS.
- Open Security > Security Chip.
- Confirm that the TPM 2.0 security chip is set to Active.
- Press F10 to save and exit.
For applicable models equipped with a hybrid solid-state drive using Intel Optane memory:
- Enter UEFI BIOS and open Config > Storage > Controller mode.
- Confirm that RST mode is selected.
Continue with the installation:
- Connect the drive containing the Windows installation program.
- Restart the notebook and press F1.
- Open Startup > Boot.
- Select the drive containing the installation program, such as USB HDD, and press Esc.
- Select Restart and confirm that OS Optimized Defaults is enabled.
- Press F10 to save and exit.
- Continue with the Windows installation and required on-screen instructions.
- Install the necessary device drivers and programs.
- Run Windows Update to install available updates, including security patches.
Important: For models using Intel Optane memory, do not install the operating system into the Optane memory. Also, carefully verify the selected storage device before copying, formatting, or saving data. Selecting the wrong device can erase or overwrite information.
Installing or Updating Device Drivers
Device driver updates may help when a hardware component performs poorly or after a component has been added.
Drivers can be obtained through two supported methods.
Method 1: Lenovo Vantage
- Open Lenovo Vantage.
- Check the available update packages.
- Select the required driver updates.
- Follow the installation instructions.
Method 2: Lenovo Support
- Open https://pcsupport.lenovo.com.
- Select the Lenovo K14 Gen 1 machine configuration.
- Locate the appropriate drivers and software.
- Follow the installation instructions.
Firewall and Antivirus Protection
The notebook may include a preinstalled firewall program that helps protect against unauthorized access and network threats.
The guide describes an antivirus program with a free 30-day subscription. Continued antivirus updates after this period require license renewal.
Refer to the installed security program’s help system for its operating instructions.
Windows License Information
A Genuine Microsoft label may be present on the notebook depending on the region and preinstalled Windows edition.
The absence of this label does not automatically mean that the installed Windows operating system is not genuine.
The Windows Product ID is stored in computer firmware and can be checked by the Windows installation process during activation.
Cleaning and Disinfecting the Notebook
The Lenovo K14 Gen 1 can be disinfected using the procedure provided by Lenovo.
Recommended disinfecting wipes include hydrogen peroxide wipes and alcohol-based wipes.
Do not use wipes containing sodium hypochlorite (bleach).
How to Disinfect the Lenovo K14 Gen 1
- Remove excess liquid from the disinfecting wipe or cloth before use.
- Gently wipe the computer.
- Prevent liquid from dripping into the computer.
- Avoid wiping connector pins.
- Follow the disinfecting wipe supplier’s cleaning procedure to reduce chemical residue.
- Allow the notebook to dry completely before using it.
Do not resume use while the computer remains wet.
Maintenance Instructions
Regular system maintenance can be performed using Lenovo Vantage and the available Windows management tools.
System Maintenance Tasks
| Maintenance Task | Procedure |
| Check Device Status | Open Lenovo Vantage and review available device information. |
| Update Device Drivers | Install appropriate updates through Lenovo Vantage or Lenovo Support. |
| Update UEFI BIOS | Use a compatible update package and follow Lenovo’s installation instructions. |
| Diagnose Hardware | Run available hardware diagnostics through Lenovo Vantage. |
| Review Battery Information | Check Windows battery settings or Lenovo Vantage. |
| Review Warranty Status | Use Lenovo Vantage or the Lenovo warranty lookup service. |
| Check Windows Updates | Install available operating system and security updates. |
Hardware Diagnostics
Lenovo Vantage provides hardware diagnostic functions that can help identify component problems.
To access these tools:
- Open Lenovo Vantage.
- Locate the available computer health or diagnostic options.
- Run the appropriate test.
- Review the results.
Available diagnostic options depend on the installed Vantage version and notebook configuration.
Storage and Operating Environment
Use and store the notebook within the specified environmental limits.
| Environmental Specification | Supported Range |
| Maximum Altitude Without Pressurization | 3048 m (10,000 ft) |
| Operating Temperature | 5°C to 35°C (41°F to 95°F) |
| Storage Temperature | 5°C to 43°C (41°F to 109°F) |
| Minimum Battery Charging Temperature | 10°C (50°F) |
| Operating Relative Humidity | 8% to 95%, at 23°C (73°F) wet-bulb temperature |
| Storage Relative Humidity | 5% to 95%, at 27°C (81°F) wet-bulb temperature |
Battery charging must take place at a temperature no lower than 10°C (50°F).
Troubleshooting Guide
The following troubleshooting instructions cover common situations addressed in the Lenovo K14 Gen 1 documentation.
| Problem | Recommended Action |
| Computer stops responding | Press and hold the power button until the computer turns off. Restart the notebook. |
| Liquid is spilled on the notebook | Immediately unplug the AC adapter and turn off the computer. Do not turn it upside down to drain liquid. Wait until all liquid is dry before restarting. |
| External monitor is not detected | Open Windows Display settings and follow the instructions to detect the connected display. |
| Bluetooth device does not connect | Confirm Bluetooth is enabled, keep the devices within 10 meters, and follow the Windows connection instructions. |
| A hardware component performs poorly | Check for an available driver update through Lenovo Vantage or Lenovo Support. |
| Battery does not immediately resume charging after reaching full charge | The notebook does not begin charging again until battery capacity drops to 94% or lower. |
| Boot device is not displayed | Review the UEFI BIOS startup configuration. The guide notes that no bootable device may appear when the computer cannot start from available devices or the operating system cannot be found. |
| Power-on password is forgotten | Use the configured supervisor or system management password to remove it, or contact Lenovo-authorized service. |
| System management password is forgotten | Remove it using the supervisor password when available, or contact Lenovo-authorized service. |
| Supervisor password is forgotten | Contact a Lenovo-authorized service provider for system board replacement. |
| Hard disk password is forgotten | Contact Lenovo-authorized service about storage drive replacement. Stored data cannot be recovered through a Lenovo password-removal procedure. |
What to Do When the Computer Freezes
If the system stops responding:
- Press and hold the power button.
- Continue holding it until the computer turns off.
- Restart the notebook.
What to Do After a Liquid Spill
- Carefully disconnect the AC power adapter.
- Turn off the notebook immediately.
- Do not turn the notebook upside down to drain liquid.
- Wait until the liquid has dried completely before turning the computer back on.
Caution: Continuing to operate the computer after liquid exposure can increase damage from electrical short circuits.
How to Reset or Restore Windows
Lenovo provides recovery resources for restoring or resetting Windows.
Lenovo recovery options:
- Visit https://support.lenovo.com/HowToCreateLenovoRecovery.
- Follow the recovery instructions.
Windows recovery diagnostics:
- Visit https://pcsupport.lenovo.com.
- Detect the computer or select its model.
- Open Diagnostics > Operating System Diagnostics.
- Follow the displayed instructions.
Replacement Parts and Accessories
Lenovo identifies certain components as Customer Replaceable Units (CRUs).
A CRU is a part that can be replaced by the customer under the applicable service procedures.
Customer Replaceable Units
The Lenovo K14 Gen 1 identifies the following self-service CRUs:
| Replacement Part | Classification |
| AC Power Adapter | Self-Service CRU |
| Power Cord | Self-Service CRU |
Other component replacements, including the built-in rechargeable battery, must be performed by a Lenovo-authorized repair facility or technician.
Authorized service locations can be found at https://support.lenovo.com/partnerlocation.
CRU Replacement Conditions
When Lenovo provides a replacement CRU, instructions and replacement information are supplied with the part or made available upon request.
If a defective CRU must be returned:
- Lenovo provides the return instructions.
- A prepaid shipping label and shipping container are supplied.
- The defective part must be returned within 30 days of receiving the replacement.
Charges may apply if a required defective part is not returned within the specified period.
Compatible Accessories
The notebook supports compatible external accessories through its available connections.
These include:
- USB keyboards and mice.
- USB storage devices.
- USB printers.
- Supported Bluetooth devices.
- External monitors and projectors.
- Compatible NanoSaver security cable locks.
Lenovo accessory information is available at https://www.lenovo.com/accessories.
Compliance and Certification Information
The Lenovo K14 Gen 1 includes different compliance identifiers for Intel and AMD configurations.
| Configuration | Machine Types | Compliance IDs |
| Intel | 21CS, 21CT | LN0001K, LN0001K11, LN0001K21 |
| AMD | 21CU, 21CV | LN0001KA, LN0001KA11, LN0001KA21 |
The compliance identifiers ending in 11 or 21 are marked for India only.
The notebook includes a wireless LAN antenna system with main and auxiliary antenna locations identified in the manufacturer’s hardware documentation.
Regulatory information is available through:
Warranty Information
The Lenovo K14 Gen 1 is covered by the applicable Lenovo Limited Warranty terms for its configuration and region.
Warranty services depend on the applicable product coverage.
Services Available During the Warranty Period
Depending on the warranty terms, Lenovo Customer Support may provide:
- Problem determination: Assistance identifying hardware problems and determining the appropriate service action.
- Hardware repair: Applicable repair services for Lenovo hardware covered under warranty.
- Engineering changes: Selected hardware engineering updates provided by Lenovo or authorized resellers.
Services Not Covered
The guide identifies these examples of services outside the listed warranty support:
- Replacement or use of non-Lenovo or nonwarranted parts.
- Identification of software problem sources.
- UEFI BIOS configuration during installation or upgrades.
- Device driver modifications or upgrades.
- Installation and maintenance of network operating systems.
- Installation and maintenance of software programs.
Service actions required because BIOS passwords have been forgotten are not covered under warranty.
Checking Warranty Status
The warranty status can be checked through Lenovo Vantage or the Lenovo warranty lookup page.
Lenovo Customer Support
Lenovo provides support for hardware issues, system diagnostics, drivers, software, warranty status, and product documentation.
Before Contacting Lenovo
Prepare information about the problem and computer configuration.
Problem information:
- Description of the problem.
- Whether the problem happens continuously or occasionally.
- Any displayed error code or error message.
- Installed operating system and version.
- Applications running when the problem occurred.
- Steps required to reproduce the problem, if applicable.
Computer information:
- Product name.
- Machine type.
- Serial number.
Finding the Machine Type and Serial Number
The machine type and serial number are identified on the computer’s identification label, illustrated on the underside of the notebook.
The information can be used to identify the correct system configuration when requesting support.
Lenovo Support Websites
| Support Resource | Link |
| Lenovo Product Support | pcsupport.lenovo.com |
| Lenovo Support Phone Directory | Support Phone List |
| Lenovo Warranty Lookup | Warranty Lookup |
| Lenovo Service Locations | Authorized Service Locations |
| Lenovo Product Specifications | Product Specifications Reference |
| Lenovo Recovery Resources | Recovery Instructions |
| Lenovo Support Forums | forums.lenovo.com |
| Lenovo Accessibility Information | Accessibility Support |
For telephone assistance, use Lenovo’s support phone directory to locate the appropriate number for the country or region.
Support telephone numbers can change, and available services depend on the applicable warranty and location.
Frequently Asked Questions
1. How do I enter BIOS on the Lenovo K14 Gen 1?
Restart the Lenovo K14 Gen 1 and press F1 when the Lenovo logo appears. The computer will open the UEFI BIOS menu, where startup, security, password, and other system settings can be configured.
2. How do I connect the Lenovo K14 Gen 1 to Wi-Fi?
Click the network icon in the Windows notification area, select the required wireless network, and enter the requested connection information. The notebook also supports wired networking through its Ethernet connector.
3. How do I charge the Lenovo K14 Gen 1 battery?
Connect the compatible 65 W AC power adapter to the notebook and AC power. With the computer turned off, rapid charging can bring the battery to approximately 80% capacity in about one hour. Actual charging time varies with conditions.
4. Does the Lenovo K14 Gen 1 support an external monitor?
Yes. The notebook supports external displays through HDMI and a compatible display-capable USB-C connection. HDMI supports up to 3840 × 2160 at 30 Hz, while the supported USB-C display output reaches 3840 × 2160 at 60 Hz. Wireless display connection is also available when both devices support Miracast.
5. What should I do if my Lenovo K14 Gen 1 is not responding?
Press and hold the power button until the notebook turns off. Then restart the computer. If the problem continues, hardware diagnostic tools are available through Lenovo Vantage, and support resources are available from Lenovo.
6. How do I update Lenovo K14 Gen 1 drivers?
Open Lenovo Vantage and check for available driver updates, or visit Lenovo Product Support, select the appropriate machine configuration, and download the required drivers according to the provided instructions.
7. How do I clean the Lenovo K14 Gen 1?
For disinfection, Lenovo recommends hydrogen peroxide or alcohol-based wipes. Remove excess liquid, gently wipe the notebook without allowing moisture into the computer, avoid connector pins, and allow the device to dry completely. Do not use wipes containing bleach.
8. What should I do if I forget my Lenovo K14 Gen 1 BIOS password?
The required action depends on the password type. A forgotten power-on password can be removed using a known supervisor or system management password. A forgotten supervisor password requires authorized system board replacement, while a forgotten hard disk password may require storage drive replacement. Lenovo does not provide a recovery procedure for the data protected by a forgotten hard disk password.