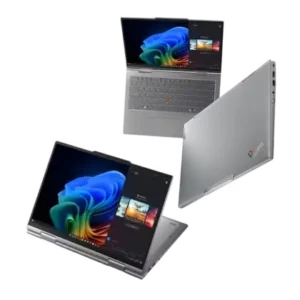
| Field | Details |
| Document Title | ThinkPad X1 Carbon Gen 13 and ThinkPad X1 2-in-1 Gen 10 User Guide |
| Document Type | User Guide |
| Brand Name | Lenovo |
| Product Name | ThinkPad X1 2-in-1 Gen 10 Laptop |
| Model Number(s) | X1 Carbon Gen 13, X1 2-in-1 Gen 10 |
| PDF File Size | 38 MB |
| Number of Pages | 137 |
| Languages | English |
Lenovo ThinkPad X1 2-in-1 Gen 10
The Lenovo ThinkPad X1 2-in-1 Gen 10 is a convertible notebook computer featuring a 360-degree hinge, touchscreen display, integrated TrackPoint pointing device, and multiple operating modes. It can be used as a traditional laptop or converted into stand, tent, and tablet configurations.
The computer belongs to the Lenovo Aura Edition family and supports features such as Smart Modes, Smart Share, Lenovo Commercial Vantage, Windows Hello authentication, and advanced power management. Depending on the configuration, it may also include a Haptic Touchpad, cellular connectivity, NFC, ePrivacy display, user presence sensing, and the rechargeable Lenovo Yoga Pen.
Product Features and Specifications
Technical Specifications
| Specification | Details |
| Brand | Lenovo |
| Product | ThinkPad X1 2-in-1 Gen 10 |
| Product Type | Convertible Laptop |
| Product Family | Lenovo Aura Edition |
| Display Type | OLED or LCD |
| Display Options | 2.8K OLED, WUXGA LCD |
| Display Resolution | 2880 × 1800 or 1920 × 1200 pixels |
| OLED Refresh Rate | 120 Hz |
| Aspect Ratio | 16:10 |
| Touchscreen | Multi-Touch |
| Memory Type | LPDDR5X |
| Maximum Documented Memory | Up to 64 GB |
| Memory Installation | Soldered Onboard |
| Storage | M.2 Solid-State Drive |
| Maximum Documented Storage | Up to 2 TB |
| Storage Slot | One M.2 2280 Slot |
| SSD Compatibility | Single-Sided M.2 SSD |
| Audio | Dolby Atmos, Dolby Voice |
| Pointing Device | TrackPoint |
| Touchpad Options | Haptic Touchpad or Trackpad |
| Wireless Connectivity | Wi-Fi, Bluetooth |
| Optional Connectivity | NFC, 4G/5G WWAN, GPS |
| Security | Fingerprint, Facial Recognition, BIOS Passwords |
| Power Adapter | 65 W USB-C |
| Convertible Hinge | 360 Degrees |
| Pen Support | Lenovo Yoga Pen on Supported Models |
The installed hardware and available software features depend on the particular computer configuration.
Display Specifications
| Feature | Details |
| OLED Resolution | 2880 × 1800 |
| LCD Resolution | 1920 × 1200 |
| OLED Refresh Rate | 120 Hz |
| Display Ratio | 16:10 |
| Eye Protection | TÜV Eye Safe Certification |
| Dolby Vision | OLED Models |
| Touch Input | Multi-Touch |
| ePrivacy Display | Selected X1 2-in-1 Gen 10 Models |
Storage Specifications
The computer supports one M.2 2280 solid-state drive with a documented storage capacity of up to 2 TB.
Only single-sided M.2 SSDs are supported because of the slot’s height limitation. Double-sided SSDs are not suitable for installation.
Wireless Features
- Wireless LAN for Wi-Fi networking.
- Bluetooth for compatible wireless peripherals.
- NFC on selected configurations.
- Wireless WAN with 4G or 5G connectivity on selected models.
- GPS on supported wireless WAN configurations.
Cellular network access requires a compatible WWAN module, an active data plan, and service availability.
Parts and Components
Front Components
| Component | Function |
| Microphones | Capture voice and audio |
| Infrared Camera | Supports facial recognition |
| Webcam Privacy Shutter | Covers or uncovers the camera |
| Touchscreen | Provides direct touch interaction |
| TrackPoint Pointing Stick | Controls pointer movement |
| TrackPoint Buttons | Provide mouse and scrolling functions |
| Fingerprint Reader | Supports fingerprint authentication |
| Haptic Touchpad or Trackpad | Provides pointer, clicking, and gesture controls |
| NFC Mark | Identifies the NFC contact area on supported models |
Webcam Privacy Shutter
The webcam privacy shutter physically covers or uncovers the camera lens.
Slide the shutter open before using the camera or Windows Hello facial recognition. Close the shutter when camera access is not required.
Fingerprint Reader
The fingerprint reader supports Windows Hello sign-in. It can be configured to recognize registered fingerprints instead of requiring the Windows password for every sign-in.
TrackPoint
The TrackPoint pointing stick is located within the keyboard. It controls the pointer when pressure is applied in the desired direction.
The accompanying buttons provide clicking and scrolling functions.
Haptic Touchpad and Trackpad
Depending on the configuration, the computer includes either a Haptic Touchpad or a conventional Trackpad.
Both support pointer movement, clicking, scrolling, and compatible multi-finger gestures.
Ports and Connectors
Side Ports
| Port or Component | Function |
| USB-A (USB 5Gbps, Always On USB) | Connects USB accessories and supports compatible charging |
| USB-C (Thunderbolt 4) | Connects compatible USB-C and Thunderbolt devices |
| Nano-SIM Card Tray | Holds a SIM card on supported cellular configurations |
| Power Button | Turns the computer on and controls power |
| Audio Connector | Connects compatible audio devices |
| USB-A (USB 5Gbps) | Connects USB accessories |
| HDMI Connector | Connects an external display |
| Security Lock Slot | Accepts a compatible security cable lock |
USB-C and Thunderbolt 4
The USB-C Thunderbolt 4 connection supports compatible peripherals, external displays, and accessories.
The documented maximum Thunderbolt 4 data rate is 40 Gbps. Actual transfer speeds vary according to the connected device, system configuration, and other operating conditions.
External Display Support
| Connection | Maximum Supported Resolution |
| USB-C Thunderbolt 4 | Up to 8K at 60 Hz |
| HDMI | Up to 4K at 60 Hz |
Higher refresh rates may be supported at reduced maximum resolutions.
Bottom Components
The bottom of the computer contains cooling openings and an emergency-reset hole.
The emergency-reset hole can temporarily interrupt power when the computer stops responding and cannot be turned off normally.
Safety Instructions
Power Adapter Safety
- Use a certified AC adapter and power cord that meet applicable electrical safety standards.
- Lenovo-qualified adapters are recommended.
- Do not use damaged power cables or connectors.
- Keep electrical connections away from moisture.
- Disconnect power before opening the computer for a permitted hardware replacement.
Heat and Ventilation
Place the computer on a hard, flat surface during operation.
Avoid prolonged contact between bare skin and the underside of the computer, as the surface may become warm enough to cause discomfort or injury.
Do not block the ventilation openings or operate the computer on soft surfaces that restrict airflow.
Magnetic Components
The computer contains magnets. Keep magnetic-sensitive items, including credit cards, at a safe distance.
Touchscreen Protection
Do not press forcefully on the display or use hard, sharp objects on its surface.
Use fingers or a compatible supported pen for touch input.
Battery Safety
- Use only Lenovo-authorized replacement batteries.
- Do not crush, puncture, or short-circuit a battery.
- Keep batteries away from water, flames, and excessive heat.
- Stop using a battery if it is damaged, leaking, or otherwise unsafe.
- Keep batteries away from children.
- Follow applicable battery recycling and disposal requirements.
Before First Use
Connecting the Power Adapter
- Connect the AC power cord to the AC adapter.
- Connect the adapter’s USB-C power cable to the computer.
- Connect the AC power cord to a suitable electrical outlet.
- Press the Power button to start the computer.
Lenovo recommends fully charging the computer when it is used for the first time.
Some configurations may be supplied without an adapter or power cord. In that case, use a certified compatible adapter and cable.
Completing Windows Setup
After the computer starts, follow the on-screen operating system setup instructions.
The process may include:
- Selecting a country or region.
- Connecting to a network.
- Accepting the license agreement.
- Creating or signing in to a Microsoft account.
- Configuring a password, fingerprint, or facial recognition.
- Customizing Windows preferences.
Keep the computer connected to AC power during the setup process.
Connecting to Networks
Connecting to Wi-Fi
- Click the network icon on the Windows taskbar.
- Select an available Wi-Fi network.
- Enter the required network password.
- Complete the connection.
Available wireless standards and frequency bands may vary by country or region.
Connecting to Wired Ethernet
A Lenovo USB-C to Ethernet Adapter can be used for a wired network connection.
Connect the adapter to a compatible USB-C port, then connect the Ethernet cable.
Connecting to a Cellular Network
Selected ThinkPad X1 2-in-1 Gen 10 configurations support 4G or 5G mobile data.
Installing a Nano-SIM Card
- Turn off the computer.
- Insert a straightened paper clip into the Nano-SIM tray eject hole.
- Remove the tray.
- Insert the Nano-SIM card in the correct orientation.
- Reinsert the tray.
- Turn on the computer.
- Select the cellular network through Windows network settings.
A cellular service plan is required.
Enabling Airplane Mode
Click the network icon on the taskbar and select Airplane mode.
Airplane mode disables wireless communication features automatically, although Wi-Fi can be enabled separately when needed.
Battery and Charging Instructions
AC Adapter Specifications
| Specification | Value |
| Adapter Power | 65 W |
| AC Input | 100–240 V |
| Frequency | 50–60 Hz |
| DC Output | 20 V |
| Output Current | 3.25 A |
| Recommended Charging Temperature | 10°C–35°C |
Charging the Battery
Connect the computer to AC power using the compatible adapter.
With the computer turned off, the 65 W adapter supports Rapid Charge, which can charge the battery to approximately 80% in one hour.
Actual charging time varies with battery condition, temperature, and computer usage.
Checking Battery Status
Open Settings > System to check battery status.
For additional battery information, open Lenovo Commercial Vantage.
Battery Charging Behavior
The battery must normally discharge to 94% or below before charging begins again after reaching full capacity.
Battery management settings can also limit the maximum charge level to help preserve battery health.
Changing Power Settings
- Open Control Panel.
- Select Power Options.
- Choose the required power configuration.
- Adjust the display timeout, sleep settings, and Power button behavior.
Computer-to-Computer Charging
The ThinkPad supports charging between compatible Lenovo computers.
Requirements include:
- Both computers must support computer-to-computer charging.
- Both USB-C connections must support charging.
- A USB-C to USB-C charging cable must be used.
Charging Another Lenovo Computer
- Connect the AC adapter to the first computer.
- Connect both computers using the compatible USB-C charging cable.
- Allow charging to begin.
Charging speed depends on the adapter wattage, battery levels, and whether the computers are being used.
Enabling Flip to Start
Flip to Start automatically starts the computer when the lid is opened.
This feature is disabled by default.
To enable it:
- Open Lenovo Commercial Vantage.
- Select Device > Power > Power settings.
- Enable Flip to Start.
It can also be enabled through UEFI BIOS > Config > Power.
Keyboard Shortcuts and Function Keys
The keyboard includes function-key shortcuts for common computer settings.
Function Keys
| Function | Action |
| Speaker Mute | Mutes or unmutes audio |
| Volume Down | Decreases speaker volume |
| Volume Up | Increases speaker volume |
| Microphone Mute | Enables or disables microphone audio |
| Brightness Down | Decreases display brightness |
| Brightness Up | Increases display brightness |
| Display Selection | Opens external display configuration |
| Smart Modes | Opens or hides the Smart Modes widget |
| Print Screen | Captures the screen |
| Snipping Tool | Opens Windows screen capture |
| Smart Share | Opens the supported Smart Share function |
Additional Shortcuts
| Shortcut | Function |
| Fn + Space | Adjusts keyboard backlight |
| Fn + Tab | Opens Magnifier |
| Fn + 4 | Enters sleep mode |
| Fn + D | Enables the ePrivacy function |
| Fn + B | Performs Break |
| Fn + K | Enables Scroll Lock |
| Fn + P | Performs Pause |
| Fn + S | Sends a system request |
| Fn + N | Opens system information |
| Fn + G | Enables or disables the TrackPoint Quick Menu tapping gesture |
FnLock
FnLock switches between the special functions and standard F1–F12 functions.
The Esc key indicator shows the active function mode:
- Indicator off: special functions enabled.
- Indicator on: standard function keys enabled.
Copilot Key
The Copilot key launches Copilot in Windows in supported regions. In other regions, it may open Windows Search.
Using the TrackPoint
The TrackPoint provides mouse-like control without moving the hands away from the keyboard.
Moving the Pointer
- Place a finger on the red TrackPoint cap.
- Apply gentle pressure in the desired direction.
- Increase pressure to move the pointer faster.
Clicking and Scrolling
The TrackPoint buttons provide left-click, right-click, and center-button functions.
For scrolling, hold the center button and apply pressure to the pointing stick vertically or horizontally.
The combination of Ctrl, the center button, and TrackPoint movement can be used for zooming.
Changing TrackPoint Settings
- Search for Mouse settings in Windows.
- Open TrackPoint settings.
- Adjust the pointer speed or other available functions.
TrackPoint Quick Menu
Double-tap the TrackPoint pointing stick to open TrackPoint Quick Menu.
The menu provides access to supported camera, microphone, battery, audio, noise suppression, and cleaning functions.
Press Fn + G to enable or disable the tapping gesture.
Using the Haptic Touchpad or Trackpad
The Haptic Touchpad and Trackpad provide pointer control and support multi-finger gestures.
Touchpad Gesture Guide
| Gesture | Function |
| One-Finger Tap | Select an item |
| One-Finger Double Tap | Open an item |
| Two-Finger Double Tap | Open the shortcut menu |
| Two-Finger Pinch | Zoom out |
| Two-Finger Spread | Zoom in |
| Two-Finger Swipe | Scroll |
| Three-Finger Tap | Open Search |
| Four-Finger Tap | Open Notification Center |
| Three- or Four-Finger Swipe Up | Show open windows |
| Three- or Four-Finger Swipe Down | Show desktop |
| Three- or Four-Finger Swipe Sideways | Switch between open apps or windows |
Gesture availability can depend on the application and current pointing-device settings.
Disabling the Touchpad
- Open Settings > Bluetooth & devices > Touchpad.
- Turn off the Touchpad setting.
Using the Touchscreen
The X1 2-in-1 Gen 10 supports touch-based interaction.
Touchscreen Gestures
| Gesture | Function |
| Tap and Hold | Open shortcut menu |
| Swipe from Left | Open Widgets |
| Swipe from Right | Open Notification Center |
| Two-Finger Pinch | Zoom out |
| Two-Finger Spread | Zoom in |
| Three-Finger Swipe Up | Show open windows |
| Three-Finger Swipe Down | Show desktop |
| Three-Finger Swipe Sideways | Switch applications |
| Four-Finger Swipe Sideways | Switch desktops |
Enabling Advanced Touch Gestures
- Search for Touch gesture in Windows.
- Enable three- and four-finger touch gestures.
Convertible Operating Modes
The ThinkPad X1 2-in-1 Gen 10 uses a 360-degree hinge that allows the display to rotate into four positions.
Notebook Mode
Notebook mode is intended for typing and conventional laptop operation.
The keyboard, TrackPoint, and touchpad remain available.
Stand Mode
Stand mode positions the display for presentations and video communication.
Tent Mode
Tent mode is suited to watching videos, viewing slides, and touch-based interaction.
Tablet Mode
Tablet mode folds the display around for touchscreen operation, writing, drawing, and compatible touch-enabled applications.
Automatic Keyboard Control
The keyboard and pointing devices are automatically disabled in stand, tent, and tablet modes.
They become available again when the computer returns to notebook mode.
Important: Do not force the hinge or apply excessive pressure to the upper corners of the display.
Using the Lenovo Yoga Pen
Selected ThinkPad X1 2-in-1 Gen 10 configurations support the Lenovo Yoga Pen.
The pen provides precise input for writing, drawing, and selecting objects on the touchscreen.
Pen Buttons and Components
| Component | Function |
| Eraser Button | Erases supported content when held |
| Click Button | Performs right-click actions in supported applications |
| USB-C Connector | Charges the pen |
| LED Indicator | Shows charging and battery status |
Charging the Lenovo Yoga Pen
- Connect a USB-C cable to the pen.
- Connect the cable to a compatible charger.
- Allow the pen to charge.
The pen takes approximately two hours to charge fully.
Pen Indicator Lights
| Indicator | Meaning |
| Blinking Orange | Low battery |
| Solid Orange | Charging |
| Solid White | Fully charged |
Attaching the Pen Magnetically
The pen attaches magnetically to designated areas of the laptop.
- Attach it to the right side of the display for temporary use.
- Attach it to the right side of the computer body when carrying it.
Position the pen correctly so that it does not fall.
Replacing the Pen Tip
- Use the tip remover to pull out the damaged tip.
- Insert a new tip using the fingers.
- Push the tip in until properly seated.
Do not disassemble the pen if the damaged tip cannot be removed.
Pen Maintenance
Keep the pen away from water, excessive moisture, shocks, vibration, and extreme temperature changes.
Clean the magnetic attachment area before storing the pen against the computer.
Connecting an External Display
Wired Monitor Connection
Use either the HDMI or USB-C Thunderbolt 4 connector.
- Connect the monitor to the computer.
- Turn on the external display.
- Configure the display in Windows.
If Windows does not detect the monitor, right-click the desktop and select Display settings.
Wireless Display Connection
For a Miracast-compatible display:
- Turn on the wireless display.
- Press Windows + K.
- Select the display.
- Follow the connection prompts.
Changing Display Settings
Open Display settings to change brightness, resolution, orientation, and display arrangement.
Lenovo Software and Smart Features
Lenovo Commercial Vantage
Lenovo Commercial Vantage provides hardware management, system updates, diagnostics, and support.
Its functions include:
- Checking hardware health.
- Installing available firmware and driver updates.
- Managing battery charging thresholds.
- Changing device and power settings.
- Configuring supported privacy features.
- Accessing warranty information.
- Running hardware diagnostics.
- Temporarily disabling input devices for cleaning.
Smart Modes
Smart Modes provides settings for different computer usage scenarios.
| Mode | Purpose |
| Shield | Privacy and security controls |
| Attention | Reduced distractions |
| Collaboration | Video meeting settings |
| Wellness | Eye breaks and ergonomic reminders |
| Power | Energy management |
Press F8 to open Smart Modes when the shortcut is configured for that function.
Smart Share
Smart Share supports photo transfers between the computer and compatible Android or iOS phones.
Setting Up Smart Share
- Install Smart Connect on the computer and phone.
- Connect both devices to the same Wi-Fi network.
- Open Smart Connect.
- Select Add a device.
- Pair the devices using the displayed QR code or account-pairing option.
- Complete the Bluetooth pairing instructions.
After pairing, Smart Share can be opened through its keyboard shortcut or the supported phone-tapping gesture.
Photos can then be transferred using drag-and-drop controls.
Smart Care
On supported configurations, Smart Care provides access to Lenovo support resources through Vantage.
It may include live chat, support calls, troubleshooting information, repair status, and warranty services.
Service availability depends on location, language, and warranty coverage.
Lenovo AI Now
Lenovo AI Now is available on selected models and in supported regions.
It provides document-related assistance and computer settings support through local AI features.
The Ctrl + Q shortcut opens its mini window when the application is available.
Global Power Management
The Vantage app provides three Intelligent Cooling power modes.
| Mode | Recommended Use |
| Best Power Efficiency | Cooler, quieter operation and longer battery life |
| Balanced | Everyday computing |
| Best Performance | Performance-focused workloads |
Balanced is the default mode.
Security and Privacy Settings
Fingerprint Recognition
- Search for Sign-in options in Windows.
- Select Fingerprint recognition (Windows Hello).
- Follow the fingerprint registration instructions.
Registering more than one fingerprint is recommended.
Facial Recognition
- Open the webcam privacy shutter.
- Search for Sign-in options.
- Select Facial recognition (Windows Hello).
- Follow the enrollment instructions.
Lock on Leave
Selected models support automatic locking when the user moves away from the computer.
The feature uses human-presence detection.
User Presence Sensing
Supported configurations may provide:
- Face Sensing.
- Zero Touch Login.
- Zero Touch Lock.
- Adaptive Dimming.
To configure these features, open Vantage > Device > Smart Assist.
ePrivacy Display
Selected ThinkPad X1 2-in-1 Gen 10 configurations feature ePrivacy.
This function reduces screen visibility from side angles.
Press F12 or Fn + D to enable or disable ePrivacy.
The feature is disabled by default.
USB-C Restricted Mode
USB-C Restricted Mode disables USB-C data transfer while retaining charging functionality.
It can be enabled when the remaining battery charge is at least 5%.
Press Fn + U, followed by Fn + S, to toggle this function while the computer is running.
UEFI BIOS Setup
Entering UEFI BIOS
- Restart the computer.
- Wait for the Lenovo logo.
- Press F1 repeatedly to enter the UEFI BIOS menu.
BIOS Menus
| Menu | Function |
| Main | Displays system information |
| Config | Hardware and power configuration |
| Date/Time | Date and time settings |
| Security | Passwords and security controls |
| Startup | Boot configuration |
| Restart | Save, discard, and exit options |
Loading BIOS Factory Defaults
- Enter UEFI BIOS.
- Select Restart > Load Factory Defaults.
- Confirm the selection.
F9 can also be used to access the default-setting option.
Saving Custom BIOS Defaults
- Enter UEFI BIOS.
- Select Restart > Save Custom Defaults.
- Confirm the configuration.
ThinkShield Secure Wipe
ThinkShield Secure Wipe provides a method for erasing information from the SSD.
- Restart the computer.
- Press F12 when the logo appears.
- Select App Menu > ThinkShield secure wipe.
- Follow the instructions.
Warning: Secure wiping removes stored data. Important files must be backed up before this operation.
BIOS Passwords
Supported Password Types
| Password | Function |
| Power-On Password | Restricts computer startup |
| Supervisor Password | Restricts BIOS configuration |
| System Management Password | Provides managed BIOS access |
| NVMe Password | Restricts storage access |
Setting a BIOS Password
- Enter UEFI BIOS.
- Select Security > Password.
- Choose the password type.
- Follow the on-screen instructions.
Forgotten BIOS Passwords
A forgotten Supervisor Password cannot be removed through a normal service procedure. Lenovo specifies system-board replacement through an authorized service provider.
If an NVMe password cannot be recovered, access to the stored data may be permanently lost.
Record important passwords and keep them securely.
Troubleshooting Guide
Common Problems and Solutions
| Problem | Recommended Action |
| Computer does not start | Check AC power, adapter, and battery charge |
| Computer stops responding | Use the emergency-reset hole |
| Battery is not recognized | Restart or reset the computer and check drivers |
| Battery drains quickly | Reduce power use and run battery diagnostics |
| Battery does not charge | Check adapter wattage and battery temperature |
| Camera does not work | Open the privacy shutter and check camera permissions |
| No audio | Check volume, output settings, and audio drivers |
| Keyboard does not respond | Check keyboard settings and drivers |
| Keyboard backlight does not work | Press Fn + Space and check keyboard driver |
| TrackPoint does not work | Check device settings and driver |
| Touchpad does not respond | Enable Touchpad in Windows settings |
| Touchscreen does not work | Clean the display and check touchscreen drivers |
| Screen remains black | Use Windows graphics reset and update display drivers |
| Screen flickers | Check graphics drivers and incompatible applications |
| External display does not work | Check connections and display drivers |
| Wi-Fi does not connect | Check wireless settings and network configuration |
| Bluetooth does not connect | Check Bluetooth power and pairing |
| USB port does not work | Check cables, USB settings, and drivers |
| Fan noise is excessive | Reduce workload and improve ventilation |
| SSD is not detected | Check storage diagnostics and firmware |
| Computer will not boot from USB | Check startup and boot-device settings |
Resetting an Unresponsive Computer
- Disconnect the computer from AC power.
- Insert a straightened paper clip into the emergency-reset hole.
- Temporarily interrupt the power supply.
- Reconnect the AC adapter.
- Turn on the computer.
If the computer still does not respond, contact Lenovo Support.
Camera Not Working
- Open the privacy shutter.
- Go to Settings > Bluetooth & devices > Cameras.
- Confirm that the camera is enabled.
- Check app permissions under Privacy & security > Camera.
- Update the camera driver in Device Manager.
- Run the Windows camera troubleshooter.
Battery Not Charging
- Confirm the power adapter has the correct wattage.
- Close heavy-running applications.
- Move the computer to a cooler, well-ventilated location.
- Reset the battery gauge through Vantage.
- Check for UEFI BIOS updates.
Keyboard Backlight Not Working
- Press Fn + Space.
- Check the keyboard driver in Device Manager.
- Install available driver updates.
Touchscreen Not Responding
- Turn off the computer.
- Clean the display with a dry, soft, lint-free cloth.
- Restart the computer.
- Check the HID-compliant touchscreen in Device Manager.
- Enable or update the touchscreen driver.
- Install available Windows updates.
Black Screen
Press Windows + Ctrl + Shift + B to reset the graphics display.
If Windows becomes accessible, install available system and display-driver updates.
Excessive Fan Noise
- Close unnecessary applications.
- Select Balanced or Best Power Efficiency mode.
- Keep ventilation openings clear.
- Clean the cooling vents when the computer is turned off.
- Install relevant system updates.
Pen Not Detected
- Charge the Lenovo Yoga Pen.
- Check the Bluetooth connection if required by the pen configuration.
- Update Lenovo Pen Settings.
- Confirm that the pen is properly paired when applicable.
Startup Error Messages
| Error Code | Meaning | Recommended Action |
| 0190 | Critical Low Battery | Connect AC power and charge the battery |
| 0191 | Invalid Remote Security Change | Confirm the requested configuration change |
| 0199 | Security Password Retry Limit Exceeded | Confirm the Supervisor Password |
| 0271 | Incorrect Date or Time | Set the date and time in UEFI BIOS |
| 210x/211x | Storage Detection or Read Error | Reinstall or replace the affected storage drive |
| UEFI Variable Storage Nearly Full | Firmware Variable Storage Has Insufficient Space | Enter BIOS and follow the cleanup prompt |
Battery-Charge LED Error Codes
The battery-charge LED can communicate hardware faults through repeated amber and white blinking patterns.
| Error Code | Fault |
| 0001 | Platform Reset Error |
| 0002 | Internal Bus Error |
| 0283 | PCI Resource Error |
| 0284 | TCG Functionality Error |
| 0285 | TPM Initialization Error |
| 0286 | Integrated Graphics Error |
| 0288 | Computer Display Error |
LED Code 0001
Disconnect AC power and perform the emergency-reset procedure.
If the fault remains, Lenovo specifies system-board service.
LED Codes 0002, 0284, 0285, and 0286
These codes indicate faults requiring system-board service through an authorized technician.
LED Code 0283
This code indicates a PCI resource problem. Lenovo provides service procedures involving PCIe devices and potentially the system board.
LED Code 0288
This code indicates a display-related fault.
Authorized service personnel may need to inspect display connections, the LCD panel, or the system board.
Diagnostics and Recovery
Lenovo Hardware Scan
- Open Lenovo Commercial Vantage.
- Select Hardware Scan.
- Choose Quick Scan or Customize.
- Run the selected diagnostic tests.
UEFI Diagnostics
UEFI Diagnostics can run when Windows cannot start.
- Connect AC power.
- Turn on the computer.
- Press F10 during startup.
- Run the required diagnostics.
- Press Esc to exit.
Creating a Recovery USB Drive
- Prepare a USB drive with at least 32 GB capacity.
- Search for Create a recovery drive in Windows.
- Select Back up system files to the recovery drive.
- Connect the USB drive.
- Follow the wizard to create the recovery media.
Warning: Creating the recovery drive deletes all existing data on the selected USB drive.
Recovering Windows
Open Settings > System > Recovery.
Select the appropriate recovery option.
Windows Recovery Environment can also be accessed by pressing F11 during startup when supported.
Back up important files before resetting or reinstalling Windows.
Cleaning and Maintenance
Quick Clean
Lenovo Commercial Vantage provides a Quick Clean function that temporarily disables input devices while cleaning.
Cleaning the Touchscreen
- Turn off the computer.
- Use a dry, soft, lint-free cloth.
- Gently remove fingerprints and dust.
- Avoid applying solvents directly to the screen.
Cleaning the Touchpad
- Turn off the computer.
- Use a soft, lint-free cloth.
- If required, slightly moisten the cloth with lukewarm water or computer cleaner.
- Gently wipe the touchpad.
Cleaning the Keyboard
Turn off the computer before cleaning.
Use compressed air to remove dirt beneath the keys. A cotton swab with rubbing alcohol may be used to clean sticky areas carefully.
Cooling Maintenance
Keep the cooling vents free from obstructions and accumulated dust.
Compressed air can be used to remove debris while the computer is turned off and disconnected from power.
Storage Instructions
For extended battery storage, Lenovo recommends keeping rechargeable batteries or battery-equipped products at room temperature with approximately 30%–50% charge.
Recharge approximately once per year to prevent excessive discharge.
Store the computer and Lenovo Yoga Pen in a dry, ventilated environment away from direct sunlight and extreme temperature changes.
Replacement Parts and Accessories
Customer Replaceable Units
Lenovo identifies the following types of service components.
| Component | Replacement Category |
| AC Adapter | Self-Service |
| Base Cover Assembly | Self-Service |
| M.2 SSD | Self-Service |
| M.2 SSD Bracket | Self-Service |
| Nano-SIM Tray | Self-Service |
| Power Cord | Self-Service |
| Lenovo Yoga Pen | Self-Service |
| Built-In Battery | Optional-Service |
| Wireless WAN Module | Optional-Service |
| WWAN Module Bracket | Optional-Service |
| Captive Bracket | Optional-Service |
Some items apply only to selected hardware configurations.
Before Replacing a Component
- Disable Windows Fast Startup.
- Enter UEFI BIOS.
- Select Config > Power > Disable Built-in Battery.
- Confirm the action.
- Allow the computer to turn off.
- Wait three to five minutes for cooling.
- Disconnect the adapter and other cables before opening the computer.
Replacing the M.2 SSD
- Back up important data.
- Disable Fast Startup and the built-in battery.
- Shut down the computer.
- Disconnect AC power and external cables.
- Remove the base cover.
- Remove the M.2 SSD and its bracket using the documented procedure.
- Install the compatible replacement and bracket.
- Reassemble the computer.
Only a supported single-sided M.2 SSD should be used.
Replacing the Built-In Battery
Battery replacement requires the appropriate Lenovo-approved part and service procedure.
Lenovo recommends using a qualified repair technician or carefully following the manufacturer’s replacement instructions.
The battery compartment must be checked for foreign or sharp objects before installing a replacement battery.
Replacing the Wireless WAN Module
Supported wireless WAN configurations allow replacement of approved WWAN modules.
Only Lenovo-authorized wireless modules tested for this computer model should be installed.
Incorrect modules may cause startup errors.
Warranty Information
The ThinkPad X1 2-in-1 Gen 10 is covered by the applicable Lenovo Limited Warranty according to the product’s warranty terms and service eligibility.
Warranty-related services may include hardware problem diagnosis and repair of covered Lenovo components.
Some software installation, configuration, driver changes, and nonwarranted component services are excluded.
Checking Warranty Status
Warranty information can be checked at:
https://pcsupport.lenovo.com/warrantylookup
Lenovo Customer Support
Lenovo provides technical support, diagnostic tools, driver downloads, warranty information, and repair services.
Support Websites
| Resource | Website |
| Lenovo Product Support | https://pcsupport.lenovo.com |
| Lenovo Contact Support | https://pcsupport.lenovo.com/contact-us |
| Lenovo Telephone Support | https://pcsupport.lenovo.com/supportphonelist |
| Lenovo Warranty Lookup | https://pcsupport.lenovo.com/warrantylookup |
| Lenovo Accessories | https://www.lenovo.com/accessories |
| Lenovo Service Locator | https://support.lenovo.com/partnerlocator |
Before Contacting Support
Prepare the following information:
- Product name and machine type.
- Serial number.
- Operating system and version.
- Description of the problem.
- Error messages or diagnostic codes.
- Whether the problem occurs consistently.
- Steps that reproduce the problem.
The serial number can be found on the product label or through Lenovo Commercial Vantage.
Frequently Asked Questions
1. How do I set up the Lenovo ThinkPad X1 2-in-1 Gen 10?
Connect the compatible USB-C power adapter, press the Power button, and follow the Windows setup instructions. Connect to Wi-Fi, configure account information, and complete the security settings.
2. How do I use the ThinkPad X1 2-in-1 Gen 10 in tablet mode?
Rotate the display backward through its 360-degree hinge until the computer reaches tablet mode. The keyboard and pointing devices are disabled automatically, allowing touchscreen operation.
3. How do I charge the Lenovo Yoga Pen?
Connect the pen to a compatible charger using a USB-C cable. The LED remains orange while charging and turns white when charging is complete. A full charge takes approximately two hours.
4. How do I enter BIOS on the ThinkPad X1 2-in-1 Gen 10?
Restart the computer and press F1 repeatedly when the Lenovo logo appears. The UEFI BIOS menu opens for configuration and security settings.
5. How do I turn on the keyboard backlight?
Press Fn + Space to adjust the keyboard backlight. If it does not respond, check the keyboard driver and install available updates.
6. How do I reset the ThinkPad X1 2-in-1 Gen 10 when it freezes?
Disconnect AC power and use a straightened paper clip in the emergency-reset hole on the underside of the computer. Reconnect the charger and restart.
7. How do I enable the ePrivacy display?
On supported ThinkPad X1 2-in-1 Gen 10 configurations, press F12 or Fn + D to enable or disable the ePrivacy function. It reduces screen visibility from side angles.